A bathroom is the most-visited room in a house in which multiple users come and go, doing their stuff. They even use different toiletries and towels. No wonder it is usually prone to clutter especially if your bathroom isn’t spacious enough. Who can stay here comfortably when taking a bath or doing a private business with all of this mess? If you think your bathroom is getting messy, now it’s time for you to spruce it up and make it look better, cleaner, and more organized. Keep on watching this video if you don’t want to miss 10-bathroom remodel and organizing ideas that won’t cost you a fortune by Simphome
10. Let’s Shop for Some New Look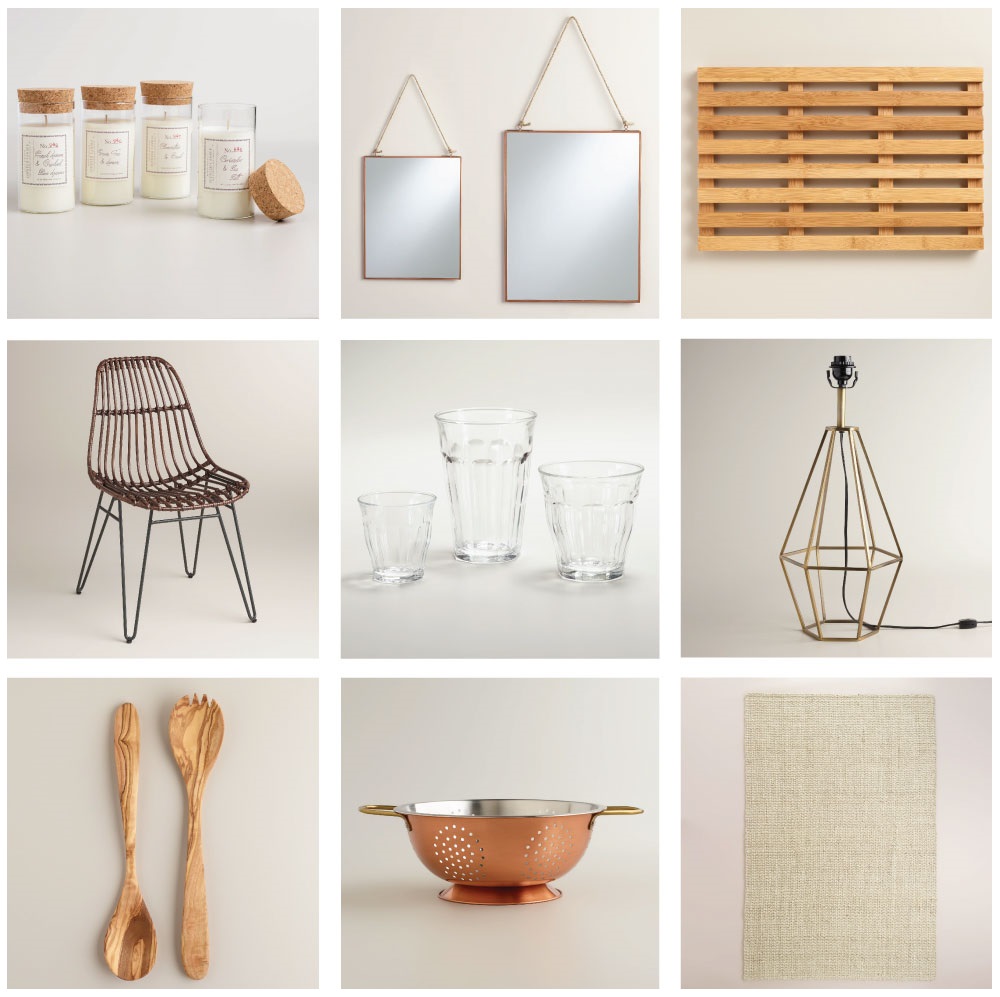
How long has your mirror hung on the wall? Can you recall when you put it there? If you can’t, it means you need to replace it as soon as possible. You can try getting a mirror with different shape and frame for a new look just like a rectangular mirror with copper frame. It would replace your round mirror perfectly. Replacing the rugs can also add a little bit nuance in your bathroom. Try this wooden bamboo bath mat and ivory jut rug that lend the warmth of nature in it. And the best thing is they won’t set you back.
9. DIY Stone Bath Mat
Bringing the touch of nature has always been a great idea. And the most unbelievable thing is you can do it yourself at home so you can cut down on more expense.
All you need to do is getting an outdoor rubber mat with a few holes or spaces so the water won’t trapped in the mat, porous ocean or river stones – they have to be smooth and not slick, and clear waterproof silicone sealer. And here comes the fun thing. Roll out your mat outside or on a plastic so it won’t ruin your floor with such a mess. Apply a little silicone sealer to the back part of the stone and place it on the mat beginning with one of the corners. Hold for a few seconds so the stone can attach to the mat quite firmly. Repeat these steps until all the mat’s surface is fully covered.
But, wait! Don’t be too rush! You can’t use the stone mat now. You need to wait for 24 hours so the stones get a firm grip to the mat.
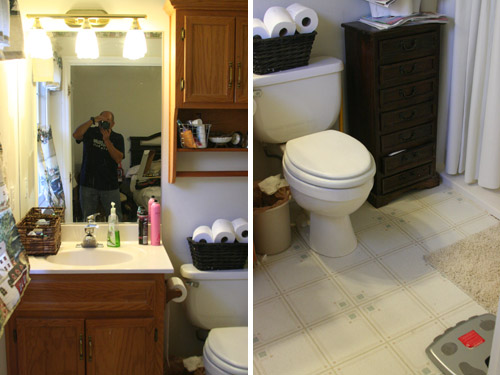
The basic theory of furnishing a tiny bathroom is don’t overwhelm it. Keep it simple without losing its functions is what you gotta do. Therefore, if you happen to have a cabinet mounting on the wall in your bathroom, just rip it off and replace it with some open shelves or racks.
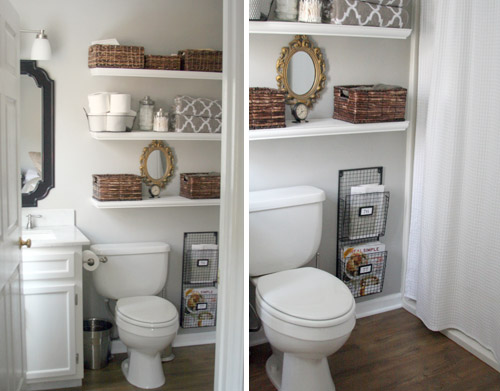
The racks function exactly the same as the cabinet which is used to store your bathroom essentials. However, they don’t gobble up the space in your bathroom, which makes it wonderful.
7. Open Shelves and Wicker Baskets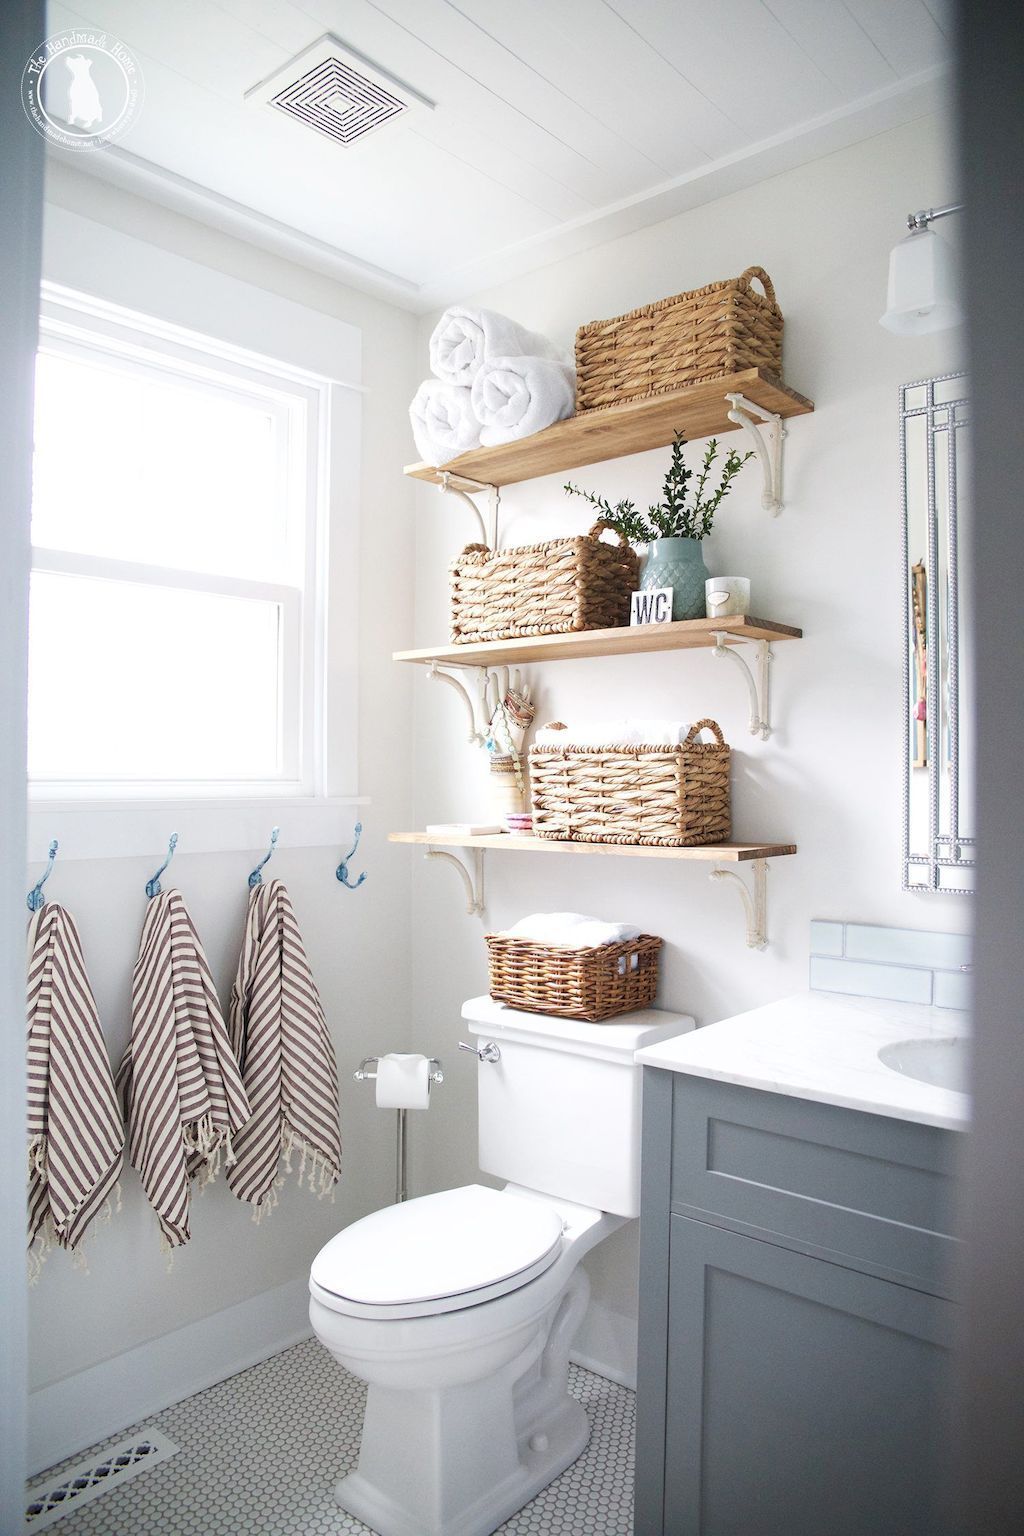
If you have no room for an extra storage like a cabinet, you can put some open shelves over the toilet tank. The shelves are relatively cheaper than a cabinet especially if you decided to use a little bit of your elbow grease to make the shelves yourself using some leftover you found in your storage room.
To add a little bit of textural element, you can try investing in some wicker baskets and place them on the shelves. Not only they help you organize things better but also improve the appearance of your bathroom.
6. Super Cheap Basket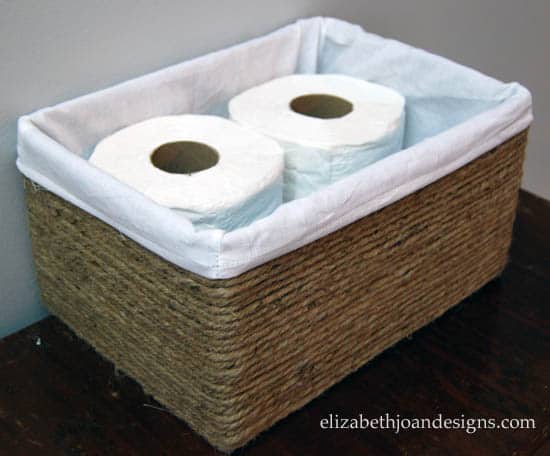
When you see this basket at the first glance, who would have guessed that it is actually made out of an unused cardboard box. Yes! I am telling you the truth. And I kinda figured this jaw-dropping basket would impress you more when knowing how cheap and eco-friendly it is.
Now make a run to your storage room and get an ordinary cardboard box. Cut the flaps of the box using a knife or scissors. Then wrap the box using jute. You’re gonna need a lot of glue sticks and a hot glue gun to do this step. Keep wrapping until the box is perfectly covered.
Next, place a fabric inside the basket to make it more appealing and look like the real wicket baskets that can be pricey.
5. Quick And Easy Open Shelves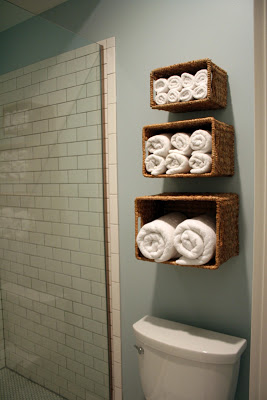 The idea of having some open shelves to store towels and toilet papers may sound great. Unfortunately, not everybody good at carpentry and making some open shelves entails a few measuring-things and a little bit of patience.
Well, don’t do it if carpentry isn’t your thing. You can make some open shelves better and easier with wicker baskets. Just attach them on the wall above the toilet tank using screws or brad nails, and you’re good to go.
4. Hang The Towels Behind The Door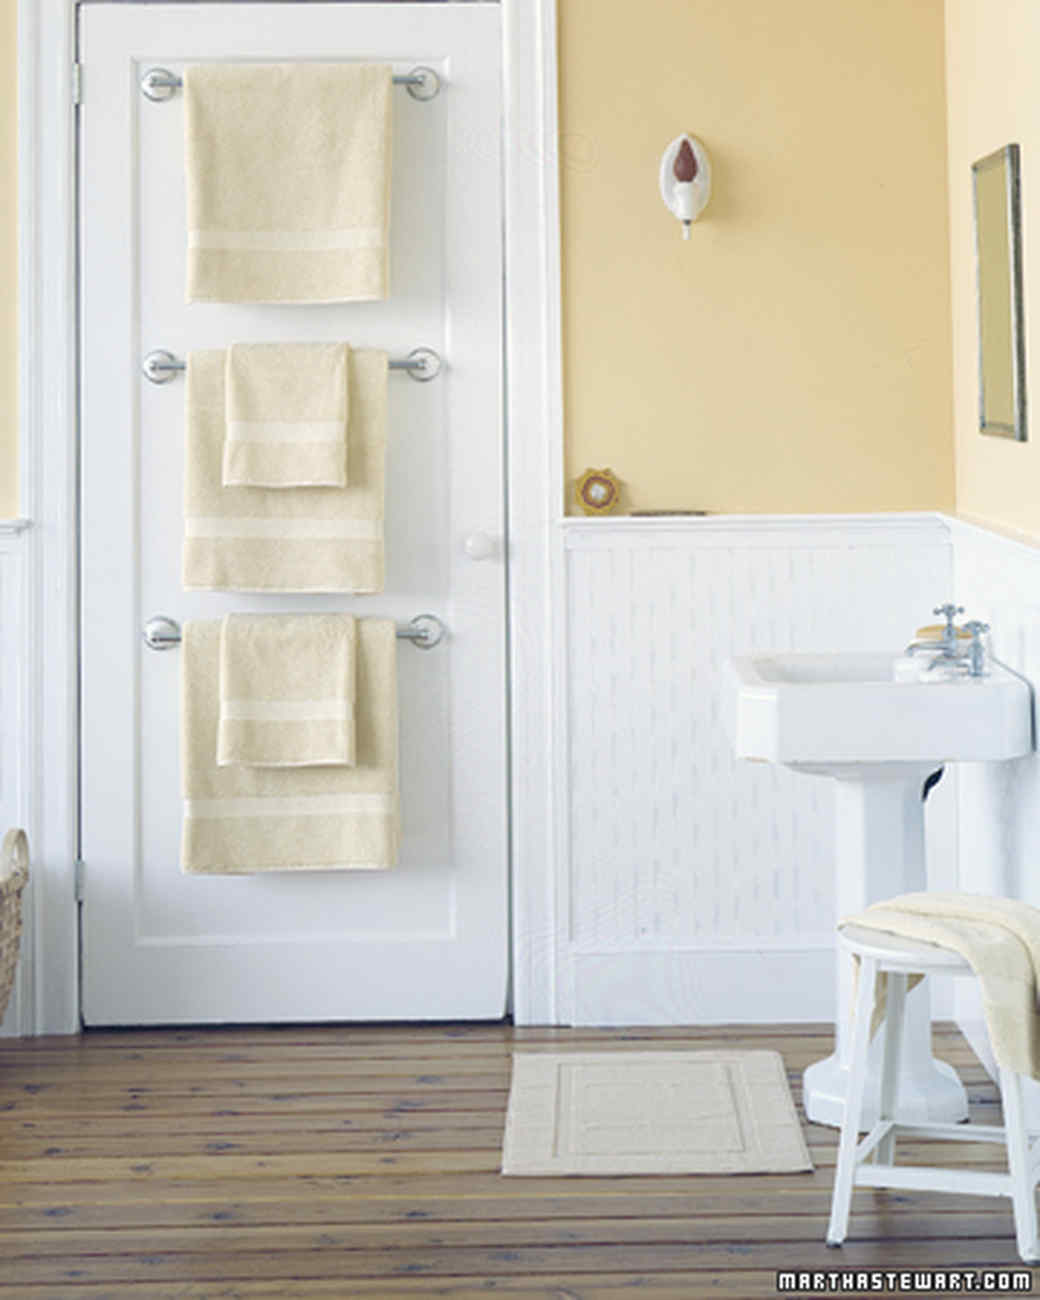
When it comes to a small bathroom, every inch count. Even the area behind the door that is usually lie dormant. You have to avail the potential of this space. Hang two or three towel bars on the back side of your bathroom door so you can air-dry your wet towels there and grab them in a jiffy.
3. Rustic Shelves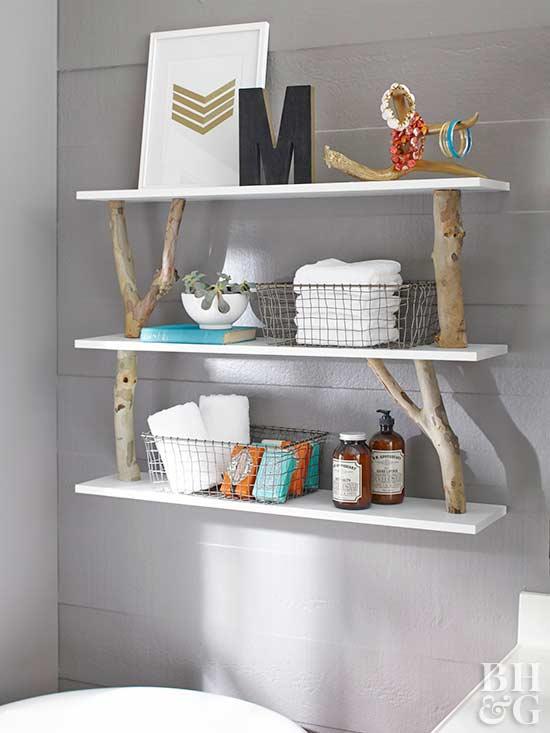
If you are a big fan of rustic style, don’t miss a chance of bringing the well-worn and natural look of this style into your bathroom. You don’t need to splurge out on antiques to get this look because you just need to make a twist on your open shelves by adding a few wood branches that have been sanded down and coated with poly-acrylic protective finish.
2. Add A Few Tints of Copper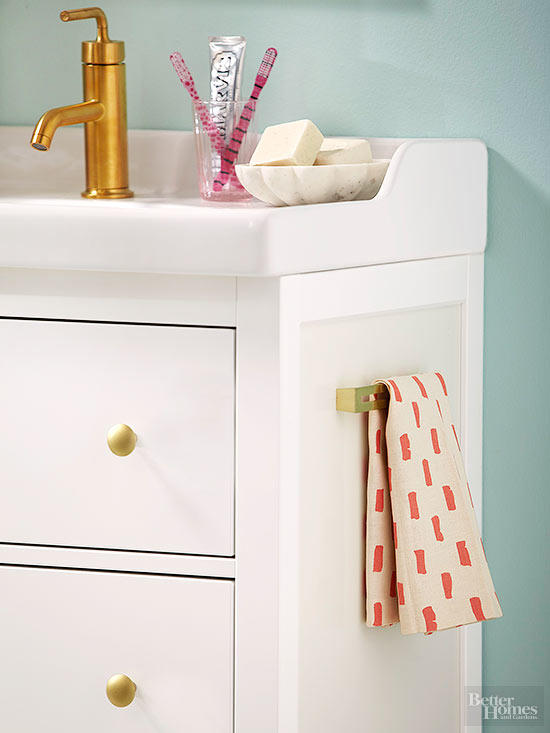
Jazz your white bathroom up with a few tints of copper. You don’t need to go overboard which can burn a hole in your pocket. Just replace your faucet, drawer pulls, and towel holders with the copper ones so they can add an upscale look to your bathroom.
1. DIY Rope Towel Holder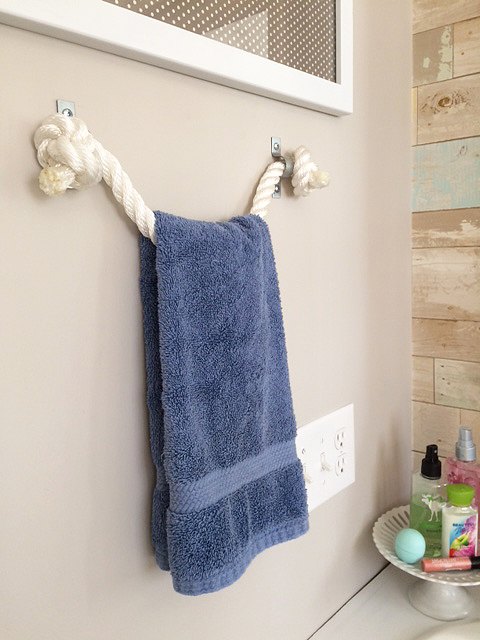 Who says that a nice and cool towel holder can break your bank? If you are looking for an affordable towel holder that can steal anyone’s focus, try this DIY rope towel holder.
You just need to get a ¾”-thick rope at Home Depot, two ½” galvanized clips, glue gun, screws, and wall anchors. Then, literally tie a knot at the both ends. After that, anchor the rope using wall anchors and screws. And, you’re done!
So, what do you think? Pretty impressive, huh? Those adornments are extremely cheap yet functional and cool. They fit any bathroom size and budget – even if you are in a tight budget.