General ideas on how to make your first small bedroom hanging bed project
You will need to have the appropriate tools and materials to hang a bed from the ceiling with chains. You will need to secure the bed to the ceiling joists for support. You will need to measure and mark the desired location for the bed and drill holes for the lag bolts and washers. You will also need lag bolts, washers, chains, a drill, and a screwdriver.
Once the lag bolts and washers are in place, attach the chains to the lag bolts and adjust them to the desired length. Make sure to test the bed before use to ensure it is secure and will not sway or move when in use.
You should also ensure that the ceiling joists are strong enough to support the weight of the bed and all the occupants. Additionally, you should use a level to ensure the bed is hanging straight and not slanted.
If you’re short on space, a hanging bed is a great option to create an elegant and modern look in your bedroom. Whether you’re playful or adventurous, these ten small bedroom hanging bed projects and designs will inspire you to create a fun and unique sleeping experience. As always, Simphome curates the countdown for you.
10 Small Bedroom Hanging Bed Project Video

10. A Floating Bed with Rope Idea
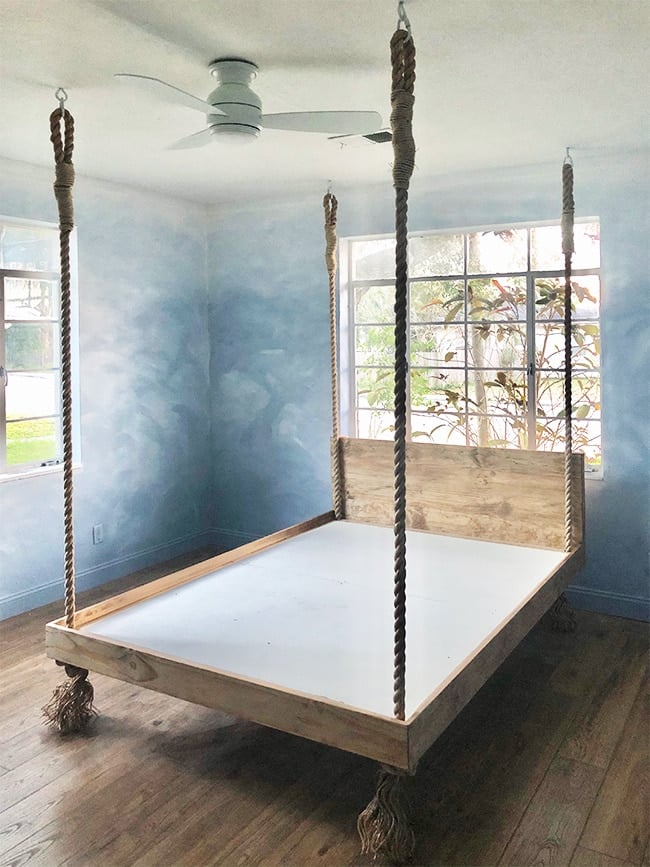 This idea’s tricky part is to ensure that the attic can support the bed. After getting the appropriate measurement using a laser measuring tool, you can create holes in the attic using a 3/8″ bit.
- Then, you can install the supports with 4x4s and joist hangers between the ceiling.
- After that, screw the joist hangers, and the other side of the joist meets at the end of the 4×4.
- Attaching the supports in the attic might be the most challenging part of the project because you need to align everything correctly in a small working space. But, when you securely place the 4X4s in the attic, you can step into the drilling holes using an eye bolt and tighten it by putting a piece of wood as the lever.
- Next, you can attach the fender washers and nuts to the other side of the eye bolt and hook triangle-quick links onto the bolts. Once you have installed the hanging support, build the bed frame with two sides supports underneath five upper slats.
- You can also add the headboard using nails and screws and create holes for the rope. The next step is installing the trim pieces.
- Then, you can thread the rope through the triangle quick links and weave them to maintain the perfect thickness of the rope.
9. A Rustic Hanging Bed Idea
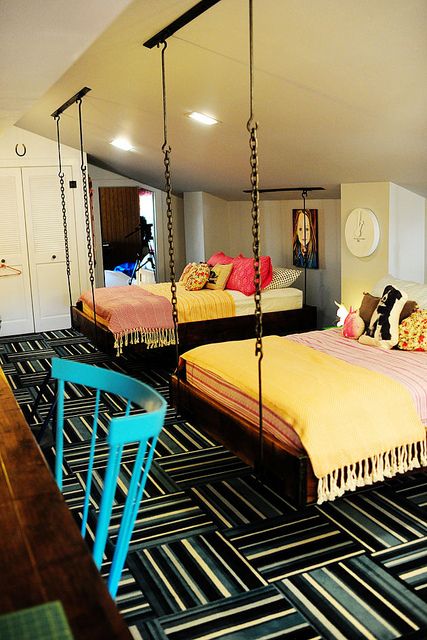 The next idea is to install a rustic hanging bed as the centerpiece of the small bedroom. Teenagers may feel escalated to propose this idea to accommodate their wild phase of life.
You can craft this rustic-styled hanging bed using wood and iron materials. Then, add striped carpet tiles to match the ranch atmosphere. The bedding is excellent, with simple-designed coverlets, blankets, and pillows. We can place a wooden desk across the bed to provide a working and studying corner.
8. A Hanging Daybed Woodworking Project idea
 As you have the idea of customizing the hanging bed, you can specialize in the hanging daybed instead. You can begin the project by cutting the frame sides and marking them with a carpenter’s square. You are encouraged to leave a gap between the marks for the studs and pre-drill a pair of holes using a countersink bit.
- Then, lay the deck boards on the frame after applying glue to the bed frame’s top.
- You can make an adjustment on the deck boards, put space to them, and drill two screws for each deck board per joist.
- Next, drill holes for the lag screws of the bed’s corners.
- Apply glue to the holes and screw to secure the bed.
- For the finishing, the exposed screw holes are filled with wood filler and let dry.
- You can sand the bed before applying paint or stain. Finish it off with a sealer.
7. A Pallet Hanging Bed Idea
 While focusing on the bedroom’s limited space, you cannot add more headaches by considering the restricted budget for the bed style.
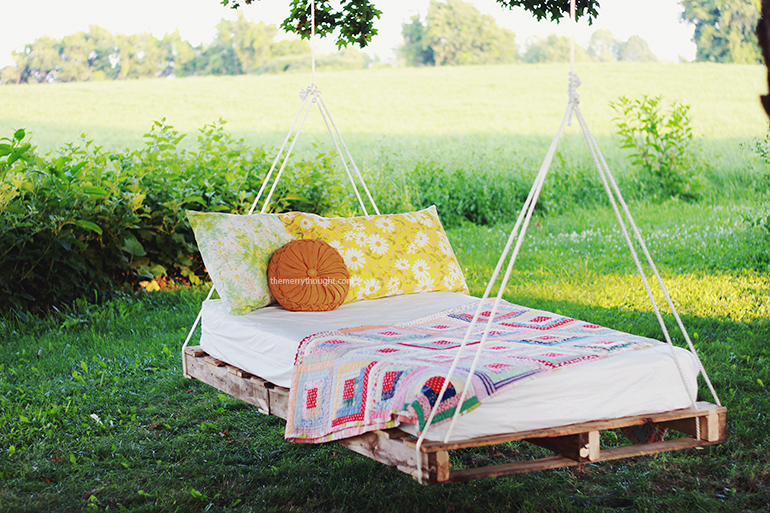
This pallet hanging bed can be a brilliant solution to your limited-budget problem. Although many build it for the outdoor living area, you can still copy this idea for your bedroom.
- To determine the number of pallets you use, measure the mattress and leave space for the rope at the ends.
- Then, slide 2x4s through the pallets for each inner edge of the pallet and one for the middle.
- You can now attach the 2x4s to the pallet sides and middle part using screws.
- It is necessary to secure the pallet support by adding pallet boards to the main piece.
- After cutting off the hanging 2x4s, you can go to the hole drilling stage to the four corners of the main pallet and upper and lower pallet boards.
- Next, thread the rope through the hole beneath the bottom part of the pallet and around the board.
- Finally, you can do the tying process to the bedroom’s ceiling.
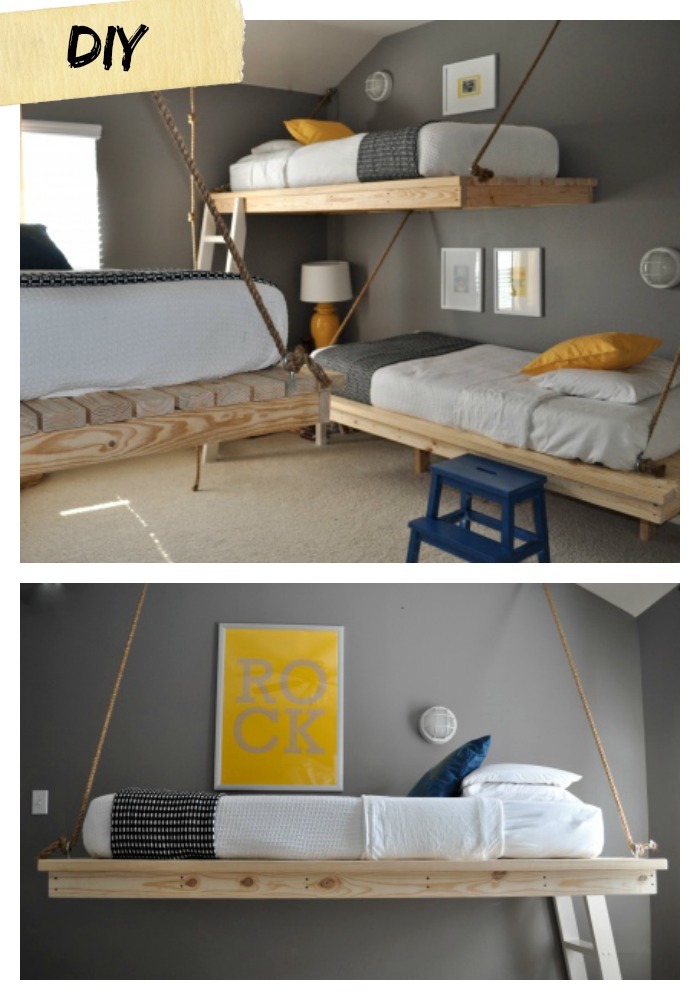
6. An Industrial hanging Bed Project Idea
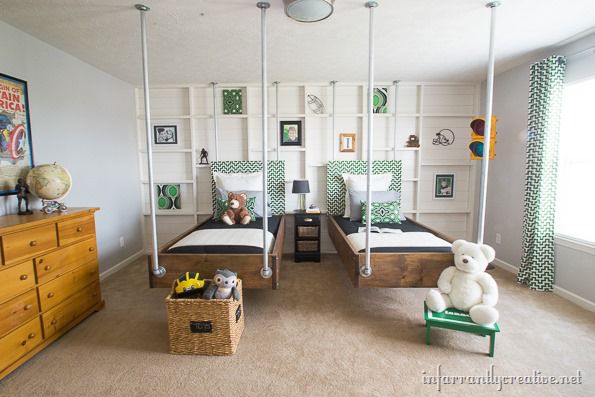
To manage two beds in a room, you can start with cutting and saving the scraps for blocking support to the ceiling. You can pre-drill the holes needed to create the frame and screw lag bolts using washers from the side to the end parts of the piece. Repeat the procedure to the top, the other side, and the bottom before inserting the footboard and headboard.
- Then, it is time to attach 1×2 to the bottom edges and screw them in the sides.
- Cut 1x4s to match the bed’s width to create slats for the mattress.
- Next, flanges and elbows are needed to attach to the bed’s head and foot.
- To hang the bed, you can use a plumb bob and pre-drill holes to attach the flanges.
- It is now time to add the blocking to the attic using leftover pieces, corner braces, and wood screws as the support for hanging the bed.
- After that, screw the flanges to the ceiling and put the threaded pipers into the flanges.
- To finish it off, screw the elbows onto the bottom part of the threaded pipes and build risers to hold the bed in place.
5. A Girly Hanging Bed with Hanging Nightstand Project Idea
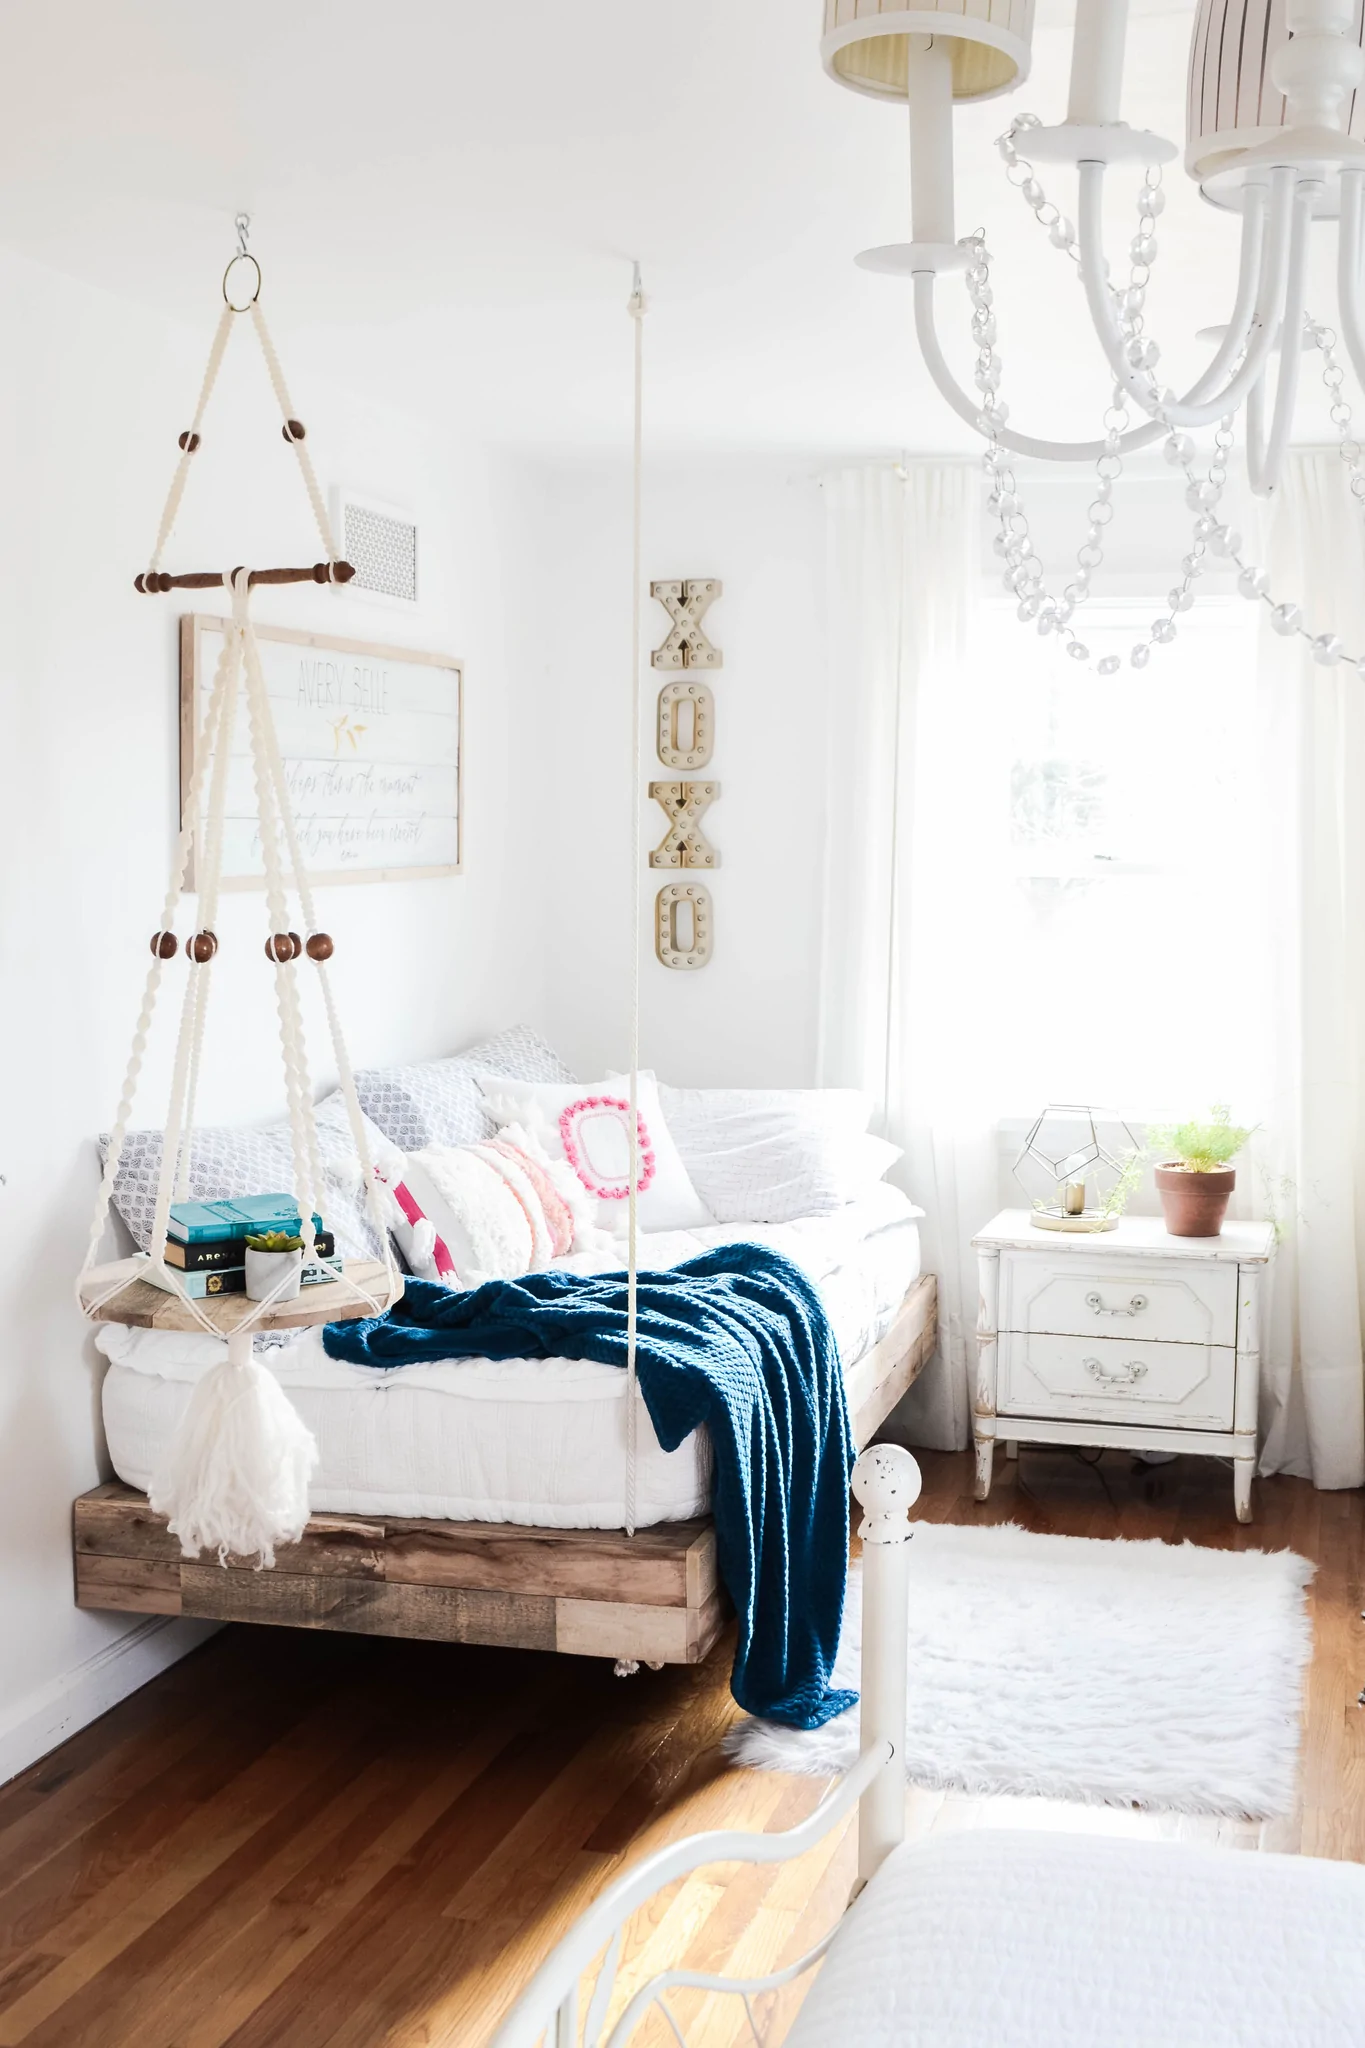 It is an exceptional idea to install a hanging bed with girly accents. One considerable alternative to make this happen is to include a hanging nightstand feature.
It is highly advisable to use reclaimed wood to assemble the bed frame for the mattress to put onto. Since you will only suspend two corners of the bed using rope, consider installing center support or heavy-duty brackets on the wall to make the bed sturdier. You can round out the whole look by including a boho-styled comforter and bed sheet.
4. A Hanging Bed for The Boys’ Idea
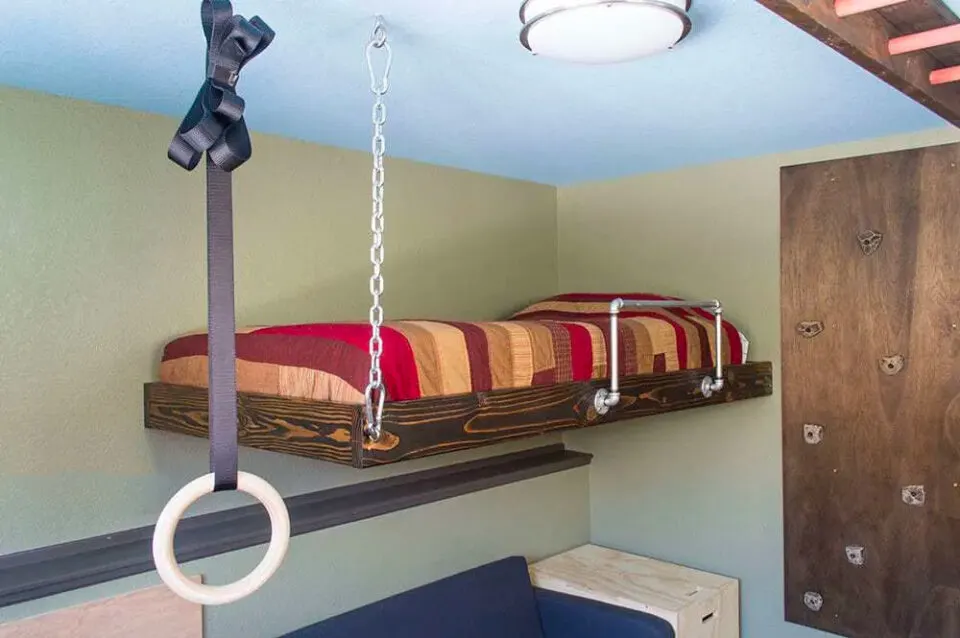 You can customize a hanging bed from scratch for the more adventurous section of the boys’ room. With a maximum of $100 budget, you can start this project by preparing the woodcuts for the side guard rails, end rails, bed slats, and bed slat supports using a table saw or skill saw.
In assembling the bed frame, you should consider using screws for each corner of the guard rail sides to locate the end rails to be inserted into the side rails.
Make sure the stud locations on the wall are appropriate to the measurement of the top of the guard rails to the ceiling. Leveling and mounting the constructed frame to match the top of the frame is the next thing to do before securing the frame to the wall through the holes drilled previously. While preparing to install the chain to the ceiling, we can use the lag screws to attach the bed frame to the wall.
Now, it is time to construct a pilot hole into the joist over the corner of the frame and install the other screw eye into the side guard rail. Then, you can connect the spring links to the chain and correlate both of the spring links to the screw eyes.
After replacing the braces, we can mount the gusset angle to strengthen the frame and add the wooden slats onto the bed. You can opt for staining and varnishing to finish the look.
3. An Elegant hanging bed Idea
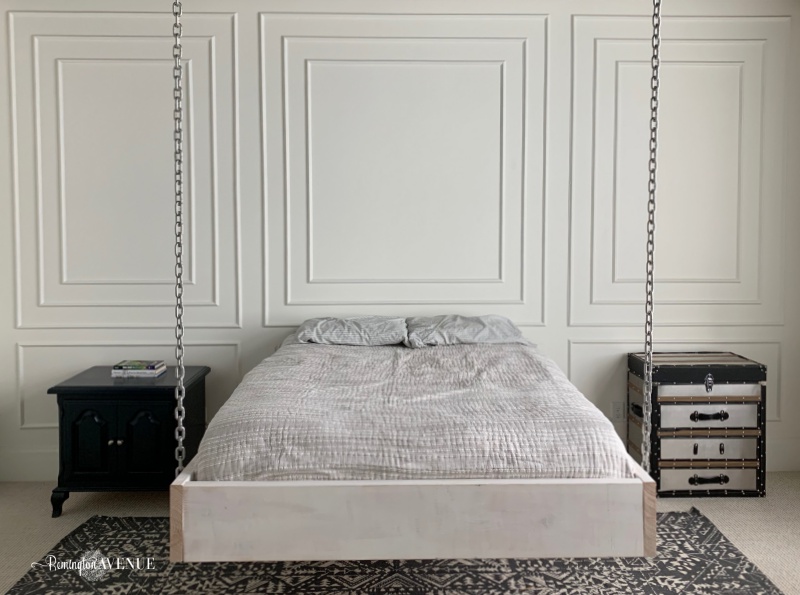 You can spare $200 on your budget for an elegant hanging bed project. To create this hanging bed, cut the wood pieces to the set measurement of the side guard rails, end rails, bed slat supports, and bed slats as the first step.
- Next, add the supports to each side rail using screws and mount the galvanized angles to each inside corner of the end rails.
- Then, assemble the bed frame by securing the end rails inside the side rails using screws.
- After that, mount the angles to the side rails to guarantee stability. Now, it is time to secure and hang the bed frame by locating the studs on the wall.
- Next, secure a pair of lag screws and washers to each stud, hang the chains, and secure the headboard to the wall studs.
- After drilling a pilot hole into the ceiling joist, secure eye screws in the ceiling and repeat the procedure for the other corner.
- Then, connect the quick links to the chain and attach both chains to the eye screws.
- After that, install the eye screws to the side rails and thread the screw eye in the attempted location.
- Finally, screw the bed slats in place.
2. A Straightforward Hanging bed Project Idea
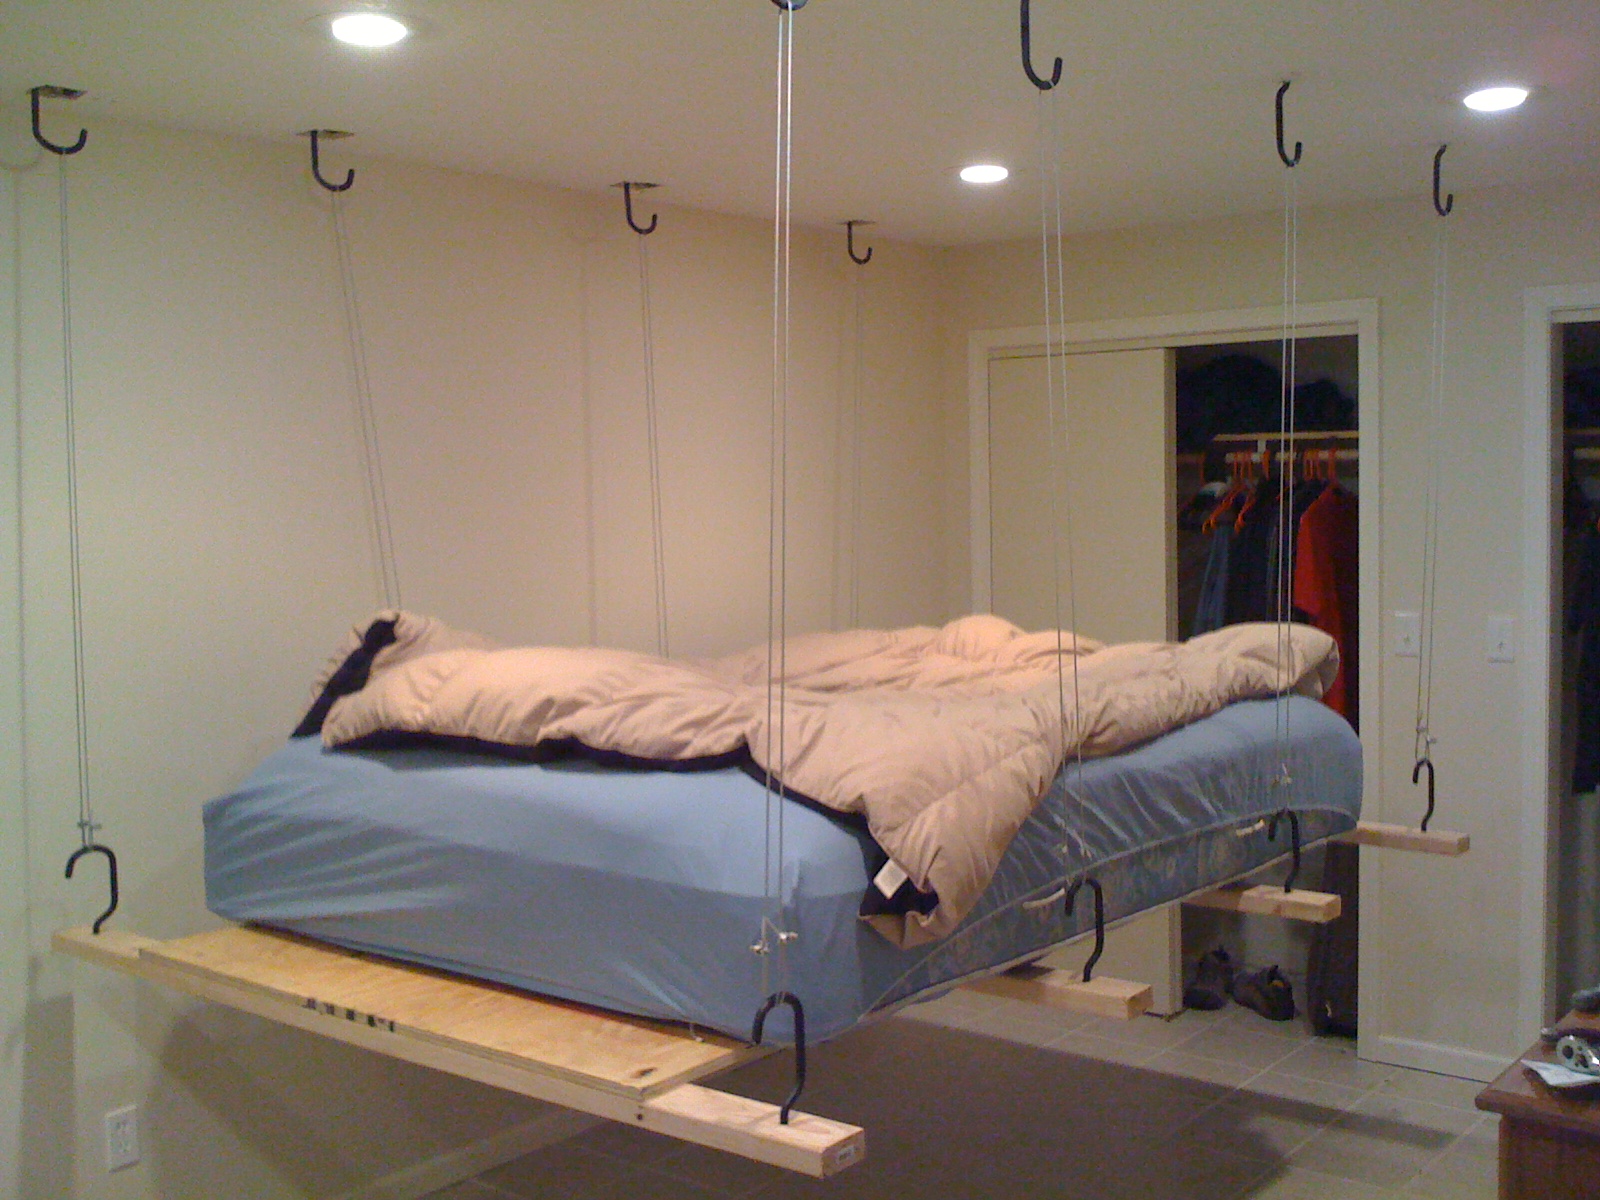 Despite this hanging bed’s excitement, it will only cost you less than $100. To hang the bed, use a stud finder to locate the trusses because this is one of the most crucial steps in ensuring safety.
- After measuring the drill holes, cut the sheetrock to the wood hole and drill out the hooks screw. Repeat the step for all the contact points and install the hook.
- Determine the wire’s length to cut for each hook set based on the height you can reserve.
- After cutting the wire, loop cables for the double cable clamp crimp and hang all eight loops to the installed hooks in the ceiling.
- Finally, we can hang the bed hooks into cable loops and level the bed.
1. A Black and Pink Hanging Bed Idea for a Teenage Girl
 Your teenage girl may overwhelm you with the refreshing idea of having a hanging bed in black and pink. Of course, we start by attaching the frame to the ceiling after installing eye bolts to the frame. You need to counter sunk a washer and a nut to the upper side of the frame.
- Then, drill a pilot hole for the eye bolt and screw it through the wood into the washer and nut.
- Add Gorilla Glue to hold the bolt tight.
- Then, find the ceiling joists using a stud finder and ensure that the joist’s center is strong enough.
- Next, attach the frame to the ceiling with lag screws and install the bed by attaching eye bolts. You can use a ferrule set to secure cables suspending the bed.
- Use the quick link to connect the cable to the eye bolt.
- We can finish the project by adding the preferred black and pink set.
References:
10. Jennasuedesign.com
9. Thepioneerwoman.com
8. Ana-white.com
7. Themerrythought.com
6. Infarrantlycreative.net
5. Aimeeweaverdesigns.com
4. Buckhorncliffs.com
3. Remingtonavenue.com
2. Instructables.com
1. Sticksandstoneshomedecor.blogspot.com