Assess the space: Measure the dimensions of your kitchenette and note any obstacles or limitations. This will help you determine what DIY kitchenette ideas will fit in the space and which will not (in case you plan to try more than one after reading the post).
Identify your needs: Consider what you use your kitchenette for and your specific needs. For example, if you are a frequent cook, you may want to focus on projects that will improve the functionality and efficiency of the space.
Maximizing storage is a great way to make the most of a small space. Consider incorporating pull-out shelves, hanging pot racks, and other storage solutions to help keep the space organized and clutter-free.
Use light colors: Light colors can help to open up and brighten a small space. Consider painting walls, cabinets, or other light-colored surfaces to make the space feel larger.
Incorporate multi-purpose elements: Incorporate elements that serve multiple purposes, like a kitchen island that you can use for food preparation and storage or a foldable table that you can use for eating and working.
Prioritize your projects: Prioritize your projects by identifying the most important ones and tackling them first. This will allow you to make the most significant changes to your kitchenette without exceeding your budget.
Research and stay up-to-date: Look at different kitchenette projects and explore the latest design trends and ideas. This will help you identify which projects will work best for your space and budget.
If a complete kitchen doesn’t meet your space, try going with a kitchenette. A kitchenette is a kitchen with a smaller version. Due to the size, it only contains a few essential appliances, like a cabinet with a sink or a small fridge. They really vary on every owner’s needs.
Regardless of the smaller size and limited appliances, a kitchenette brings various advantages. First, it obviously suits best for small spaces like an apartment. Second, it could be portable and easy to clean regularly. Third, it’s undoubtedly affordable, especially if you build it yourself. In case you need some inspiration, here are 12 DIY Kitchenette Ideas. As always, Simphome curates and presents you with the list. However, before we start the countdown, check out the following relevant FAQs you may need to know.
FAQs on How to start a new DIY kitchen improvement project?
Q: What are the first steps to starting a new DIY kitchen improvement project?
A: The first steps to starting a new DIY kitchen improvement project include assessing your current kitchen layout, identifying the areas that need improvement, and setting a budget. Once you have a clear idea of what you want to achieve, you can start researching and gathering ideas and inspiration for your project.
Q: What tools and materials will I need for my DIY kitchen improvement project?
A: The tools and materials you will need for your DIY kitchen improvement project will vary depending on your specific project. Common tools and materials include a saw, drill, hammer, level, paint, and tile adhesive. It’s important to have the right tools and materials before starting your project, so be sure to consult a professional or do your research beforehand.
Q: How can I get professional help or guidance for my DIY kitchen improvement project?
A: You can get professional help or guidance for your DIY kitchen improvement project by consulting a home improvement store, hiring a contractor or designer, or seeking advice from online forums or blogs. You can also find many tutorials and videos online to help guide you through the process.
Q: What common mistakes to avoid when starting a DIY kitchen improvement project?
A: Some common mistakes to avoid when starting a DIY kitchen improvement project include biting off more than you can chew, not having a clear plan or budget, and not properly researching the project before starting. It’s also important to be realistic about your skill level and not take on a project beyond your capabilities.
Q: How can I ensure that my DIY kitchen improvement project stays within budget?
A: To ensure that your DIY kitchen improvement project stays within budget, it’s important to set a budget beforehand, research the costs of materials and tools, and compare prices. You should also consider the cost of hiring a professional if you need help with certain aspects of the project. You can also try to reuse or repurpose items you already have at home.
12 DIY Kitchenette Video
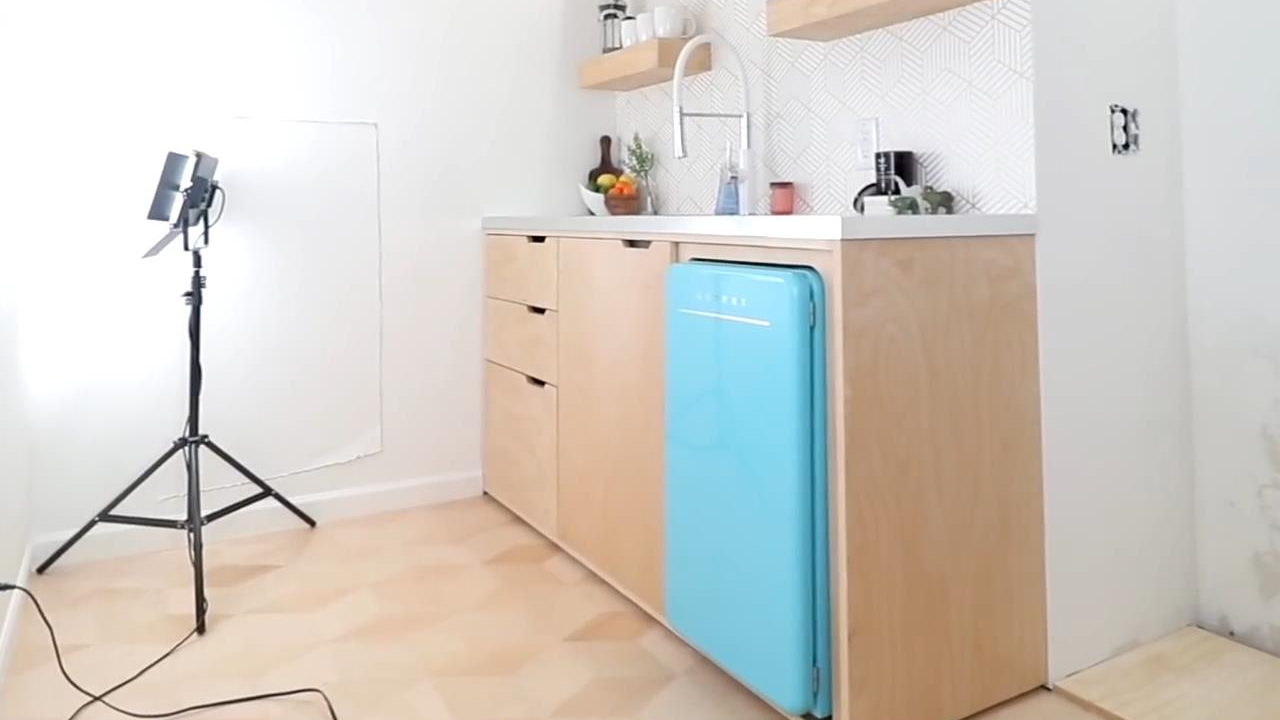
12. How to Turn a Dresser into a Simple Kitchenette
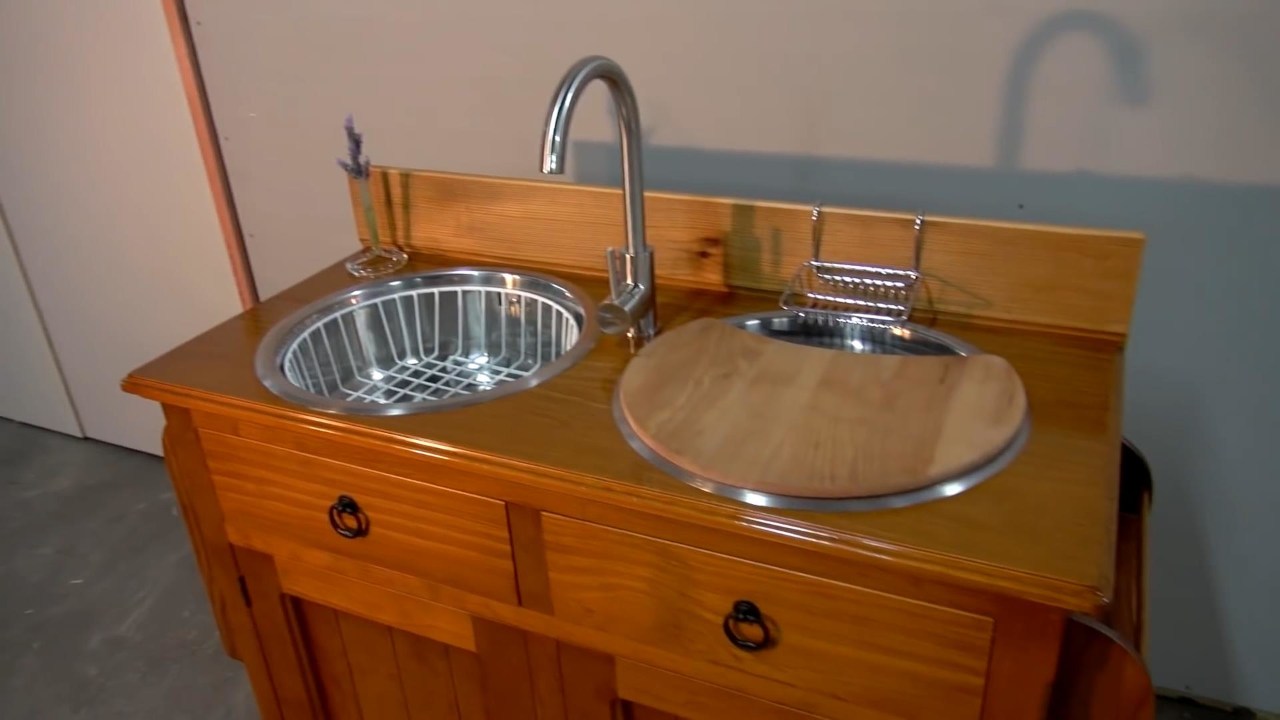 If you have a tired dresser and are thinking about getting a new one, please do not throw the old one yet. You can give it a second life by turning it into a kitchenette.
Begin with installing the sinks by measuring where you want to position them from the edges. Then, trace the outer rim of the sinks to the top of the dresser.
You will also need to measure the sink lip and transfer the measurement to the line you have made.
After that, cut out holes for the sinks and try to place your sinks into the holes to see whether they can rest perfectly. Then, secure the sinks in place using silicone. Silicone will help you attach them to the dresser and create a waterproof seal.
Next, you can install the kitchen mixer between the sinks. After that, drill a hole in the back for the pipes. For the finishing touch, you can install a backsplash and add a rack on the kitchenette’s sides for extra storage.
11. An Outdoor Kitchenette project transformation with Concrete Countertop
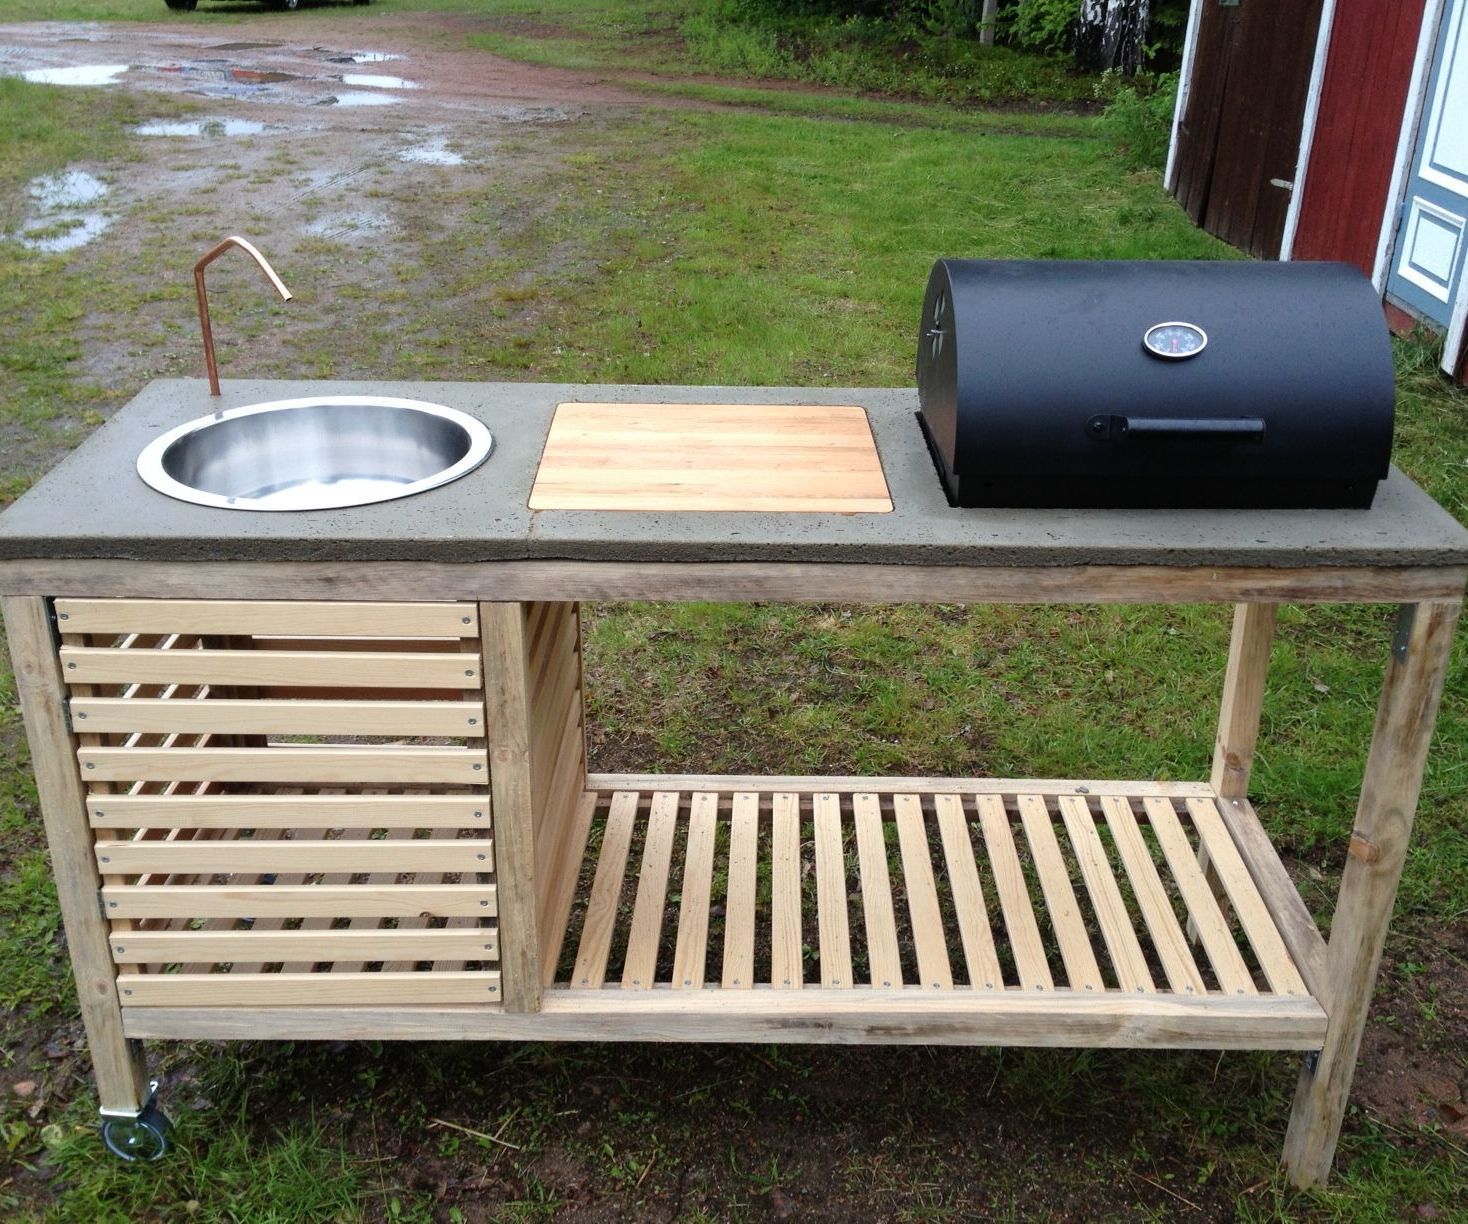 When throwing an outdoor party, it will be advantageous to have an ample countertop and sink near the grill like this kitchenette. The concrete countertop is made to fit the sink, wooden chopping board, and grill. Since it is a bit heavy, the wheels enable you to move easily. However, consider attaching wheels to each leg instead of only two.
To create a similar kitchenette, you need to begin making the base from wooden boards assembled with reinforcing mending plates.
Then, you need to make the concrete countertop. Since you will have a built-in sink, cutting board, and barbeque in your kitchenette, you have to create sized holes where they will fit.
Once the concrete countertop is set, attach it to the base. Then, insert the sink, cutting board, and barbeque into the countertop.
10. A DIY Outdoor Kitchen project idea for only $200
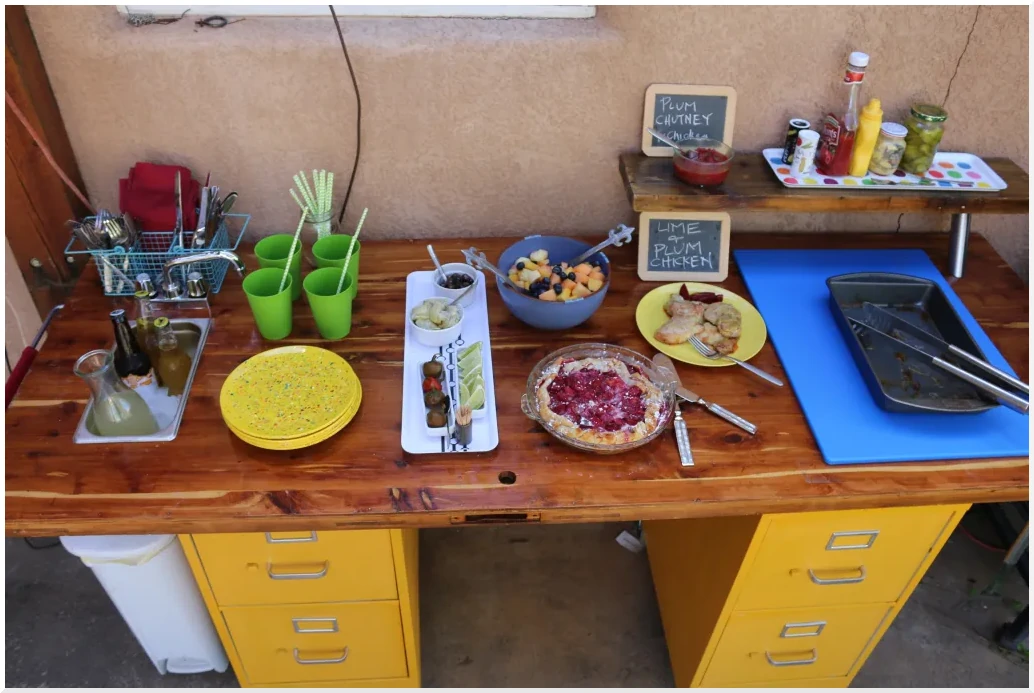 This kitchenette provides a wider counter space to prepare and serve meals and more storage space. The sink does another duty as bottles cooler when not used.
You can remake this kitchenette at home with two file cabinets as the base and solid wood as the countertop. This cabinet will not rust because it has been spray-painted. Besides, it is waterproof.
9. A Modern Kitchenette project idea from @Modernbuilds
 This kitchenette is perfect for any studio apartment or basement. It will give the space a bit of style while being functional.
To make this kitchenette, you can begin by cutting a 3/4-inch birch plywood to length. Then, assemble the pieces using wood glue and 16 gauge finish nailers.
The two internal dividers are inset. Consider using scrap wood when assembling the dividers to create a consistent offset.
If you want to make the kitchenette sturdier, you can grab corner braces and attach them to the back corner of the cabinet. After that, create drawers and install them in the cabinet.
Besides drawers, you will also need to create a cabinet door and install trim to round out the mini fridge’s cabinet. Next, install the countertop and sink. Finally, decorate the kitchenette.
8. IKEA Mini Kitchen Project Idea
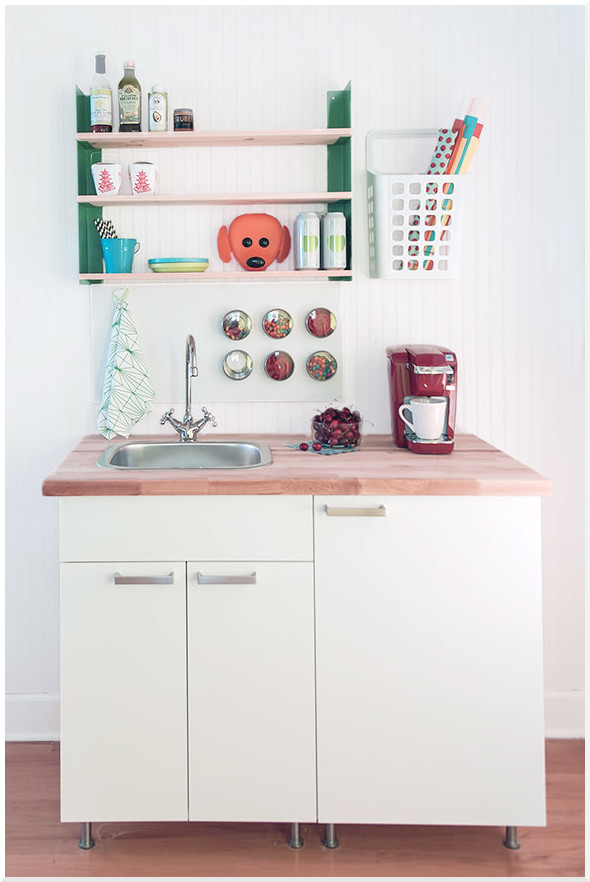
To be affordable doesn’t necessarily mean to make everything from zero. For example, you can build this kitchenette from an IKEA base cabinet. Just follow the instruction guide from the manual, then add a countertop. Remember to cut out the countertop to insert a sink and faucet, and there you have it.
Add wall-mounted shelves above the kitchenette to provide more storage. You can also install a pegboard between them to hold more things.
7. A Kitchenette project idea for the Basement Hallway
 Consider adding a kitchenette nearby if you have a family room in the basement or usually welcome your guests. It could be in a hallway like this. Besides allowing you to serve people easily, it also makes an empty space more entertaining.
By coincidence, the space in this hallway just fits perfectly for two narrow cabinets and a mini fridge. So, all left is to give a new face to cabinets by painting and installing pulls. Last, put the board on the countertop, and there you have it.
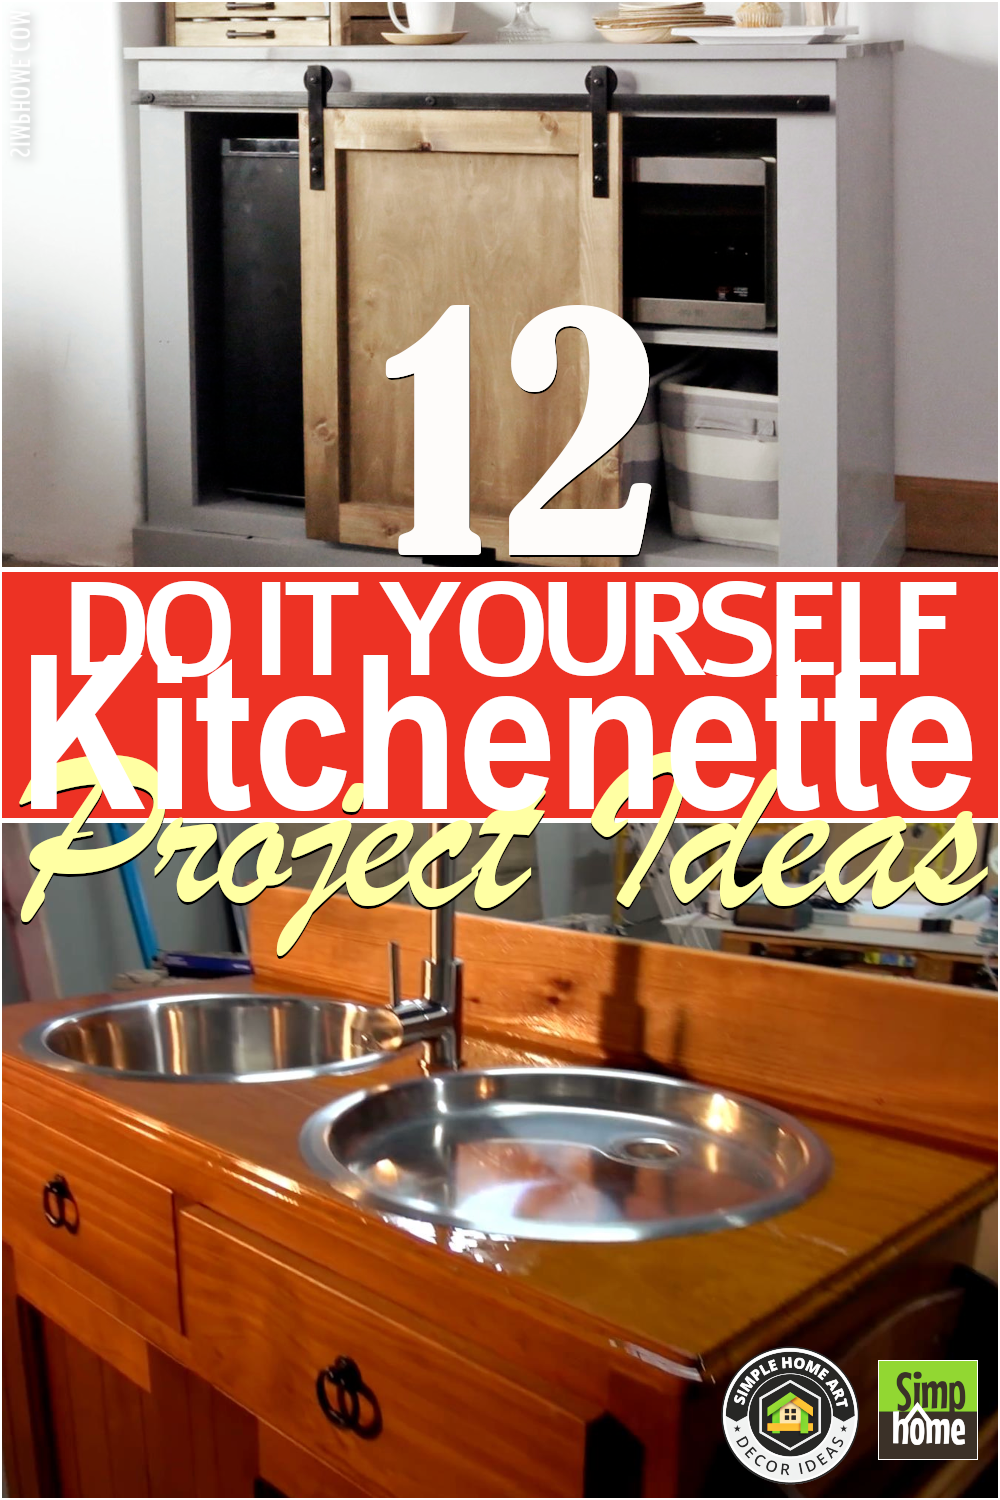
6. A Kitchenette project transformation for a Guest Room
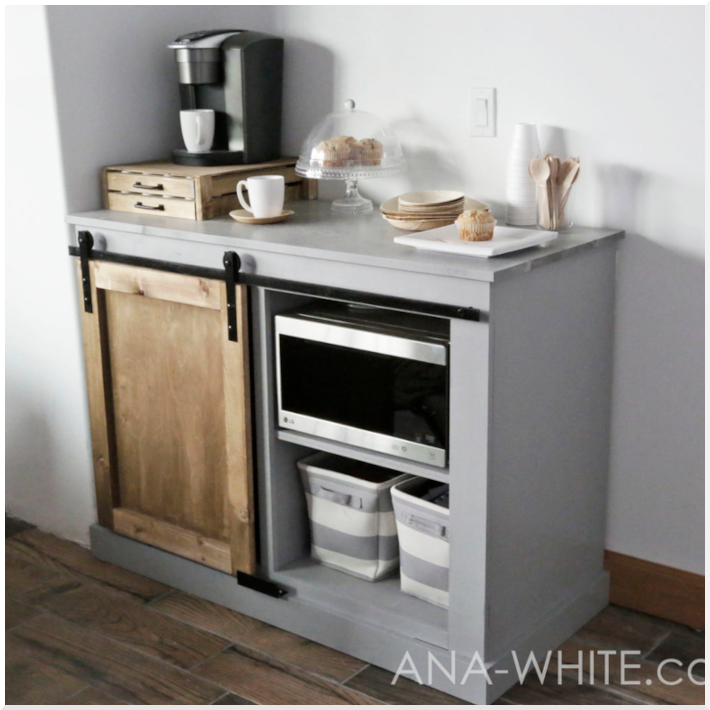 This kitchenette looks just cute with a barn door. Although the size is relatively small in fact, it can hold a mini refrigerator, microwave, coffee maker, and some baskets. Isn’t it gorgeous to put in the guest room? This way, you can serve them better, and they don’t need to bother you by going to the main kitchen to get some drink or to warm their food.
You can build the similar one in a day. Start by creating the cabinet from plywood according to the fridge and microwave size. Add a face frame where the reels will be installed, then attach the barn door.
5. A Redwood Outdoor Kitchenette by @Lovelyindeed
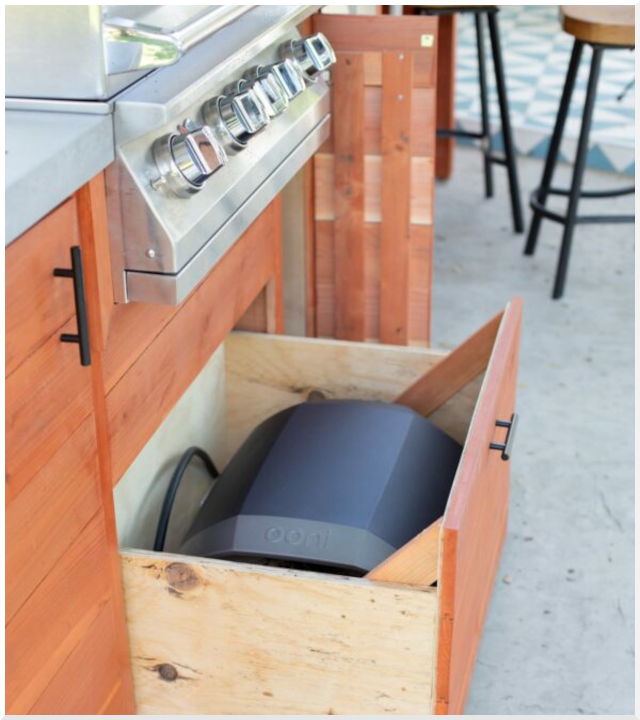 If you want a stand-out outdoor kitchenette, try going with redwood. This kind of wood looks beautiful against a white wall, even among the greenery. The addition of a silver grill and fridge enhances the fancy look. And if you notice, the kitchenette is actually floating.
This kitchenette is built by first screwing the ledger frame onto the wall. It needs to be highly sturdy and stable. Then continue building the cabinet face to the size you desire. To create a floating look, give the bottom frame some space from the ground and add metal brackets under the cabinet for additional support.
4. A Practical Kitchenette project for Camping by @Homemademodern
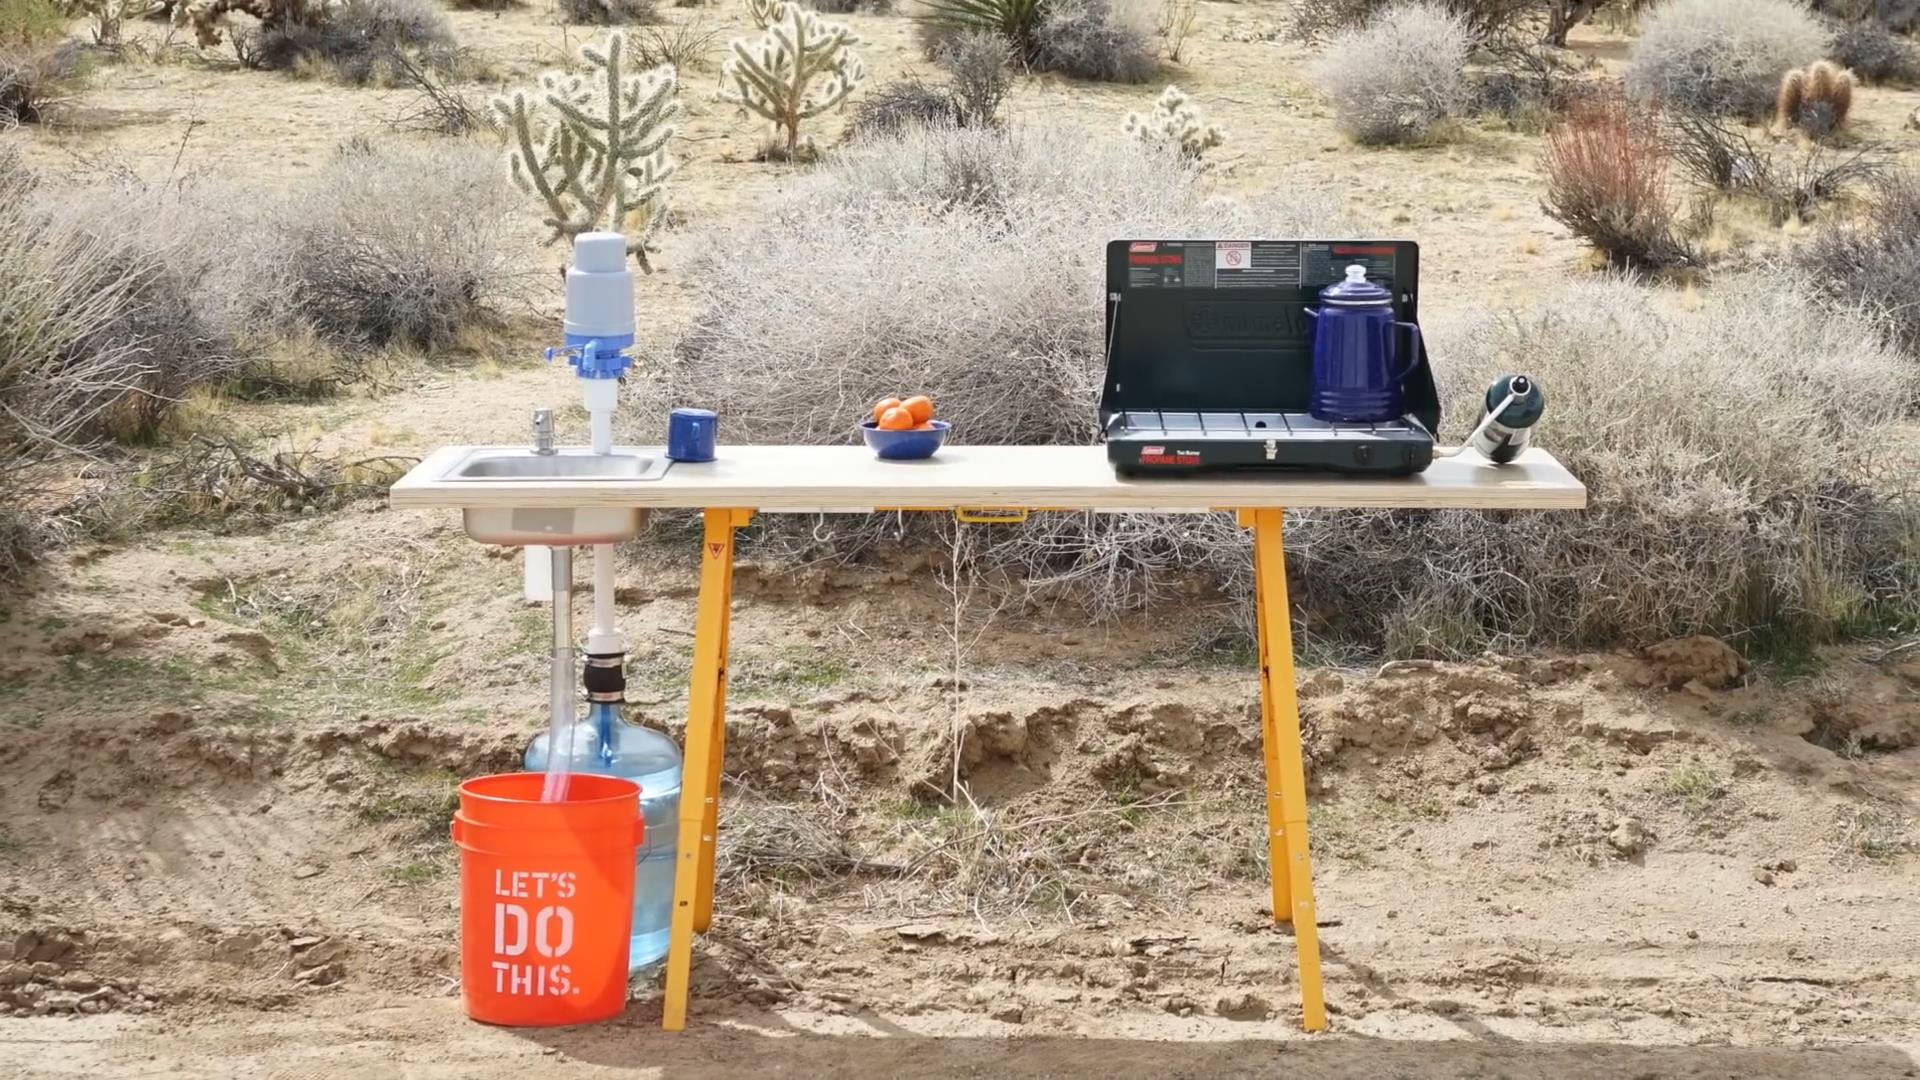 This insanely clever kitchenette will ease you to prep meals literally everywhere inside and outside the house. The countertop can be disassembled from the legs, which allows you to bring the set easily. The folding metal sawhorse, which is the leg, is foldable and adjustable to the height you need and has some holes to hang kitchen things. Besides, with this leg shape, the kitchenette can stand up firmly even on uneven ground.
Aluminum angles play a critical role as brackets to adjoin the countertop and the legs from the underside. It is cut into several pieces and drilled so bolts can be inserted. The same points of holes are drilled in the countertop and the saw horse.
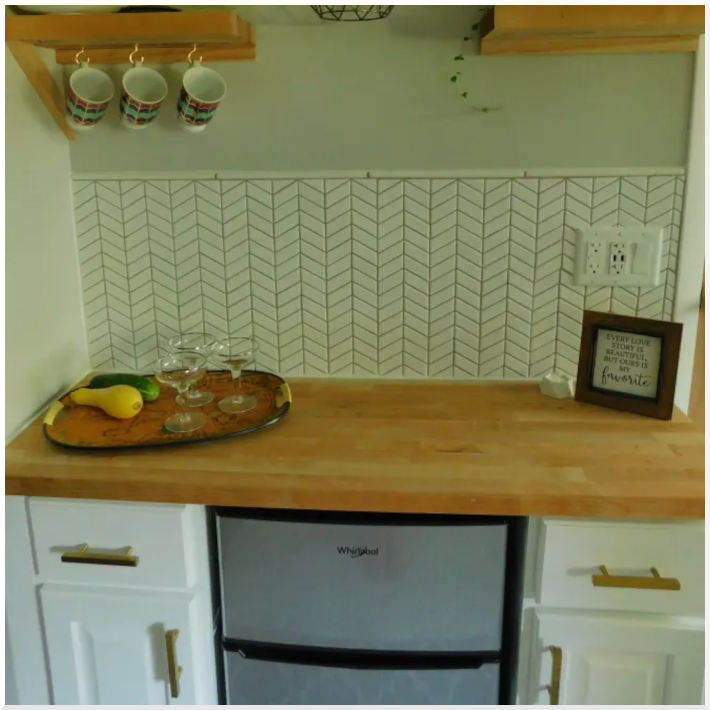
3. A Kitchenette Corner Redo for under $600
 Don’t let your corner be gloomy because isolated things keep tucking there. Instead, try to turn the space into a small kitchen. Use a cabinet as the foundation, then add a butcher block counter.
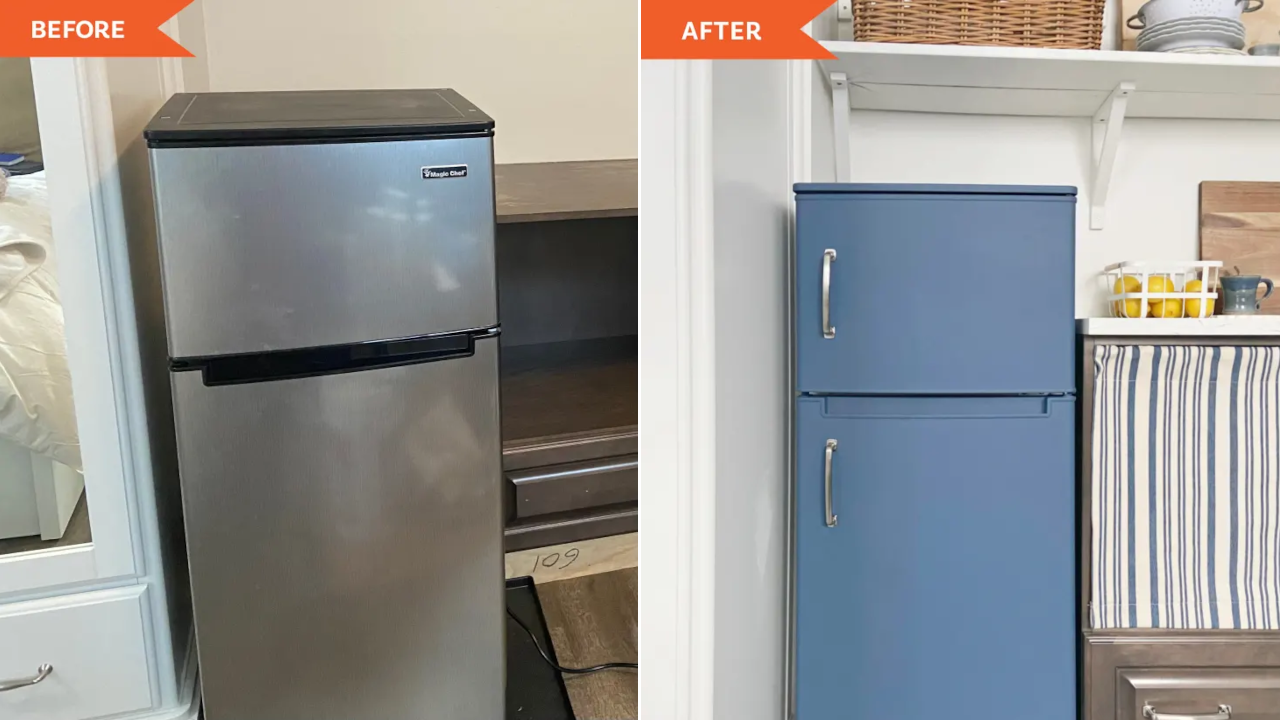
In this picture, the cabinet has an opening for a stove that is not really needed, so a piece of curtain and tension rod is used to disguise it. The fridge also has new hardware to match the cabinet, and the navy color matches the ceramics. To add detail, the existing shelves that once held toys now hold some baskets and accessories.
2. A Campervan Kitchen project idea from @Funlifecrisis
 Do you like traveling for days in a van? If so, you should check this mini kitchen out. It uses a cabinet for the base, so there is enough storage for kitchenware. However, try to maximize the space using a foldable knife, chopping board, and multipurpose utensils.
Next, create space for the fridge and make some modifications to fix it. Cooking will not be better without spice, so add a magnetic spice rack to any leftover space. Different colors of spices could also add a decorative look in a pretty tiny space, like in a van.
1. A clever idea on how to Cook with no Kitchen by @Myweeabode
 Many dorms and studio lack kitchens because of space problems. This idea could inspire you in this situation where the space leaves nothing but a bulky cupboard. The key is to maximize the space. One of the most foolproof ways to do that is by presenting a kitchenette.
Utilize a rolling cart to add extra storage and a counter. Also, think of maximizing the space vertically by installing open shelves, magnetic knife holders, and a spice rack. To save up more space and bills, try multifunctional items like an instant pot, electric skillet, air fryer, and rice cooker that surprisingly can steam veggies as well. If you are a fan of IKEA products, you’ll find new IKEA hackers’ publications interesting perspectives to try.
References:
12. Youtube.com/livingbig
11. Instructables.com
10. Mylandscapecoach.com, Mylandscapecoach.com
9. Club.chicacircle.com
8. Fleamarketgardening.org
7. Thehomestud.com, Doityourself.com, Pinterest.com
6. Empressofdirt.net
5. Thenavagepatch.com
4. Interiorfrugalista.com
3. youtube.com/refugiogreen
2. Firstdayofhome.com
1. Hgtv.com