15. Craft a Scrap Wood Shoe Cabinet in a Snap!
 Rising to Beth’s shoe storage challenge, Nick from realitydaydream.com dived into a one-week scrap wood challenge.
Using handy melamine scraps, he crafted an efficient shoe cabinet.
Key steps? Cut sheets to size, carve out the intricate shelves, and ensure edge banding.
Don’t forget to use the angle gauge for precise dowel holes. Assembly can be tricky (Nick learned the hard way), but the result? A rock-solid shoe cabinet. A bonus? It might even inspire a mini version for the kids. Melamine or not, this project is a definite WIN!
Here’s the diagram from Realitydaydream!
14. Elevate And Transform Your Limited Space with The Raised Storage Bed Solution from KiaDesigns

Meditation and yoga have become inseparable parts of your routine, but a tighter budget has nudged you into a smaller living space. No worries! It’s time to get inspired, make some adjustments, and take action.
Here’s how we can make it work in your cozy new home. Picture a raised platform storage bed at the room’s far end, brilliantly offering drawer space at the front and a large cavity underneath — the ultimate hideaway for bulky items like suitcases.
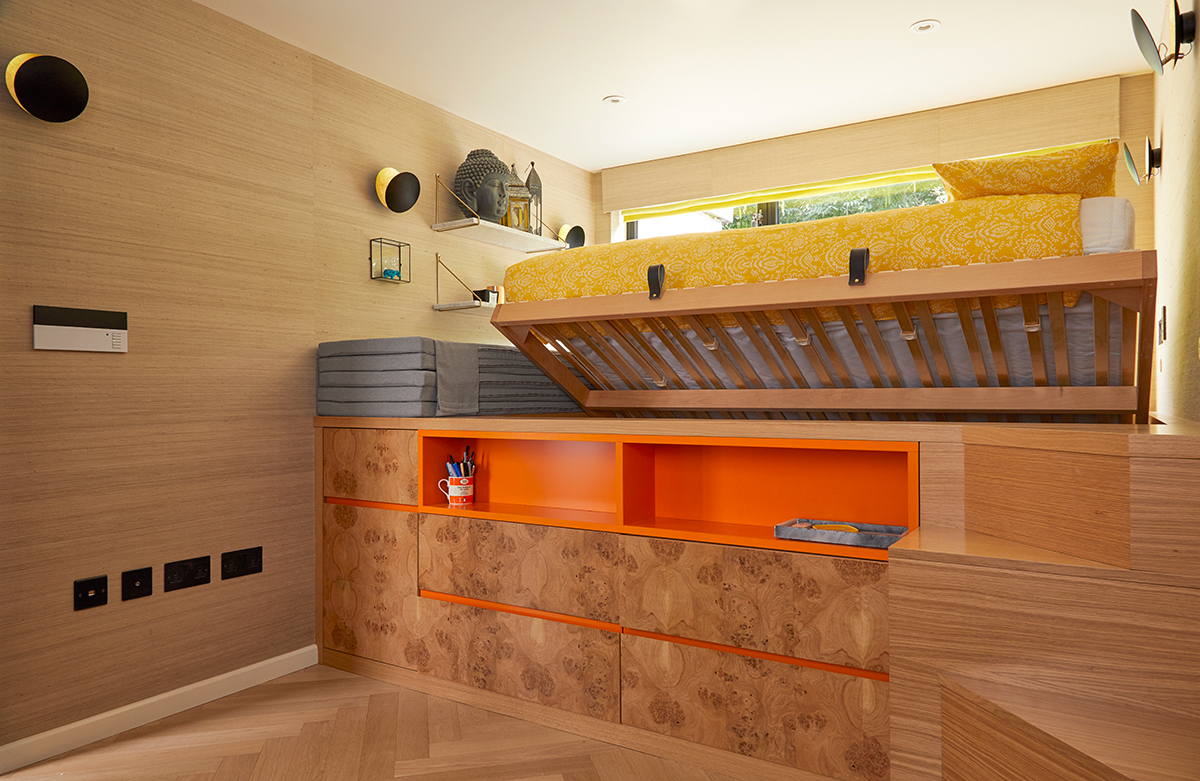 Not just practical, this setup transforms the room into a peaceful meditation haven, complete with a serene color palette inspired by classic ’70s art. It’s a functional design meeting restful retreat!
13. A Wall Sofa Bed Project and The Murphy Bed
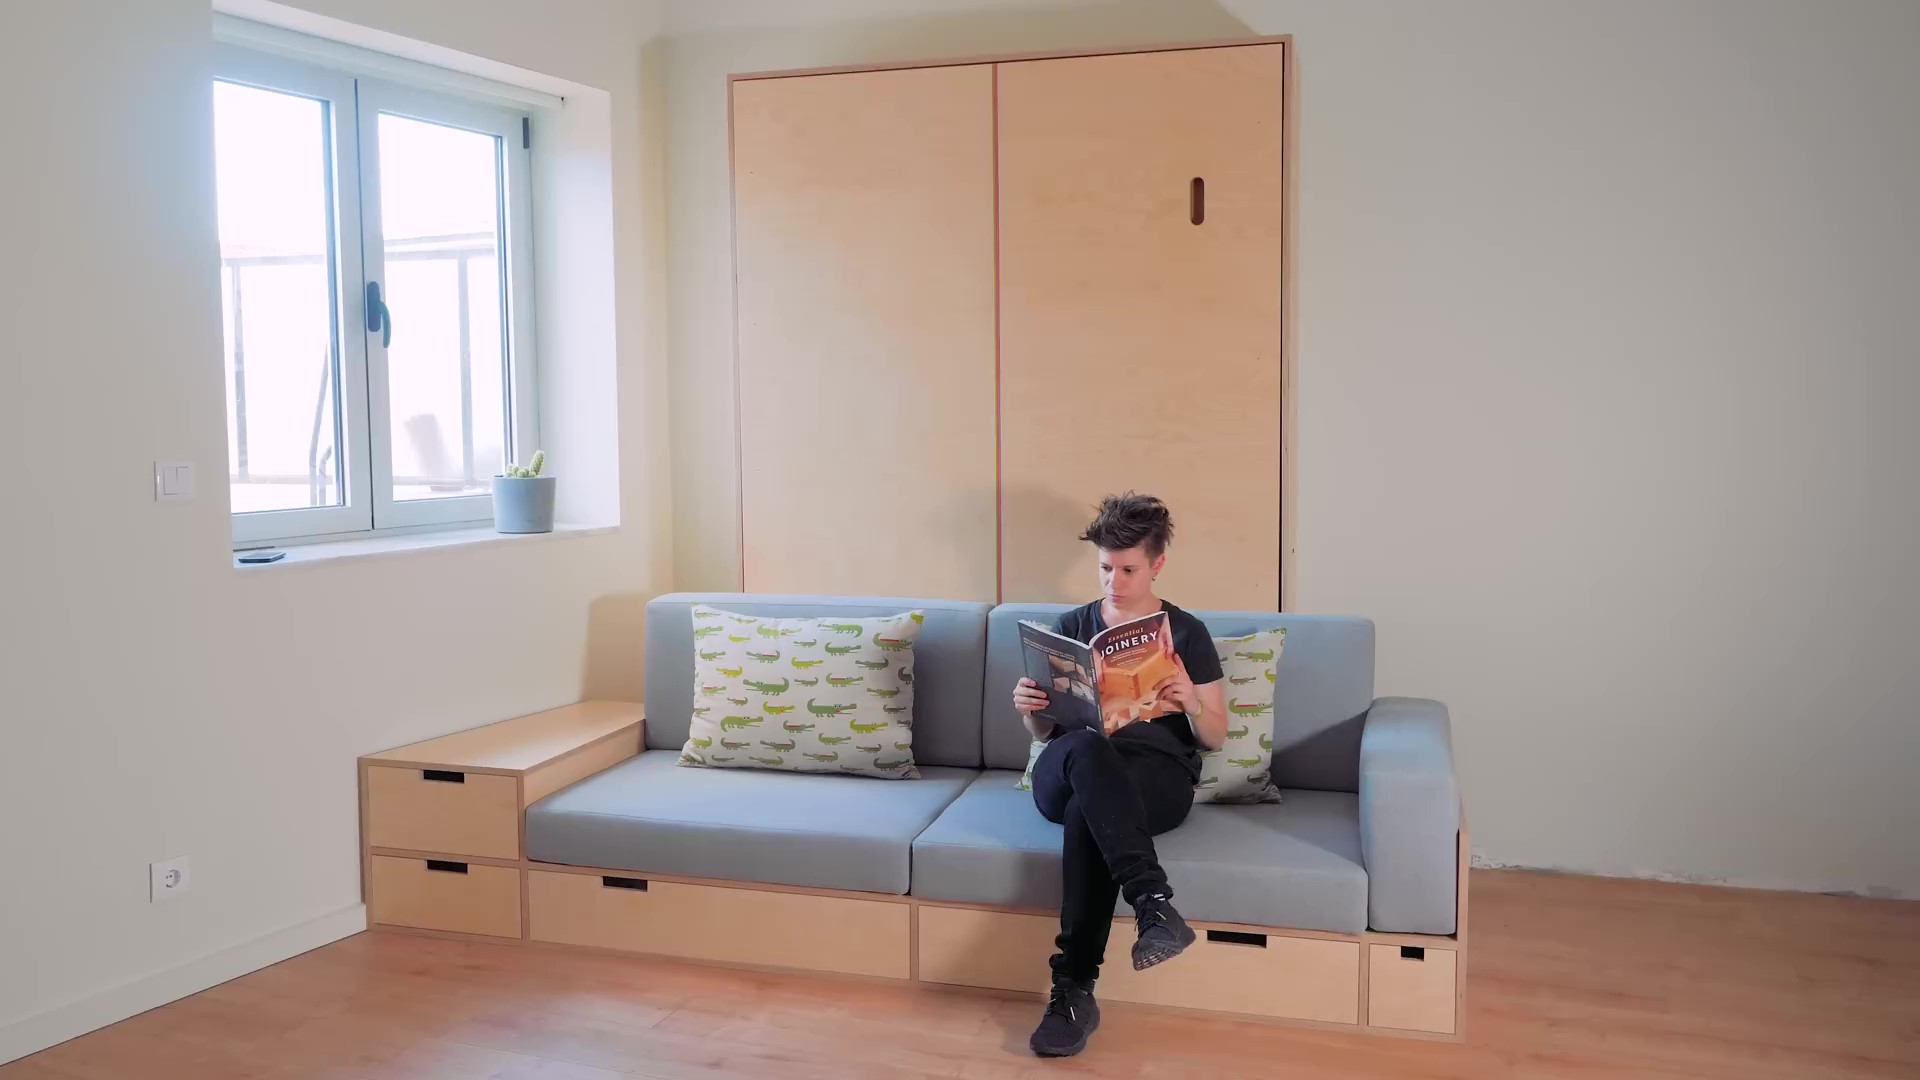 Start by constructing a wall bed that flips over your sofa, using durable birch plywood. Opt for colorful wood accents to avoid a cramped feel and add vibrant character. Make precise cuts and label each section to keep track of your progress.
For a touch of artistry, incorporate rainbow plywood details that bring your bed to life. Follow the hardware kit’s instructions closely, adapting as needed for your queen-size mattress. Secure the frame with screws, cleverly hidden by vibrant wooden plugs. Finally, treat yourself to a meticulously crafted handle recess, rounding off your masterpiece.
Video by Get Hands Dirty | Buy the plan here
12. A Custom Walk-in Closet by Serena
Transform a cramped 5′ x 7′ space into your dream closet! Start by ditching that disorganized mess and inadequate shoe shelving. Imagine a left-side haven: folded clothes space, drawers for off-season attire, a desk with a window view, and a functional shoe shelf. SketchUp is your design friend (though expect a learning curve!).
![]() Measurement tip: Check multiple wall points and use the smallest figures to ensure your organizer fits like a glove. With maple plywood, precise tools, and your vision, you’ll create a stunning, custom walk-in closet that’s both practical and awe-inspiring.
Measurement tip: Check multiple wall points and use the smallest figures to ensure your organizer fits like a glove. With maple plywood, precise tools, and your vision, you’ll create a stunning, custom walk-in closet that’s both practical and awe-inspiring.
Detail from Thriftdiving.com
11. A DIY Sleek Shoe Rack Project Idea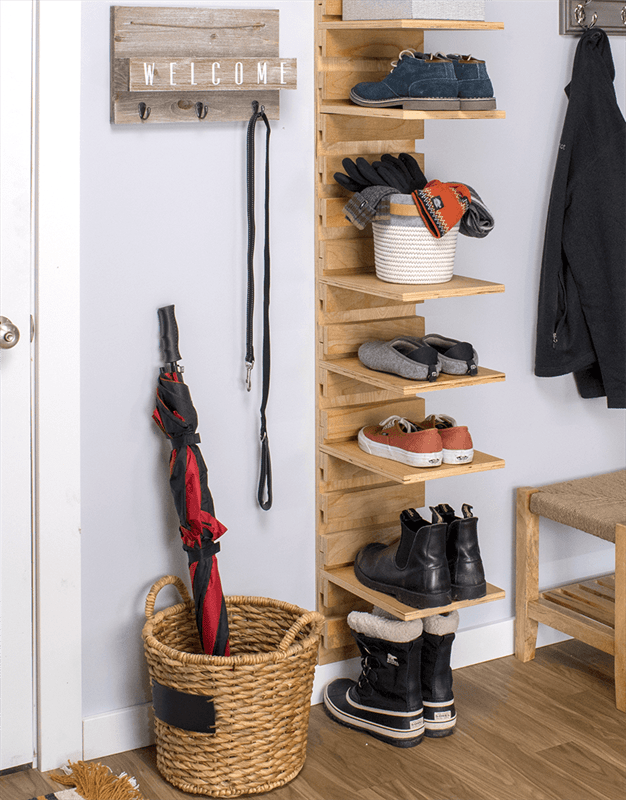
1. Cutting the Plywood: Using a single 19mm plywood sheet, rip your Back, Shelves, and Cleats using a circular saw, preferably with the Kreg Rip-Cut. Then, finalize the lengths with a miter saw.
2. Shelf Assembly: Glue a Narrow Cleat to a Shelf edge to ensure they’re flush.
After drying, secure with two #8 x 38mm screws. Repeat!
3. Cleat Glue-Up: Position Cleats on the Back, use glue, ensure alignment, and let dry.
Do this sequentially for all cleats.
4. Screwing Cleats: On the flip side, drive #8 x 51mm screws into each Cleat for reinforcement.
5. Finishing Touches: Sand edges, remove dust, and apply a finish – natural oil is ideal!
Avoid paint for smoother shelf placement.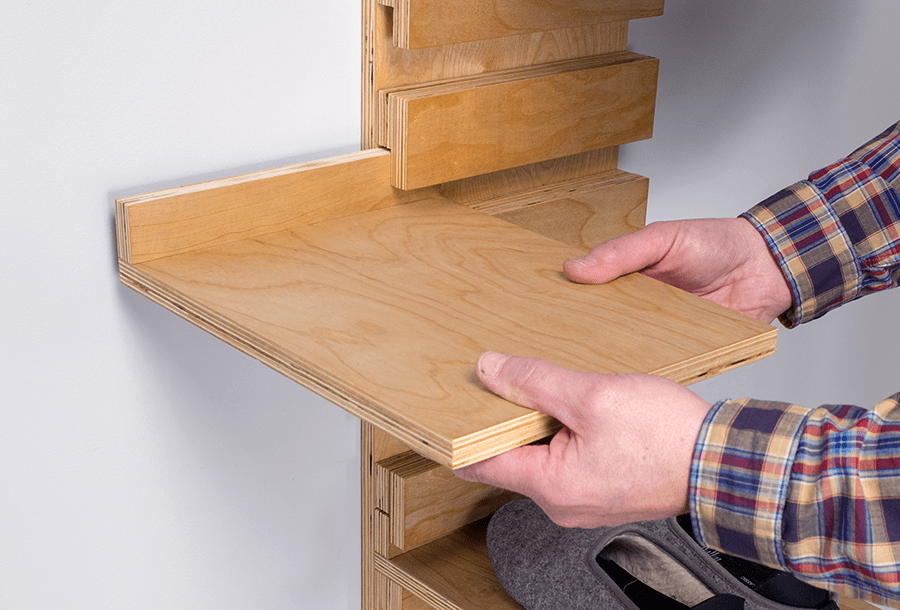
6. Wall Mount: Position your rack, mark the spot, and if on a stud, use #8 x 51mm screws.
No stud? Use wall anchors and then secure.
Detail: @Learn.kregtool.com