If you don’t have much money to spare, your makeover options will be limited by the size of your budget.
No worries. Simphome.com has come up with twelve ideas to improve your bedroom aesthetically that are light on the wallet. Without any more introduction, let’s begin our countdown.
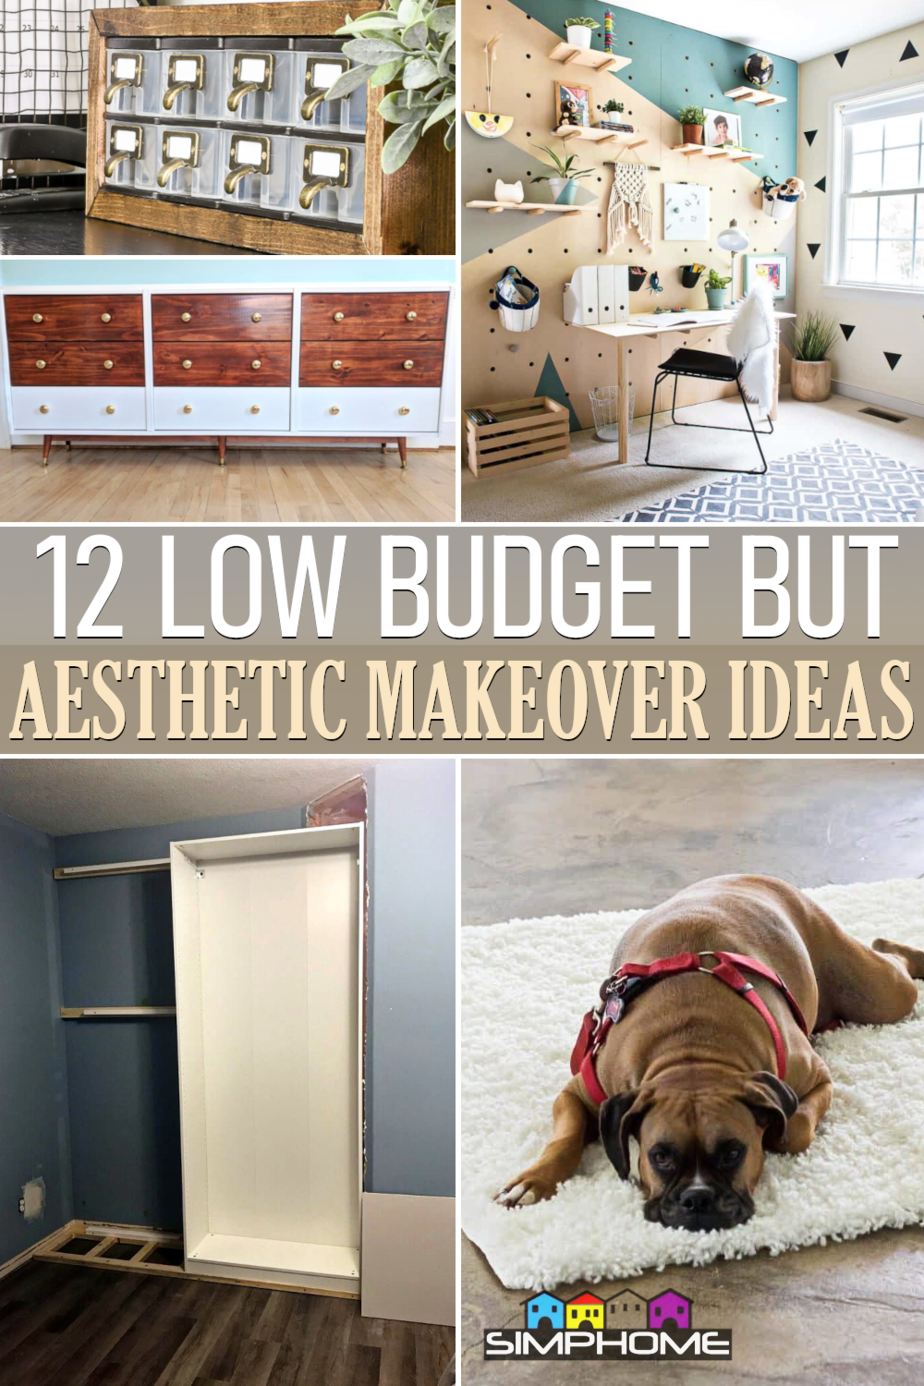
🔊12 Low Budget But Aesthetic Bedroom Makeover Video:
List Entries:
12 Do It Yourself Bedroom Built-In Ideas
12 Modern Minimalist Bedroom Design and Makeover Ideas
12 Ideas on How to Makeover Your Bedroom Coziest Place to Be
12. These Pallet Beds Are a Great Minimalistic Addition to Your Bedroom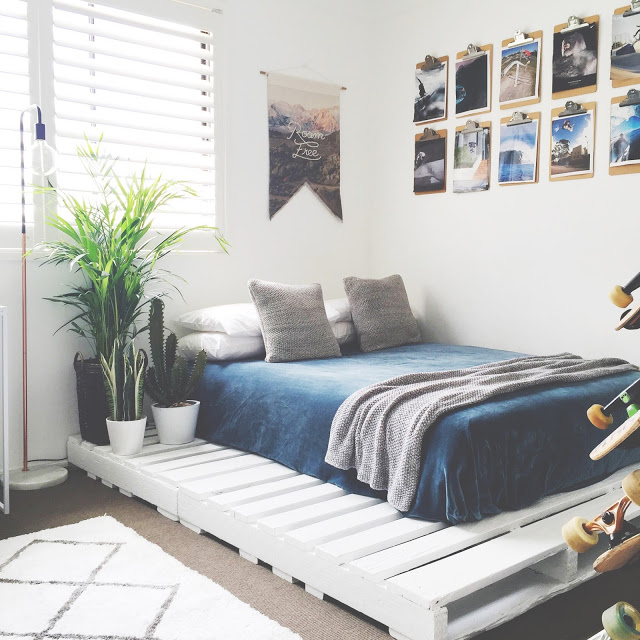
Pallets offer versatility and are useful in many creative projects. You can also get them on the cheap.
Take, for example, a double mattress placed on four pallets. It’s a straightforward matter of cutting off a third of the two on the right. It will leave enough of a ledge on the left to place plants where a nightstand would’ve been. After that, sand it so that you get rid of any splinters and rough edges.
Then you can spruce it up a bit with two coats of white paint. It will complement the white walls and make the blue bedding pop out.
11. Tote Bags As Throw Pillows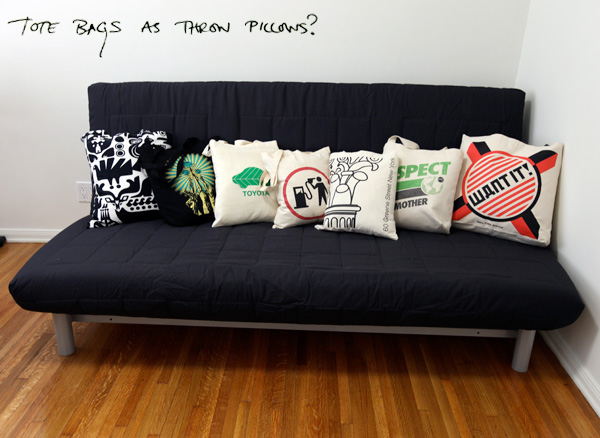
Tote bags come in many colors, patterns, and designs. You can pick the ones you like that go well together to create several charming throw pillows out of them.
Why not? They have the ideal shape, and their size is just about right. If you have an artistic flair, you can even print your own designs. The cotton fabrics are sturdy, and most of the work has already been done for you. Simply put in a throw pillow insert just as you would in their cases. It’s up to you if you want to get rid of the handles, add a zipper, or sew the opening shut. Maybe you can even add fringes.
10. Renew your Bedroom Interior for Cheap with this DIY Fluted Dresser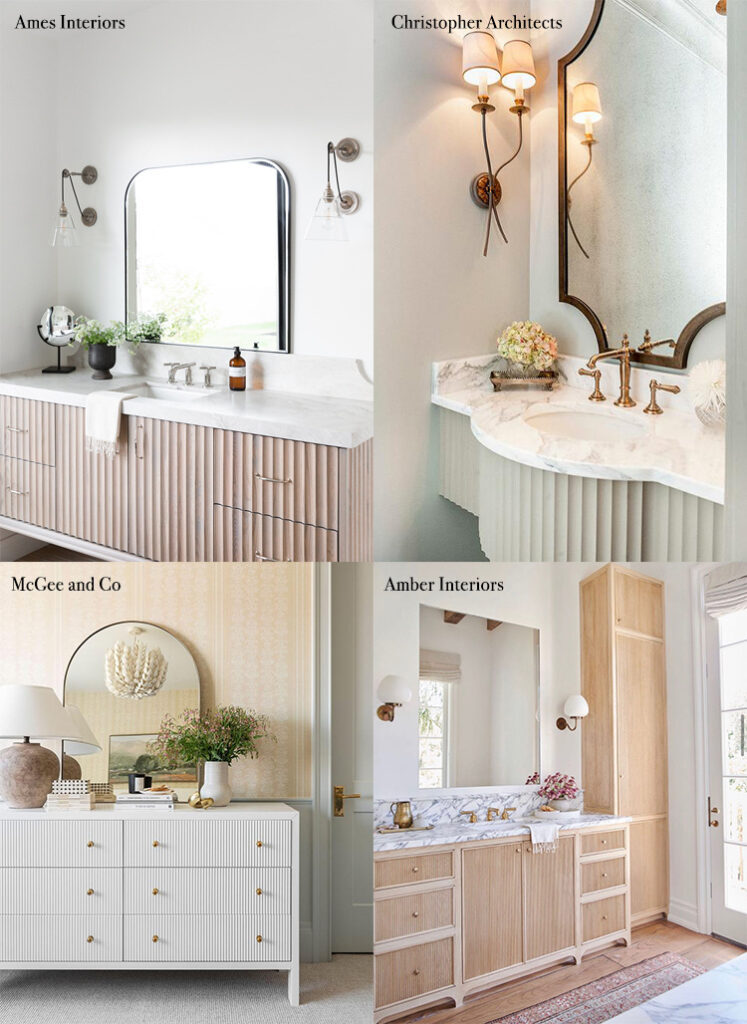
We rarely see reed or fluted furniture, but the price tags are usually astronomical when we come across one. Don’t be surprised if it goes for more than a thousand dollars.
You can build a similar-looking one with a Tarva dresser from IKEA that won’t burn a hole in your pockets. The secret is using fluted panel moldings. Measure how many you’ll need before purchasing them. Cut them precisely to the height of the drawer faces.
After thoroughly sanding the Tarva dresser using 80-grit sandpaper, glue the panels on starting from the left. Remember to trim any excess on the right and sand it round to match the left side.
Lastly, paint everything to your desired color and add the handles.
9. Bring In the Right Amount of Light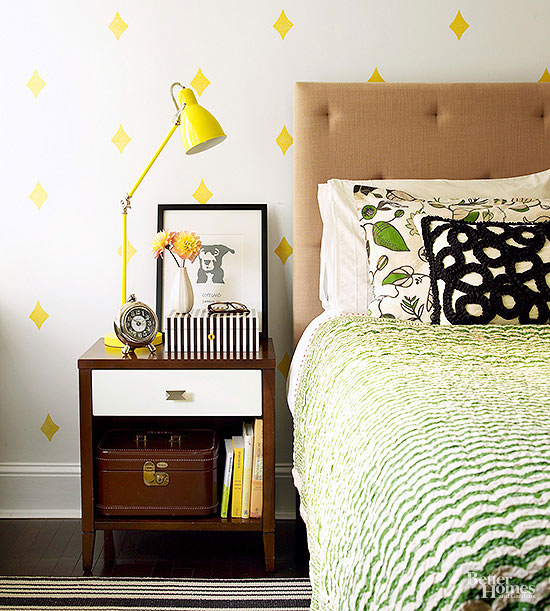
When trying to figure out the type of illumination to give your bedroom, focus more on the accent lighting.
They take priority in the bedroom more than overhead or ceiling lights to create a cozy ambiance. It could be sconces, table lamps, mood lighting, or reading lamps. It’s also best to go for warm light instead of sharp LED white lighting. More subdued glows will provide a dramatic difference in making the bedroom look and feel more inviting and soothing.
You can buy warm white LED or even yellow ones to achieve the same effect. Not only that, it can save you some costs on your electricity bill than warm fluorescent lighting.
8. This Triple IKEA RAST Hack Would Save you Lots of Clutter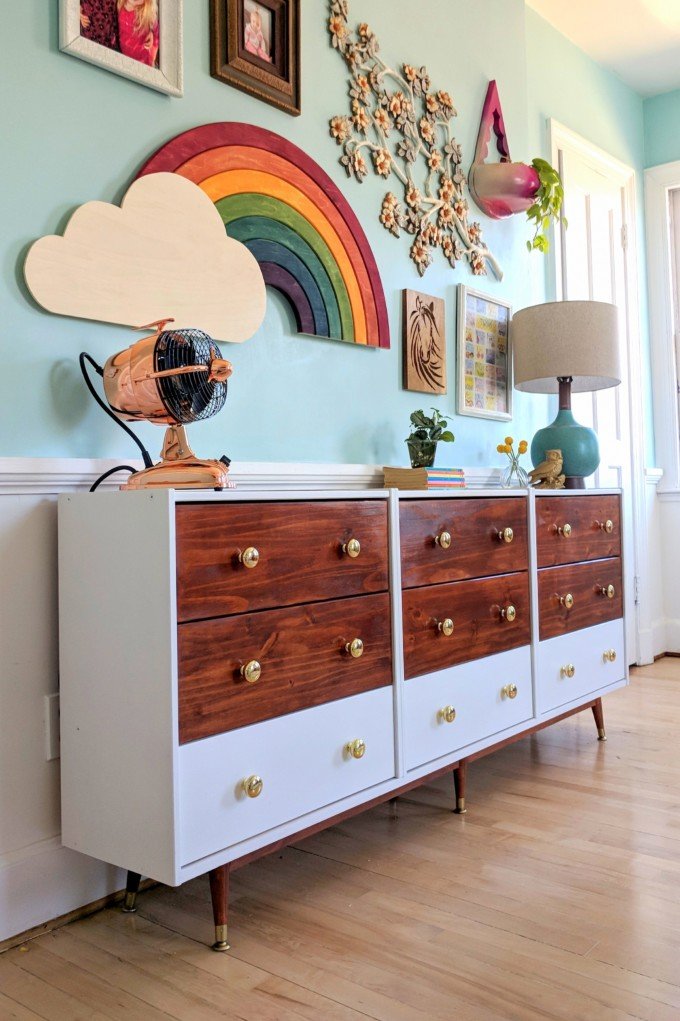
You can use three RAST dressers from IKEA to build this larger one with an almost vintage 1960s-70s appeal.
First, cut off the bottom skirts. You can attach them at the back with four stainless steel brackets. To join them at the front, open the drawers and drive screws on the sides where they meet. Add 1×4 boards the same length as the dresser at the bottom front and back. That’s where you’ll install the six mid century legs. Follow the contour of the legs when you add 1×2” trim between all of them.
Paint the dresser and the lower three drawers white. The legs, their trim, and the top six drawers get a natural finish. Finally, install golden round knobs on each drawer.
7. DIY Plywood Pegboard Wall Idea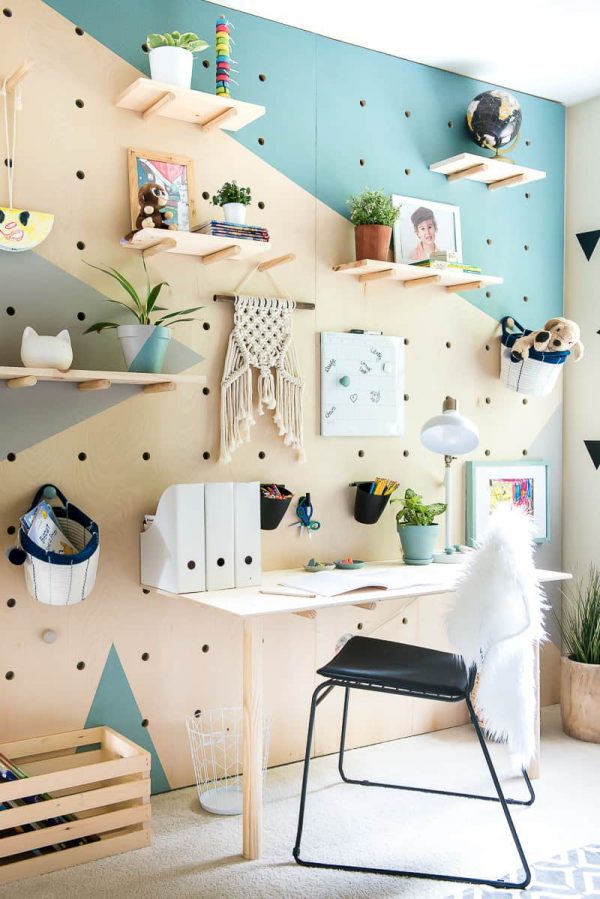
Pegboards are great for hanging and organizing some of your things on the wall. Why not take it a step further and create an entire pegboard wall?
That way, it would be a breeze to hang almost anything you can think of across the wall. Best of all, you can add more shelves wherever you please. You can even insert pegs to support the back end of a table! All you need to do is install 2×4” frames on the wall to attach the 3/4” plywood. Mark out on the plywood where you’ll drill evenly spaced 1” holes with a Forstner bit.
Instead of plain color, you can add colorful patterns to make it a delightful accent wall in your child’s bedroom.
6. Unique Ideas for Hanging Curtains with Rope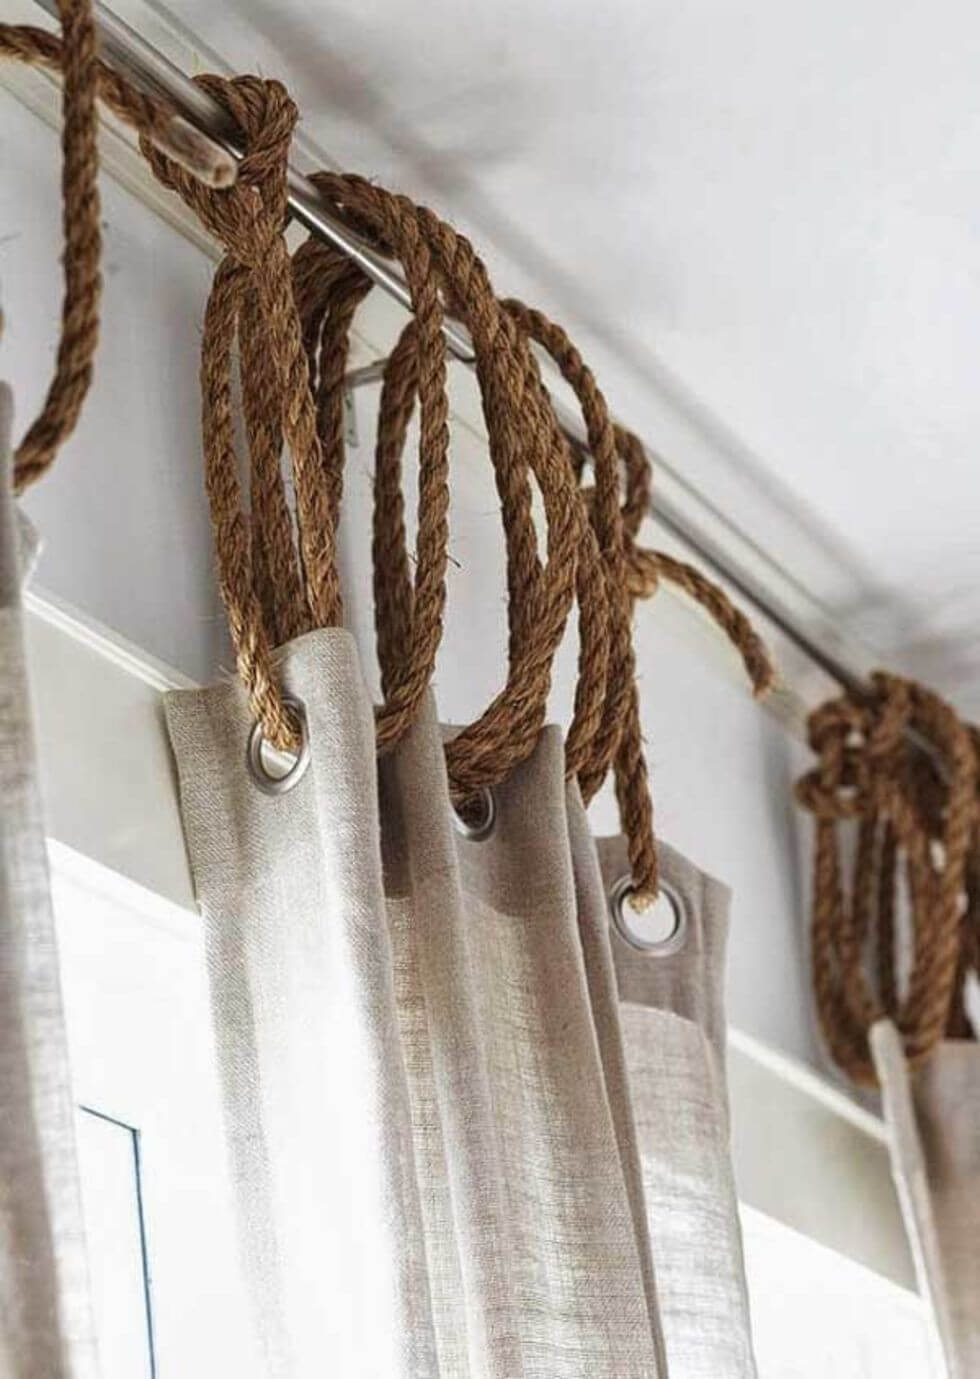
Many homeowners have found several decorative uses for rope in their homes. However, we seldom see it used in hanging curtain panels.
This method will make your curtains look unique and stand out in your bedroom. You’ll need curtains with eyelets and must first raise the rods higher on your walls to account for the rope slack. To hang a panel, first, tie one end of the rope to the rod loosely. Then insert the other tip in the first eyelet and loop it over the rod before inserting it in the next hole.
After the last one, also tie that end loosely on the rod. Repeat this process with the other panels. It would look better if you use a bit darker rope.
5. Hand Letter Your Own Wallpaper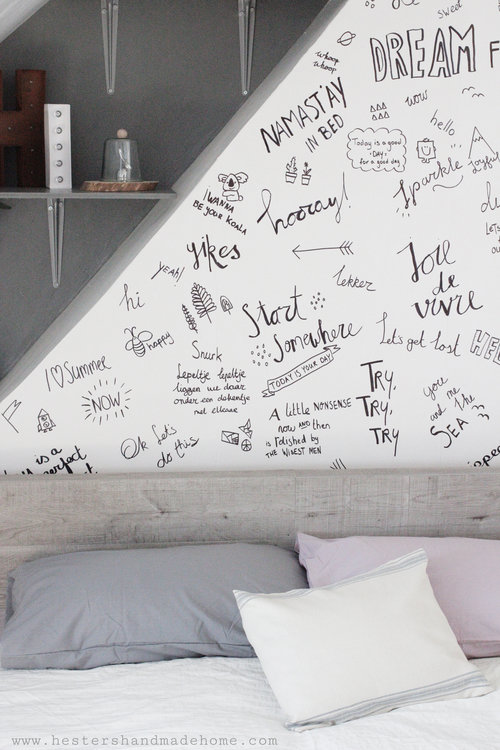
Write your thoughts, favorite lines, quotes, or doodle some funny images directly on your wall using a black sharpie.
Well, not exactly. You can attach lining paper first and paint it white before you start scribbling away. The reason? It’s a fun and whimsical way to create and decorate an accent wall in your bedroom. You use a liner to easily tear it off whenever you decide on a new design for the wall. Yes, you can scribble directly on the paint. However, black is pretty hard to paint over with bright colors without applying several costly coats.
It’s a one-of-a-kind decorating idea that will leave a smile on your face whenever you look at that wall.
4. DIY Dyed Tassel Rug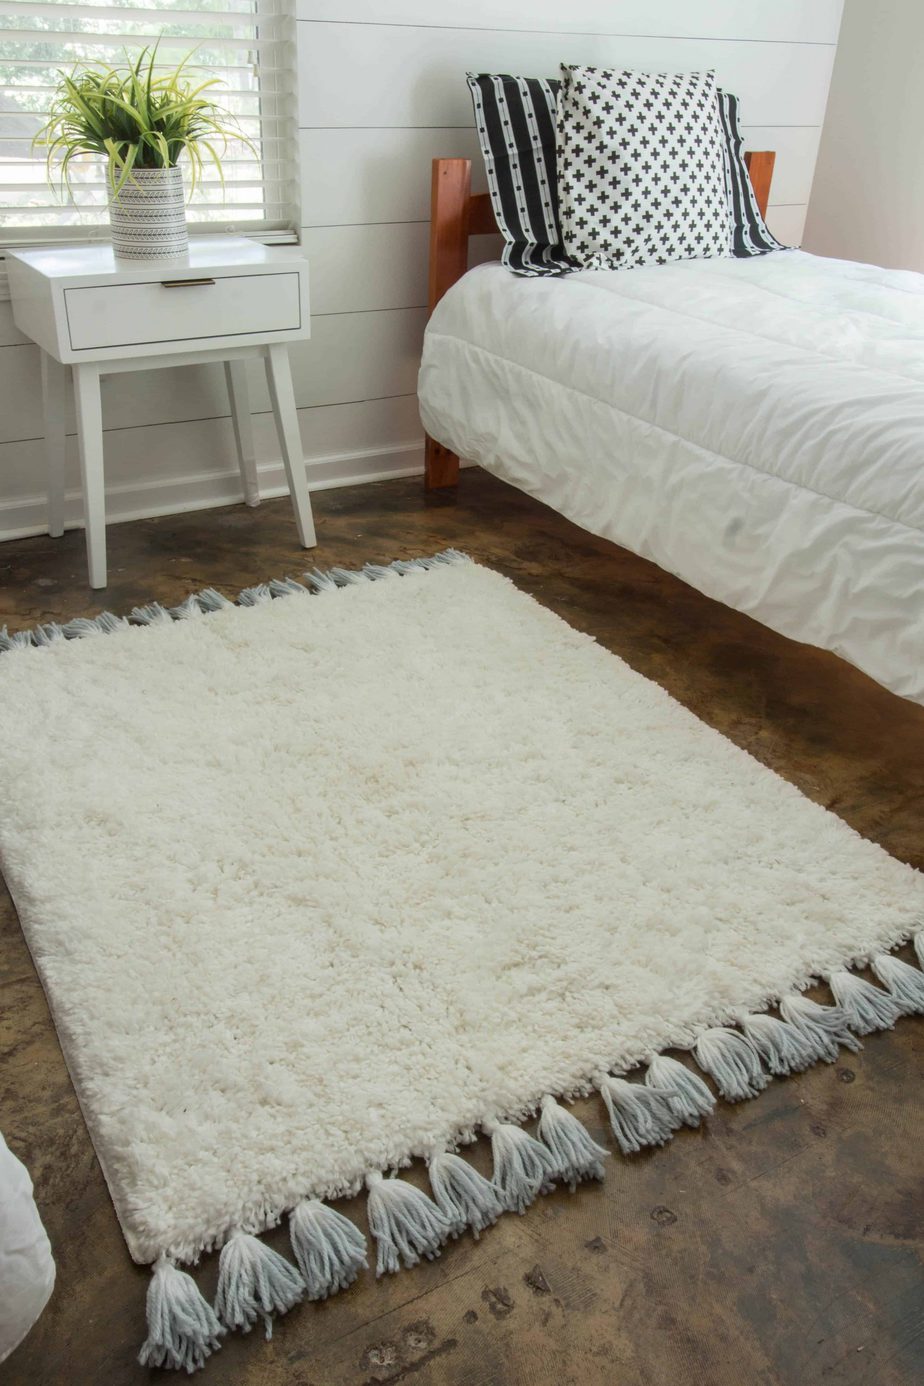
If you have a nice rug, but it’s too plain looking, some tassels will spruce it up and make it more attractive. And while you’re at it, why not dye the whole thing with a new and brighter color?
To make tassels, loop yarn around an object like a pocketbook until you have enough. Cut a piece at the end to tie the bunch in the middle. Next, cut the yarn on the opposite side, also in the middle. Tie another piece about 3/4” below the first knot. After you have all your tassels, hang them on clothespins in a pan and Rit dye them in light grey for around 10 minutes. Hand-sew each of them to two shorter edges of the rug.
3. A Clever Solution For An Awkward Nook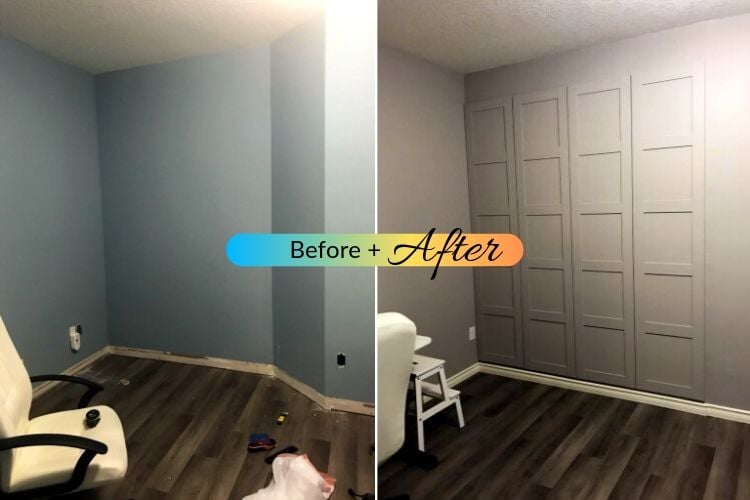
At first glance, guests might think it’s merely shaker style wall paneling. They’re actually the doors of a built-in wardrobe.
If you have an awkward recessed area in the room, you can duplicate this using a couple of PAX wardrobes from IKEA.
The trick is using shaker style doors and make it look like part of the protruding wall. You first need to install a 2×3” base for the wardrobes to sit on. You’ll use 2x3s to build the wall stud framing around the closet. After you’ve finished installing the wall, add a matching baseboard.
Next, install four BERGSBO doors with closing hinges. Lastly, paint the bedroom’s walls and the closet’s doors to a new color.
2. Transform Dollar Tree Organizers In a Few Easy Steps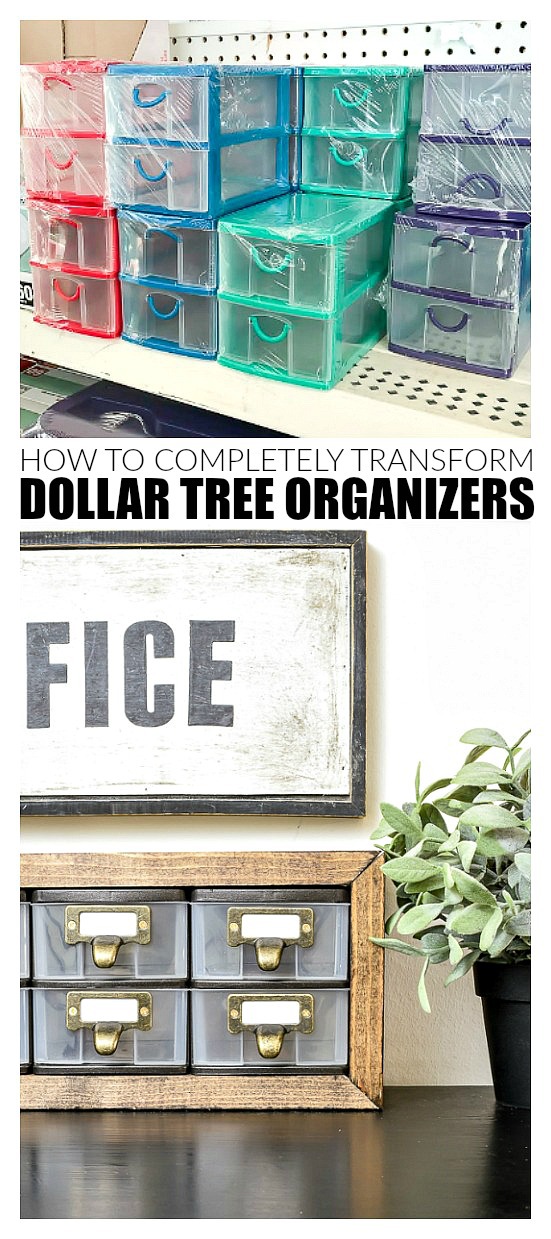
You can create a stylish rustic and industrial looking drawer organizer out of cheap Dollar Tree plastic organizers.
You’ll need four sets of the organizers with a plastic frame holding two drawers. Remove the drawers, sand the frames lightly, and paint them in gray with a spray can. When dry, glue them side-by-side with all-purpose glue.
Cut four pieces of 1x6s mitered 45° to wrap around the bin frames. Sand and glue them to the plastic frames and their joints. Secure everything with clamps until they dry. Apply a natural stain finish to the wood. Lastly, attach a small bronze label pull to each drawer with nuts and bolts before inserting them back into the organizer.
Lastly, Number 1. How To Craft Built-In Bunk Beds at the Beach House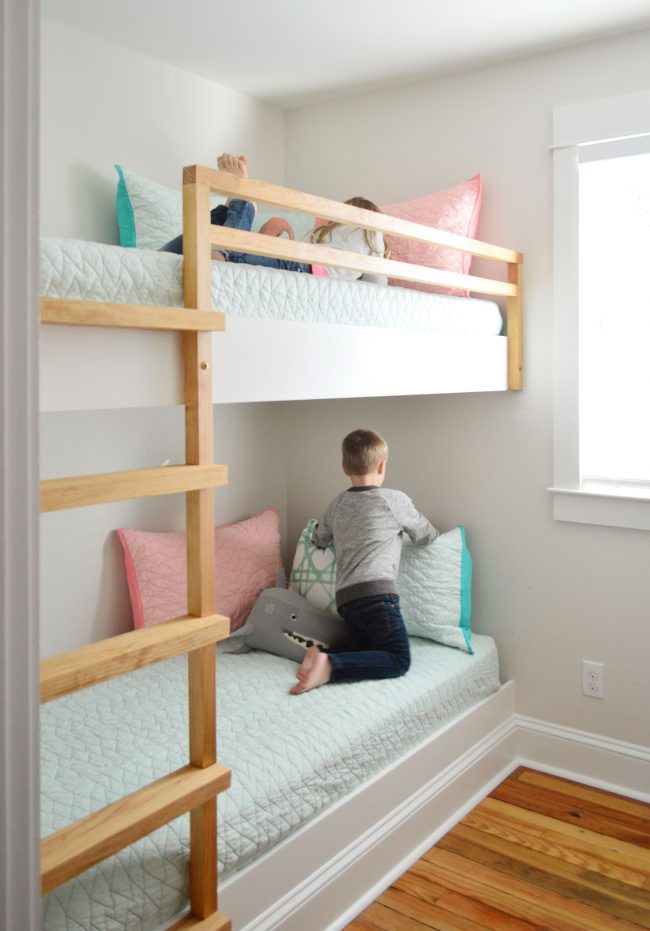
If the dimensions match with the long mattresses you’ll use, you can craft and finish cozy built-in double bunk beds on a narrow side of your kids’ bedroom.
Start with the 2×4 base frame about ten inches above the floor with five perpendicular support bracing in the middle. Level and secure it with 5/16”x4” structural screws to wall studs and 2×4” feet at the front. Add another horizontal 2×4 to the feet at the bottom, where you’ll attach a matching baseboard.
Then add a 1×6” face on the frame above this baseboard. Cover the top with 1/2” plywood. Repeat the process for the higher bed frame and also install a 1×6” face. Install a 2×2” ladder post combined with a rail on the right of the top bunk. Use 2x4s for the steps.
Finally, give the ladder and rail a natural wood finish and paint everything else white.
Conclusion
Thankfully, you don’t have to splurge to achieve a dramatic improvement, as shown by this excellent list presented by Simphome.com.
They’re all pretty straightforward enough to follow. Some are more affordable than similar-looking commercial products that will set you back several hundred or even above a thousand dollars. And they look just as good.
Reference:
12. Honeynfizz.blogspot.com
11. Notcot.com
10. Jennasuedesign.com
9. Bhg.com
8. Realitydaydream.com
7. Placeofmytaste.com
6. Homebnc.com
5. Hestershandmadehome.com
4. Savvyapron.com
3. Ikeahackers.net
2. Littlehouseoffour.com
1. Younghouselove.com