5. Use the sandpaper organizer to organize your folded garments or pillowcases.
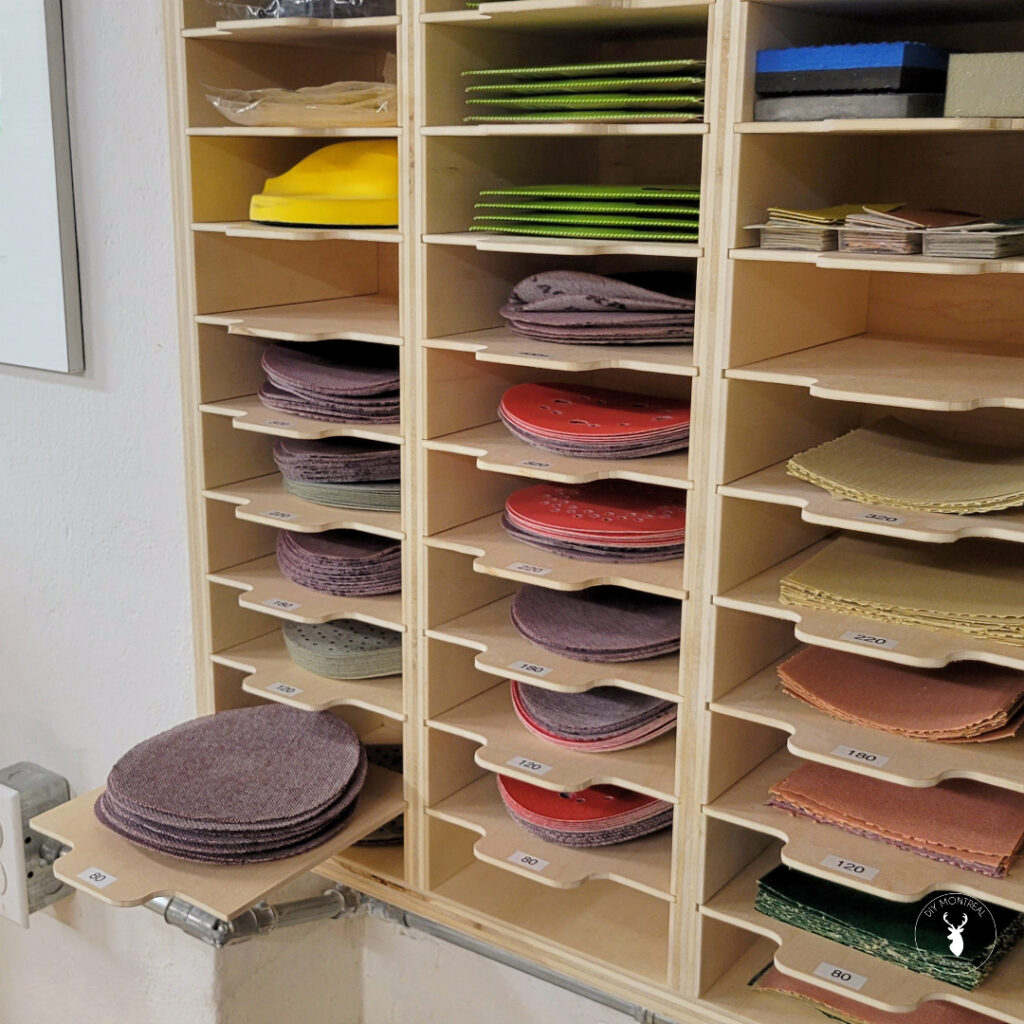 Create a functional sandpaper organizer (or, in our context) folded garment organizer and storage cabinet with these simple plans. Avoid the frustration of curled singlets and disorganized undershirts.
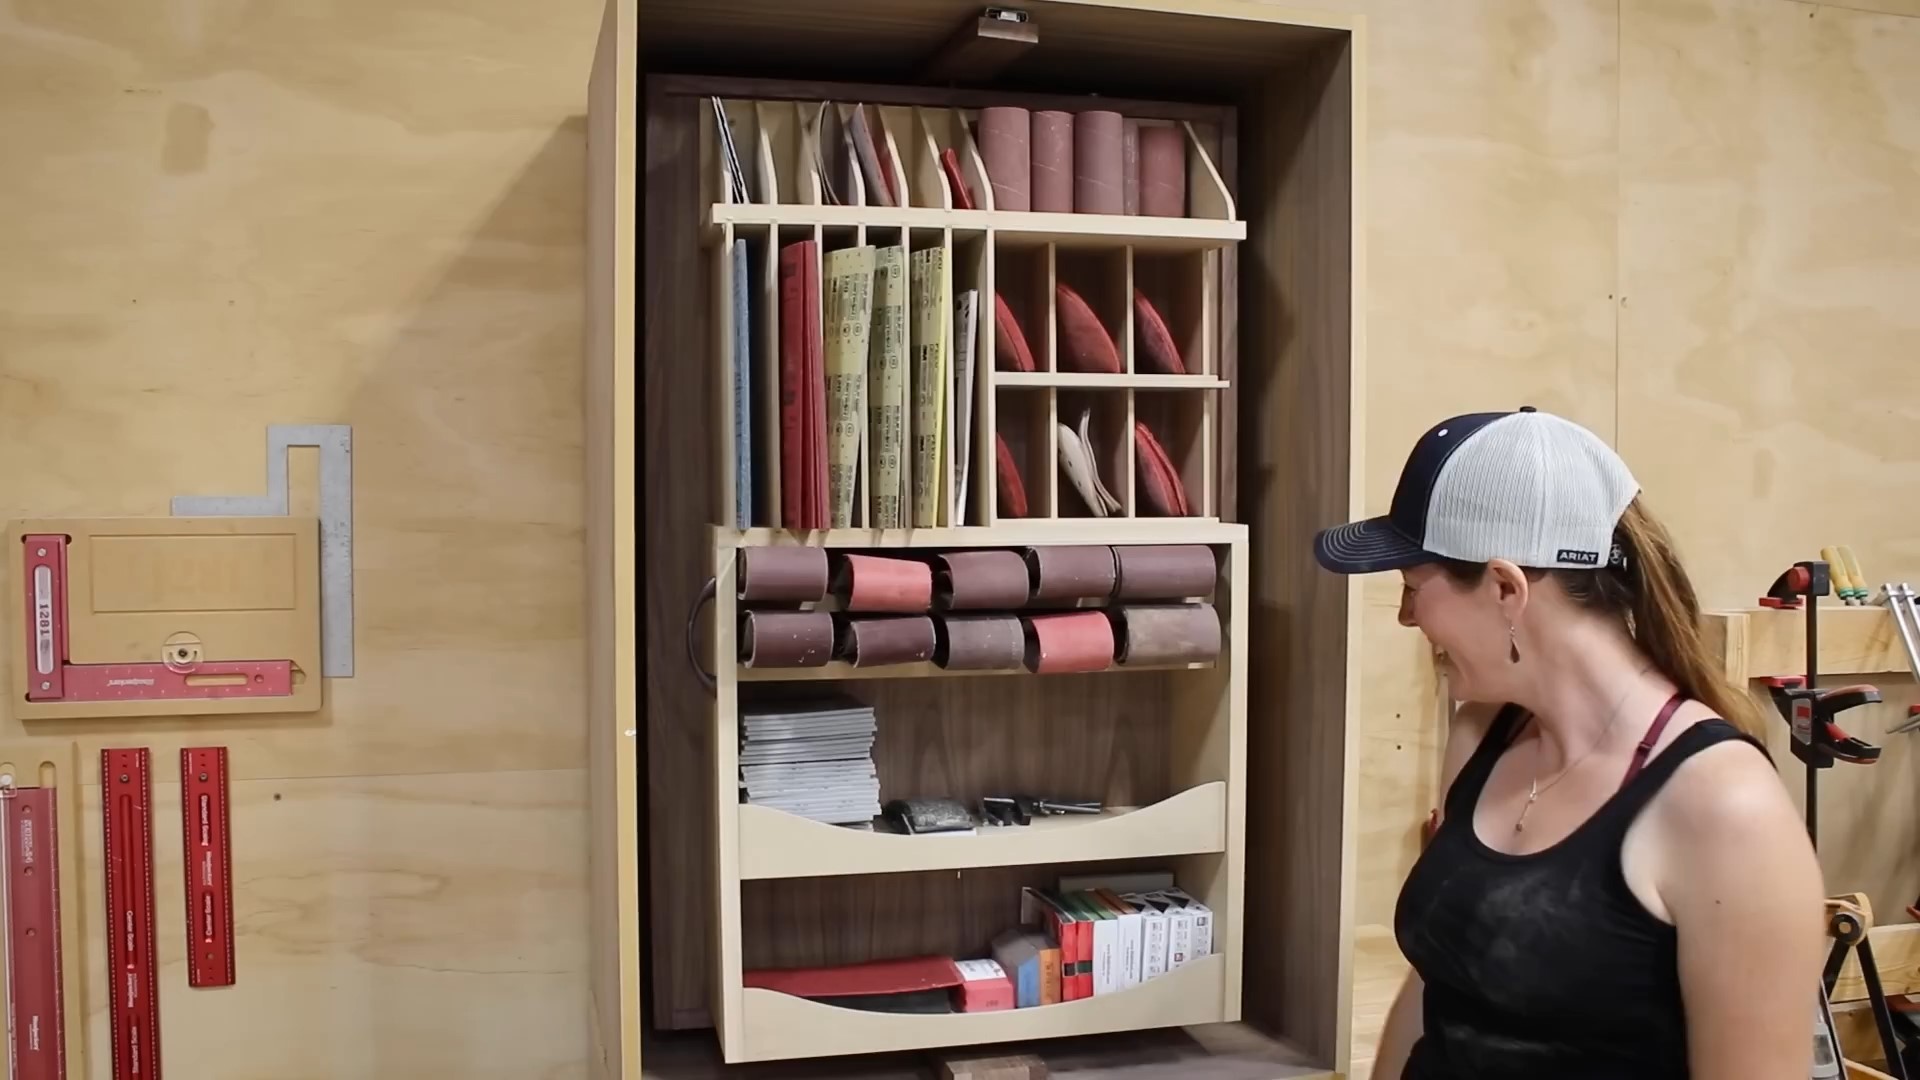
Cut dados for sliding shelf trays using a table saw, ensuring the correct measurements. Assemble the cabinet frame using screws and butt joints, keeping corners square with clamp squares. Add pull-out shelf trays for easy access to sanding discs. Mount the cabinet using a French cleat system for sturdy wall attachment. Organize sanding discs by size and label each section. Utilize the remaining space for storing slumber wear. Stay organized and keep your folded garments in top shape!
Detail: DIYMontreal
4. Repurpose this Rotating Shelf to Generate More Space to declutter your mess.
 Sure! Here’s an expanded version of the article with more detail and step-by-step instructions for building the DIY Flip-Around Shelf:
Step 1: Prepare the wood by pre-drilling
To begin building your rotating shelf, prepare a piece of plywood that will serve as the wall holding the shelves. Choose a sturdy material, such as walnut or any 3/4″ thick wood. It’s recommended to pre-drill the wood to make the assembly process smoother.
Step 2: Putting a threaded insert into the left and right parts of the shelf
Take the left and right parts of the shelf and install threaded inserts. These inserts ensure stability and help connect various components. It’s important to insert them as straight as possible. Use a wheel and an Allen wrench to thread them in securely. Keep an eye on alignment during this process using a speed square.
Step 3: Create the sliding piece for the top of the rotating shelf
Now it’s time to create the sliding piece for the top of the rotating shelf. This part will allow the shelf to rotate smoothly from side to side. Attach a drawer slide to the backside of the sliding piece, ensuring a secure connection. This component will play a crucial role in the flipping mechanism.
Step 4: Make the top and attach it to the base
Build the top of the rotating shelf using the previously pre-drilled wood piece. This short section, which was left longer for ease of drilling, will be an essential part of the flipping mechanism. Align the holes on the top with the corresponding marks and secure them using screws. Add a threaded insert to the center hole, which will serve as the attachment point for an aluminum swing arm.
Step 5: Hanging the rotating shelf!
With the rotating shelf assembled, it’s time to hang it or place it on a suitable surface. While it was initially intended to be hung on wall studs, using a plumb toolbox as a support can be a convenient alternative. Ensure that the shelf is at a comfortable height for easy access.
Customize your rotating shelf:
Now comes the exciting part—deciding what to store on your rotating shelf! The beauty of this design is its versatility. With a bare center wall, you can customize the shelving to suit your needs perfectly. The possibilities are endless, whether you plan to store shoes, towels, hardware, or shop supplies. Consider using CNC technology to create custom shelves to optimize your organization and bring order to your space.
Building the DIY Flip-Around Shelf offers both functionality and space-saving benefits. It’s an ideal addition to any workshop or home where efficient storage is essential. The detailed plans available for this project provide step-by-step guidance, ensuring a smooth and successful build. So get started and enjoy the convenience and organization the rotating shelf brings to your space!
By following these instructions, you can create a rotating shelf that will enhance the functionality of your workshop or home. Utilize this space-saving solution to keep your belongings organized and easily accessible. With careful attention to detail and precise execution, you’ll have a DIY Flip-Around Shelf that combines practicality and aesthetics. Embrace the joy of a clutter-free space and embark on this rewarding project today!
Remember to gather all the necessary tools and materials, including wood, an Allen wrench, drill, screws, wood glue, sliding hardware, and the rotating shelf plans. This resource from Wilkerdos (including a video) will assist you in each building process step, ensuring a successful outcome. So roll up your sleeves, dive into the project, and enjoy the satisfaction of creating your very own rotating shelf!