13. A DIY Slipcovered Bed Project Idea from Kassyondesign
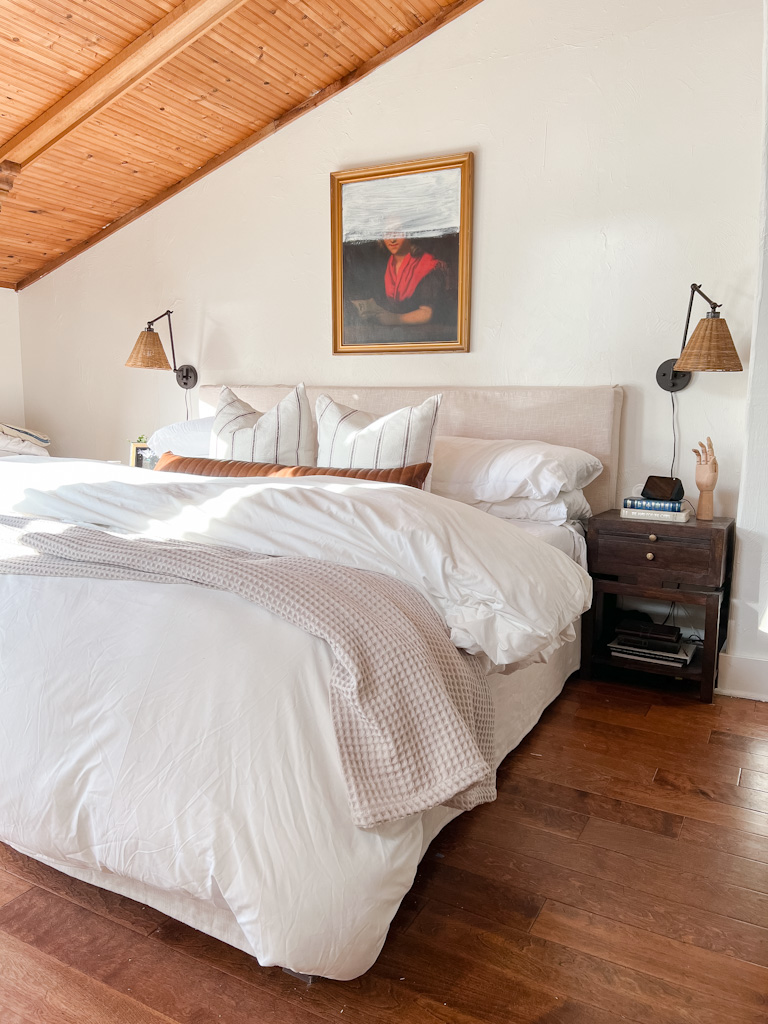 Are you dreaming of a stylish slip-covered bed but finding the price tags too steep? We have the perfect solution that won’t break the bank. Follow these simple steps to create your slip-covered bed, just like the high-end version, at a fraction of the cost!
Here’s what you’ll need:
Materials:
– (5) 2x4x8 boards
– (1) Sheet of 1/4″ Plywood
– (1) Sheet of 3/4″ Plywood
– (9) 3″ bolts with corresponding nuts and washers
– (1) Drill bit slightly larger than the bolts
– (7.5) Yards of fabric
– Extra loft batting
– Furniture pads
– Brad Nailer
– Electric Drill/Driver
– Circular Saw
– Circular Saw Guide
– Staple Gun
– Sewing Machine
– Metal Bed Frame
– A helpful hand!
Step-by-Step Guide:
1. Build the Headboard:
- Follow the provided diagram, adjusting measurements to fit your bed size.
- Precut the boards and assemble them using a drill driver and screws.
- Attach furniture pads to the bottom to protect your floor.
- Cut the 1/4″ plywood to size and attach it to the bed frame using a Brad nailer.
2. Build the Frame:
- Cut three pieces of 3/4″ plywood, determining their length based on your bed frame.
- Support the plywood pieces with 2x4s on each side, ensuring a 3″ height from the floor.
- Drill holes in the plywood and bed frame, aligning them for secure attachment.
- Repeat the process for all three sides of the frame.
3. Covering the Base:
- Wrap the side pieces with extra loft batting for a plush feel.
- Cut fabric into strips, hemming the edges.
- Attach the fabric strips, creating a pleated look by covering the corners first and then stapling the long hemmed pieces.
4. Slipcover for the Headboard:
- Wrap the headboard with two layers of extra loft poly fill, ensuring a comfortable feel.
- Create a slipcover by cutting fabric into strips and rectangular pieces.
- Sew them together to form a box-like cover, adding a hem at the bottom.
- Attach the slipcover to the headboard using a staple gun.
5. Finishing Touches:
- Secure the headboard to the top of the bed by tightly pushing the frame against the wall.
- Enjoy your slipcovered bed’s sturdy, high-end look at a fraction of the cost.
- With a budget of only $275, you’ve achieved a stunning bed that rivals the $3700 store-bought version.
12. Experience the Wonder of a Retractable Bed: Creating Space and Style in Your Home
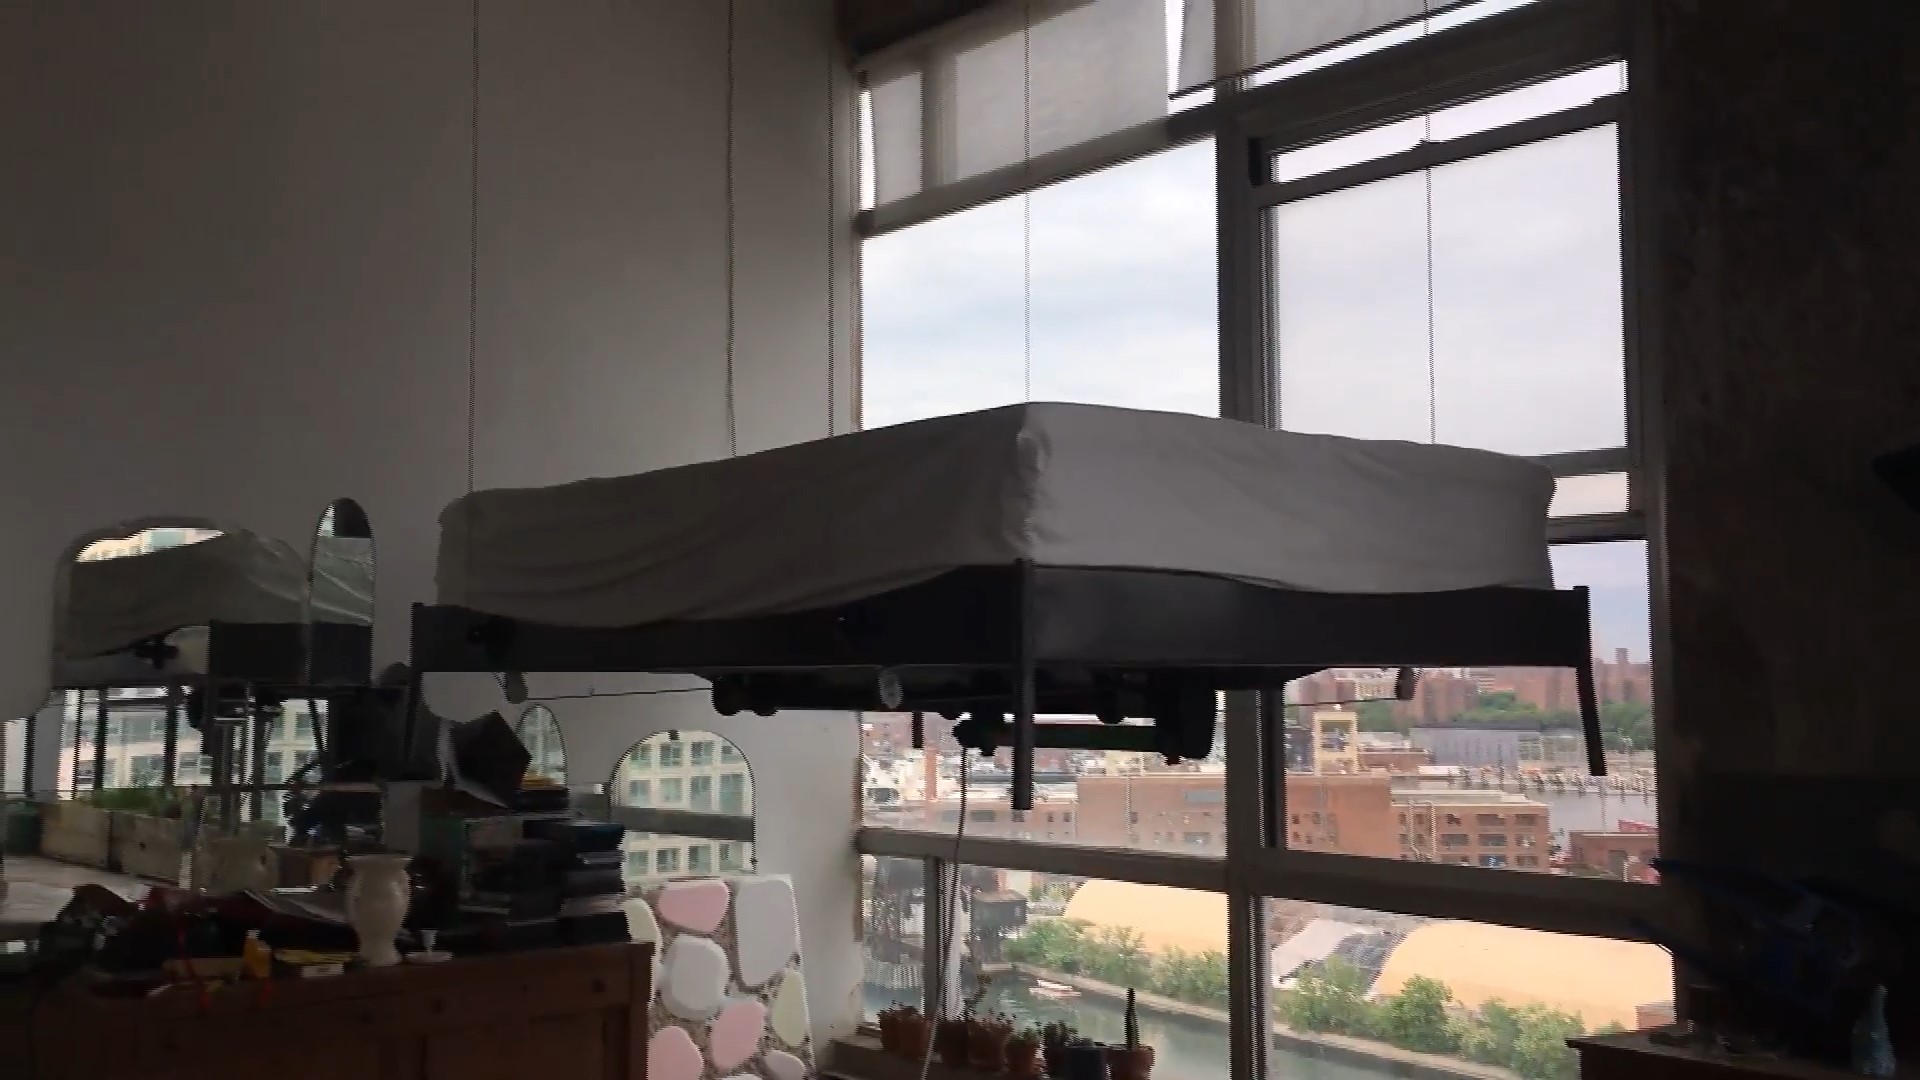 Dreaming of a guest room without sacrificing precious space? Look no further than the ingenious retractable bed. Imagine converting that high-ceilinged bay area into a functional oasis. Here’s how you can bring this innovative project to life:
1. Bed Frame and Hoisting System:
Take an Ikea steel bed frame and retrofit it with a specialized hoisting system, originally designed for garage storage platforms. With its tubular motor and user-friendly switch, effortlessly raise and lower the bed.
2. Custom Pulley Setup:
Craft a seamless transition from horizontal to vertical movement using sturdy pulleys. Design aluminum housings and combine them with original pulleys for optimal guidance and smooth operation.
3. Operation and Size:
Conveniently located, the switch allows for easy control. Lower the full-size double bed smoothly to the ground, fitting snugly within your designated space. Just pay attention since there’s no automated stopping mechanism.
4. Ceiling Attachment:
Ensure stability by securing the retractable bed to the ceiling with four anchors featuring welded screw eyes. Sturdy cables, crimped and quarter-inch thick, guarantee reliable support.
5. Space Optimization:
Watch in awe as the bed gracefully disappears into the ceiling, freeing up valuable floor space. Enjoy the convenience and versatility of this smart, space-saving design.
Unlock the potential of your home with a retractable bed—a stylish solution that maximizes space and functionality. Embrace the freedom to create a guest-ready haven whenever you desire. Say goodbye to space constraints and hello to endless possibilities.