7. A DIY Indoor Hammock Wall Mount Idea: A Step-by-Step Guide
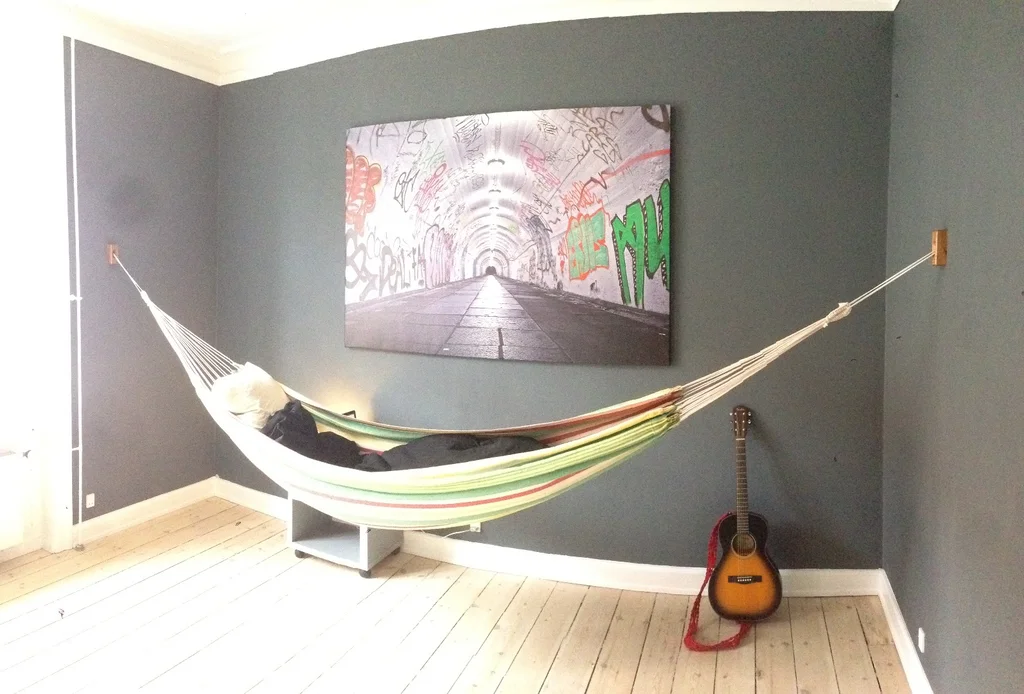 Escape into a realm of tranquility with the following DIY hammock wall mount, designed to bring the serenity of outdoor hammocking into your apartment. Discover the joys of suspended slumber and bask in the comfort of a personalized indoor retreat.
1. Wood: Optimal Inner Hole Size
Ensure the inner hole in the wood is only as wide as necessary for the rope to fit. A narrower hole guarantees enhanced strength, although a wider hole offers versatility when experimenting with different rope thicknesses.
2. Metal Pins: Choosing the Right Hardware
If possible, use proper metal pins for the hammock mount. Alternatively, cut screws and select larger ones with a diameter of around 4mm. Ensure the screws are long enough, utilizing only the unthreaded section for maximum stability.
3. Wall Mounting: Consider Wall Material
For brick walls, distribute the screws widely to maximize support. If you have studs, opt for two screws instead of four, aiming for the center of the stud. Use longer screws and test the need for a pilot hole beforehand.
4. Concrete Installation: Reinforced Stability
When mounting on concrete, using two long expansion screws or bolts instead of four regular screws is recommended. This provides increased stability and support.
5. Drilling, Cutting, and Milling
Begin by drilling, sawing, and milling the inner holes first, as it allows for easier router handling on a larger surface area. Remember to cut a groove in the back plate to accommodate the metal pins.
6. Metal Pin Alteration
If metal pins are unavailable, adapt by cutting two screws to the required length, utilizing only the unthreaded portion. These makeshift pins can serve the same purpose effectively.
7. Assembly: Gluing the Plates
Assemble the wall mount by securely gluing the plates, ensuring the pins are appropriately placed and aligned.
Additional Information:
Discover an alternative approach shared by a fellow hammock enthusiast who used a gate hinge fitting with coach bolts for a block wall installation. They incorporated a chunky D shackle to connect a carabiner, facilitating easy packing of the hammock into a wall cupboard. Embrace their creativity and adapt it to your setup.
Calculating Height:
Refer to the Ultimate Hang website to calculate the ideal height suitable for indoor hammock installation and experience the restorative power of suspended relaxation. Unwind, rejuvenate, and share the joy of your retreat with others.
Happy hammocking!
Detail: Instructables.com
6. A Versatile DIY pegboard Project Idea with a 2×4
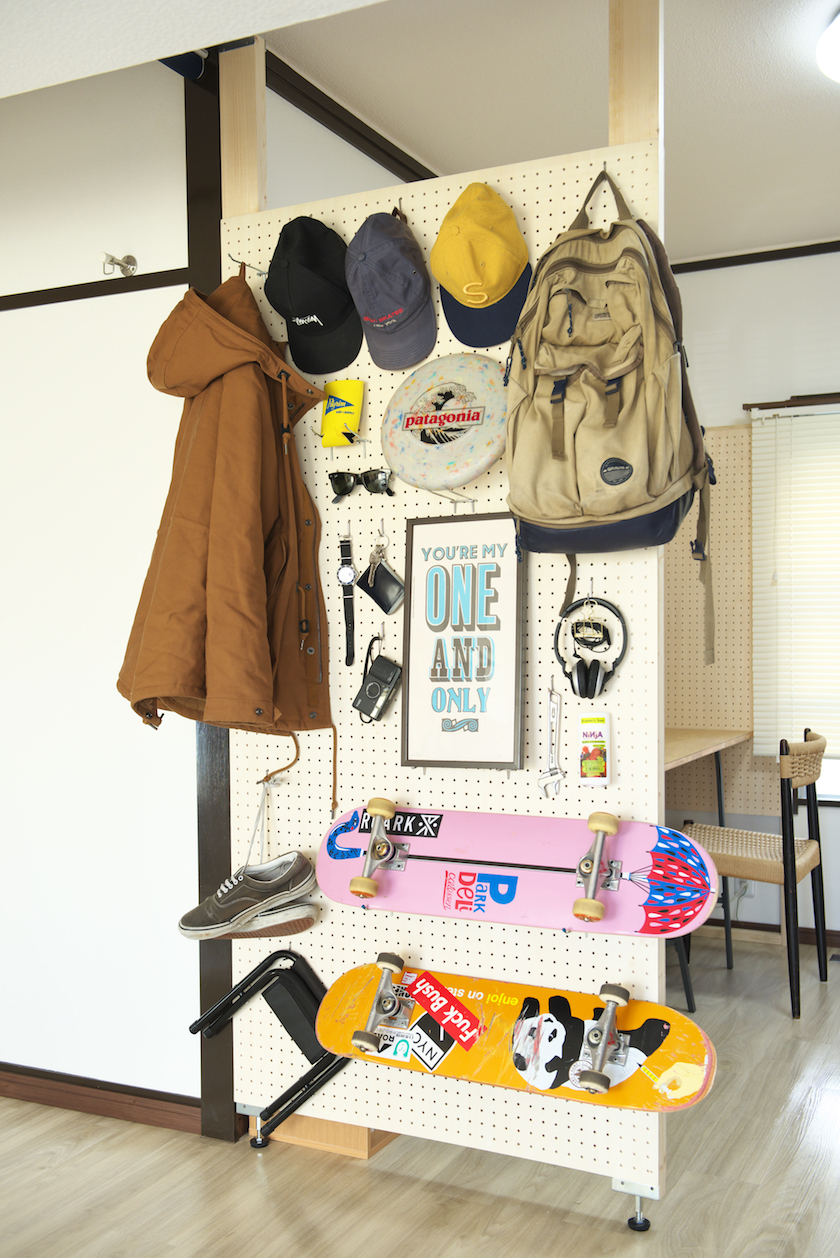 First, gather two perforated boards (910 x 1820 mm), 2 x 4 lumber (2438 mm) x 2, 4 brackets, wood screws, and 30 perforated board hooks to start the project. Keep costs around USD 80.
Cut the 2 x 4 lumber shorter than the ceiling height, considering the brackets. Fix the brackets securely to the lumber using suitable wood screws, and you can ensure the pillars are level and vertical using a square bar and the iPhone’s horizontal function.
Attach the perforated boards to the pillars at the desired heights. Consider storage patterns for hobby items or clothing and utilize hooks, neodymium magnets, and shelves for additional functionality. Customize the organization to suit your needs.
Detail: Web.goout.jp