While store-bought furniture is convenient, you secretly long to try your hand at woodworking. You’d like to push yourself to do something truly remarkable, then revel in the satisfaction of doing so.
Of course, not everyone can build their furniture because they don’t know how to work with wood or have other handyman skills.
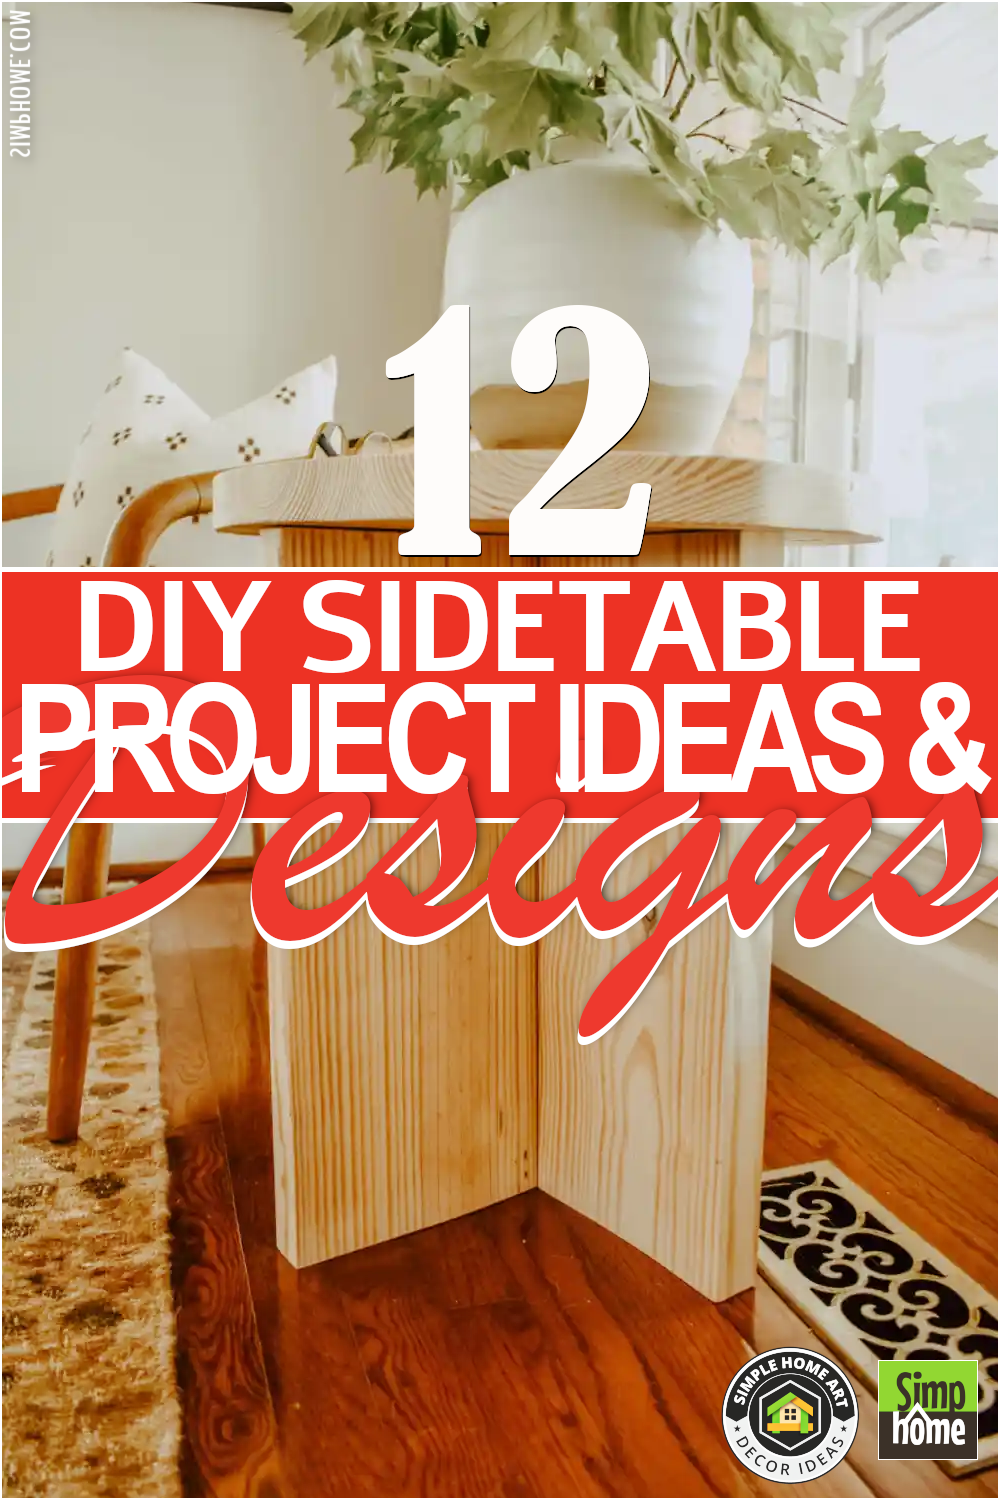
Although, you shouldn’t let it stop you from venturing out of your comfort zone. You can take baby steps, like putting together one of these 12 DIY side table ideas. As always, Simphome presents you with the list.
12 DIY Side Table Projects Video
12. A Quirky Side Table from Plexiglass Idea
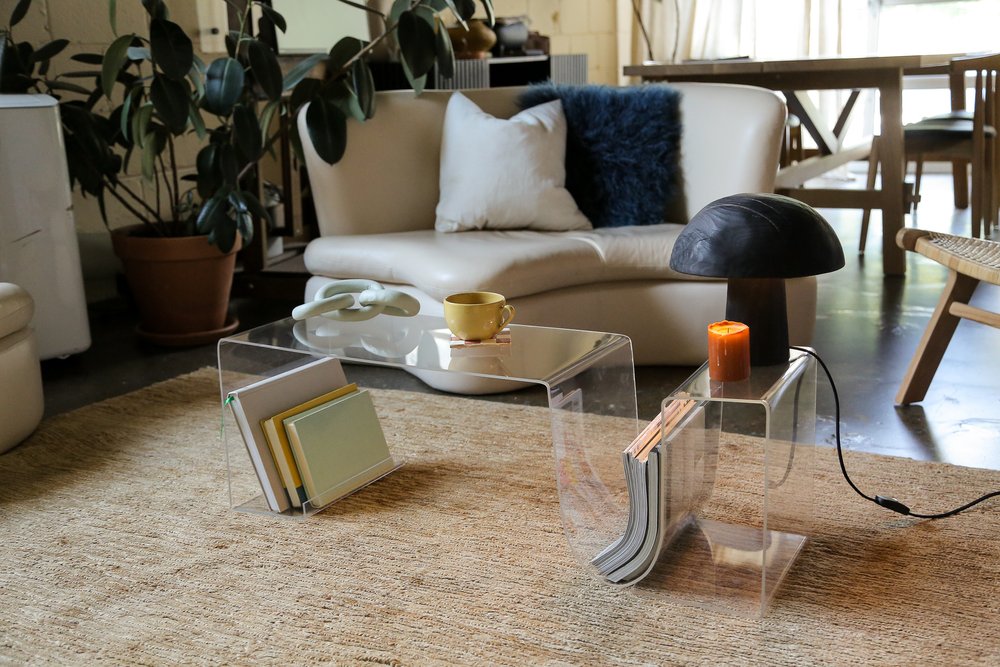 Wait a minute! Are those cups, phones, and notebooks floating? Of course, not. They are just resting on an almost invisible bedside table.
- To make this clear bedside table, you will need 170-centimeter acrylic plastic (also known as plexiglass), a heat gun, cardboard tubes, and some imagination that can lead you to create a bewitching piece of furniture.
- It would be easier to mark the area where you will bend, so please take the time to do it.
- Then, use a wooden board, a piece of scrap wood, and a clamp to keep the plexiglass in place while you bend it.
- You need to be patient because the heating process takes approximately 10 minutes. The plexiglass will crack if you only heat it for a short time.
- First, you need to create the legs by laying the plexiglass on a table, clamp, and bend it right on the area you have marked. Use a triangle ruler to check whether the top goes perpendicularly with the legs.
Afterward, get your cardboard tubes to create the phone and book holder grooves. You are targeting a larger area to bend seamlessly. Thus, you will need to apply the heat evenly along the bend line.
Consider turning on the fan to cool it down faster after bending.
11. Add a bit of Luxury with a Marble Side Table
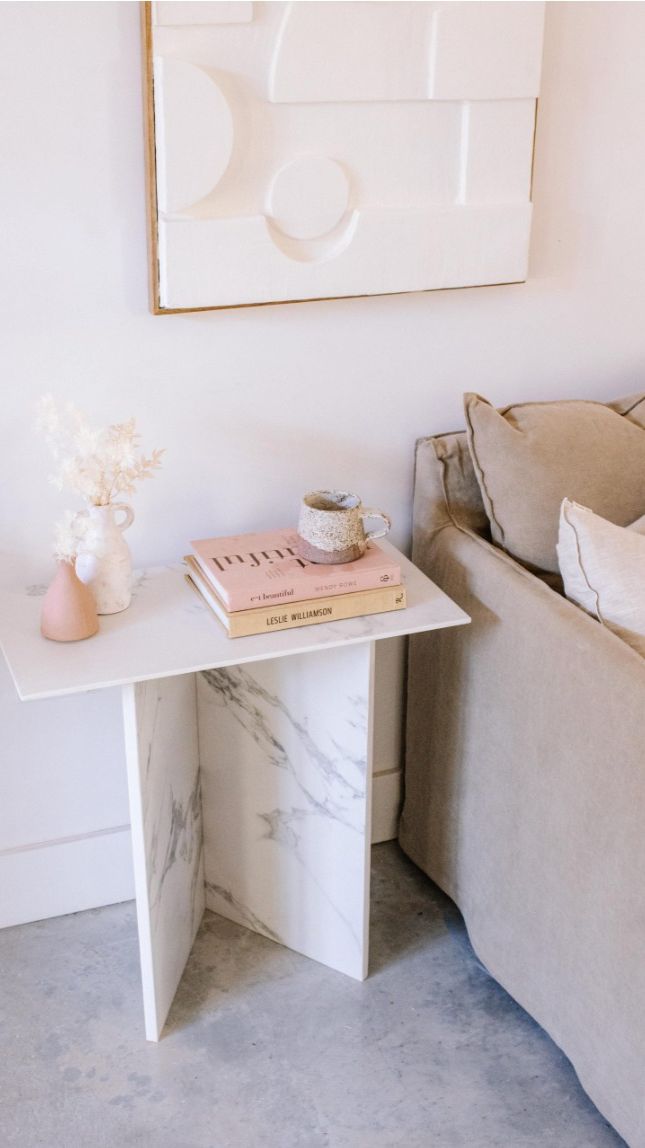 You might think a DIY project cannot add luxury to your home. The truth is you can try creating a marble side table from tiles.
You need five separate tiles if you want to create this look. Since you can only find the marble pattern on one side, you have to get two tiles and glue them together with liquid nails. This way, you can get a sturdy slab with the same design on both sides. Repeat these steps for the other leg.
Once the liquid nails dry, use a multi-joint compound to fill the sides. Then, sand them down a bit when they dry to get a smooth look.
Now, it is time to assemble the pieces, which is merely a piece of cake. Create a V shape using the two slabs you created. You can use liquid nails and painter’s tape to stick them together.
After that, get the fifth tile and put it atop the slabs. Secure it with liquid nails. Finally, apply a multi-joint compound when it is dry already.
10. An Epoxy Ocean Side-Table Ide
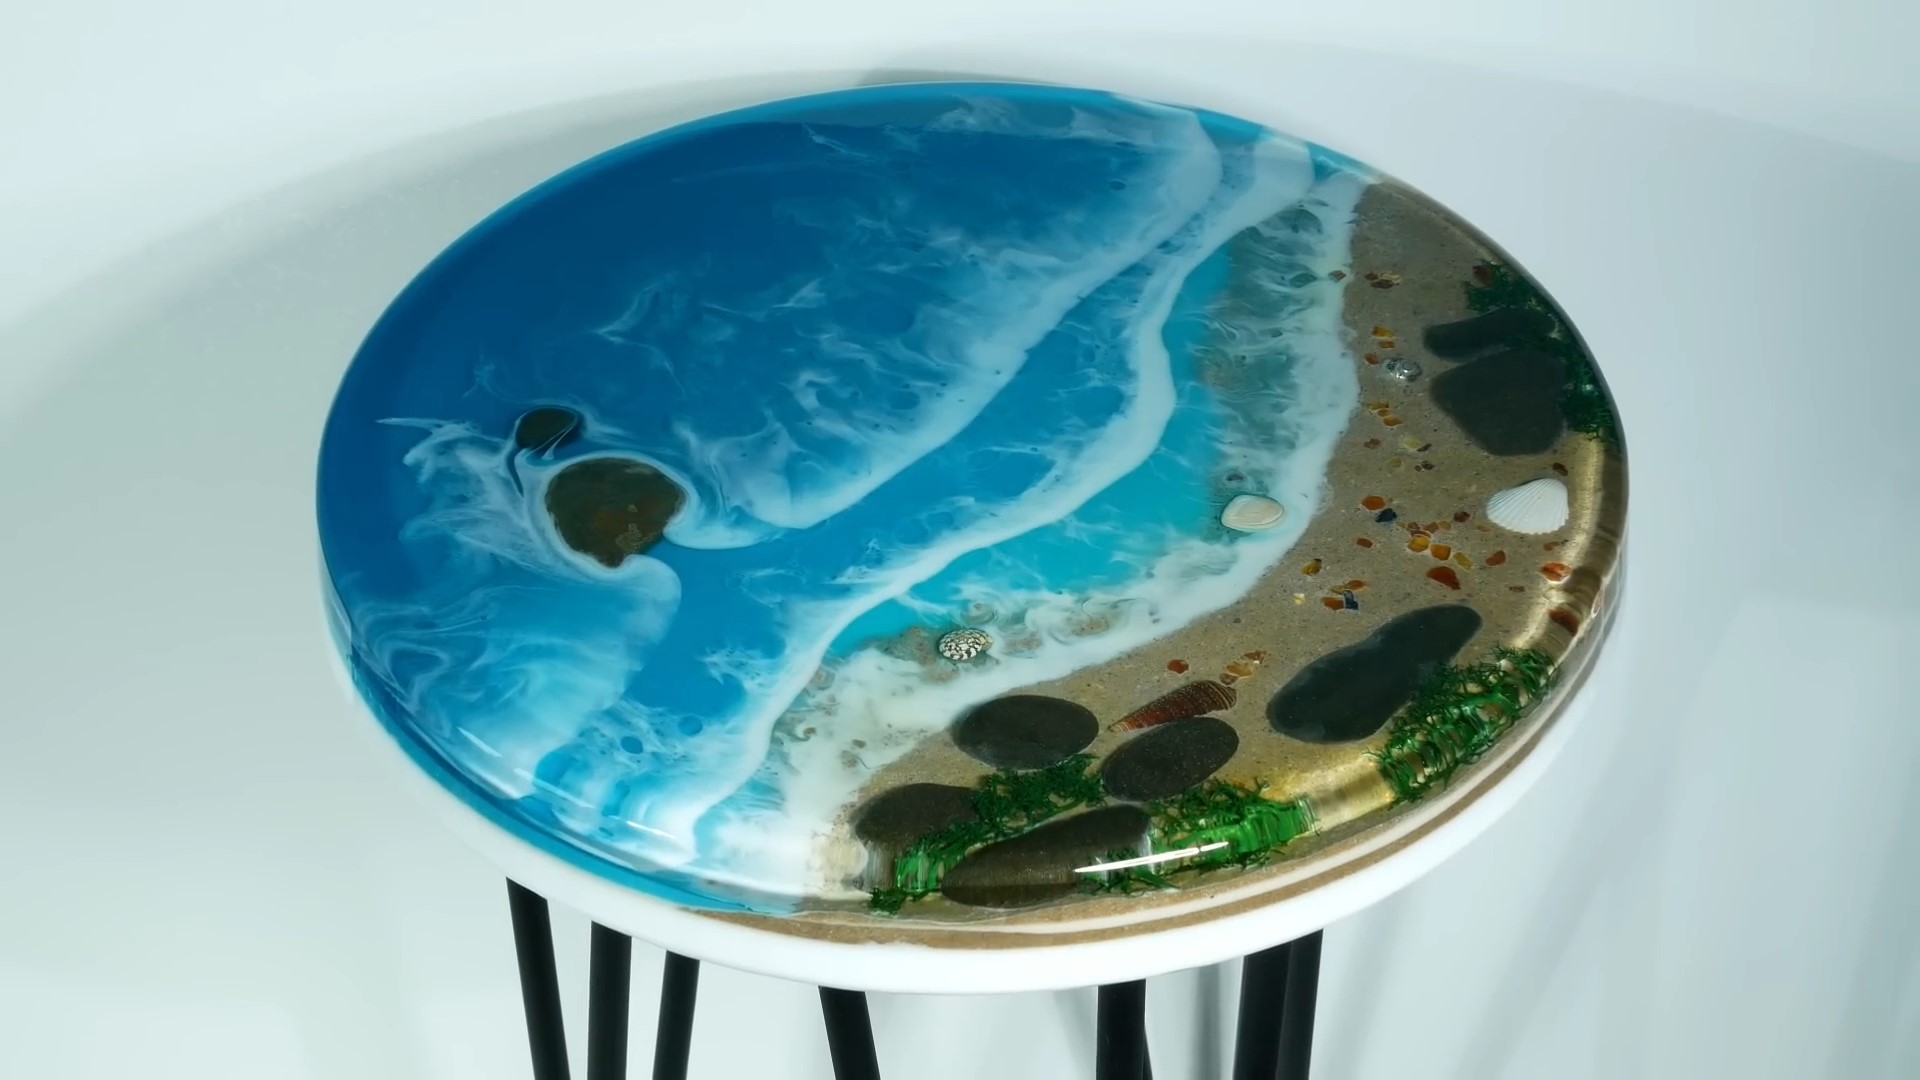 This accent table can draw attention to itself. It is not only practical, but it also has a captivating quality about it.
- To make this table, lay beaverboard on a table. Then, attach the clear tape to it to help you work with the tabletop more easily.
- Grab a round cutting board and lay it on the clear tape. Next, use a circular plastic, and glue it down around the cutting board edge so the resin will stay.
- Mix the epoxy resin, hardener, and white dye well, and pour the mixture onto the cutting board. You can also use a plexiglass or anything to spread it evenly.
- Add a teaspoon of sand and mix it with epoxy. Then, pour the mixture onto a quarter of the cutting board.
- Use a spoon to spread it out evenly and wait until it hardens before you add another layer.
- After that, explore your imagination by topping it with pebbles, amber, shells, and artificial moss.
- Next, pour a mixture of epoxy, turquoise, and white dye onto the remaining part of the cutting board. Use a gas burner to remove air bubbles.
- Then, place two or three pebbles on it, and apply epoxy and turquoise mixture only.
- Later, it is time to create the wave by pouring white-dyed epoxy and blowing it with a hair dryer before it hardens.
- Once you are done and everything is set, pour transparent resin until you cover everything.
- Finally, take the circular plastic and cut out the uneven edge.
- Sand the edge slightly and apply clear resin onto the top and edge.
Now, you only need to install hairpin legs and enjoy the spectacular landscaping.
9. A Side Table-Shelving Combo Idea
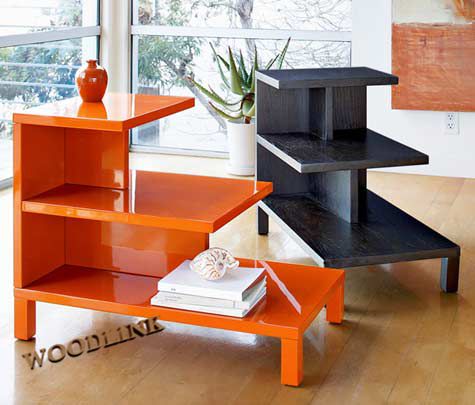 When dealing with limited space, it can be helpful to have a single piece of furniture that serves multiple purposes. This side table and shelf unit is a space-saving alternative to buying a separate bookcase.
- Begin assembling the 20-inch bottom partition made of 1×8 with the 22-inch middle shelf made of 1×16.
- Next, assemble the 15 ¾-inch back sheet made of 1×16.
- Then, attach the 10-inch top partition made of 1×8 to the middle and top shelf.
- Finally, assemble the shelving unit together with the bottom shelf and legs.
8. The Infinity cube side-table project idea

He decided to use 1.5-inch square tubing for the project since the resulting 3/4-inch gap makes for a neat, compact appearance around the outside. If you want your table to look less cramped, you can increase the distance between the parallel lines. That means that, at any given height, the top and sides will be noticeably reduced in size.
Then he made a little end table with a wall thickness of 1/16″. Choose thicker material if you want to use the design to create a larger kitchen table, chair, or anything else needed to support greater weight. If you click the resource, you can access a calculator to help you design your experiment.
7. A Mid-Century Modern Side Table with Storage
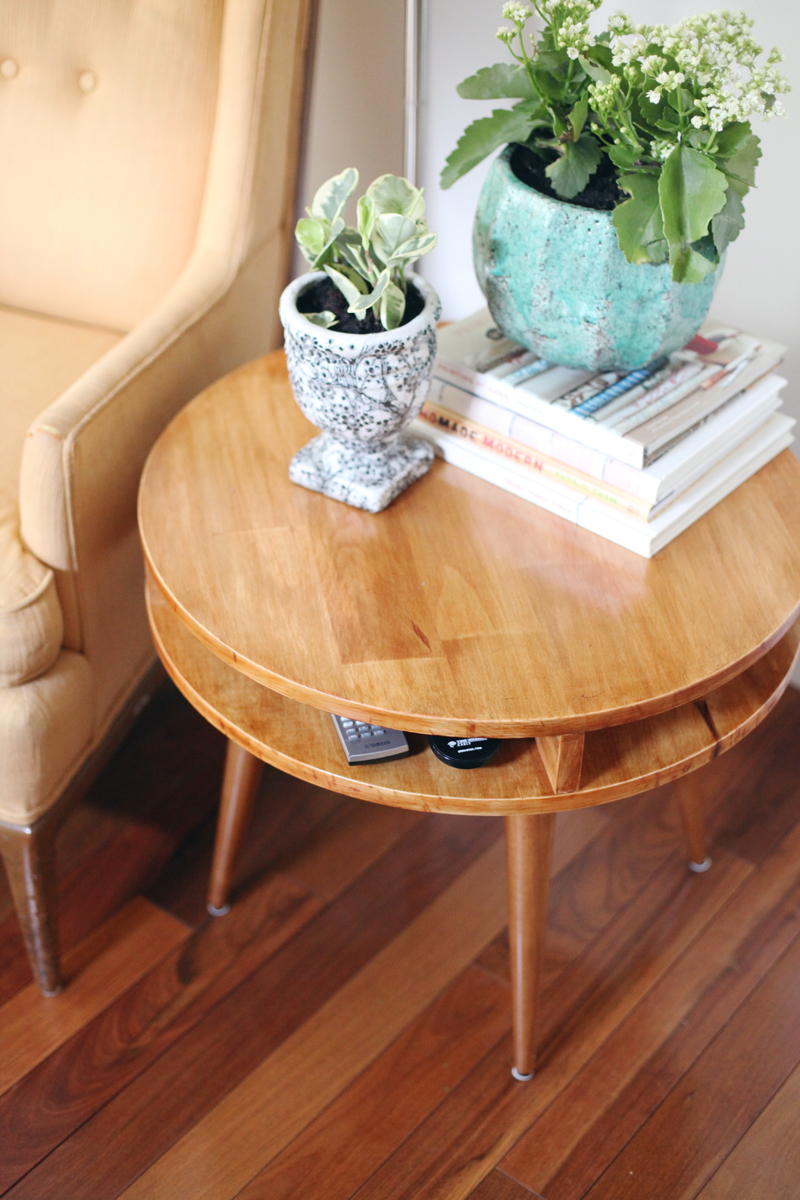 First, get yourself two wooden boards 24 inches in width, and then design a circle on each. Next, join the two pieces of wood measuring 23 5/8 inches and the one measuring 24 inches using 1×3 strips. Use these strips to construct a lot of shelving for trinkets.
Assemble the base, and screw on the tapered legs to define the modern mid-century design. At last, finish it off with whatever you choose.
6. This Side Table Only Set You Back $35
 It’s simple, yet this end table serves its purpose well. More importantly, it’s easy to create at home, and you won’t need to sweat over it.
You can begin by assembling two 8 ½” pieces. You can make four pocket holes to screw both pieces. Next, get two 7 ½” pieces and attach them right at the center of the 8 ½” pieces. Finally, top the base with a round tabletop.
5. A Mobile side table idea for the sofa and bedroom
 Caster wheels make it possible to roll this laptop stand from your bedroom to the living area to the backyard.
Drill two pocket holes on the top shelf’s sides. Choose the ideal side for the laptop stand since the board only has holes on one side. Wood glue the upright and top-shelf edges and screw them together. Repeat the bottom shelf pocket holes. Before attaching the bottom shelf, glue the shelf sides. Place the bottom shelf and glue the upright. Apply wood glue to the shelf divider borders and fasten both sides. Leave overnight.
Drill pocket holes in the base and attach them to the upright. Finish by gluing the corner supports under the shelf and above the base and attaching the caster wheels with 16mm screws.
4. A Wooden Crate Side Table Project Idea
 You can find beauty in simplicity. It does not have to be fancy. A combination of a wooden crate and copper hairpin legs can perk up your living room or bedroom in no time without compromising functions.
If you love this look, get the supplies, namely a wooden crate, chalk paint, and hairpin legs. Assemble them after sanding the crate down and applying the paint.
3. Use a Side Table to Accentuate Your Boho Bedroom
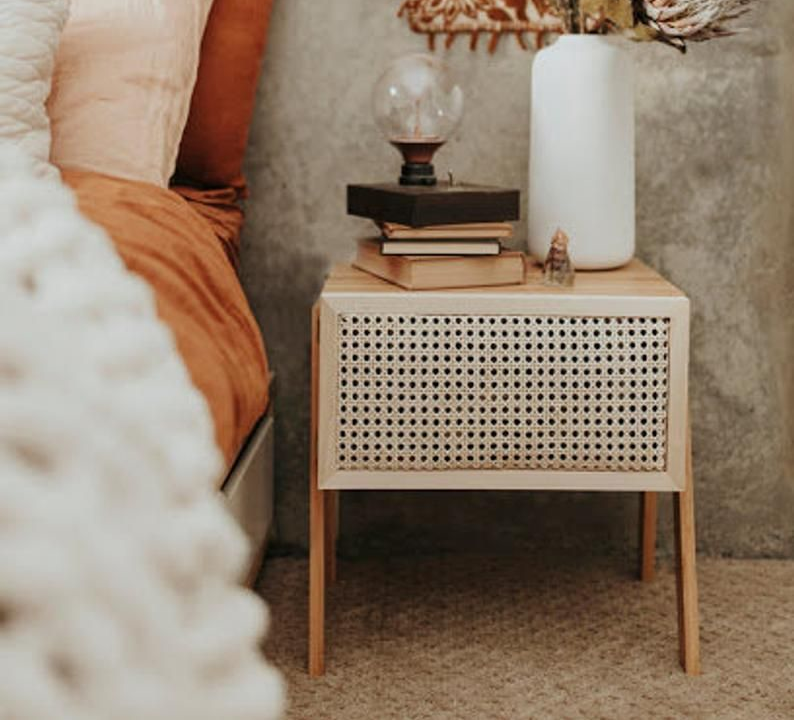 This project does not guide you to make a side table from scratch. Still, it is worth the try since it will level up the interior of your bedroom.
You can use any ready-made side tables that you can purchase in stores. Or, if you have side tables already, you can reface them to upgrade them. All you need to do is create the front frame with square wood dowels. Then, place cane webbing inside the frame. Install hinges and assemble this front piece to the side table. That is it!
2. A DIY MID-CENTURY MODERN SIDE TABLE Project Idea
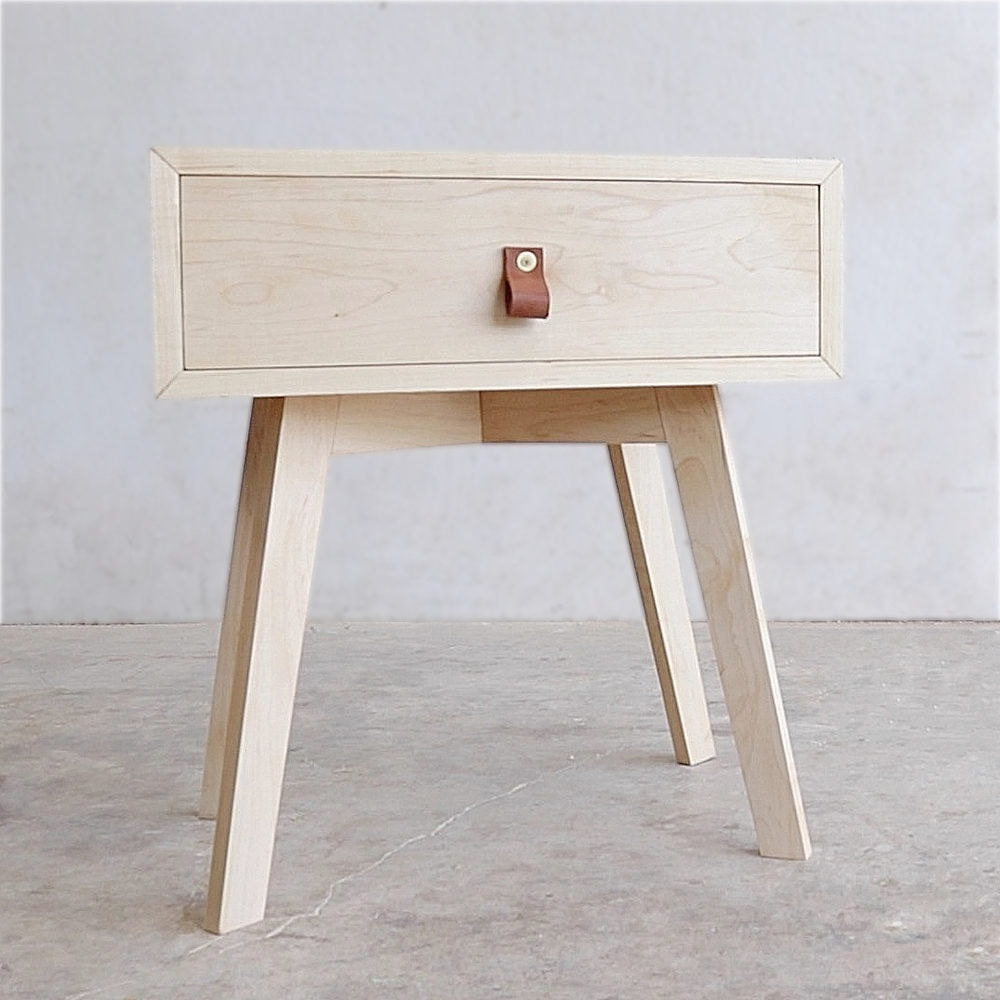 You can make quick work of cutting the primary casing or “box” for the table by setting your saw to a 45-degree angle.
- Then, cut them in a specific order to ensure that the grain will continue to run uninterrupted from one piece to the next once they are glued together.
- Your seams will turn out much neater if you lay all your parts out in order along a straight line and tape them together.
- After applying glue to the inside of the joints, tape the box shut, and you’re done!
For added structural support and aesthetic appeal, Dowels should be drilled and placed every inch or so around the top and bottom of the box.
1. Two DIY Simple Sidetable Project Ideas
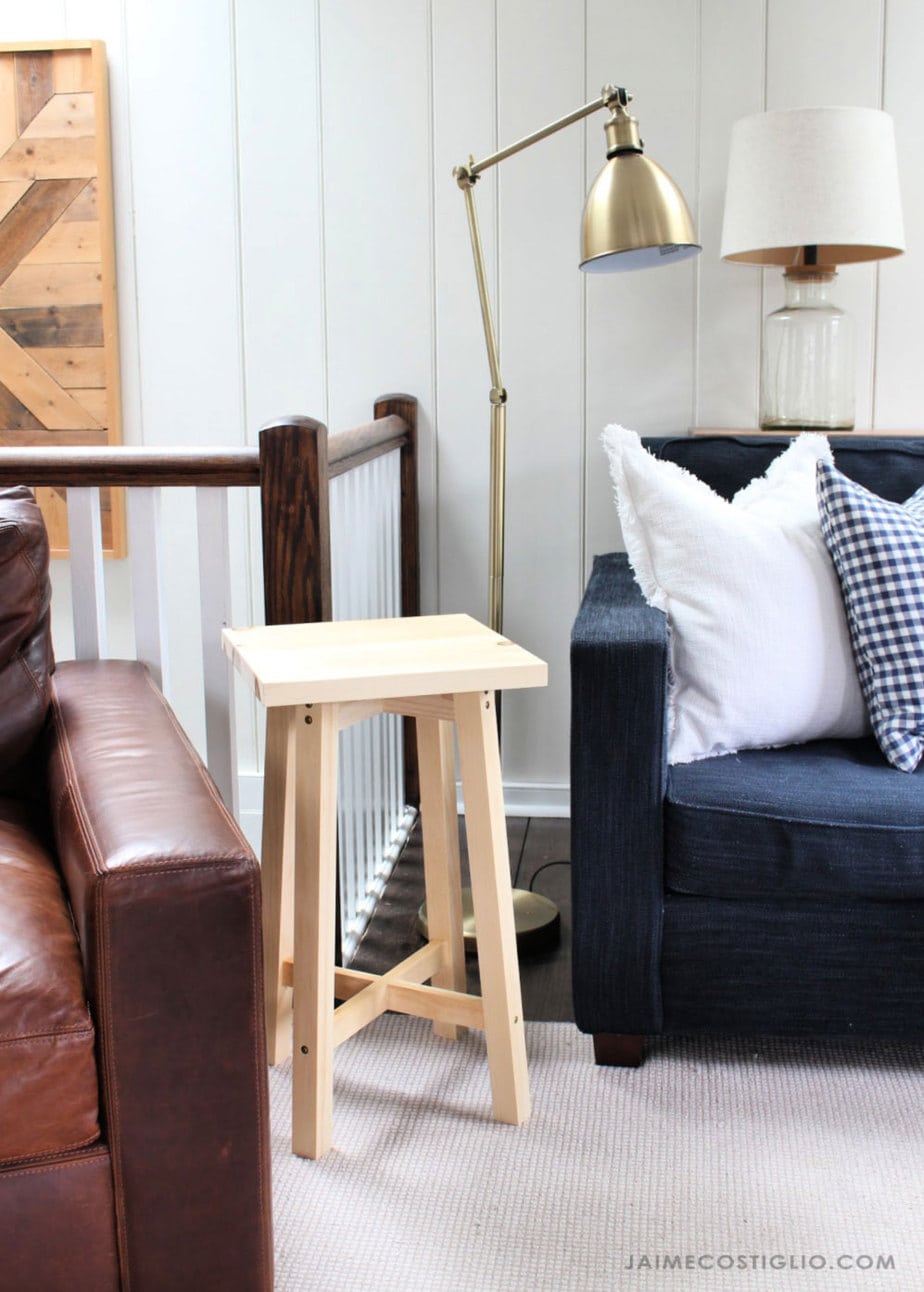 The first one from Jaime Costiglio.
- To create this basic side table, you should start by sifting through your scrap wood pile and modifying the designs to work with any boards you find.
- Use a miter saw to begin slicing the boards. A miter saw is necessary to perform the required 5-degree miter cuts.
- For the top cross support, use 23 boards. Before putting the 23 to use, The Author recommends trimming off the rounded edges with a table saw, leaving you with a square piece.
- Use Half lap joints for the table’s cross supports.
- Additionally, a jig saw, or you can use a scroll saw to cut the notches.
The second comes from Salvaged Inspirations, and your job is recycling an old and dated side table into a more modern one.
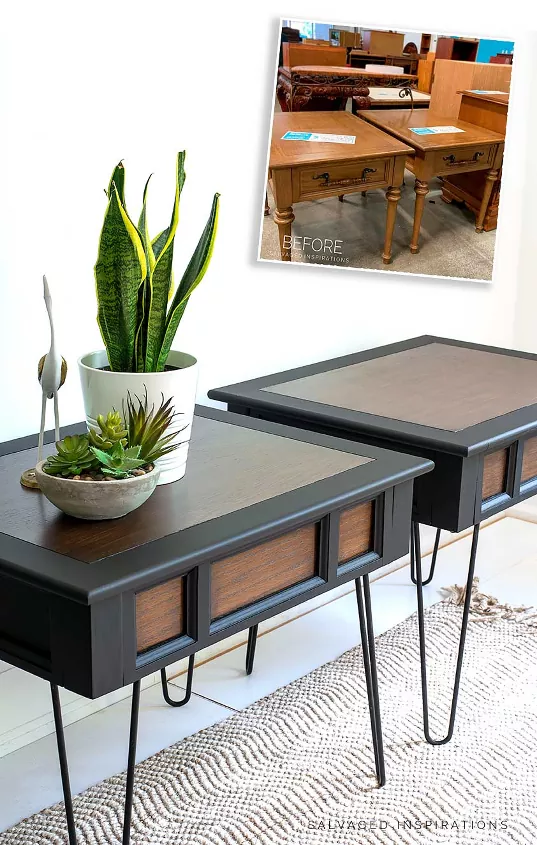
General instructions:
- First, wipe down the tables with TSP and then clean distilled water to remove any traces of the cleaner.
- Using an epoxy stick, fill the hole left by the removed hardware.
- Put the tables through a scuff sanding with 100 grit sandpaper and an orbital sander before painting them.
- Use a gel stain with an old-fashioned base to color the top and side panels. The stain produced an excellent, dark, rich finish on the right side table.
- Make a jig to make uniform cuts on the legs, and then screw in the hairpins. A jig can help you achieve a flat, uniform surface on which to attach the hairpins, ultimately giving your table greater stability and balance.
Despite their fragile appearance, they are remarkably strong.
References:
12. Pinterest.com, Thesorrygirls.com, Youtube.com
11. Collectivegen.com
10. Youtube.com
9. Ana-white.com
8. Everythingmetalandwood.com, Youtube.com
7. Abeautifulmess.com
6. Houseonlongwoodlane.com
5. Home-dzine.co.za
4. Madeupstyle.com, Crazylaura.com
3. Lynnchanglewis.com
2. Nation.ryobitools.com
1. Jaimecostiglio.com, Hometalk.com