Your options. You most likely have heard the apothegm, “When life gives you lemons, make lemonade.“ Relating that to organization, the fact is, it’s not often about how much space you have. It’s about how well you use it. In a small bedroom, space is a luxury you can’t afford to misuse or waste. And that’s what the tips in this guide help you figure out.
For the most part, space management in a small size bedroom involves having multi-purpose furniture (say a bed that doubles as a bookcase, or wall mirror that doubles as a makeshift table) and exploring minimalism. The projects in this article are fun to do, and quite a number of them would give you about as much difficulty as assembling IKEA furniture.
So read through, find a project (or projects) that appeals to you, roll your sleeves, and get right on it. The investment will pay off nicely, I assure you. Continue to our list.
Follow this link to find the first part of this 15 DIY Organization project for Small Bedroom

🔊15 DIY Organization Project for Small Bedroom Video:
10. Under-Bed Drawers
Overview:
It isn’t exactly a novel idea to keep stuff under your bed. We’ve been doing that since we were kids. But organizing stuff down there with drawers! Now, that’s something that should perk your ears. This DIY is the very definition of easy. All you really need is to touch up a couple of [old] drawers and attach casters underneath them for mobility. Then organize your things in them and roll them under your bed. Under bed drawers!
Things you need
| Materials | Tools |
|---|---|
| Old drawers | Power drill |
| Paint | Paint brush |
| Casters (FOUR per drawer) and screws | Sander or sandpaper |
The DIY Process:
The infographic above gives you a concise overview of what the project entails.
- Step 1: Get your old drawers and do a quick clean. You could have two or three under-bed drawers—depending on the dimensions of your bed.
- Step 2: Use a sander or sandpaper for light sanding.
- Step 3: Paint the drawers.
- Step 4: Attach casters to the underside of each drawer. Preferably, attach one caster at each corner of the drawer—that’s four casters per drawer.
- Step 5: Arrange your stuff in the drawers and slide them under your bed. That’s about it (below video by Lowes).
You may also repurpose an old large shelf to serve as an under-bed drawer. Get more info on this page.

9. Platform Bed
Platform beds are particularly artsy. But when paired with large drawers, they could potentially relieve of your “storage headache.” A platform bed with underfloor storage may just be what you need to get a strong hold of the organization dilemma in your small bedroom.
That’s the good news. The not-so-good news is that platform beds are not as easy to put together as most of the projects on this list. But if you do look past the amount of effort required, the result is unarguably satisfying and well worth the effort. This guide offers you over a dozen different platform bed DIY ideas to choose from (you’re interested in the beds that have drawers or storage of any kind).
8. Modern Farmhouse Murphy Bed
We’ve gone on about the Murphy table already. This Murphy bed DIY has an obvious similarity—you can just fold it up when not in use. But that’s about as far as the similarities go. It isn’t exactly an easy, quick DIY by any chance. You’d be dealing with large boards (and lots of other materials), an extensive plan, and multiple steps. And it isn’t the most inexpensive project on this list. With that out of the way, the Murphy bed would be a brilliant addition to any small bedroom, giving you a ton more space (both free and storage) than you thought possible.
7. Rolling Shelf
If you have a little nook in your room where you could hide this, then there’s hardly a case you can make against this project. It is a standard shelf with handles on one side and casters underneath it. That’s all there is to it.
Therefore, you only have to take dimensions to make a shelf that’d slide in and be hidden from sight seamlessly. Then you can apply paint (if you wish, to match your decor), and add the handles and casters.
6. Over-the-Door Hooks
Overview:
Okay. So most DIY projects on this list are all about making good use of available space. But how about kicking it up a notch to make space out of thin air.
This idea isn’t particularly new. Doors have flown under the radar as capable organizers, even though they aren’t typically used to store a lot of stuff. However, in a small bedroom, you have to use all the tricks in the book.But sometimes, you may run into a hiccup. Say for some reason, you can’t place traditional over the door hooks because there isn’t enough space between the door frame and the top of the door.
That’s where this hack comes in. You simply make your own over-the-door hooks that fit like a glove. Watch video.
Things you need
| Materials | Tools |
|---|---|
| TWO 5" x 7" aluminum flashing sheets | Straight edge |
| Multi-material screws | Power dill |
| Tool organizer or a piece of wood to which you’d attach whatever you want |
The DIY Process
- Step 1: Use a straight edge to bend each flashing sheet into a shape that’d fit over the door. Ensure you wear gloves, as the sheets’ edges are sharp.

- Step 2: Attach the sheets (now in the form of a hook) to a piece of wood to which you’d attach anything you’d like to hang on the door or serve (or that’d serve as your organizer). In this tut, the sheets were attached to a tool organizer.
You may want to use a nail to make a small divot before drilling to help prevent the screw from slipping.


- Step 3: Attach the hooks to the top of the door.


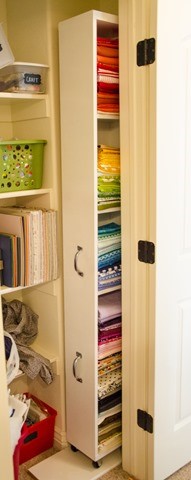
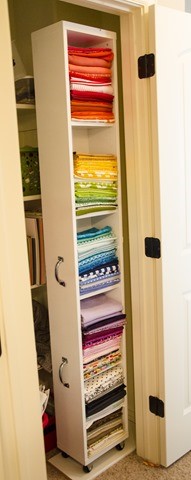
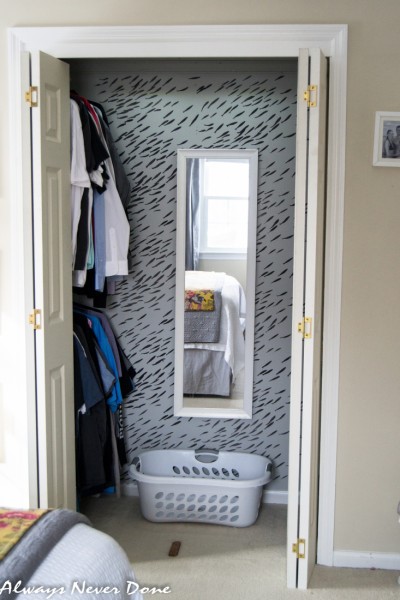
5. Closet Makeover with Stencil
Sometimes, the current setup of your closet may not be the most efficient. And no, I’m not talking about the mess you’ve made because you happen to be a chronic procrastinator
(this reference obviously doesn’t apply to those who have OCD). I’m saying if you’ve got something like this for example:
Then a makeover could have it look this way, with substantial expenses—since you’d focus on reusing or repurposing existing materials.
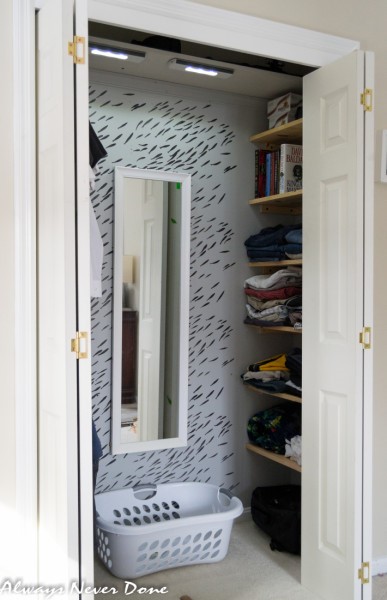
You can pick up ideas from this project for your closet makeover and consider investing in a stencil that catches your eye. There are no rules to follow. You only have to tap into the creative you to ensure the new setup makes better use of the space than the old one. Planning the makeover before setting out to make changes may be an important step not to gloss over.
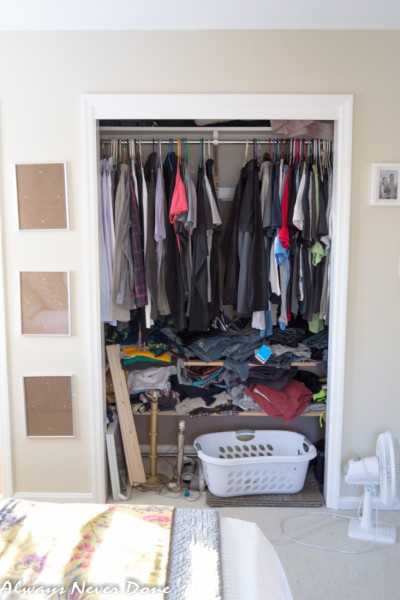
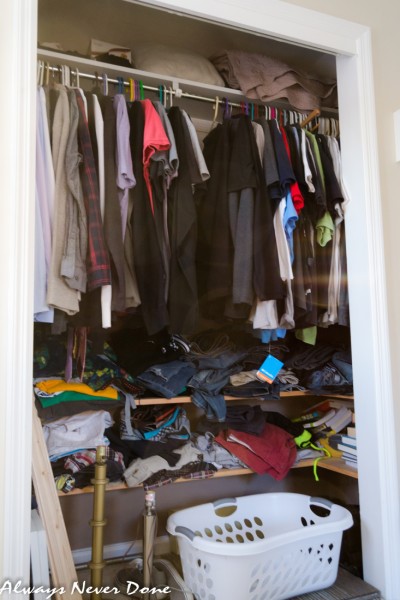
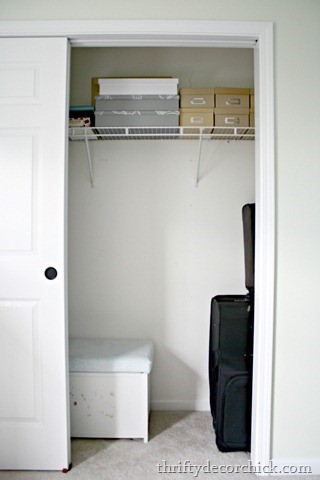
4. $50 Closet Kit
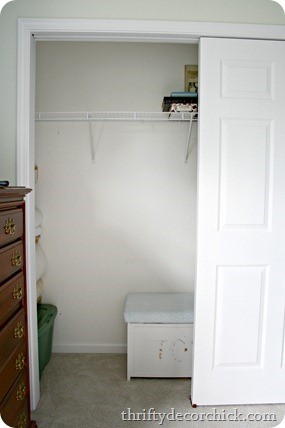
If you have a fairly bland closet that looks like this: …then one thing is for sure—it isn’t going to store a lot of your stuff. You can change that with a bit of planning, cutting, and installation. Now this isn’t a quick project: However, each step is really easy.
The closet has three primary components—a top shelf, a shelf/drawer system that divides the sides in the middle, and a bottom shelf.
You’d prolly have to make adjustments, since closet sizes in all homes are not uniform. But this detailed guide takes you through all of it, from start to finish. And when you’re done, something like this below would greet you when you look at your closet:
That’s a lot of stuff for a small closet, right?
3. Eliminating Wasted Closet Space
It’s amazing what will, creative thinking, and a free afternoon can do to a closet with tons of misused or wasted space. This project breathes new life into your closet’s appearance and organization. It isn’t a full-on makeover. Instead, it’s more of an incremental update. This guide gives you a rundown of what the project entails.
2. Open Wardrobe
At some point, you have to take a couple of steps back and try out a different approach to organization—minimalism. The open wardrobe concept thrives on this approach,
as you have to cut out a lot of clutter and embrace the idea of having a bit freer space. The guide to this concept delves into the core of the thought behind this concept, requirements, and the process to make it work for you. It is stylish, clean, and just as importantly, inexpensive (since you’d have to “be resourceful [with] the pieces [that] you already own and lean on your skills a little more.”)
1. Hanging Storage Crates
Overview:
This project is majorly about maximizing the use of space, and importantly, without having to do a ton of maneuvers, complex woodworking, and the likes. It comprises of two rope strands suspending a vertical stack of crates that serve as storage. Making it happen is as easy (and as inexpensive) as it sounds. And by DIY standards, this project does offer a bit of versatility, since you get to choose the sizes, styles, and shapes of crates you’d want to use.
Things you need
| Materials | Tools |
|---|---|
| Wooden crates | Power drill with drill and hole saw bits |
| Rope | Sander or sandpaper |
| Paint and sealer | Paint brush or sprayer |
| Duct tape | Measuring tape and clamps |
The DIY Process
- Step 1: Use the tape to get a concrete measurement of the vertical distance from the rod to the floor. Lay the exact tape measurement on the ground, and use it as a guide to verify how you’d stack the crates.
You should particularly pay mind to the space between the crates (above and below each crate).
- Step 2: Give each crate proper and thorough sanding. Don’t skip the nooks between the slats.

- Step 3: Use a 1” hole saw bit to drill four matching holes at the edges of each corner. To avoid splintering, don’t drill a hole through at a go. Instead, drill halfway from the bottom, then flip the crate, and drill from the inside.

- Step 4: Do quick sanding around the holes. Also remove any dust on them. With that done, paint all crates use a paintbrush or paint sprayer (and spray shelter).
The paint used for this project is chalk paint. Afterwards, seal using some satin polyurethane, which you should also spray on. Using a sprayer and spray shelter allows easier painting of the crates’ slats.
- Step 5: Begin the process of hanging the crates. That involves measuring out two sufficient rope lengths and tossing them over the bar.
 Alternatively, you may cut each rope length in two. Then tie the divided ropes above the bar. This allows for easy disassembly of the setup. This tut uses the former option.
- Step 6: Clamp each rope to the rod for stability.
 And wrap the edges of each rope with some duct tape. This enables you to thread the rope through the rough crate holes without it fraying up.
- Step 7: Thread each rope end through corresponding holes. Then make a knot at a measured length for each crate. We recommend you have someone help you out during this step, by holding the crate.
 Keep at it until you get to the end. Cut any excess rope off, but remember to leave a little extra should you want to adjust or change the crate order at some other point in time.You’d also notice adhesive metal label holders on each crate for better organization. Check hyperlink for more detail.