Turning a spare room or area into a comfortable home office requires only a few pieces of furniture and some practical modifications. To create the most conducive setting for working from home, you need to ensure that the various areas flow into one another while maintaining their individual identities. You wouldn’t want to bring the day’s tensions into your private sanctuary by reclining on the sofa in the next room once you get off work.
That’s why setting boundaries between your office and your free time is crucial. Simple adjustments to the current layout and adding a few strategically placed pieces of furniture will accomplish the trick. You can either select a spare corner of the living room and fill it with a desk and filing cabinets or use a stylish divider to create an office space. A DIY console table you put behind the sofa can also double as extra desk space if needed. You may not have been able to tell your former corporate boss how much you disliked the office’s standard-issue gray desk chairs and partitions, but now you get to choose everything from the paint color to the desk accessories. Your decoration choices are limitless and, more appealingly, entirely up to you, whether you want a modern, sleek style, or a more rustic farmhouse feel.
There are a variety of situations in which a person would benefit from having a private workspace in their own house. Some must take their assignments home to complete them by the due date. Some people simply prefer not to go into an office at all; thus, they need to be able to set up a functional office area in their homes.
However, setting up a home office can be difficult if you do not have a spare room. As a result, think about these 12 do-it-yourself desks and living room makeover ideas to create a relaxing environment to get things done. As always, Simphome curates and presents you with the list.
12 DIY Living Room Desks and Inspiring Transformation Video
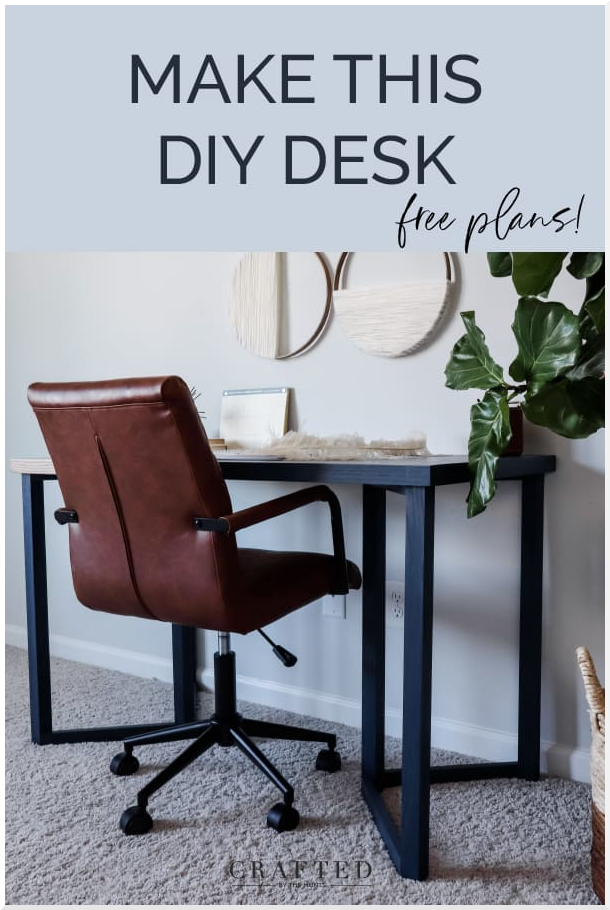
12. A Simple Yet Modern Desk Idea by Craftedbythehunts
 IN STEP 1: MAKE YOUR CUTS
Begin by cutting the wood for the legs and top according to the cut list. Don’t bother cutting the 1x2s for the top yet. Making cuts is always more precise as you progress through the project and begin to put things together.
IN STEP 2: DRILL POCKET HOLES
Like most DIY furniture, the skill to complete pocket holes is crucial.
IN STEP 3: MAKE THE TOP OF YOUR DESK
Attach your 1x6s to the top of the desk with glue and 1.25″ screws. Wipe away any excess glue that has gotten on the top or bottom of the desk.
STEP 4: MAKE THE LEGS
Clamp a spare board to the side of a leg as a guide to building the leg details. This work will allow you to keep the angled piece flush with the front of the leg by pushing it up against the spare board.
STEP 5: ASSEMBLE THE TOP AND LEGS
We’ll use 1.25′′ screws to secure the legs to the top.
First, cut three boards: one to connect the center parts and two to connect the outside legs.
To complete the project, you have five more steps to go.
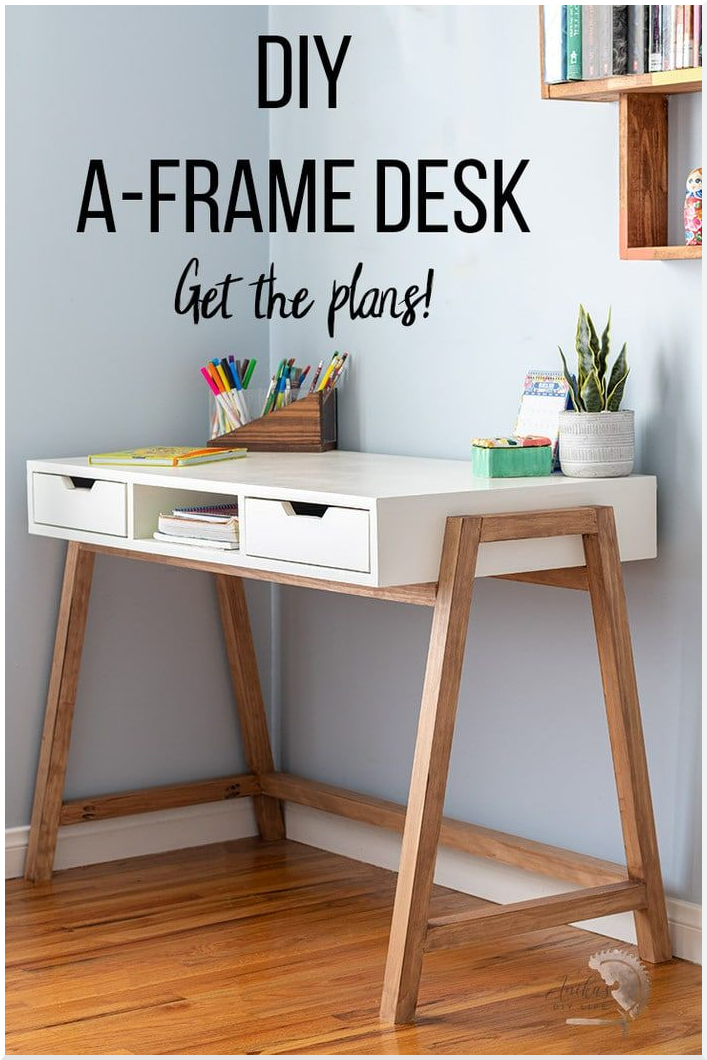
11. A-Frame Desk DIY Idea from AnikasDIYLife
 Step 1: Make your cutouts.
Cut the plywood according to the plans using a circular saw and a straight-edge guide. You may do this using the Kreg Rip-Cut. It makes it very simple to create identical cuts over and over. The miter saw was used to cut the 22 boards. The legs and a few supports have 10-degree angles carved into them. You may set the saw once and perform all the cuts with completely equal angles.
Step 2: Construct the top frame
Make pocket holes in the plywood and construct the drawer structure. Remember that the Kreg Jig has a particular setting for plywood.
Step 3: Construct and install drawers
Make two drawers out of 13 boards.
Install the drawer slides and drawers in the top frame.
Step 4: Attach the top
Once the drawers are in place, secure the top with wood glue and 14′′ finish nails.
Make a note for the central supports so you can add nails properly.
Step five to finish:
Build the legs, assemble the base, connect the top, and add drawer faces.
10. A Stylish Desk with IKEA Alex Drawers
 This is another brilliant and hassle-free idea to get a cozy home office. It is pretty similar to the previous one. However, you will use IKEA Alex drawers instead of upper cabinets to support the tabletop.
You have a wide array of choices when it comes to a tabletop. The best option would be a butcher block. Unfortunately, it is rather expensive. Therefore, you can opt for two sheets of 4’x8′ sand plywood with a birch or maple finish instead.
To create the tabletop, you need to glue the boards together. Consider securing them with screws so that they will not slip. Then, place the tabletop on top of the IKEA Alex drawers. You can also add the front piece for a more finished look.
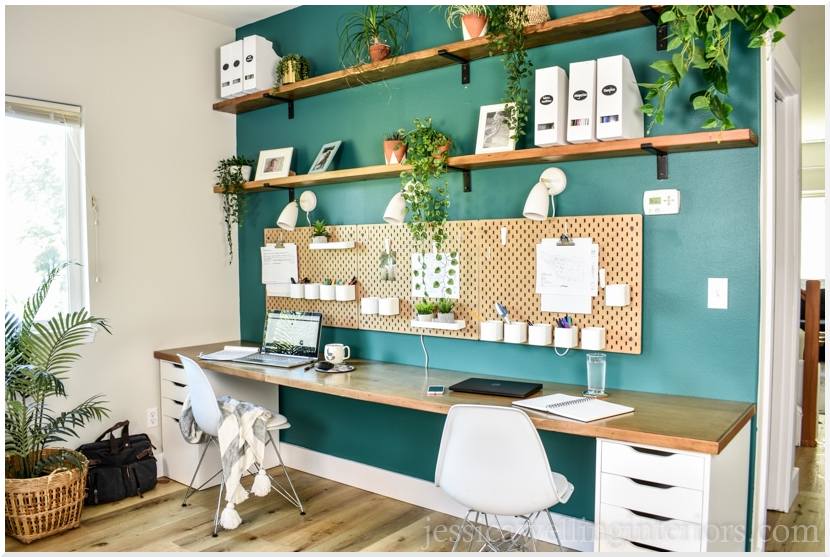
9. A Built-in Desk Idea with a High-End Look
 Some people have a built-in bookshelf in their living room to create an elegant look while incorporating storage solutions. But it will leave an awkward void if they decide to take it, which is not a great view.
If you have this problem, consider reusing this void and turning it into a high-end home office.
- To make this built-in workspace, you have to install vertical paneling for the base.
- Then, you will need two IKEA Billy bookcases.
- Before putting the bookcases in place, screw three 1x4s into studs on each side wall around the top, middle, and bottom. These pieces will help you hold the bookcases.
- After that, shove them into each corner to stay flush with the protruding walls.
- Next, place IKEA Alex drawers in the middle.
- After that, top it with an IKEA Ekbacken countertop to get the high-end look from the marble effect.
- The desktop will slip easily. We know! Thus, you need to secure it by screwing L-brackets to the wall and the bookcases to support it.
- Finally, install sconces and front pieces to finish it off.
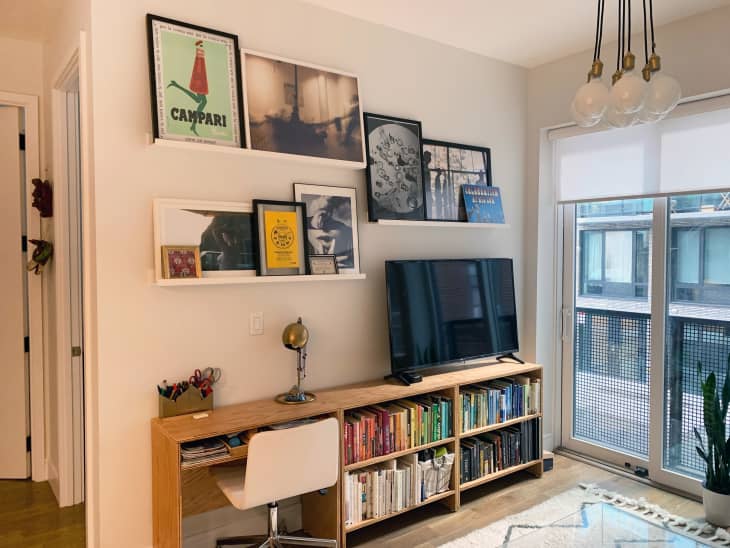
8. A Desk and TV Stand Combo
7. An Adjustable art desk with a French cleat wall mount.
 You can make this workstation to work on your artwork. It can be used as a standing or sitting desk and laid flat or tilted. The fundamental design is based on Nathan Frey’s Frey Desk, duplicated and altered. The materials cost between $160 and $180. A circular saw, jigsaw, corded and battery drills, an orbital sander, a Kreg pocket Jig, screwdrivers, a carpenter square, a ruler, and clamps are required.
First, make a Blender model of the desk so you may experiment with design changes and create a materials list.
The author shared that you must fit as many components as possible inside the specifications of a 4x8ft (3/4in thick) plywood sheet, then have the sheet cut into three main pieces at Lowe’s. Make the smaller cuts at home with a jig and circular saw.
Then you design the outline for the primary rack spacing, which is three inches apart from center to center and at a 45° angle. If you were to construct it again, an L shape or curve would have worked better than a 45° angle at keeping the rod in place.
If you don’t have a table saw, you’ll need to use a circular and metal guide to keep the main two rack parts straight. You can perform other rip cuts by fastening another piece of wood to the plywood as a guide, as the metal guide was most likely insufficient for the project.
6. A Cozy Workspace Idea
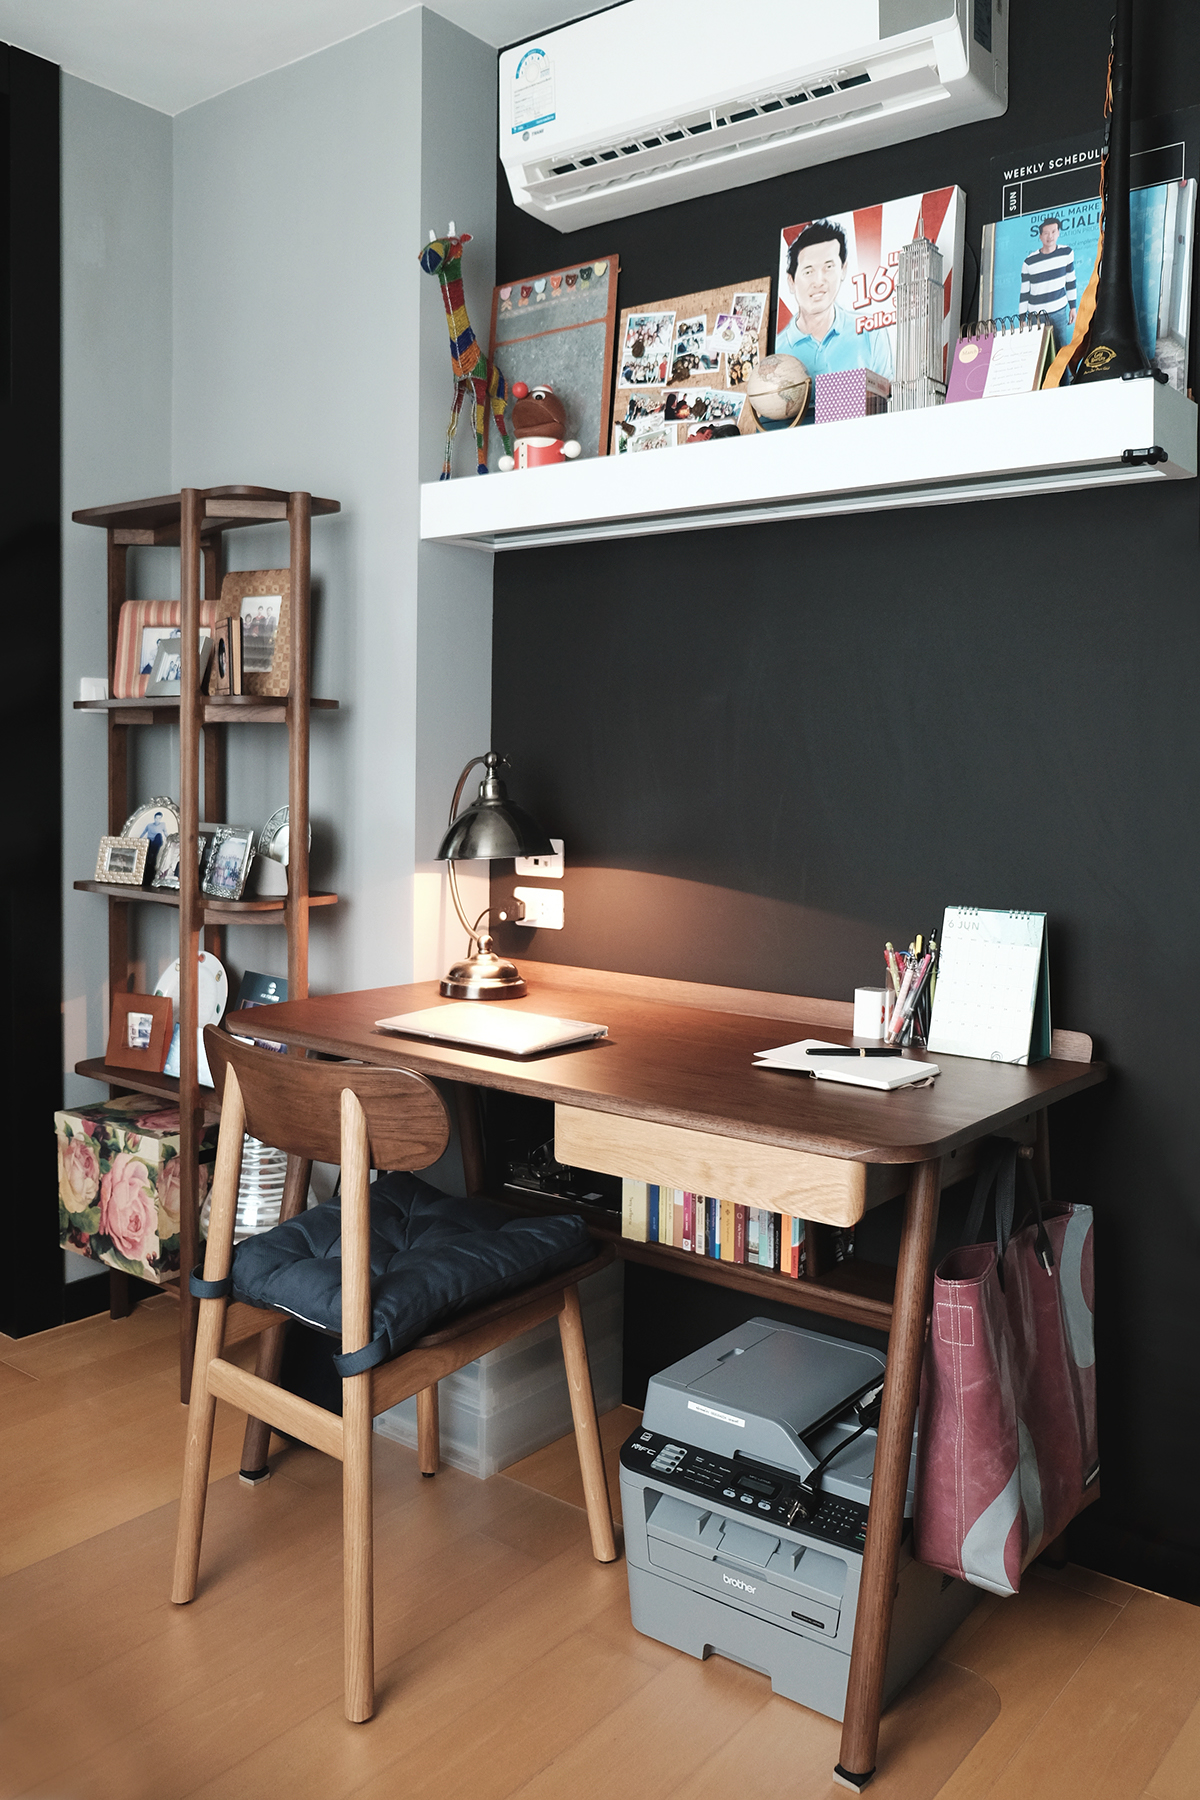
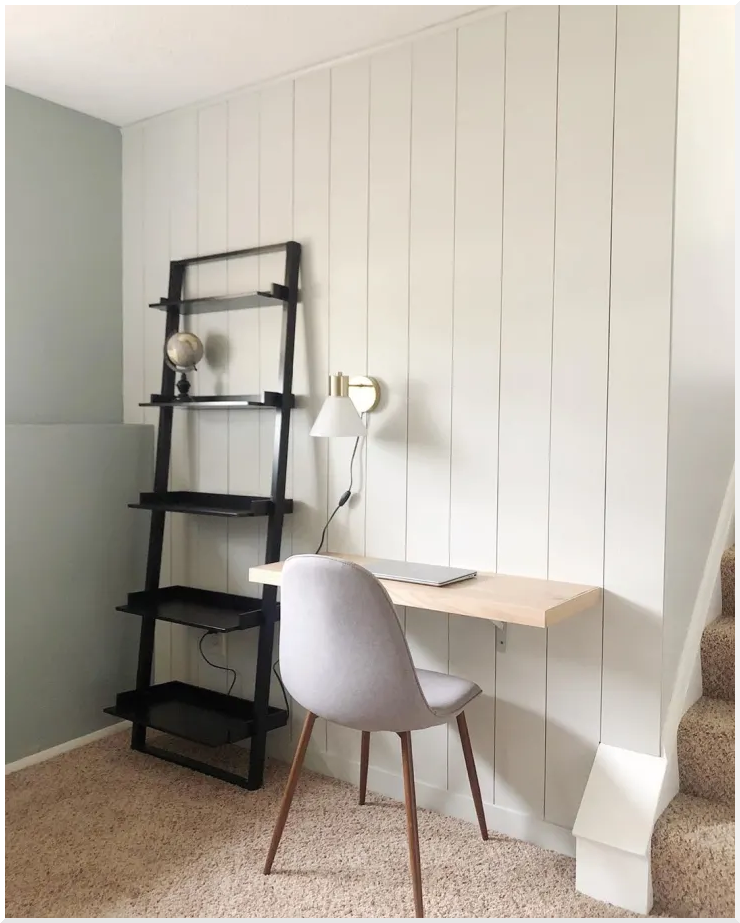 Sara’s wall-mounted workstation features a sconce light, ladder bookcase, and Eiffel chair for a cohesive look.
With the design, you can find a working space with more and more stuff on the office wall. Sara found the perfect watercolor print at @target for only $14.99! It is 11 by 14 inches and is of high quality. There’s a chair, and a felt pin board, both from Target and a sconce from IKEA, for $19.99.
To copy the cozy desk, you only need to mount a wooden board to the wall using L-brackets. Then, build ladder-like shelves next to the desk to house books, files, and anything you want.
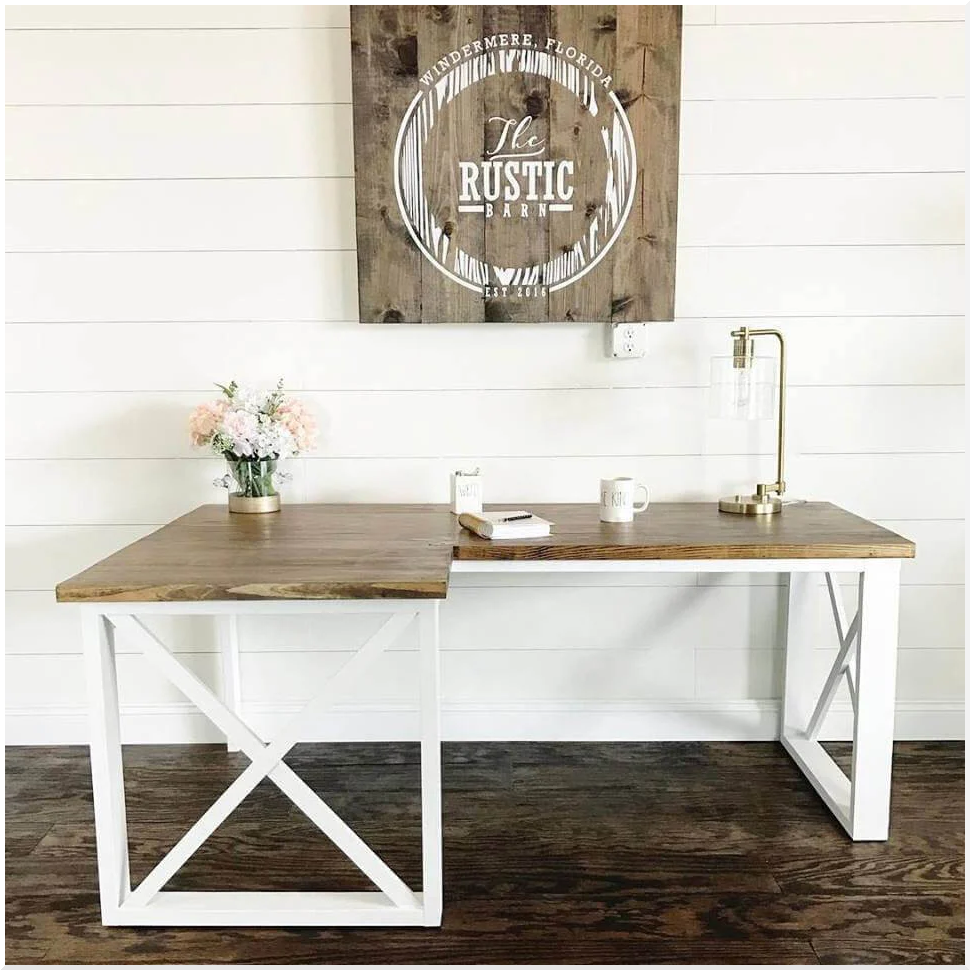
5. The L-Shaped Desk
 Construct the leg frames first.
Constructing the outer structure of your desk legs is the first step in making an L-shaped desk. With a Kreg Jig and pocket hole screws, you will join the vertical 2×4 legs to the horizontal 2x4s. This L-shaped desk requires two frame legs.
Add X and then trim.
Then you’ll install the X-shaped ornamental trim. Hold your assembled desk side up to your 1×2 and mark it to see exactly where you need to cut it to create the X trim. Use the brad nailer, brad nails, and wood glue to join the 1×2 brace to the 2×4 square. It’s important to ensure the first 1×2 is flush with the leading edge of the 2×4 square. After finishing one square side of the L-shaped desk, you must repeat the process for the second square side. Both the constructed desk’s side frames need an X-shaped decorative trim added.
Put Together the Desk’s Bottom.
Now that the desk’s side pieces are put together, they can take their final shape. You will use a 2×4 cross brace to join the constructed side to the 2×3 leg. To join them, you’ll need to use a Kreg Jig again. Before securing the inner 2×4 bracing to the desk’s frame, drill Kreg holes through the brace’s face to accommodate the desk’s top.
4. A Wall Mounting DIY Floating desk for the laptop
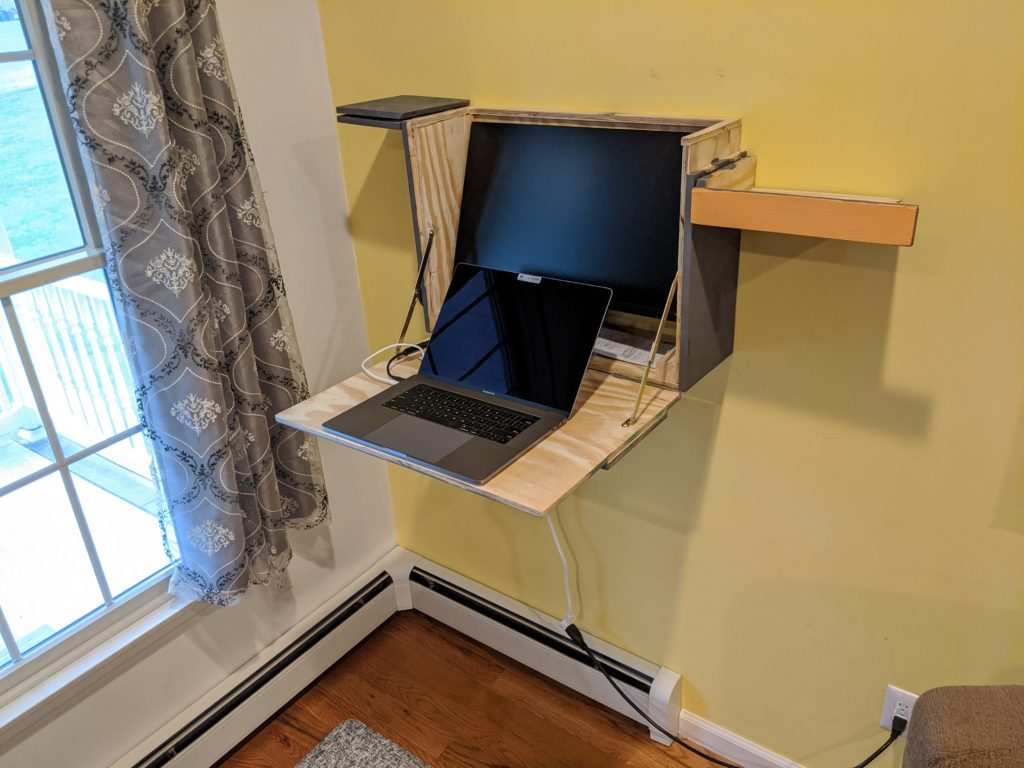 It is a simple cabinet with a hinged door and an opening at the top for me to get to the cables and storage space behind the screen. A cover that folds down into shelves, accessible via a hinge. The odd top slab of wood serves a purpose as the opened shelf rests on it.
Like a kitchen cabinet, it is hung from the wall studs using four drywall screws of an appropriate length. The original cabinet was constructed from the inner plywood layer. Author Joe put the outer layer to the right side as a shelf support and to the left for symmetry. He was experimenting with different methods of securing the sides of the cabinets, as seen by the small blocks in the bottom corners. When trim-head screws failed to prevent the board from cracking, he switched to using the blocks. (It turns out they make great small bookcases.) Ultimately He made a change to an air nailer. The glue and clamps did all the heavy lifting, so it didn’t matter.
3. A Simple yet Functional Computer Desk Idea
 The most difficult part was locating the studs. A stud finder will not work if your house is made of cement board rather than traditional drywall. Studs are normally spaced 16″ apart (or 24″ in some houses) in the center, which means it is 16″ from one stud to the next.
Wall outlets are typically installed at the same time as studs in a newly constructed home. In most cases, studs are located on either side of an electrical outlet. Usually, the first stud is placed in a corner. If you measure from the wall’s corner to the outlet, the number of inches should be a multiple of 16. Alternatively, you might measure from the opposite side. If neither is, then drill a hole through the wall on either side of the outlet using the smallest drill bit. You have to ensure you can locate the stud. Finding other studs is simple after discovering the first one.
Take 16 inches and give a new, smaller hole a shot from that point on. If you hit another stud, the distance between them will be 16 inches. If not, then give 24 a shot. Searching to locate the studs will require you to make around six or so small holes in the wall. You can cover up the flaws by filling and painting.
2. A DIY Wooden Desk for under $20
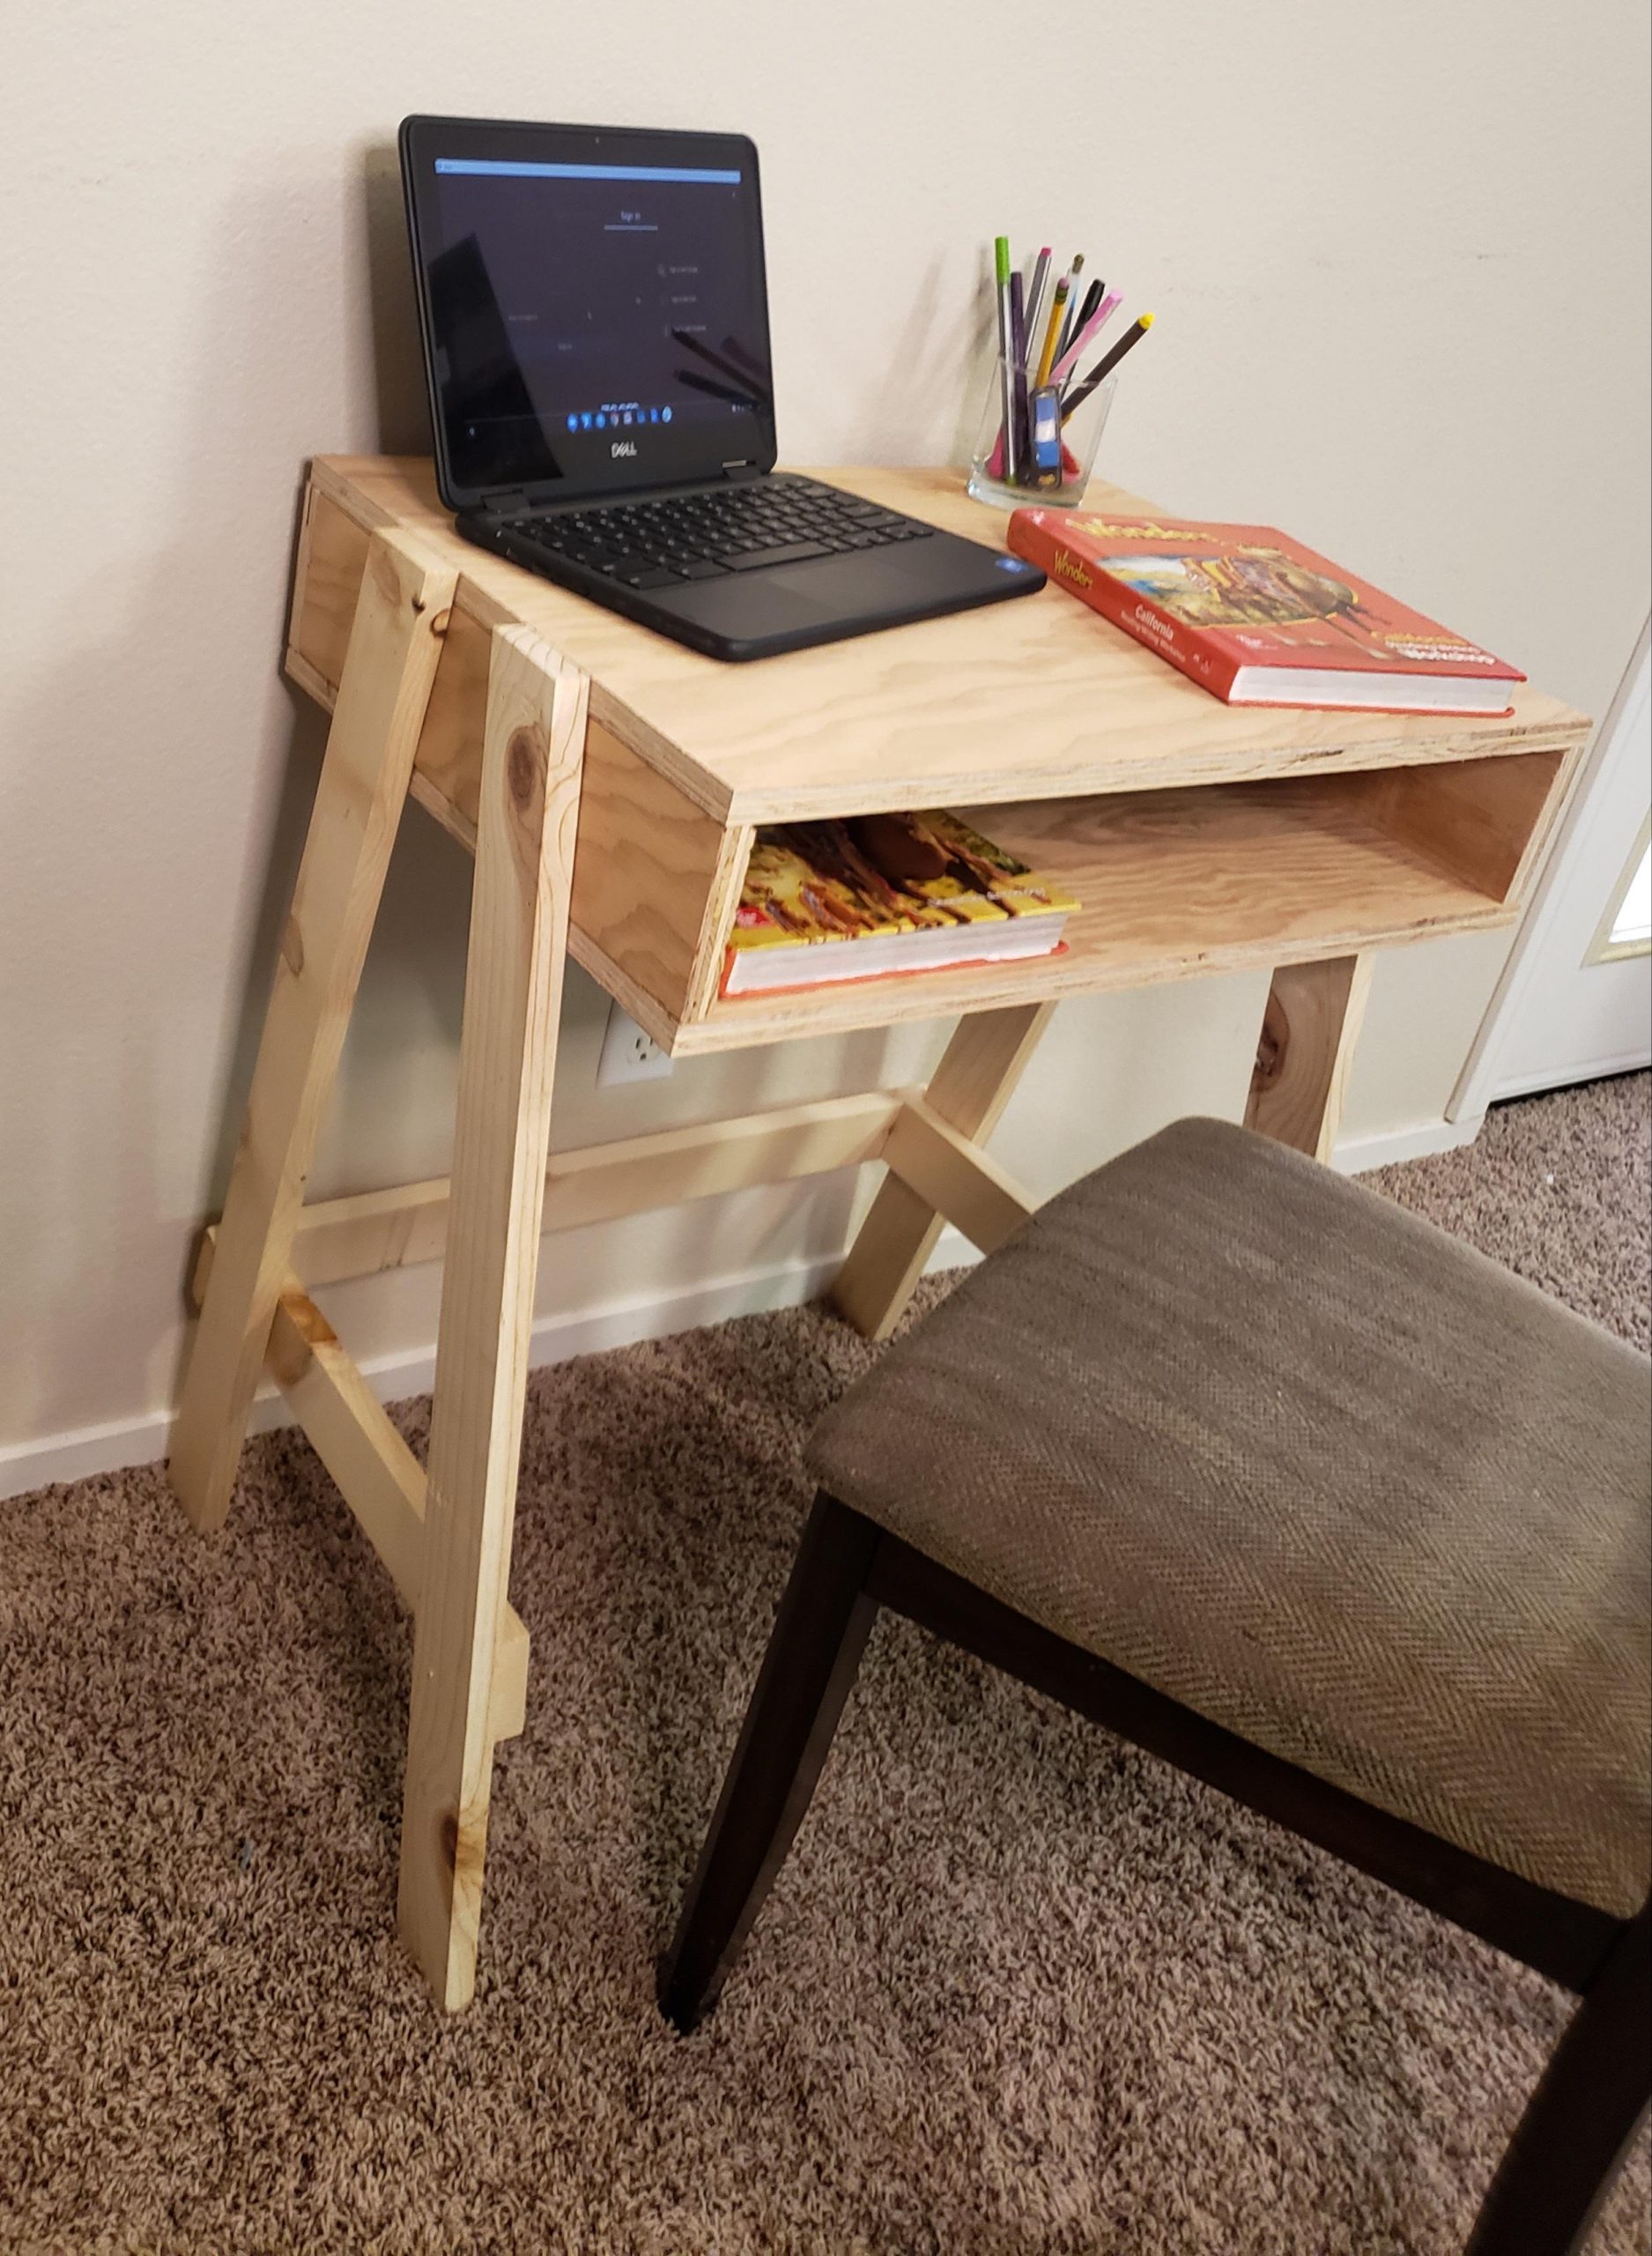 Here’s the finished product. It measures 24″ wide by 18″ deep. Large enough for a pupil to work at rather than the kitchen table.
You need to use a 2’x4’x3/4″ piece of sanded plywood to make the box. This size is widely available in retailers. Next, cut out (2) 18″x24″ pieces for the box’s top and bottom. The dimensions of the sides are (1) 24″x4″ for the back and (2) 4″x17 1/4″ for the sides. You then glued the sides and top, and Brad nailed them. This step results in a box with one side open. To round off the edges, lightly sand them.
Use (2) 1″x3″x8′ wood boards for the legs. You’ll need four 34-inch-long legs with 10-degree angle cuts on either end. This construction will align the ground’s angle with the top of the box. Place each leg 5 inches in front and back of the box. The legs were glued on and held together using Brad’s nails. The desk can now stand on its own. One 25.5″ brace on the back, 10 inches up from the ground, is required for additional support. The side bracing is 16″ long and has 10-degree cuts on both ends. If you choose, you can now paint or stain the desk. The final result is a basic but functional desk, yet you can copy the idea for about $20 in less than an hour.
1. THE KITT Desk Idea from The KILTT
 In 2015, KILTT Introduced the KITT desk to serve home office needs for urban living.
In these days of restricted living space, homeowners must be more selective while purchasing furniture. KILTT offers the KITT workstation to address such limitations.
The desk is fully equipped with remarkable versatility, suited for modern life, and every element of the desk may be effectively employed without wasting extra space. If you are a minimalist, the desk idea gives you a new perspective while adding elegance to your home decor. Unfortunately, you must rely on your imagination, 3D modeling software such as Blender, and carpentry experience to accomplish the project. Alternatively, you can contact Kilttdesign to obtain a copy with your custom measurements.
References:
12. Craftedbythehunts.com
11. Anikasdiylife.com
10. Jessicawellinginteriors.com
9. Stephaniejanecameron.com
8. Apartmenttherapy.com, Apartmenttherapy.com
7. Boredpanda.com
6. Apartmenttherapy.com, Instagram.com, Instagram.com,
5. Handmade-haven.com
4. Joecullin.com
3. Opensoul.org
2. Imgur.com
1. Kilttdesign.com, Behance.net