Unlike the common misconception, organizing your kitchen, even without any dedicated pantry, will not cost you hundreds of dollars. You’ll be able to enjoy a well-organized cooking space throughout the year if you’re prepared to take on DIY tasks and are consistent in your attempts to maintain your kitchen clean.
The pantry is the savior of every kitchen. This is where you can stow canned foods, flour, and other kitchen essentials away. Thus, you should not forgo it whatsoever.
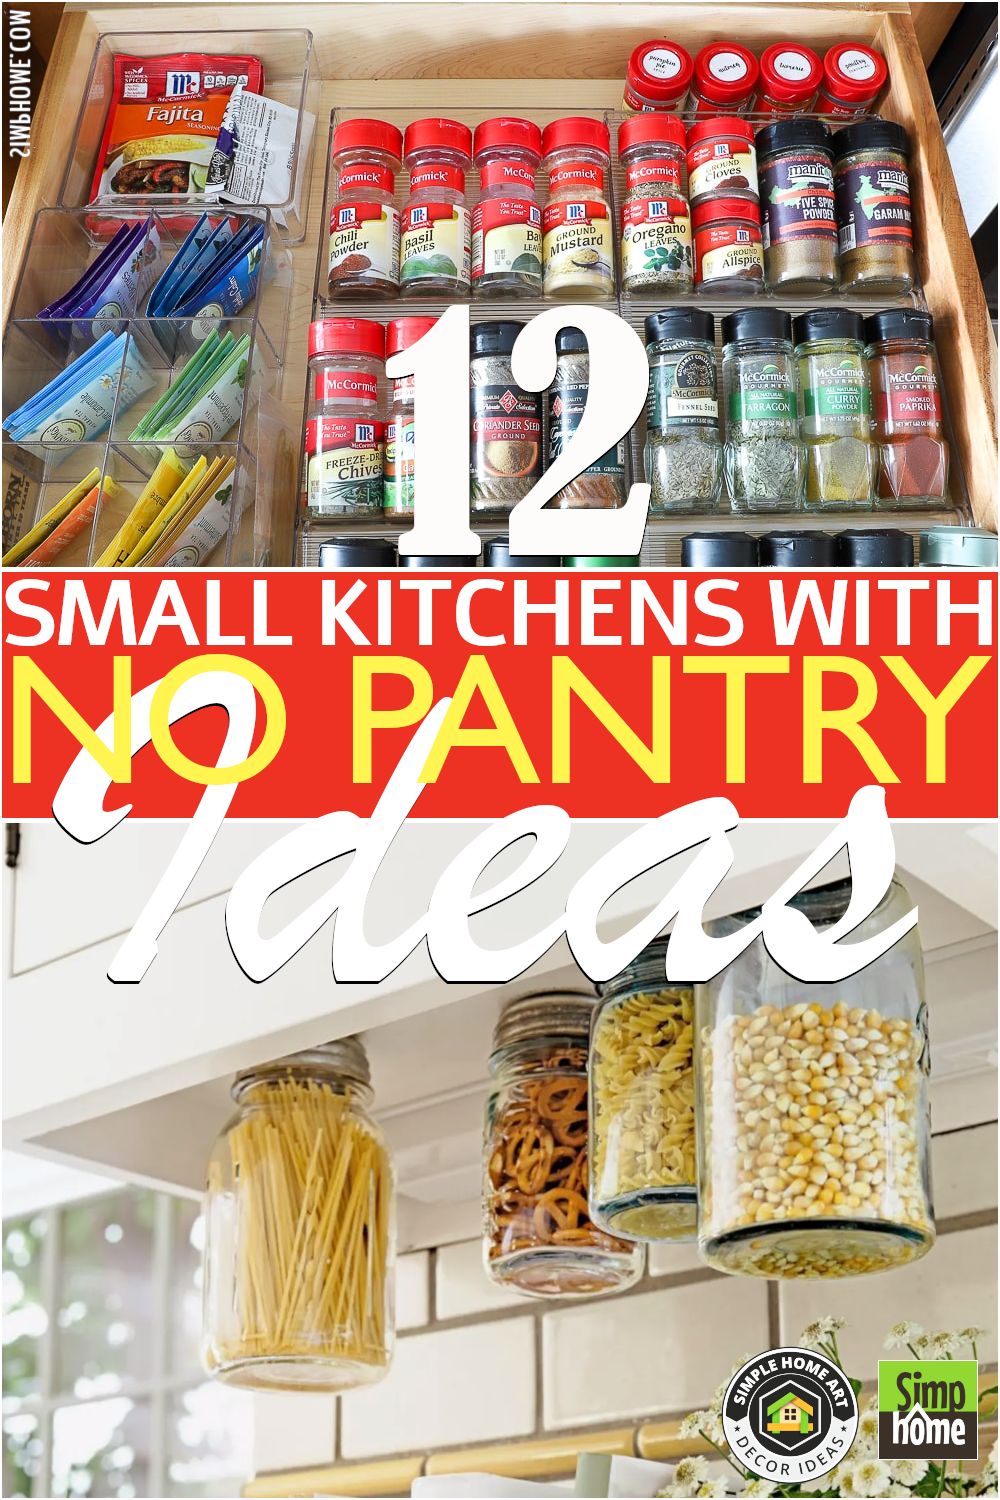
Unfortunately, some homes have kitchens that are so cramped that the owner must make do without a pantry until she moves. Still, you should keep hoping for an organized kitchen if her situation is the same as yours. We have listed these 12 small kitchens with no pantry improvement ideas here. One or some should be able to give you a fresh perspective you can take to tackle your kitchen organization. As always, Simphome curates you with the list.
12 Small Kitchens with No Pantry Improvement Video:
12. Hide them away
 Not having a pantry is not the end of the world. You begin to ask yourself where you should store your food. Well, this idea may be what you are looking for.
Bookshelves are highly versatile. The truth is they can stay anywhere in your house, such as in the living room, bedroom, or kitchen. Thus, they can make the perfect pantry you have longed for.
You only need stackable bins to store cereal bars, chips, candies, crackers, and any smaller items. These inexpensive bins will keep those tiny snacks in place so they will not be scattered on the shelf.
The shelf under the snack zone is perfect for canned foods. Storing them at eye level can be terrific because you can check what is available and what is not. This way, you can only buy the things that you need.
Since stored foods can be an eyesore and you do not want to look at them all the time, you can install a curtain rod at the front of the shelves. Then, hang a curtain to hide them away.
11. How to build your own portable above-storage cabinet
 The cabinet above the fridge is one of the most difficult to keep neat and tidy in the kitchen. Some prefer bare shelves or blank wall space above their refrigerator rather than a cupboard.
Using double-sided MDF, in which both sides are pre-finished, is a huge time saver. Because of its laminate or melamine finish, cleaning is a breeze. You can use paint and primer in its place if you can’t find a 2-sided MDF panel.
DAP’s Rapid Fuse adhesive would be suitable for this gluing task. Even a small amount of glue proved to be quite effective. If you’re used to using 2-step glue, switching to the glue that just requires one step for a secure hold will save you a lot of time.
Tiered racks are as versatile as bookshelves. People use them to display their plants, knick-knacks, and family treasures. If they can show off your collections, they can house edible items, too, right?
This freestanding tiered rack can make a great pantry without taking up more valuable space you have in your kitchen. Depending on its type, you only need inexpensive baskets to house all items.
It would be better if you labeled each basket. This way, you will find anything more easily. Besides, they look good on the rack.
10. Tap into the Underside of Your Cabinets
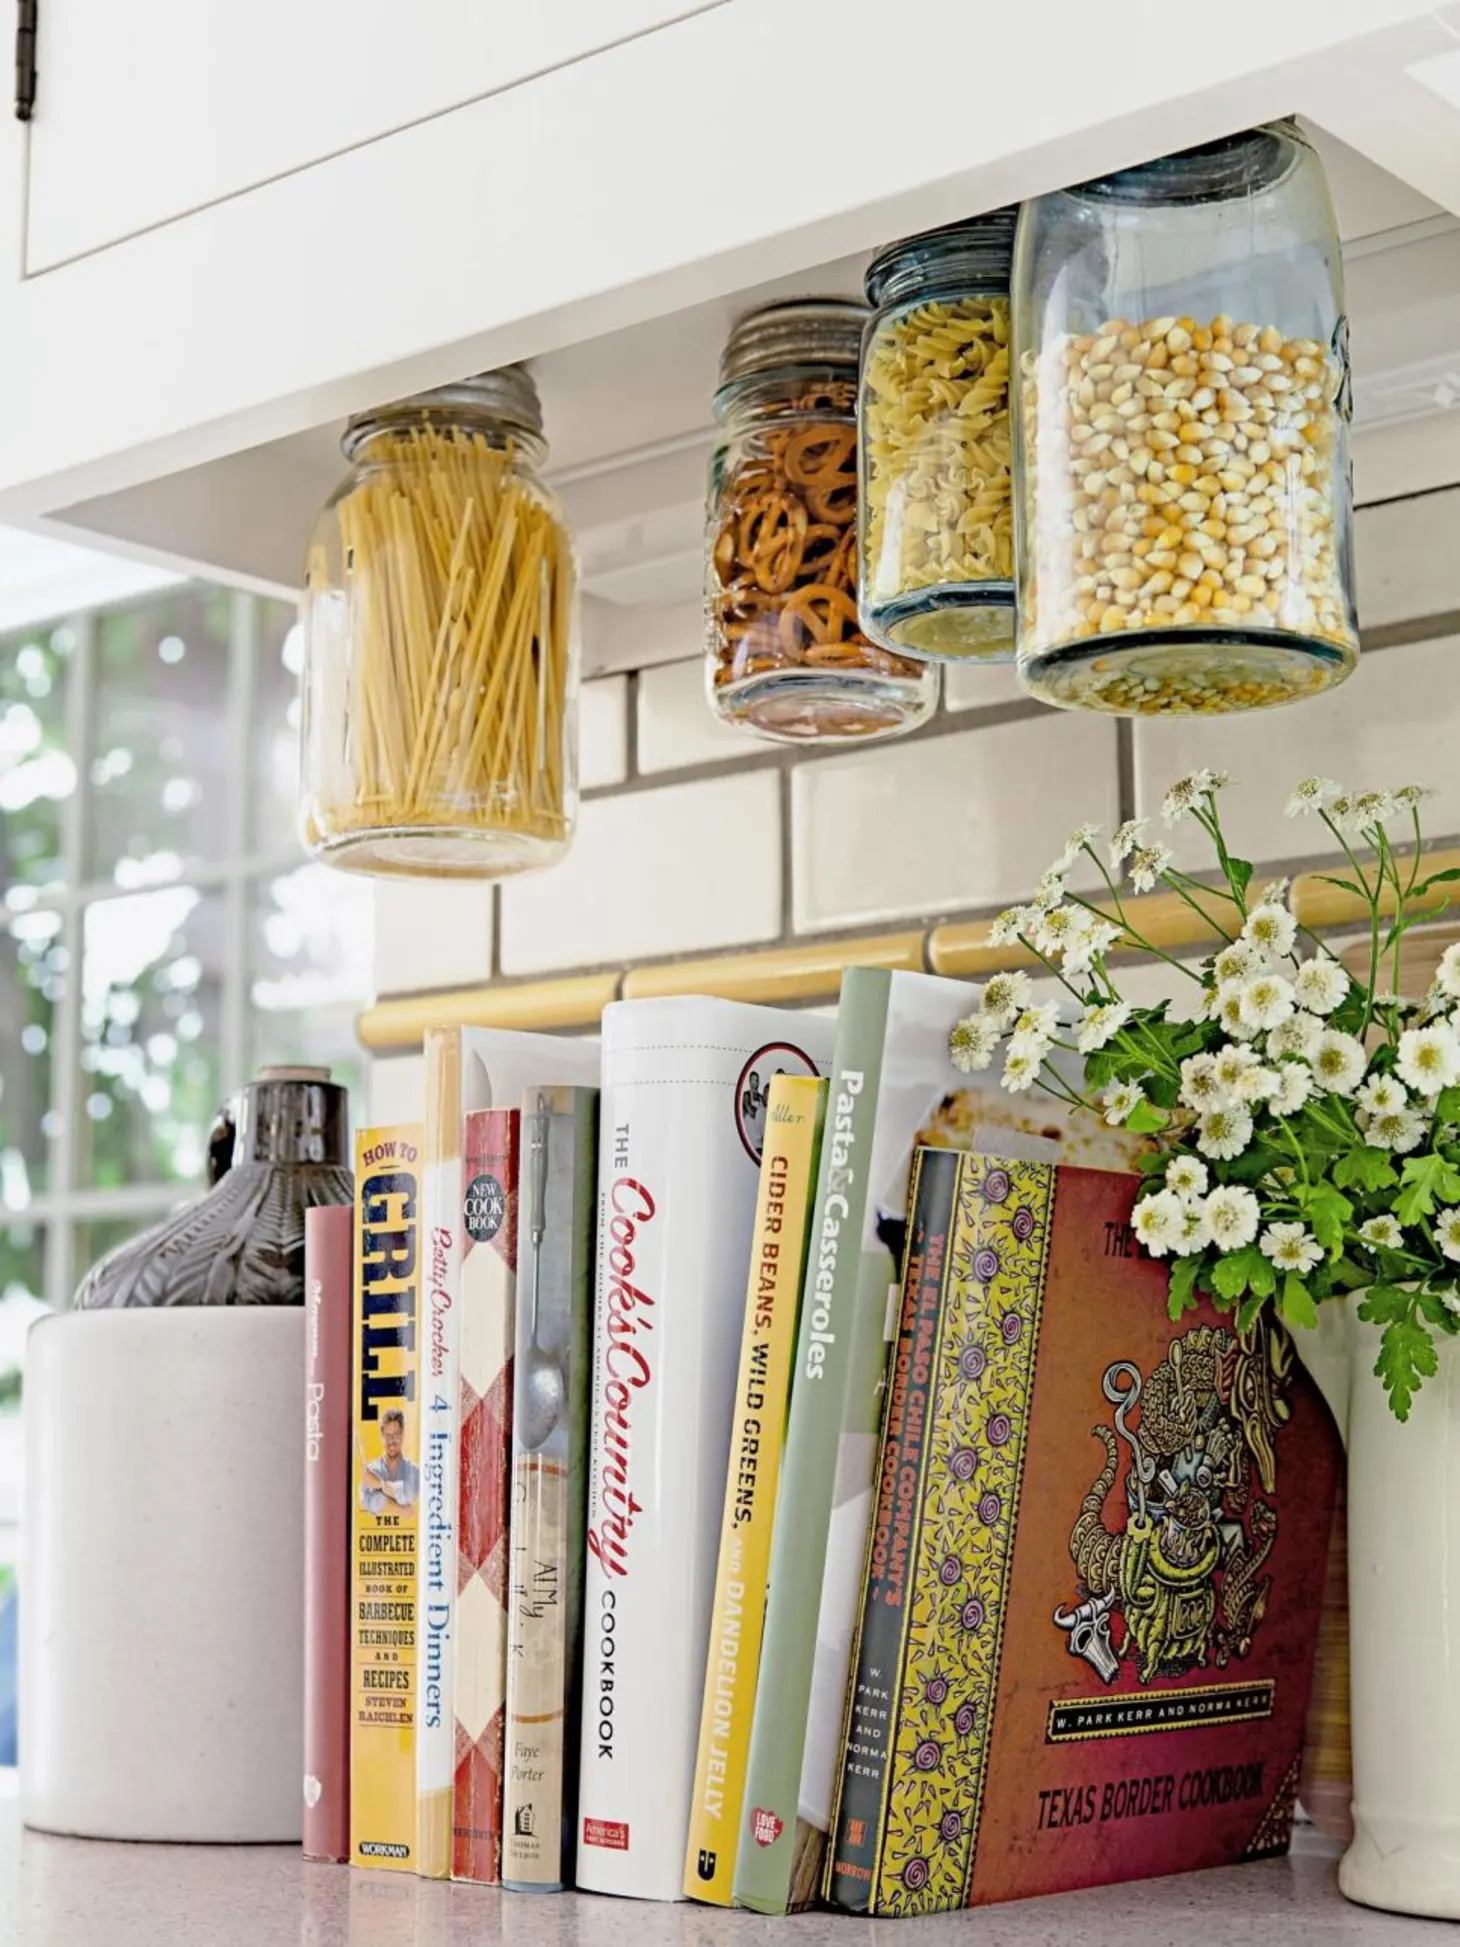 If you do not have any space to store dried foods, try tapping into the underside of your cabinet.
To do this, you will need some mason jars. Then, remove the lids from them. After that, grab a scrap piece of wood and place the flat top on it. Poke a hole in the flat top by hammering a nail into the center.
Next, screw the lid through the hole you have poked into the underside of your cabinet. Then, you only need to fill the jar with corn, cereal, sugar, or anything you like and tighten it to the lid.
Be careful when opening or closing the lid. You must hold the bottom of the jar when doing it.
9. A Pantry replacement idea Between The Studs
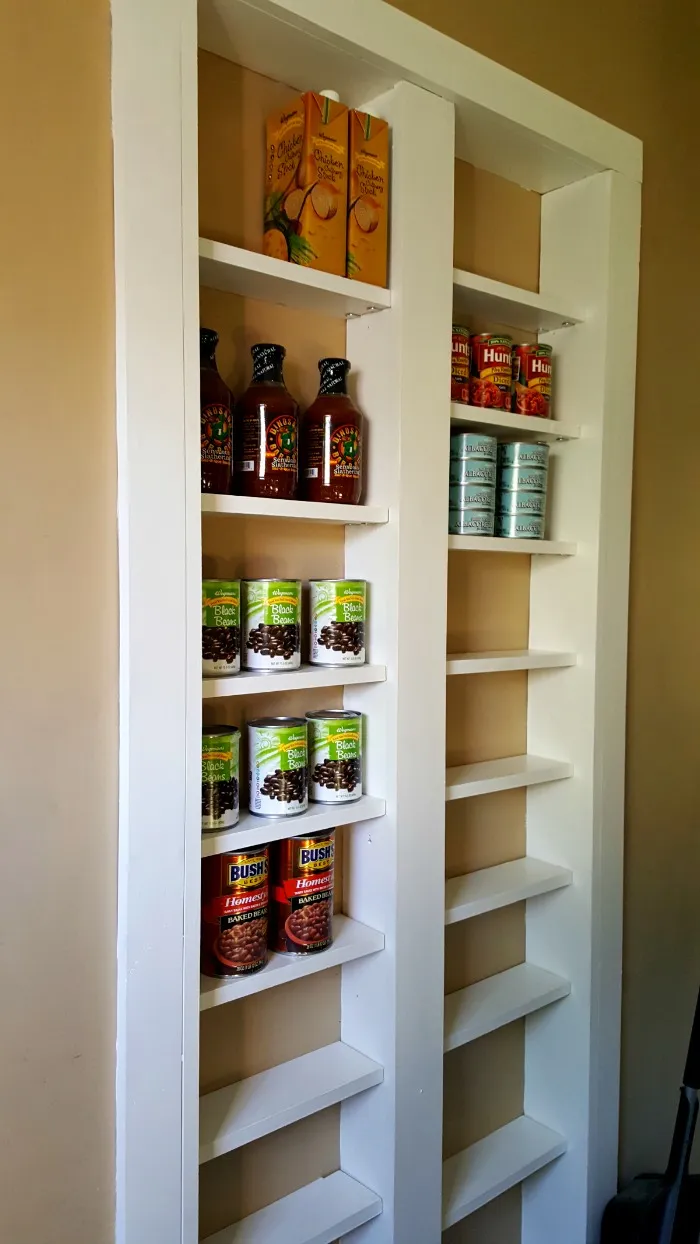 You might be able to fit a pantry between the studs in the hallway leading from the kitchen to the rear door if your kitchen is only 10 feet by 10 feet. Given that the studs in the author’s house are anywhere from 12 inches to 16 inches apart, it was impossible to predict how far apart these two would be. When deciding how wide to make this opening, remember that the studs in your wall will determine the limits.
If you’ve already safely encased the dated wiring in safe storage, you may move on to installing the new pantry. The proper method would be to conceal that side piece beneath the molding for the pantry; however, you may need to improvise based on the materials at hand. Working with molding, shelving, and painting is the next step. It would look best if the color matched the interior doors and trim.
Last, instead of using L-brackets to mount the shelves, you might use those small adjustable clips instead. It will save you money.
8. The Stainless steel pull-out storage idea
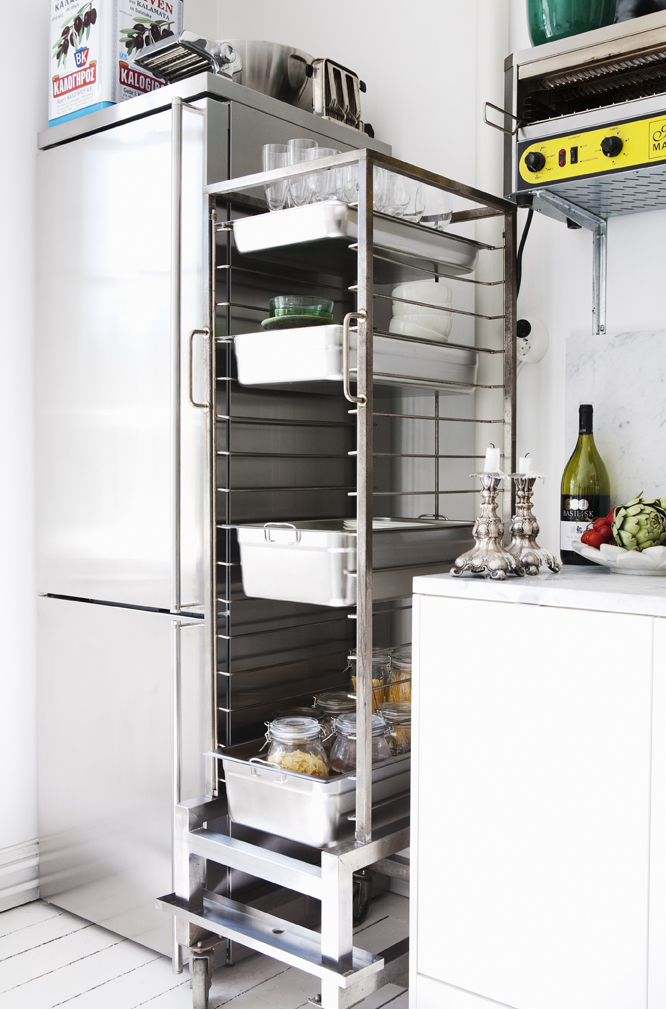
It is one of the best kitchen pantries on the market, and if you want to imitate the design, all you need to do is buy. A 10-Tier Aluminum Baking Trolley by CaterWare that Rolls on Castors.
7. Build your own Slimline spice rack
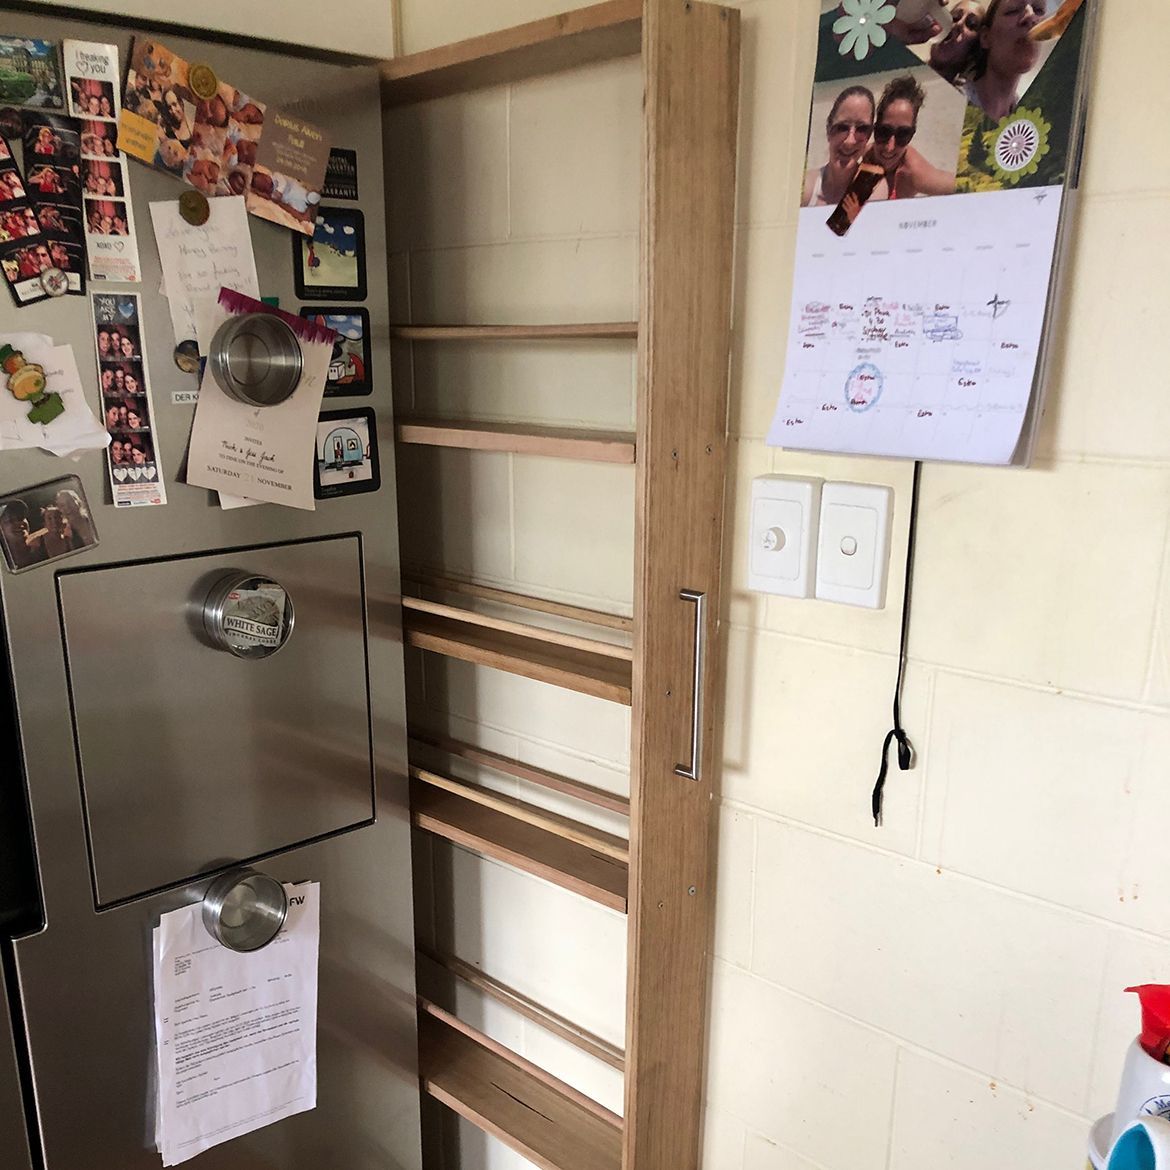 Start by cutting the wood. Cut four dressed Pine 89 x19mm into 90cm shelves. Cut Pine dowels to 92cm for the railings. Arrange your shelves and sides. Set the top two shelves apart 23cm, then the bottom three 33cm.
Mark the top and bottom shelves on the side panels. Mark rail hole placements 4.5cm above the shelves and 1.5cm from the side panels. Create a guide by transferring rail hole measurements onto scrap wood. Drill holes and clamp the guide to the side panel. Drill 10mm into the side panel.
Add 10mm to your guide’s thickness and wrap the painter’s tape around the drill bit. The tape indicates that you’re only drilling 10mm into the side panel, and the guide keeps your holes uniform. Drill side rail holes. 3mm drill bit per shelf side. These holes will be between the top and bottom shelf lines. For the rest five steps, follow our resource area.
6. Create a Spot for a Faux Pantry
 If you still have a spare room in your kitchen but smaller for a dedicated pantry, you can try creating this faux pantry.
This faux pantry consists of many shelves with different purposes. You can create it by simply screwing dowels to the wall. Then, add as many shelves as you want. You can also add a shelf that holds a recipe book for you.
5. The DIY TWO-TIER WOOD PRODUCE STAND from wooden crates
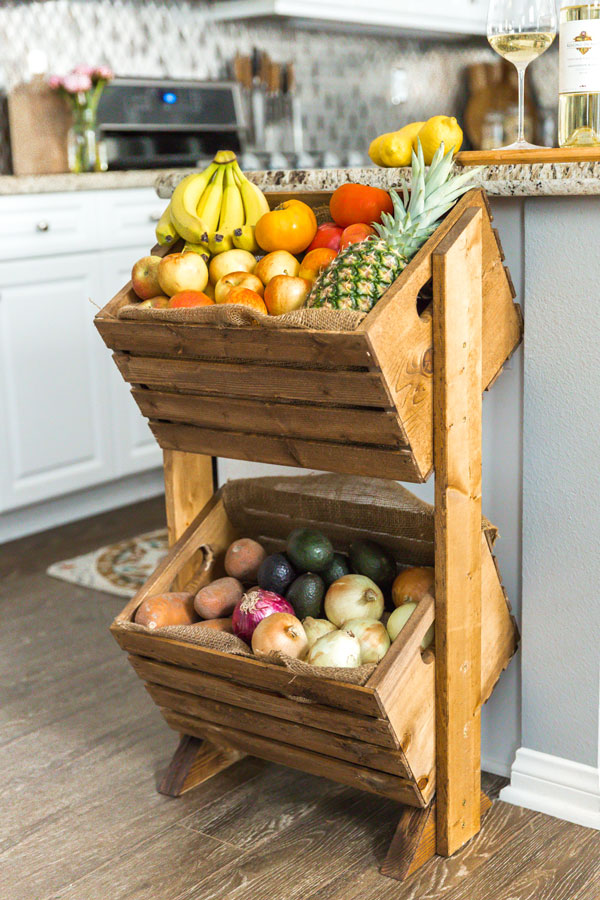 You can make your own version of this two-tiered wood produce stand to keep your fresh fruit and vegetable selection organized and off the counter. It’s a convenient solution outside the pantry to complete your kitchen island feature. With it, you can quickly reach your fresh ingredients, such as avocado, onion, tomato, or sweet potato.
General instructions:
- Use the saw to make two boards, each measuring 34 inches in length, from the 1x4x8 piece of lumber.
- To make a 30-degree angle, cut the top of one end of each board.
The sidewalls of the produce stand will be made from the following materials:
- Make two boards that are 10 inches long from the 2x4x8 board.
- Use a miter saw to shave off 45 degrees from both ends.
4. Build a New Pot Rack With an Extra Shelf
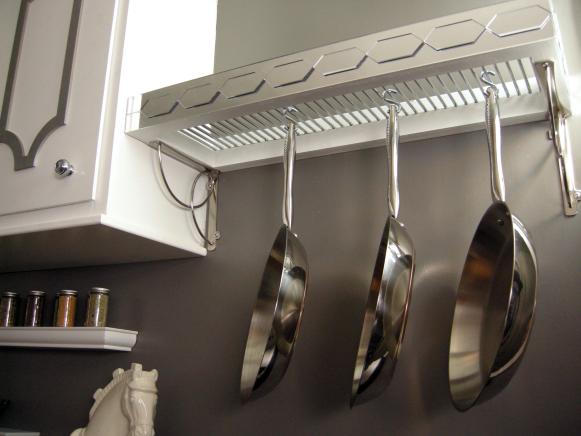 Create the frame for the pot rack by cutting the MDF. One rectangle will be nestled inside another to create a thicker, double-thickness frame. To support the metal grate shelf, you will need to cut the inner rectangle shorter than the outer.
Create yours to fit the opening size of the metal grates you intend to use. Start with the smaller rectangle and wrap the larger one around it. At the bottom of the rack, ensure that both layers are flush. Use wood glue and Brad’s nails to ensure the pieces stay there. Apply two coats of primer to the frame once the glue has dried. Last, use construction adhesive to secure the decorative mirror pieces to the pot rack’s exposed edges.
3. Sort the Items in Your Drawers
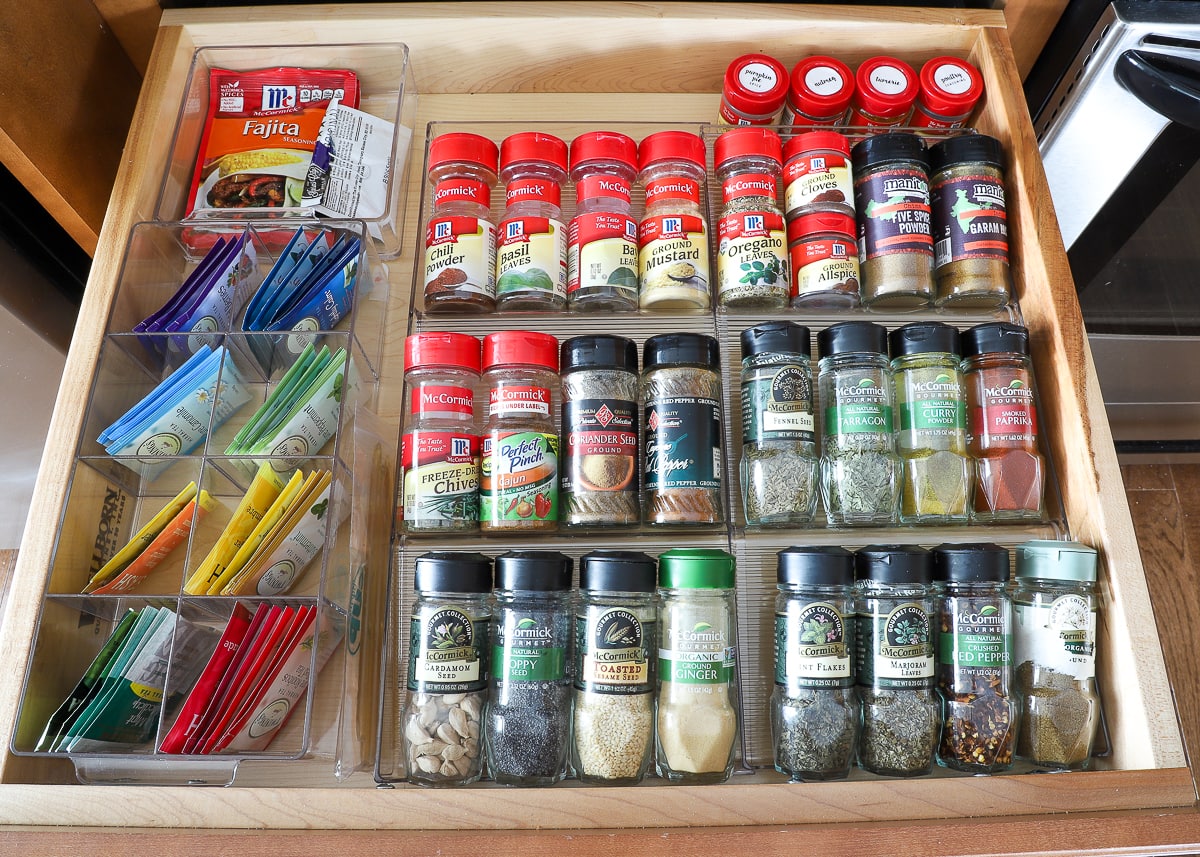 The drawer can be a great place to stash away clutter. It does not mean you can let clutter conquer this space, though.
You can keep things tidy inside your drawers by investing in drawer dividers. Clear containers may work like a charm. You only need to place them in the drawers. Then, sort out your snacks and put them in the containers.
2. Build the roll-out cabinet idea
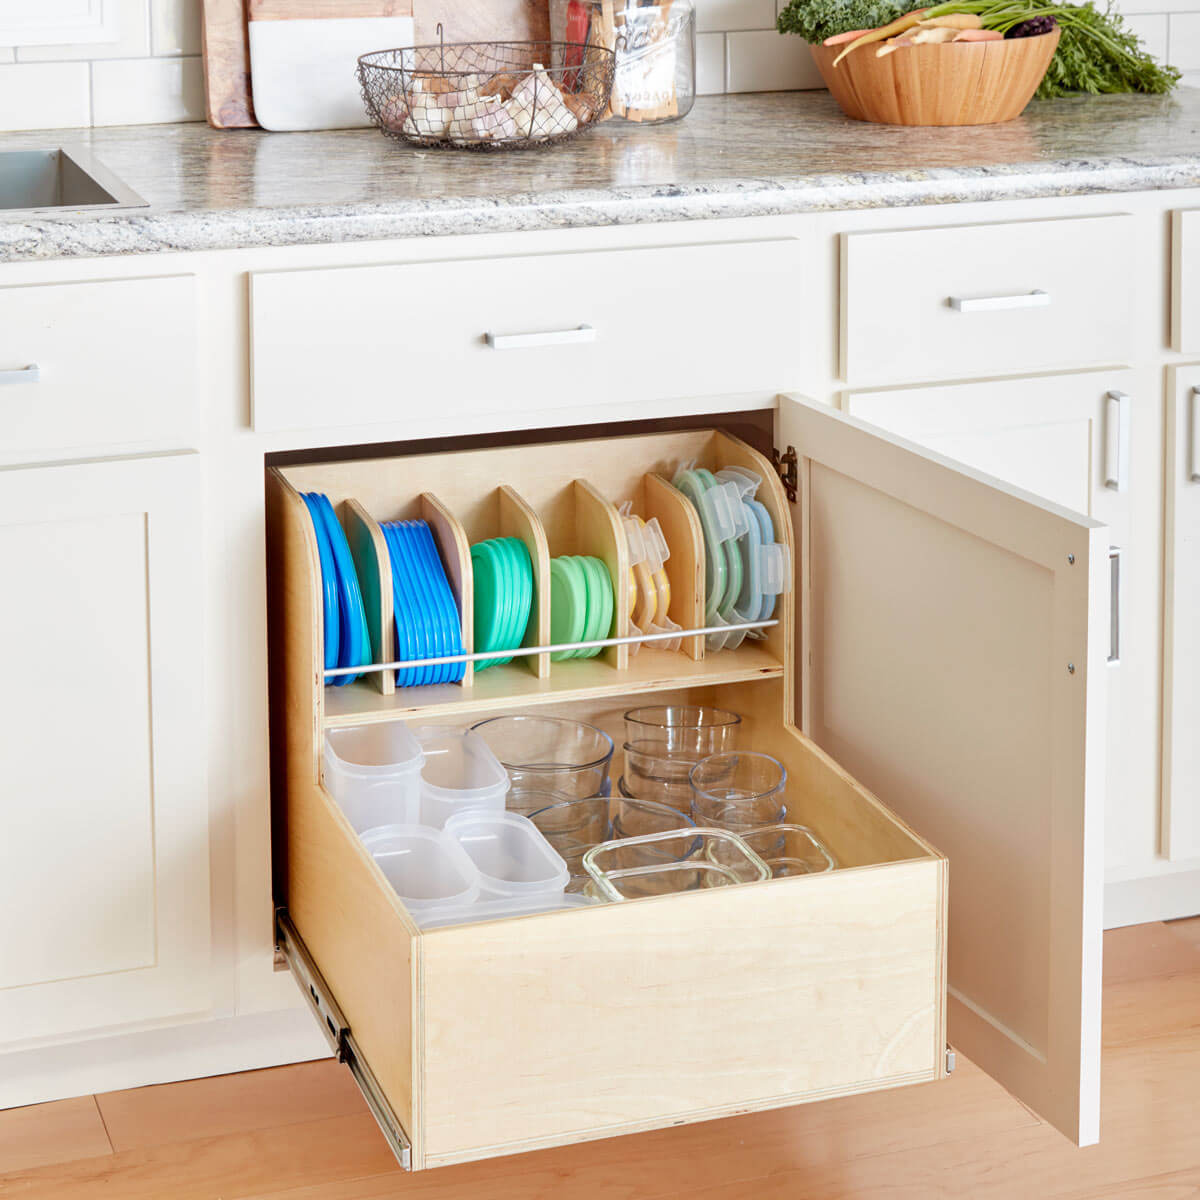 You’ll also need 22-in. full-extension ball-bearing slides and a 1/4-in. Aluminum rod. Measure the cabinet opening. Most base cabinets are 23 inches deep and may fit this container storage cabinet roll-out. If the distance from the face frame to the cabinet back is less than 22 inches, you’ll need a shallower roll-out and shorter drawer slides. Trim the sides.
After modifying components B, C, D, and E for cabinet width, cut off all but the carrier bottom. Make L-shaped cuts with a table saw. You can’t see how far the blade cuts on the underside, so stop an inch short of your inside corner lines.
Above, Cut curves using a jigsaw. Trace a 1-gallon paint container to draw the side panel curvature. Draw the dividers’ radius using a quart-size can. Jigsaw the side and divider curves (Photo above). 100-grit sandpaper smooths curved cuts.
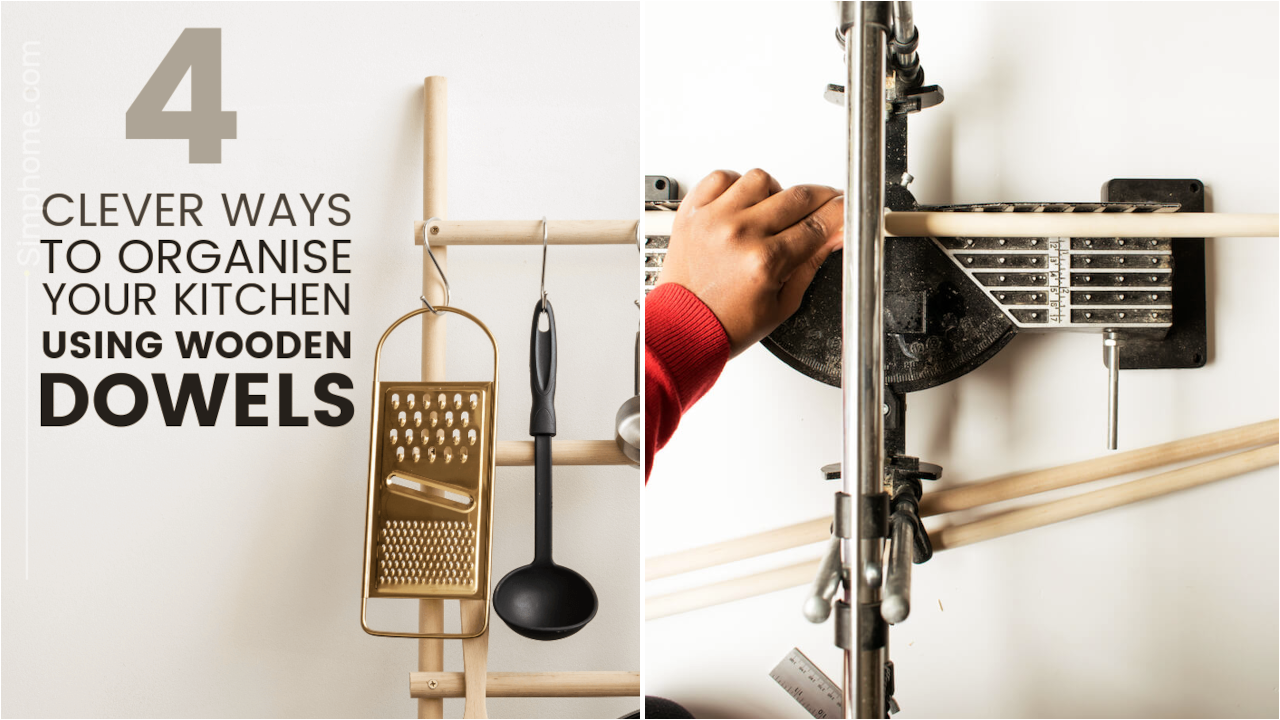
1. The DIY Kitchen Basket Shelf with DIY Dowel Joints
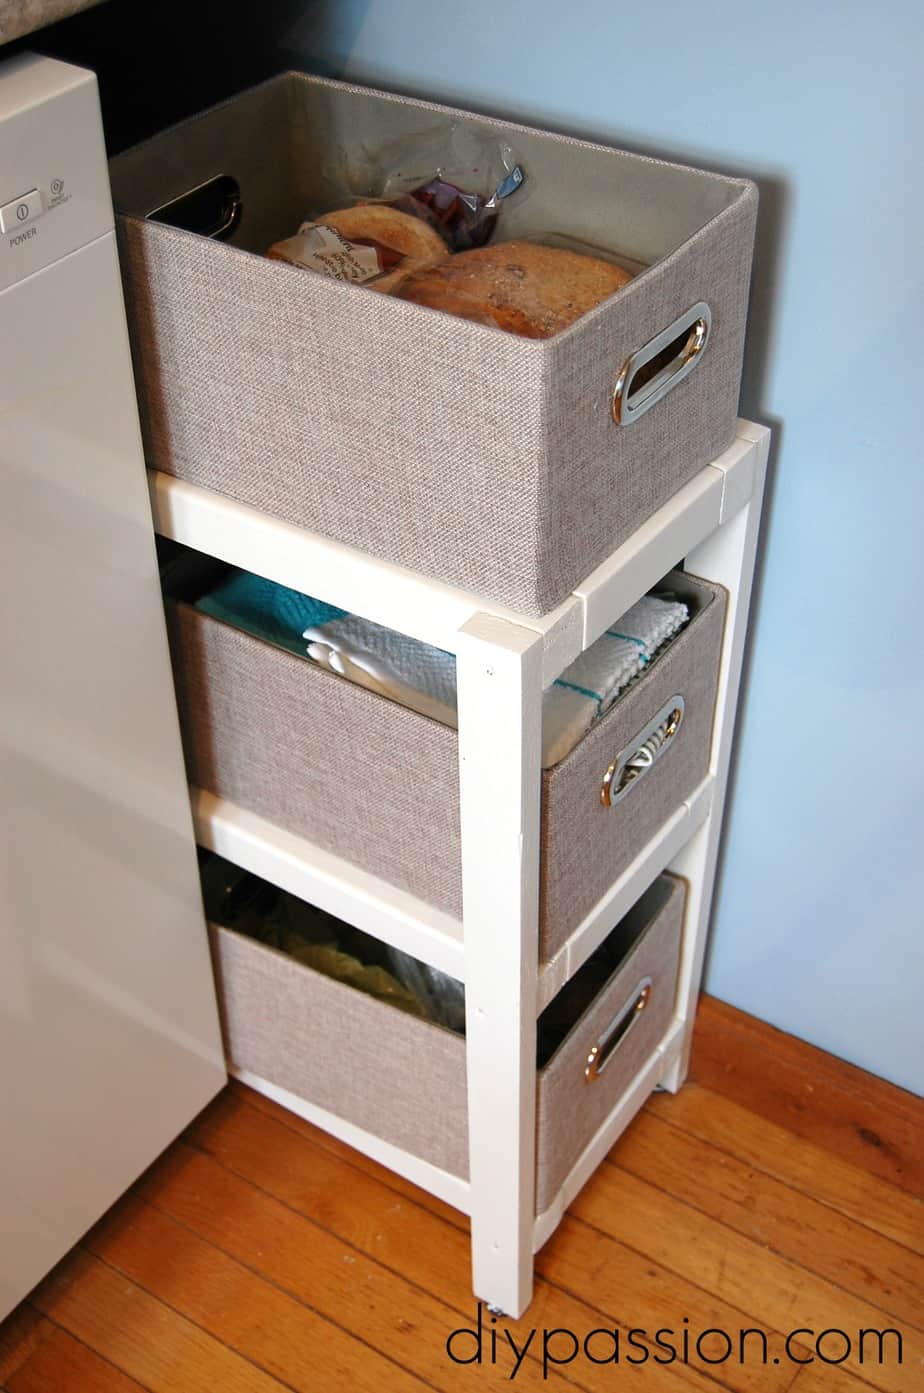 To begin, consider what you plan to put on the shelves. We propose a system of baskets for often-used items like tea towels, root vegetables, and daily bread, which should help alleviate the problem of clutter. Another difficulty is ensuring the shelf will fit in the space between the wall and the dishwasher. Choose 1x2x8 framing lumber for the challenge’s legs, then fasten 8-inch-wide shelves to it. You will go beyond using simple glue and screw connections (called “butt joints”).
In the project, you will use dowel joints.
Dowel joints can be made using a drill and a handsaw and are stronger than a butt joint.
Construct a square or rectangular shelf, and use dowel joints to fix the corners.
Next, you must screw the legs into place and attach the shelves. There will be no extravagant extra after the step.
The dowel joints will fix the whole construction intact.
References:
12. Mom4real.com
10. Stowandtellu.com, Hgtv.com
9. Livefromjulieshouse.com
8. Simphome.com
7. Workshop.bunnings.com.au
6. Stowandtellu.com
5. Kj.com
4. Hgtv.com
3. Thehomesihavemade.com
2. Familyhandyman.com
1. Diypassion.com