6. An Easy Ikea Desk Hack: Create a Custom Desk Using Ikea Ivar Cabinets!
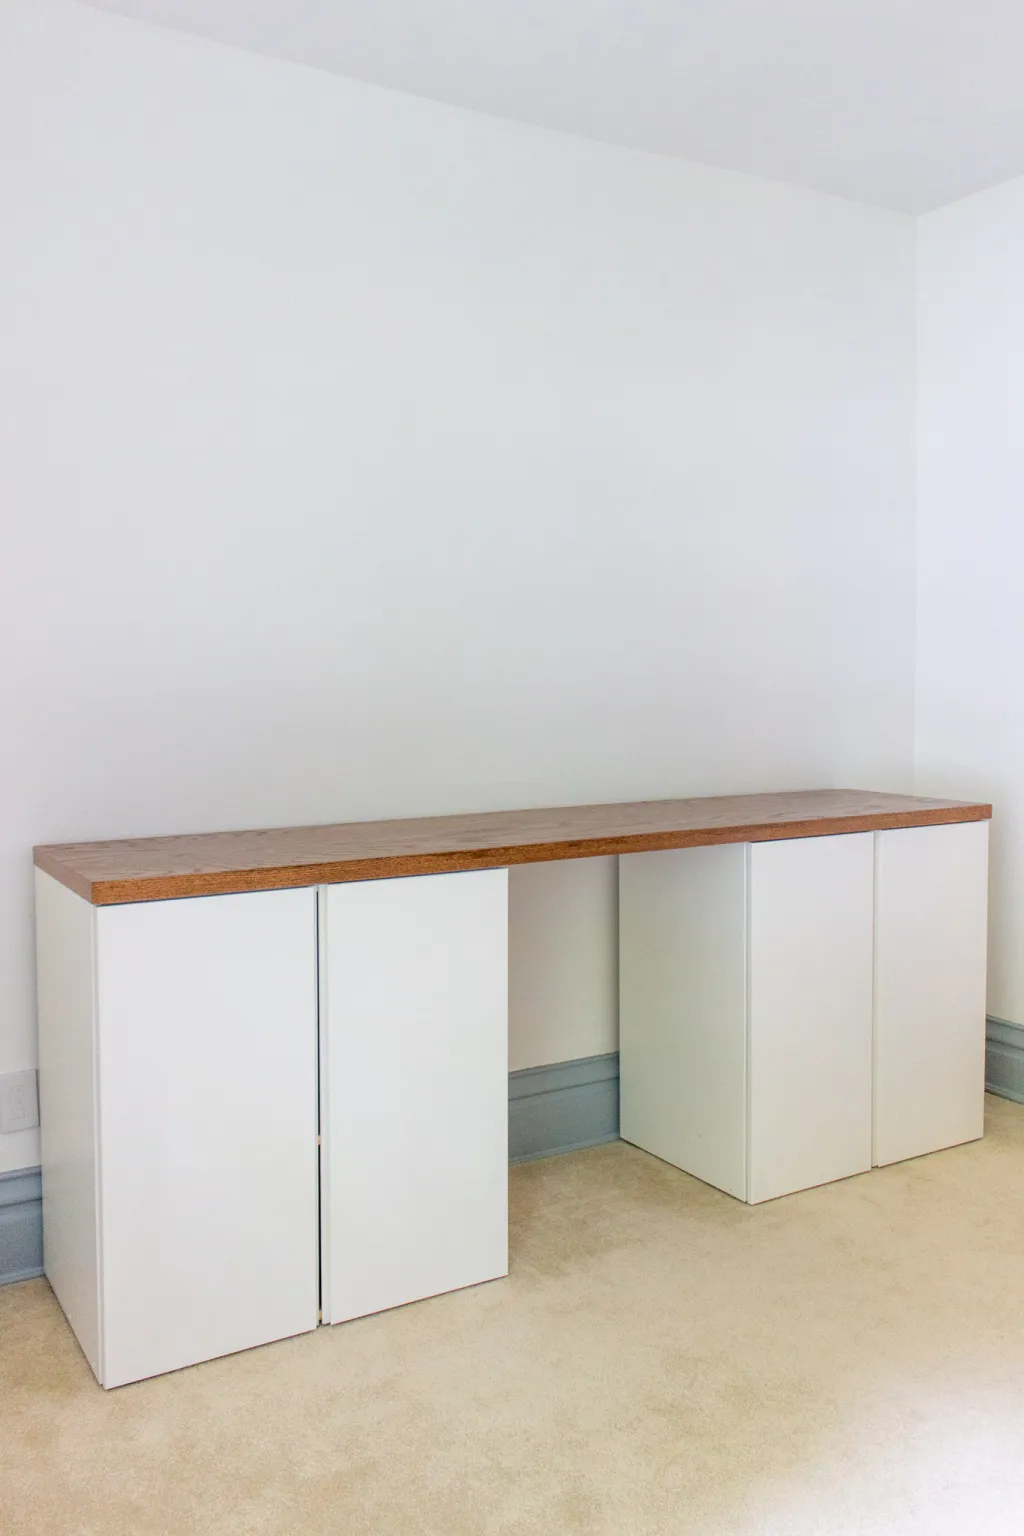
Looking for the perfect desk that meets your specific needs? Look no further than Ikea! With DIY magic, you can transform Ikea’s versatile Ivar cabinets into a personalized desk that ticks all the boxes.
Initially considering a wall-to-wall faux-built-in desk using Ikea kitchen cabinets, the height challenges, long countertops, and potential relocation turned the author off the idea. However, after extensive research, Mandy discovered the Ivar cabinets and knew she had found the ideal solution.
Here’s why the Ivar cabinets were the winning choice:
1. Customizable: The unfinished pine cabinets offer endless possibilities. The author painted them with cabinet paint, matching the colors of the room’s walls.
2. Ample Storage: Deep cabinets with adjustable shelves provide plenty of storage space for all your essentials.
3. Ideal Height: The desk is designed to accommodate a counter-height stool and keep the computer out of reach for kids, with a perfect height of 32 5/8 inches.
4. Budget-Friendly: At just $90 each, the 20-inch deep Ivar cabinets are a cost-effective option.
5. Readily Available: Despite stock issues at Ikea, the Ivar cabinets were in stock and easily accessible.
To create your own Ikea Ivar desk, here’s what you’ll need:
- 2 Ivar cabinets
- 2 sets of adjustable Eket feet
- Primer, paint, or stain (optional)
- Sandpaper (150/220 grit)
- Level
- Drill
- Furniture straps
- Desktop supplies
Once you have your Ivar cabinets, assemble them according to the instructions. Consider door placement and leave out shelves until the cabinets are in their final position. Next, decide whether to leave the cabinets unfinished or paint/stain them. Sanding may be necessary even though Ikea claims they come ready to paint.
Before proceeding to the desktop, determine the desired spacing between the cabinets. Take into account the room’s proportions and personal preference. Ensure the cabinets are the same height and level by attaching adjustable feet. If your floors are uneven or you have carpet, the Eket feet are the perfect solution to adjust the cabinet height.
To secure the cabinets, consider using wall attachment hardware for added stability.
Finally, it’s time to tackle the desktop. Measure the desired span of the desk and determine the overhang. Cut and finish the desktop, then position it on the cabinets and attach it with wood screws.
Mandyjackson.com
5. Dream Ikea Kitchen Just in Time for the Big Day: A Hack Story!
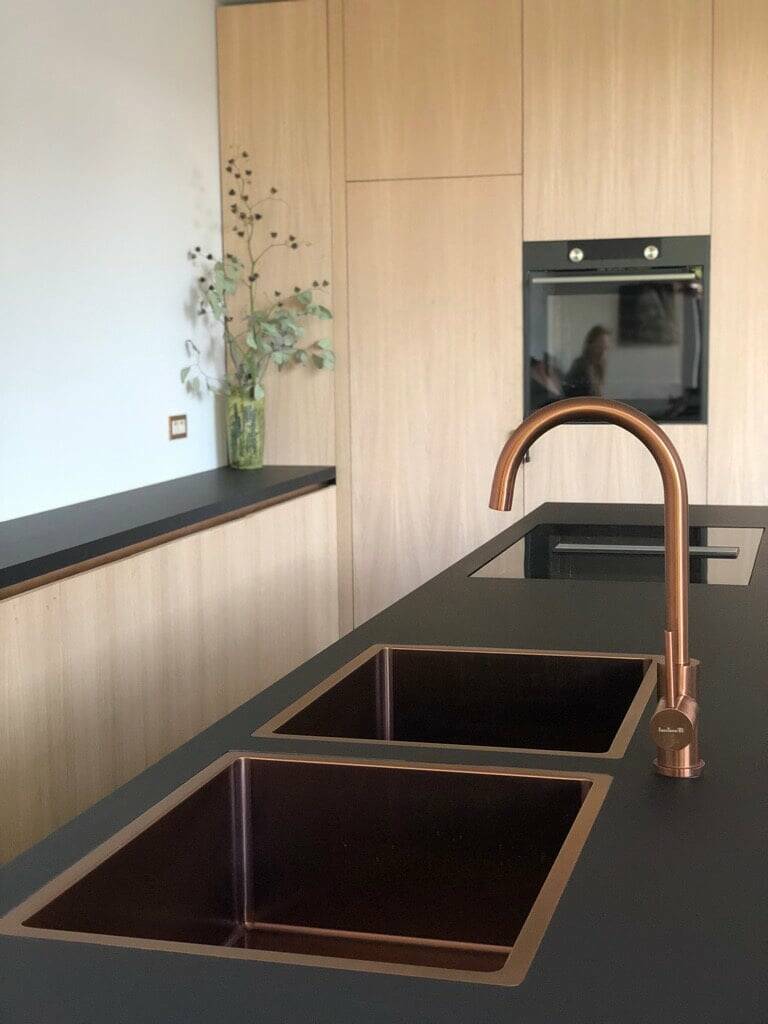 When time constraints dashed the plans for a custom kitchen, IKEA came to the rescue! With only three weeks before kitchen companies closed for the holidays, there was no time for production. So, a redesign using IKEA’s in-stock cabinets became the best option.
The kitchen was transformed using standard 40-60-80cm width elements to fit the floor plan. Achieving the desired height involves using custom plywood legs instead of standard PVC ones.
But the challenges didn’t end there! While assembling the cabinets, the old kitchen was still in use. The positioning of the kitchen was switched, with the dining room becoming the new kitchen and vice versa. Plumbing and electricity had to be adjusted accordingly.
To personalize the kitchen, the VEDDINGE melamine fronts were replaced with new oak veneer fronts. Some fronts had to be modified, extending from 2cm above the floor to 3cm, allowing for a handleless gutter not part of IKEA’s range.
Key IKEA Items:
- METOD kitchen cabinets
- VEDDINGE door
Other Materials and Tools:
- Veneer fronts
- Brass sink and tap
- Black door handles
- Miele downdraft hood
- ATAG black oven
- Reginox Miami copper sink and tap
- Black solid HPL worktop
Creating the dream IKEA kitchen involved handle-less cabinets with overhanging doors, attaching an OSB or plywood base on the floor, fixing the cabinets on top, and adding a wooden frame with a metal C-profile.
The total cost and timeline included cabinets (€2800, 3 weeks), veneer (€1400, 2 weeks), appliances (€5000), paint (€300, 2 days), and worktop (€800, 3 days). This hack stands out because the IKEA cabinets are not recognizable, thanks to the custom fronts. The hardest part was achieving a custom look with standard elements, but the result was worth it.
Extra touches included a downdraft hood, a seating bench made from wall cabinets, a custom island worktop, and painted side panels and fillers.
Looking back, the effort put into this hack was well worth it. The fulfillment of having a beautiful kitchen every day is priceless.
~ By Ben Vandenberghen | Ikeahackers
4. Food Storage 101: Master Your Cabinet Organization!
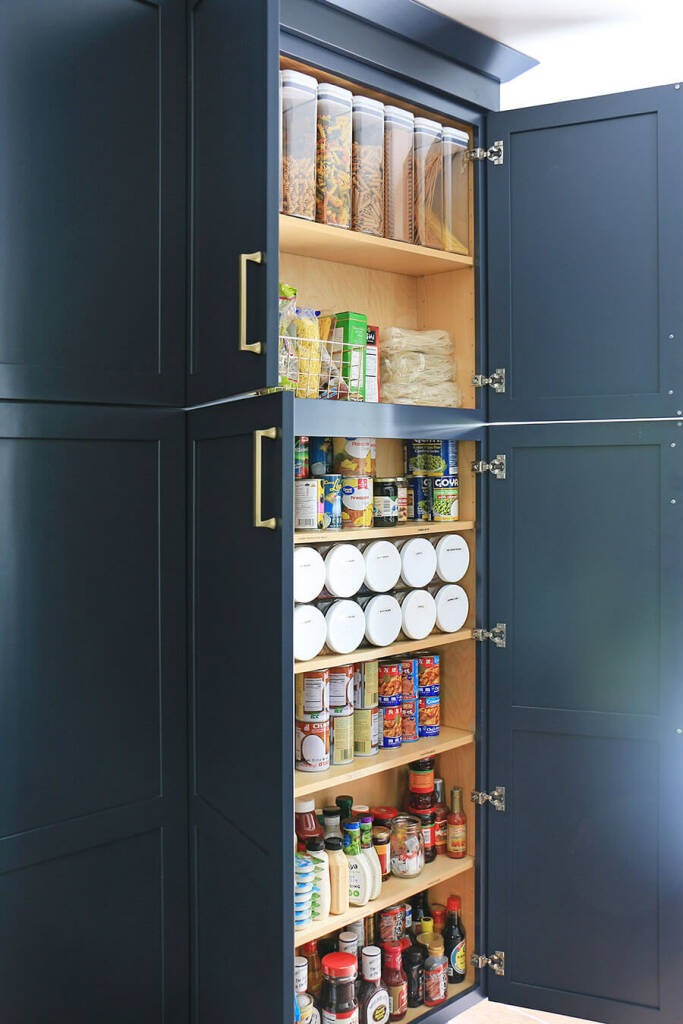
Here’s how to keep your food storage spot-on:
1. Dedicate Spaces: Group similar foods on shelves or cabinets. This way, when a section looks empty, you know what to add to your shopping list. Label sections according to your food habits, like canned fruits, dry beans, sauces, etc.
2. Label Everything: Use durable labels for shelves and food storage containers. This helps you quickly identify what you need and when to restock.
3. Re-imagine Storage: Don’t just stack containers; lay them on their side for easy visibility and access.
4. Go for Shallow Cabinets: If you’re designing your kitchen, opt for a shallow pantry that can fit all your food storage needs without sacrificing visibility or kitchen space.
5. Utilize baskets and trays: They’re perfect for sticky items, loose foods, or things you’d like to present to guests.
6. Choose the Right Containers: Vary container sizes and shapes based on food categories. For example, large flip-lid containers work great for cereals, while twist-top lids might be better for dry beans.
7. Leverage Drawers: Store specialized items like baking ingredients in an easily accessible drawer.
8. Plan Your Kitchen Layout: Mapping your kitchen can make a world of difference for efficient use of storage. Consider putting painter’s tape with written food categories on cabinets to visualize your new organization.
Remember, when a pantry section looks sparse, it’s time to stock up! Not only does this prepare you for unexpected events, but it helps when budgeting. Now, whip your kitchen cabinets into shape and embrace the power of organization!
Via: Homemadebycarmona.com