13. Organizational Bliss: Discovering the Ivar Hack’s Impact on the Charming Storybook Cottage Kitchen
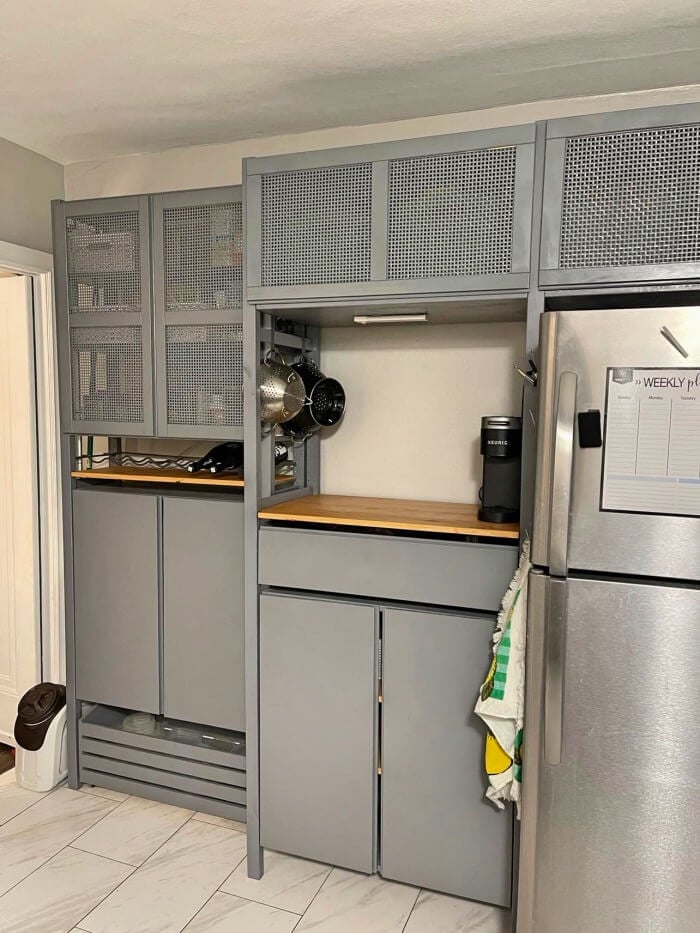 Jennifer created a viral-worthy storage in a vintage bungalow with an IKEA Ivar Hack. Rejecting modern looks, she opted for solid pine cabinets, experimenting with different setups. After initial attempts with fancy cabinet paint failed, she painted the cabinets Coastal Grey. The flexible Ivar system allowed for a coffee station, overhead cabinets, and a pantry setup.
All this came under $1000! Challenges included uneven floors and the need for a heavy finish to protect against potential splatters. Her taller friends appreciated the overhead storage while Jennifer nailed her a reliable bespoke storage solution perfect for giving an old kitchen a new lease of life. (IKEAhackers)
12. Increase your IKEA Hack Success Rate with Plykea
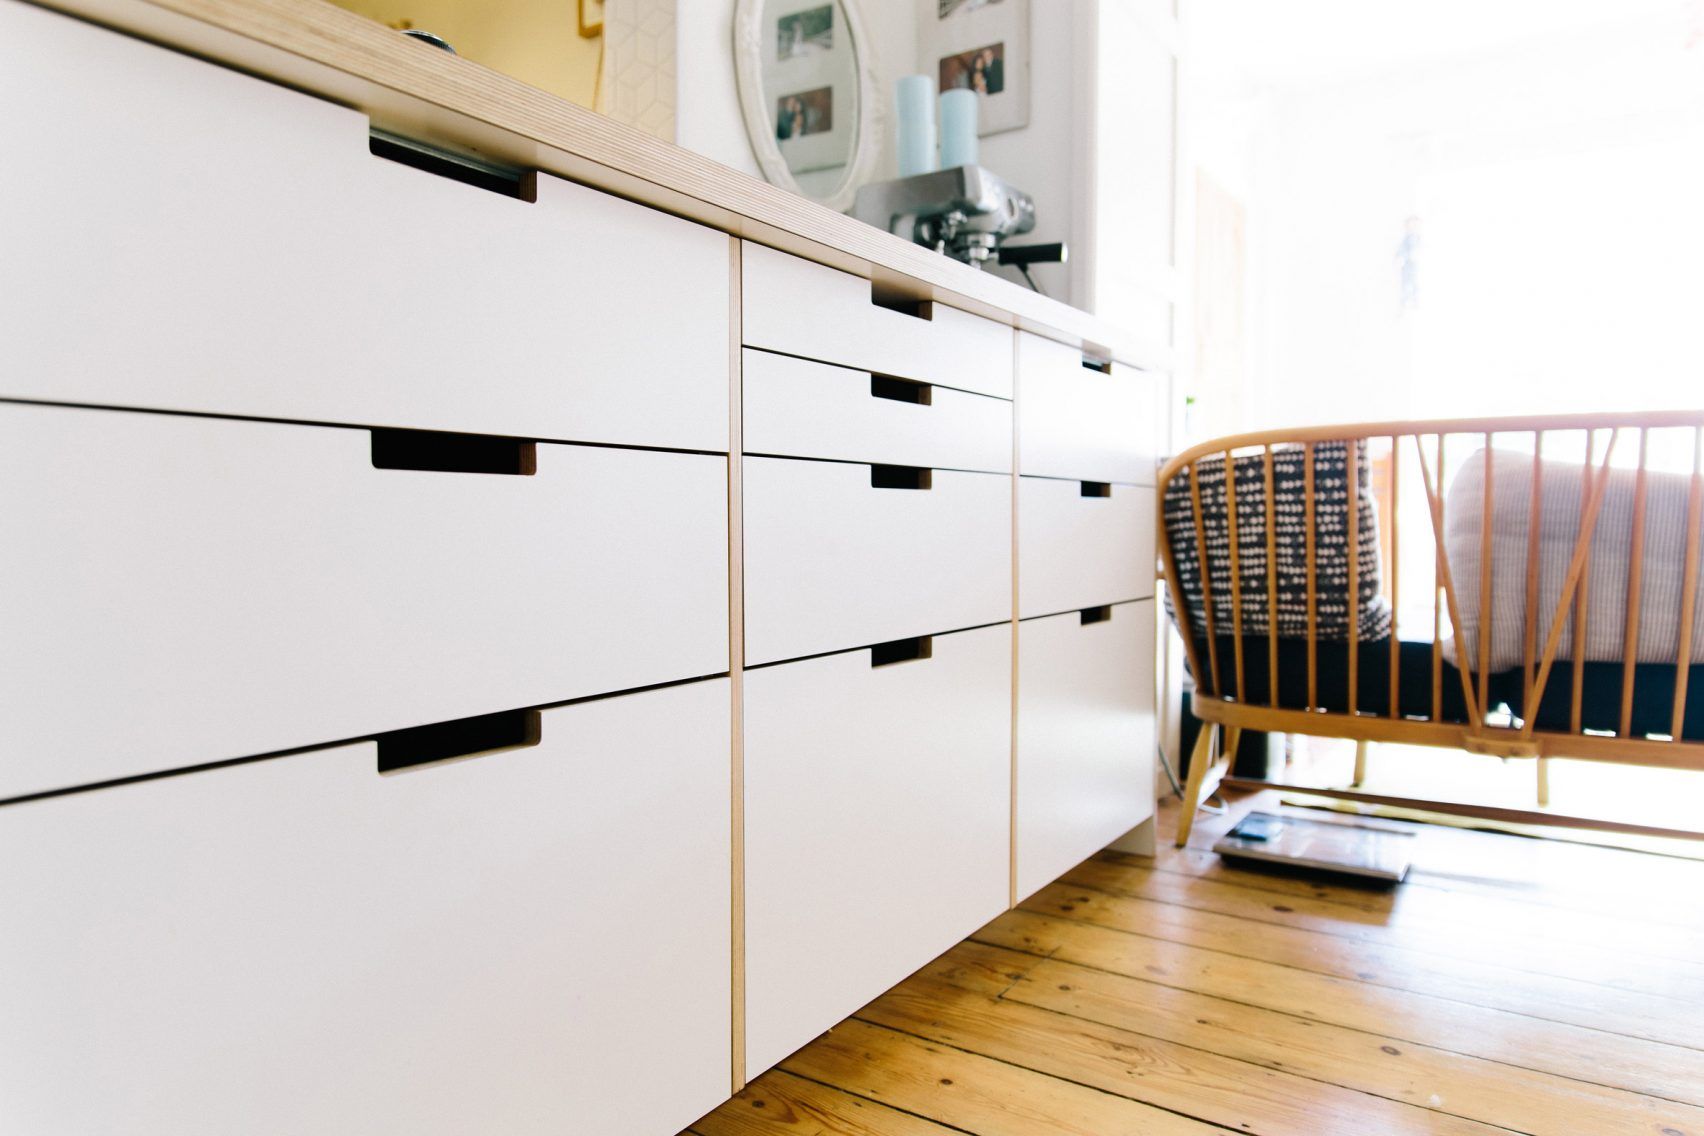 Startup Plykea transforms IKEA’s Metod kitchens using bespoke birch ply doors and worktops. Founder Tim Diacon, unable to find affordable custom cabinetry, initiated the venture with furniture designer Adam Vergette. Plykea’s offering includes options of wood or Formica fronts and varied handles. Currently focused on IKEA’s Metod, the company has received inquiries about expanding its range to accommodate other IKEA collections. Via: Dezeen.com
11. An architect-inspired kitchen makeover idea from the 30×40 Design Workshop
Turn your kitchen from drab to fab on a shoestring budget! One creative architect from the 30×40 Design Workshop proved it’s possible, drawing inspiration from classy eateries and galleries. The transformation began with a dark palette, ditching open shelves for sleek black panels and functional metal shelving. Clever storage, minimalist white cabinet fronts, dramatic lighting, and updated appliances followed.
Along with a few personal touches, he turned his ordinary kitchen into an extraordinary space worthy of a cooking show. Key lessons? Creativity and practicality beat budget constraints. For your own kitchen transformation adventure, DIY is the way to go.
10. How to Install Your Kitchen Cabinets: A Step-by-Step DIY Guide
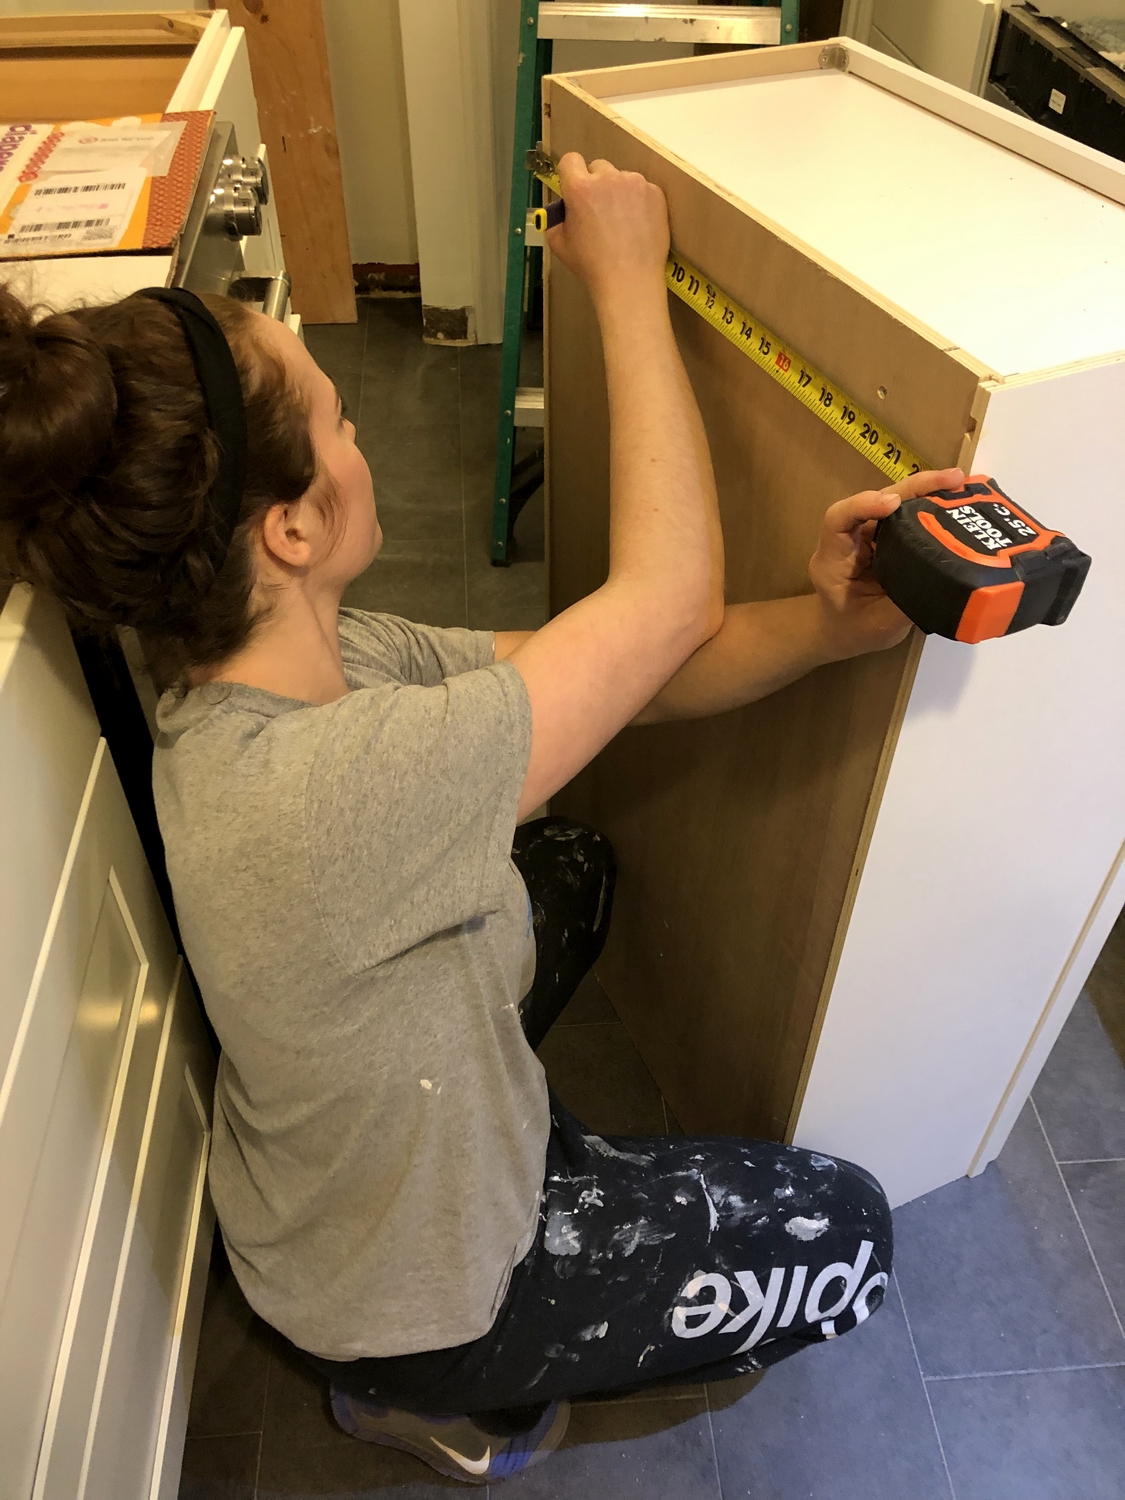 Ready to tackle the installation of your kitchen cabinets for the first time? Here’s a simple step-by-step guide just for you!
- Please learn from this helpful YouTube video, and remember the key principle: find studs, drill pilot holes, make cabinets level, and screw them in.
- Gather the necessary tools, including a long level (around 4 feet), construction screws, and wood shims.
- Begin with the filler and upper cabinets. Use the provided elevations and floor plans to determine their placement. Clamp the cabinet frames together, drill pilot holes, and secure them with screws.
- Ensure the upper cabinets are installed first to avoid obstacles when installing lower cabinets. Find the studs on the wall and mark their positions.
- Install the upper cabinets by measuring and marking the height of the support pieces inside. Drill pilot holes through the wood at those locations, and have someone hold the cabinet while you screw it into the wall (studs).
- Find the highest point on the floor for base cabinets and establish the top level. Draw a line along the wall using a long 2×4 and ensure each cabinet is level front-back and side-side. Use shims to adjust and prevent tipping. Screw the cabinets into the wall through the shims.
- Score and break off any excess shims sticking out above or to the side of the cabinets.
- If you have panels or drawers, follow similar steps for their installation, ensuring everything is aligned and secure.
- Don’t forget to retrofit cabinets for specific needs, such as accommodating sink lines or drilling holes for appliance connections.
- Finish off your cabinets by adding crown molding to fill gaps at the top, installing toe kicks, and using scribe molding to cover any remaining gaps between cabinets and walls.
Remember, watching the video and following the instructions will guide you through the process from start to finish with minimum error. Take it step by step, and you’ll have beautifully installed kitchen cabinets in no time. Happy DIYing!
Create-enjoy.com