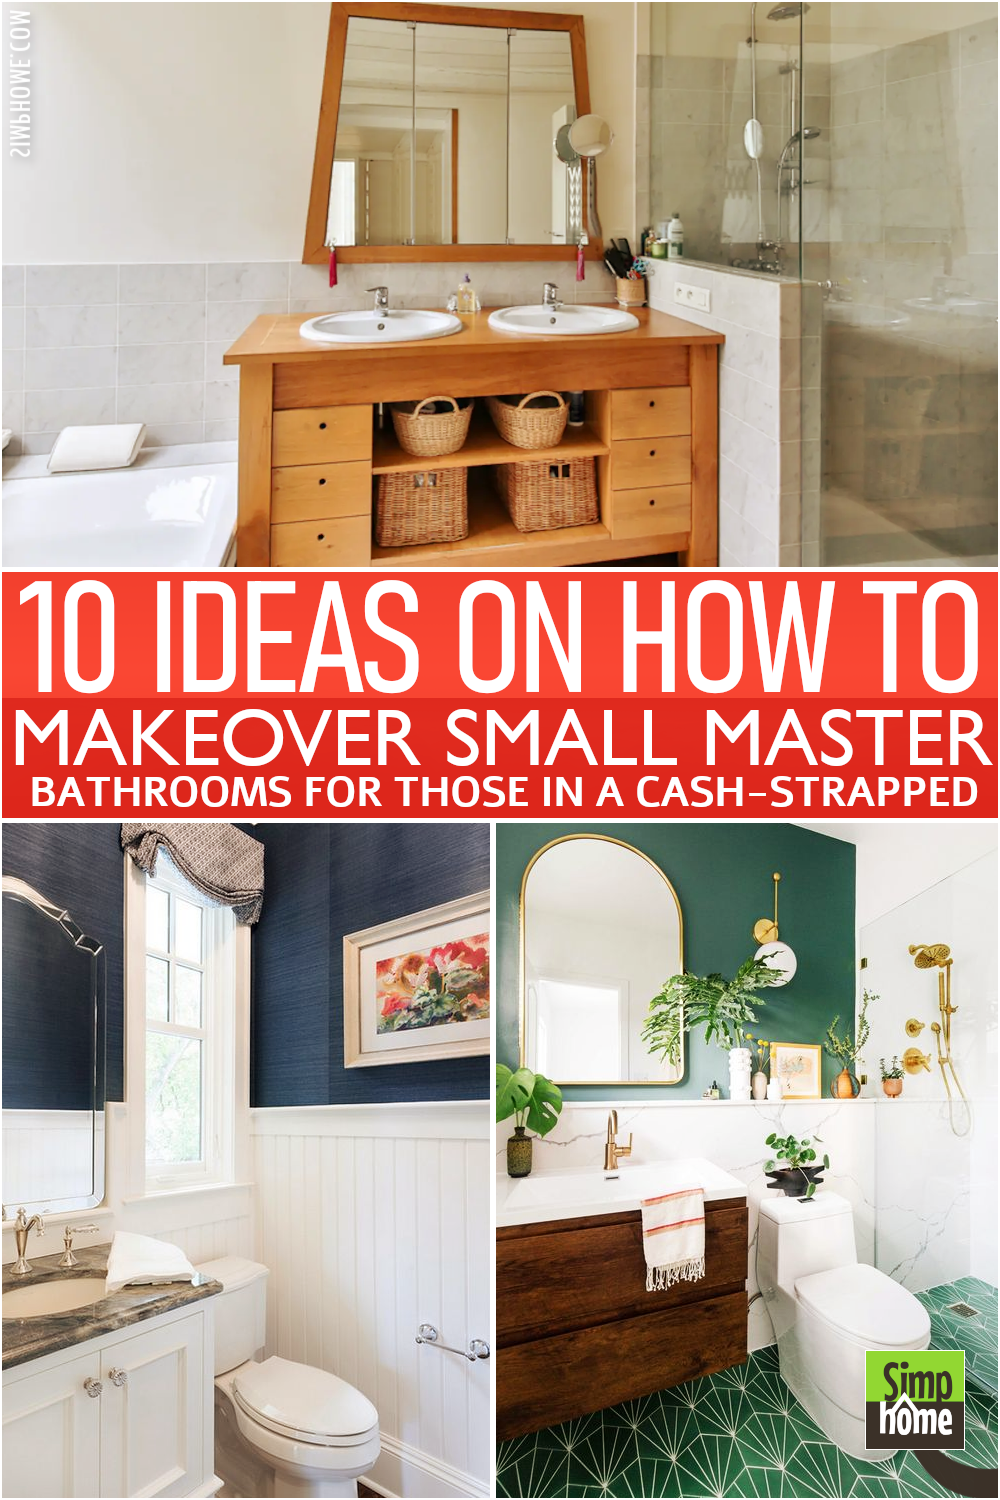
Below are 10 Small Master Bathroom Makeover Ideas to design an organized and stylish space for you.
Key Takeaway:
- Owning a small bathroom does not have to make it difficult to find storage solutions.
- Hanging toiletry bags from the wall, for example, can give you the amount of space you need at the sink.
- You can utilize a shelf under a window to hold towels and toiletry bags.
- Adding a pullout shelf in the shower can help to keep your shower free from clutter.
- Adding a wall-mounted cabinet can give you the extra storage you need while maintaining style.
- You can hang a basket on a door to hold your towels and toiletry bags.
- A towel rack on top of the shower door is another good place to hold your things.
- Using a tiered tray below your sink is also a great trick for keeping everything in sight and easily accessible.
- You can add baskets to the back of your shower wall, too, to help you with better bathroom organization.
Every small bathroom detail does matter. But when you have all the right items, a small master bathroom makeover can make it look modern and tasteful.
Are you thinking about turning your bathroom into a lovely area, but you have no idea where to start? Or maybe you are thinking about remodeling your bathroom, but you don’t know where to begin. Here, we are going to offer you some help.
If you simply want to update the look or add new functionality to your current bathroom, stick around because we have probably found something new. Here are ten small bathroom renovation ideas from Simphome, and let’s begin the countdown.
🔊10 Small Master Bathroom Makeovers Video:
List Entries:
10. Repaint the Wall and Add a Wooden Vanity
 As a good rule of thumb, if a room has more light, the larger the space will appear. Ideally, you wish to create a balance between a surface that reflects light and dark colors.
To do this, choose a patterned floor that blends well with a wooden vanity. Next, repaint the bathroom walls teal color that can reflect natural light. This hue will help you brighten up the whole room.
Also, add a thin glass panel to separate the toilet and shower room. This option is better than hanging a shower curtain that tends to block the view. Besides, the glass is transparent and sleek, which is perfect for a modern bathroom.
Relevant instructions:
- No 1. Begin the painting from the ceiling and work your way down.
- No 2. Use a tennis ball to apply a smooth layer of paint onto the walls, then follow up with a roller for even application.
- No 3. Apply two coats of paint, and you are all done!
- No 4. Apply the same technique to the ceiling, then let it dry for 24 hours before applying the second coat of paint.
Optional:
Discover the Light by Replacing the Window
If you have an older home and your bathroom window is small, consider installing a new one to bring more natural light into the room. Several options include tempered glass, frosted glass, or a more traditional louvered design. In addition, upgrading to double-pane glass will save you money on your energy bill.
9. Consider An extra Bathroom Storage with Bar Cart
 It would be best to have some creative small-space storage hacks to tackle the limited space in a tiny bathroom. Besides, they will make your life easier.
Take a bar cart and use it to house your bathroom essentials and towels. Or, if you have enough space, take a corner to place it in the bathroom permanently. Keep your towel or bathrobes neat and organized by using the adhesive hooks on the inside of your closet doors. You can even take some fancy baskets and mount them on the wall for storage (shelf style) if it is necessary.
Alternatively, to acquire more storage solutions, you could add a tall mirror with a shelf to the back if you have enough space to keep everything organized.
Relevant instructions:
- Find a bathroom spot that is clear of all furniture.
- Measure the size of the door to ensure it is big enough for you to use.
- Use the mirror to line up the corner, so it’s at an angle, then slide it into place and mark with a pencil where you want to place it permanently.
- Find a bar cart that will fit as your storage unit and make sure it can withstand high tensions placed on its plastic material parts by you unless you prefer to replace them with metal ones (recommended).
8. Refrain Overcrowding Floor
 The denser the floor space in your bathroom, the more you probably end up with a petite room. Not to mention the usual possible tripping hazards that might occur. So, how to solve this?
You can install a floating sink or pedestal to keep your floor nice and clean.
Also, consider making some wall-mounted storage will in your small bathroom. This way, you can keep all your essential items nicely without conquering the floor space.
A floating sink is versatile and sturdy. You can use it for laundry and multiple purposes in the bathroom.
It is ideal for small bathrooms since it’s not a permanent fixture. It also encourages creative use, such as storing towels or toiletries. All you need to get is a custom-made floating sink and install it on your wall. Just remember that a floating sink will not fit into every small bathroom space out there – it would take some extra working space to maintain it!
Also,
Make Use of Natural Light!
In small bathrooms, bright daylight usually comes from one corner to the other due to the limited height of the ceiling. It may not look like that, but it can also be a great space saver.
Maybe you’re going to have a tiny piece of wall for your shower enclosure. So, you need a way to maximize this little space. A corner shower will help with the tight space and the design factor of your small bathroom.
7. A Modern Rustic Bathroom idea
 What is your first impression of seeing this bathroom? Is it interesting? We guess so.
This modern rustic bathroom has natural wood vanity and a mirror in a wooden frame that gives this space a farmhouse touch while still looking stylish and up-to-date. It is ideal for all kinds of bathroom sizes.
If you need to keep away a heavy cabin-like feel in your rustic bathroom, choose lighter wood finishes and white tiles instead. This space looks huge but is still comfortable, welcoming, and warm, with natural wood elements in the vanity and divided wall mirror that brings a modern touch.
To transform your current bathroom according to the new style, you need to pay attention to:
- No 1. Choose the right vanity for your bathroom.
- No 2. Choose a proper type of glass for the mirror.
- No 3. Update your floor and wall tiles with new rows of tiles in wood finishes and modern colors like white, grey, and beige.
- No 4. Wallpaper walls may give a big scale accent to the whole room if you have enough space to spare for the printed paper on the walls, but You can also use wallpaper in smaller rooms with only small prints here and there.
- No 5. The best bathroom furniture for this style is a natural wood vanity.
- No 6. A mirror in the form of a split wall is the optimal choice to give that rustic feel while still being simple and easy to maintain.
- No 7. Decorating your bathroom with mirrors, like the one on this modern rustic bathroom, can be done by choosing a contemporary wood frame but also like it was made with authentic tools and tools, such as chisels and hammers, like if you were out in the woods.
- No 8. Add a set of rustic bathroom lighting with metal and glass for more authenticity.
- No 9. Choose towels and rugs in dark colors like maroon, brown, and dark green for the best result for your modern rustic bathroom.
6. Add a Fresh Touch of a new Interior with Wooden Floor

Or you can save time, effort, and money by taking care of your hardwood floors and painting them with protective enamel. However, remember that solid hardwood should not be your first preference for bathroom floors. But if you already have one, this is an inexpensive way to maintain them for as long as possible.
Also, if you have a hardwood floor, make sure it is clean, dry, and free from dust and oil. Also, make sure that you clean any stains thoroughly.
Ways to Maintain Hardwood Floors In Your Bathroom:
The first thing you can do to maintain your hardwood floor is wax it. This step will make your wood look smooth and keep it clean.
After waxing is done, put a protective coat on the floor to ensure that the vivid colors stop bleeding into your house’s decor. If you want to cover up any spots or cracks, you can use one of the floor protectors available in the market.
Next, you can use a stain or paint to clean up the floor. If you have hardwood floors that are already stained, you can use a heavy-duty cleaner and a flat, clean cloth to wipe it down. Be careful not to rub your cloth too hard into the wood as this can cause scratches.
- If you have any marks on the floor, use a little wax on them and let them sit for a few minutes before giving your cue sheet another swipe.
- Try sanding it down instead of painting if your hardwood floor still looks dull after all of these measures.
- Or when the floor is beginning to get damaged in spots. These are just a few simple ways to maintain your hardwood floor and keep it looking nice.
- Painting is the most popular way of beautifying hardwood. Although painting your floor can give it a new look, check all measurements first when considering this option.
Though this may seem like an easy task, you should make sure that painting will not damage your wood other than damaging your floors. If you decide to paint over the wood, choose a paint that will protect it. Do not use paints that are not compatible with hardwood because they will run easily and cause soiling on your floors.
5. Refinish Your Bath Tub
 Consider a total replacement of your bathtub as your last choice, at least from a cost-savings point of view. Instead, try refinishing or repairing it.
Bathtub refinishing is one manifestation of the theory that it is better to repair and maintain than remove. You can re-polish your bathtub if the problem is primarily about a yellowed surface and some cracks and tears.
Alternatively, bathtub liners are not as expensive as they look. In fact, the liner will carry you through some years if set up correctly. On the other hand, Bathtub refinishing is cheaper and often looks great.
Relevant instructions:
- Step 1: Pay attention to the caulk of the bathtub over the sides, against the wall. If worn and discolored, you might have to discard it altogether and re-caulk the area. If there are cracks in it, then repair them.
- Step 2: Sand down with a hand sander or a palm sander on all areas you want to target for refinishing. Try not to make your bathtub surface shiny, as this is undesirable.
- Step 3: Seal in everything with a polyurethane sealant to not let moisture in again. For best results, wait for 24 hours after applying the sealant before painting on top of it.
- Step 4: Prime, paint the bathtub and apply the sealant again.
Specific to the bathtub:
- Step 1: Determine the category of your bathtub. Consider it if it is an old-style tub or an all-ceramic tub.
- Step 2: plan what and how you will refinish your bathtub according to the type of tub you have followed above. If a new look is not what you want to achieve with your bathtub, we suggest removing its coating.
- Step 3: Sand down all areas you want to keep light in, for decorating purposes only, with sandpaper or a woodwork tool (i.e., hand sander). Sand down the rest of the tub to eliminate any cracks and stains.
- Step 4: You can choose to remove or leave in your bathtub’s existing coating, but to remove it could be good to have an acid or an acidic solution that can dissolve the paint.
- Step 5: Take all necessary safety precautions before carrying out any steps. Then, prime and paint your bathtub however you would like it to look. Apply polyurethane sealant over all surfaces you want to protect from moisture for finishing touches.
4. Install a New Sink
 Like installing new hardware in cabinets, installing a new sink is one of the tricks designers, and DIYers use to make a sink sparkle without replacing the entire top or vanity.
It enables the sink faucet to be easy to install and clean yourself. You don’t have to call a plumber. It will not only save labor costs but also advances the timetable. Grab a sink faucet in the morning, and you’ll be running it at lunchtime; that is easy.
3. Install a Pre-Fabricated Shower
 The most pricey option for a new shower is to rent a professional to construct a custom tile bathe from scratch.
While tile showers and bathtubs can be pretty and unique, consider pre-fabricated shower units, which are usually much less expensive. Combining a poly shower with a tile will save you the hassle and cost if you want to have a tiled showerhead. Building a tiled showerhead takes time and is usually fine left to a qualified tile maker.
Also, understand that your shower is one of the most used areas in your house, so a well-built tiled shower will last you for years.
And not to mention, get rid of that old, ugly, and cheap shower door and install a new one that matches the rest of your bathroom.
To keep your bathroom neat,
Install a new storage container for your Bathroom towels and towel rack too.
It’s hard to believe, but it does need a good amount of space to store your towels. If you don’t have enough space in the cabinet under your sink or wherever else you might put it, consider installing a portable towel rack hanging from the cabinet above or from the wall.
2. Install Wainscot on Half of the Wall
 If the bathroom material still works, repair and reuse it. The guiding principle of any surface-level maintenance is that you never want to cover anything because it needs replacing.
For example, there’s no better solution to cover the underside of a wall than with an easy-to-install wainscot.
A wainscot is a pre-fabricated board that extends to fifty inches in height and eliminates the need to patch wall dings and pinholes; a wainscot works well and just covers it up.
Wainscot is also inexpensive and doesn’t require any particular installation procedure. It will instantly give you a wall surface that looks like wood. The main difference between existing walls and wainscot is that the latter is thicker, so you will hide any holes.
Relevant details:
- If you don’t think your master bathroom needs the extra attention, try it on just the back wall.
This step will help hide plumbing and any other unsightly piping infrastructure. - Or, choose a semi-transparent paint or wallpaper to match your bathroom fixtures and tub/shower; add additional accessories like a wall-mounted faucet and showerhead.
- You can also consider giving your bathroom a shower curtain rod add-on.
- You can also replace the old marble soap dish by setting up a shower curtain rod next to the tub.
- You can hang rugs over the end of the rod so they sit next to the tub itself; this will help keep water from splashing over its edge while you’re stepping out of it.
Lastly, number 1. Give your plumbing some fresh treatments
 If you hate asking a plumber for renovation work, stop asking yourself what you probably can do yourself. With the advent of PEX plastic plumbing and push-in fittings, even the most insecure do-it-yourself plumber can tackle light plumbing jobs effortlessly.
If your idea of plumbing work still has its roots in the days of soldering copper pipe on an open flame or working with galvanized pipe, take this idea seriously. You might discover that PEX and push-in fittings are best for your needs.
What is PEX?
Answer: Cross-linked polyethylene. Though still made of plastic, the material contains a special additive that helps it withstand high heat. The product comes in either rigid or flexible form in various diameters.
Push-in fittings are inserted into a tubing fitting and firmly pressed in place to seal. When used with PEX, they require a little more pressure than traditional screw-in connectors, making the job much easier if you’re not used to soldering pipe joints. Push-in tools speed the job if you’re installing a new fixture.
Relevant instructions:
Bathroom plumbing is a big job. And every plumbing project has at least five parts:
1). Preparation before you start: (Inspect your walls and floors)
At this stage of the bathroom renovation, many problems in the appearance of the bathroom can be eliminated or minimized. The Preparation is usually done with a cloth or sponge to clean out all stains and dust.
- Water supply (except for water supply in special circumstances)
Water supply is essential to your bathroom renovation work. If you have well water and low mineral content, it is best to use only clear water with no aggressive chemicals, such as chlorine (do not drink any water without testing it first).
2). Construction of the fixture itself (cut and fit materials)
At this stage, you will install your new fixture. You can do this work with a screwdriver or with a special tool that you can buy at a plumbing supply store.
- Divert the water line to the sink or shower faucets.
This step is a special job that requires you to be careful not to damage the pipe or faucet. The system of pipes is made differently depending on where you will install the fixture. For example, some faucets have plastic lines and can freeze when exposed too long, so ensure that your plumbing works comfortably after repointing them.
Professionals usually install the new lines, and usually, it takes about two hours for an average DIY restorer to complete. - Construction of the pipe system (pipe fittings, pipe, etc.) together
If you have well water and low mineral content, it is best to use only clear water with no aggressive chemicals, such as chlorine (do not drink any water without testing it first).
If you must work with galvanized pipe, do this in a well-ventilated or outdoors. Rust stains will be difficult to remove from other surfaces. And never use galvanized pipe in your main cold-water supply lines to the house.
3). Fixture installation
This process will be much faster if you purchased a premade system and/or used a PEX water supply.
- Use the 2-in-1 pipe wrench to tighten the pipe to the wall or fitting. Most systems will have different sized fittings, so make sure that they are properly installed in a watertight manner or, better yet, use drill bits to help tighten the pipes before they are placed in the wall or floor.
- Consider using anchor bolts for added strength when using larger, heavier plumbing components, like toilets, sinks, and showers.
- Connection of the faucet.
4). The finishing touch (Decorating the bathroom)
5). Use (flushing)
The bathroom offers many functions. The most effective way to optimize your limited space is to be innovative with what you have.
So, Hopefully, with these 10 small master bathroom makeover ideas, you can turn your small space into a spacious one and maybe become your next favorite room! Who knows?
References:
10. Shelterness.com
9. Pinterest.fr
8. Sweeten.com
7. Hearnconstructioninc.com
6. Dailydreamdecor.com
5. Pinterest.fr
4. Pinterest.fr
3. Pinterest.fr
2. Pinterest.fr
1. Pinterest.fr