No 2. An Awesome Waterfall Side Table Project Idea
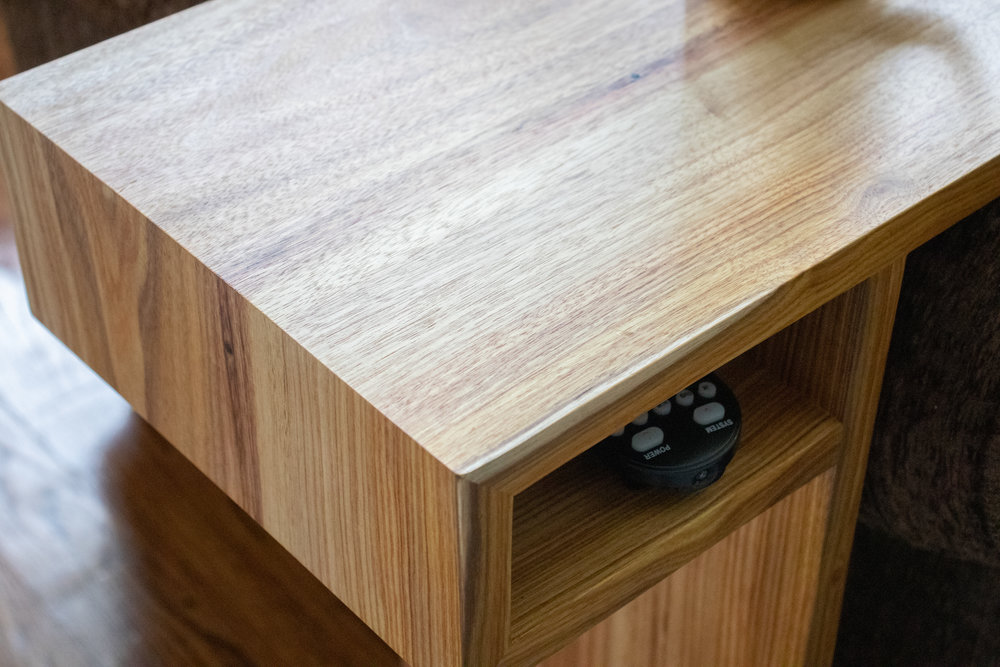 For this project, we’ll be using one board of Canarywood, which can be purchased from Woodworkers Source. Trim the board to be about 10 inches wide, but feel free to customize the size to fit your needs.
Next, make marks on the board for where to cut the miter joints. You’ll need to make four miter cuts on three pieces of wood to achieve the two waterfalls in this table’s storage box. To ensure accuracy, use clamps on your sled for the back of the board and on the fence of your sled to put pressure on the front of the board.
Now, it’s time to create the waterfall feature by flipping the mating board over and cutting the miter on the other side. The key to this is to place the board so that the blade cuts right before the end of the previous cut, removing the least amount of material.
For the joinery, create a jig to hold the mitered pieces at the correct angle at the router table.
*Skip-only blog version*
This can be done using two pieces of scrap plywood with the same 45-degree miter cut on one end of each piece. Glue the two pieces of plywood with the miters cut on their ends and reinforce them with brad nails. Then, glue on some small triangles made from scrap MDF to act as supports.
With the jig complete, set it up at the router table using a 1/4-inch spiral bit and raise it to 1/4-inch high. Set stop blocks for the beginning and end of the cuts to make this a hidden joint, and then cut all the slots needed.
To make the hidden spline miter, use a sled at your planer to plane down a scrap piece of wood to the correct 1/4-inch thickness needed, and then cut it to width at the table saw. Cut the splines to be slightly smaller than 1/2-inch at the crosscut sled to leave room for glue. The grooves left over from the router bit were round on the ends, but you can use a block to square up the grooves.
Assemble the table by gluing the bottom base to the main stand of the table and reinforcing it with dowels. Glue the top spline into place, and then place the top of the table onto the main support piece using dowels and clamping it down. Be sure to clamp the miter joints from the sides and the top.
After everything is dry, sand the table flush and smooth, but be careful not to take off too much material. Finish with wipe-on poly, and you have your own Awesome Waterfall Sidetable, perfect for drinks, storing remote controls, and other items within reach.
No 1. A Dinner Drop Leaf Table Idea
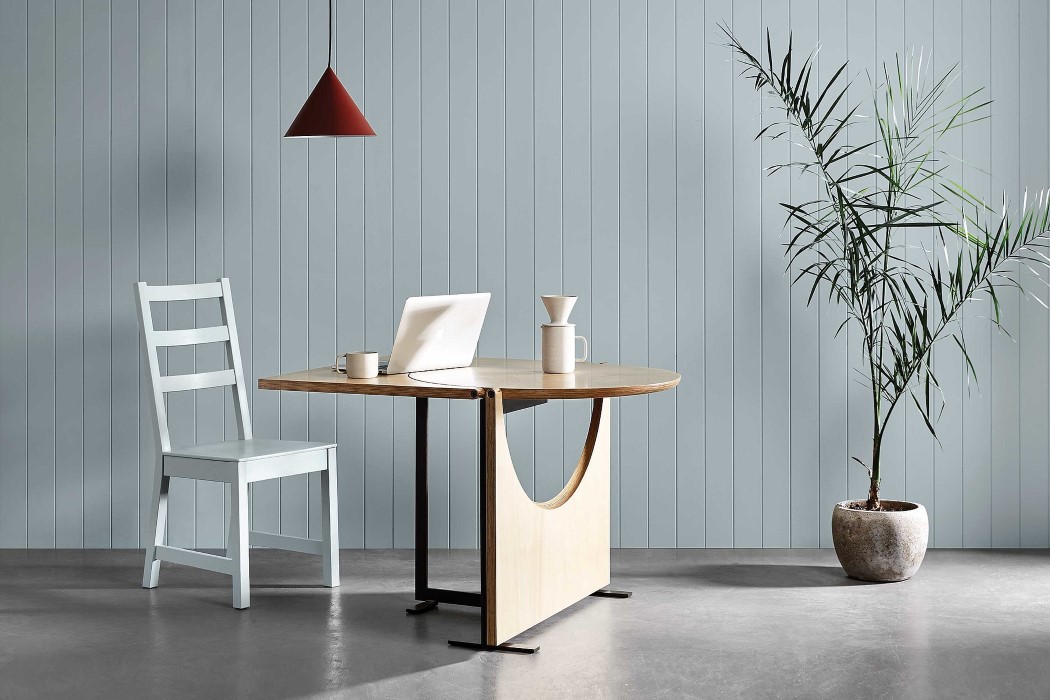 Living in a compact space but loving hosting? Meet the Drop Leaf Table, your big party in a small package. This ingenious table comfortably seats two but expands to accommodate six, thanks to cleverly designed ‘leaves.’
It’s a dream of a solo dweller, and it’s perfect for quiet tea times, work sessions, and, yes, big festive gatherings. Winner of the Red Dot Best of the Best Design Award in 2021, this table merges high-tech design with traditional craftsmanship. Its sophisticated design blends CNC technology with traditional timber and metal craft, resulting in a piece that’s as elegant as it is functional. And when the party’s over, the leaves drop back neatly, and the table returns to its compact form, ready for the next gathering.
References:
Kmldesign.dk
@Eternal Harvest door.
A Lounge sofa or futon idea from Imee Made
Remodelista.com
Woodbrew.tv
Boards.weddingbee.com
Jaimecostiglio.com
Bunnings.com.au
Hanging-chairs.net
Erinspain.com
Kitsmade.blogspot.com
3x3custom.com
Yankodesign.com