No 6. A DIY hammock chair Idea
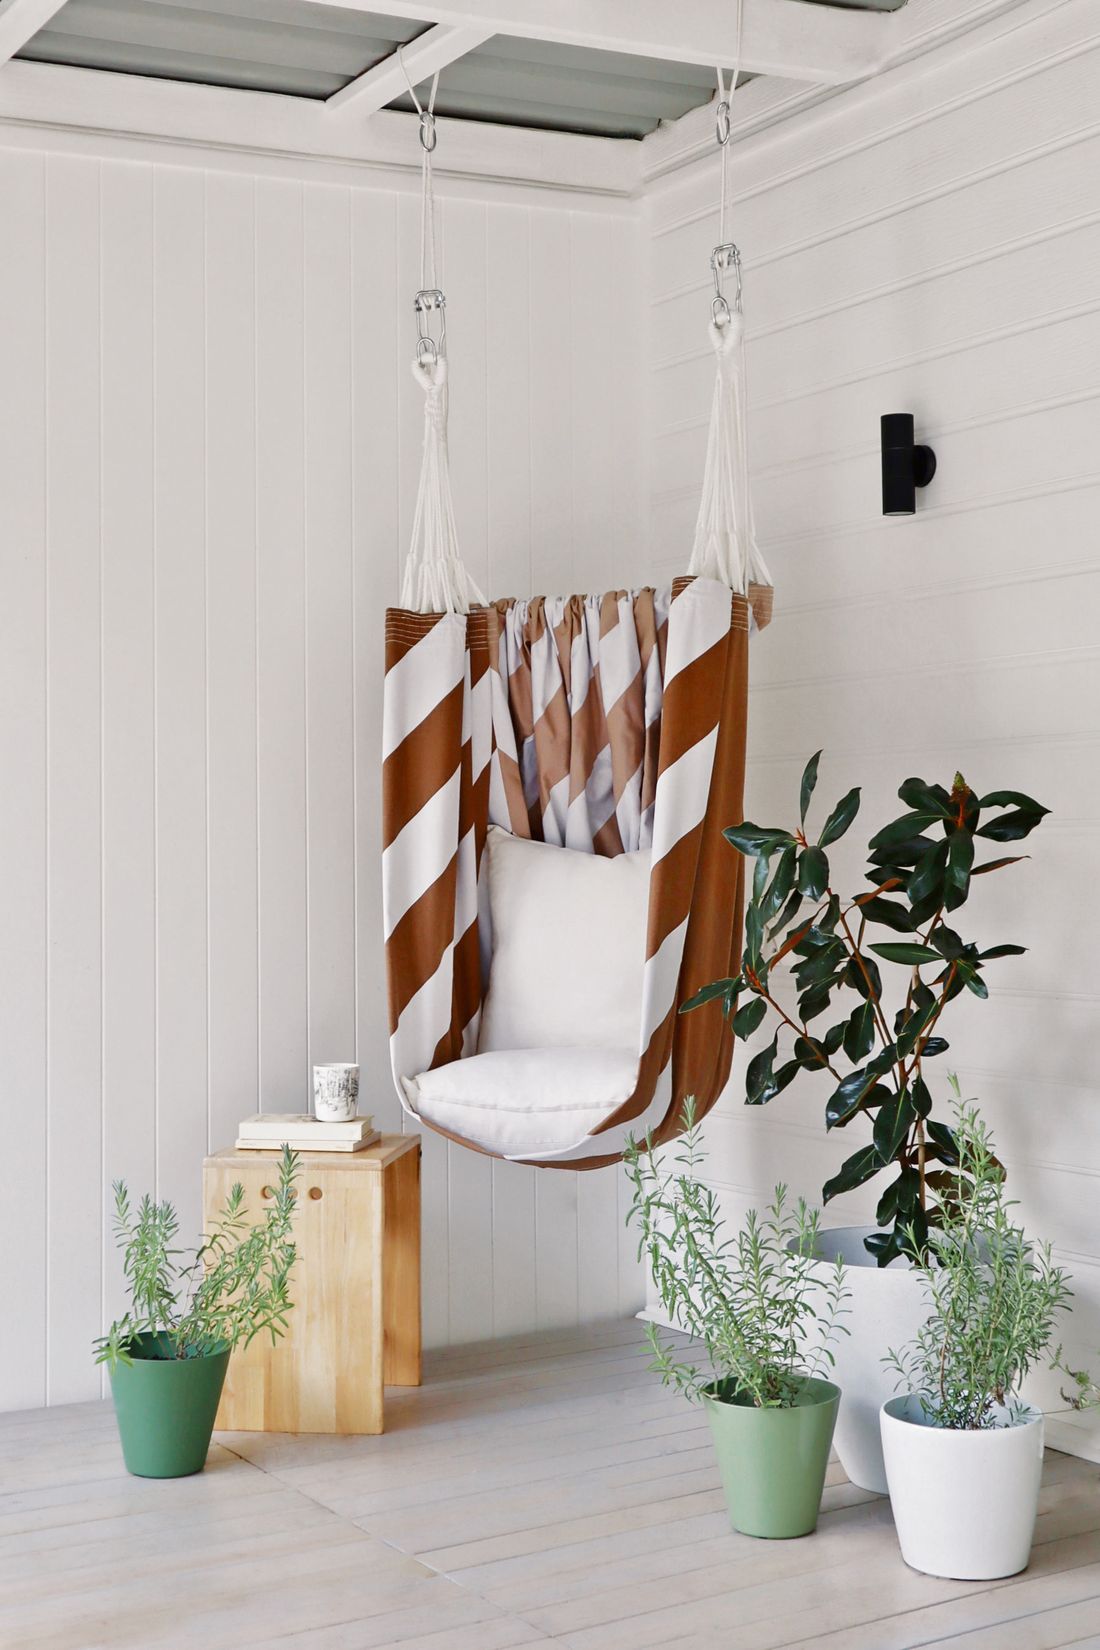 Although, it may not suit everyone’s comfort preferences. If you’re not one of those folks and you demand a living room improvement with little maintenance that adds a dash of vacation vibes to your home, then the next highlight is for you.
Here are the simplified steps to create a DIY hammock chair:
- Choose a suitable size hammock and adapt the fold-over measurements to your space.
- Apply construction adhesive to the hems to create a pocket for a rail and reinforce the seat.
- Cut two stoppers from a 6mm dowel and a 600mm rail from a 25.4mm dowel, and drill 6mm holes in the rail.
- Thread the rail through the top fold of the hammock and insert the stoppers to hold it in place.
- Use a hammock hanging kit to secure two hooks 500mm apart and thread the cord through the clamp hook and over the sliding lock bars.
- Hang the hammock loops over the hooks, twist the rail so the stoppers hold against the seat, and fold down the sides to minimize bulk.
- Place a cushion in the base to help hold the seat’s shape.
With these easy steps, you can create a comfortable and stylish hammock chair without any carpentry skills. Just make sure to use sturdy fittings and affix the seat to a structure that can bear the weight of an adult.
No 5. A DIY Wooden Hammock Chair stand.
 Looking for a relaxing spot to read a book or snooze in the breeze? Look no further than your own backyard with a cozy hammock chair. But what if you want to bring that comfort indoors, and there’s nowhere to hang it from? Don’t worry; we’ve got you covered.
General instruction:
- Wash the board and the branch with soap and water, then dry them.
- Sand the wood using sandpaper or a sander.
- Vacuum the wood to clear the dust and debris.
- Apply water seal to the wood using a paintbrush, sprayer, or roller.
- After the water seal dries, apply a wood stain.
Installation:
- Bolt the branch to the wooden board using 8-inch bolts, nuts, and washers.
- Drill holes on both ends of the board, then attach it to a wall using 12-inch bolts.
- Hang your hammock chair on the branch.
- Remember to use a dead or dying tree for the branch and to let the kids help for a more enjoyable experience.