So, when taking up a hobby like this one sometimes you get really lucky and you’re friends will give their “get it out of my house furniture” to you…which is awesome! And sometimes you get a little less lucky and you find a free piece of furniture..on the side of the road or on craigslist..or wherever.
Now, in my limited experience the latter, while totally awesome and I’ll never turn my nose up at, usually involves a little more “grunt” work.
This past Fall, I got a call from Sherri about a listing on craigslist for a free bed frame. Now, I had been looking for a free bed frame to do a pinterest project that I’d seen (nothing cutting edge…but wanted to give it a try) for awhile.
So, when Sherri called I literally dropped everything and RAN my little booty over there. It was fate, she lived in the same town as me…and I got lucky. So, right before a Minnesota winter hits I’m running out to fill my garage that my car should be parked in workshop with a “whatif idea”.
The Brit was thrilled (he puts up with so much from me!).
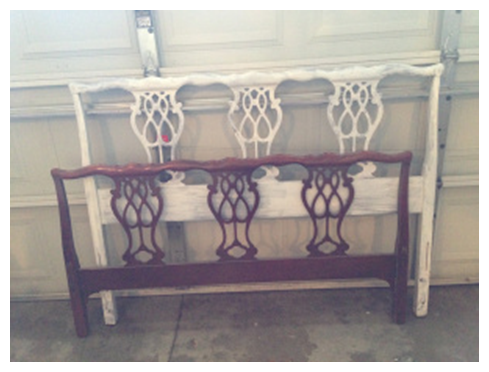
So, here she is!
 “She had me at FREE”
The gal had gotten it and then decided she didn’t want to do it. I didn’t look it over too close, after all, it was free. Then I got home…

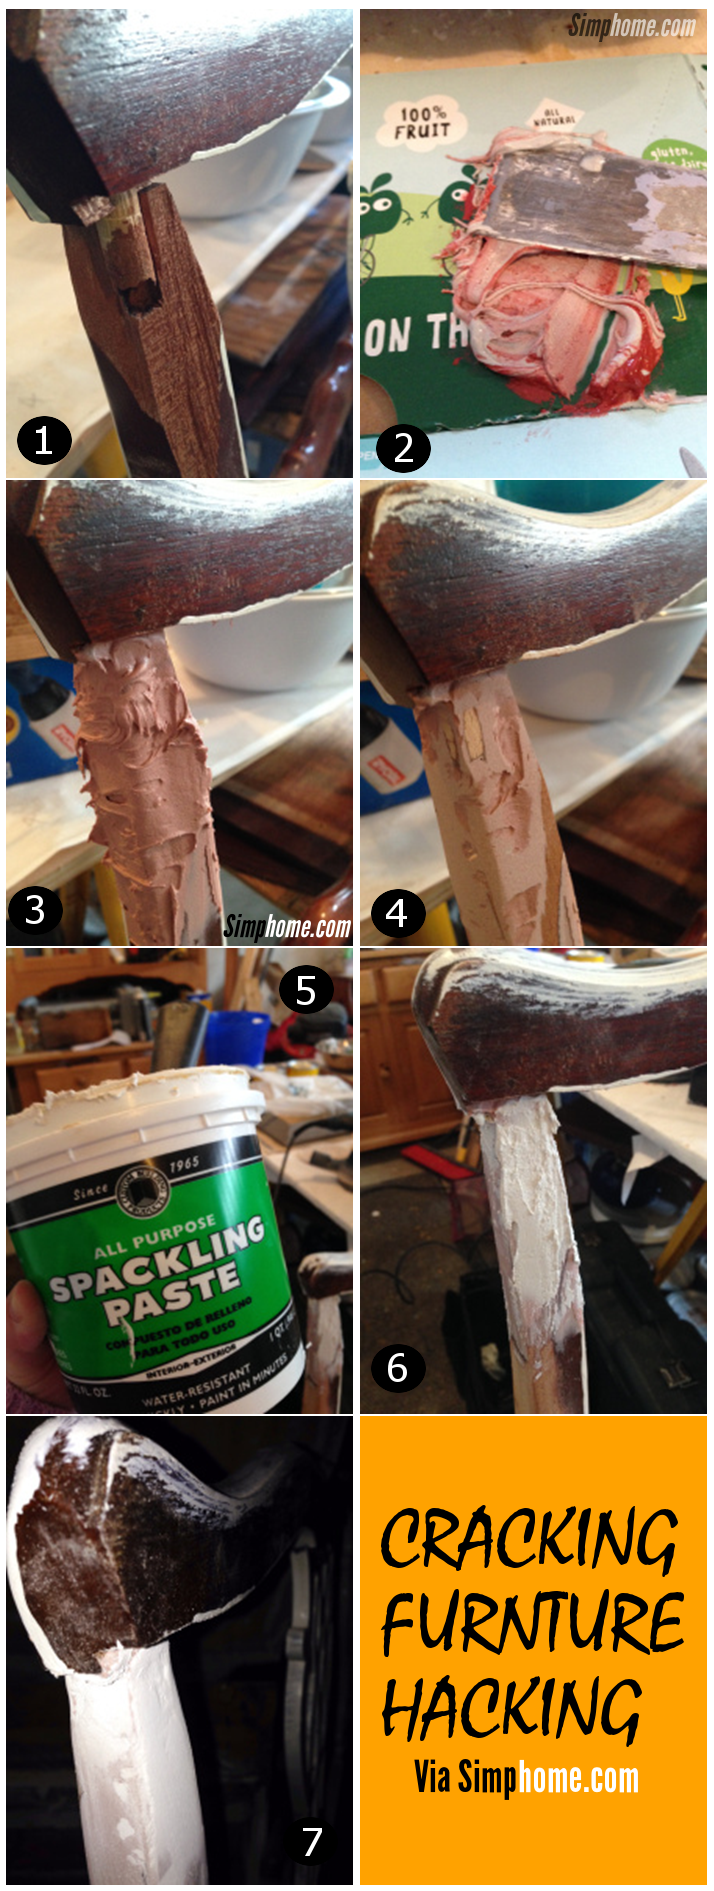
1.Check out this joint! 🙁
Now, a few years ago, this would have just been tossed in the trash…but don’t even THINK about doing that! Here’s my secret: all you need is Bondo! Check it out here! This stuff is awesome! It was made for auto body detail work…so it is tough! There are two parts…the grey part and the red part. There’s no exact science to it, but mix a “smidgen” red to a “glob” of grey. Yes, I know…such precise measurements!
2.A smidgen and a glob..lookin’ good!
Mix the smidgen and the glob together until they’re one cohesive color. Make sure you do it in an airy area because this stuff has a scent all it’s own. Then you really just treat it like spackle. Put it on, make it proud (make it high). But work quick, once it stops being gooey and delicious and starts looking like dried out play dough – it’s done. When that starts happening, scoop it off your cardboard and toss it. So make it proud, then leave it to dry. Come back with your sandpaper, I used 100grit (might have been a little too aggressive…but it worked for me) on my rotary sander, then sanded by hand with 120grit.
3.Nice and Proud!
4.All sanded down. Nice and pretty!
Now, it’s flat…but you can see the little crevices there. It’s stable, it’s not going anywhere, but if I slapped some paint on it, it would still not look so good. So, now you grab you’re spackling paste! You know, the same stuff you putty your walls with.
5.Same putty you fill nail holes in your walls with!
Again, make it proud, let dry, then sand down.
6.Just gotta wait for it to dry and then sand it down.
Now, sand it down and grab you’re paint can and brush. You, my dear, just got a FREE piece of furniture and now it’s ready for you to make it awesome! And when everyone oohs and ahh’s you can decide if you want to keep the secret…or share it like a badge of DIY honor.
7.All stable, smooth and ready for a coat of paint!
By the way: stay tuned to see this repurposed project come to life soon! Hopefully, you’ll be AS impressed even though now you know my secret!