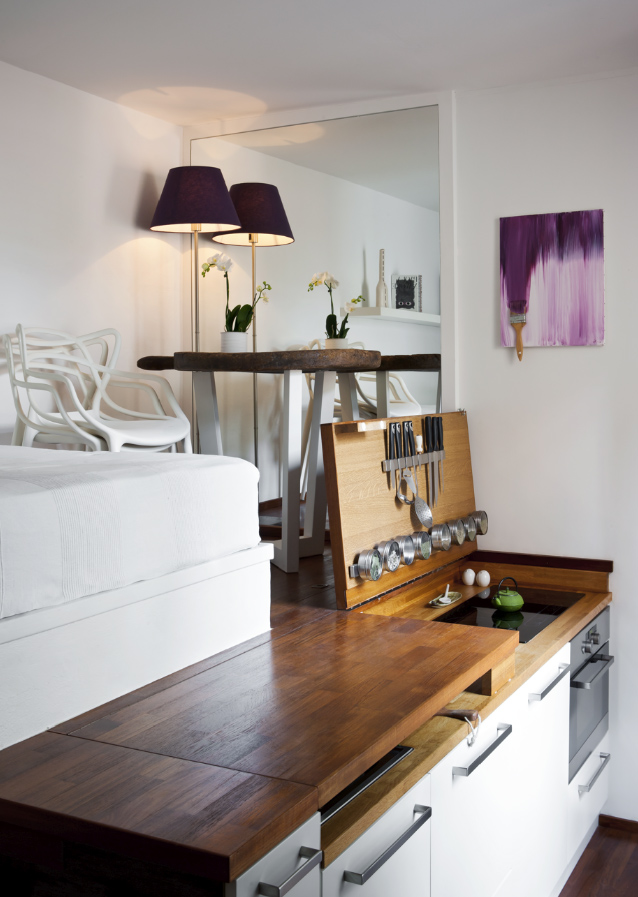
6. A Chic Micro-Apartments: Smart Design for Student Living
Picture this: you’ve just snagged two adjacent apartments in the bustling 9th district—27 m2 of potential chic living space and another 11 m2 that scream opportunity. With a dash of ingenuity and designer Réka Antal’s vision, you’re diving into the world of smart, space-saving interiors fit for the savvy university student.
You’re tearing down the old to make way for the ultra-functional. The layout? A snug living area and a bathroom that defies its compact size. It’s all here: a bathroom sporting a roomy shower, a kitchen with must-have gadgets, and a washer-dryer duo ready for action. And what’s that extending from the kitchen counter? A petite dining-cum-study table, the perfect two-in-one combo.
No room for a loft? No problem. Elevate that bed and discover the perks beneath—a sneaky spot for a fridge and slide-door wardrobe. The shoe stash, a behemoth wardrobe with mirrored magic, and a clandestine cupboard atop the shower are storage sorcery. The catch? A built-in shelf cupboard that plays hide-and-seek behind matching wall coverings.
Awash in light, soothing hues, with snow-white laminate underfoot and a herringbone divider, it’s cozy meets contemporary. The bathroom’s a splash of drama with gray, black, and hints of natural wood, topped with a dapper waterproof wallpaper. It’s the dorm of design dreams, redefining student digs one square meter at a time.
5. U.S.B: Ultimate Storage Bench
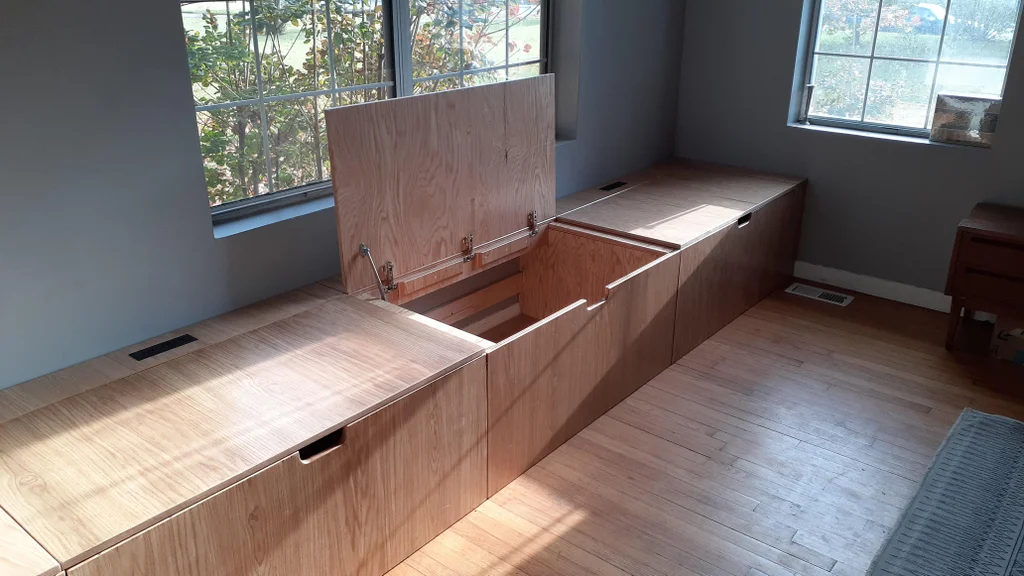
Hey there, home improvers! Settled into a charming ’50s abode but find yourself doing the storage shuffle? Don your DIY cap – it’s time to build the Ultimate Storage Bench (U.S.B.) that ups your storage, seating, and surprise-sleeper game!
Step 1: Keep It Sleek with Fusion 360.
No over-the-top designs this time; we’re channeling that minimalist magic to make every inch count.
Step 2: Frame Work – Wall Runners.
Initiate your inner carpenter by fastening two 1×4 wall runners along your bench’s future silhouette. The upper marks the bench’s height, and the lower dodges the baseboard like it’s no big deal.
Step 3: Hoop Dreams – Crafting the Frame.
Saw those 2x4s into hoops that form your bench’s sturdy skeleton, dividing the space into three cozy cubbies perfect for all your odds and ends.
Step 4: Cubby Barriers and Wood Grain Secrets.
Prep those plywood dividers, paying homage to wood grain direction – because aesthetics and resilience go hand in hand.
Step 5: Cut Like a Pro.
Wrangle big plywood sheets with a kreg-jig track and a circular saw. Get that razor-sharp precision with a makeshift sled and cut like you’ve got a table saw in your toolkit.
Step 6-19: Piece by Piece.
From adding exterior cubby dividers to attaching hinges on the lids, each step adds polish and purpose. The grand finale? Crossbeams ready for heft, trims bringing finesse, and an electrifying twist for power at your fingertips.
Bonus Pro Tip:
When it comes time to cushion up for that ultimate comfort, grab a serrated bread knife and slice your foam like it’s Sunday brunch prep. Your U.S.B. won’t just be storage-savvy – it’ll be sit-back-and-relax luxurious.
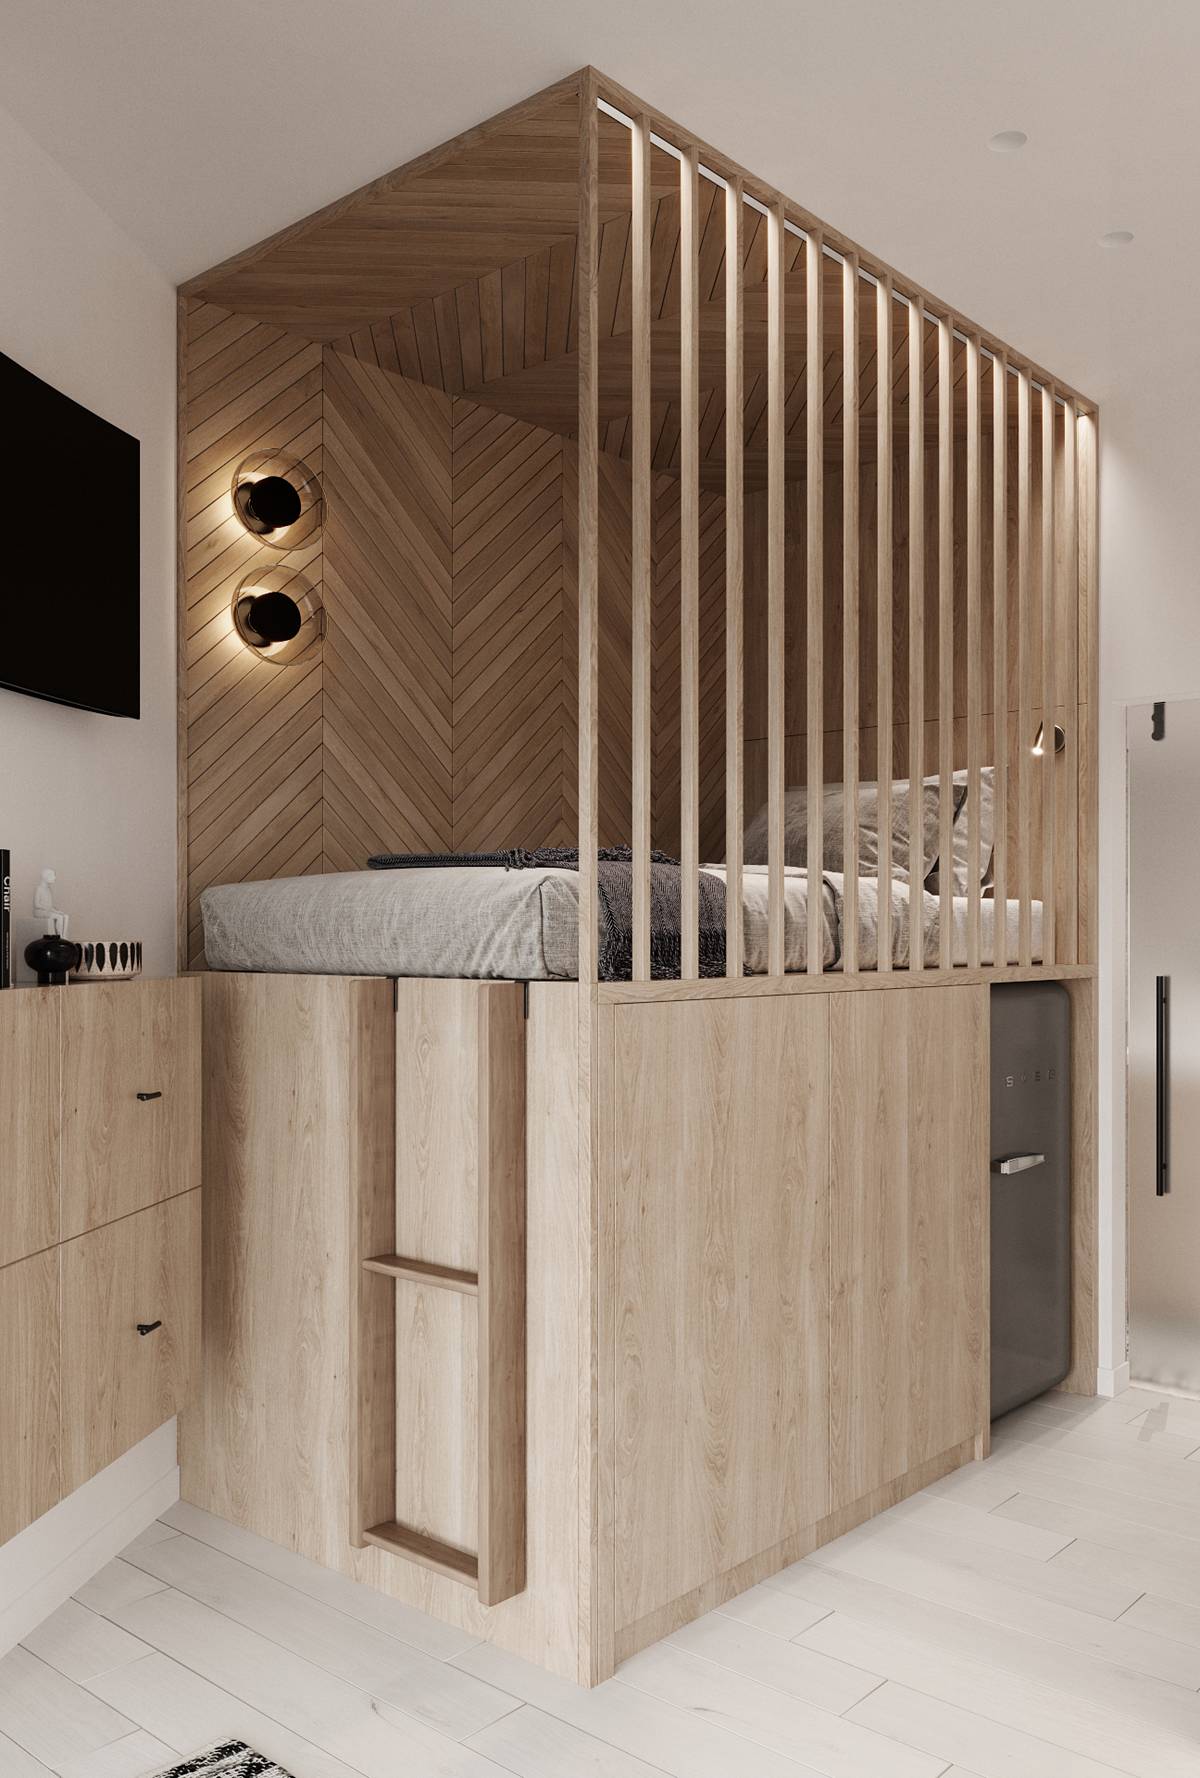
4. A 15 Square Meter Challenge To Inspire your Next Organizations
Get ready to enter the world of micro magic, where every inch is precious and every design decision counts. Imagine squeezing the essence of a fully-equipped apartment into a mere 15 square meters. Sounds like a tight squeeze? Not with some smart thinking and a sprinkle of creativity.
First, let’s talk about your new best friend: vertical space. With a ceiling that gives you room to reach high, carve out a cozy wooden platform about a meter off the ground. It’s not just an elevated nook—it’s your studio’s secret weapon, concealing a fully-functional kitchen tucked away under folding shelves.
Those nifty steps doubling as containers? They’re your stairway to heaven, leading up to a combined sleeping and living zone. But wait, there’s more. Peek under the bed with a secret “trap door with ladder” beside your table, and voila—there’s your wardrobe complete with shelves and hangers.
Your space-saving sofa bed is a chameleon; by day, it’s a cushioned retreat, and by night, a dreamy mattress. The dining table, just a flap away from your hidden kitchen, makes solo meals and dinner parties a breeze. And when nature calls? There’s a discreet door whisking you away to a bathroom decked out with all the essentials, including a shower cubicle.
3. DIY Desk-to-Bed Transformation: A Carpenter’s Guide
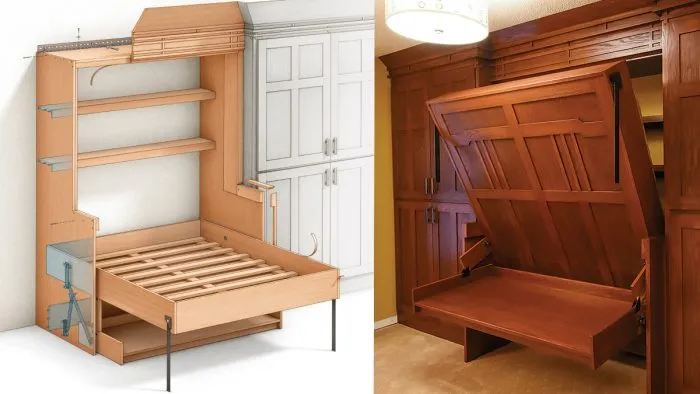
Let’s morph that extra room into a dual-duty den with a sophisticated twist: a Murphy Bed that swaps between work and snooze setups. Trim carpenter Nathan Rinne has got your blueprint for a seamless switcheroo.
- Lift, Pivot, and Stabilize:
Start with a sturdy lift mechanism and rotating desk hardware – these are your magic wands. Add folding steel legs from Hiddenbed USA, and you’ll have a setup that keeps your desktop level and your teacup safe during the transition. - Get the Goods:
The hardware – think steel hinges and pivots – can be yours straight from the manufacturer or various online spots. Twin, double, and queen – pick your size, receive the shop drawings, and get cutting. Or take the easy route with precut options in multiple wood varieties, or CNC toolpath files for local custom cutting. - Make Room:
Plywood wrestling? That’s a sport. You’ll need the elbow room of at least a single-car garage for this double or queen-sized endeavour. - Edging with Ease:
Hide the plywood’s raw edges with the comfort of a clothes iron and edge banding tape, gently rolling it flat. - Desk Duty:
Reinforce that almost-5ft-wide desk with a one-inch square steel tube to defy the droop, secured with 1.5-inch screws. - Pivot With Precision:
Secure the desk sides with edgeband and screws. Those handy pivots from your kit align everything to perfection. - The Weight of Work:
Color-matched screws and T-nuts fasten the desktop’s pivot, supportive for up to 45 lb. Load it up – it won’t budge when you raise or lower the bed. - Symmetry Speaks:
For those spacious double and queen designs, center your plywood seam – it’s all about aesthetics. Connect two 2ft 4in panels with wood glue, biscuits, and mask that join with some sleek flat stock. - Double Duty Drilling:
Speed meets accuracy when you drill mirrored holes for those critical hinges and lift mechanisms – no room for error. - Bed and Cabinet – A Solid Union:
Join forces with large-shouldered bolts, tightened with a hefty 10-mm hex wrench. Local auto-parts store for the win? - Final Fixings:
Lock it down – hinges, lifts, and bed sides all bolted securely. Those gas pistons? Matched to your bed size, they make lifting a breeze.
Now, behold your multifunctional marvel – work by day, rest by night, and a room that adapts at each dusk and dawn.
2. The Perfect DIY Puzzle Table Transformation
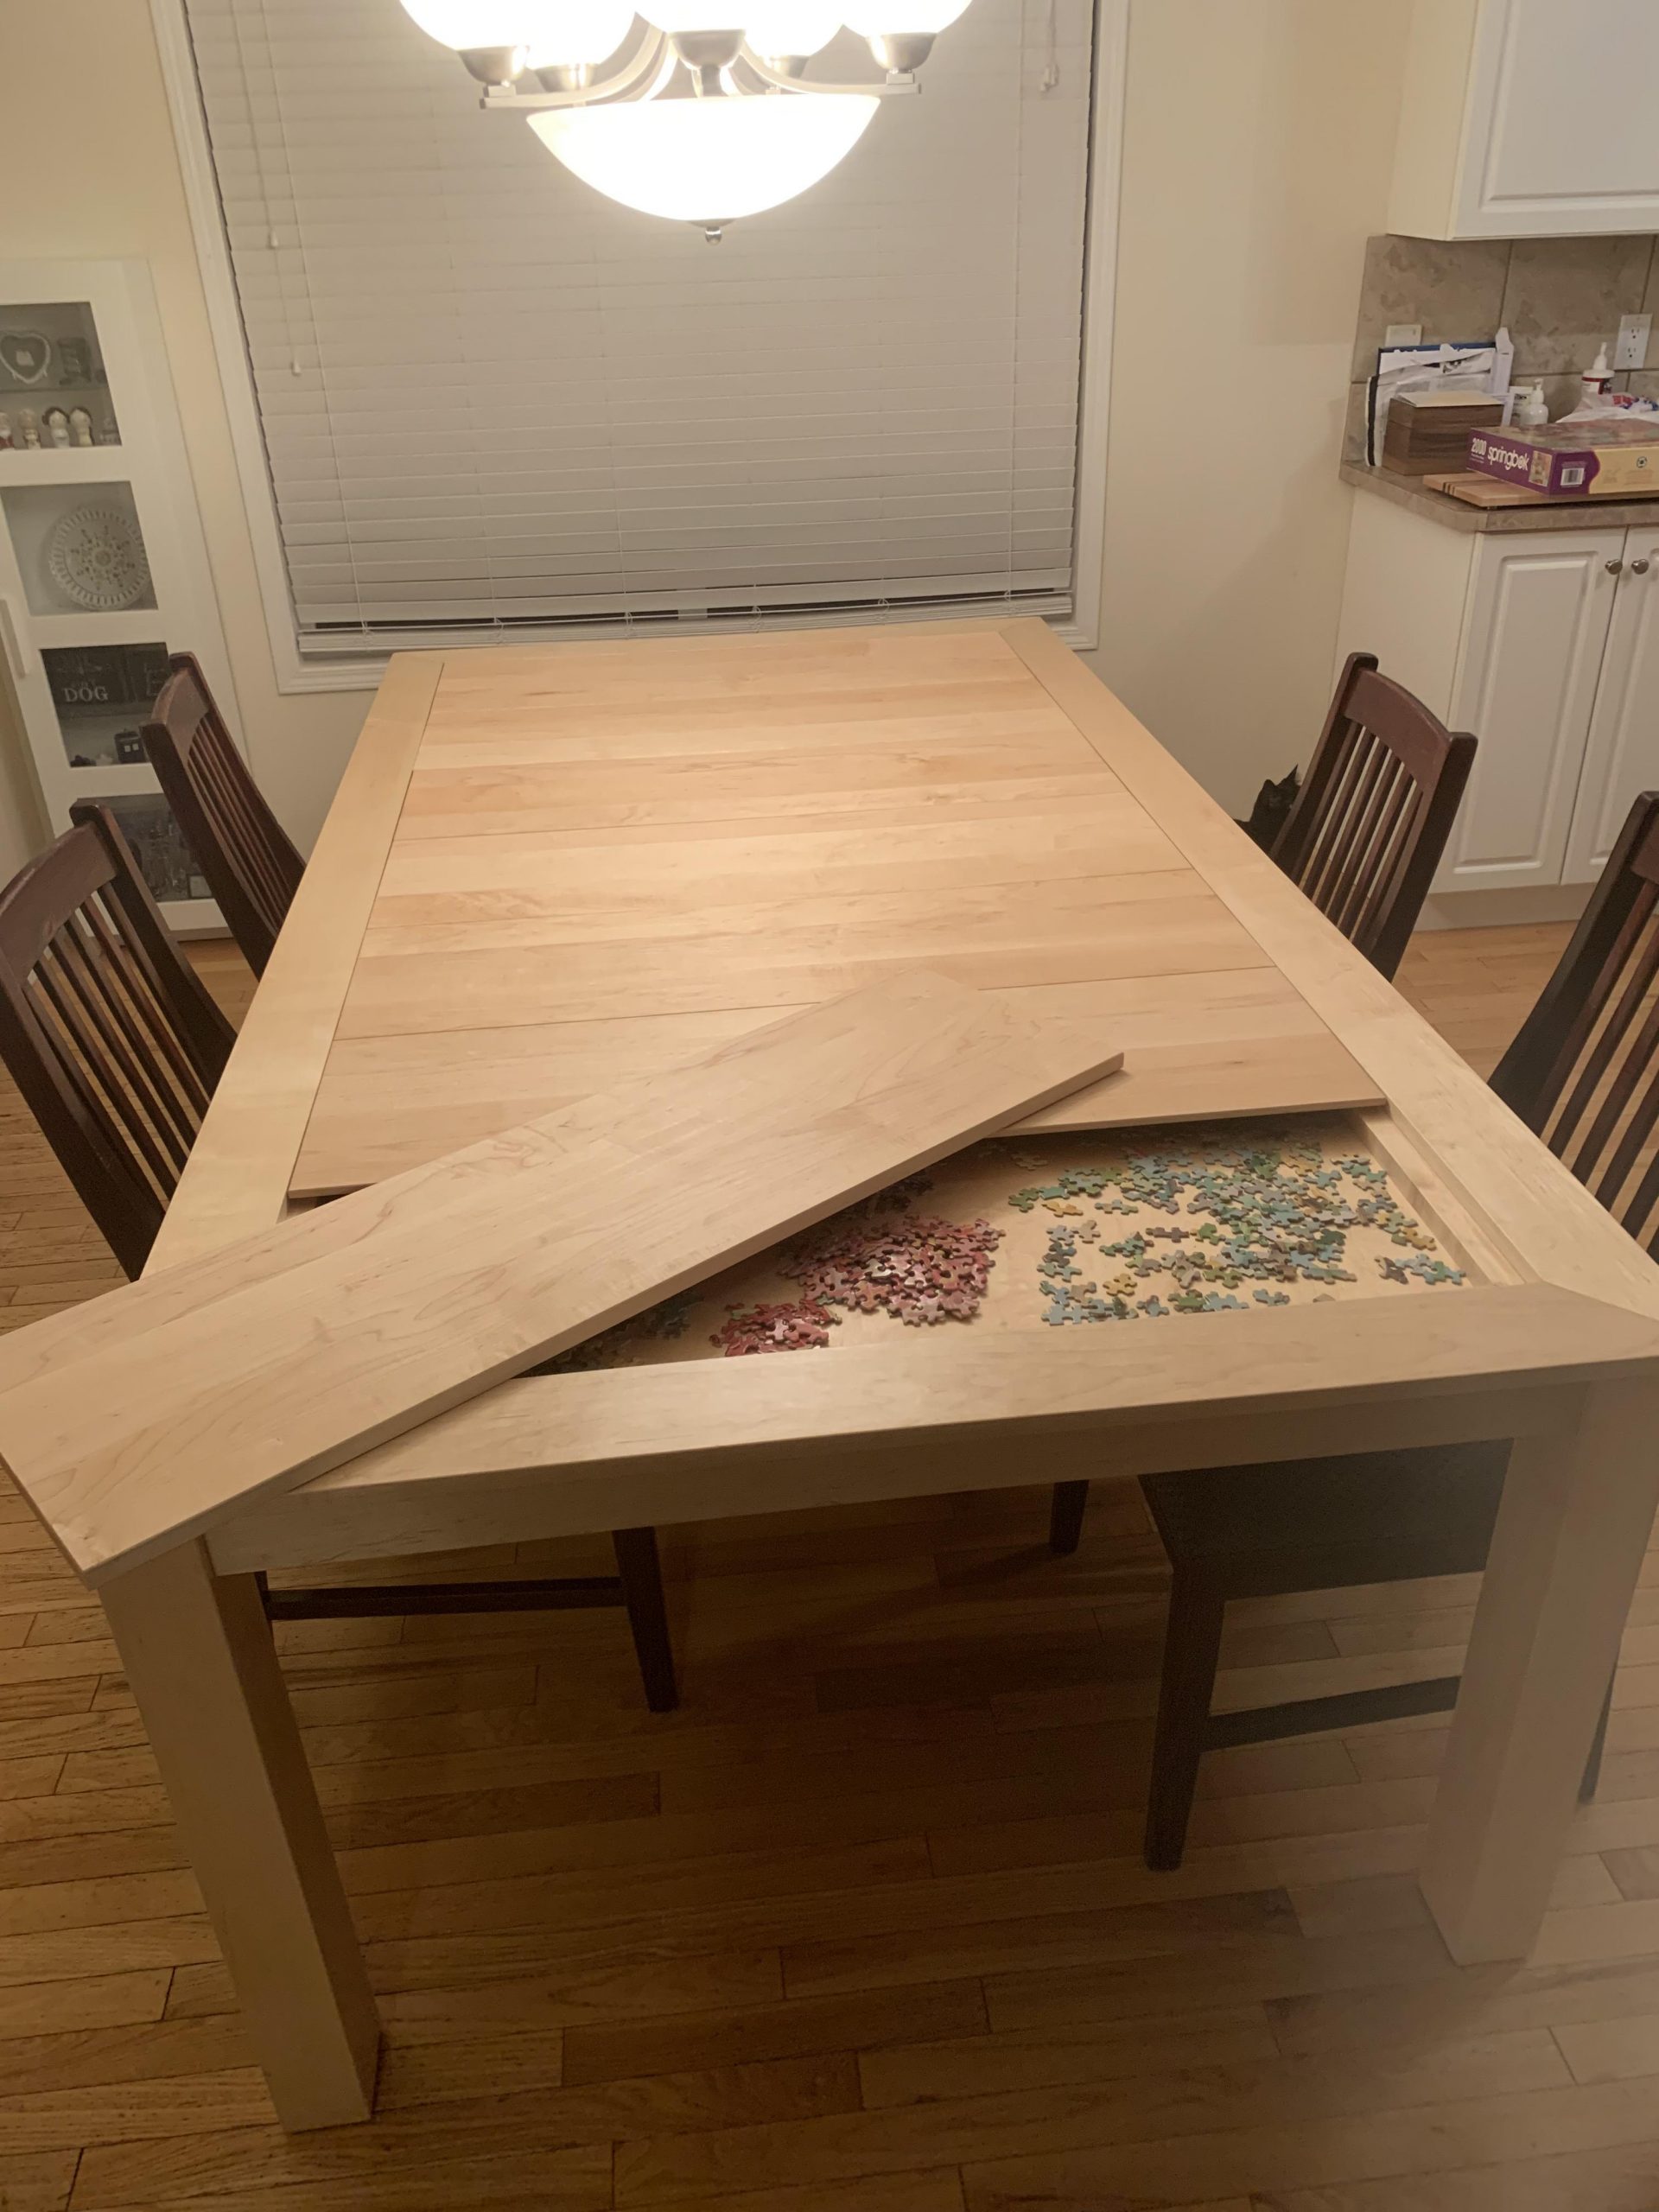
Hey there, puzzle enthusiasts! Tired of monopolizing the dining table with your jigsaw masterpieces? Dan Amantea, a gifted woodworker from Alberta, Canada, has just set your inspiration ablaze with his customizable maple dining table, boasting a sneaky compartment for all your gaming needs.
Let’s set the scene: You’re crafting a 2,000-piece art piece, but those pesky pets play bandit with your bits. Enter Amantea’s solution: a table topped with removable panels revealing a compartment that’s a safe haven for puzzle pieces.
Dreaming bigger? Modify that secret space with a simple deepening tweak to stow away card decks, board games, or even Lego extravaganzas.
Channeling The Wood Whisperer’s finesse, this isn’t your run-of-the-mill DIY. It’s a call to arms—or saws—for the experienced woodworker. If that’s you, grab those plans! If not, Amantea’s own craftsmanship starts at around $2,100 CAD, provided you’re around Calgary.
Discovering tables with hidden depths isn’t breaking news—they’re out there, from Carolina Gaming Tables to BoardGameTables.com, crafted to order with all the bells and whistles you fancy. Or for something off-the-rack, ZBrandonWoodworking on Etsy might have your dream table waiting.
And for the puzzle-curious little ones or spill-prone adults? Amantea has a pro tip up his sleeve—a strategic plastic tablecloth layer to ward off any potential invaders. As for The Wood Whisperer’s take, it already includes this protective duo: a soft cloth and clear plastic layer beneath the removable wooden guards.
There you have it, a dining table that’s all about fun without forever surrendering your eating space. Transform, tuck away, and get back to dinner—or the next great puzzle—without a hitch.
01. A DIY Modular French Cleat Entertainment Center from Bamboo Plywood
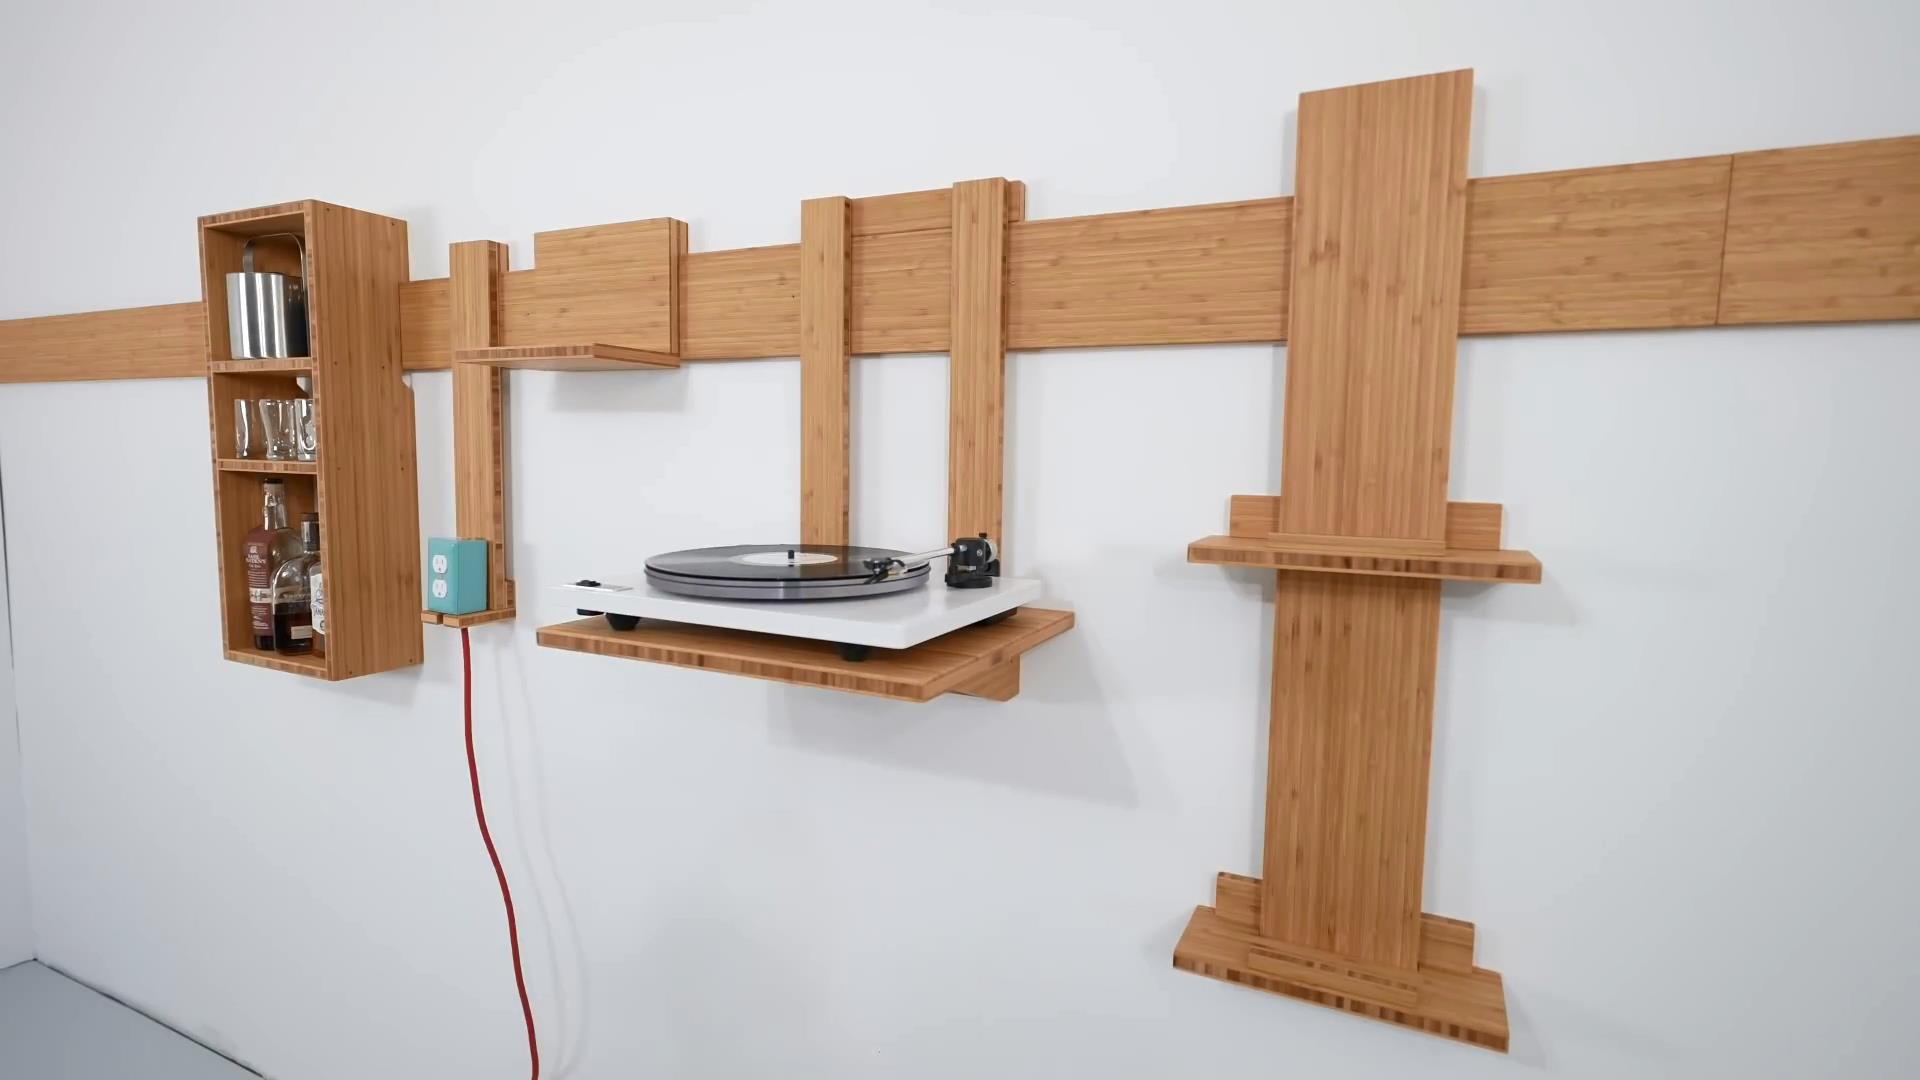
Hey there, space savers and style seekers! Ready to level up your living room? Get set to create a bamboo plywood entertainment center flexing the power of the French cleat system. Say hello to a stylish setup that you can twist, tweak, and rearrange for endless fun – all with a chic minimalist edge.
Here’s the low-down: Grab eco-chic three-quarter-inch thick bamboo plywood, sturdy yet oh-so-svelte. Slice those hefty four by eight-foot sheets into manageable pieces with a circular saw, guided by a trusty straight edge.
Crown your saw with a 10-inch, 80-tooth Diablo blade perfect for slicing bamboo like butter, and tip that blade to 45 degrees to whip up cleat magic. Dial back to a precise 90 for risk-free edges that won’t snag or scratch. With a contractor saw and a cross-cut sled, you’ll craft and cross-cut with the pros, notching perfect angles for that swoon-worthy record player support.
Smooth the surfaces with 220-grit sanding pads – they’re pretty pristine already, but who doesn’t like to go the extra mile?
Time for action: Fix those rails to the wall, five feet up, to be your anchor in the sea of design possibilities. Don’t skimp on the finish – plant-based options enliven the bamboo’s rich tones while keeping things natural.
What’s next? Drill, attach, and finesse each module, from record racks to mini shelves that can cradle your spirits as well as your tunes. You’re gunning for an aesthetic vibe that turns functionality into fine art.
Add power to your masterpiece with discreet holes for cords because even the most enchanting record players need a plug to spin their magic.
And there we go: brought together by simple screws and a drop of glue, your entertainment center isn’t just furniture—it’s a statement, it’s your muse, it’s a conversation starter. Curious about adding more zest? Dabble in epoxy mirrors or mull over integrated cord management.