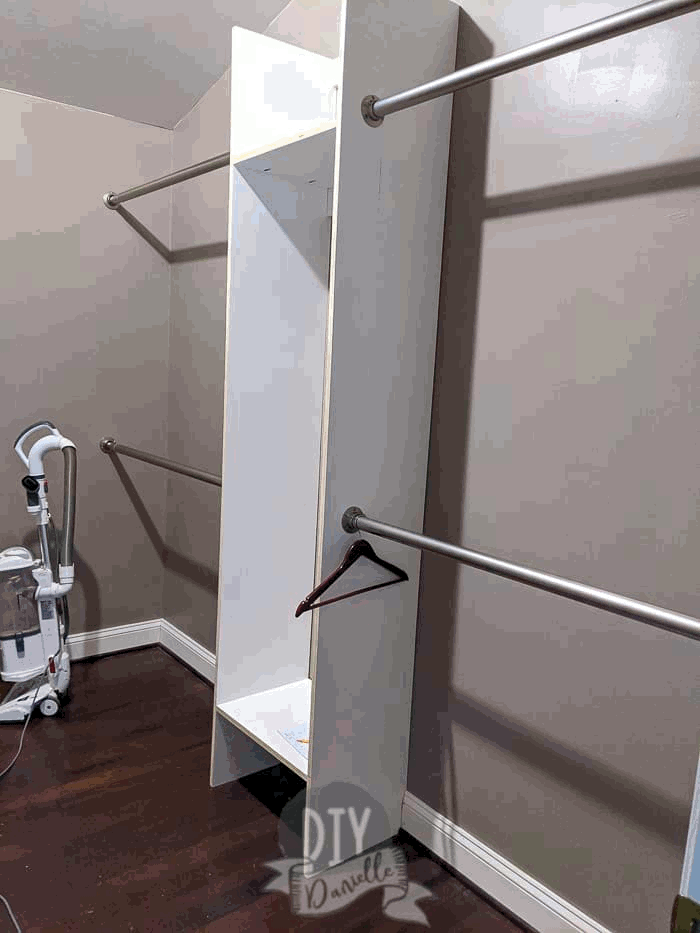
11. Your Ultimate No-Drill Closet Shelving for the Modern Nomad
Ever battled with cluttered closets? Good news! Dive into an ingenious solution that fits renter lifestyles, camper enthusiasts, or simply anyone hungry for a quick revamp: no-drill closet shelves. Picture this: instead of your clothes tragically puddling at the bottom, they’re neatly organized on sleek wooden shelves.
And guess what?
No drilling!
Total win, right?
You might wonder about the longevity of this no-drill miracle. Trust this – years could roll by, but they’ll stick around. Yet, if whims change, disassemble in a snap. Moving house? Pack them up. Need the rod back? Presto, it’s free.
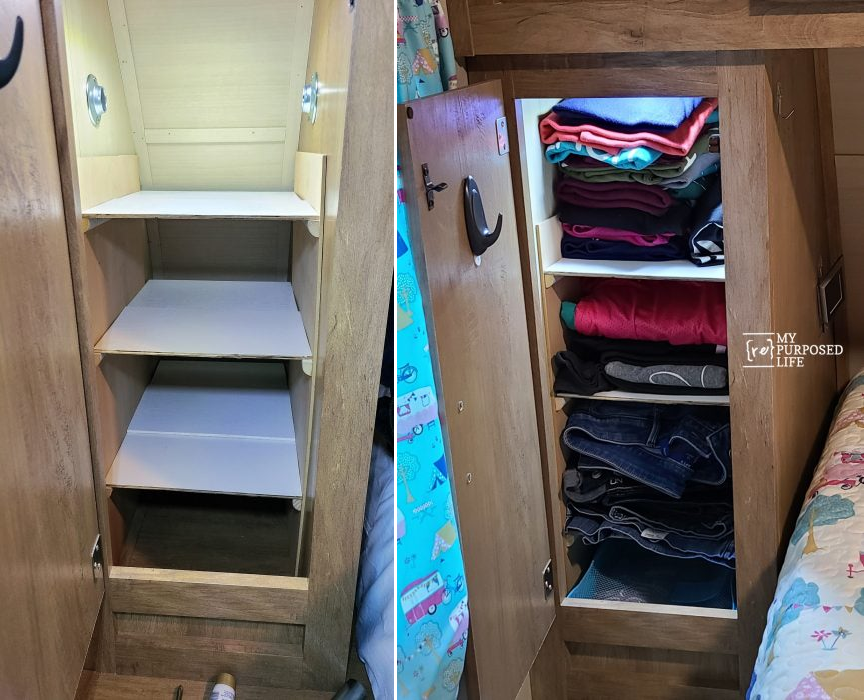
Alright, you keen traveler, step into your camper. Observe those side closets flanking your comfy bed. Tsk, such diminutive hanging space. Or perhaps you’re eyeing that linen closet of yours, contemplating a revamp. Here’s how to transform it.
Creating Your No-Drill Dream:
- Measure Twice, Cut Once: Start with thin plywood for light storage or thicker 1×6 or 1×8 lumber for heavier items. Your goal: shelves that comfortably span the width of your closet.
- Ace the Support: Witness the magic of quarter rounds or shoe moldings. They’re your shelves’ trusty sidekicks, offering sturdy support without a single drill hole. So, after slicing your plywood to desired lengths, slice these moldings for cleats.
- Precision is Key: Grab a carpenter’s square. Make sure those cleats align perfectly, then glue them in place. Tip: thin panels adore clamps. They help your glue set without a hiccup.
- Onwards to Shelves: Got leftover planks? Repurpose them! Cut to size. Using small ⅝” brad nails, secure them atop the cleats. Safety first: sand down any roughness to ensure smooth edges.
Shelf Installation – As Easy as 1, 2, 3:
1. Nestle the side panels in place With your closet rod (brackets intact).
2. Pop on the shelves. They should fit snugly—these bad boys keep the panels upright!
3. Revel in your handiwork. Not only have you maxed out space, but there’s zero damage!
Now, gaze upon your masterpiece. Look at that tidy cascade of clothes, each item readily accessible. Extended trips? Bring them on! And remember, these shelves keep your original space unscathed.
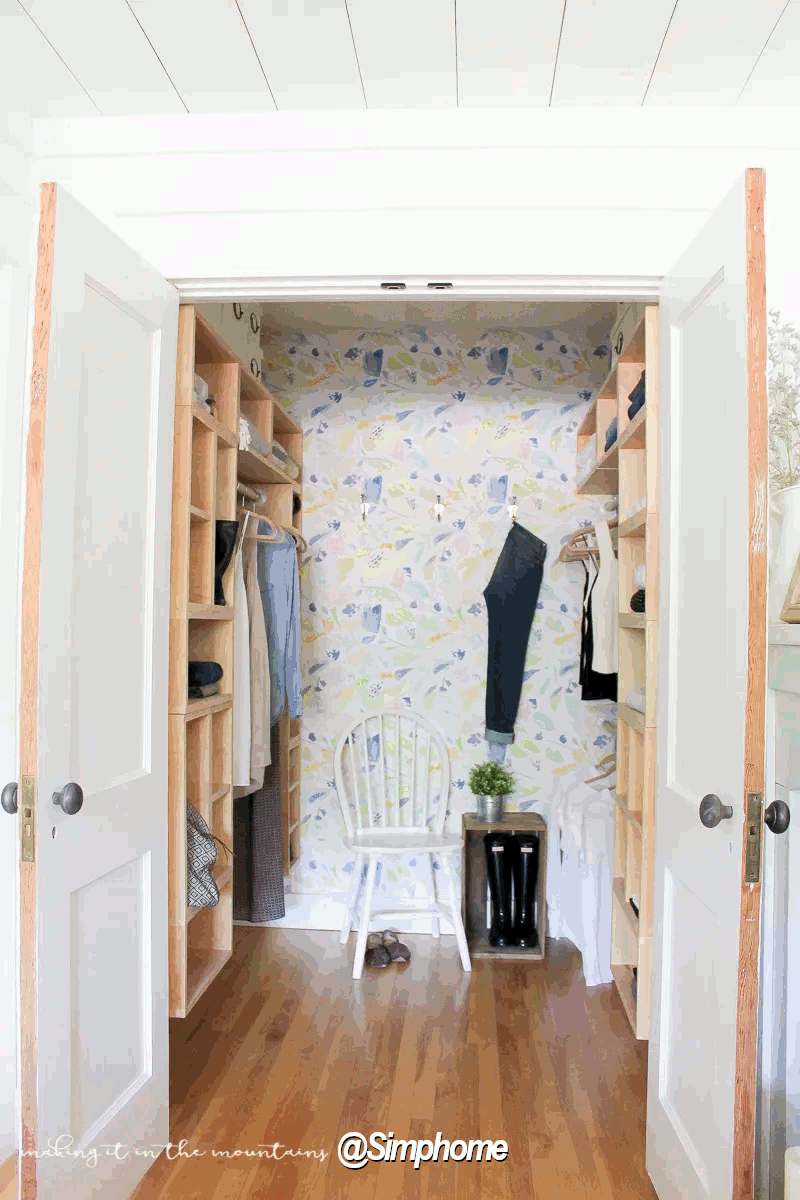
10. Unleash Your Inner Carpenter: Bedroom Closet Shelves With Dowel Joinery
Ever dreamt of flaunting a lavish walk-in bedroom closet with tailor-made shelves? Well, it’s time to turn that vision into reality! And here’s the best part: your dream closet won’t break the bank. So, let’s roll up those sleeves and get started!
1. Inspiration from the Pros
Kick-off by inviting a sales rep from a renowned closet company (like Closets by Design). This might take an hour, but it’s invaluable. They offer a plethora of designs and provide measurements. One visit quoted me at a whopping $3,000! Instant motivation to DIY and save big!
2. Vision Before Execution
Now, visualize! Our source ditched the hanging space and built a hamper section and some personal shelves. Remember, it’s about optimizing the storage potential. Sketch out your design. Need measuring guidance? [Here are some tips].
3. Shopping Time!
Select sturdy 3/4″ thick MDF plywood. For our modest closet, two 4×8 plywood sheets were ample. Depending on your closet size, adjust accordingly.
Essential Supplies Checklist:
- Dowel kit (for that elite floating shelf look)
- Plywood trim
- Wood putty
- All-purpose caulking
- Must-have tools: table saw, nail gun, impact drill
- Pristine white paint (Behr Ultra white paint and primer combo)
4. The Dowel Magic
Invest in a quality dowel kit. It’s your ticket to achieving that sleek, floating shelf appearance. And trust me, it screams elegance. Not sure about dowel installation? Check out [our recommendation].
5. Details Matter: Trim, Putty, and Caulk
Add a dash of sophistication with finishing trims. Any minor gaps or imperfections? A dab of caulk has got you covered. For any nail or screw dents, wood putty is your go-to.
6. Painting Perfection
A double coat of a quality paint like Behr seals the deal. This ensures vibrancy and longevity.
9. A DIY Custom Closet Organizer: The Brilliant Box System
Ever fancied a chic, custom bedroom closet but balked at the price? Your dream is closer than you think! Dive into this DIY closet organizer journey that’s easy on your pockets and super fun to make!
Reimagining your cluttered closet? Picture this: an organizer built entirely from boxes. Same-sized, simple boxes. That’s right, uniform boxes that are 19.5 inches long x 9.75 inches wide x 15 inches deep. Designing a custom closet is a breeze when all your pieces match!
Kickstart your project by measuring your closet space and chalk out your dream design. With the dimensions decided, it’s shopping time!
Essential supplies to grab:
- 3/4″ birch plywood boards (your main building material)
- Wood stain (for that sleek finish)
- Veneer edge tape (for polished edges)
- Wood filler, glue, and dowels
- Screws, and of course, closet rod brackets for hanging space.
Onto the construction!
Each box consists of two long side pieces (19.5 inches x 15 inches), two shorter end pieces (8.25 inches x 15 inches), and two back pieces (8.25 inches x 2.75 inches). Assemble them in a snap with some glue and screws. With your box blueprint in mind, streamline the construction – remember, every box is the same! Once all your boxes are ready, add that finishing touch with some wood stain.
The magic begins as you piece your closet together. Find your wall studs and start attaching the boxes, ensuring sturdiness. Mix and match your box orientations and throw in some extra shelves in between. Complete the look with closet rods cut from simple wooden dowels held up by brackets.
8. How to master your clutter with the Game Changer DIY Closet Drawers.

Hey there, fellow DIY enthusiast! Have you ever found yourself doubting if you could pull off a project? Well, join the club. We took on a challenge: building our own closet drawers. Before you drop $300 on store-bought versions, here’s a fun guide to crafting your own!
1. The Right Wood Matters: Dive into this with quality in mind. Opt for well-sanded, 3/4″ premium pine. Your closet deserves the best, right?
2. Plywood Bottoms: The 1/4″ sanded plywood is your go-to. Why? That’s what you’ll use for the drawer bottoms. And guess what? Our source routed to pine to fit these snugly!
3. The Kreg Jig Magic: If you’re unfamiliar with a Kreg Jig, it will be your new BFF. Using it for pilot holes ensures each wood piece is secured flawlessly together. A few screws later, and you’ve got a box!
4. Dress ‘Em Up: Amazon is a trove for stylish, high-quality drawer pulls. Add them to your box and cabinet, giving it that sophisticated touch.
5. Measure, Measure, Measure: Precision is your mantra here. Remember, the drawer fronts will be larger than the boxes. Factor in the space between each drawer to let them breathe (and slide!). Our secret? Measure from the top of the drawer slides on the cabinet.
6. Bring on the MDF: MDF drawer fronts, painted a crisp white, offer elegance and routed lines for added depth. Ooh la la!
7. Finishing Touches: Now, we’re not entirely done. The hardware is pending, a paint touch-up is on the list, and you’ll wrap a baseboard around the bottom to seal the deal for a seamless, built-in look. It’s already turning heads and oozing class.
Get set because, by tomorrow, your clothes will have a brand-new, chic home. Dive in and watch your DIY dreams come alive!
7. Dive into the Elfa Closet System: A ‘Before & After’ Makeover Extravaganza!
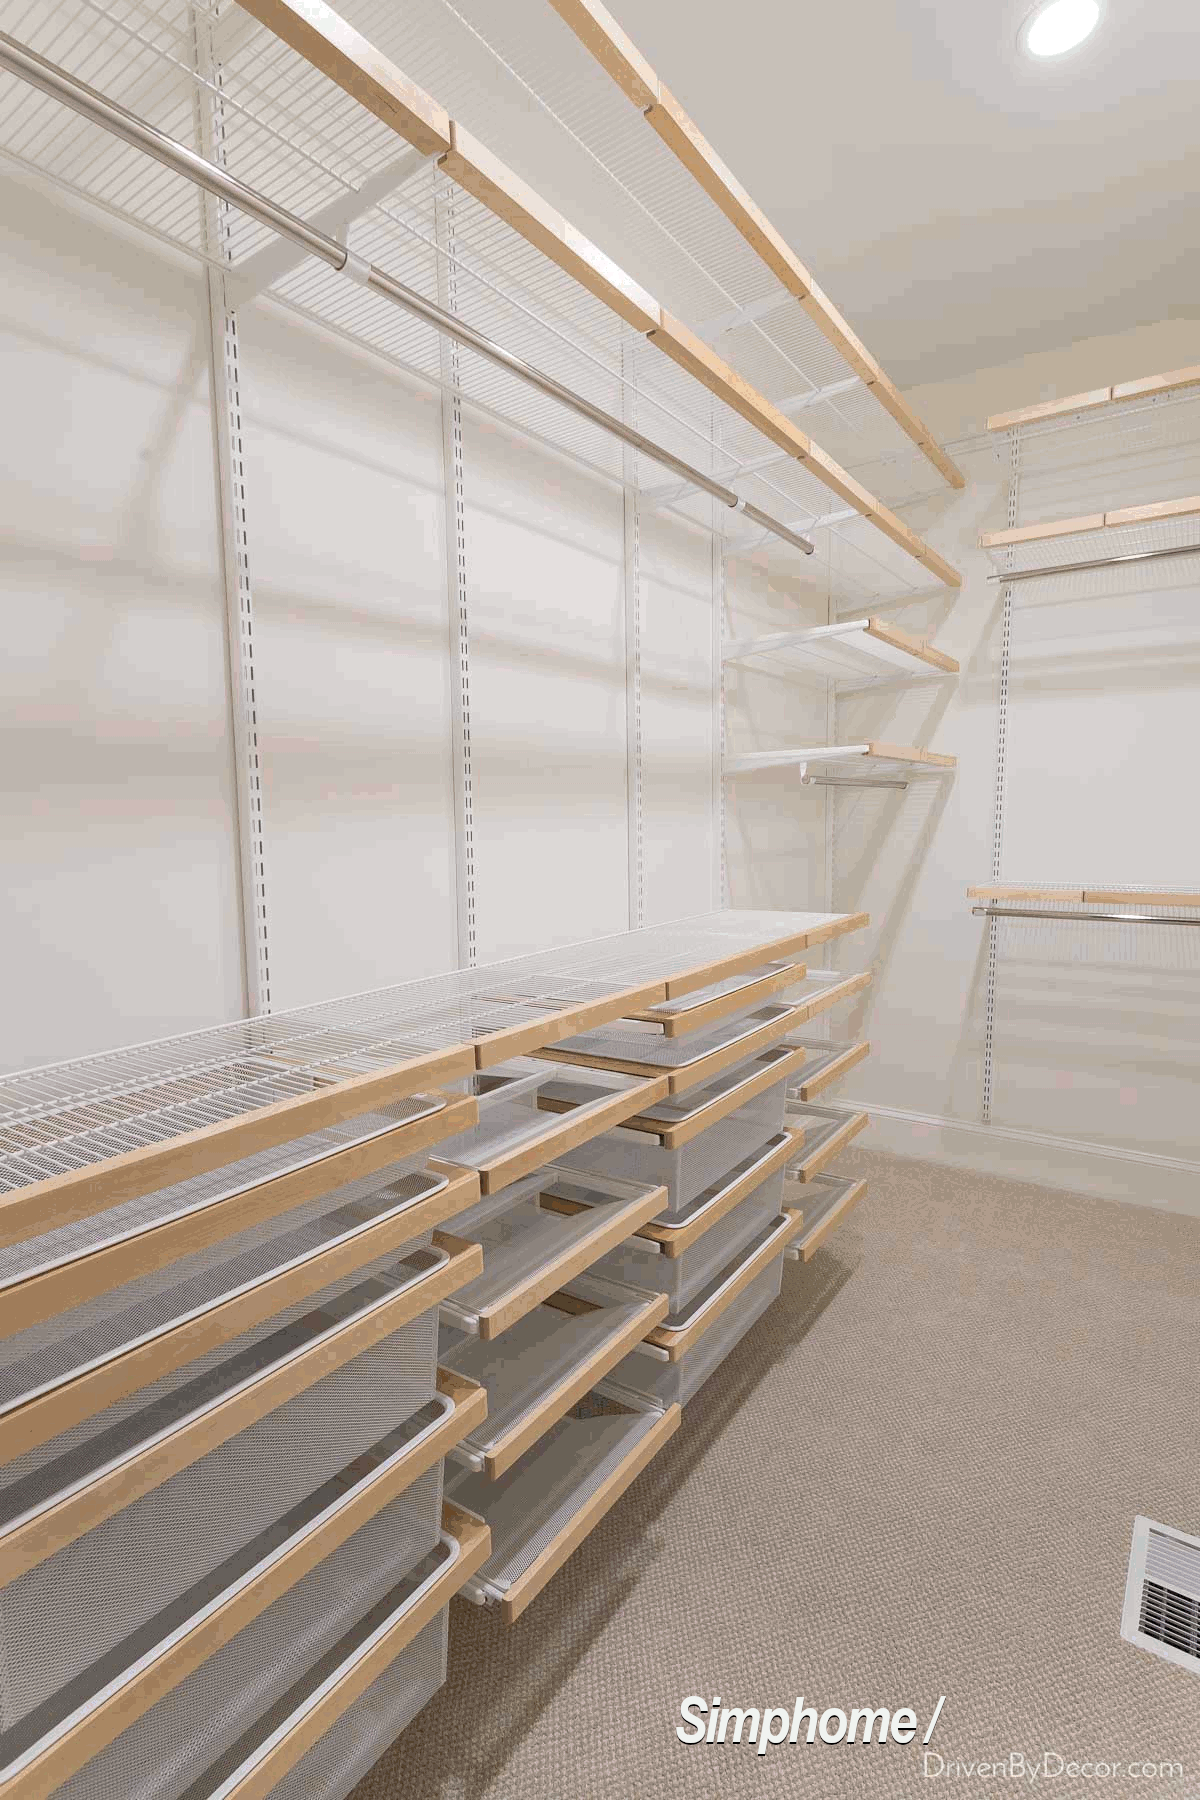
You know that sweet ecstasy you feel when a home project just *clicks*? Imagine having an unkempt closet, glaring with wasted space, then turning it into a magazine-worthy storage dream. That’s the magic our source experienced transitioning from the IKEA PAX system to the Elfa Closet System.
The following is the continued story from our source, Kris Jarrett from Drivenbydecor:
Remember our CT home’s bathroom closet? After a dance of decisions between Elfa and IKEA Pax, the PAX system won. Flash to the present, and we’re at a new address, staring at a closet begging for a facelift. Its sad highlights were a single, long, lonely rod and quirky corner shelves.
Eager for a redo, we craved more – more height usage, more layers for our clothes, and little dedicated corners for my shoes and sparkly jewelry. We gave the nod to The Container Store’s Elfa. And the results? Mind-blowingly spacious!
Step in my shoes (literally and figuratively!) as we embark on the Elfa journey. And if you’re torn between the IKEA PAX and the Elfa, stay tuned! We’ve got the deets on both.
Elfa’s Blueprint for Success
Elfa is user-friendly with its DIY online design tool. Input your closet’s dimensions and play architect! Yet, if design isn’t your forte, The Container Store’s *FREE* design services come to your rescue. Schedule virtual or in-store appointments. My go-to was Jenna from Raleigh. A few exchanged ideas, and bam, visual renderings of the new closet were in my inbox.
Once you agree with the design, purchasing is a click away. Decide between in-store pickup, home delivery, or the very COVID-era curbside pick-up. We went with the latter, and everything was loaded into our car in a jiffy.
Let’s Get Building!
Installation? We went the DIY route. Why? Well, Pro Installation had a hefty price tag. The Elfa system’s beauty is its top track. Fix that, and the rest is a piece of cake (or mostly so).
Jeff and I joined forces for the top track, but I took over after that. Total time? A solid 6-7 hours, thanks to a hiccup. Here’s a tip: check if your top track aligns with wall studs or drywall. Ours aligned with drywall, making us nervous about the track’s weight-bearing capacity. Our hack? We drilled additional holes for a secure fit. Future plan: request a custom top track.
Once that’s settled, hang the vertical “standards” and brackets and install the shelves, drawer tracks, and hanging rods. I went a step further with Elfa Decor pieces for a refined look. And guess what? There are tools for hiding unsightly screws and holes. Your closet will look polished!
Elfa Classic vs. Elfa Decor
A quick note on customization: Elfa Classic is your budget-friendly choice, available in white, platinum, or graphite. We jazzed ours up with Elfa Decor in birch, adding classy wood fronts. Feeling more lavish? Check out Avera and Laren for ultra-luxurious vibes.
Cost Breakdown
Costs vary depending on size, components, and any Elfa Decor indulgences. Our closet’s total retail was $3987, slashed to $3189 with a 20% discount. Choose only Elfa Classic, and you’d save a chunk, estimating around $2750 or a sale price of $2200.
Elfa vs. IKEA PAX
In our previous home, IKEA’s PAX system ruled our closet. While both systems shine in their ways, the ideal choice depends on your needs. IKEA PAX is wallet-friendly but demands more DIY effort. It uses wardrobe frames, limiting customizability. Yet, with the right touch, PAX exudes a high-end charm.
Elfa’s major win? Flexibility. Everything, except the top track, can be rearranged, allowing the closet to evolve with your needs. It’s perfect for spaces with unique dimensions and high ceilings. And the variety in shoe storage? Total win!
However you spin it, both systems have their merits. It all boils down to your personal preferences and space constraints. Cheers to organized living!
6. A DIY Closet Makeover with Plywood Magic
Hey there, future closet magician! Ever dreamt of giving your wardrobe space the ultimate facelift without burning a hole in your pocket? We’ve got the deets! Plywood’s about to become your favorite buddy. Dive right into this DIY wonderland where basic plywood and a bit of trim can craft a chic closet space that would make even Marie Kondo proud!
Here’s the Juicy Bit: By simply embracing plywood shelves jazzed up with snazzy 1×2 trims, you could *save a whopping $4000*! But hey, before you dive in, a quick heads-up: Some of the links here are affiliate ones, but every piece of advice is to make sure your DIY game is on point.
Your Closet’s Cry for Help: Ever glanced at your master closet and felt that cringe because of those messy wire shelves?
And oh, those bank-busting professional quotes? Well, you’re about to change the game.
Your Blueprint:
- Cost Showdown: DIY vs. Pro: Got a $5k quote and almost fainted? We feel you. Let’s learn the savvy way.
- DIY: Yay or Nay?: Weigh the pros and cons. Is DIY your jam? Let’s find out!
- Choosing the Right Trim: Get the skinny on why 1x2s might be your closet’s BFF and when to play the veneer card.
- Accessorize Like a Pro: From swanky belt hangers to elegant valet rods, pick what screams YOU.
- Nailing the Measurements: Unravel the secrets to ideal shelf heights, widths, depths, and more for your dream space.
- Insider Tips & Tricks: Master the plywood cost-saving hacks and sneaky design strategies.
Crunching Numbers: Starting with (6 sheets) 3/4″ Plywood at $300, down to rods at $216, your dream closet could come alive for *just a mere $660*! Remember, there might be a few extras like paint and those oh-so-important tools.
Design Wisdom: Think about what you really wear (hello, floor-length dresses) and those tall, sassy boots you love. And a pro tip: Not every wall is a straight arrow. Flexibility is your secret weapon!
Gear Up: Arm yourself with trusty tools like the circular saw, the stud finder, and drills, and don’t forget the miter saw.