5. Transform a teen’s space with an IKEA KALLAX platform bed, integrating storage, a desk, and a comfy sleep area!

You’ll need: 5 Kallax 77×77 units, 3 Kallax 147X77 units, an iron bar, Sprax wood screws, 5 OSB3 18mm thick boards, vinyl parquet, vinyl glue, and a plastic strip for finishes. Distribute weight evenly with the KALLAX units, secure them to walls, reinforce them with the iron bar, and attach the OSB3 boards. Finish by applying glued PVC flooring and edge with the plastic strip. Voilà, your awesome platform bed has materialized! ~Diane D., France.
4. A sleek, modular room divider transformation idea
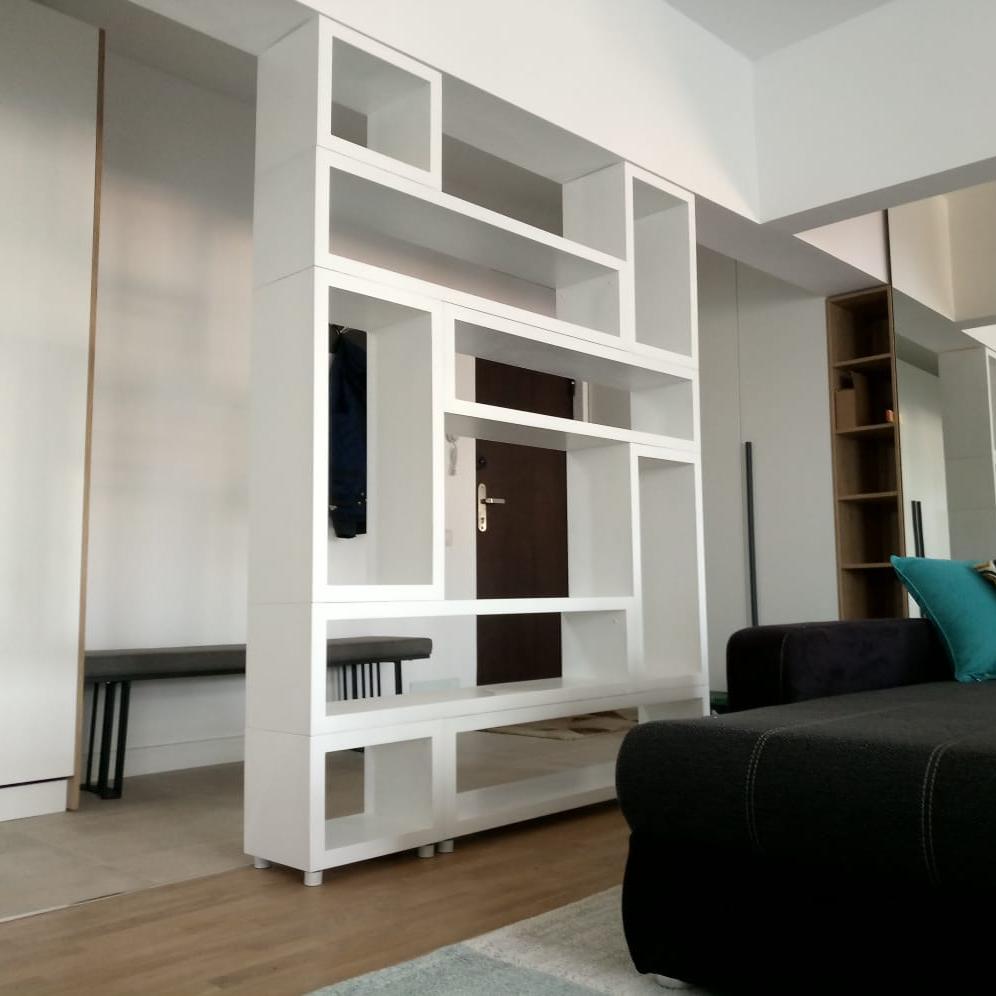
Follow this DIY guide! Begin by mapping out your shelf’s depth, length, and height.
Opt for 40 mm thick MDF boards; they’re tricky to find but absolutely worth the hunt. Make sure to get them pre-cut to your specific measurements – think about a 2800 x 2070 x 40 mm board as a reference. Assemble your cubes using screws and glue, but remember to pre-drill holes to avoid any splits. Hide those screw holes with quick-drying two-component polyurethane mastic, and sand once dry for that perfect finish.
Ready for color? Start with a primer, then layer on 2-3 coats of your chosen paint (consider RAL 9002), sanding between each application. Top it off with 3D-printed adjustable legs to fit your floor height perfectly. Voilà, you’ve got yourself a stunning MDF divider to show off!
3. Take “ADU” from Cosmic A serious Consideration
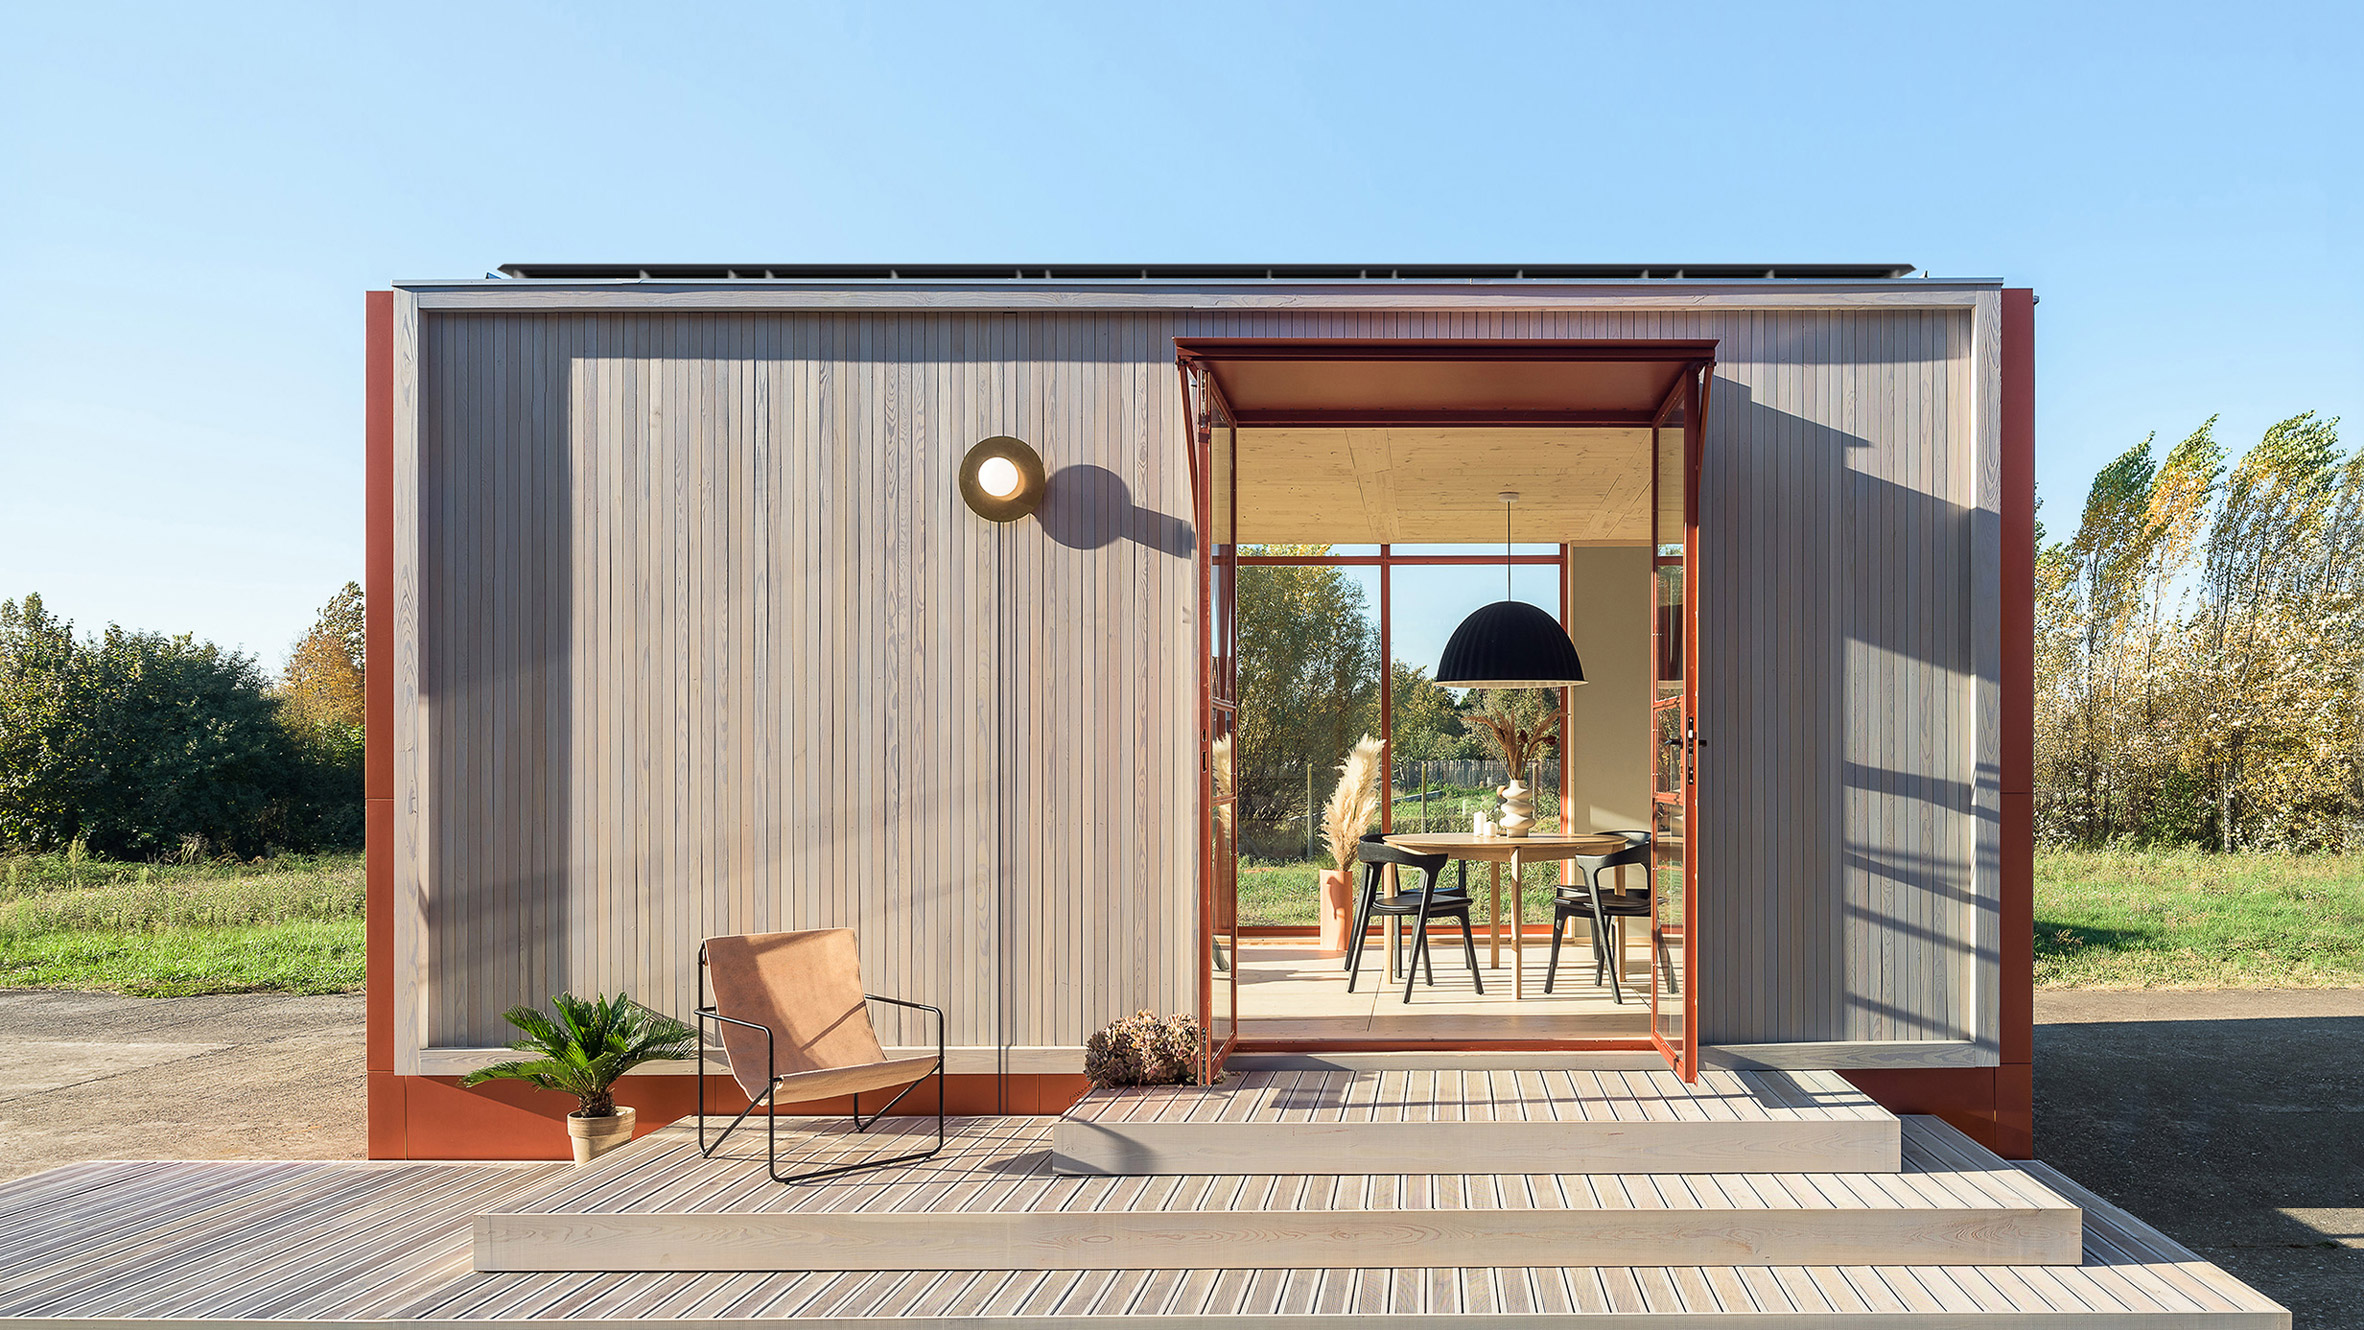
San Francisco-based startup Cosmic is pioneering the future of housing with its self-powered, solar-charged accessory dwelling units (ADUs). Founded by design-pro Sasha Jokic, with over 14 years of experience, Cosmic crafts ADUs that produce more energy than they consume, challenging typical construction norms.
Their innovative “hybrid prefab approach” combines off-site factory work with on-site assembly. A highlight? The Cosmic Studio is a versatile 350 sq ft, eco-friendly unit featuring cross-laminated timber walls and high-end finishes. Designed for more than just living—think workspaces and playrooms—Cosmic’s ADU is reshaping the “American Dream” for a greener tomorrow.
2. Christian’s revolutionary 24-square-meter apartment is like a life-sized Lego set for adults!
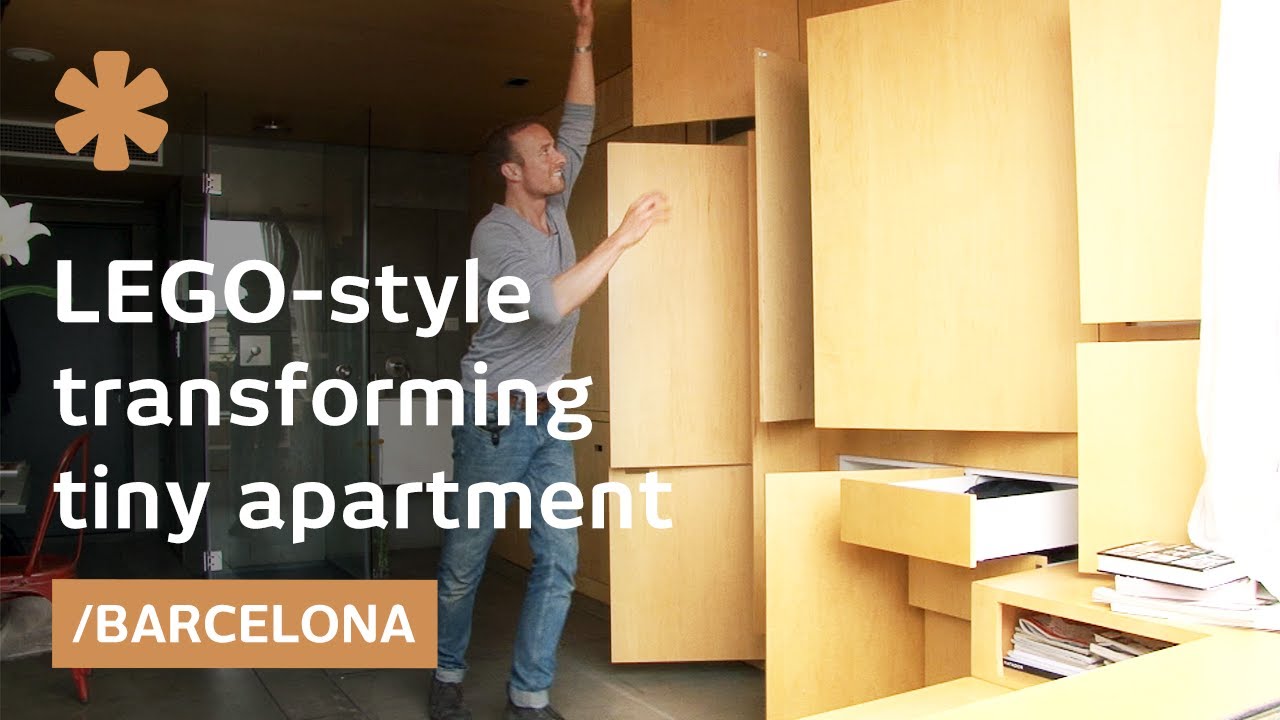
Inspired by boat designs, every corner unfolds a surprise: from a pop-up kitchen with a dishwasher and microwave to a hidden bathroom with a “glass cube” shower. His dynamic space includes a bed that tucks under the balcony and flexible lounging areas. Efficiently designed, you can even grab a drink from the fridge while lying in bed! A harmonious blend of function and flair, this action-packed apartment keeps Christian constantly moving – no gym needed!
1. Kickstart your TV makeover with this DIY Nintendo Switch guide:
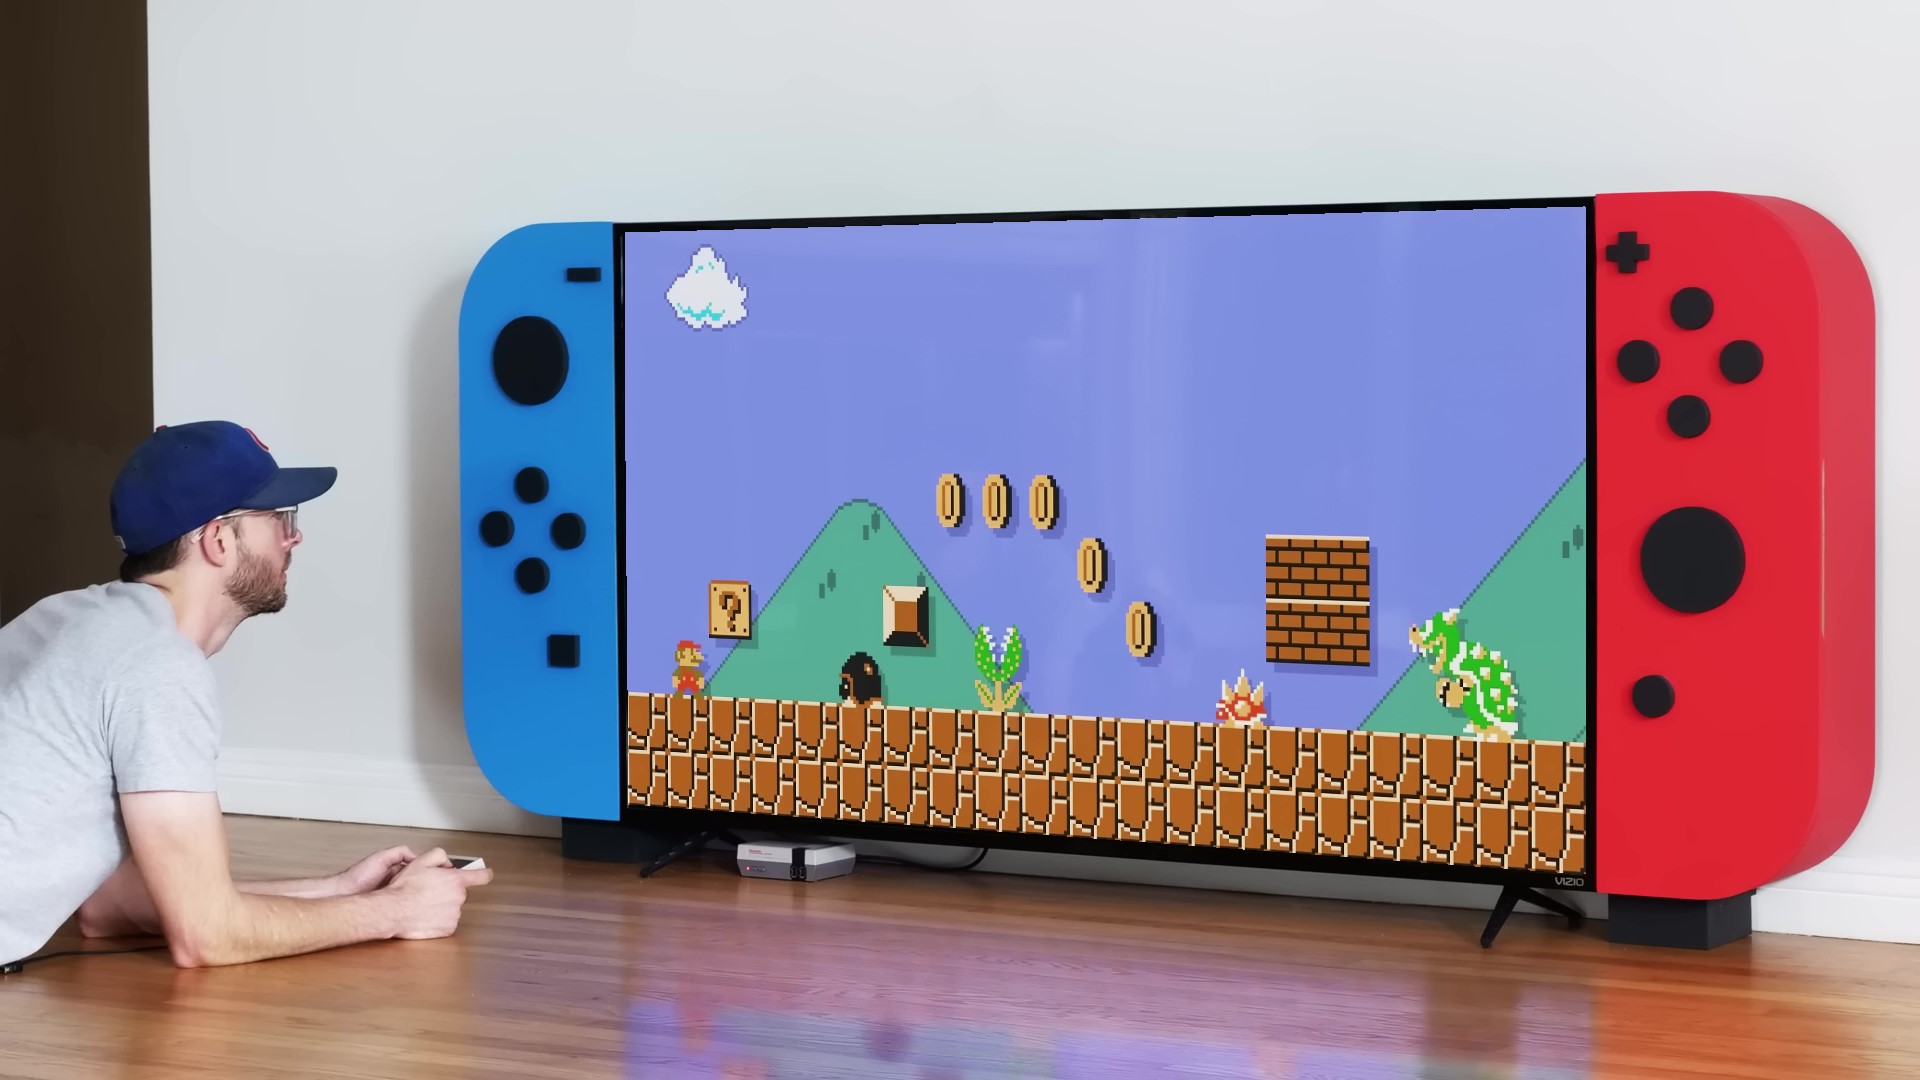
- Begin with the Back Panel: Cut two half-inch MDF rectangles. This will anchor everything else.
- Scaling: Measure an object (like a joy con) and scale it up to your TV’s height. Adjust the sides accordingly.
- Building the Frame: Use half-inch MDF with kerf cuts to wrap around the back panel. Strengthen one side with 3/4 inch plywood for hinge installation.
- Shelving: Install three shelves inside; two are removable, and one’s fixed.
- Final Touches: Install doors that resemble a controller. Prepare a base to surround your TV.
- Execution: For precise bends, utilize kerf bending. Play with blade height to ensure optimal bending without breakage.
- Assembling: Attach panels using glue, nails, and screws for reinforcement. Attach interior shelves for rigidity.
- Door Design: Trace the cabinet shape onto plywood for doors. Add finger holes, paint, and attach.
- Decoration: Use tools or hand-paint for button designs. Paint and glue onto your structure.
- Installation: Build a box matching your TV stand’s height. Attach with long strips to tie together. Add removable shelves for flexibility.