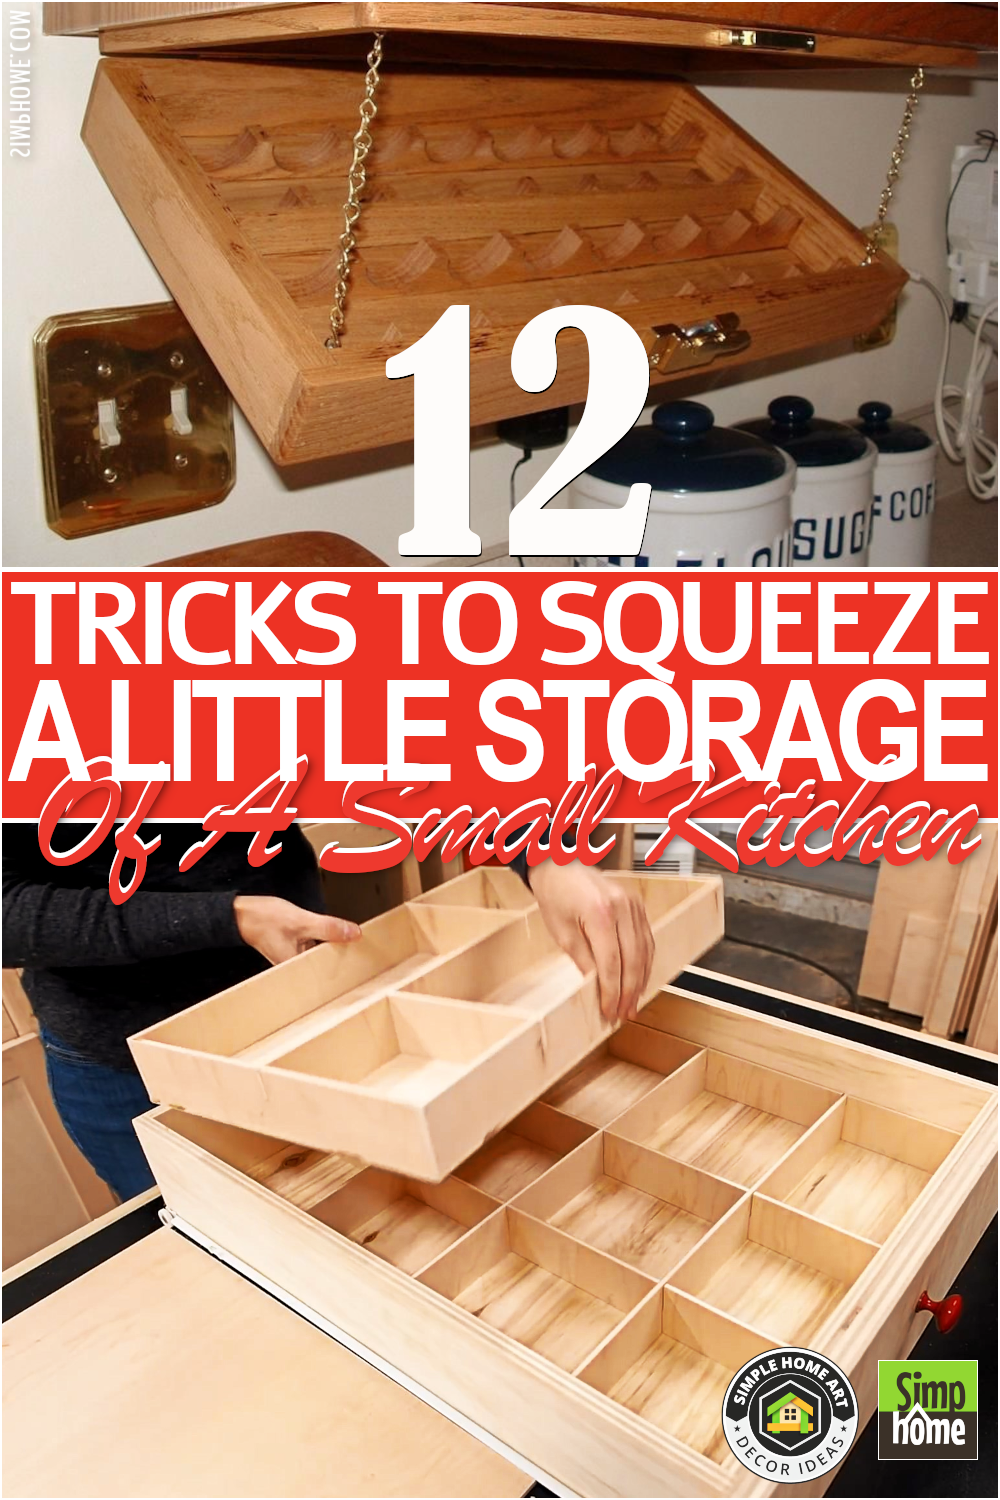
The longer you spend your time as a family cook, the more utensils you accumulate. All of a sudden, you begin to realize you need bigger space to store them all. The only problem is you have a limited kitchen area.
Well, when storage space is a serious problem in your small kitchen, there’s no solution but to be resourceful and creative to get as maximum as possible. Does it feel like you’ve executed all ideas that exist?
Don’t worry. You can always find ways to squeeze in a little extra storage. The tricks vary broadly from repurposing a shoe rack to utilizing a peg board. Here are dozens of them.
12 Small Kitchen Storage Solution video
12. Give your regular cabinet a new Pullout Kitchen Shelf
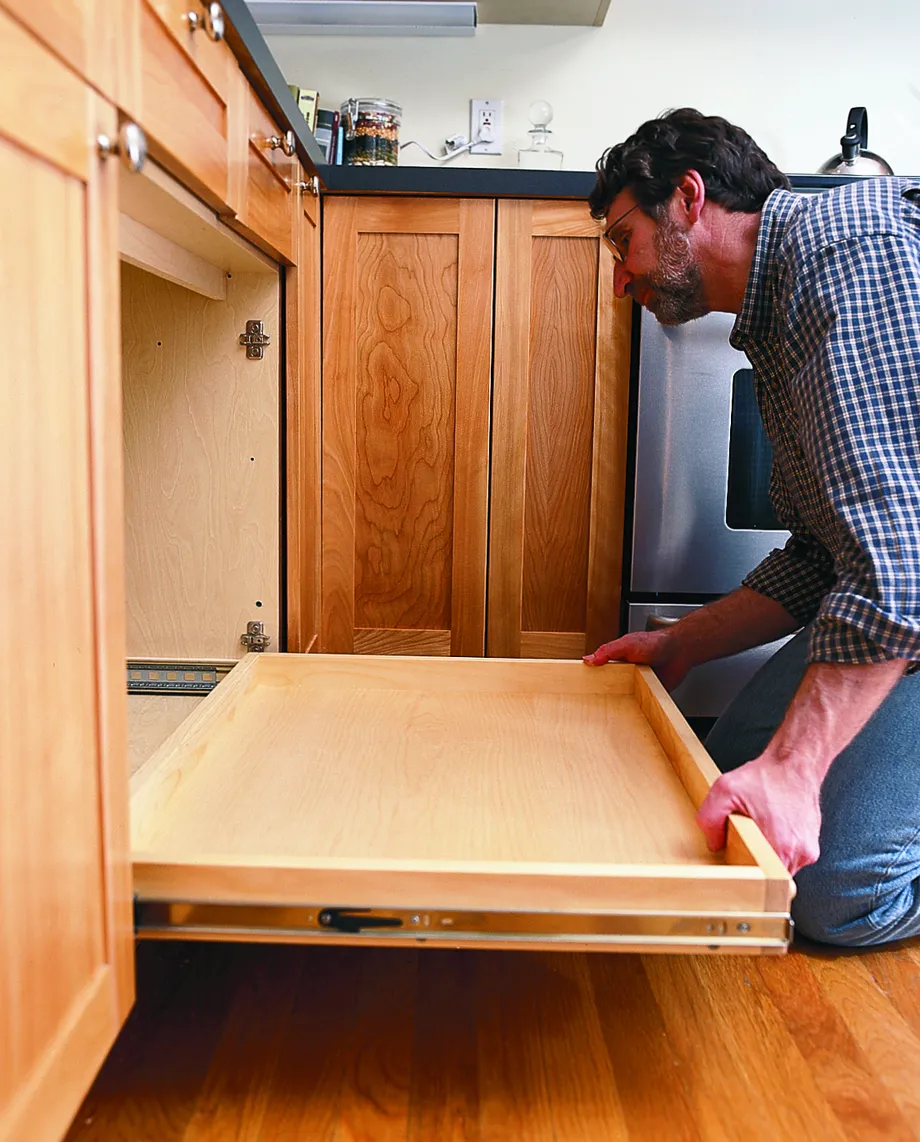 You often forget about canned foods stored in the back row of the cabinets because you cannot see and access them. End this problem soon by making pullout kitchen shelves.
First, measure the cabinet by opening the door, then position the drawer slide with an extended inner rail. After that, measure the space between the cabinet side and the back of the drawer slide. This way, you can get the exact dimension of your cleats that will help your shelf past the cabinet door and hinges smoothly.
Once you have made the cleats, set them aside. It is time to build the drawer. Remember to subtract 1-½-inches from the shelf’s width and depth to know the dimension of the shelf bottom. Consider concealing any screw heads with a ½-inch wood button for a more finished look.
When the shelf is ready, install the cleats to the cabinet. Then, mount the slides to them. After that, install the rail to the shelf.
Next, you can install the shelf by removing the shims from the cleats and drawer slides. Then, sweep out the inside of the cabinet. Align the sliding rails with the slides in the cabinet and push the shelf into it. You need to do it carefully and firmly.
11. Replace Your Backsplash with Pegboards
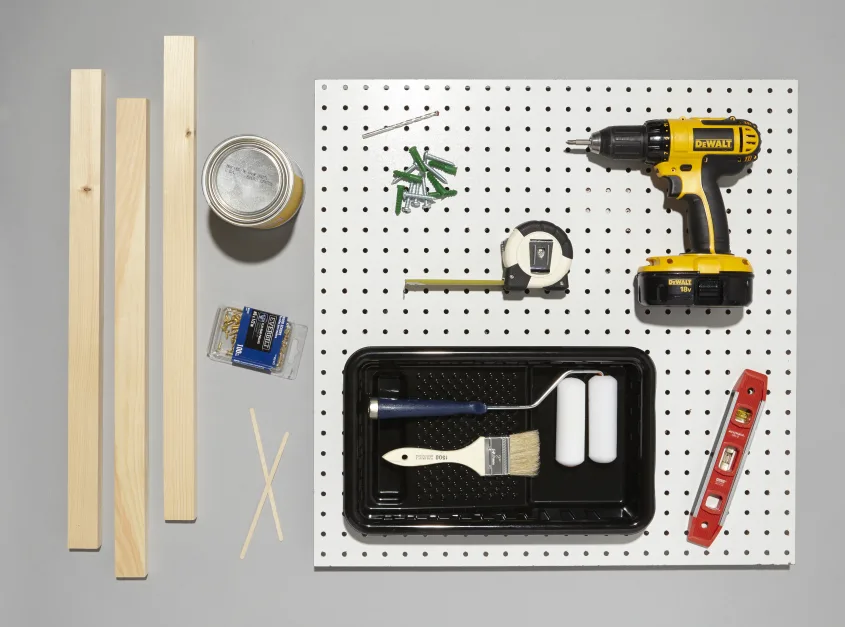 Pegboards are usually seen in the garage to store woodworking tools and car folks’ equipment. Yet, come to think of it, when it works well in the garage, it’ll work in the kitchen just as great. Any wall in the kitchen will do, but the most effective is the backsplash space. There, your tools and utensils will be within arm’s reach.
Besides pegboards, you will also need plank, wood screws, wall anchors with matching screws, clear polyurethane or paint, a brush, tray, paint roller, wooden skewers, drill, tape measure, level, and pencil to execute this storage hack.
First, paint the planks and pegboards and let them sit for 24 hours until dry. Then, add stability and set anchor points by lining up a pair of planks with pegboards (one for each side) and secure them with drill and wood screws.
Next, place the pegboards on the backsplash and mark its corners with a pencil—drill holes into the wall through the pegboards. Put down the pegboards to put anchors into the wall. Then, hang the pegboards before finishing by covering up the visible screws’ heads. Organize some hooks and brackets to have a basket, shelves, and others aboard.
10. A Sliding Pot Rack Idea
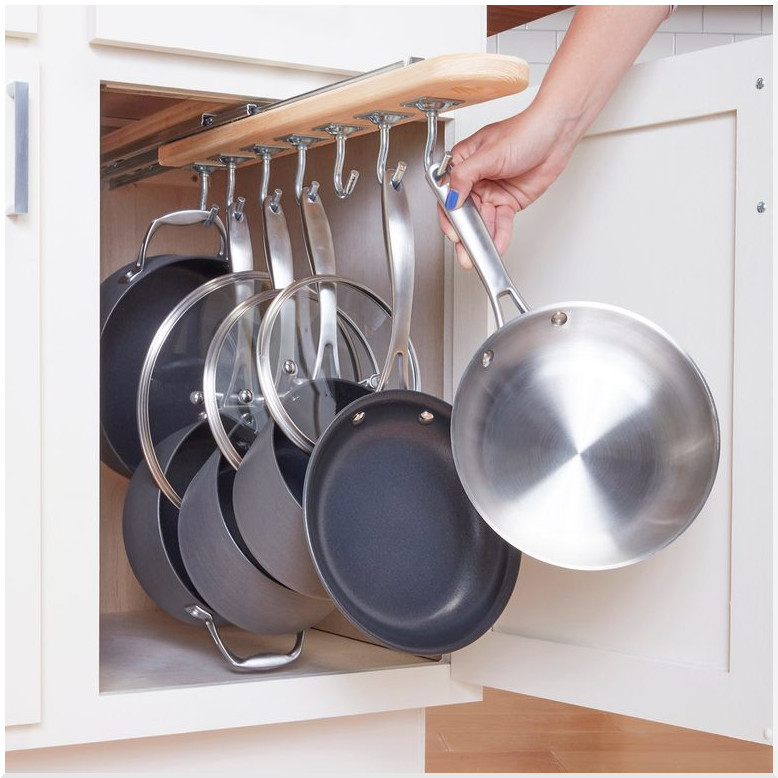 Another cool way to increase kitchen cabinet storage is by making a sliding pot rack. The first thing you require is an empty kitchen cabinet. Then, gather the tools and materials, such as essential hand tools, drill/driver, jigsaw, pines, side-mount drawer slides, and hooks.
Create a sliding pot rack in six steps: measure the cabinet, build the H-frame, mount the drawer slides, screw the slides to the carrier, add the hooks, and install.
9. The IKEA Alex Kitchen Hack for Multiple Users
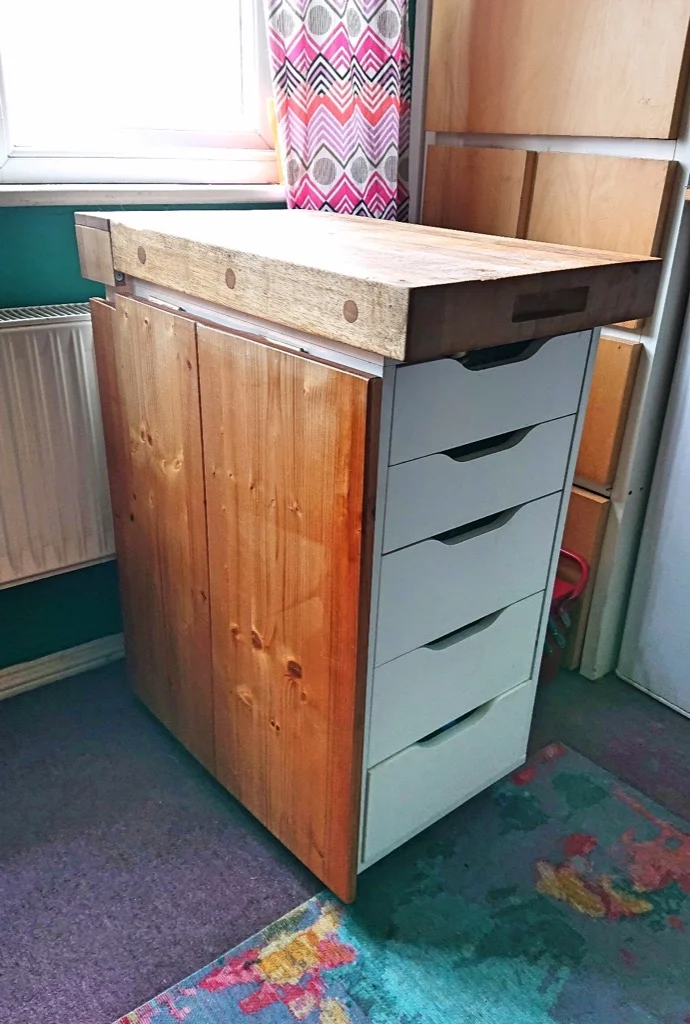 Multifunction items are necessary for small kitchen space. With this idea, you can have a cart to store the tools and utensils more efficiently and do the prep before cooking. However, bear with the process as it involves a lot of items. At least, you’ll need drawers, a spice rack, butcher block, pine planks, and castors.
First, install castors to IKEA Alex. Afterward, get IKEA BEKVÄM, turn the spice rack upside down, and screw it into the butcher block. Later, this rack will store your utensils with the help of hanging rings.
Continue putting the butcher block atop the drawer and setting the planks as the drop leaf.
8. A DIY Drawer Dividers with Sliding Tray
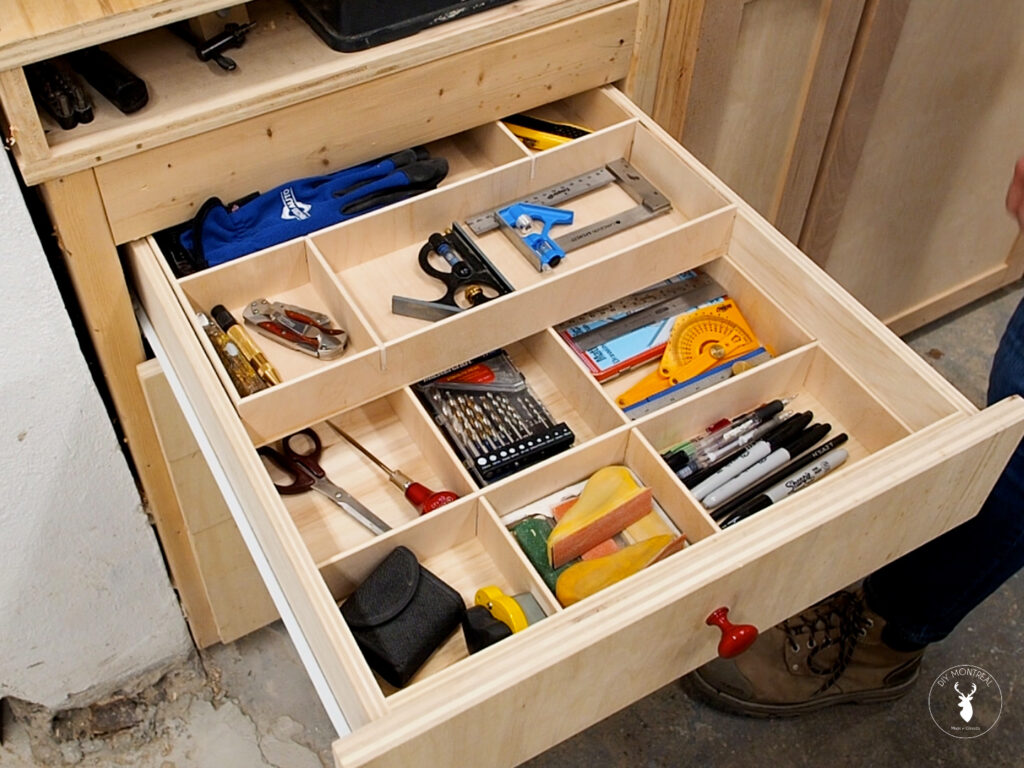
If your drawer is 4 inches deep, you will need 2-inch strips to create the divider. Then, cut notches so that you can assemble the strips more easily.
Using wood glue or nails, you do not need to secure the dividers into the drawers. This way, you can change the layout if you want.
After installing the divider, you can make the drawer organizer tray. This tray can slide back and forth, which levels up your kitchen storage solutions.
To create the tray, you only need to get a sheet of plywood. Ensure the plywood is half the drawer’s length so you can slide it easily.
Then, grab some 2-inch strips and cut notches. Assemble the strips using glue and brad nails. Once the divider is ready, drop it onto the tray inside the drawer and reinstall the drawer.
7. Add a bit of a Quirky Look with These Live-Edge Shelves
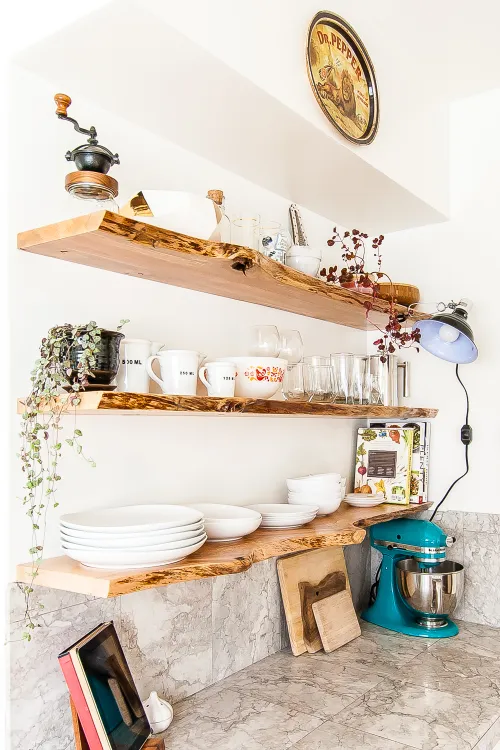 Extra hanging shelving above the countertop is a must to maximize your kitchen space. For the sake of uniqueness, use live-edge solid wood for sure. Here’s how.
Pick appropriate wood greater than 1″ thick and greater than 5″ deep. Cut it, so one is flat if both sides have a live edge. Wall drill the vacant space to secure a bracket after finding the center of the stud. After this step, you’ll need a lot of measuring and leveling work done. Drill the wood for the brackets accurately. Support is required to ensure safety. You could either use a drill press or build a jig.
Check whether it’s level by sliding the shelf onto the brackets. If it is, take it down, sand it, clean all of the dust, and seal it. It’ll need a while until it’s dry before you can hang it up. Repeat the process to the rest of the shelves, if there are any, and you get yourself quirky live-edge shelving!
6. A Kitchen racks and plate idea from Setyard furniture
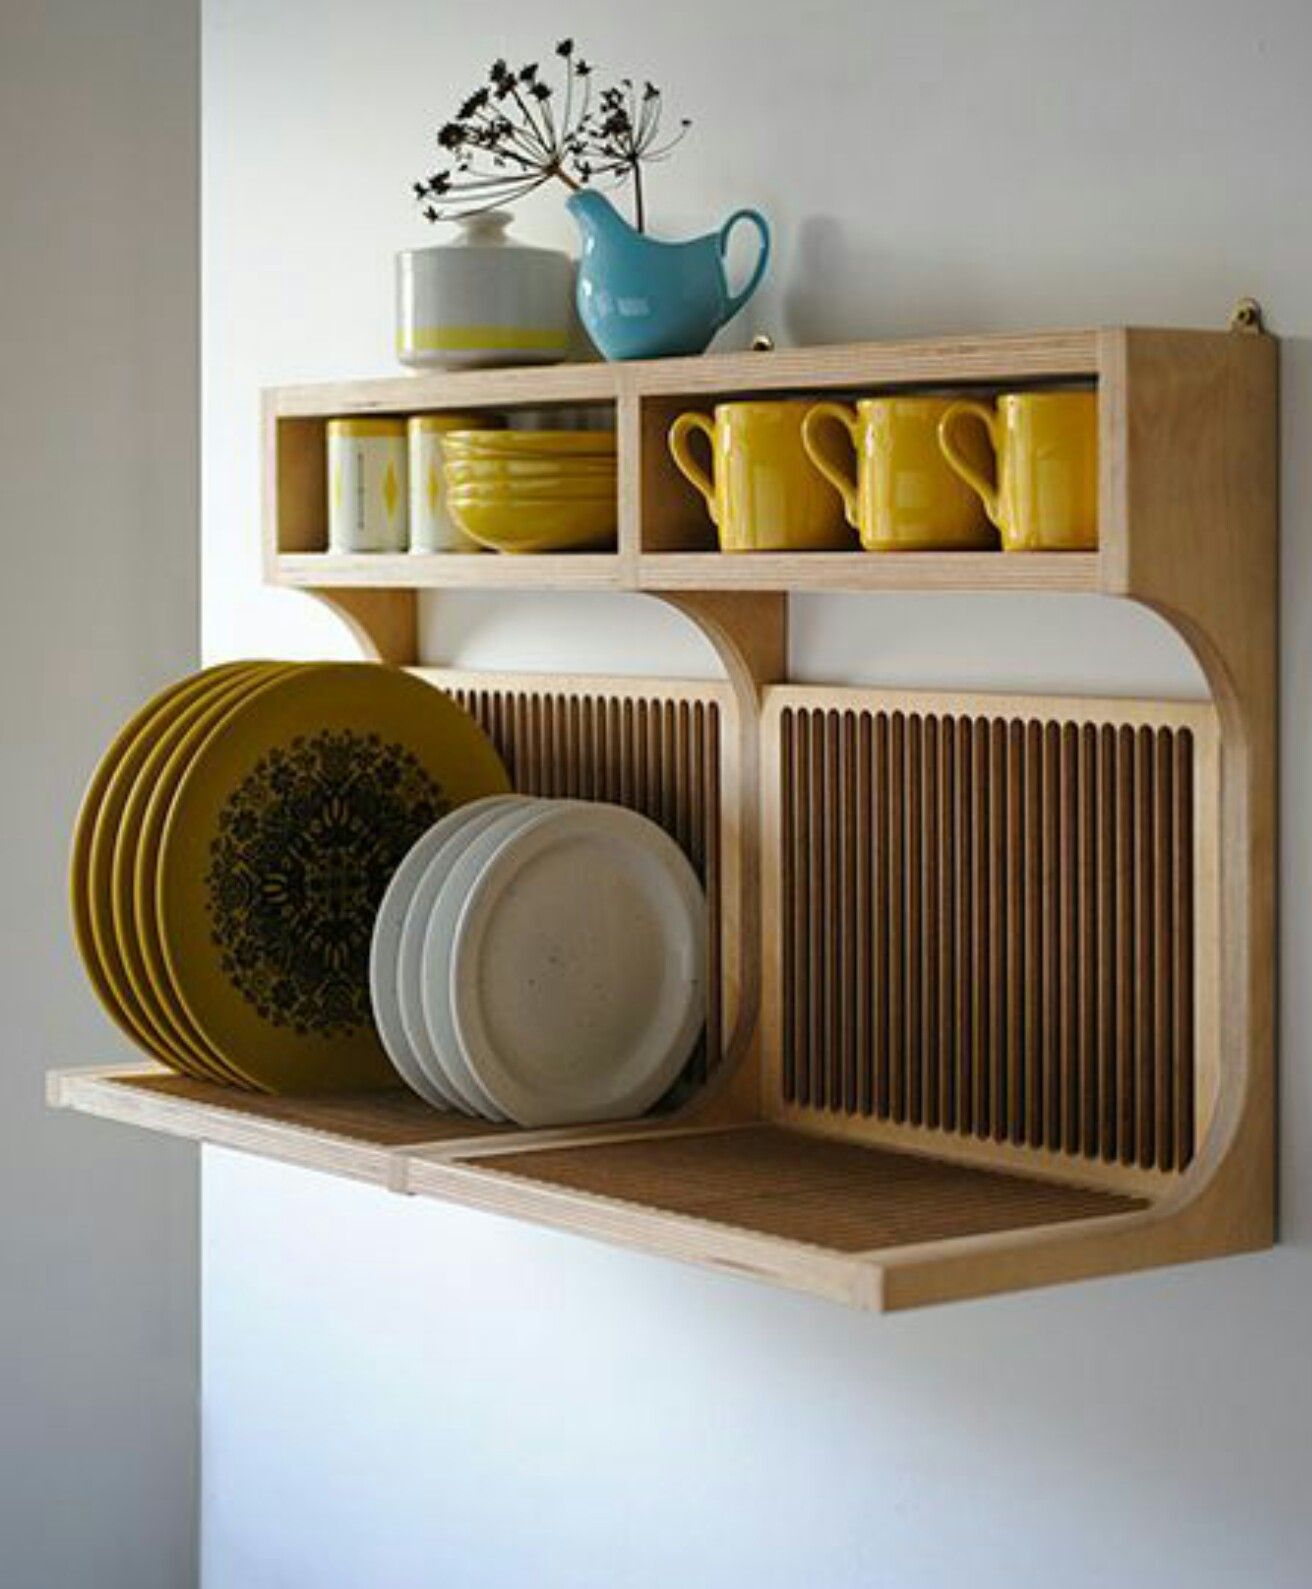 Are your cookie sheets and trays piled up messily inside the cabinet? It prevents you from looking for the right item and reduces your efficiency.
Try to keep them vertically! Make them stand straight using inserted dividers. Find wood strips at a local store and install them at the top and bottom of the cabinet with a slight gap between the two strips. Later, the gaps work as the rails for the dividers.
Insert dividers and mind the space between one and another. The spaces created by any two dividers become vertical shelves, so make them fit different items’ thicknesses.
5. Repurpose an Old Drawer to a Drop-Down Spice Rack
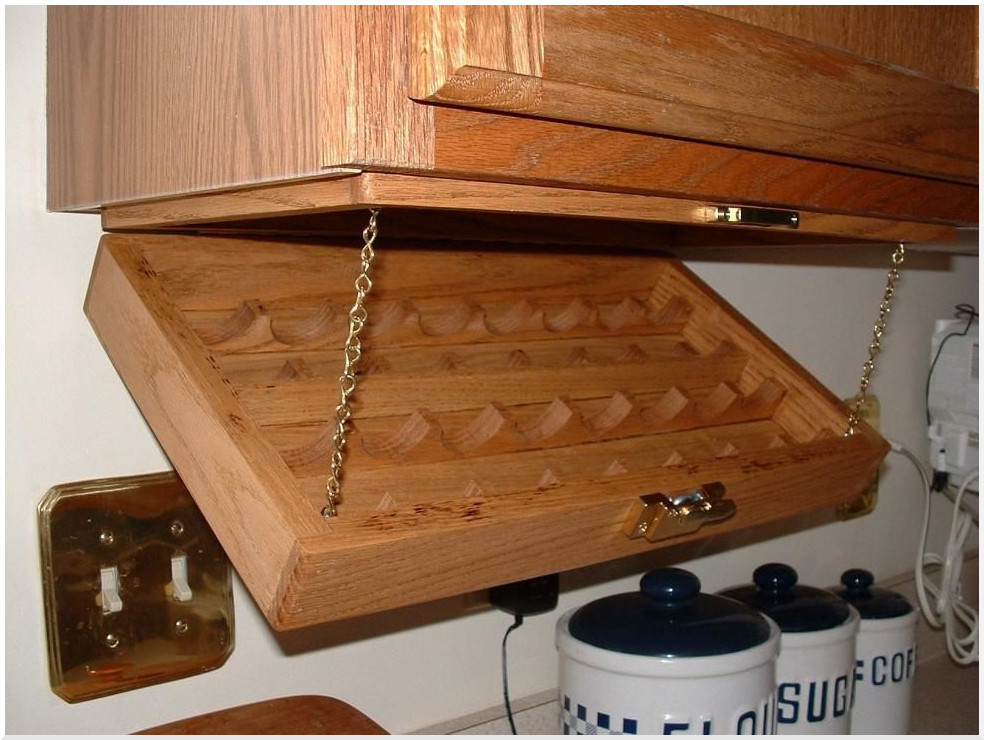 Using a one-dollar drawer at a flea market, you can get a drop-down spice rack under the cabinet. First, remove any hardware from the drawer, like the old rails. Adjust the drawer length with the cabinet depth and cut the back part if it is longer than the cabinet.
Make new support for the back, then secure it with a staple gun and glue to have a good joint. After that, attach a piano hinge or a pair of chains on both sides to hold the drawer. Assemble a shelf or two after measuring the height of the spice, install the drawer, and it’s done.
4. A Wicker bike basket storage for your new kitchen clutter management (Repurposed it for your kitchen produce)
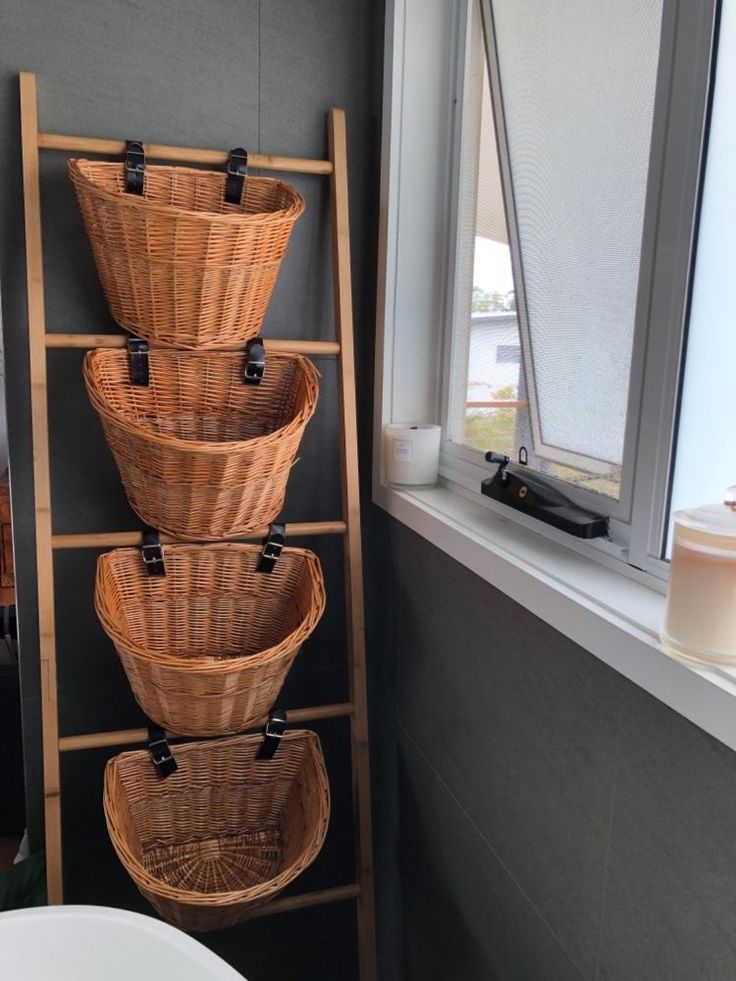 These wicker baskets look cute in the bathroom. Imagine you bring them to your kitchen. You will get cool additional storage to organize potatoes, tomatoes, and other produce.
You only need to get four wicker baskets and slip the buckle straps through them. Hang the baskets on a bamboo ladder and load them with produces.
3. Double Spice Racks behind the Door
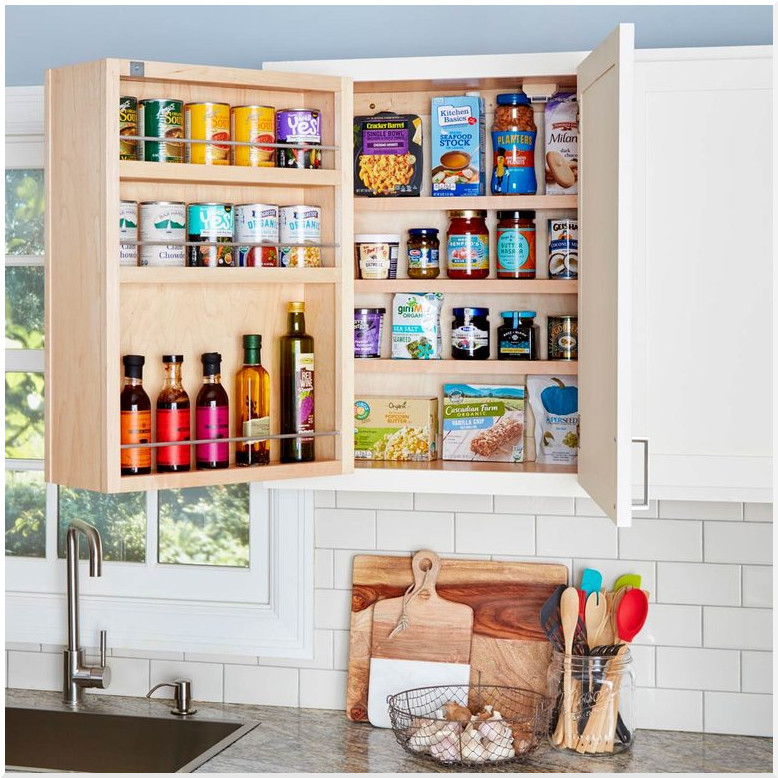 The common problem with lining up bottles, jars, and cans in the cabinet is you can only know the inner ones if you remove the fronts. It’s such a hassle and slows down your working pace. The solution is to build a double-layer spice rack behind the cabinet door.
Don’t execute this hack when you have a lot on your plate because the project will take a full day.
Measure the opening height and the distance between the narrowest width from door parts or protruding hinges.
Then, check whether the swing-out storage will fit the opening diagonally. After that, build the storage frame by cutting plywood and assembling them using nails and glue.
Create the shelving edging with wood strips and manage different spaces for each shelf. After that, attach the divider, which separates the front and back racks. Install rods by drilling holes at the inner sides. Add the edging and apply the finish before attaching the continuous hinge. Then, hang the swing-out and install adjustable shelves inside the cabinet.
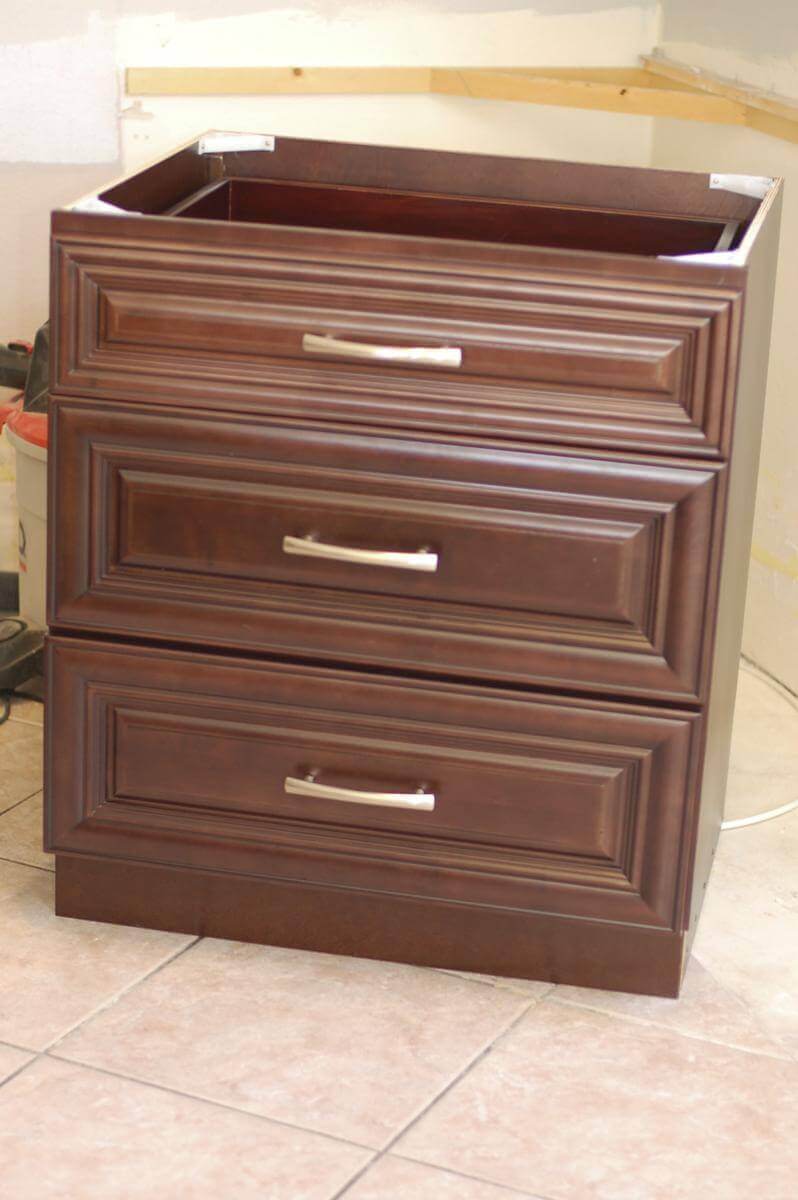 Toe-kick area is meant to let your toe rest while standing in front of the kitchen cabinet. Thus, many cabinet manufacturers purposefully make it unoccupied and sealed.
With some work, the toe-kick area could serve you some extra space for storage. The more excellent part is it’s hidden!
Get a drawer kit to do this job and measure both the drawer and the toe-kick area. Bear with the measuring work as you want it to be precise. Use a table saw, and miter saw to cut the drawer, if necessary. Lastly, attach the toe-kick board to the drawer front. You’ll probably need to cut the board height a little to provide some opener space.
1. A Corner kitchen cabinet with Lazy susan
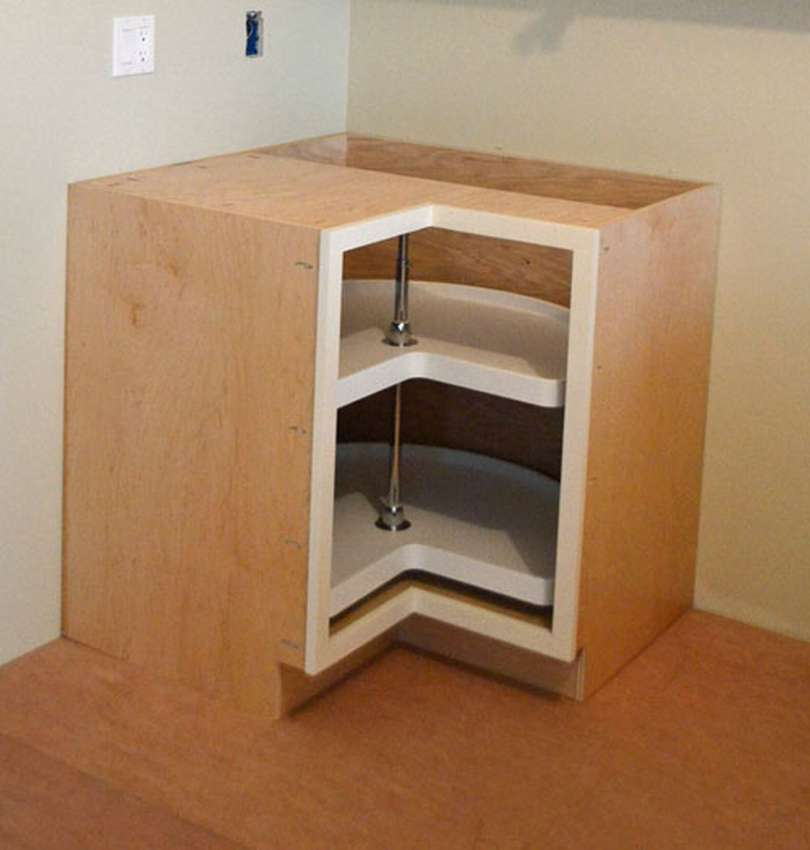 Installing lazy Susan in a corner cabinet is a great idea because it allows you to easily access every item you store there.
You can buy a lazy Susan kit with a pie-cut corner to make it easier. Then, you can make the cabinet by cutting side panels first. You will also need to cut out toe kicks using a jigsaw to match the base cabinets.
Once the frame is ready, do not assemble the top yet. Consider installing the lazy susan kit because it will be much easier to do it with a partially done cabinet rather than a fully finished one.
References:
12. Thisoldhouse.com
11. Thekitchn.com
10. Familyhandyman.com
9. Ikeahackers.net
8. Diymontreal.com
7. Diyinpdx.com, Diyinpdx.com
6. Setyard.co.uk
5. Youtube.com, Homesthetics.net
4. Hometalk.com
3. Youtube.com, Familyhandyman.com
2. Tikkido.com, Laurelberninteriors.com, Project.theownerbuildernetwork.co
1. Ana-white.com