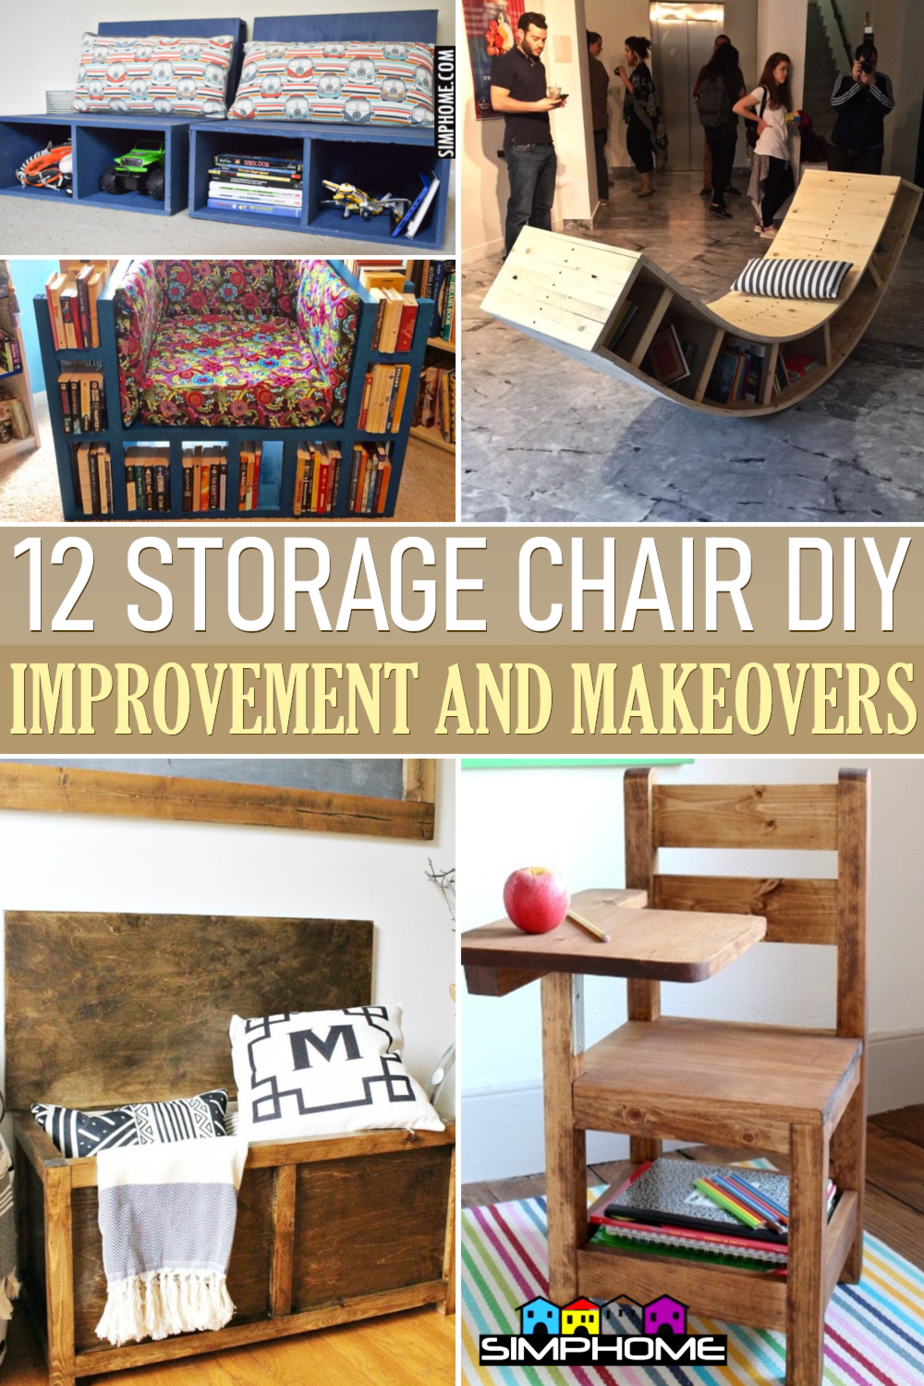
If you’re desperate for more storage space, you can tap into this list compiled by Simphome.com of twelve creative DIY storage chair ideas. They’re unique and won’t cost you an arm and a leg to build. A few might just be the right storage ideas you need.
🔊12 Storage Chair DIY Video:
List Entries:
28 Clever IKEA Chair hacks
10 Chair and Table Ideas for Girl Bedroom’s
10 Bedroom Sofa Ideas
12. DIY Plywood Kids Chairs with Storage
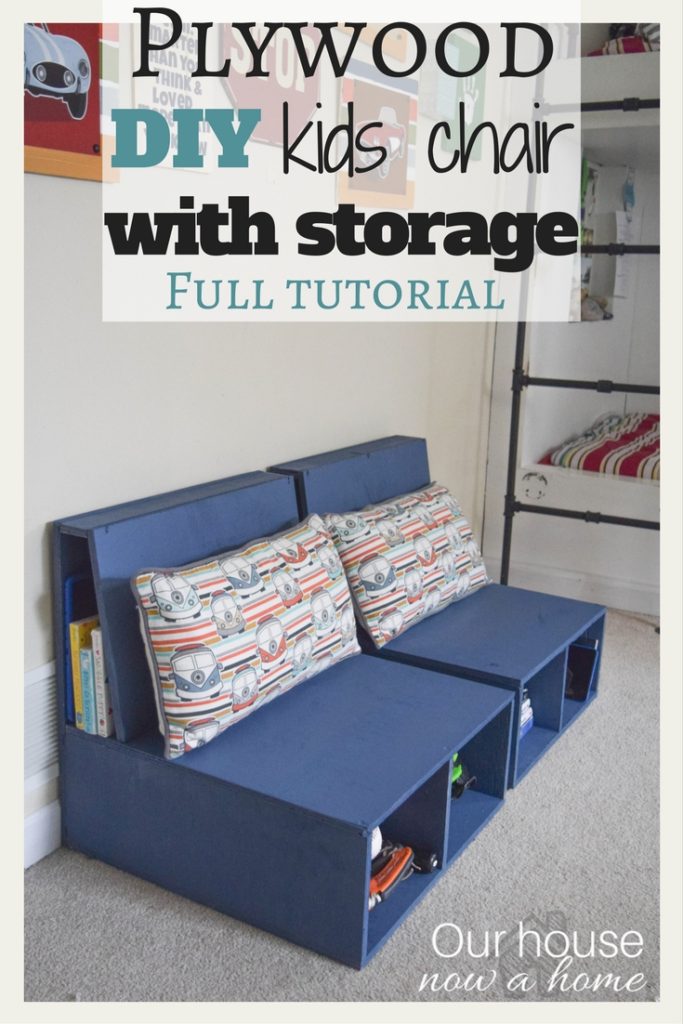
Here’s a low-cost storage solution for your kid’s things and also doubles as chairs. They’re made entirely of 3/4” plywood and assembled with screws.
First, cut all the pieces you’ll need. It’s best to lay them all down and apply fresh coats of paint in your desired color before putting them together.
The base is a simple box frame high enough for your kids to sit on and has a divider in the middle. You then attach the back and a narrow top piece.
For the backrest, attach plywood between the top and seat at a slight incline. The hollow space inside it can also serve as open storage.
Lastly, add a couple of throw pillows to make them more comfortable.
11. How to Build Biblio Chair
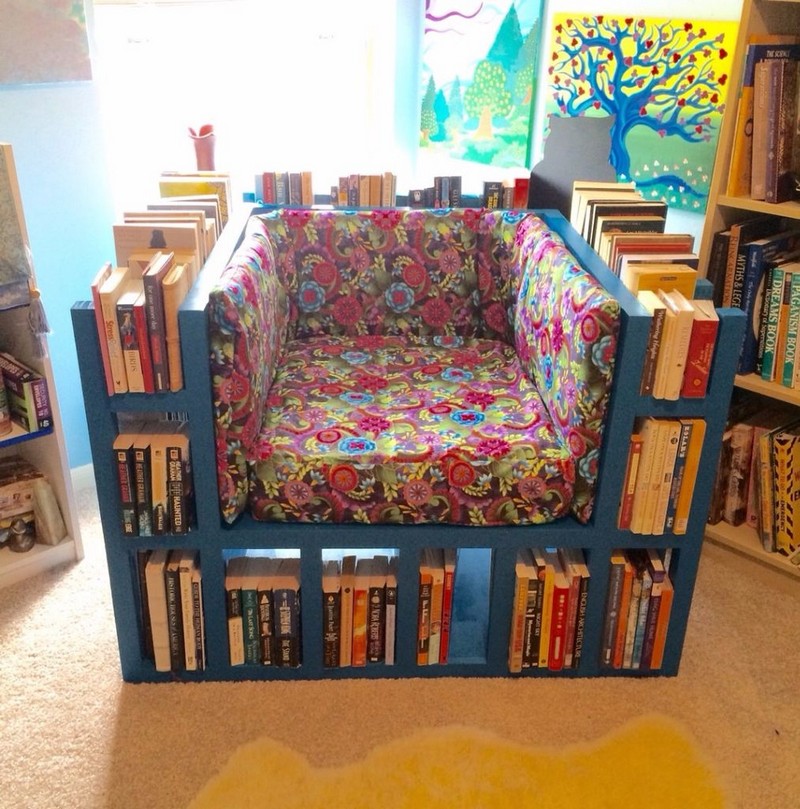
Another unique idea is a chair that also functions as a bookcase.
The base, sides, armrests, and back all have shelving to place books. You can even remove the seat cushion to access more storage underneath! There are also cushions lining the sides and backrest to make it more comfortable to sit on. You build the frame from 2x2s surrounding the seat made with plywood.
You then add more plywood for the shelving. Lastly, paint it with a color matching the upholstery. The result is a fun and unique-looking chair that would delight any bibliophile. It would be perfect for small rooms with no space for a separate bookcase.
10. Sitting on your Assets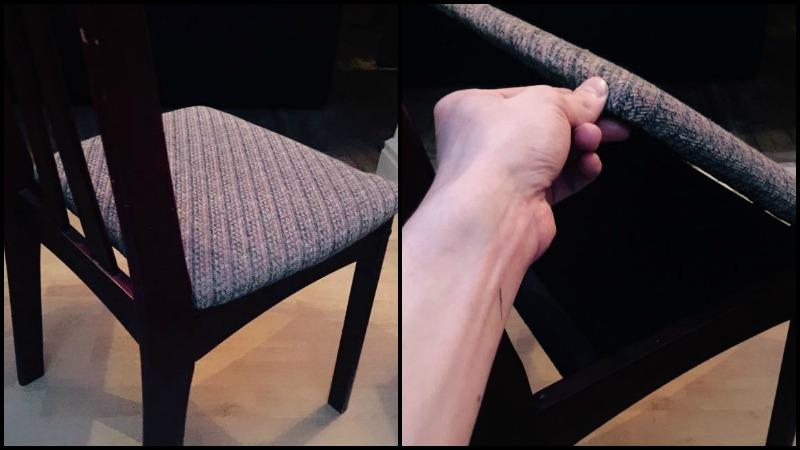
You can store valuables or other items, such as chargers, small tools, etc., out of plain sight.
Just make sure the chair’s base frame is tall enough to conceal the storage compartment. Start by removing the cushion. Next, cut a piece of 1/4” plywood for the bottom and attach a 1×1” bracing at the back. You can add felt fabric to dampen the rattling inside when moving the chair.
Attach the bottom to the frame’s front using small L-shaped brackets. Do the same to attach the back bracing to the sides. Finally, reattach the cushion with two hinges at the front.
9. DIY Schoolhouse Chair
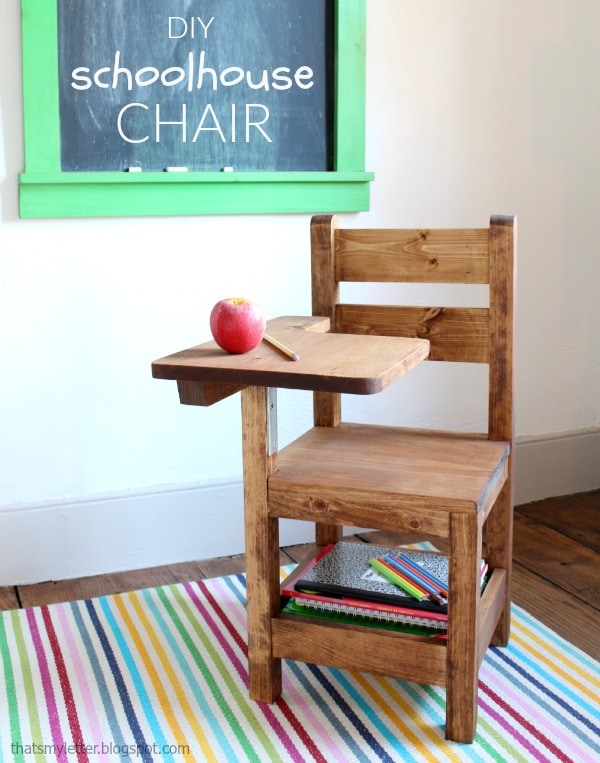
A small DIY schoolhouse chair would be great for your kids doing their homework.
There’s also a railed shelf underneath to put their school books. The frame is 2x2s, with the front left leg extended upward to armrest height. Both back legs extend up to the backrest’s height and are round at the top. The seat frame is 1x2s and connects all the legs. Bracings for the lower shelf and two horizontal backrest slats are 1x3s.
All the surfaces, such as the seat, desk space, and shelf, are 3/4” plywood. You cut the desk area to its familiar shape with a jigsaw.
8. Wooden Lounger With Book Storage
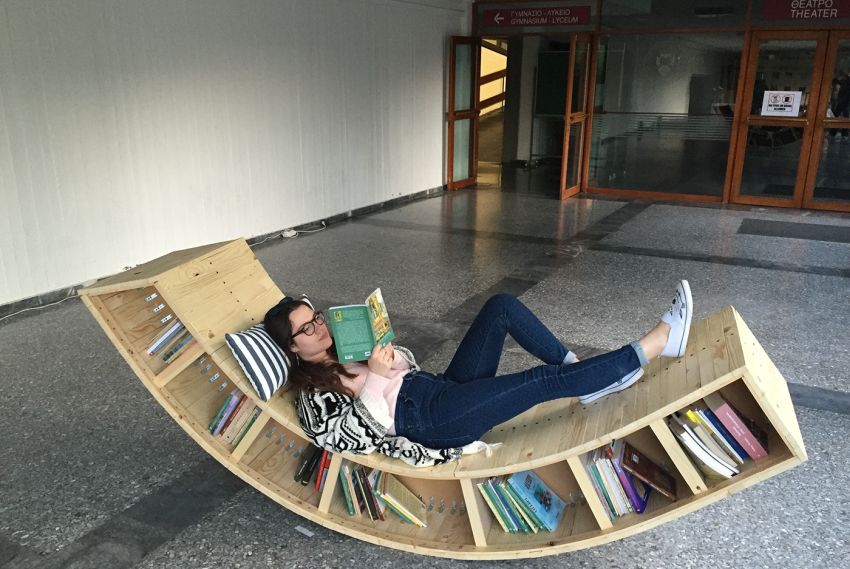
Here’s another book storage seating idea. However, this time it’s a curvy lounge chair/bookcase combo that looks like a modern sculptural work of art.
First, cut the middle 3/4” plywood divider into the c-shape you see in the picture. It will serve as the basis of the lounge’s overall form. Next, screw perpendicular 1/2×2” slats from end to end at the bottom and top.
You’ll also reinforce each slat with metal brackets on either side of the divider. After that, you’ll add a long 1/2×2” trim to join the ends of these slats together. Cover both ends of the chair with plywood and reinforce the seat with six vertical plywood dividers on each side. Finally, add a 1/2×2” face to cover the plies.
7. Toy Storage Bean Bag Chair Free Sewing Patterns & Tutorials
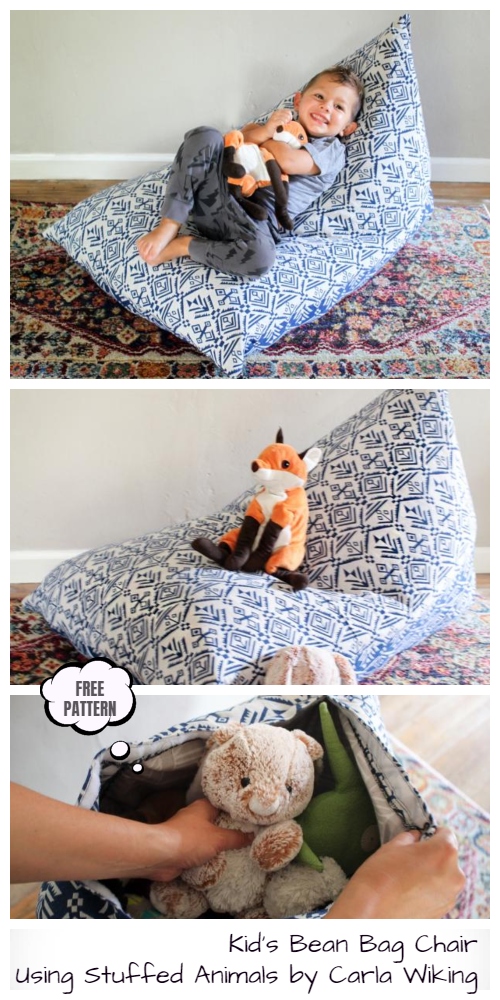
You can download a free sewing pattern to create this storage beanbag chair for your kids.
Fold the heavyweight fabric you’ll use and cut along the beanbag pattern. After that, fold it again, but this time with the inside out. Pin the long edges first to secure them in place and start stitching with a zig-zag pattern using your sewing machine. Next, open the bag by the seams and stretch it to match the front ends.
Pin this front and sew in a zipper for the opening, then turn the bag inside out. Instead of filling it with polystyrene beads typical of bean bag chairs, you can stuff it with your neglected kid’s plush toys.
6. DIY Chair Shoe Storage
This DIY bench provides a terrific way to store your footwear. You can even sit on it to untie your shoelaces before dropping your shoes in one of its container bins. You’ll need two rectangular 3/4” plywood for the base and seat. First, screw four casters underneath the corners of the bottom one. Turn two crates on their sides with the openings facing forward and glue them on both ends of this plywood. It will leave a gap in the middle for more storage. Then glue the top on these two crates.
Paint it and let it dry. Finally, place two container bins big enough to fit snugly inside each crate. You can also add cushions for more comfortable seating.
5. 2X4 Adirondack Chair Plans
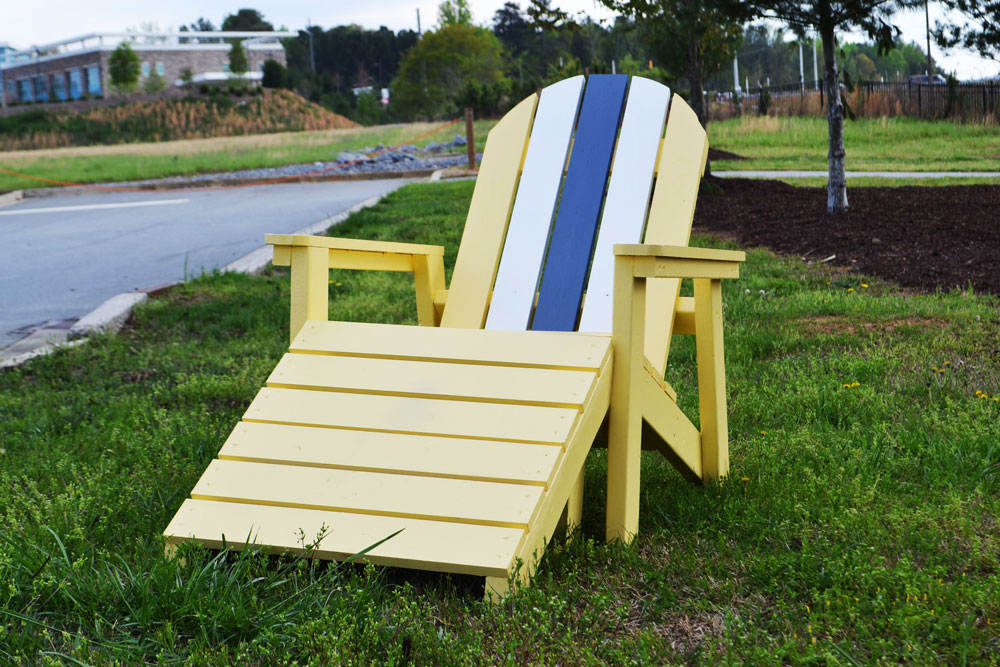
What makes this Adirondack chair version special is the use of 2x4s to strengthen the frame. It also has an optional footrest.
All the feet are 2x4s, and there are 2×2 pieces to support the 1×4” armrests. The inclined seat frame and backrest support are also 2x4s. All of the slats, including the seat and backrest, are 1x4s and spaced about 3/4” apart. The top has also been trimmed to form a round shape.
As for the footrest, it’s merely two 2x4s inclined downward and filled with the same 1×4” slats. This version is significantly heavier than an average Adirondack chair but also sturdier and more durable.
4. Sewing Chair With A Top Secret Drawer Idea
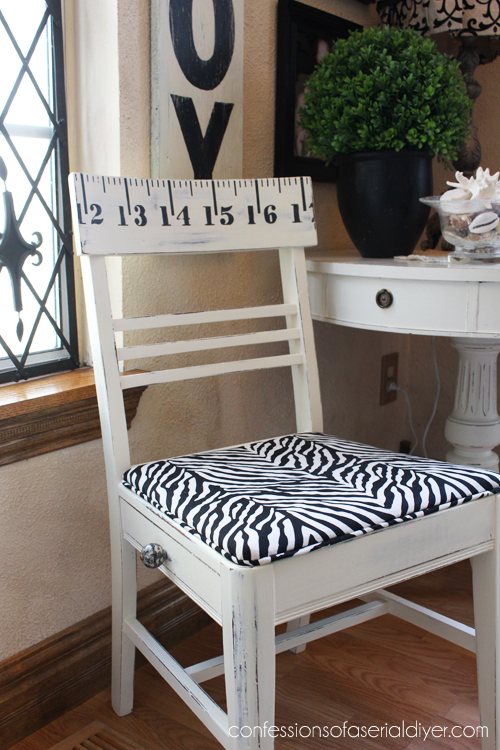
At first glance, it looks like an elegant chair with a simple design. What sets it apart is the inset side drawer.
It would be a great companion for a sewing machine. The drawer can hold sewing items, such as threads, needles, pins, buttons, scissors – you name it. You can follow this design if your chair has a high enough seat frame to fit a slim drawer without breaking.
For some flair, the top backrest looks like a large tape measure. It also uses eye-catching black and white zebra print upholstery. The drawer also has a black and white knob handle to match the fabric.
3. Repurpose this Coffee Table DIY Idea by Removing the Glass and Replace it with a Round Pillow.
The original idea was to install a round plastic basin that fits snuggly in the middle. It could hold small succulent plants that would be visible through the glass top.
However, you can repurpose it as an ottoman with a secret compartment. All you need to do is add a lid to the container made of round plywood for more seating support. You then place a large circular cushion or pillow to cover it. It’s necessary to build similar round support underneath to attach the feet if you’re going to sit on it. Or you could top the lid with a lazy Susan instead and retain the hidden storage. The choice is yours.
2. Or you can Start from Scratch to Build a Storage Tire Chair Wrapped in Twine
To build one from scratch, clean the tire and cut two 3/4” plywood circles wider than the hole.
Glue the first one over the bottom hole. Continue gluing twine on a spiral from the center of this plywood until you’ve covered the whole tire. Next, cut a round piece of foam cushion the same size as the second circle and glue them together. Place it face down on a piece of fabric.
Fold the fabric around this plywood and attach it with a staple gun. Cut any excess cloth in the middle. Turn over this new cushion and mark four points where you’ll add tufting, then press the staple gun down hard at those points to double staple into the wood underneath. After that, glue four large buttons over those staples.
You now have a cushioned seat to cover your tire chair’s storage.
Lastly, Number 1. Simple DIY Storage Chest Project Idea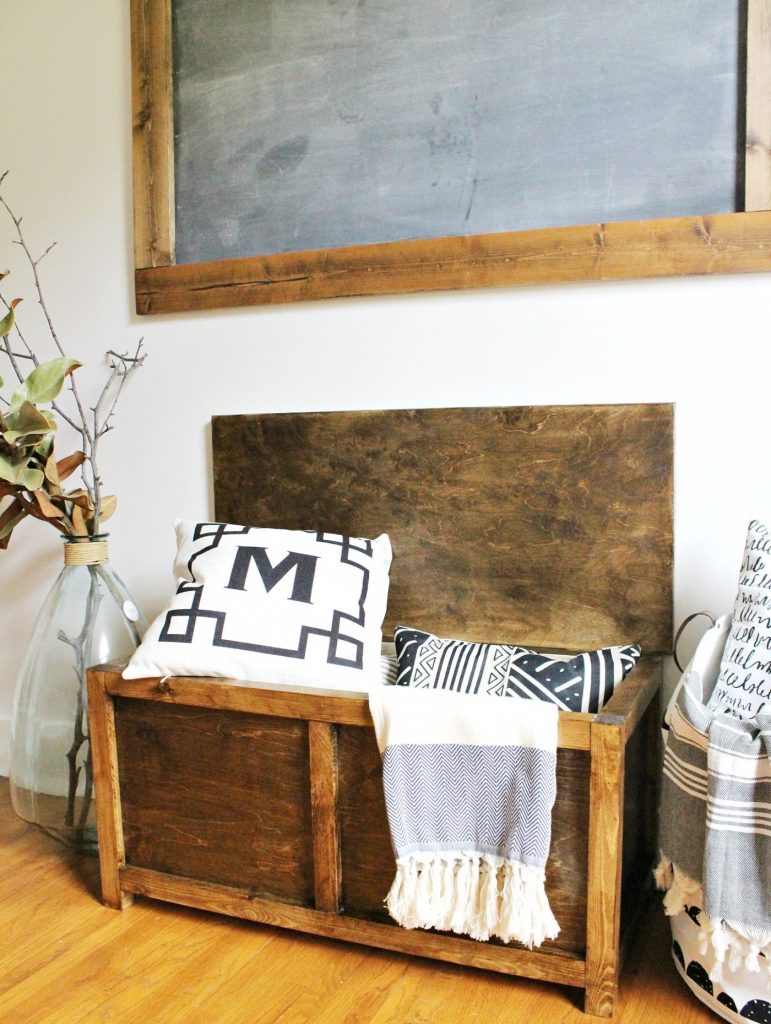
You can build this simple storage chest that can store extra stuff that you can’t use yet.
All the frame pieces are 2x2s, and the joinery used is pocket hole screws. A Kreg jig would come in handy.
Start assembling the front and back rectangles with the bottom 2×2 raised about 2” to form the legs. Join them with four shorter perpendicular 2x2s, and you now have the cabinet’s frame.
Inset 3/4” plywood panels into the front, back, sides, and bottom. Cut 3/4” plywood for the lid, which should be flush with the top, and add edge banding to hide the plies.
Finally, you can attach it to the box’s backend with hinges.
Bonus Idea
Set down four crates on their sides with their openings facing front to form this nifty coffee table with open shelves. You can attach them with screws and glue. (For this one you need to play the main video available in the post)
Conclusion:
With some creativity and a little elbow grease, you can create more storage even from the unlikeliest things.
While chair storage isn’t uncommon, the ideas presented here by Simphome.com are unique and will expand your options.
I hope at least one of these terrific ideas sparked your interest in building an even better chair storage version.
Reference:
12. Ourhousenowahome.com
11. Project.theownerbuildernetwork.co
10. Project.theownerbuildernetwork.co
9. Jaimecostiglio.com
8. homecrux.com
7. Fabricartdiy.com
6. Pinterest.com
5. Ana-white.com
4. Confessionsofaserialdiyer.com
3. Pinterest.com
2. Pinterest.com
1. Woodshopdiaries.com