The idea of having a lush forest-like garden is always fantastic. Imagine that you have various kinds of plants right in your yard. Your neighbors and passersby will envy you. Unfortunately, it is unlikely to happen due to the limited space.
If you think it is just a dream, think again. It is time to make your dream come true with these 10 brilliant space-saving ideas for small gardens that will help you out with that. Finally, you will be able to grow a lot of plants despite the limited room.
🔊10 Brilliant Space Saving Ideas for Small Gardens Video:
List Entries:
10. Grow More Veggies with a Garden Tower
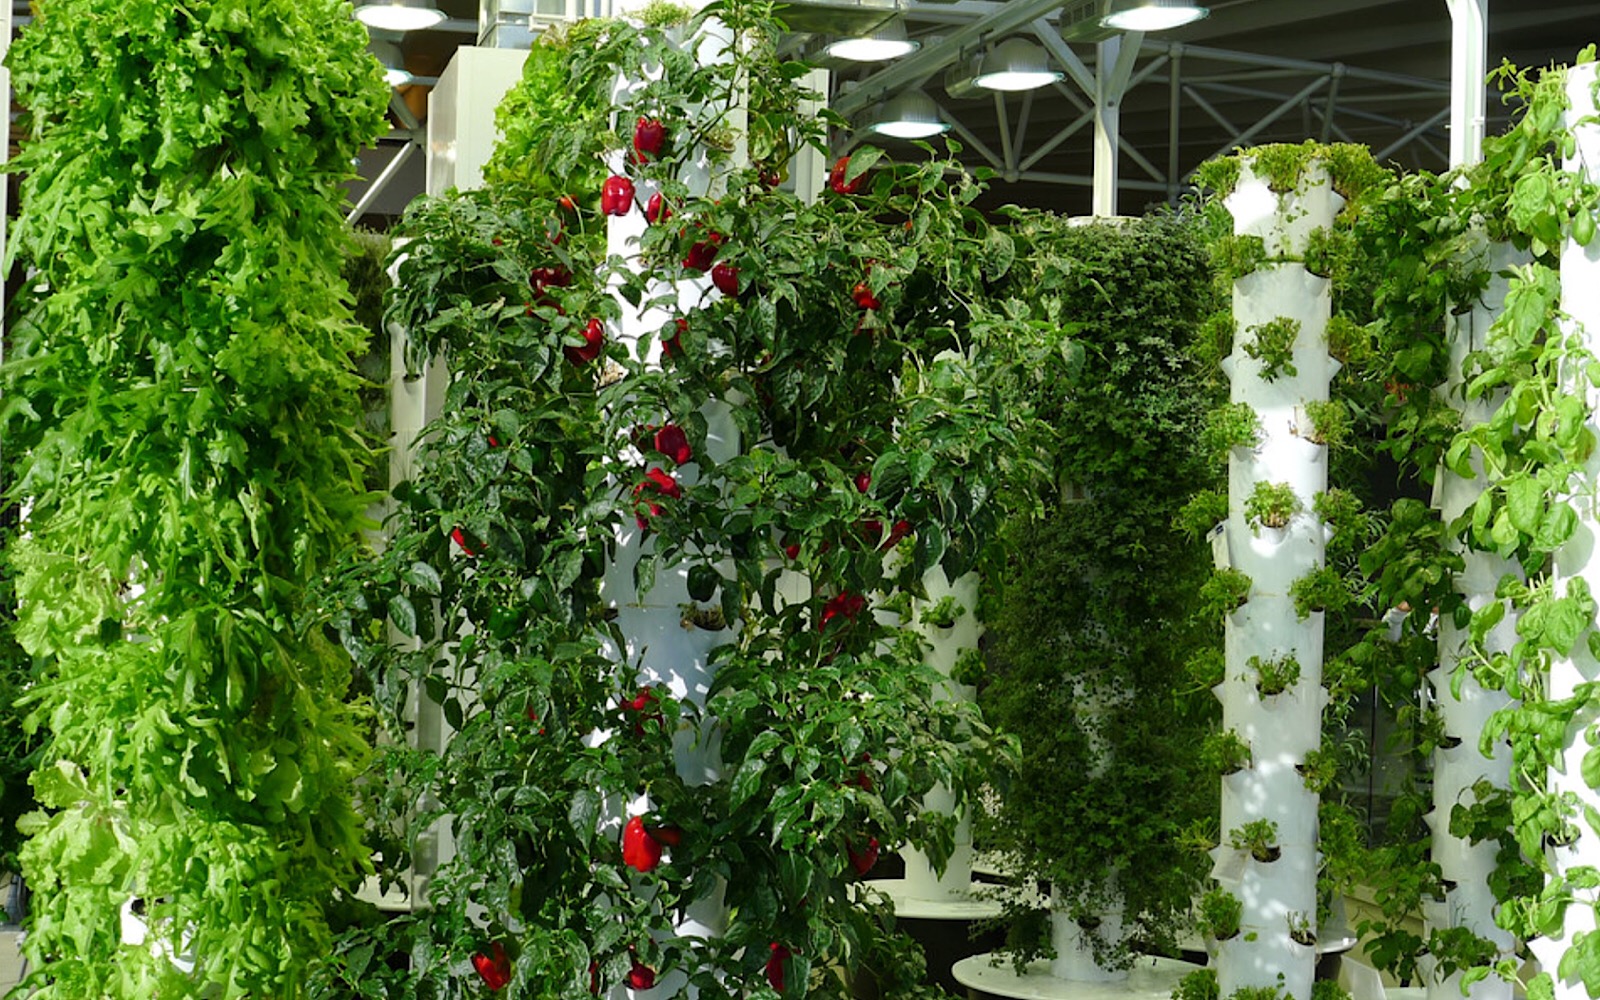 If you do not have much space yet want to grow various vegetables, you can try going vertical by making some garden towers.
To make a garden tower, you will need a bucket or a terracotta pot as the base. Then, fill it halfway with stones. After that, put a wire mesh cylinder or PVC pipe lengthwise. After that, insert peat moss into the wire mesh. It will help you retain moisture so that you will not have to water the tower frequently.
After adding peat moss, layer the rest of the wire mesh with silt or loamy soil. Finally, you can add the plants you want to grow.
Do not worry about growing more than one type of plant in a tower garden. It is possible, and it can handle it. Just make sure you put the tallest on the bottom.
Instructions to make a vegetable garden tower is:
- Step 1: Take a bucket and remove the handle. You can use a terracotta pot or any other container.
- Step 2:Put a cylinder in the middle of the bucket. It can be a PVC pipe or wire mesh cylinder.
- Step 3:Fill the bucket halfway with stones. It will serve as drainage for excess water and hold everything in place.
- Step 4:Add several inches of peat moss into the wire mesh cylinder to help you retain moisture in the garden tower.
- Step 5: Fill the rest of the bucket with silt soil. Make sure to add a lot of compost and fertilizer before planting any plants.
- Step 6:Plant your favorite vegetables in the garden tower. You can also add flowers to bring aesthetic appeal into your home.
9. Try Gutter Garden
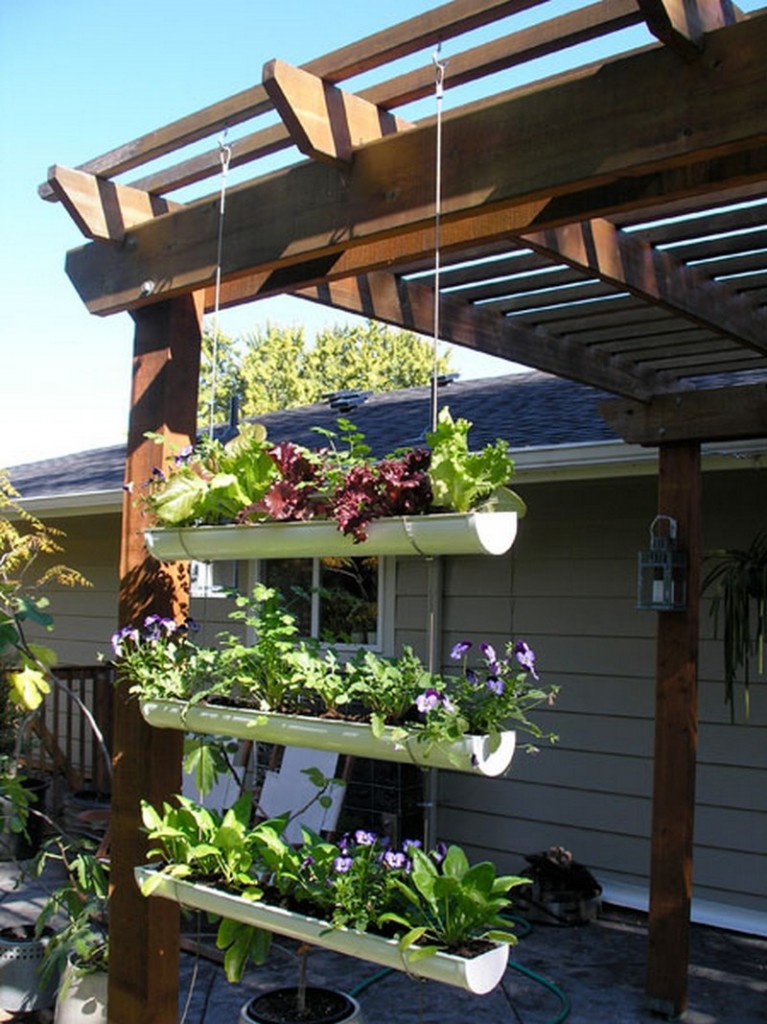 This one is another brilliant and affordable idea that you can use to make use of your vertical space. A gutter garden allows you to grow some plants and create a stylish and inexpensive privacy screen for your patio.
To make a gutter garden, you need to determine the center and then draw a reference line. This way, you will be able to hang it right.
Next, drill some holes for the cable rods. You will also need to make some larger holes for good drainage.
You will hang it from the patio cover or ceiling. Therefore, you need to drill pilot holes for the eyehooks. Make sure they are at the same distance. Finally, add the gutters by sliding them through the holes you made. After that, secure them with cross clamps and half-circle steel rods.
To build a gutter garden for the first time, pay attention to:
- No 1. Hanging the gutter garden.
Make sure the cables will support all your weight. Expect them to stretch a little bit, so make sure you have enough room for adjustment. It is best to hold the long side at an angle of about 35 degrees. - No 2. Make holes for gutters before installing cable rods
This action will allow you to roughly determine where you should drill the holes before screwing the gutters to the cable rods. It will save you a lot of time and give a neater result. - No 3. Put in the brackets for support
You should put the brackets on the outside to not be visible when you hang the gutter garden. You can use bolt and bolt holes to secure them in place. - No 4. Slide-in gutter through holes
You should slide the gutter through one hole, wrap it around the cable rod, and then slide it through another hole, repeating until you have installed them all. - No 5. Secure cables
Remember, cables are not strong enough to support the weight of the gutter garden. Therefore, use cross clamps to secure them in place. - No 6. Secure gutters with brackets
After putting the gutters on the cables, put them in one or two brackets for support. You can also use chain clamps or chain wire to secure them if needed.
8. Galvanized Tipsy Pots
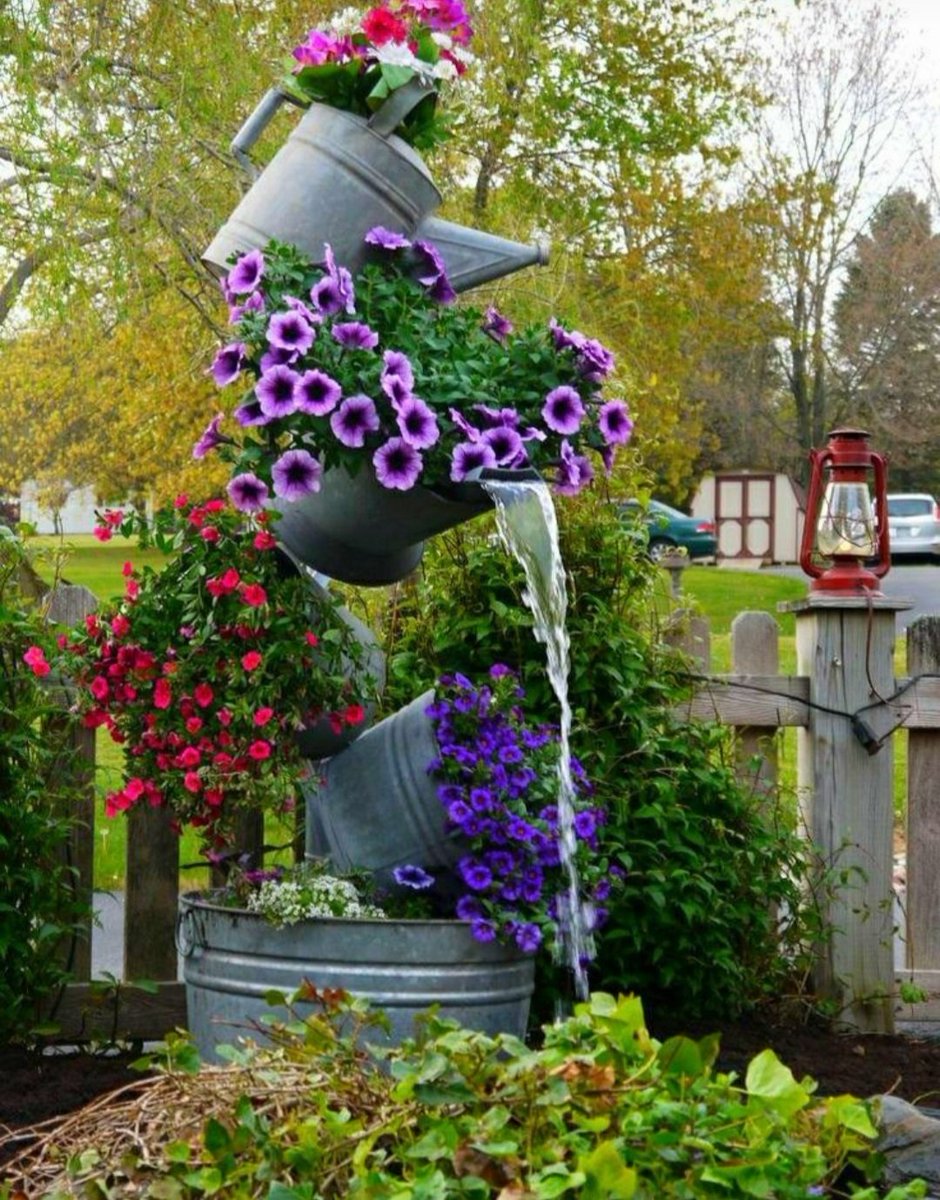 Apparently, stacking up some planters allows you to grow more plants while saving more space. And this one is another brilliant solution for your small garden.
Like a tower garden, tipsy pots enable you to use vertical space more efficiently. However, you will not use wire mesh to hold the plants. You will use some galvanized buckets and rebar or a 1″ electric conduit steel pipe instead.
First, hammer the rebar or steel pipe into the ground. Make sure it stays in place firmly. Next, thread each galvanized bucket through it. Do it one at a time while adding potting soil and plants as you go. Ensure that you can water them.
Each bucket will have to have a sturdy resting place. Therefore, you can add stones to secure them in place.
Other details you need to know are:
1. The height of the planter. It will depend on the diameter of the bucket you are using. I used one that is about 50″ in diameter.
2. The type of soil you are using. You can use clay, peat moss, or coir for planting.
3. The type of plants you are growing in the planters. Choose which ones you want to grow in them, then install them accordingly.
4. Do not try this with too many plants at once, or your pots might fall over!
7. Upside Down Planters
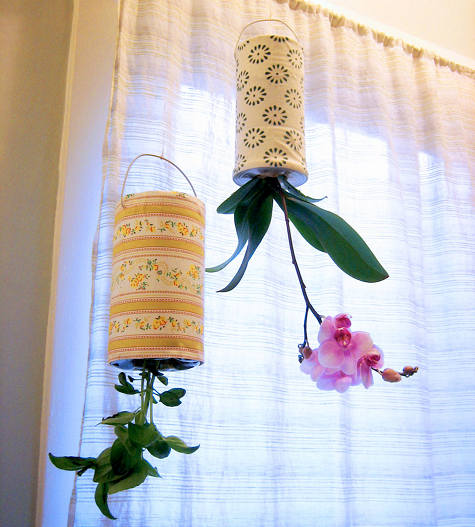 Are you seeking a creative way to use your vertical space? Try this upside-down planter. You can use either an unused can with a lid or a soda bottle.
If you use a can, remove the bottom with a can opener after washing and drying it thoroughly. After that, drill holes in the disc that you have removed. You will also need to make two holes to hang the planter.
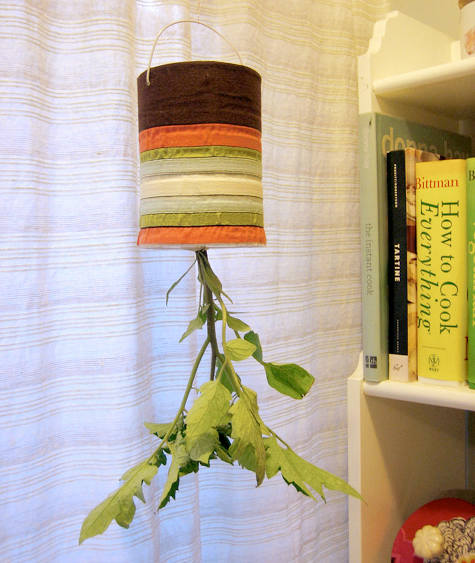
After that, flip the unused can over, then add some soil to it. Next, place your plant, and add more soil around it. Do not forget to pack it firmly.
Now, grab a coffee filter or landscape fabric. Trace the can bottom on it and cut it out. Next, fold it in half and cut a small hole right in the center to make an opening for the main stem. Cut a slit, and then slide it around the plant. Ensure it rests on top of your planter.
Finally, create a hole in the center of the lid and gently slide it towards the can rim. Carefully pull the leaves through the hole and close the can tightly.
For the upside-down planters, recommended plants are:
1. Annuals that you want to re-grow every year like tomatoes, peppers, marigolds, lavender, ferns.
2. Perennials like English Ivy, African violet tree, English holly tree, catnip (cats love it!), yarrow (use it for headaches), oregano (put it in your garden to attract bees), etc.
3. Annuals that you can plant in pairs like chrysanthemums and zinnias.
4. Biennials like daisies and lettuce
5. Nicotiana (growing these plants will help keep your garden pest-free)
6. Ornamental grasses like pampas or salvias
7. Columnar or dwarf palm tree
6. Tap into the Fence
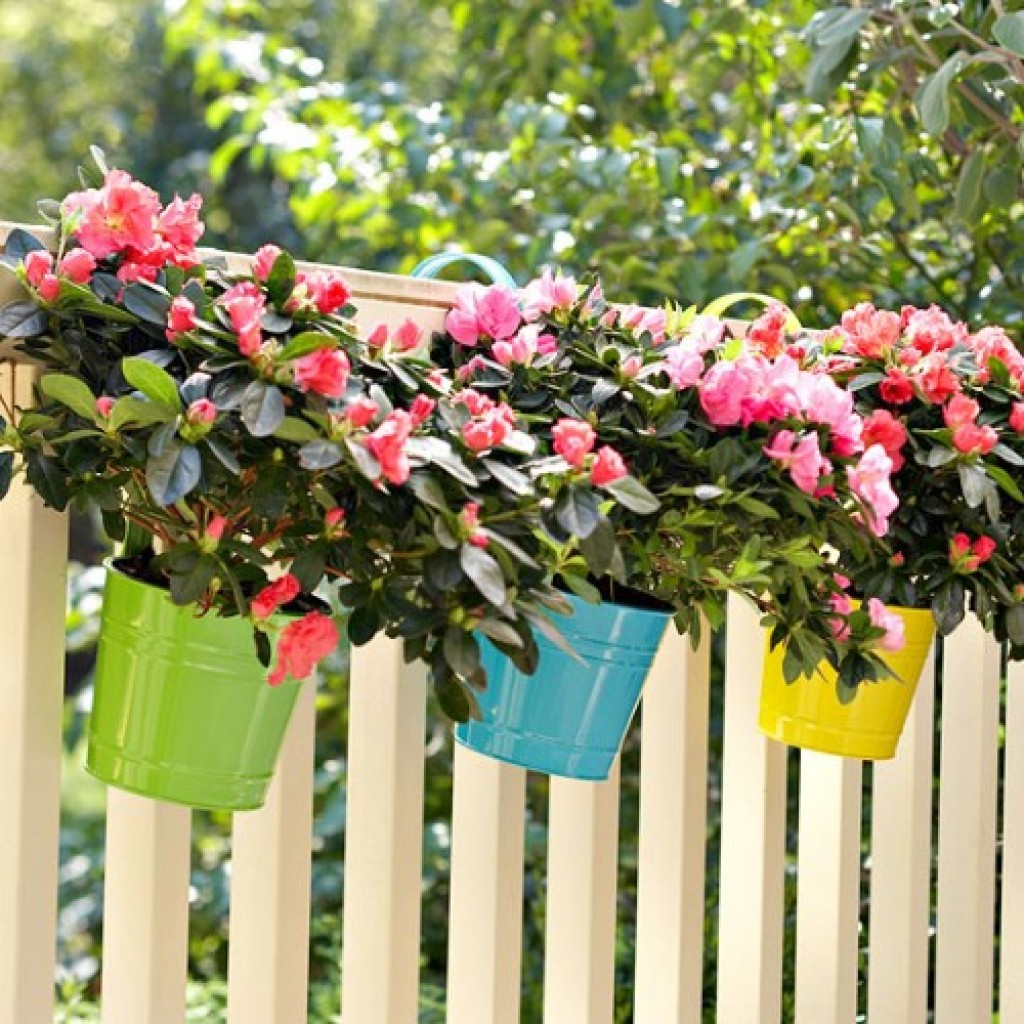 Living in a big city does not give you the chance to have a spacious yard. It does not mean you cannot grow any plants, though. If you cannot use the ground, you can just harness the versatility of containers. After that, hang them on your fence, balcony, or porch railing. That’s it! To make them look more appealing, you can paint the pots.
For the small garden, to build a fence for it, your instructions are:
- No 1. Find two 8–10 inch pieces of wood that can support each other.
- No 2. Drill a hole through the bottom piece and one through the top for your plant to lie on.
- No 3. Choose a container that fits well on the wooden frame and fill it with soil and plants.
- No 4. Secure your plant to your fence or piece of railing using galvanized straps or zip ties if needed.
- No 5. Enjoy!
You can use the same method to hang your containers on a balcony railing too.
There are many ways you can choose from to create a small garden of your own. These methods will help you to save space, time, and money too. You can even try different combinations of them for the ultimate small garden of your dreams!
5. Living Walls
 Who says that you have to have a large backyard to create fabulous landscaping? If you do not have any, you can always use your wall instead.
Creating a living wall is not that hard. First, you need to make the frame with supports and slats. Then, lay it horizontally so that you can line the sides and bottom with plastic sheeting. It would be better to use a clamp to hold the plastic while staple it to the bottom.
 Next, line the frame with landscape fabric. Then, you can begin to add soil. After that, cut some slits to put the plants. Finally, you can hang it over the French cleat that you have made and attached previously on the wall. You may need to seek some help when lifting the frame, though.
Recommended plants for the living walls are:
1. Flowers, such as alstroemeria, roses, or geraniums
2. Trees that can stand up well in a small space like the dwarf pomegranate tree
3. Edible plants like peppers and herbs
4. The Chinese juniper tree is a popular one to use in light-colored walled gardens
5. Shrubs such as Ivy or jasmine to add color and greenery
6. Mosses are used to help with moisture retention
7. Cacti are easier to care for if they are in a vertical garden. You can also choose to use the type that bears fruit, like the prickly pear cactus
8. Annuals like petunia, zinnias, geraniums, foxglove
9. Biennials, like sweet peas
4. Spiral Garden
 A spiral garden will allow you to hold more plants without taking up much space and improve the landscaping. It has a distinctive look that will draw everyone’s eyes.
If you want to create a spiral garden on your lawn, ensure you get rid of the weed by covering the area with wet cardboard. Next, construct the wall structure in a spiral shape.
When the base is ready, you can begin to add the second tier of bricks. Finally, add the organic materials and plants.
In details, making the spiral garden are:
- Lay down the plastic sheet to form a foundation shape or make a rectangle on the garden surface.
- Lay down a circular brick base that is not as high as the top of the first tier.
- In detail, construct the second tier on the next level on top of your first brick base.
- Add a small brick wall to the bottom horizontal wall.
- In detail, construct three layers of bricks on different levels to build a connection with your first-tier bricks.
- Finish off by adding plants and finishing materials you want from your garden bed.
- Mix the concrete, making it thick enough to hold the weight of the soil.
- Place the bricks in an upward spiral shape.
- Add the leaves, compost, or manure inside.
- Cover with soil.
You can use the same method to create a spiral herb garden on your deck or patio! You have to replace bricks with wooden boards and add some slats at the bottom for drainage. - Put the first tier of bricks to build the wall shape.
- Add soil and plants on top of the first tier of bricks.
- Fix the second tier of bricks on top of the base flooring. You can also store gardening tools or recycle old containers there too.
3. Let it Climb
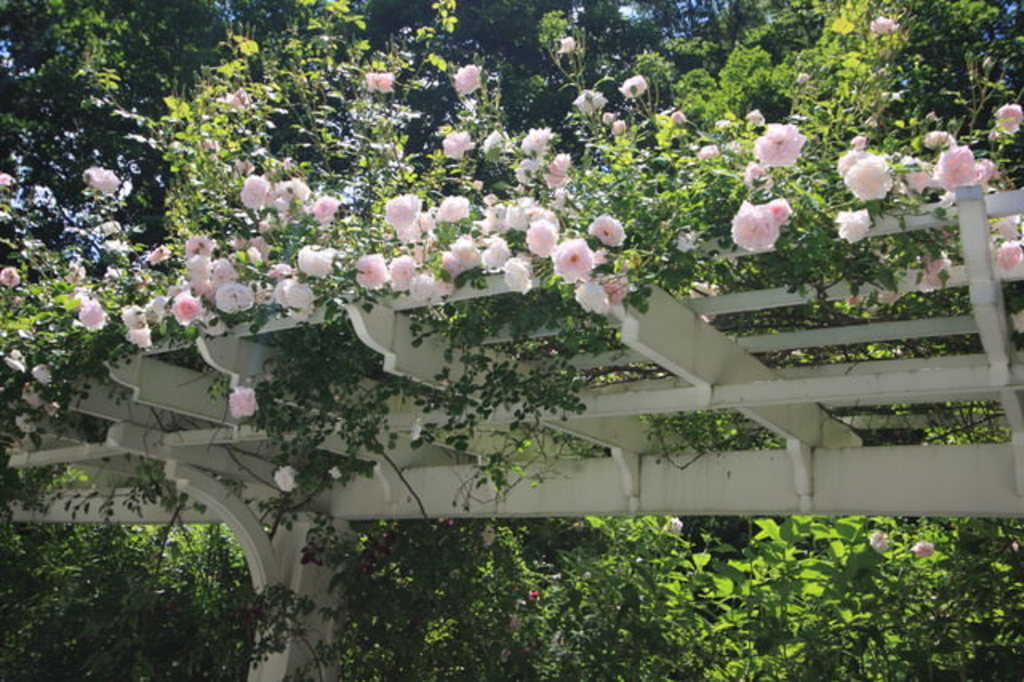 You can use not only your wall and railing to grow some plants but also a pergola that covers your patio. This way, you can have some beautiful flowers and add a dramatic backdrop to your outdoor space.
Many plants will look great on your pergolas, such as Clematis, Rose, passionflower, honeysuckle, grapevine, jasmine, trumpet vine, wisteria, Ivy, morning glory, and kiwi.
To treat your plants and love their health, your instructions are:
No 1. Plant the stems in the soil.
No 2. Water them well.
No 3. Keep them well-cared for, like watering enough each day and cutting off the dead leaves at its base.
No 4. Wait for the first flowers to bloom and cherish them!
If you want your plants to grow taller, you can build a trellis on the pergola fence. Just cut some small holes in it and pull up some strong vines through those spaces so that they will climb up. At the top of the trellis, put some stakes on it so that you can tie some long vines to them or use nail polish on their end. Both ways work well too.
2. Window Box Garden
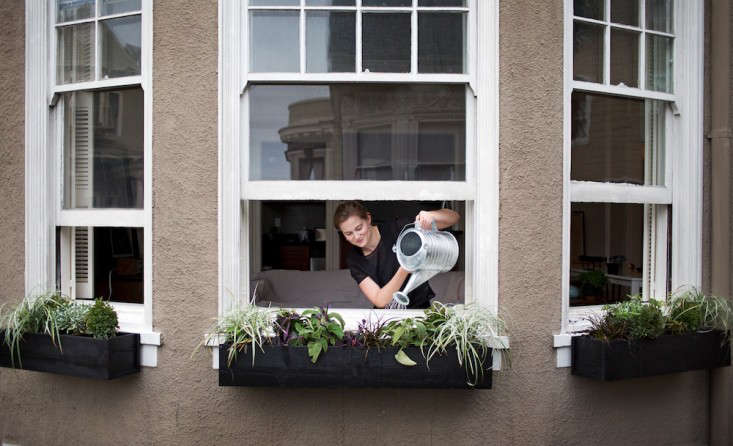 Window gardening is a practical solution for those who live in an urban area. You just need to hang a box or container on the outside trim of your window, and you are good to go. It is simple and accessible.
To detail, the instructions of the ideas are:
1. Find an ordinary cardboard box
2. Measure the interior of the box and make holes using a utility knife. The key here is to make sure that you have enough holes for the plant to hold strongly, but not so many that the whole thing collapses on your head. The width of a hole should be just a bit smaller than a pencil and dig it about 1/2 inch into the underside of the box.
3. Cut the box into the shape of your window.
4. Plant some herbs or flowers you like to decorate your window.
5. Hang the box on the outside of your window using wire or nails
6. You can create more than one to give color and design to your room.
Lastly, Number 1. Try Making Kokedama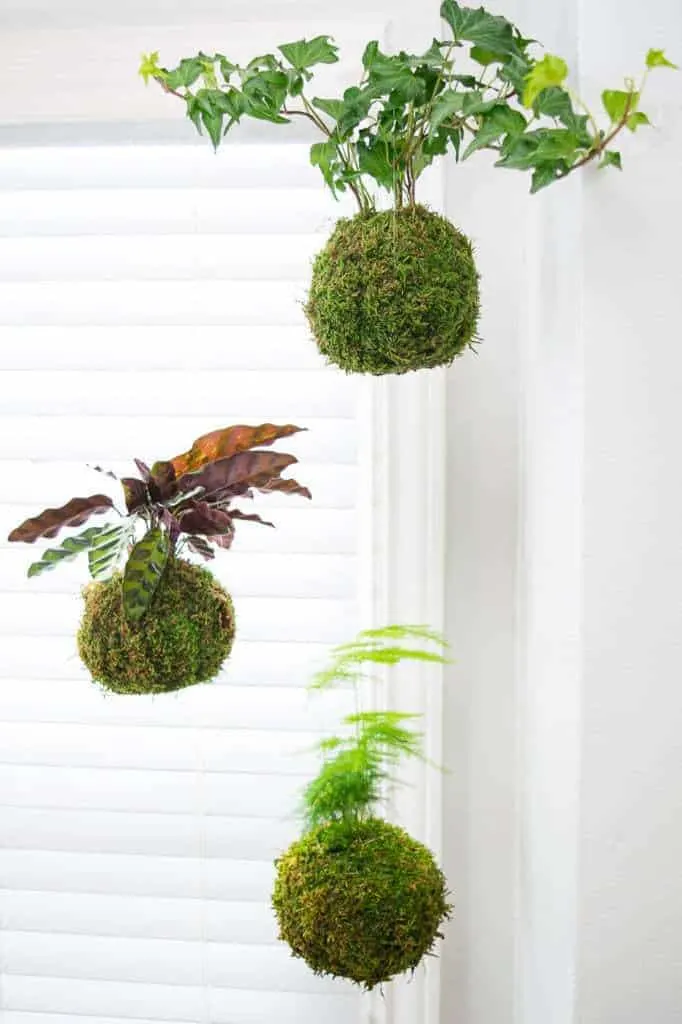
Have you ever heard anything about Kokedama or Japanese ball? It is basically a ball of soil covered with moss that holds your plant. Once it is ready, you can hang it wherever you want.
Unlike a plant in a container that needs showering, watering Kokedama will be a bit different. You need to submerge the ball in a bucket filled with water at least once a week.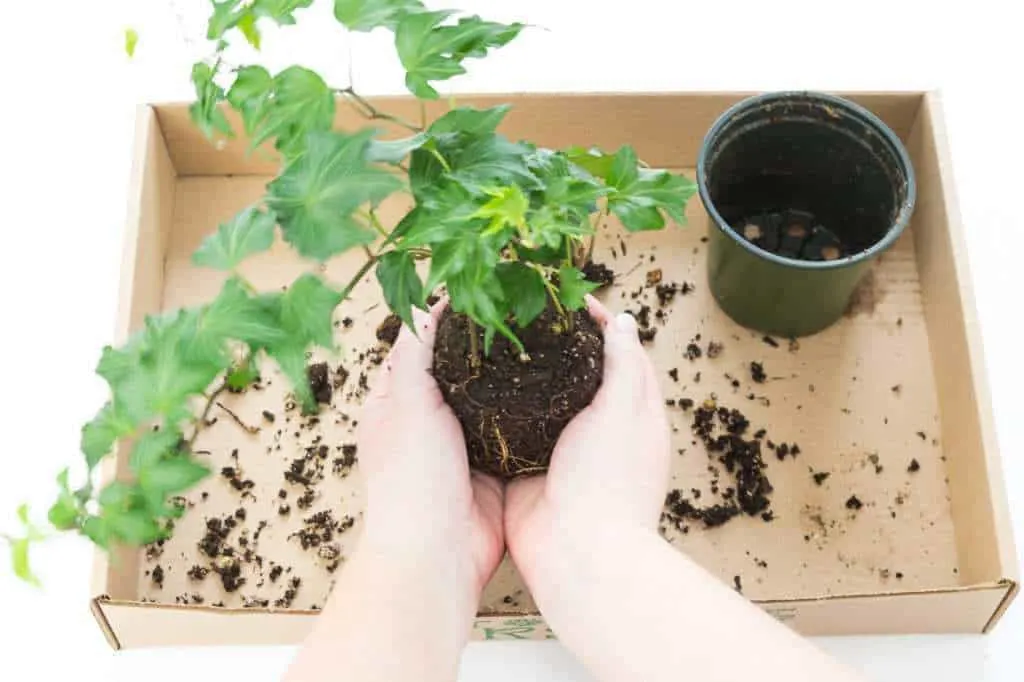
Detailed instructions:
- Pull out small amounts of soil from your garden, and mix it with rock or gravel.
- Allow the mixture to dry.
- Take a piece of mason’s cloth (or some other fabric), and roll up the ball like a burrito.
- Tie the mason’s cloth using some string or yarn around the ball, but be sure that it does not touch the sides of the ball; this will allow for air circulation throughout your ball and help keep it moist, fertilized (and alive!).
- Hang it up in a place where it will get good air circulation.
- Water the ball when you see that the top layers are slightly wilted.
Gardening can be soothing for some. With these 10 brilliant space-saving ideas for small gardens, everybody has the chance to calm their body and mind by growing some plants, and – eventually – you will have a green thumb.
References:
10. Gardeningknowhow.com, Wikihow.com
9. Gardeningsoul.com, Homemadeiseasy.blogspot.com
8. Fleamarketgardening.org
7. Designsponge.com
6. Diyncrafts.com
5. Bhg.com, Organicauthority.com
4. Themicrogardener.com
3. Ecotek.com
2. Blog.gardenloversclub.com
1. Thehandymansdaughter.com