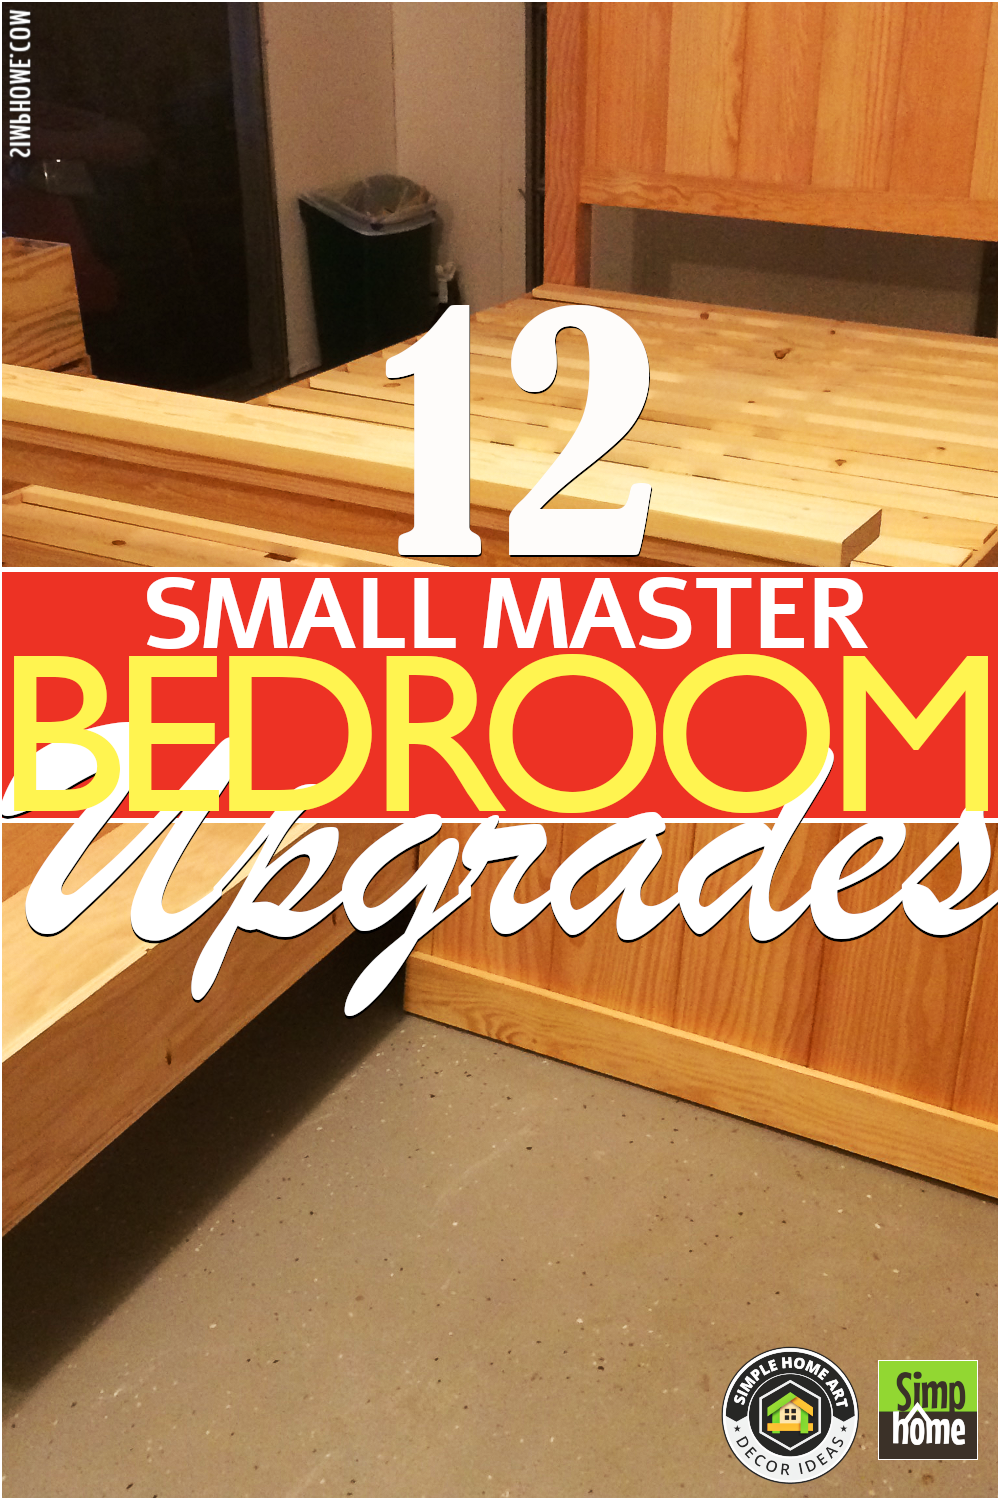
It’s nice to fantasize about a master bedroom with plenty of room for a chaise lounge, a fireplace, and a walk-in closet, but the reality is that not everyone has that luxury. If you know how to arrange it, a small primary bedroom may be just as stylish and practical as a larger one. The saying goes that “good things come in small packages,” which may very well be the case.
To help you make the most of a small sleeping space, we scoured the work of 12 of our favorite Small Master Bedroom upgrades for your inspiration. As always, Simphome curates you with the list.
12 Small Master Bedroom Upgrades Video
12. How to Build a Murphy Bed that Easily Transforms into a Desk
![]() Use maple lumber and plywood purchased from a specialized retailer, and then apply many coats of polyurethane for the project’s finish. Although buying supplies from a home improvement store could help you save money, the quality will be doubtful.
Use maple lumber and plywood purchased from a specialized retailer, and then apply many coats of polyurethane for the project’s finish. Although buying supplies from a home improvement store could help you save money, the quality will be doubtful.
The bed kits sold by Hiddenbed come with all necessary pieces already cut and sized for easy assembly. In addition to the whole kit, which includes the blueprints, offer the hardware kit separately. Instead of spending around $1,200 on a precut kit, you can save money by constructing the bed yourself. Beds with a strip of LED lights and cork boards affixed to the underside can be made even more practical.
On hiddenbedusa.com, you can get the necessary components for a twin bed for around $300. Double and queen-sized options are also available. Hardware stores carry all the other essential hardware, fasteners, and materials.
Please note that the bed/desk assembly fasteners are not included in the hardware kit, but everything else for the folding mechanism is. The manufacturer sells a fastener kit, but its screws have a noticeable head size after assembly due to their huge diameter. Use adhesive and trim-head screws if you value tidiness.
11. The DIY platform bed with a built-in Nightstand
 The three primary pieces of this bed are:
• The non-visible inner foundation.
• The visible outer shell.
• The headboard with attached nightstands.
If you need access to power while you sleep, you can take advantage of the addition of the project’ built-in plugs in the headboard.
Begin the project from the very center. Remember that you will hide this from view, so while it should be square, aesthetics aren’t as important.
The parts used in the building process are the INNER BASE, the OUTER SHELL, the HEADBOARD, and the ASSEMBLY.
Make sure to use the downloadable cut list when preparing the boards for the inner foundation. Put in the bed’s legs and rail supports, mount the bed rail brackets, and then fashion the slats. Once you’ve finished with the exterior shell, you may go on to the headboard. If you try to cut both 16′′ pieces from the same side, the grain will be interrupted. Cut pilot holes,
Build your headboard, sides, and frame using glue and 1.25′′ screws. There’s no rush to join the headboard’s side panels just yet, so you can leave them apart.
After the assembly is complete (here is where everything comes together to form the bed), the metal can be sanded, stained, and spray painted.
10. The Corner floating bed
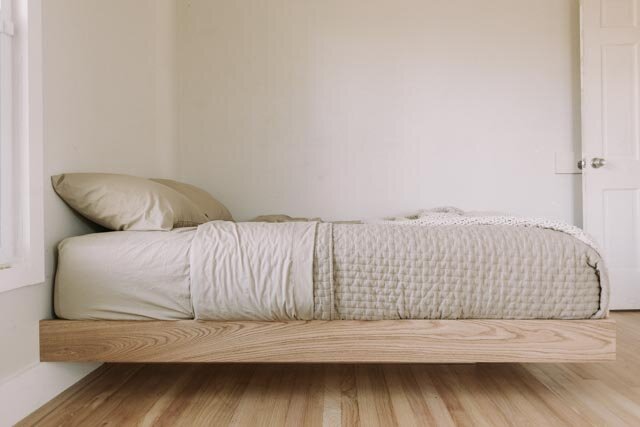 Cut the 2x4s in half diagonally and arrange them in a rectangle for the first step. The top and bottom 2x4s are positioned INSIDE the exterior 2x4s. The next step is to cut three 24 boards and arrange them in the middle of the rectangle at regular intervals. Get out the drill and some screws since you’ll need to fasten the 2x4s together.
The next step is to gather your 2×6 boards to construct the base for the platform. You can determine the location of the inset by placing your 2×6 boards underneath the top platform. If you look at the bed from the side, you shouldn’t see the platform at the foot.
Use a drill and some screws to fasten the base platform together. You must set up the final 2×6 support in the middle of the lower platform. Your new length is 58 inches. Ensure the bed won’t move by securing the underlayment to the underside of the platform and the underlying platform to the studs in the wall before setting the bed on it.
This way, the bed won’t budge even if you sit on the very edge. Prioritize security. Finished off by getting some underlayment from Home Depot and cutting it to size. The underlayment should then be fastened in place using a finishing nail gun. This construction will serve as the foundation for the bed.
9. A Four-Poster Bed to Emphasize Height
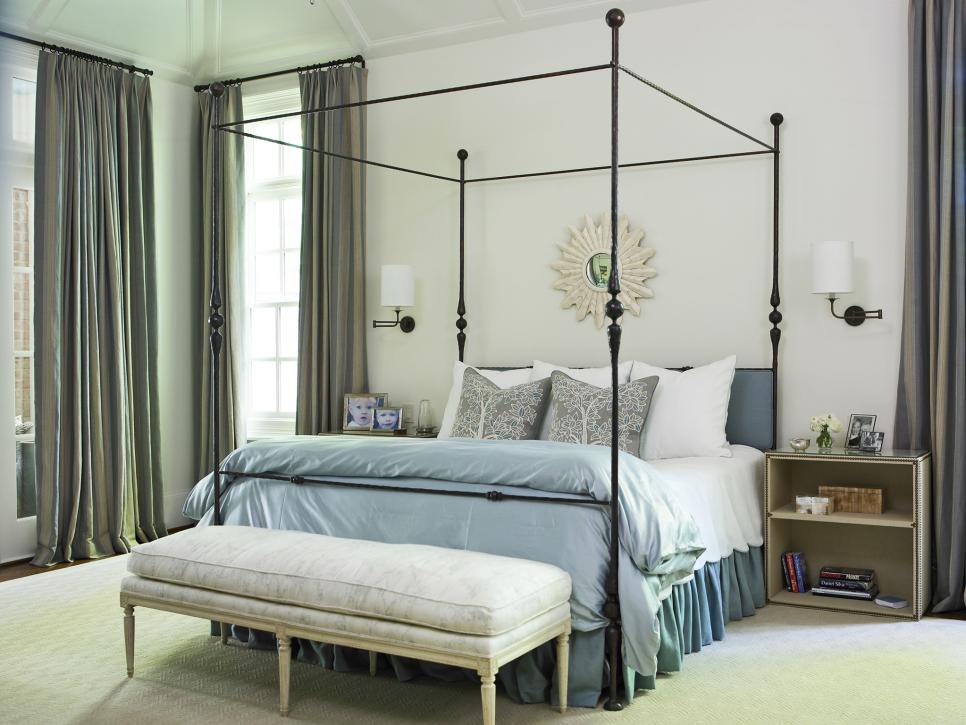 Consider a tall bed as the centerpiece of your bedroom to acquire most of the space provided by the high ceiling. Melanie Miller, president and founder of The Design Atelier in Atlanta, said that the bed’s Height draws attention to the room’s volume and ceiling height. To achieve this look, you’ll need a bed with a lot of architectural detail and a low profile.
If you want to save on weight, use a bed without a footboard to denote where the mattress ends. She explains that a hardwood four-poster bed would be too grand and opulent.
8. Focus on the Accent Wall
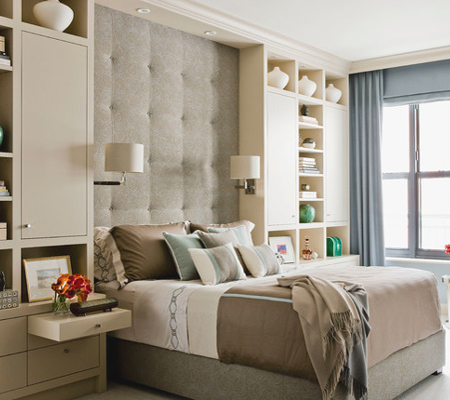
It does not have to be built-in storage, though. You purchase modules and assemble them to create a storage wall flanking the bed in the middle.
You can also make an oversized tufted headboard from a pegboard, foam, a stapler, and buttons that run up to the ceiling to accentuate the centerpiece. It also adds a bit of a luxurious ambiance.
To make this luxurious headboard, lay your pegboard down on the floor to determine the size of the foam. Once you cut the foam to size, decide the pattern you will apply and mark the pegboard holes for the buttons.
After that, screw 1x4s to the board’s edges to create more support. Next, transfer the markings to the foam by placing a dot on it through the pegboard.
Then, remove the pegboard and cut out the area you have marked on your foam. After that, attach the foam to the pegboard and ensure the markings align correctly with the holes.
Next, secure your batting over the foam and board using a stapler. You may find unneeded excess. Cut it off if necessary. Now, you are ready for tufting.
7. An ingenious floating bedroom shelving idea by @Zoetropefurniture
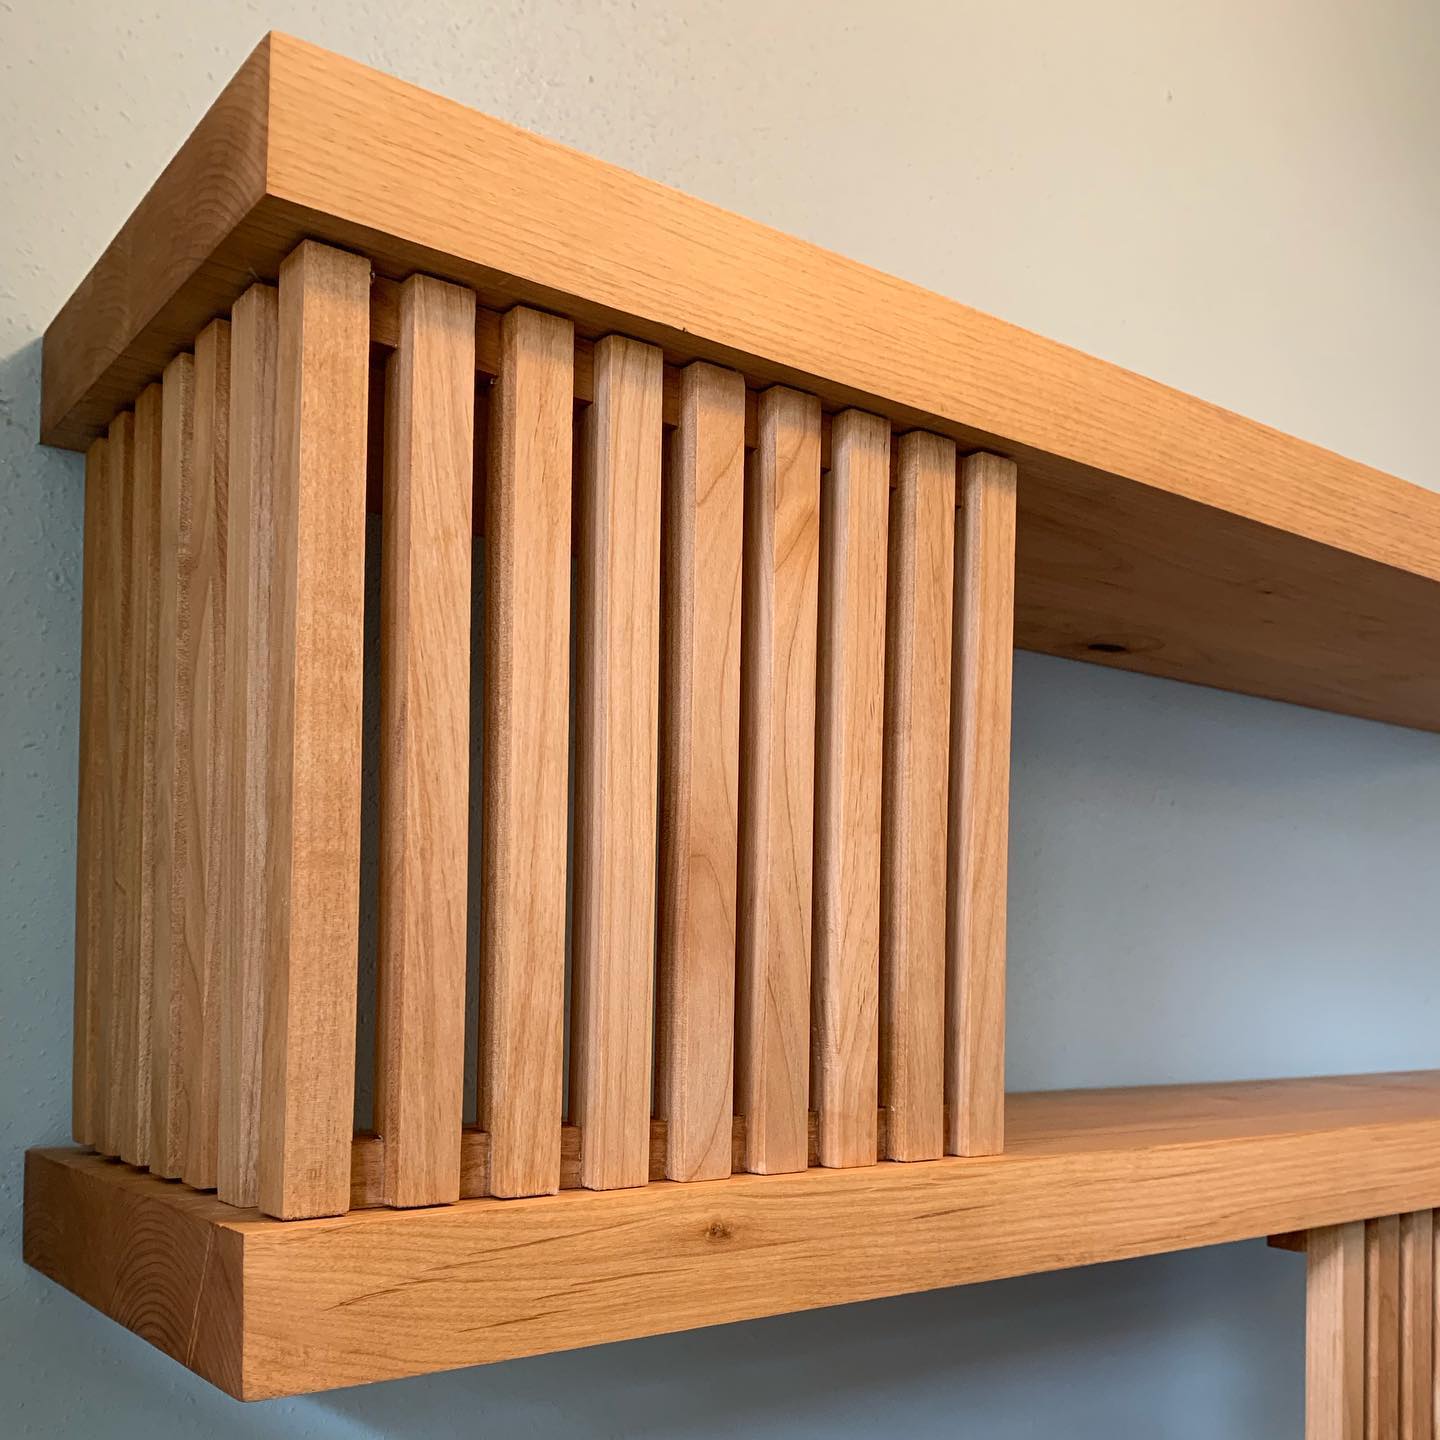 Enjoy some downtime with your favorite books or houseplants. By the end of this do-it-yourself project, you’ll have something more than simply a standard floating shelf. Instead, we have floating bedroom shelves. Really, this is awe-inspiringly beautiful. Not only that, but it’s the kind of distinctive and rustic we’ve never seen before.
The shelves are arranged eccentrically yet creatively, and the author detailed the steps required to make this idea permanent display panels for your memorabilia. This piece’s presence would benefit any space, from a bedroom to a kitchen. It was initially planned as a floating Alder kitchen shelf with fixed panels. Shelf hardware by @shelfology and @odiesoil for final touches.
6. A Small master closet makeover, Barnhouse style
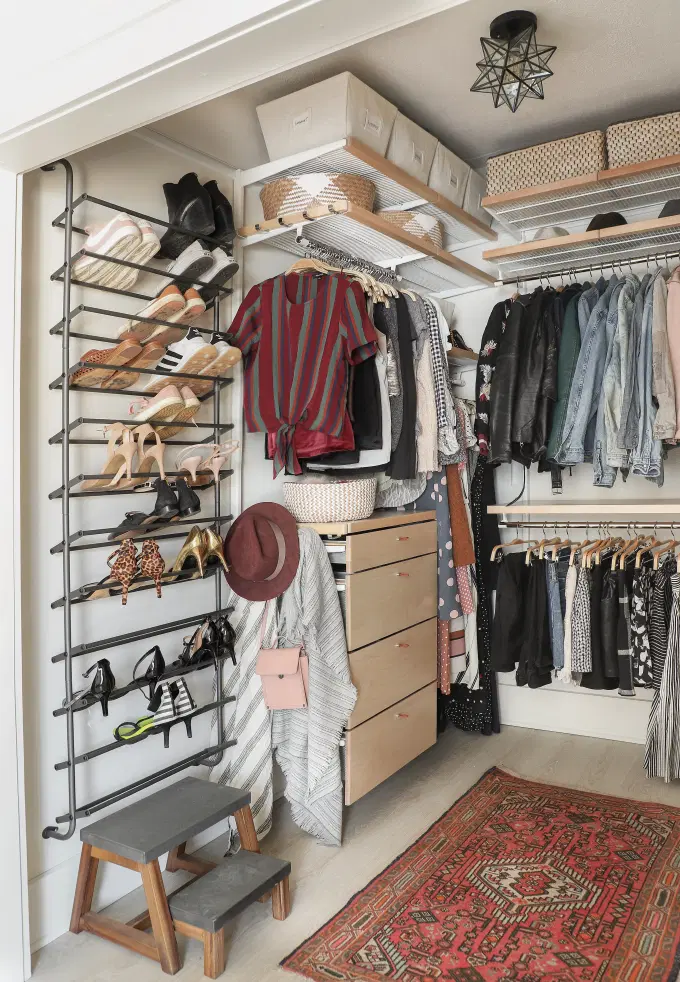 To begin, just measure the area where you intend to store your clothes, and then schedule a consultation with a designer at your local Container Store. After discussing your preferences, needs, and budget, the designer will return in about 20 minutes with a depiction of your closet, complete with the wood tone, bracket color, handles, and a unique height that will prevent your long dresser from hitting the floor.
The Container Store will bring over an installer, but the whole thing is well documented on video and easily replicable to save you money. The vertical tracks are supported by rails attached to the wall studs with screws.
Next, you’ll want to install and adjust your shelves.
Final touches include ingenious plugs that snap into the tracks to conceal the holes and blend in with the background.
It also gives you a shoe rack to attach to a closet wall or hang over a closet door. The answer is perfect for 36 pairs of shoes.
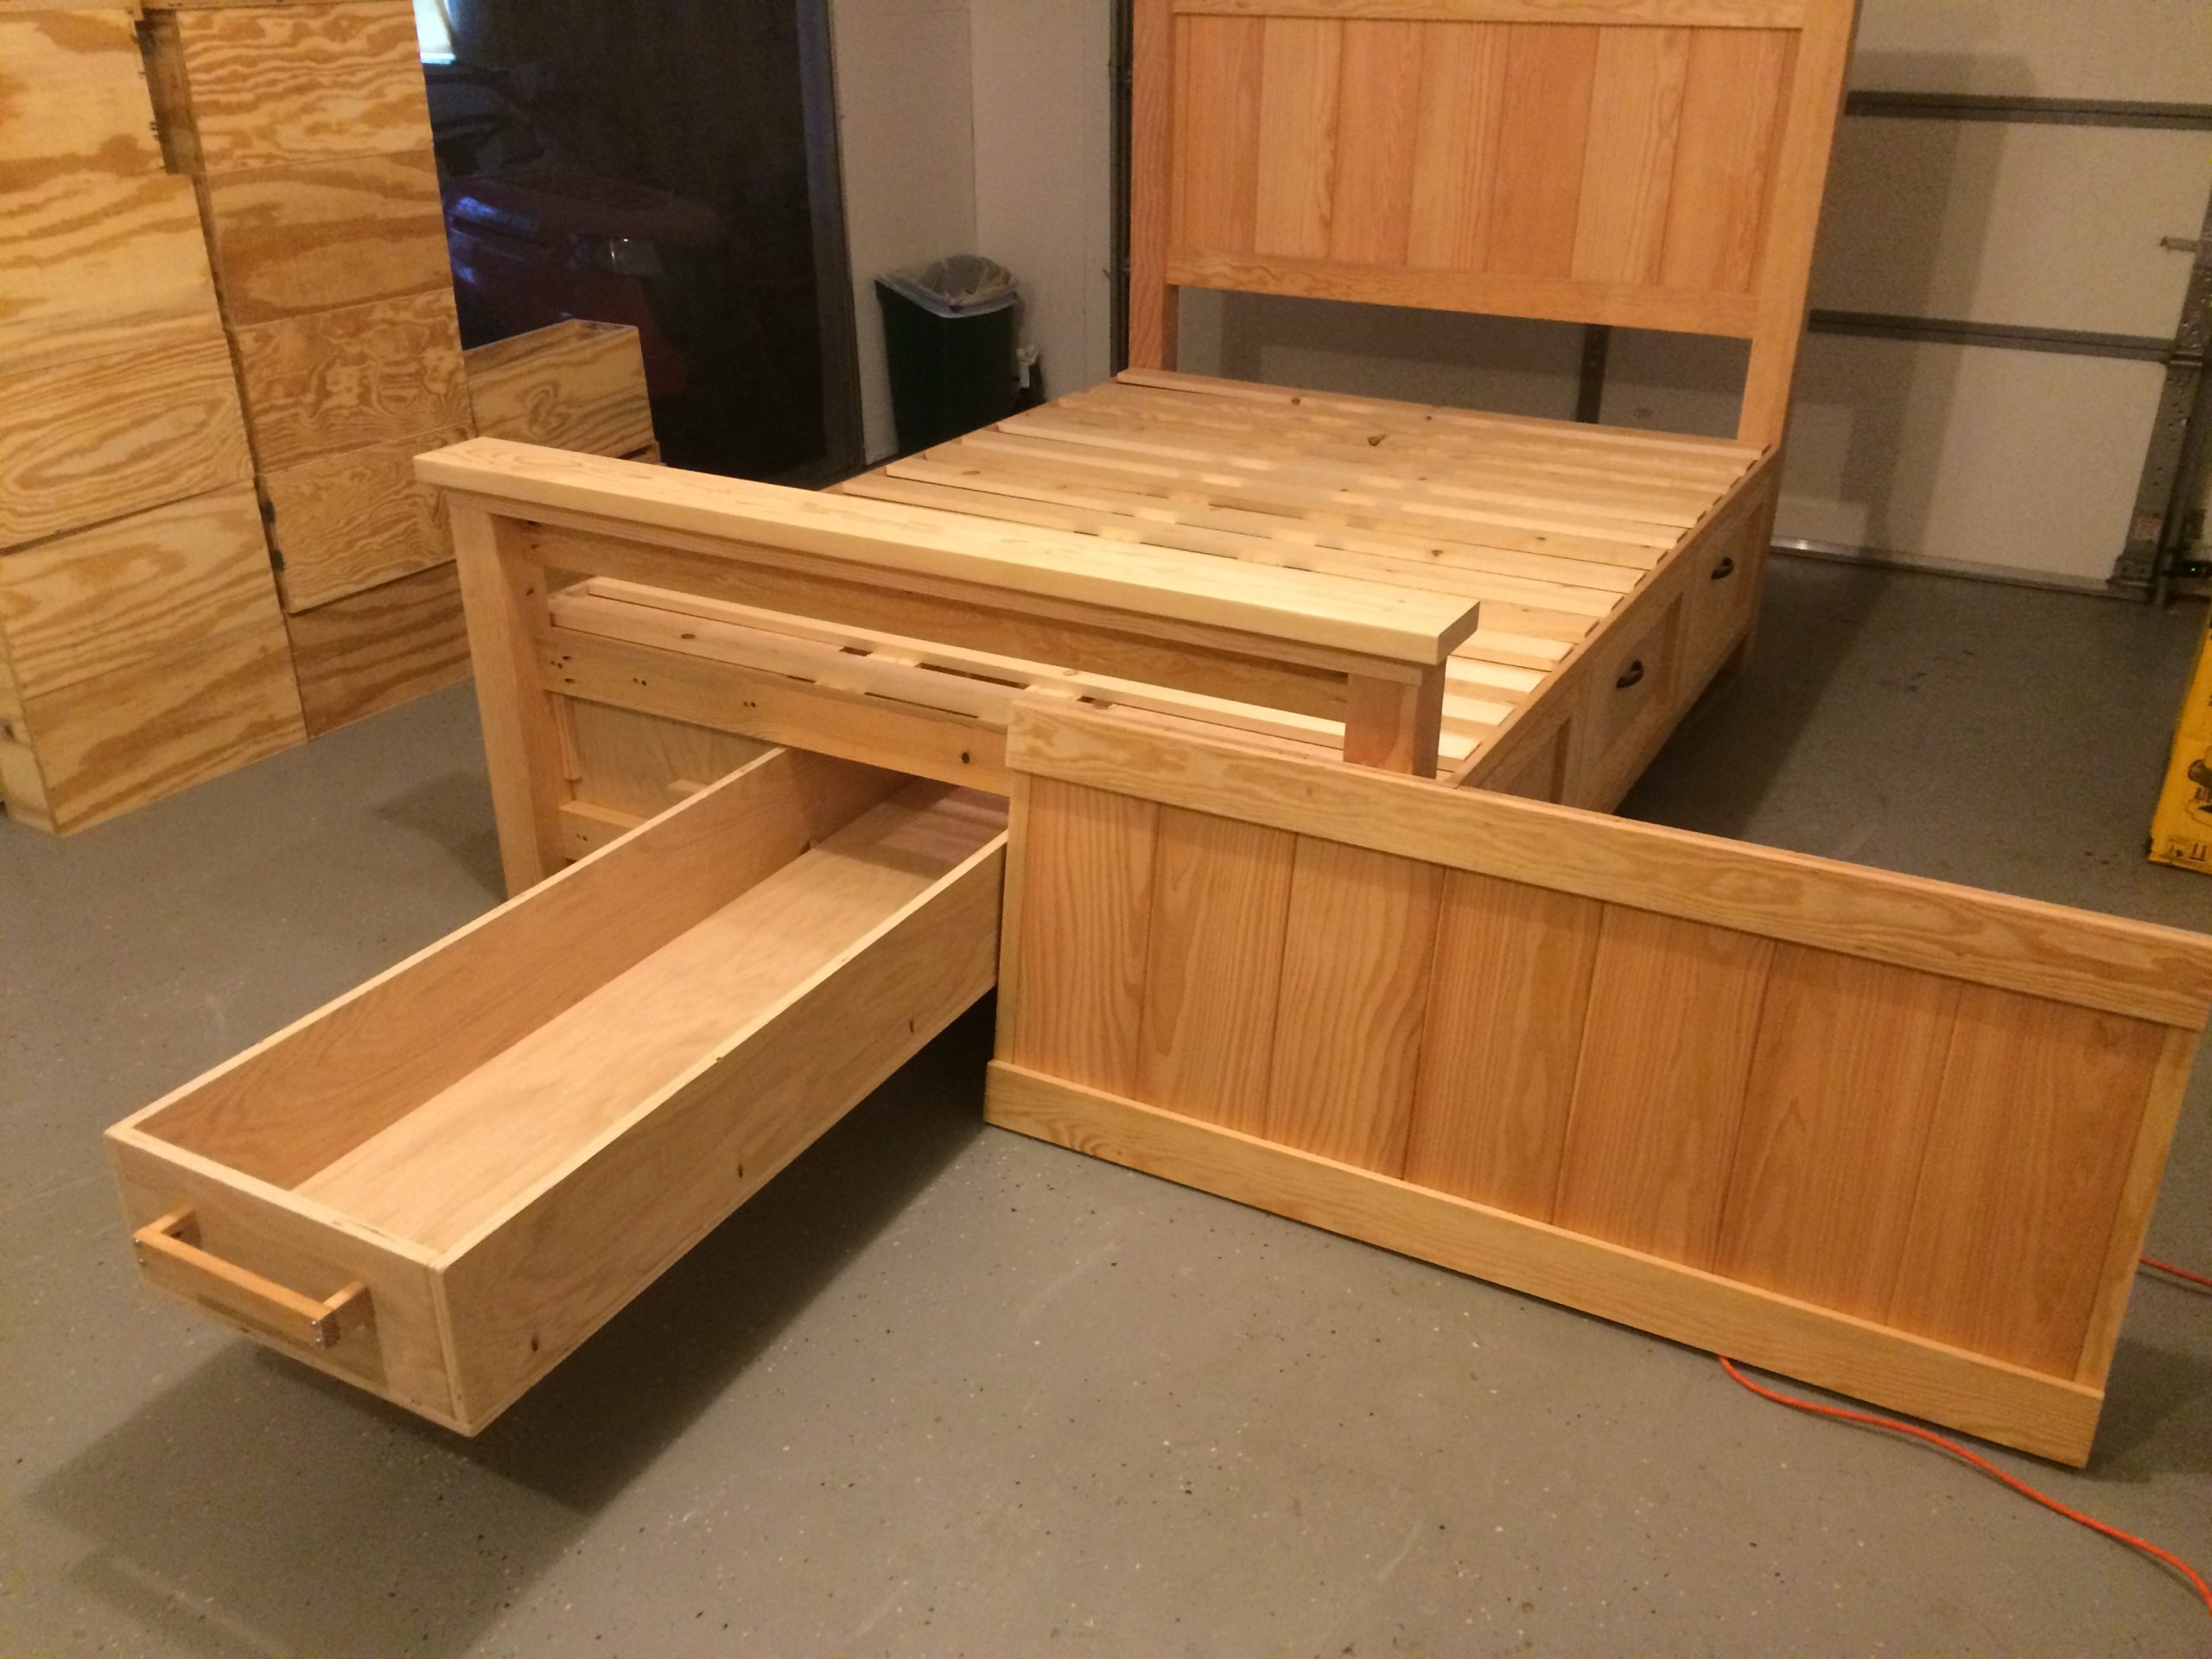 A set of Ana White’s plans for a Queen Farmhouse bed and a Queen Farmhouse Storage bed, with some alterations, is all you need to make a similar bed.
To begin, you’ll need to construct a faceplate for the drawer boxes and modify them to maximize storage space. Euro roller bearing slides will enable you to expand the size of your drawers. If you want your footboard to be higher than your mattress, you can easily make it removable by using the concealed latches on the inside.
Create a secret drawer about 6 feet deep to use the empty area between the drawer units. The optional center support needs to be swapped out for 4X4 blocks that are pocket screwed beneath the center of the boxes to accommodate the new concealed drawer. Birch plywood and fir lumber are two viable options for construction.
4. A little update for a small slanted master bedroom with a big storage impact
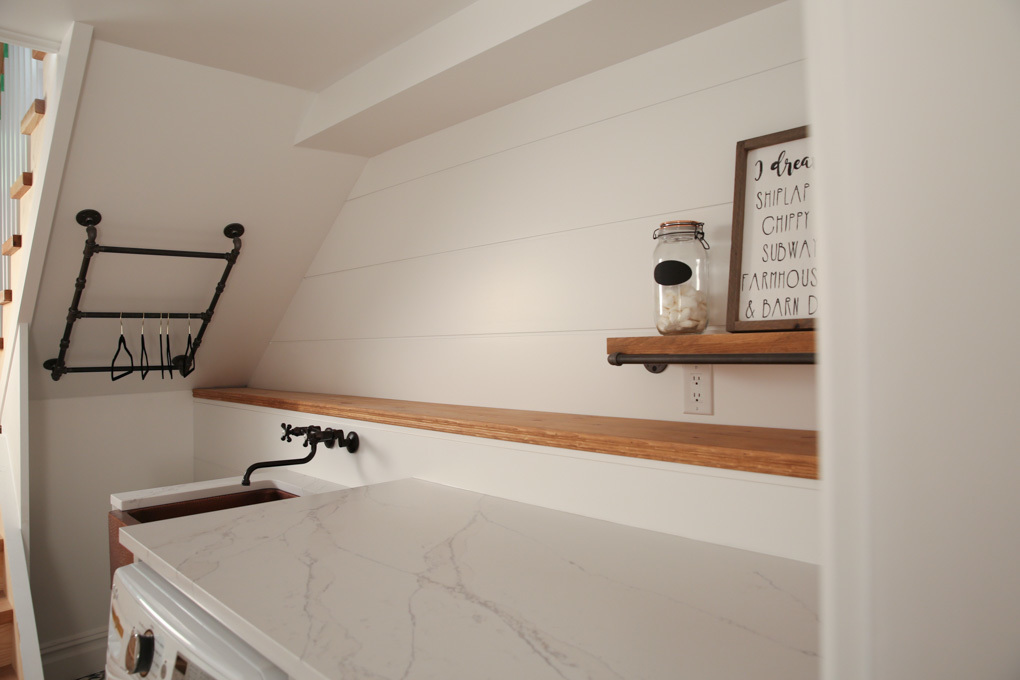 If you have trouble finding space for your clothing in your slanted master bedroom, take a cue from Roxanne West and Craig and what they did to organize her laundry room. They came up with a simple method.
As can be seen from the photographs, there was hardly any room to access the area under the staircase in the smaller “nook” that is often utilized for usable “dead space.” Craig provides three iron pipe bars that you may use to hang items at varying lengths so they can dry. Craig also made the wooden shelf attached to the shiplap wall and supported by pipes. The long wooden shelf is another do-it-yourself project that conceals the wall bump in a more aesthetically acceptable view; it holds all the plumbing and other essentials.
3. A Floating bookshelf ideal for the small master bedroom
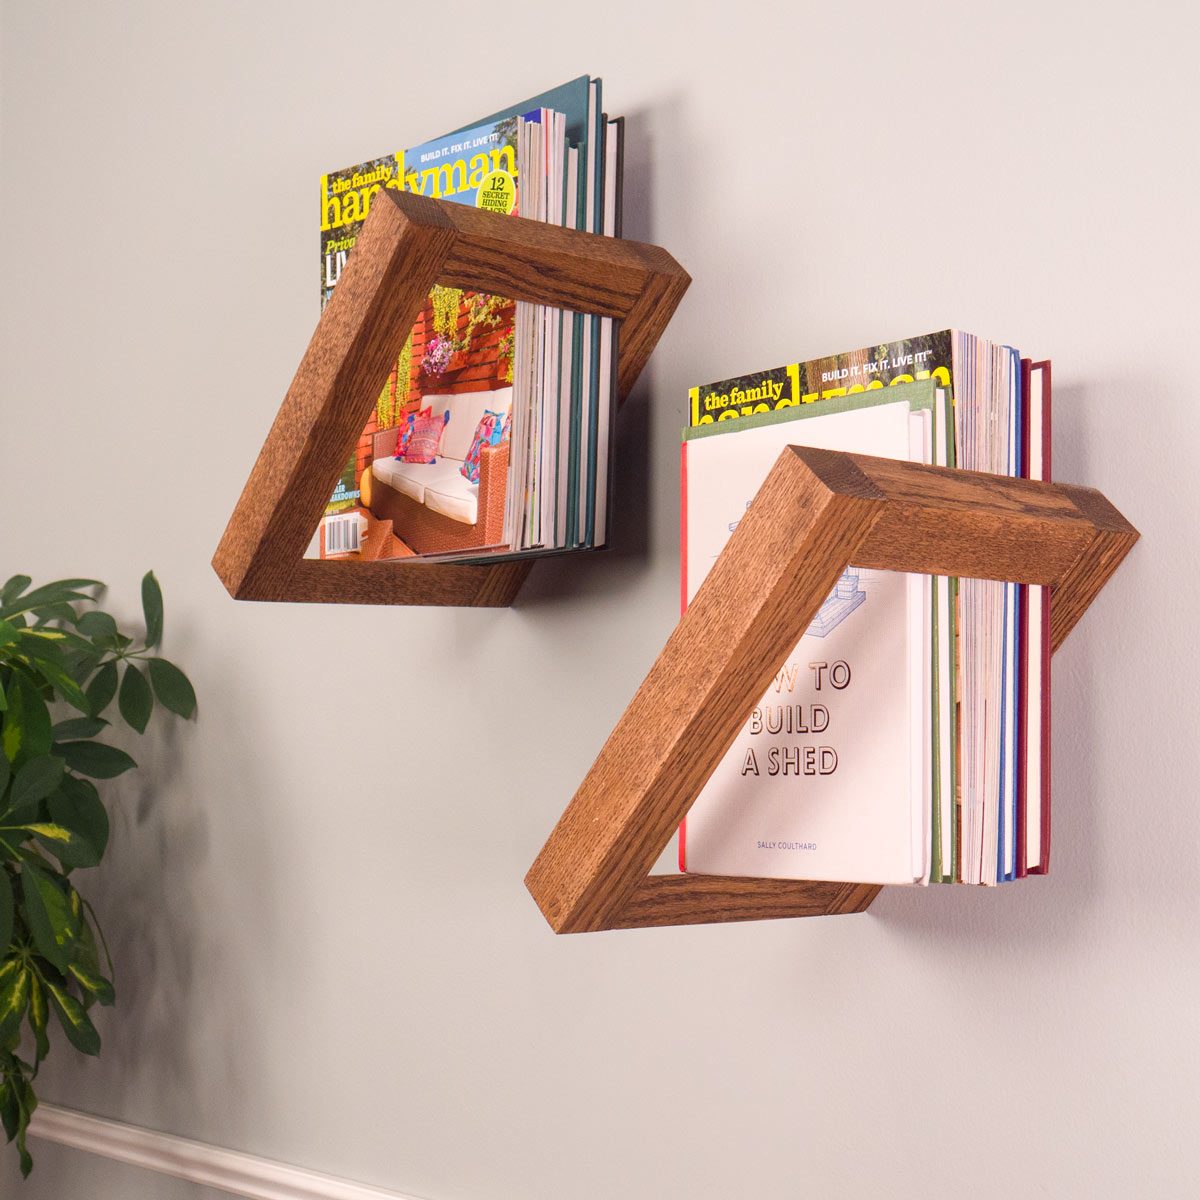 Is your master bedroom boring? If you want a more practical and attractive space, consider this easy upgrade from Familyhandyman.
This 1-hour floating bookshelf project is a clever way to learn how to cut plugs for hiding screws while also adding some nice interest to your reading space.
Take a miter saw to one end of the 2×6 and cut a 45-degree angle. Remove the beveled edge with a saw, and the leftover piece will measure 1-1/2 inches by 1-1/2 inches. Make two 6-inch cuts for the angles (A). Create a new cut at 1-1/2 inches for the side (B).
Each end (B) should have a 3/8-inch Forstner-drilled counterbore drilled into it. Get a drill and some pilot holes, then clamp the frames together. To free the sides from the clamps, you must drill a clearance hole through the counterbores. Use flat-head screws 1 1/2 inches in length to secure the side panels to the chamfered edges.
You can use a 3/8-inch plug cutter and a drill press to make plugs. Using a chisel, remove the plugs. Use 3/8-inch dowel stock if you don’t have a drill press and a plug cutter set.
Insert the plugs into the counterbores and glue them in place. You should remove the glue with a moist towel. The glue needs some time to dry. Cut the plug flush with a handsaw while preserving the wood’s surface with cardboard. Eventually, you can finish the shelves in any way you choose.
2. The second DIY Platform Bed With Floating Night Stands (This time with extra cute lights)
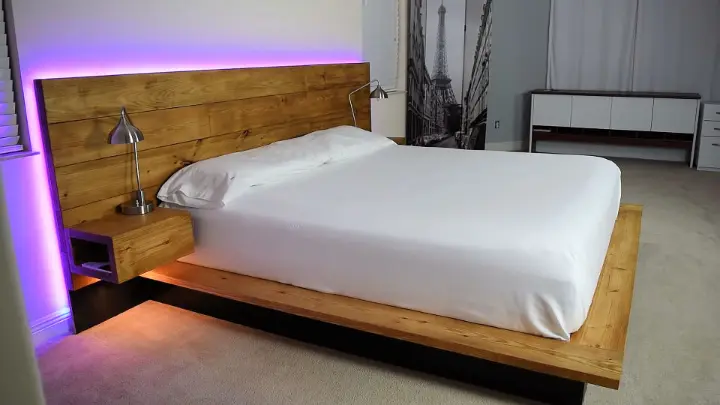 Cut 8-inch wood to size and create the bed’s frame. Be sure to measure your bedroom before building a bed. Sand the surfaces and paint the bottom frame glossy black. Build the mattress supports by placing evenly spaced lumber slats. Use thin timber slats to make mattress supports.
Cut a plywood piece to size and fill it with bespoke timber sizes. This phase is like a puzzle game. After filling the entire plywood size solid, this will be your headboard. The headboard is made of two blocks of wood.
Use robust hardware to install the bed. Fix LED light strips to the headboard’s back; choose any color. Install an On/Off switch on a nightstand or headboard to regulate light!
Shape two boxes from excess wood as floating nightstands on the headboard’s front. The floating nightstand will save floor space and makes your bedroom look more spacious, and the Mini lights you attach to the bottom of a floating nightstand will give you extra luxury. Next, move your mattress to the new platform bed.
1. The inspiring toggling bed for a tiny master bedroom
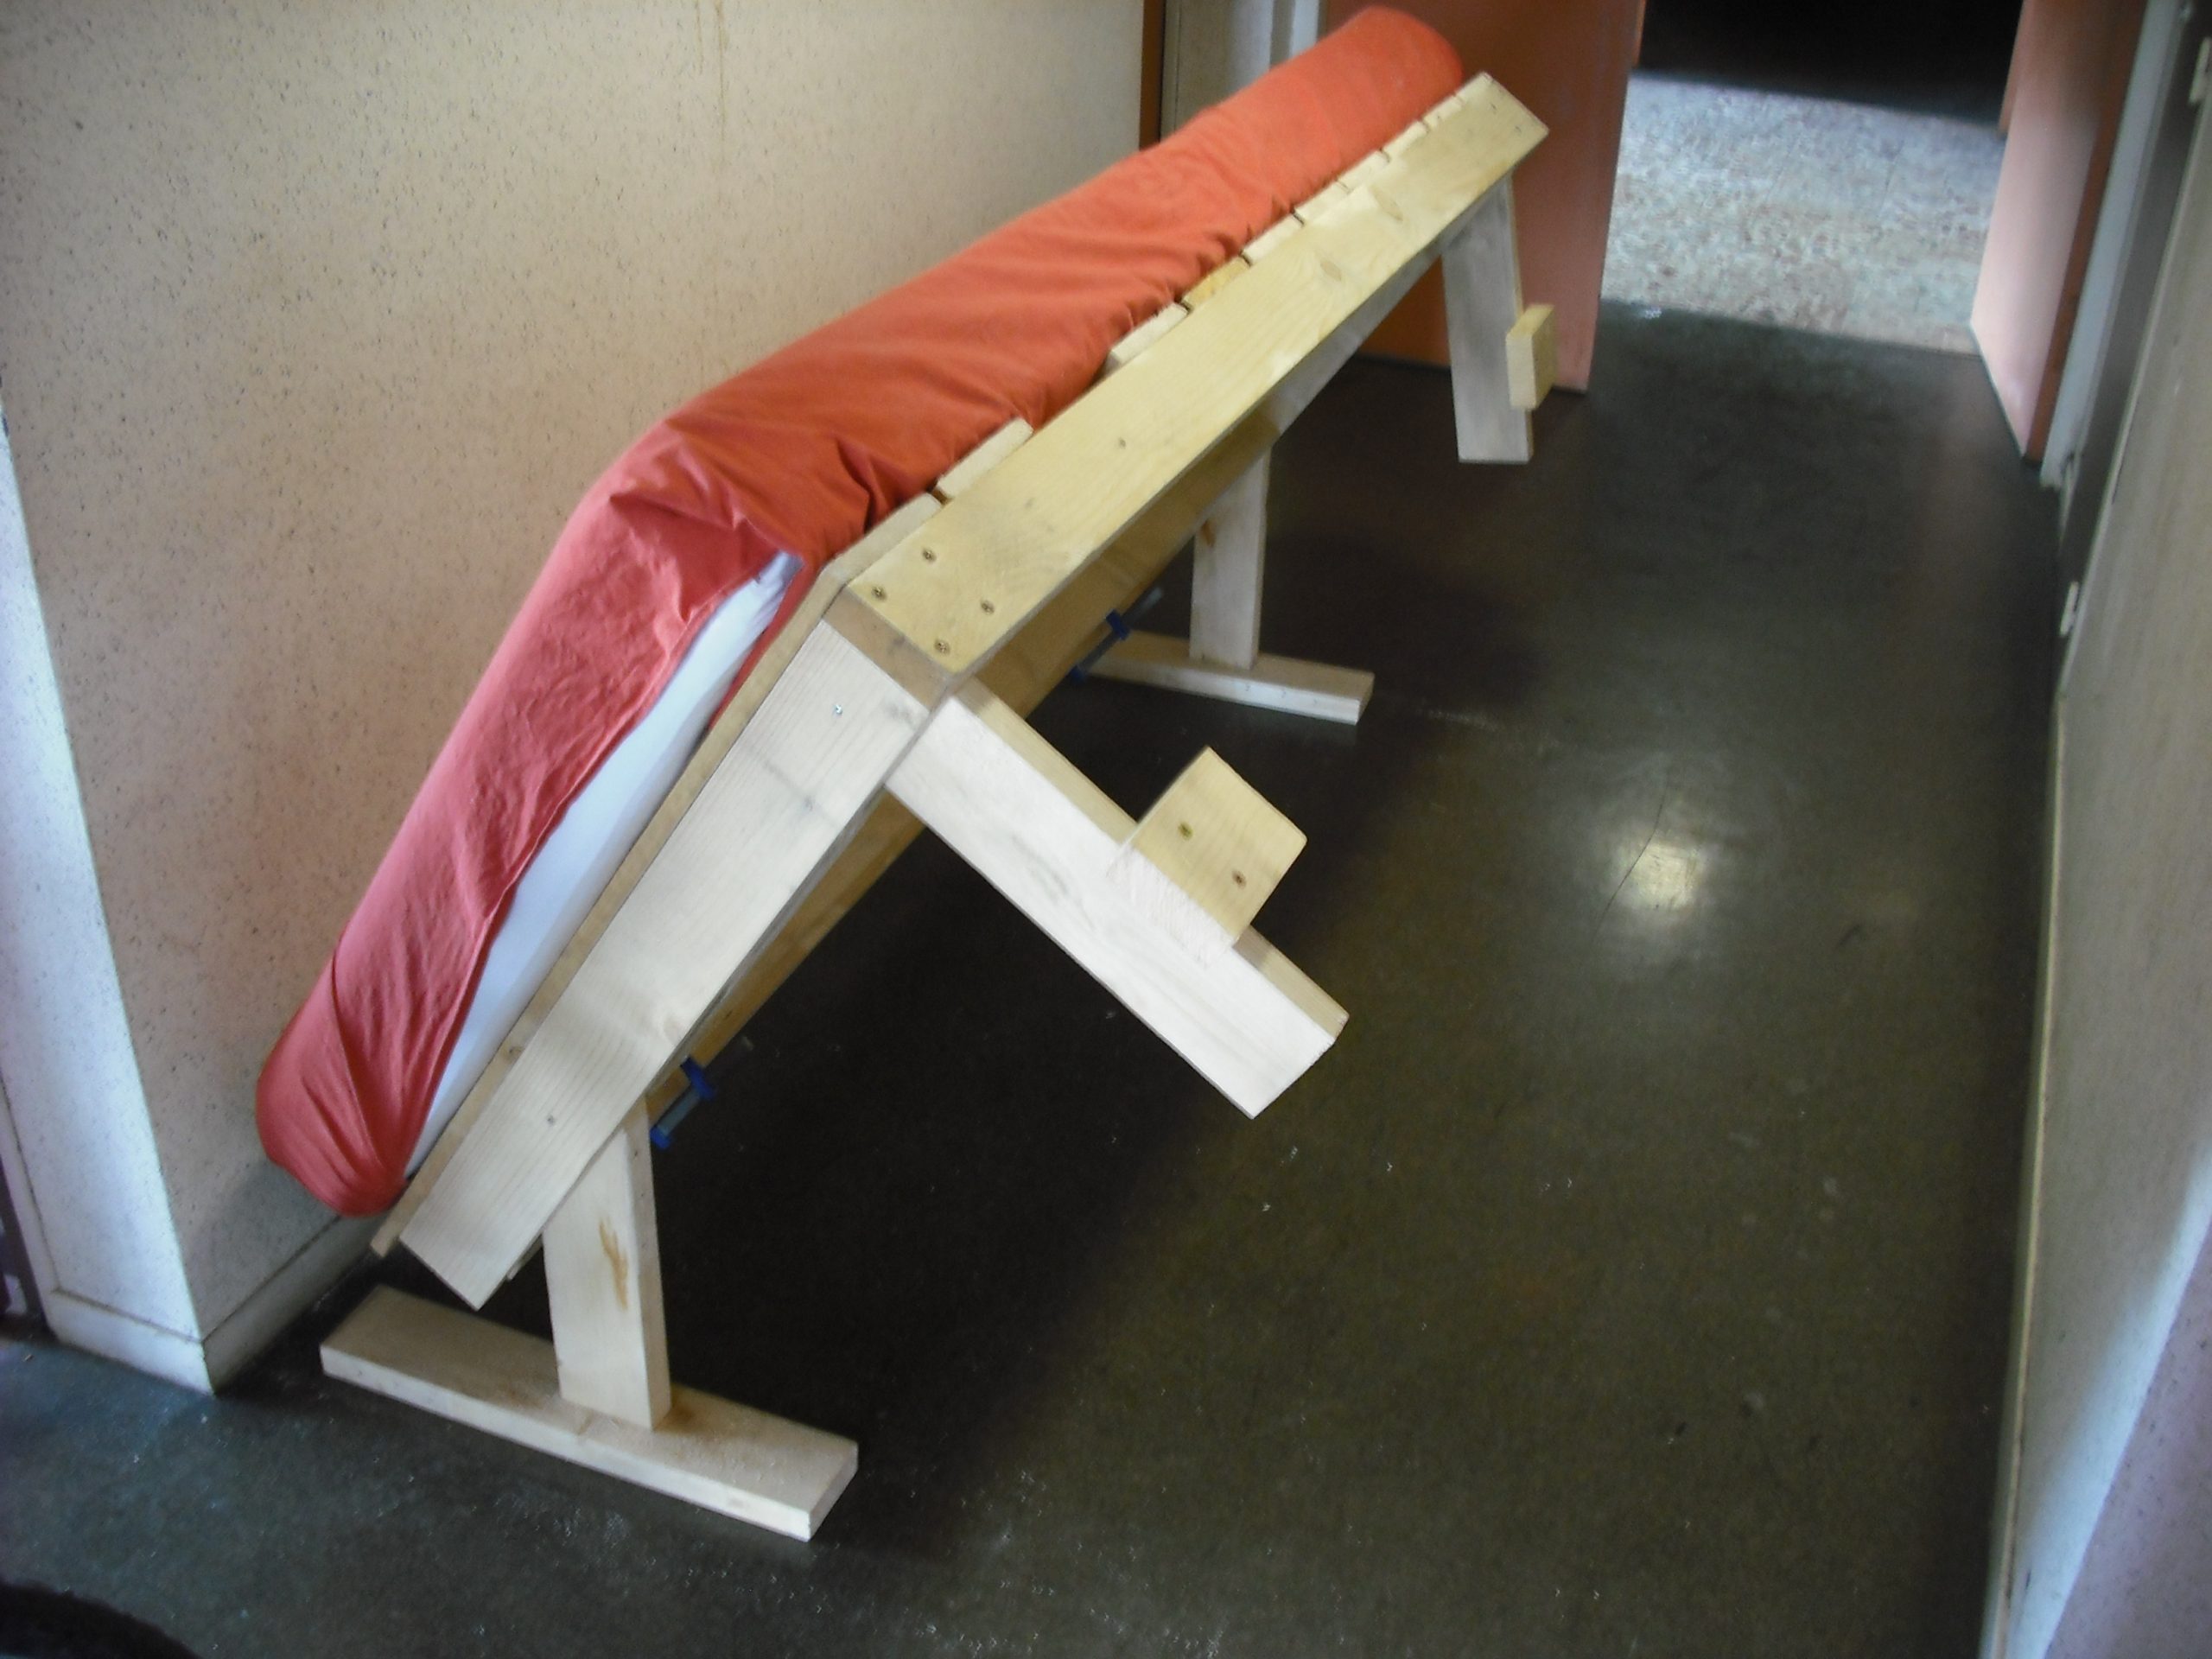 If you want an extra bed that you can toggle up to save space for something else, the last suggestion is the one that will work best for you. The rotation is carried out by hand using a metal screw of 6 millimeters in diameter.
You can access Google if you are interested in the 3D results.
The guide also includes the SketchUp file, which contains accurate measurements.
Extra, you can add a hole in the frame and a hole in the supporting strut on either side that you could slip through to prevent it from tumbling abruptly.
References:
12. Familyhandyman.com
11. Craftedbythehunts.com
10. Thisminimalhouse.com
9. Hgtv.com
8. Home-dzine.co.za, Chicmisfits.com
7. Instagram.com
6. Ispydiy.com
5. Ana-white.com
4. Bonjourblissblog.com
3. Familyhandyman.com
2. Itsoverflowing.com
1. Instructables.com