One of the major problems you should avoid is to make your kitchen messy and cluttered because it can negatively impact your creativity and efficiency whenever you cook. Which will eventually make you upset, especially if the mess is large enough for you to feel like everything is falling apart at once when making a new dish or preparing a recipe.
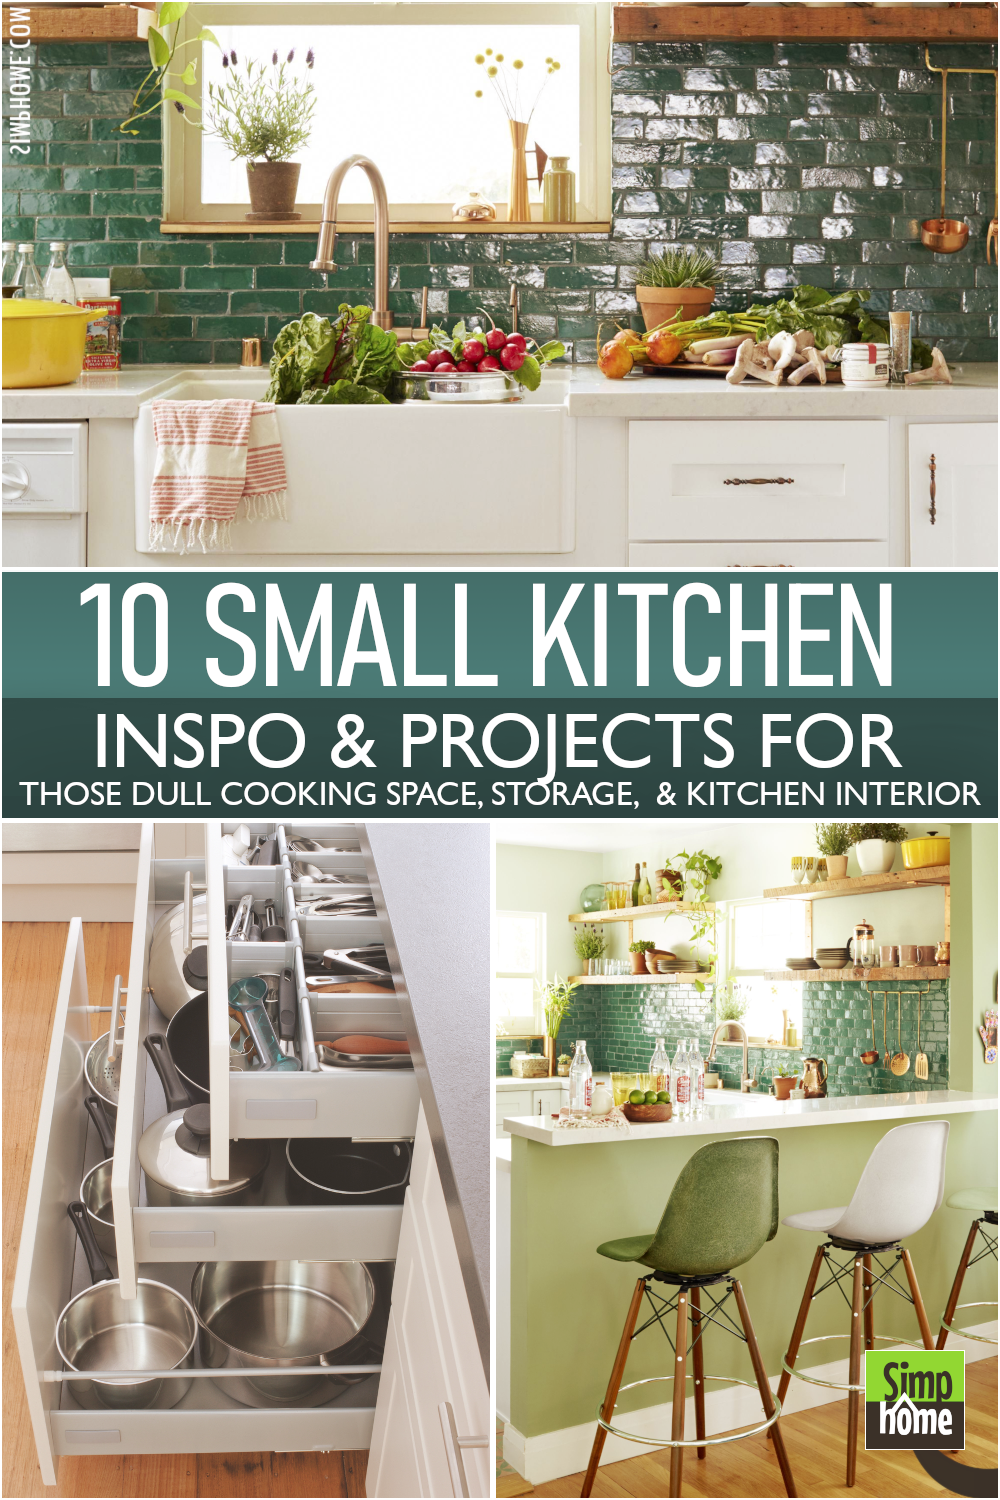
A clean place is an essential requirement for every room, including the kitchen. No matter how small it might be, the kitchen should have a proper arrangement with everything so that you can cook comfortably. So let’s check out our 10 Small Kitchen Inspo and develop a plan for the kitchen!
Here, we have gathered small kitchen optimizations for you struggling to find an alternative way to make your kitchen feel wider and efficient without neglecting its beauty. For more detail, follow the Simphome link inside the reference area.
First, How do you make your kitchen feel bigger? – Get an efficient workstation. It should have a small counter that isn’t too long to fit into small spaces and an adjustable height tower so you can have an eye-level space for food prep or organizing your appliances.
🔊10 Small Kitchen Inspo Video:
List Entries:
10 Small Kitchen Appliance Storage Ideas
10 Tricks to Squeeze a Little Extra Storage Out of a Small Kitchen
10 Small Kitchen Nook Ideas
10 Small Kitchen Living Room Combo Ideas
10 Small Kitchens with No Pantry Improvement Ideas
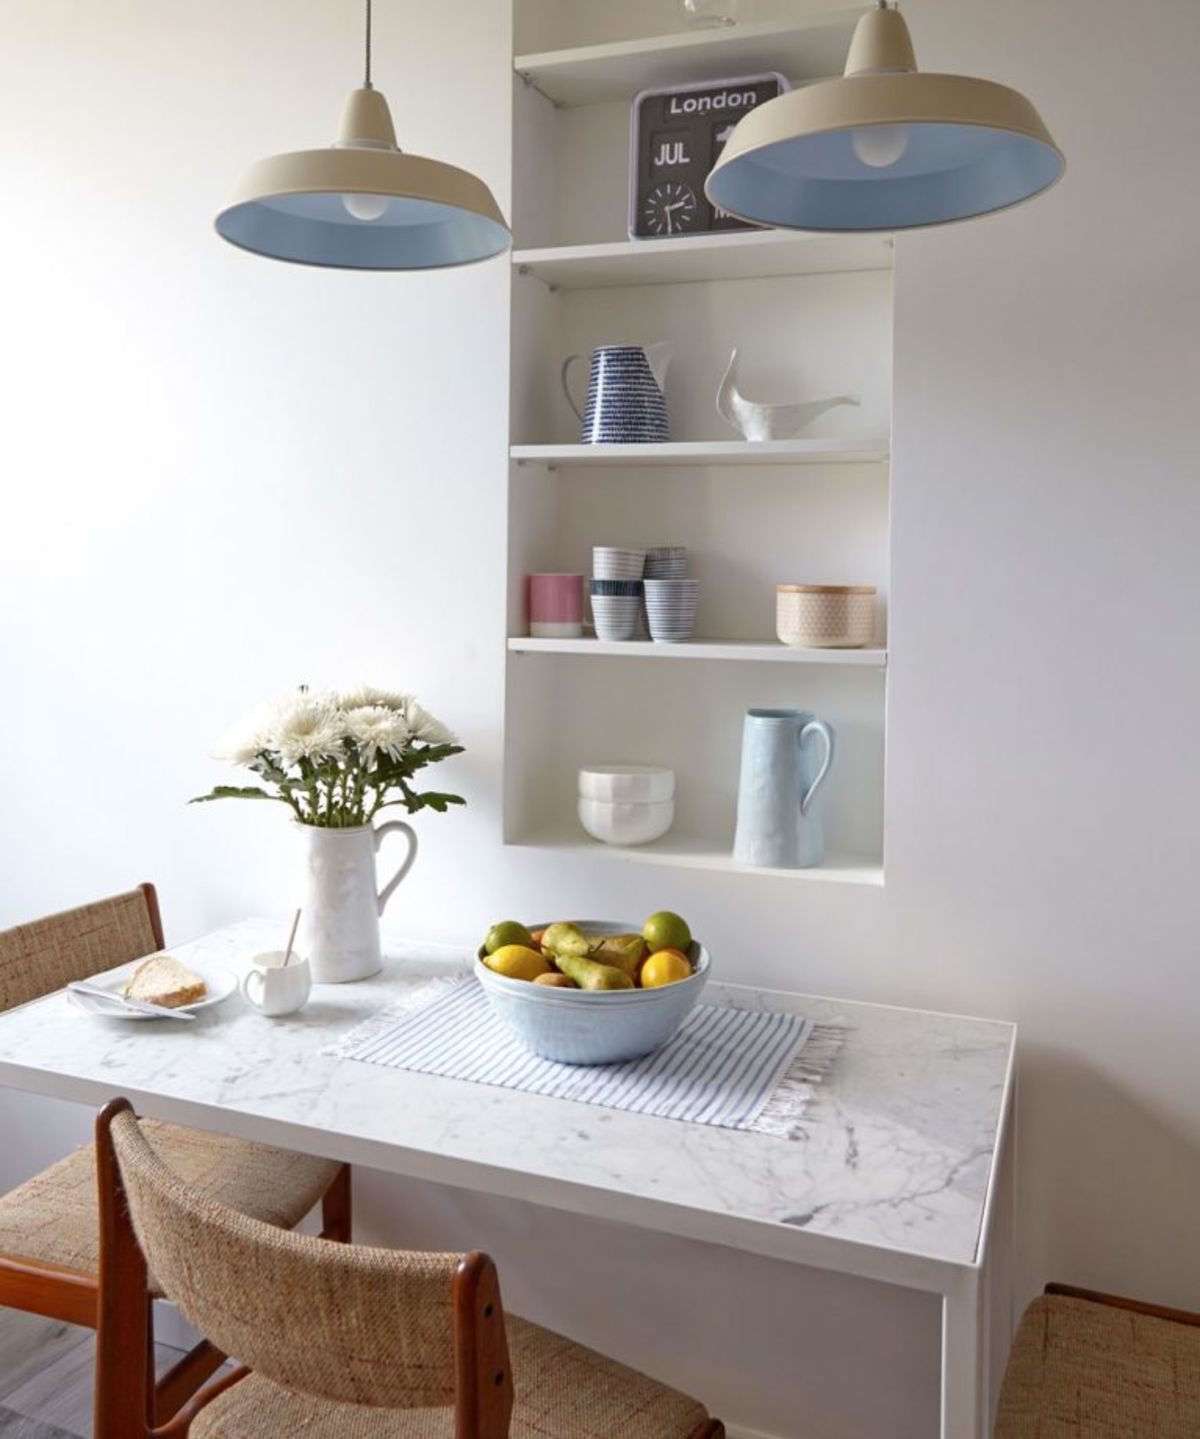
10. Attach a Shelf to the Wall
As saving space is mandatory, you should be clever enough to create your own idea to squeeze some more stuff in. This floating shelf idea is just your life savior when it comes to maximizing space.
You could have a table and chairs in the kitchen, but a floating shelf is a clever replacement for that since your kitchen has a narrow space. You can simply fix it on the wall and put some chairs around it.
There’s still some room for you to walk back and forth around the aisle, but if you use a table, it will consume so much that it limits your movement.
Relevant details:
- Choose a shelf that will fit your counter area, and decide whether you want it to be freestanding or attachable.
- Before deciding which size and kind of shelf to choose, you need to measure and mark the wall where you want the shelf to be placed (for example, at the edge of the counter).
- With a pencil, measure, and mark your wall where you wish for the shelf to go.
- Measure the width between the two marks to see if you can fit in a shelf that will fit your wall measurement.
- If yes, make sure to remember it in your kitchen planning better.
- Now, you need to measure the distance from the wall to the floor and then add some extra space so that there’s room for cleaning up and walking on this shelf.
- If there’s no space for cleaning up, make sure to leave some room in the middle.
- Take measurements of your counter area (both sides), and measure the width of your counter – this is the width you’ll need to put your shelf at.
- Take your counter measurements and adjust them to see if they fit in your wall space. Use more space on the sides of your counter so that the shelf holds on the wall even better.
- Take some measurements of your Wall to see if you can fit in a shelf that will fit your room’s dimensions. Adjust the measurements accordingly.
- Now, for attaching a shelf to the Wall, we suggest you ask an expert about this step since it’s not something you can do yourself. Here are some ways to attach shelves to walls:
~11.1. Using a drill, attach the metal brackets to the wall with screws.
~11.2. Use a special tool that has a hook, and hang the shelf from the hooks.
~11.3. Use a screwdriver, hammer, and a drilling machine to attach it on both sides of your Wall using screws. - Now that you have measured your counter area and know how much space you have for your counter appliances, it’s time to look for those things that would better use those spaces. Here are some ideas:
~12.1. Find the most efficient working space for your appliances, like a small counter area and a tower area.
~12.2. Look for appliances that will directly help you with your cooking (like a microwave or a toaster etc.).
~12.3. Buy or create a small table and chairs around a floating shelf, so you have a sense of comfort while cooking.
~12.4. Get storage items to keep your plates, cutlery, and other things organized in your kitchen, so it doesn’t become messy at all times.
9. Turn the corner into a storage
 Storage is such a fantastic feature for every room. It’s hard to find a kitchen without one, regardless of how compact the space is. An empty corner is your opportunity to ease your problem in the kitchen or dining space related to storing.
But please don’t only focus so much on storage that you forget to make it look appealing as possible. It’s because everybody loves a kitchen with innovative organization and cleanliness.
You can create a DIY shelf or a rack on the wall by the table. It’s a small one, but it’s enough to organize some glasses and other things.
Relevant details:
- No 1. Combination of a table and storage
A square table is the most space-efficient one. It’s practical and looks fantastic, especially if it has some unique detail, like shelves. You can then use the spaces above it or below to store other things you might need during cooking.
By doing this, you don’t need much other kitchen storage because you can easily use your square table to store all kitchen utensils, plates, drinks, and even foodstuff. - No 2. Use the Wall behind the stove
The Wall behind your stove is not an empty one. You can utilize it to put other things that are not essential for using the stove, but you should know that they’re valuable and come in handy when you need them. Use small storage racks on the Wall to store some spices and other things you might need right away when cooking.
Alternatively, you can use decorative items such as framed photos or paintings to beautify the kitchen space and add more aesthetics. - No 3. Apply a simple concept
You don’t need to spend much on kitchen decor. You just need to apply a simple concept that makes your space look spacious and more valuable.
Instead of creating an entire kitchen décor, simply making some storage solutions help you create a compelling atmosphere in your kitchen. You need to be creative with the “how” of organizing things in your space. For example, instead of using ample shelves, hang decorative items or accumulate items together to make it look complete and functional at the same time. - No 4. Keep the space visible
It might be challenging to keep the kitchen clean while having so many cabinets and shelves. But, you don’t have to compromise regarding storage while keeping your kitchen clean.
Use some LED lights on the upper side of your storage so that they illuminate the kitchen when it’s dark. Combine some wooden shelves with glass doors, or have a transparent wine rack under them, so that you can keep the space visible while putting things away. - No 5. Place the storage above the countertop
Space above your stove or sink is usually just ignored. You tend to leave it empty, but you can utilize it to store some things that are easy to access, like plates, kitchen utensils, and drinks.
You can check the picture below for a better insight.
Relevant details:
~5.1. Use a cabinet instead of a drawer
Although you can use a drawer in a cabinet, it’s hard to pull out if you place many things in it. A cabinet allows you to open it wide to reach items inside, which is more convenient.
~5.2. Create a DIY storage rack on the Wall
This suggestion is one of the easiest ways to make your small kitchen look spacious without having many built-in cabinets or shelves. You just need some bricks and wooden planks that are easy to find.
~5.3. Wrap all planks with fabric or some other decorative items so that they look more stylish. You can also use bricks as a planter for some herbs or other plants. - No 6. Make use of the wall mount cabinets
Wall mount cabinets are not as standard as built-in ones, but they’re a great way to turn your small kitchen into a spacious one. You can use them to store your kitchen equipment, accessories, and others that you don’t need to take out simply. You can use them to keep your most used things, like knives, cookware, plates, and others.
Relevant details:
~6.1. Use the space above the sink
The space above your kitchen sink is filled with products that you need to clean every day. It is often difficult to keep clean because of all the stuff you put on top of it.
But, you can utilize this space by placing additional shelf units on top of them. You can then put some utensils and other materials that you need to use.
Alternatively, you can use a narrow and long shelf instead of cabinets. It’s also a great organizing solution for kitchen utensils and materials, but it’s best used for storing bottles and jars with liquids.
~6.2. Use some built-in cabinets on the Wall
Building Built-in cabinets on the wall are an excellent way to maximize your small kitchen space. You don’t have to clutter up your countertops by using a full cabinet.
You can use it to store kitchen tools and materials, but you should know that the space they’ll take is limited, so you have to move things around when you cook.
You can also install shelves in a new spot in your walls by using a small “wall cabinet.”
10 DIY Rustic Furniture Ideas for Dining Room and Kitchen
10 DIY Storage Ideas for Limited Kitchen and Dining Room
10 Small Dining Table Ideas and DIY
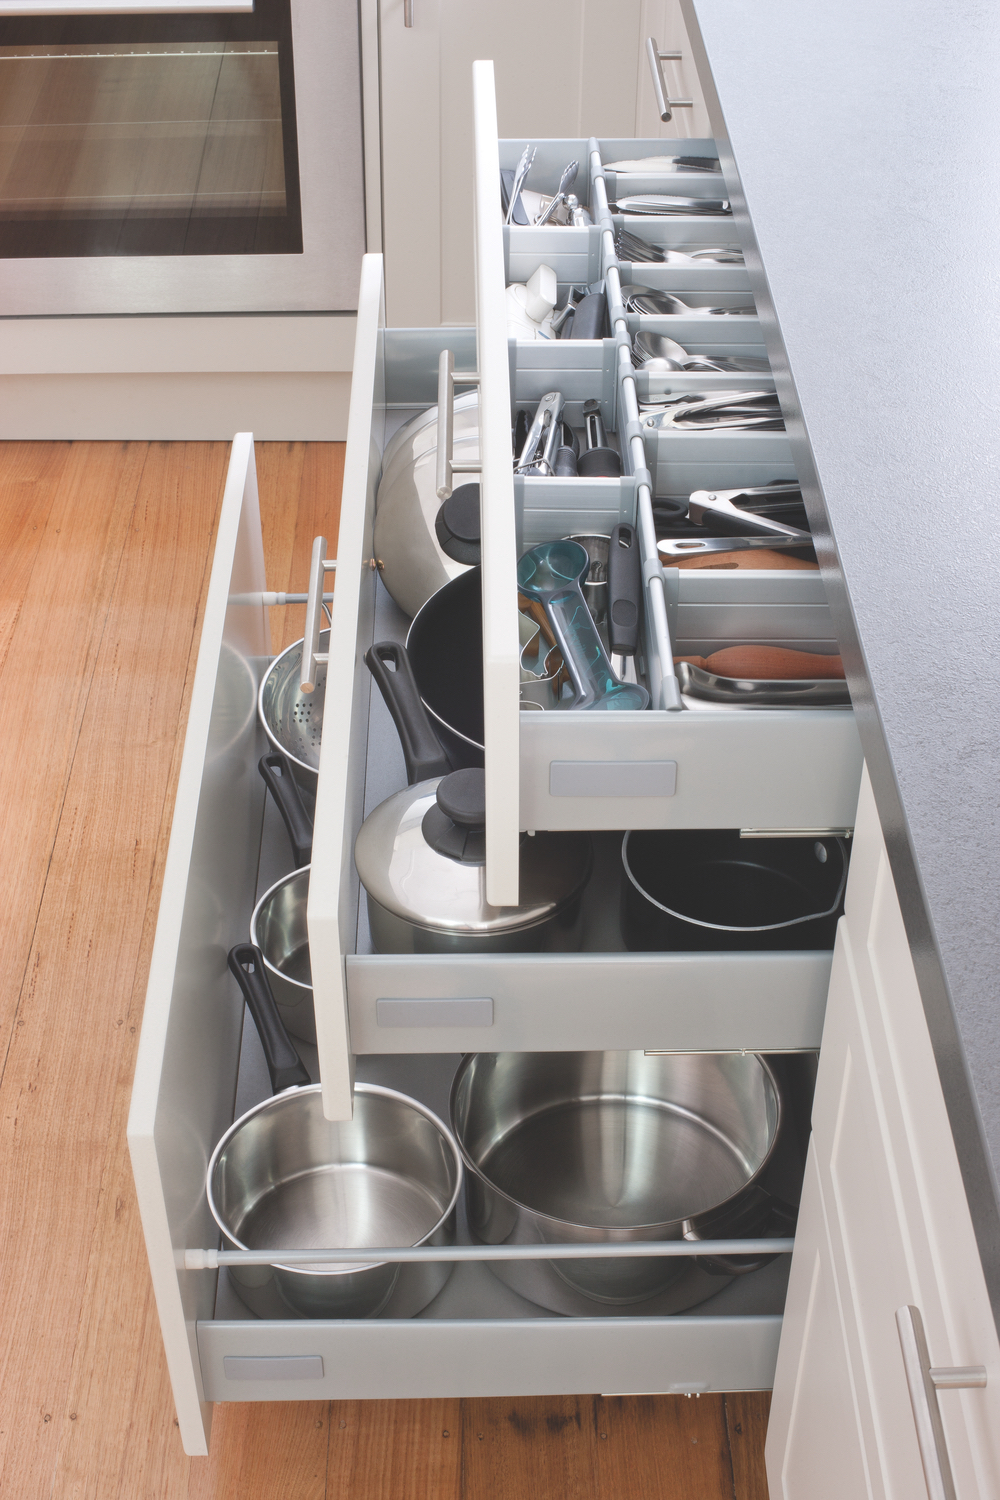
8. Get a Drawer organizer
 Noises are one of the things that you can hear very often coming from the kitchen. Imagine making something at night for yourself, but you unintentionally keep bothering your neighbor and your family members with noisome.
This drawer organizer is like a silencer that reduces some commotion you make in the kitchen. You can easily take or put the equipment or utensils needed when doing the cooking activity.
There are three cabinet drawers, and each drawer saves different kinds of utensils to help you find what you’re looking for.
Relevant Instructions:
- No 1. At the front of the drawer organizer, a round structure helps you put in some utensils. Take out each drawer at the bottom. Then, take out all the utensils in the drawers.
- No 2. There are two holes on each side of this drawer organizer. You can use them to hang some cutlery or kitchen tools that cannot fit into the drawers.
- No 3. Separate the three drawers and remove the wooden structure.
- No 4. Put some accessories, such as saucepans, in each drawer to help you notice when you pull out the drawer.
Relevant Tips:
- You can also put different kinds of equipment or utensils into each drawer so that your kitchen is well arranged and orderly.
- If you need to save more space in your kitchen, you can do away with some utensils and equipment that are not frequently used and put them in the drawer organizer.
- You can also use some pieces of cloth to wrap the drawer organizer so that you can quickly determine the drawer you are looking for.
- You can also put some small jars in the drawers to save different spices, like pepper and salt.
- This drawer organizer is also handy if you have small kitchen cabinets for spices, seasonings, or condiments.
- Insulate the Rug under the cooktop
Do you know how to make your kitchen look more effective? Then, insulate your kitchen rug under the cooktop with gas heaters or heat absorbent pads that protect your floor from heat radiation. When you feel cold on your floor after cooking or baking, you can simply remove the rugs and use this space to store some accessories. - Add a Glass Shelving Unit on Every Wall
Glass shelving units can help you make your kitchen look more extensive and more spacious. This storage is also suitable for saving space, and, most importantly, it allows the sunlight and air to come into the room. - Add a corner cabinet with a quartz countertop
If you live in an older house that has very few cabinets, you can add a corner cabinet with a quartz countertop at the far end of the kitchen. It will help you store some kitchen utensils even if your kitchen is smaller in size. - Add a foldable table for extra storage
If you live in a small apartment, no matter how much you try to achieve an open kitchen, there will always be some unutilized dead corners. You can store or hide some of your kitchen accessories by placing a foldable table here.
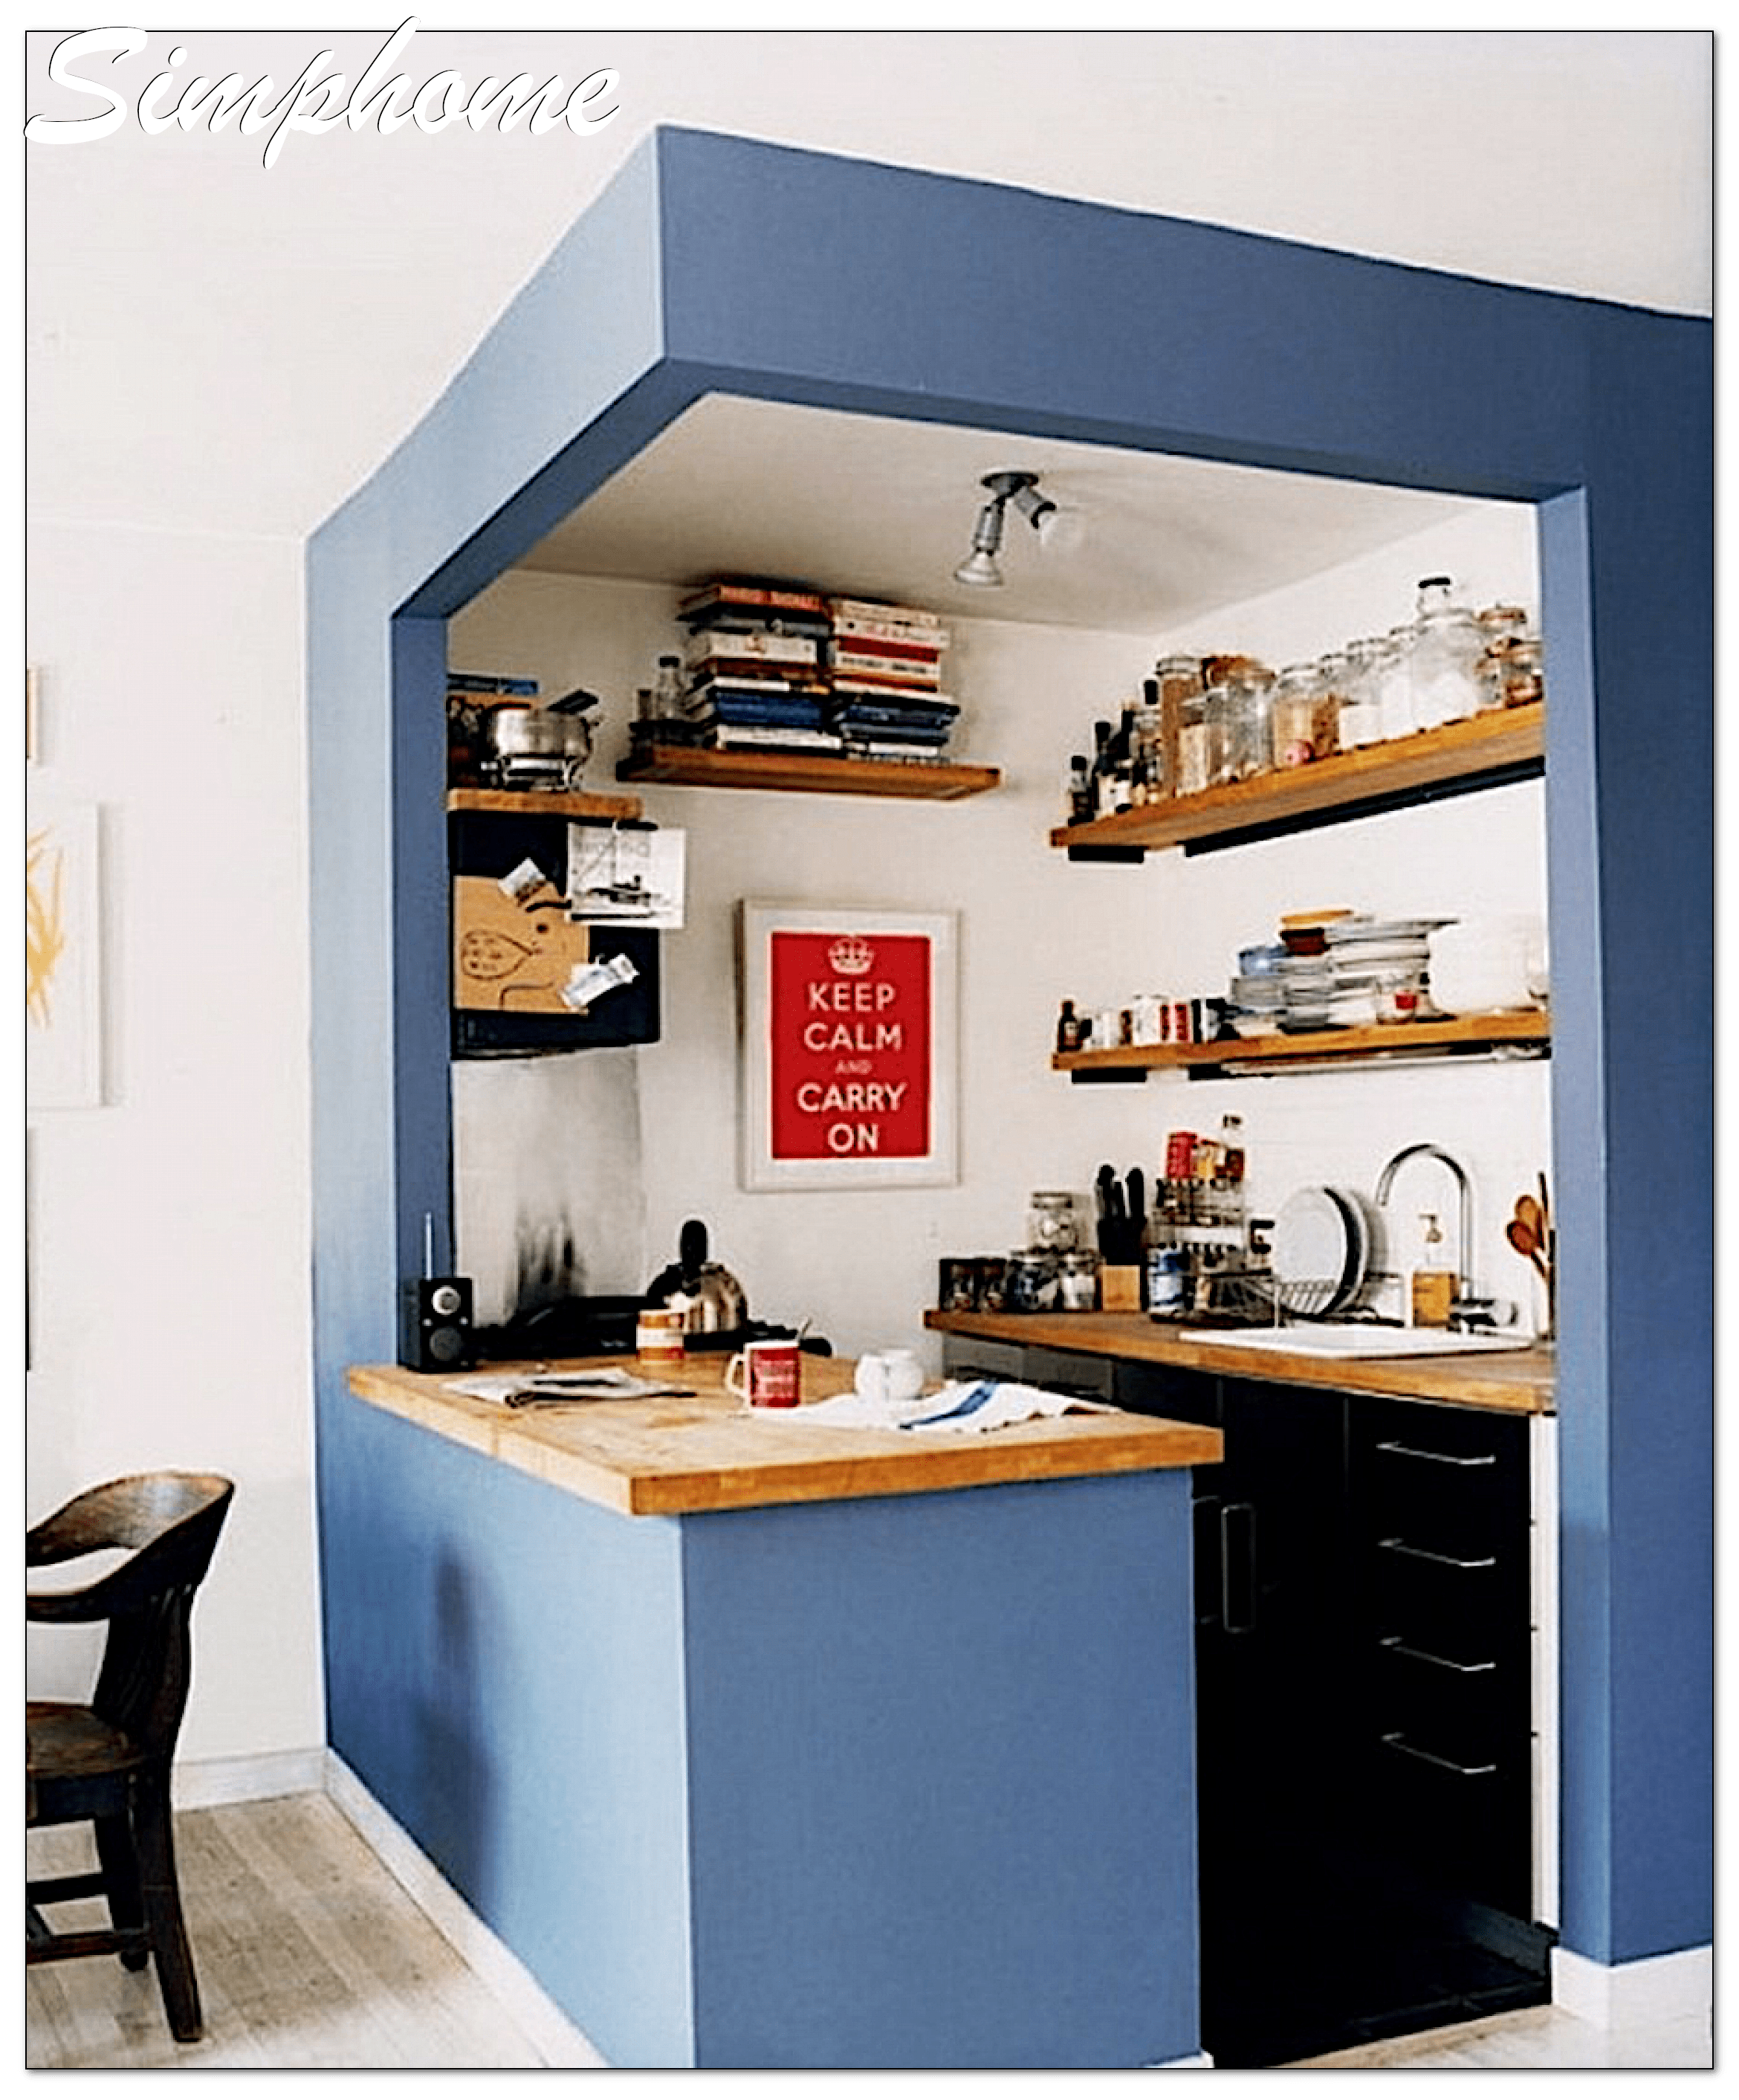
7. Complement your space with Floating Shelves
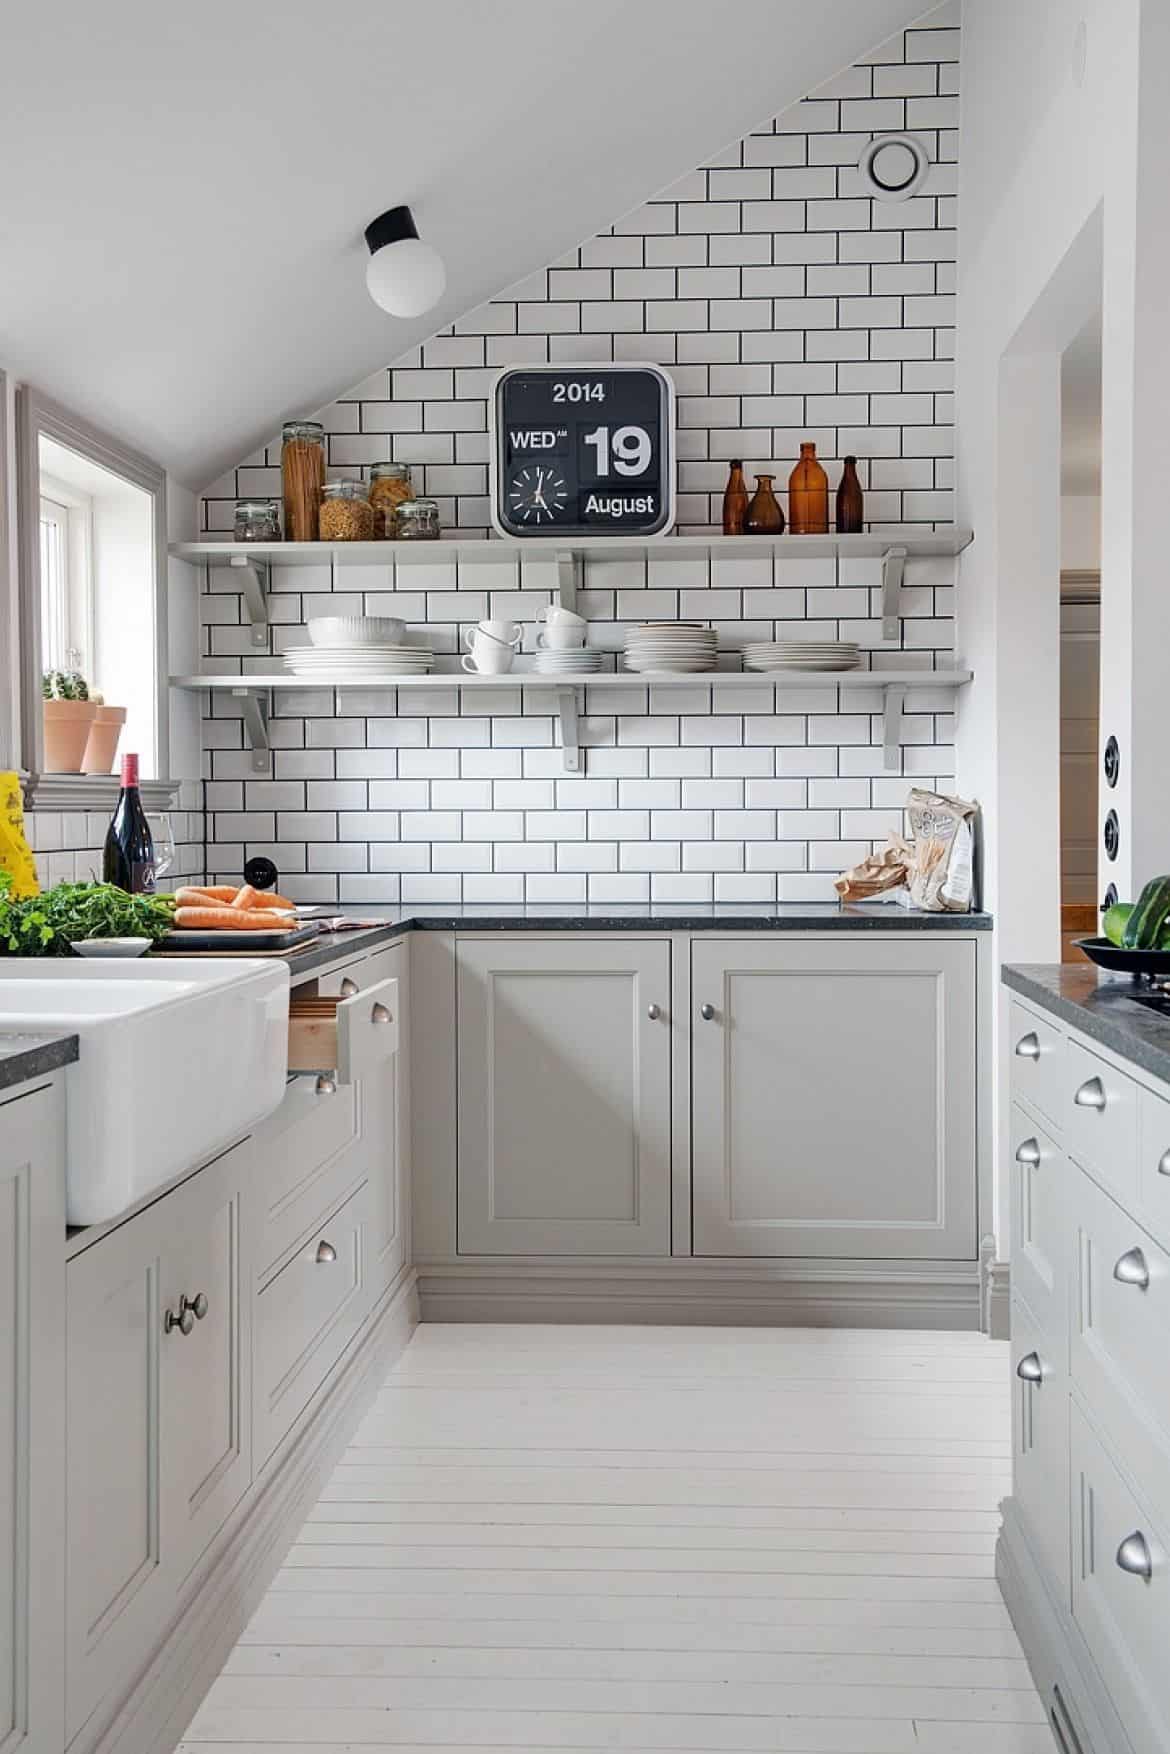 Not letting the wall be unoccupied is a ubiquitous but brilliant thing to do when creating storage. Putting shelves on the Wall won’t bother the workflow as long as you attach them above the counter that can save you from bringing some extra boxes or tables that will obviously consume some space.
You should be aware not to put easy-to-break items out of your reach as it will be a disaster when falling. The window allows the sunlight to give natural light that also works to keep your plates stay dry, and the kitchen doesn’t feel too moist.
Building new floating is not as complicated as you think; your basic instructions are:
- Take a box which you need to cover the two studs at the back.
- Buy the right size shelves for your storage needs; your work is basically done here.
- Mounting them on top will turn them pretty awesome, but you need to be careful with it, as some of the extendable shelves are not designed for that method of use. You can also choose to use brackets or putty to tie it into place if it’s not strong enough. That’s up to you!
- Lastly, you can always paint the box if it’s needed.
Also, if your house is quite old and you are afraid that the wall will fall apart when the shelf is attached, try to use a ring beam thickness to reinforce the shelf point. And for wooden walls with nails or holes in them, using some kind of wall anchors or screwing them in place will work just fine!
You can also use floating shelves with glass doors to showcase some of your decorative pieces. If you have relatively lightweight items that are not breakable, then just leave them on the glass door without worrying that they might fall too far or drop onto any others when opening.
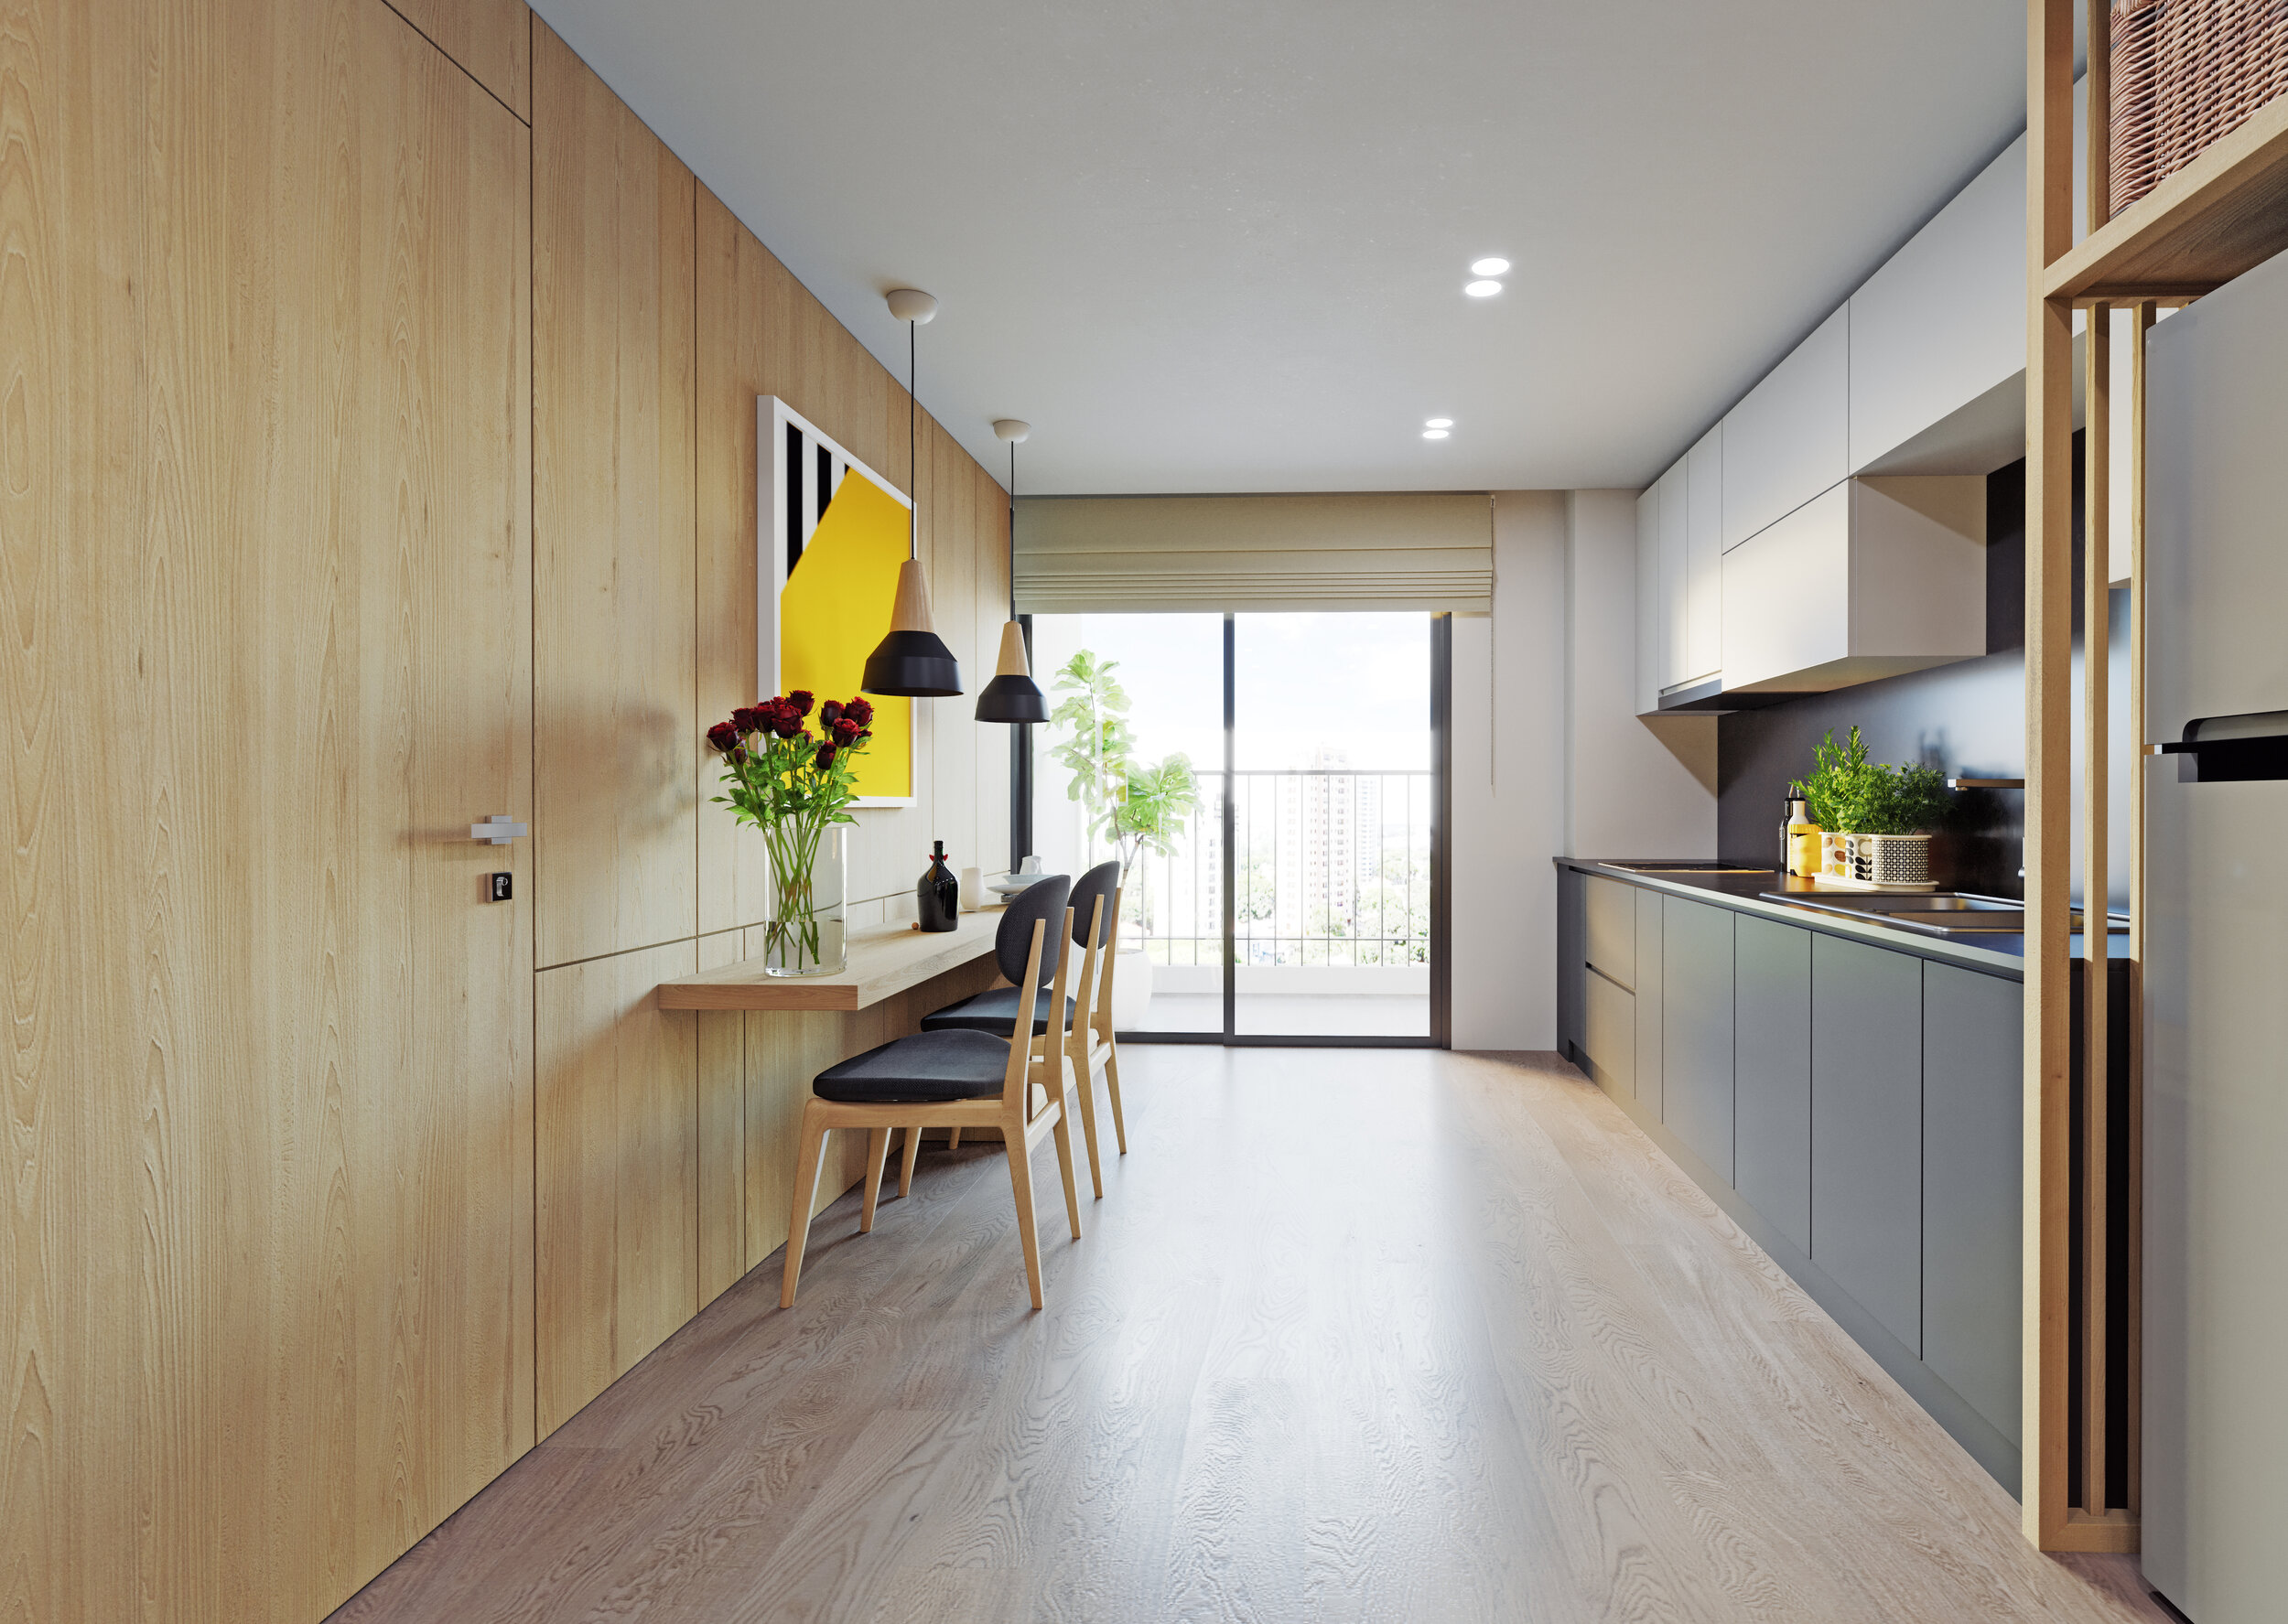
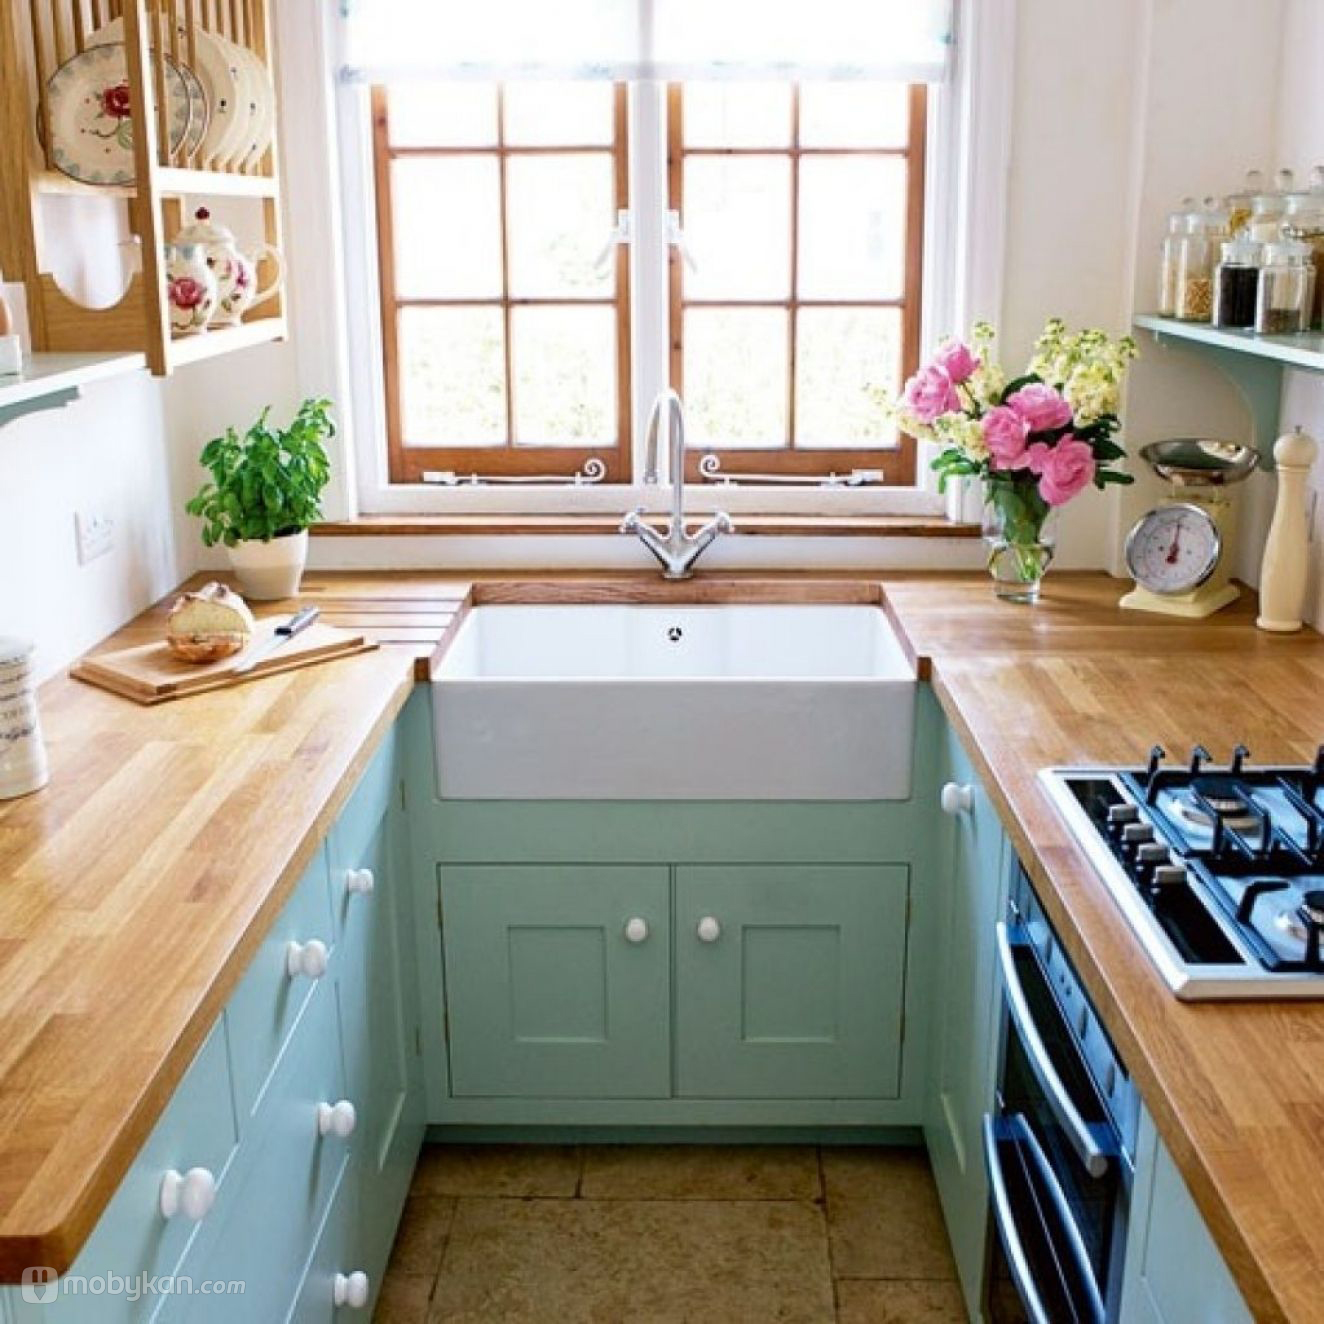
6. Play with Colors
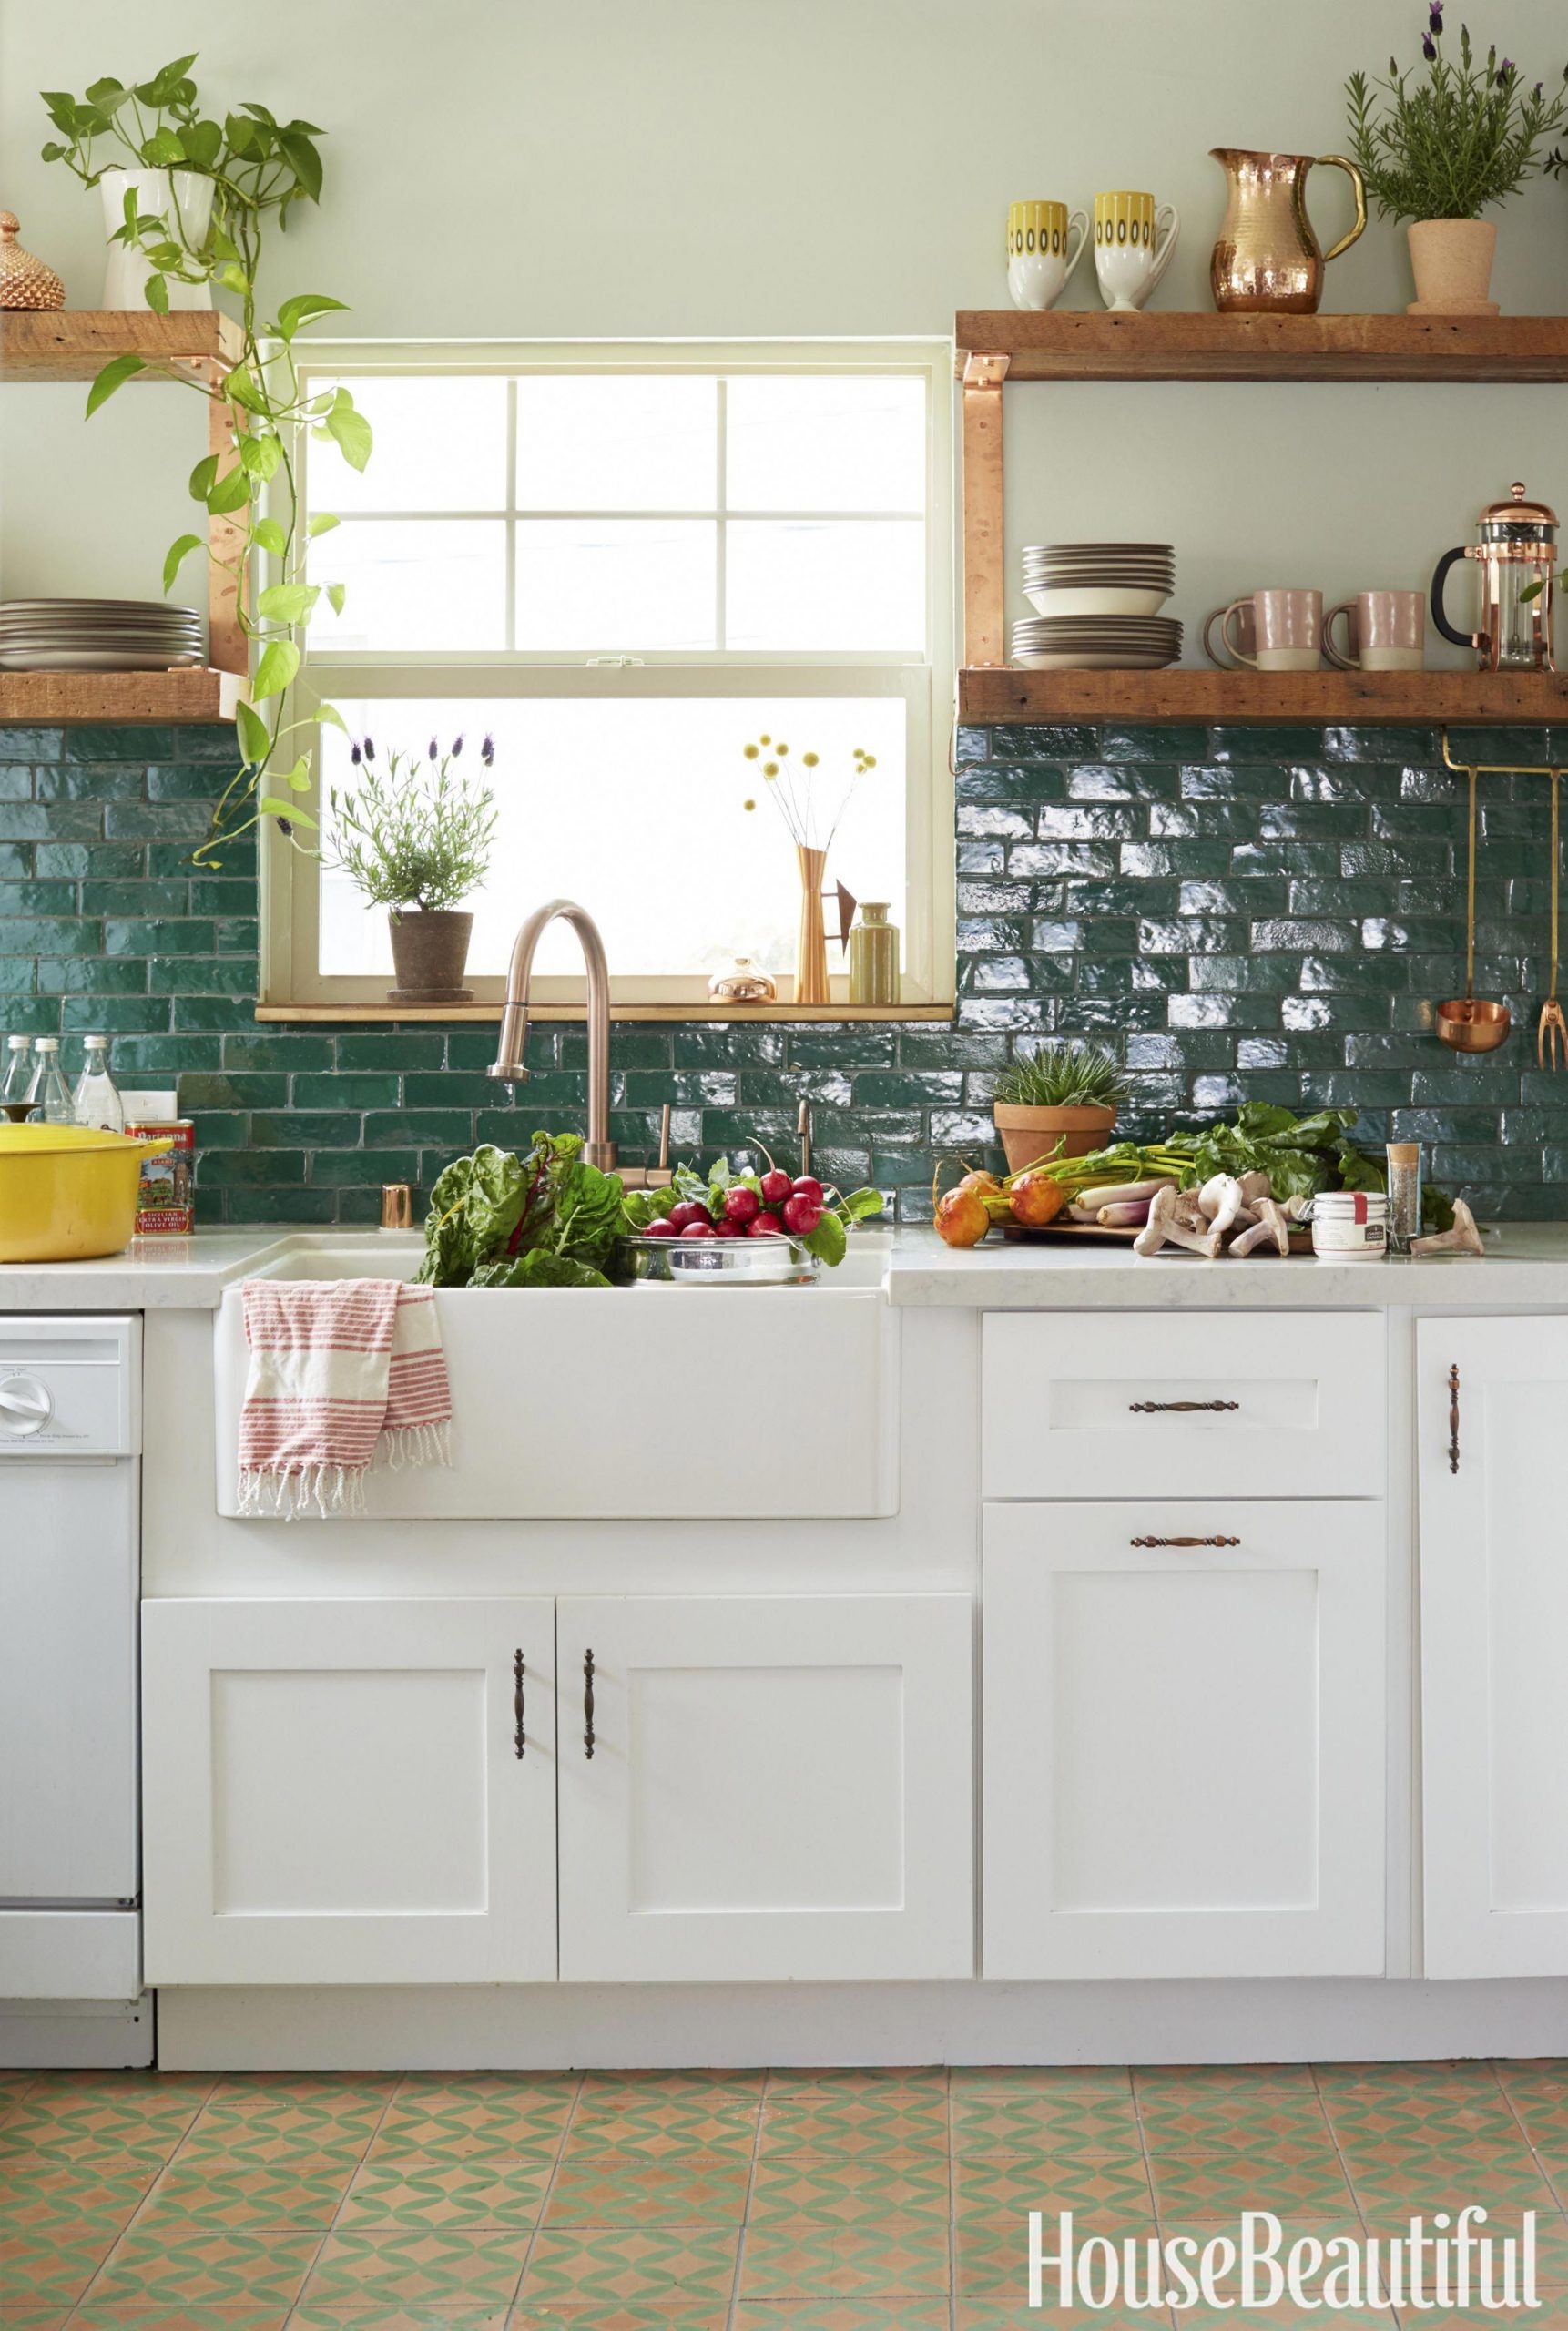
We’re looking for the ambiance when combining colors, not how many or how colorful it is.
Those plants are a nice bland that will remind you how fresh the air in a garden is.
Then there’s a mini-table or a bar with some chairs.
It’s a good replacement for a kitchen island that might be too big for a limited space.
Those greeneries also add a more dramatic and natural touch. Make sure you have a window to allow those plants to get what they need to thrive.
Detailed Instructions:
- Choose the perfect brick.
- Choose where to place the bricks from the kitchen area to the rest of the house so you’ll have a painting design with colors that match your home’s theme.
- Fill up a container with water and add a few drops of plant food to it. Set it outside on a sunny day and let it sit for a few days so that it can become fully saturated with water and fertilizer.
- Prepare your tools: You will need high-quality paintbrushes, foam roller, sturdy ladder, paint tray or bucket, lime sulfur (optional), and latex paint (paint on walls only).
- Prep the surface: Remove old paint, clean, and patch up your wall holes with the joint compound.
- Paint the frame only: Once the joint compound dries up completely, you can paint your walls. Start using a foam roller to apply paint over the frame evenly.
- Add finishing touches: Use a set of wallpaper seam rollers to rub excess paint along the wall and ceiling joints and trim any overspills around windows and doors with a matchstick or putty knife.
- Optional: You can also use lime sulfur to treat your fresh cement joints for an antique look if you want it to appear weathered and aged.
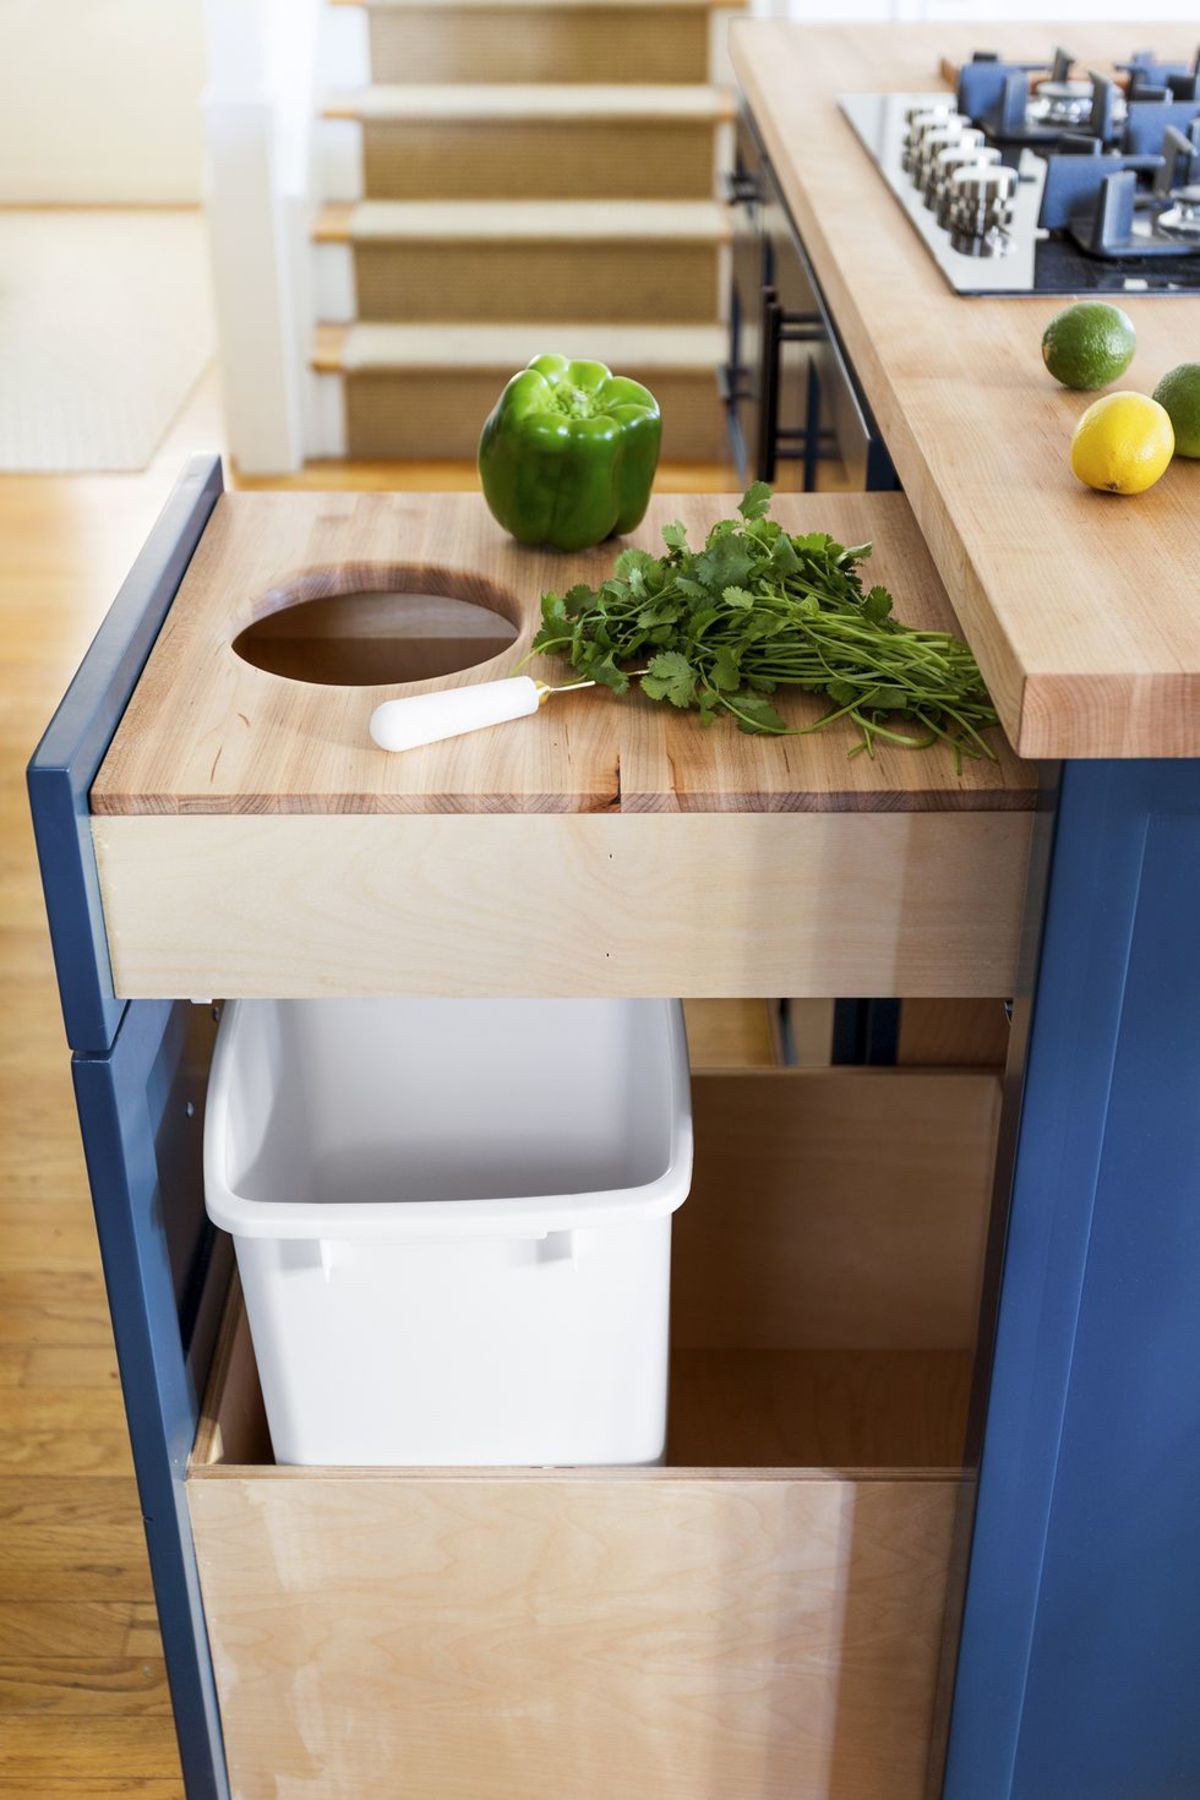 An efficient step is required when you lack space. This butcher stand just comes right to save your problem. You can hide it inside a drawer, and what’s more interesting about this butcher is that it has a big hole that allows you to ditch unwanted parts of vegetables.
It simplifies your work for cutting and throwing. As it’s in the drawer, it doesn’t consume space. There’s one thing you shouldn’t forget, though. When closing the drawer, you should check whether or not the trash bin is wet because it can cause a pungent smell.
Detailed Instructions:
- No 1. Prepare the drawer
Measure the size of the drawer first and see what you can do. You can cut out some holes on the edges or even on the bottom to fix it more sturdily. - No 2. Fix the shop with glue sticks instead of screws
Alternatively, you can use hot glue to stick them together. However, there are also screws for this butcher stand like this one that you could buy on Amazon that will help you in case you’re scared of using glue sticks. - No 3. How to fit it?
When you place it in your drawer, fix the butcher stand on the drawer first using screws. After that, you should adjust the position of the shop so that it can be as hidden as possible. For this, you should also consider the length and width of the drawer and its depth. - No 4. Placement:
The butcher should be placed at the front of your cabinet. If you can’t put it at this spot, then just take into account where you can position it more efficiently for this purpose.
Place the small trash bin inside the drawer, put your trash bin in the drawer, place the butcher in the middle (the small hole is used to discard parts of vegetables.), fix it with a rubber band when necessary.
4. Change your kitchen cabinet door into Sliding Door
 When your cupboard sits in an awkward position and opening its doors would become a problem, remove and turn them into a sliding door instead. Some may prefer the common door design and leave it the way it is.
But since it can cause a problem related to efficiency, modifying it a little would be much better. You may remove the doors and install the track. Cover the track with a piece of wood to make it hidden.
Detailed Instructions:
-
- Take some measurements.
Ensure that the track would fit the space to ensure easy sliding. - Pick the best sliding door hardware.
Make sure to pick one that would fit your kitchen interior design and suit your cupboard doors. - Install the sliding door hardware
Refer to the instruction manual for a detailed installation guide. But basically, you need to drill a hole where you want it, put it in the pin, and then screw it in place. The next step is putting in a rubber stopper or ball bearing on it so there won’t be any friction between your cupboard doors and track when you slide it open or close. - Measure the space where you will put in your new sliding door.
It should be an exact measurement to ensure it’s not too small or too big. If it is, make sure to adjust it before installing it with the hardware. - Decide where to put your new sliding door
You can place it anywhere in the cupboard area. It should not take up too much space, for it would affect the walk-in free space. - Install your new sliding door
You may use screws or bolts to install it with the hardware. - Fitting in the track
Put it in with an appropriate size, ensuring that there are no gaps in between the two cupboards that would allow food to fall on the floor when opening them. You may use a thick adhesive when fitting it in with wood panels, then cover it with some paint when making it look good. - Consider the split hinge.
As it would be an issue to open and close the cupboard door, make it easy with a split hinge that can separate each cupboard to make it much more manageable.
- Take some measurements.
Expert Tips:
- If you don’t like sliding doors, use semi-transparent plastic film as your door instead. It will give you the same look like a sliding door without having to spend much on it.
- You may paint your cabinet doors with color that reflects the color scheme of the interior design of your kitchen.
3. Save Some Space with Tiny Island
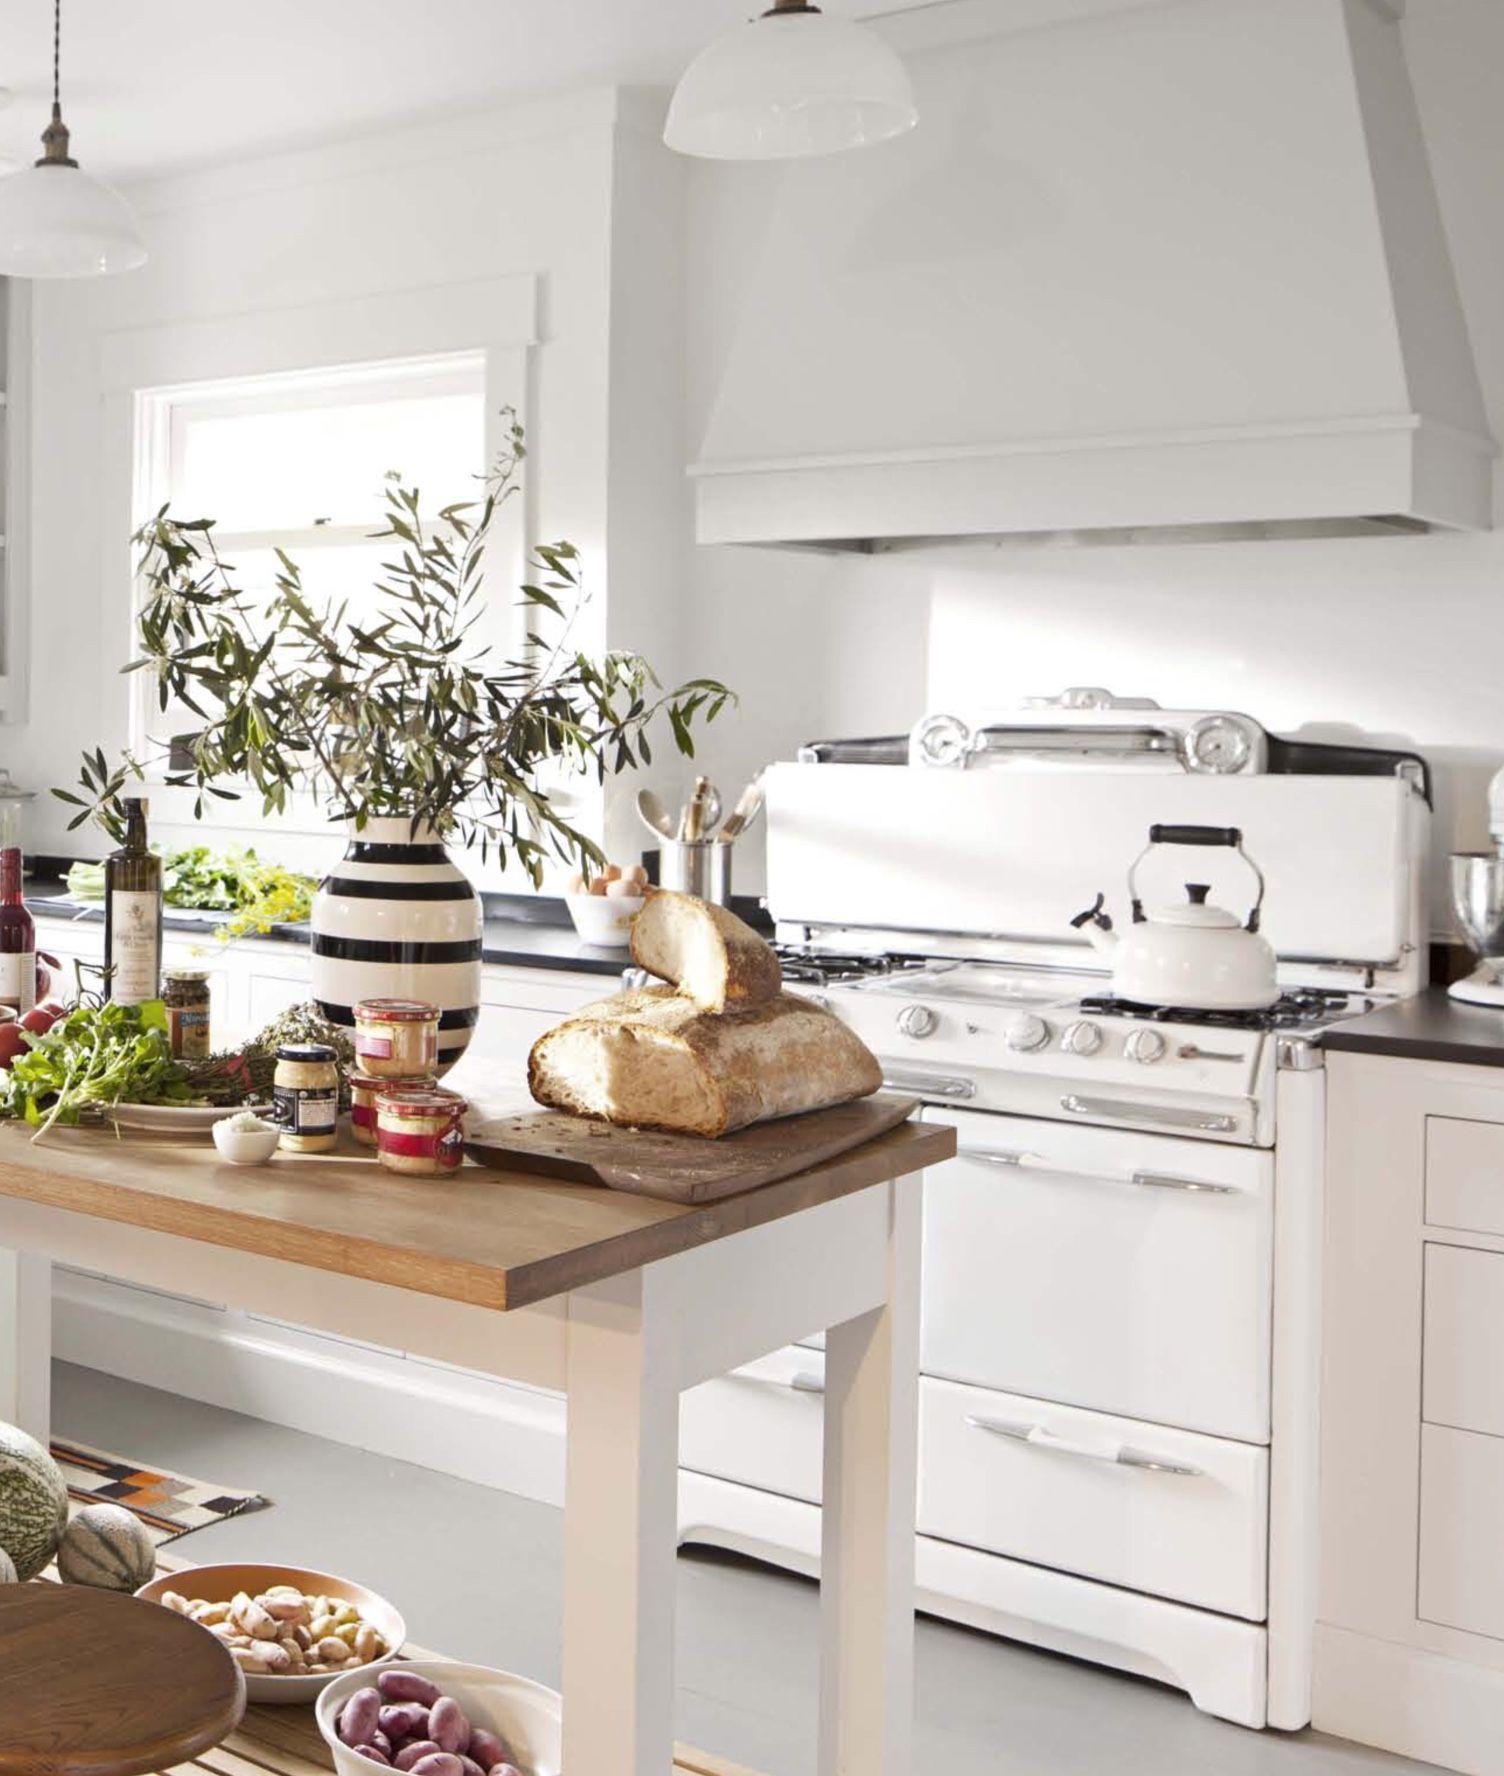 Maximizing the space still comes first, so a tiny island should be just enough to prepare the meal – not too big to obstruct your movement but fair enough to get your work done nicely.
You may as well put some stools or chairs if it takes some extended time to do the daily task in the kitchen.
It is when your kitchen is on a condition where it can hold an island. If not, you may have to be happy just by using the counter of the cabinet. Some kitchens don’t have an island since it’s impossible to have it due to its tiny space.
Detailed Instructions:
- Start by removing the clutter; this includes garbage cans, metal rack, etc.
- Measure the available space on the countertop by drawing a line. Make sure it’s not too big or too small (around 4 inches to 6 inches) for your legroom.
- To make it workable for you, cut out an “I” shape with the wood board if you could get any that has holes in it so that you can easily attach hooks to hang up your pots and pans to store them when not in use.
- Attach some hooks on the board and hang up some metal racks on it so that you can store your pots and pans.
- Put a cabinet door below the counter, which you can utilize as a breakfast bar or a place to rest your feet while standing up to do some job in the kitchen.
- You can put any stools or chairs that are easy to move around, but make sure it doesn’t obstruct anyone from walking around freely in the kitchen (and most importantly, it should be able to hold your weight).
2. Ditch the Old Hardware
 Many would agree that removing hardware from the counter can spare some space. You wouldn’t be too worried about working in the kitchen, bumping, and breaking on the hardware you have.
It would be a terrific idea to keep it inside the cabinet and take it out when you’re using it. And when you have to put it on the counter, place it in a corner that’s safe from your cooking activity.
Other Alternative ideas to have organized kitchen counter are:
- Use hooks.
In detail, these are best for hanging your keys, eyeglasses, phone, or whatever you need. These are easy to use and are not hard to remove. Just hang it on the wall above the counter; this would help you better organize your tools. - Use Key Hooks.
These are one perfect kitchen tool that can be attached to the cupboard door or cut out of wood. This one is convenient because they can hold keys or other items in your bag constantly without the risk of accidentally leaving them behind. - Use a magnetic rack on the wall to hang your towels, mugs, and other stuff that you can hang.
- Use a magnetic board for your recipe card.
In detail, you just need to cut the board into two halves, one for the front and one for the back. Attach it with some nails at each of the sides of the countertop to hang it. - Use a magnetic shelf to store your utensils on.
It works similar to a magnetic rack on your wall. However, with this alternative, you can attach it to your kitchen cabinets by using nails or tacks instead of tacks on your Wall. This idea is perfect, especially if you are unsure if it will stay in place since the company usually manufactured them with pretty strong magnets. - Use magnetized strips on your cabinet doors or walls for kitchen utensils like peelers, spatulas, spoons, etc.
In detail, this will save you a lot of space and time when looking for a specific utensil. The grater, knife, and plastic wrap can also be attached to this kind of magnetic strip. - Use a magnetic strip on your cabinet doors for utensils that need to be placed in the fridge.
In detail, this will help you to place your pot or pan in the right place so that you don’t have any problem storing them in the fridge or other places in your house. You can also use this for other things like your bowl of mayonnaise, sauces, condiments, etc. - Use a basket or empty box for your pots and pans and put it in the corner of your kitchen counter or cabinet under the sink
- Use a large tray for your baking supplies, chopsticks, and other small stuff.
- Use a decorative plate as a place holder for your cooking utensils.
- Put a towel bar at the side of your island. Or under the sink to hang your dishcloth and sponges.
- Place an herb plant to be displayed as well as kept safe from pets and kids at the corner of your kitchen counter/cabinet.
Lastly, Number 1. Update your organization tricks to Get Your Kitchen More Organized
 Your skills to organize things in the kitchen probably make your kitchen look comfortable despite its size. You need to put the bowls, plates, or glasses back in their storage once you finish using them.
If not, it won’t be pleasant to see those utensils scatter all over the place. And when you want to cook something, you don’t have to ditch them first as your kitchen is already clean and ready.
Other Alternative ideas to have organized kitchen counter are:
- No 1. Make use of the wall space
Make use of the wall space to make your kitchen counter appear wider. You can place some shelves or cabinets alongside the counters. The fresh colors will make your clean white look more beautiful. You can put your utensils on those ‘showcase’ to be close at hand when you need them, but also well hidden when you don’t. - No 2. Do not refuse the potential space
Don’t ask for too much space, or you’ll just end up with a messy kitchen that lacks storage and looks messy. If you only have a small kitchen, it is good not to overthink about the storage. - No 3. Use baskets
You can put your kitchen utensils in a basket instead of using a drawer. This way, you can put your baskets on the counter to make it look tidy and well organized at once. - No 4. Use granite or stone countertop
If you have a small kitchen with light color cabinets, you should consider using granite or marble for your kitchen countertop. It will add a nice expensive touch to your home without too many expenses! - No 5. Arrange the stuff on the shelves properly
If you have placed some shelves to store your cooking utensils, don’t just throw all of them in there! Arrange each piece properly so that it won’t fall when someone bumps them accidentally. - No 6. Use cupboards or drawers
If your kitchen countertop is already full of your daily cooking utensils, don’t throw them on the floor to make room for other things. There is still unused stuff that you can store inside the cabinets or drawers. You will never get sick of using them because you can use them for anything and everything! - No 7. Organize your food in the fridge and pantry
Organize your food likewise in different sections to make searching easier. Color coding is a good option if you want to simplify things even further. - No 8. Add some ledges
You can add a ledge or ledges to the Wall behind your kitchen counter. This area is where you put stuff you commonly use, such as bowls, plates, and glasses. You can also add some pictures or decoratively display them to showcase how much you care about your home! - No 9. Add hooks and shelves
You can add several hooks for storing kitchen utensils such as spatulas and ladles. Make sure that these things won’t be in the way you cook by hanging them away from the stove or sink. You can also add a shelf in an open space to keep your dry goods and spices out of sight but close at hand. - No 10. Use small containers
You can use small containers to make your kitchen countertop look wider. - No 11. Use thin cabinets
Using thin cabinets will make your kitchen look wider when you are only using the space in the middle of it. You can even add shelves or cabinets that are thin enough to fit inside a cabinet if you want a mirrored effect. - No 12. Arrange them vertically
You can arrange your cabinets vertically so that the space will be invisible. - No 13. Add a mirror
Mirrors are a great way to make a small kitchen look bigger or brighter! You can place it on the wall behind the cabinets or drawers. - No 14. Use some stickers and artwork for decoration
You can also use some stickers and artwork as an alternative way of decorating your kitchen without having to spend too much money! - No 15. Paint the walls in a bold color
You can paint your kitchen walls in a bold color that will create an illusion of space and brightness. - No 16. Use some mirrors
Mirrors are a great way to make a small kitchen look bigger or brighter! You can place them on the wall behind the cabinets or drawers. - No 17. Use glass containers for storing your dry goods and spices
You can use glass containers to store your dry goods and spices inside your kitchen. They look nice and do not take up much space, but will prevent them from being scattered over the floor! - No 18. Use a combination of accessories
Use a variety of accessories such as shelves, cabinets, drawers, and mosaic tiles to trick people into thinking that you have more storage space in your kitchen. - No 19. Use different textures
Use different textures to make your kitchen look more prominent. It also makes your kitchen look more sophisticated. You can choose from light brown or pebble effects. - No 20. Arrange the things vertically
Arrange the things vertically so that the space will be invisible. People will think that you have more drawers stacked one on top of another if they see them arranged vertically! - No 21. Add some oven racks
Add some oven racks to give your kitchen an extra punch of modern cleanliness and style! You can arrange them with your stove so that they are not in the way when cooking!
Conclusion:
So as you can see, there are plenty of ways to organize your kitchen counter. Always remember that you don’t need to spend so much money if you can’t afford them since they will only clutter your space and make you look less organized at the same time. You can also try some alternative ideas if you want, or you can just stick with the basics and have a clean and organized kitchen.
Kitchen design is a broad topic, so it isn’t easy to justify your opinion because everyone’s preferences differ. The things we mentioned in the article are great, but these may not work out for some people, so try out other methods if they don’t work out for you.
So,
What do you think of our 10 small kitchen inspo? If there are some more valuable tips that you have, you can share them with us.
References:
10. Archify.com
9. Idealhome.co.uk
8. Renoguide.com.au
7. Renoguide.com.au
6. Housebeautiful.com
5. Goodhousekeeping.com
4. Goodhousekeeping.com
3. Housebeautiful.com
2. Pinterest.com
1. Prado-designs.com