Because it is a place to unwind, you may feel that your living room is less prone to clutter than the kitchen. Yes, you have a point there.
However, you should not ignore that it is the first room guests see. They come here to hang out and chat with you. So, you can’t use the coffee table as a storage area for your books and trinkets. Shelving and other appropriate storage solutions are required. The verticals or the more multifunctional ones.
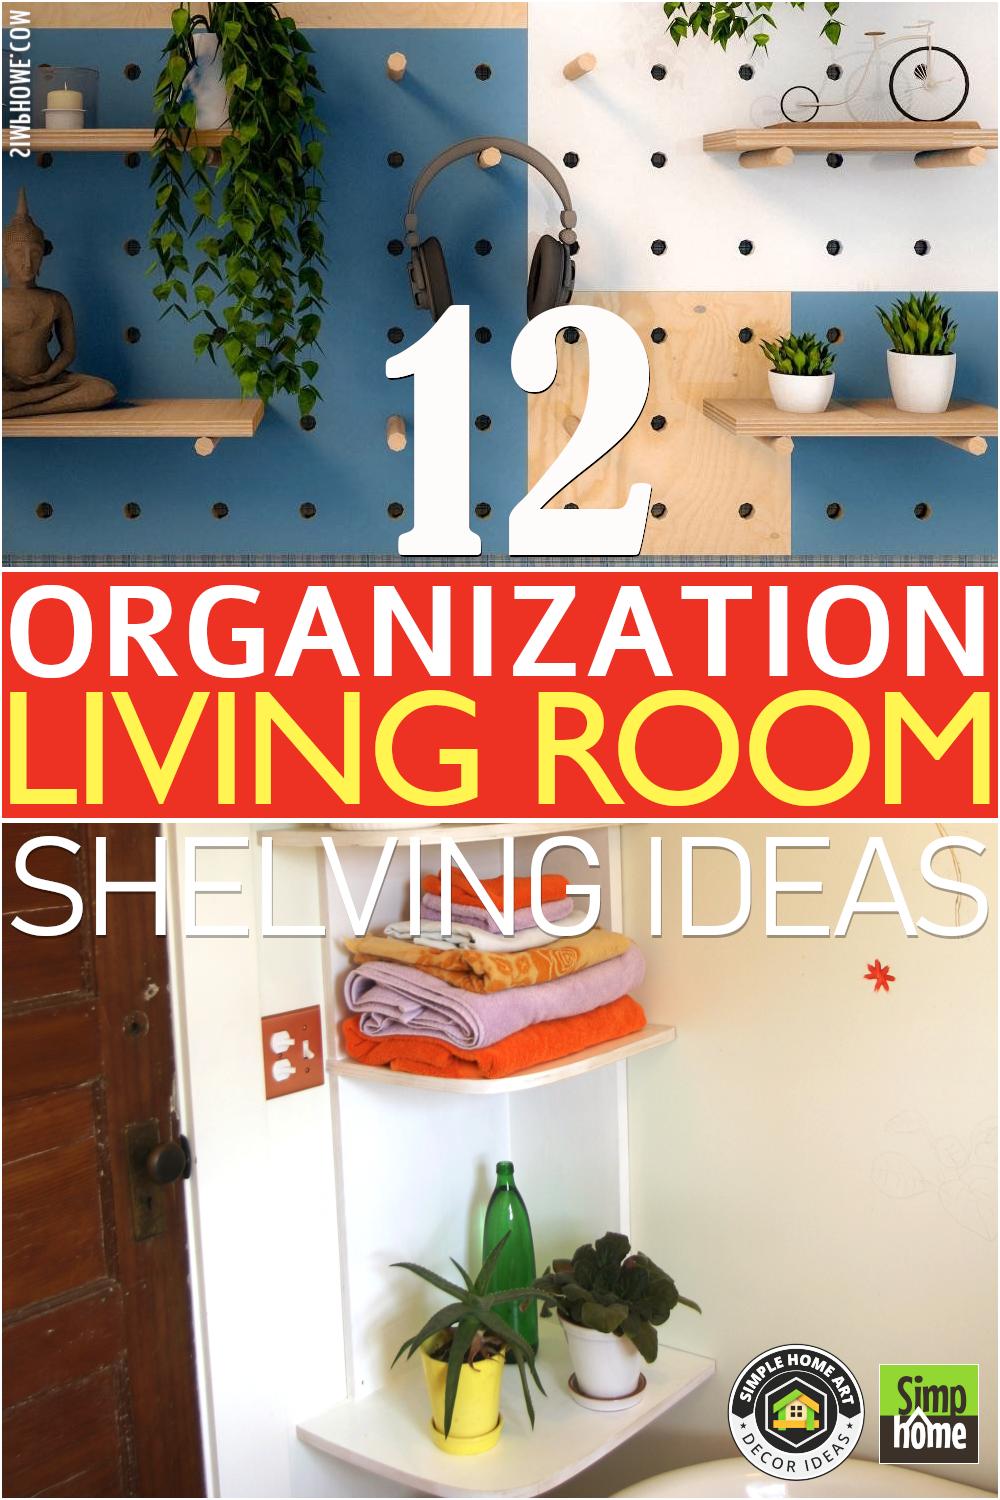
In the following countdown, you will find creative home storage and display ideas that impress your guests, including your prospects. Here are 12 storage solutions for your living room, including shelving options. As always, Simphome curates and presents you with the countdown and the video.
12 Organization Ideas with Living Room Shelvings Video
12. Be Flexible with Pegboards
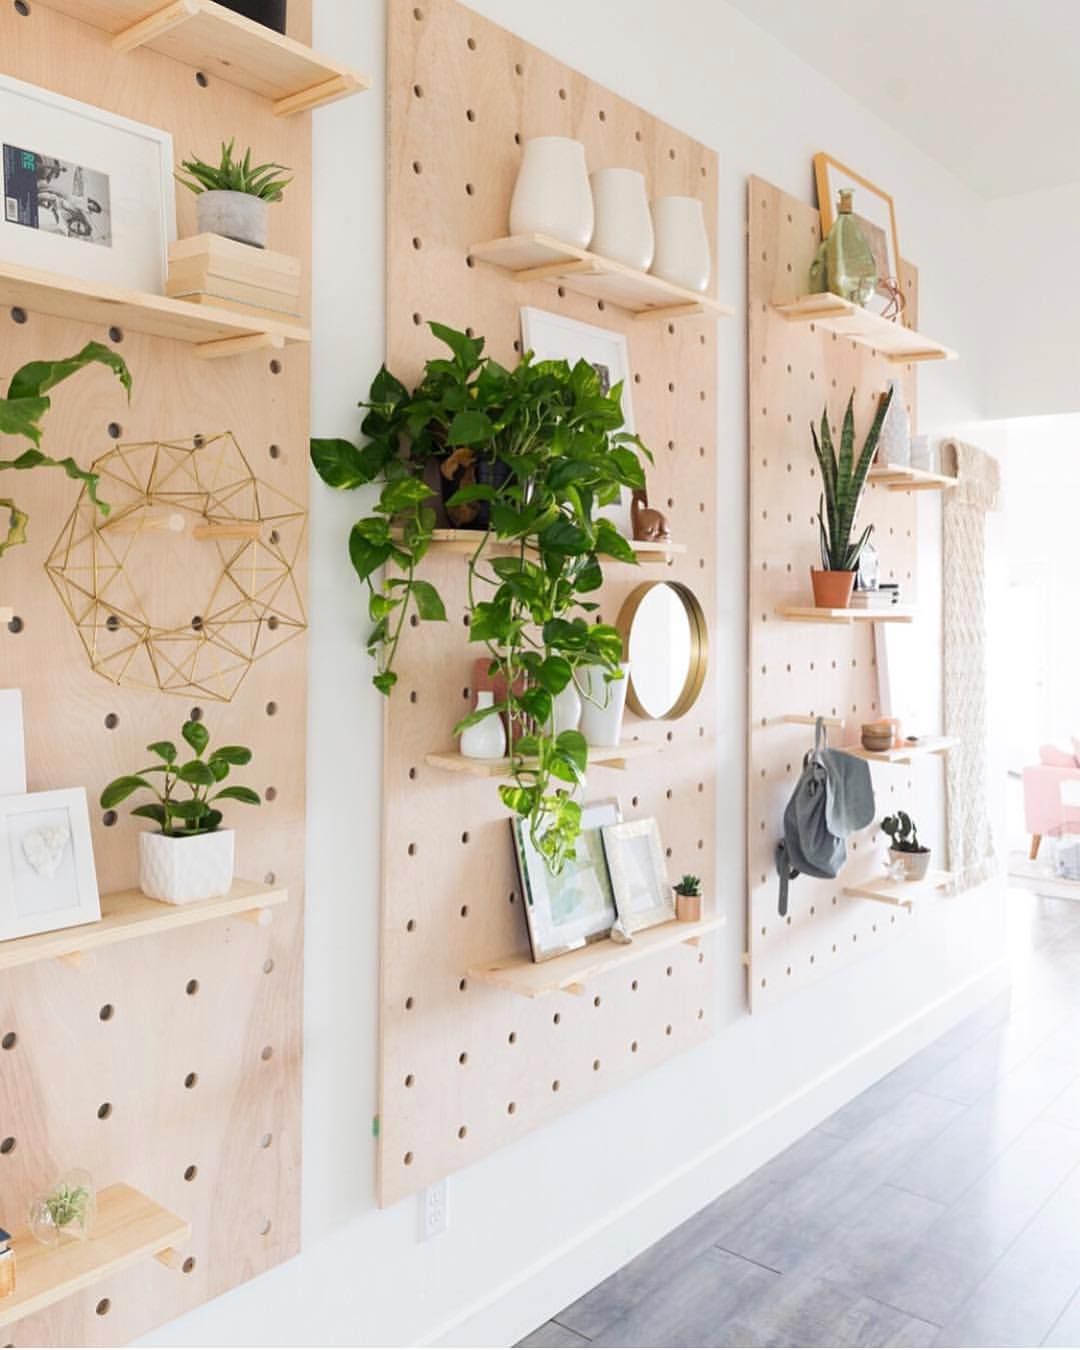 The versatility of pegboards allows you to use them in any room in your house, including your living room. Besides, they are a type of storage that pack a lot of possibility and flexibility.
You only need to hang one or two pegboards in the living room. Then, add as many shelves as you want with wooden dowels and boards. Finally, display your books, plants, and photos on the shelves.
- Make sure all of your stacked wood is upright. Drilling through the rear can ruin the veneer, which is never cute.
- Avoid destroying your drill bit by drilling into the ground by elevating your wood with scrap wood or an extra sheet of plywood.
*Use a sheet of plywood when you need to see through both sides. There will be much less of a punch when you use this.
11. Make Them Float
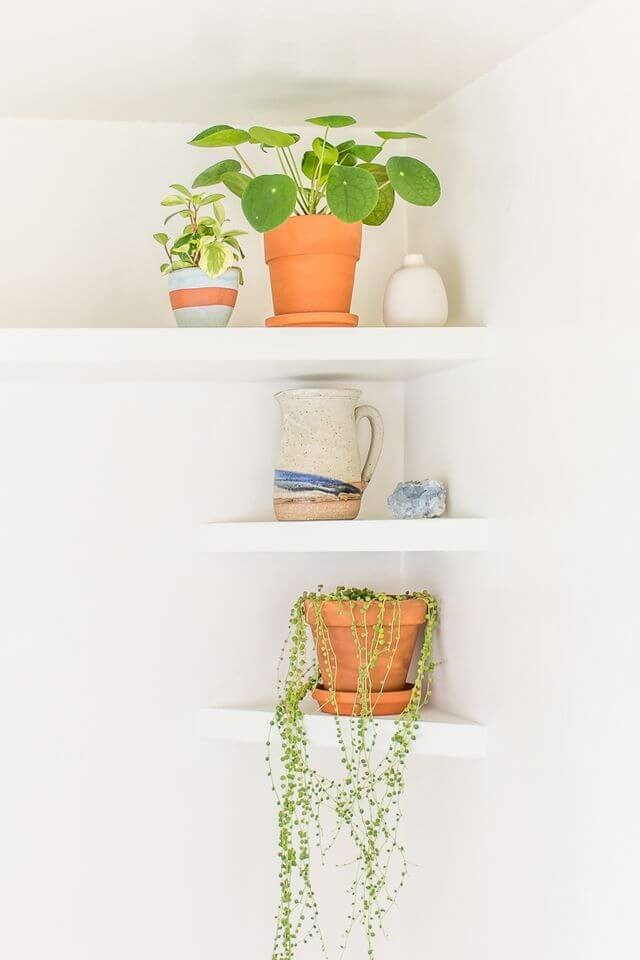 The best strategy for maximizing a limited space in a living room is to get creative. For instance, installing shelves towards the ceiling and corners will help you better arrange your living area.
To make the long, deep shelf, you need to make the frame from 1×2 and 1×3.
- Once you have installed the frame close to the ceiling, you can add plywood. You may also need to attach plywood to the underside and the front piece.
- To make the corner shelves, you need to nail two pieces of 1×1 to the studs as the support.
- Then, get wooden boards and cut them so that they can align with the two walls.
- After that, nail them on top and bottom of the support. Next, attach the face piece.
Do not forget to paint the shelves the same color as your wall to camouflage them. This way, your books and plants will look as if they were floating.
10. A DIY Leather Strap Shelf Idea
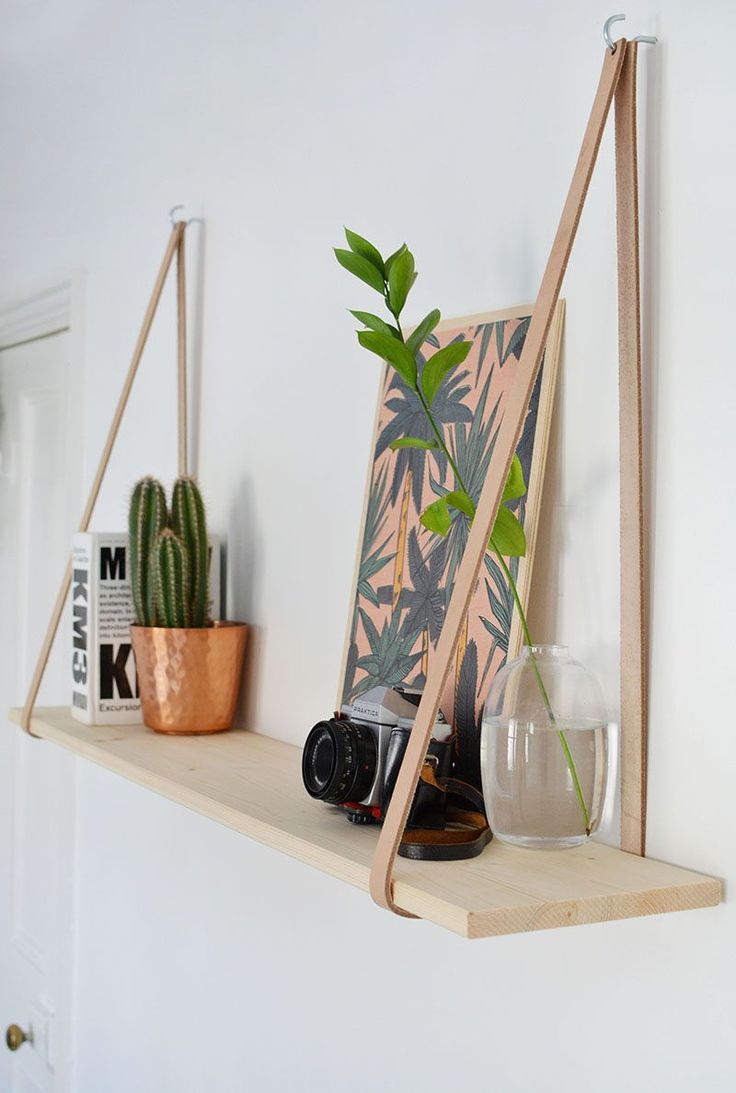 Are you looking for an easy-to-make yet stylish shelf? This one is for you.
This shelf is straightforward, but it can draw attention instantly due to its stylish look, which is ideal for a Scandinavian living room.
To make this shelf, you need to screw two hooks into your wall. Next, grab two 50-inch strap leather and punch a hole at each end. Then, slide the straps over the hooks. After that, slide a wooden board through the straps. And that’s it! It is easy, right?
9. An Industrial Wooden Slice Shelving idea
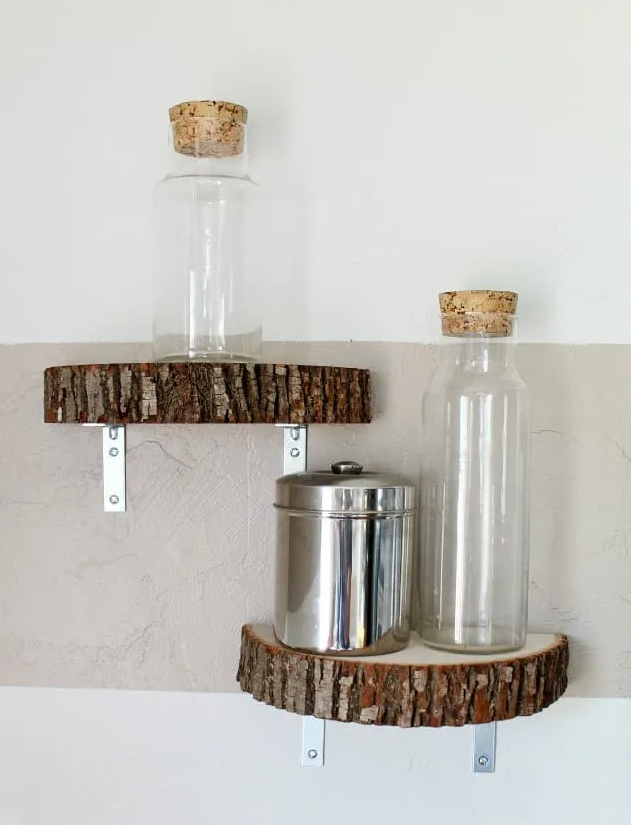 Do you want a more country feel in your living room? Check out the following unique shelving project.
- First, you need a 14 inches unfinished wood slice.
- You’ll also need L-brackets that are 4 inches in length to hold up the shelves.
- Before doing anything else, divide the wood slice in half lengthwise.
- Then, attach two L-brackets to the underside of each component using screws.
- After that, you just need to connect the shelves to the wall.
8. An Industrial Pipe Shelving Idea
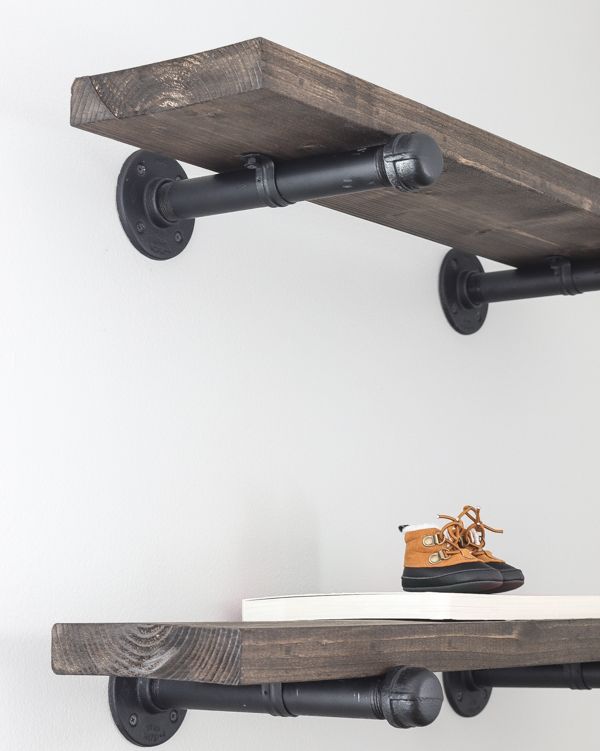
The industrial style has always managed to impart an air of rugged confidence. These industrial floating shelves are a great choice if you’re interested in experimenting with this particular aesthetic.
- To make these shelves, you will need black galvanized pipes and fittings because they are bold and sturdy.
- Then, secure them to the wall to create the support for the wooden board. Once the pipes are ready, you can grab 1×12 boards and cut them if necessary.
- Next, sand and stain them to create a well-worn look, which is the hallmark of the industrial style.
- Then, place the board on the galvanized-pipe support and secure it with pipe clamps.
7. A Built-in Shelving Idea from IKEA Billy
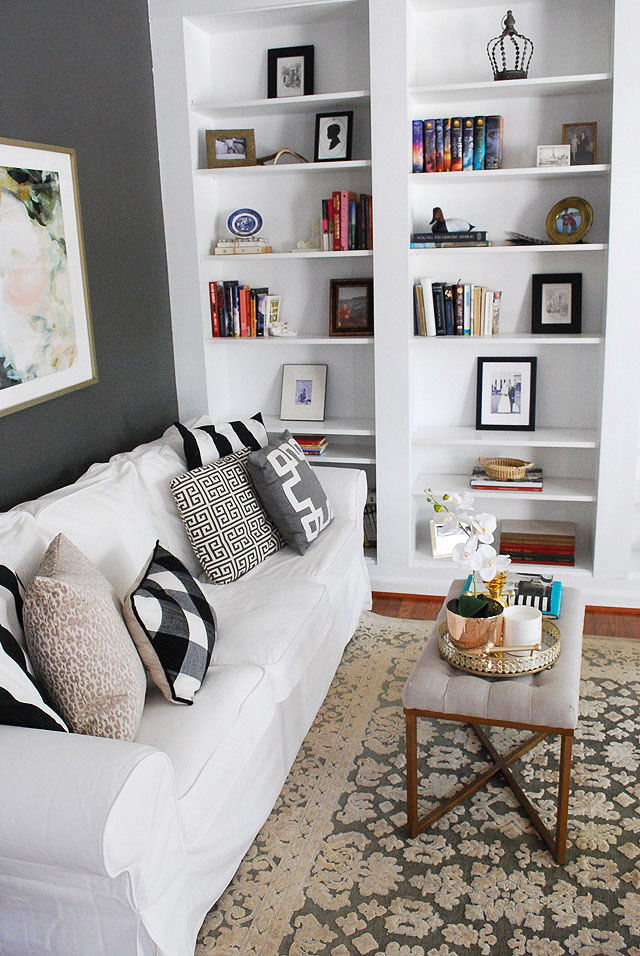 You can try this idea to make built-in storage for your living room without damaging the wall. First, you must build the base to keep the shelves steady.
However, to figure out how to use the space most effectively, you must use little math to find the ideal space between the walls.
In this case, it was almost 12 feet or 144 inches. The author then took off the width of the bookcases, which is 31 inches each, for a total of 124 inches. So, she had 20 inches of space to fill with trim. She needed five 5-inch boards for the ends and between each shelf based on that number.
Once the molding is up, caulk any gap for a perfect look. Most importantly, paint the molding the same color as the bookcases and walls to create a cohesive appearance, which is the main point of investing in built-in shelves.
6. The DIY Birch Shelves
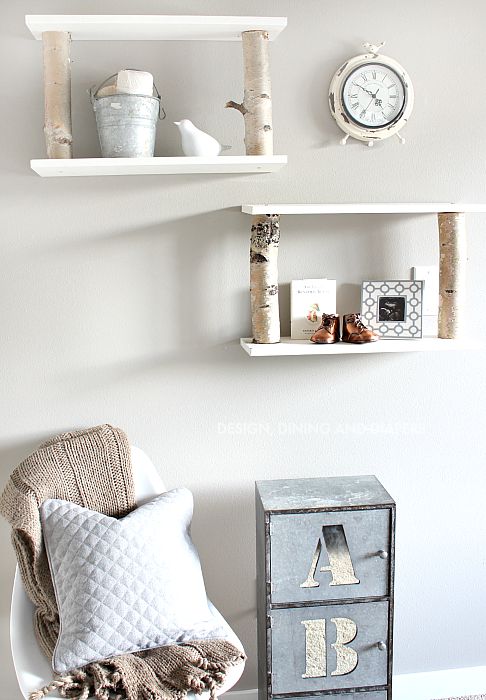 You will only need four wooden boards and four 12-inch pieces of birch to copy the idea.
- Then, attach the two birches on each end of one board.
- Next, attach another board on the other end of the birch.
- Finally, screw the shelves to the wall, and you are ready to display your treasure.
When you paint your work, you better use pre-finished PVC wood. It has a smooth finish, and if you want to paint it white, you only need to put on one quick coat of paint. The shelf is 24 inches long. You can change the length of yours (shorter or longer). Birch shelves are difficult to attach, and one screw won’t secure the wood and shelf. Also, the log will turn. However, Adding wood glue and letting it dry helped attach the pieces and fill in uneven wood gaps.
5. Repurpose Wooden Crates
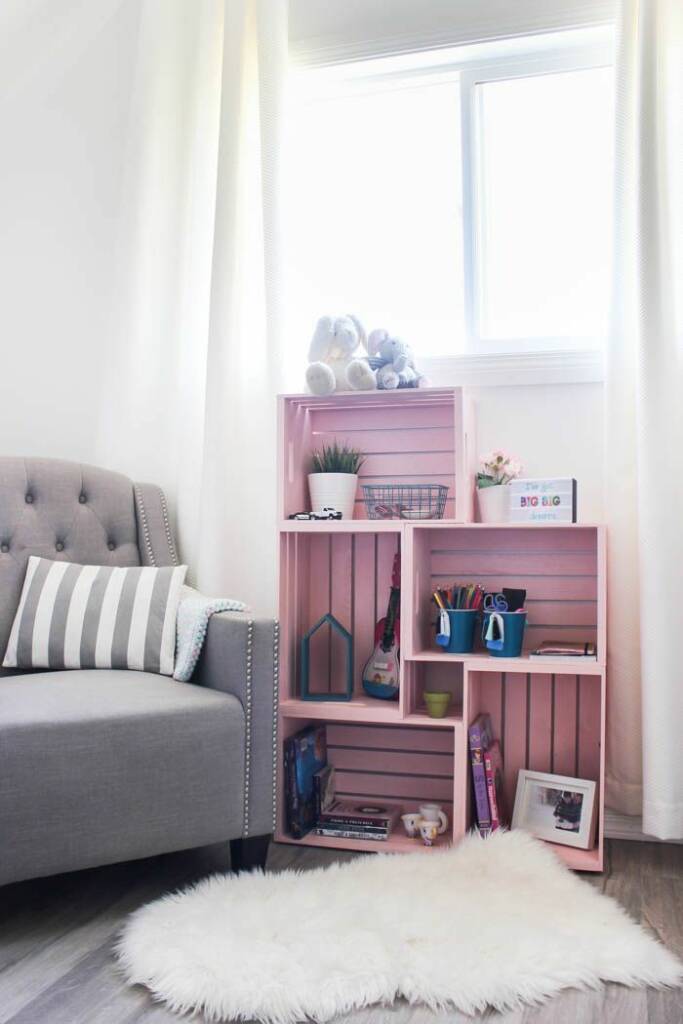 Another versatile item you can use to incorporate more storage solutions into your living room is wooden crates. Like pegboards, wooden crates pack limitless possibilities for creative minds. Therefore, it is always a terrific idea to experiment with these materials.
You can get wooden crates in a craft store. If you are lucky, you can get used ones for a lower price – or even free – from grocery stores, hardware stores, and liquor stores.
Once you get wooden crates, sand them thoroughly to remove any splinters. Then, you can stain or paint it as you desire. Finally, stack them as you please. Let your creativity lead the way.
4. A Pretty Shelving idea to Display Your Artwork
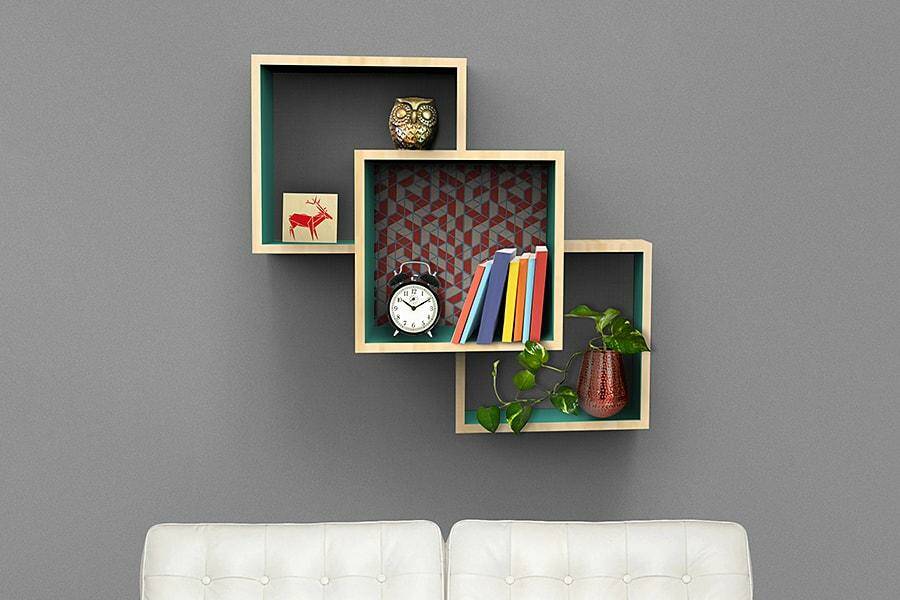
 These wall-mounted shelves let you display antiquities or store books creatively. The two outer portions flank a center box for a unique design. You need boards, screws, and a miter saw to create 90° cuts.
You can make these shelves by assembling 1×12 pieces to create the center box. You will also need to attach a 1×3 at the back of it as the cleat. For the outside boxes, you can make them using a 1×6 board. Cut it into some smaller pieces and assemble them with the center box.
- Align the boxes on a flat surface, as illustrated. Mark pilot holes at the ends of the #8×2″ outer box parts “screwdriver.
- Insert a screw into each hole in the central box and push the tip into the outside boxes.
- Remove the boxes and drill 1/8″ holes 1″ deep in the board ends.
- Make holes using a straight drill.
- After drilling holes, fasten outer boxes with #8×2″ screws fixings
3. A Circular Wooden Shelf
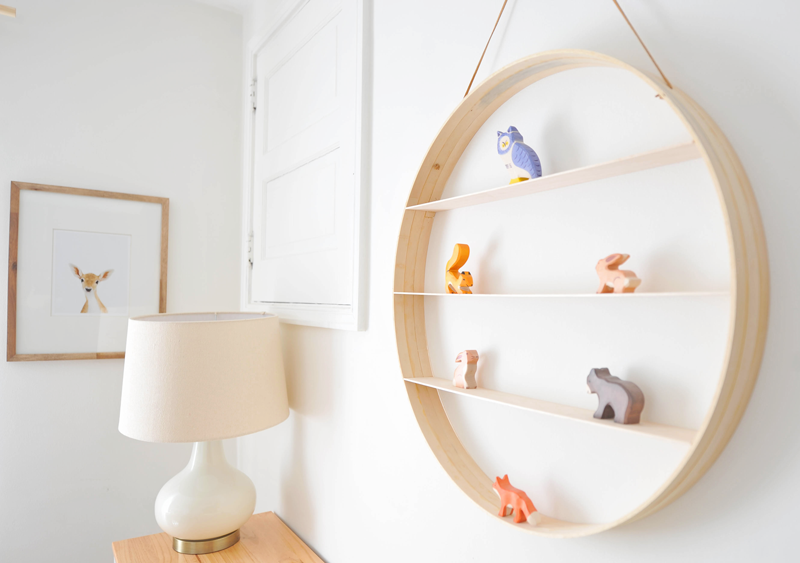 A shelf does not have to be rectangular. It can be circular, too.
To make this circular shelf, you will need three quilting hoops to create one thick shelf. You can use wood glue, toothpicks, and mini clamps to help you hold the quilting hoops in place.
Once the gluing process is finished, attach three basswood sheets to the inside of the circular shelf. Then, use suede leather lace to hang the shelf.
More detailed instructions:
- Finding large circular wood pieces that didn’t require bending wasn’t easy. For that reason, buy 23″ round quilting hoops at a craft or home improvement store.
- Since you can’t join the outside hoop’s wood, you have to utilize the inside hoop, which was already a full circle. Lined up three pieces of similar-colored hoops.
- The trickiest aspect was connecting the three quilting hoops to make one sturdy shelf. Wood glue was easy and sands easily, so use that.
- Apply wood glue to each hoop layer before stacking. Use toothpicks and micro clamps to position the hoops and bar clamps to push the adhesive.
2. A Wood Panel Idea with Floating Shelves
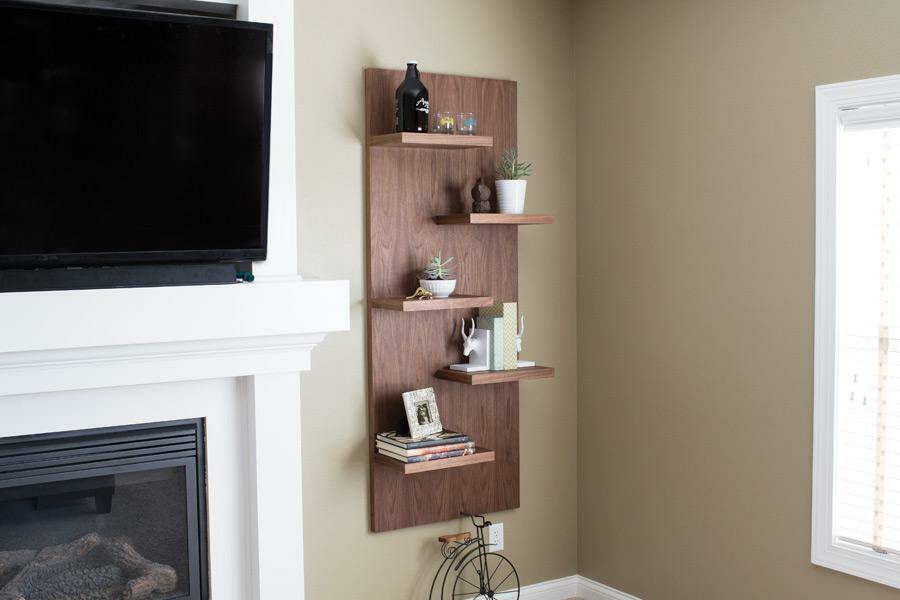 Cut six Filler Strips from a 3/4″ of plywood. An edge guide ensures straight, smooth cuts. Later, cut and adhere these strips to the Back Panel. Using a 1/2 “-thick board
While the finished product gives the impression of being crafted from a single piece of solid wood (walnut in our case), it is manufactured entirely of plywood with iron-on edging to conceal the plywood’s raw edges.
How to get clean plywood cuts
This project requires clean, straight, tear-out-free plywood cuts. Here are some circular saw tips.
- Buy a plywood-cutting saw blade. Smoother cutting.
- Make straight cuts with a saw guide.
- Third, place the best-looking plywood face DOWN before cutting. So, the blade will cut into the face rather than leaving it, preventing a tear out of the veneer.
Lastly, Number 1. A Console Table Idea with Shelves
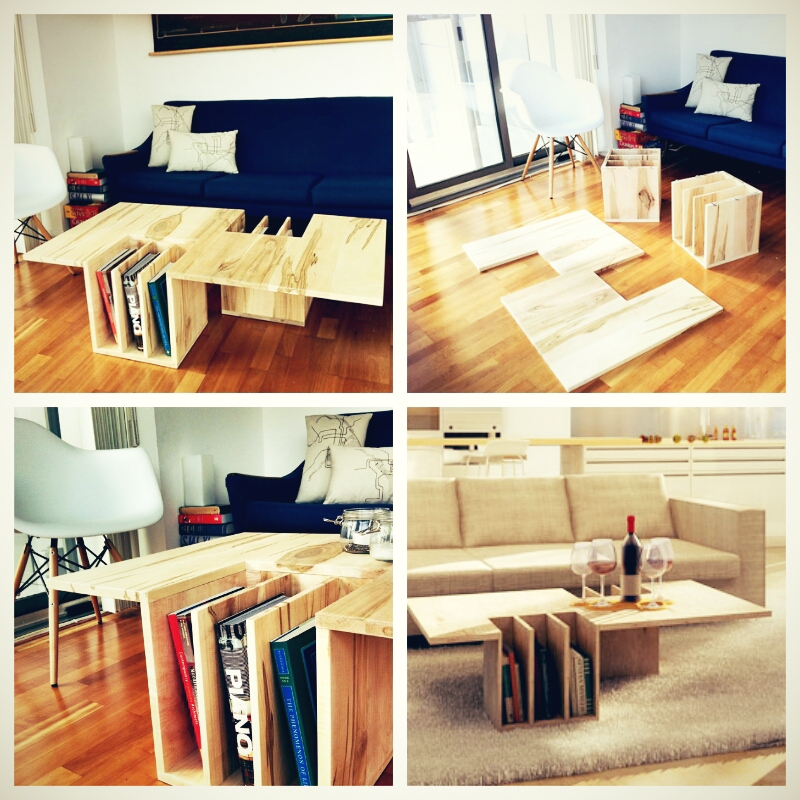 If you apply an open floor plan in your house, you may notice that the back of your couch is an eyesore. Thus, you need a console table to conceal this unpleasant view. Instead of a single table, you can try this console table with built-in shelves. This way, you can hide the flaws while organizing things better.
Alternatively, you can consider hiring someone to build this unique coffee table from Studio Ehoeho.
Studio Ehoeho is responsible for a fantastic new product in this category. The studio came up with the idea of a coffee table that doubles as a bookcase. This stylish item is ideal for the ever-changing routine of daily life. Include space to organize and keep notebooks, smartphones, magazines, binders, and photo albums. It’s versatile enough to use at almost any time of good day or gloom, from coffee in the morning to a traditional ginger ale in the event of unhealthy stomach metabolism.
References:
12. Housebeautiful.com
11. Homebnc.com, Diyinpdx.com
10. Burkatron.com
9. Girllovesglam.com
8. Housebeautiful.com
7. 11magnolialane.com
6. Tarynwhiteaker.com
5. Countryliving.com
4. Learn.kregtool.com
3. Newblooming.com
2. Learn.kregtool.com
1. Digsdigs.com, Mehomez.com, Trendomat.com