The patio is a perfect sanctuary to hang out with your family and friends. It offers the charm of outdoor entertainment, along with the cool breeze and glittering stars. However, the maintenance makes some people feel reluctant to have one.
If you seek outdoor entertainment that will not give you the hassle, try these 10 minimalist patio ideas. So, let’s get started. And as always, Simphome presents you with the list.
🔊10 Minimalist Patio Video:
List Entries:
10. Decorate Your Patio with Fuss-Free Plants
 The ultimate goal of a minimalist patio is carving out an impressive look without being too sophisticated. Most importantly, it has to be fuss-free. Therefore, sticking to gravel, pavers, or concrete is your safe bet. However, it does not mean you can forgo the beauty of plants. Pick several low-maintenance varieties, and you are good to go.
When it comes to decorating a minimalist backyard, tree aloe (Aloe barberae) has to be on your list. It can give a sheer impact to any simple look. More importantly, it is drought tolerant, meaning it will not cause you any trouble.
Some other fuss-free plants that you can grow to complement your minimalist patio are Frangipani, Japanese maple, mother-in-law’s tongue, cycads, birch trees, reeds, bamboos, and decorative grasses.
Since the hardscape does not cover the entire backyard, you can try placing a ring of bark dust around your patio. This way, you can create a clear boundary while accentuating the patio. Then, place shrubs or low-maintenance trees every few feet. Varying the heights of the plants and planters can enrich the look, too.
Detailed instructions:
- Step 1: Prepare the soil.
Make sure you have created ample enough space where the plants can grow. This advice is to avoid overcrowding while achieving the desired effect. You should also ensure that the soil has enough nutrients; otherwise, they will not live long. - Step 2: Plant the plants.
If you are using bark dust, you can simply pour it into planters and mix it with soil. For bulbs, cut them into suitable-sized pieces and mix them with dirt in the planters. - Step 3: Adorn the space.
For your minimalist patio to look good, you have to have a sense of harmony. Therefore, use planters of various heights and shapes to enhance the overall look. It also helps if you have a few accent pieces to create a sense of balance. You can then utilize them as decorative elements or to give your patio that extra touch of style. - Step 4: Create a focal point.
A focal point is a vital aspect of a minimalist backyard. It can be a single piece or theme that accentuates the look of the entire space. In this case, one way to create a focal point is to place it at the center of your minimalist patio. For example, you can build a tower made from recycled materials or have an impressive tree at the center of your space. - Step 5: Enhance the look with lighting.
When designing a minimalist patio, you should consider how it will look at night. As we said before, addressing the lighting aspect will help your space look better and more impressive at night. - Alternatives:
Instead of purchasing expensive or energy-hogging lightings [like LED lights], you can try using string lighting. It uses bulbs similar to LED lights but do not require any wiring or electricity [because they run on standard bulbs]. They can be hung over the plants and create a beautiful glow at night.
As far as lanterns are concerned, skip the classy ones because they tend to look tacky when placed indoors. - Step 6: Go for a fire pit.
When it comes to creating an impressive patio, a fireplace is a must on your list. This item can add a touch of elegance and charm to any minimalist space and if you do not want the hassle of lighting a bonfire, go for a fire pit instead. Additionally, you can also use this firepit as a heater during these chilly winter nights. - Step 7: Add color with the furniture and accent pieces.
To make your minimalist patio stand out, you have to consider its appearance at night, particularly when it comes to the furniture and accent pieces. A simple way to make them look even more impressive is enhancing their appearance with color [especially when they complement the overall design]. - Step 8: Add a few details.
When you have a minimalist patio that is easily accessible, it can be a perfect place for your guests to hang out. However, your outdoor space will not be complete without a few details. You can add some finishing touches, such as a lovely table and chairs, some flowerpots, and lanterns. These items are perfect for adding extra charm to your space while creating the right amount of ambiance for your guests. - Step 9: Add some comfortable seats and relax on them [or doze off].
It is impossible to enjoy the outdoors [especially in summer] if you don’t have comfortable seats or places where you can rest and chill out. Therefore, you should try to create places where you can sit comfortably. - Step 10: Create an oasis of simplicity.
You should not only focus on the beauty of your minimalist patio but also on the overall look. You can do that by incorporating some rustic elements into your space—like stone benches and coat racks. This idea will help you create a more sophisticated outdoor look without compromising on its cleanliness and minimalism.
9. Keep It Simple
 Being simple is the primary point of a minimalist patio. Therefore, the key to carving out this style is investing in clean-lined furniture and fixture while holding the clutter at bay. You may also need to keep things down to a minimum.
You can begin by applying neutral colors to the entire patio. Light gray concrete is the most common material that many people use to create a minimalist patio.
If you plan to add some furniture to your minimalist patio, ensure it features clean-lined edges and a straightforward design to accentuate the simple look.
Detail instructions:
- Decide on what you would like to create your patio with.
- Purchase your materials and cut them to size.
- Use sand or gravel to cover the entire area of your minimalist patio.
- Add the sand to make it look clean and polished.
- Once you’re satisfied with the result, start putting up your seating or seating sets by inserting them into the sand or gravel around the concrete surface that you created for this purpose.
- Use bricks, bricks, and more bricks to create decorative walls around your patio.
- Use stonework to make decorative supports around your seating area or around the walls that you constructed with bricks.
- Add some decorative elements, like the fancy lantern.
- Use various materials to create a focal point for your minimalist patio, like a stone bench
- When you are done, and if you would like, you can go ahead and put up a large tree or even a gate to complete the look of your outdoor space.
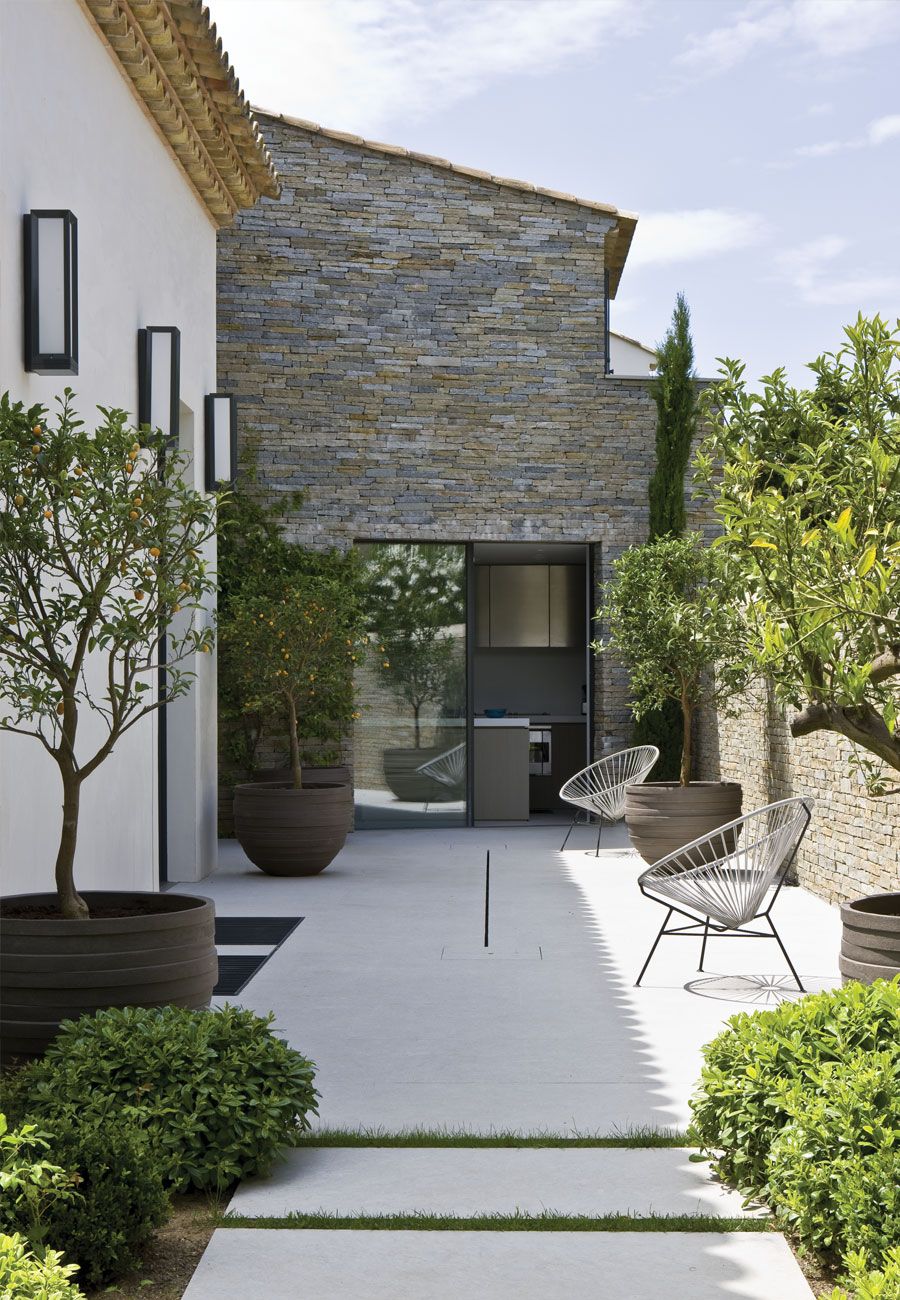
8. Grow Your Plants in Containers
 If your backyard has little room, you may think to expand the hardscape to the entire available space. It means you will not have any lawns nor some spots to grow some trees.
Although you do not have any space to grow plants in the ground, you can always use planters. In fact, flowerpots have always been a part of a minimalist patio.
Planters give you a lot of advantages when it comes to carving out a minimalist patio. They come in various colors and designs, allowing you to change the look and add interest instantly. Besides, containers enable you to grow many kinds of plants, including fruits and veggies.
To build your new garden planters, your detailed instructions are:
- Step 1: Pick the suitable planters
You can choose your small pots or big planters. The first thing you need to do is think about where you would like to install them. Besides, remember that the more plants you have, the better. - Step 2: Prepare the soil for your plants.
It is essential to know that all plants need some sort of soil. Moreover, each of them might require different things that will not be alike for all of them.
So, before filling it with water, be sure to mix soil according to its requirements; this will make it grow well and withstand strong winds and other factors. - Step 3: Plant your plants.
You must know that different plants need different potting requirements. So, why don’t you start planting your plants first?
Once done, make sure it gets enough light to help your plants grow properly. - Step 4: Make sure you water regularly.
It is vital to water your plants regularly. You can do this by periodically checking the soil or even using a moisture meter to determine how much water is necessary for them to continue growing well. - Step 5: Your planter must be connected to the proper drainage system
During rainy days, you need to be sure that your growers do not flood. You can use a rain gutter or even a pipe so that they stay dry during torrential downpours. - Step 6: Eventually, your plants will need some maintenance
Although they grow very well, you can still take care of them by regularly pruning or fertilizing them. Otherwise, you can call your local landscaper to do the work for you if you need it.
However, it is essential to ensure that no maintenance is necessary for at least the first six months after planting your plants since they need time to adjust to their new environment. - Step 7: Learn about how to care for your planters.
Once established, cleaning your pots will not be difficult. But, if you are new to gardening and do not know how to care for them, there are some things you need to know.
Make sure you choose planters that do not contain plants that require a lot of sunlight because plants like tulips and parsley prefer different kinds of light than plants like tomatoes and peppers. Moreover, they also need different types of soil.
Besides, you can choose simple flowerpots without any accessories since accessories tend to be very complex and take up a lot of your time cleaning them. - Step 8: Start re-potting your plants
Over time, your plants will need to be re-potted. This idea is an excellent idea since it will enable them to grow well and have more space to explore. Make sure you have the right gear at home not to have any problems when creating new pots.
Moreover, re-potting may help you eliminate any pests typically found in the soil around your plants. - Step 9: Your garden planters can be used indoors or outdoors
If you would like, you can use your planters to decorate your outdoor space. When it is not in season, bring it inside so that you can plant some indoor plants. Besides, remember that indoor plants require less maintenance than outdoor plants. - Step 10: Make sure you give your planter a good maintenance
You can take care of your plants by regularly inspecting them and making sure they are well-fed. You can also make sure they get enough sunlight to grow well.
Additionally, You can build and take benefit from the new Garden area in your Tiny Space.
If you have a small space that needs to be filled, start growing herbs in pots or creating shelves that will cover the entire area. In this way, you will be able to use all the available space without wasting any of it for plants you do not need.
7. Play with Color Scheme Wisely
 When creating a minimalist patio, you may have heard a lot about sticking to a neutral color palette like gray, white, and black. However, do not discourage yourself from incorporating more interest with colors.
Although you have to stick to a neutral tone, adding a few pops of color is always okay. You can do it by growing plants or bringing in some pieces of furniture coming in a bold hue.
The key point is that do not go overboard. You can use white or other neutral colors as the backdrop. After that, sprinkle some vivid colors by tossing a burnt orange cushion or some beautiful flowers.
To pay with garden’s color scheme harmonically, you need to pay attention to:
1. Focus on one area to create contrast
2. Choose a neutral basis to avoid color clashing
3. Adjust the intensity of colors according to personal preferences
4. Avoid using similar colors at the same time
5. Get inspired by other people’s creations
6. Adjust color scheme according to seasons or stick to one color scheme per season if necessary.
7. Do not be afraid to play with colors
8. Look at the elements behind you
9. Check your environment before picking the palette
10. Choose the best hue for your area
11. Remember that color is subjective
12. Ask for help when you are lost or confused about color selection
6. Alleviate the Glaring Sun

Patio shade covers come in a wide array of sizes, designs, and materials. If you are looking for the simplest and effortless one, an outdoor umbrella will be your safe bet.
Fabrics and shade sails are perfect options for those who love DIY projects. Besides, they are less expensive than pergolas. Corrugated galvanized metal is another low-cost choice for your patio.
For that reason, you may need to consider adding Screens to Your Patio or Porch.
To do it, your instructions are:
- Step 1: Determine the size of your Patio or Porch
The size of your patio is significant since it determines the amount of shade you will need. If you have a small area that is relatively short, then a single panel should do the trick. In addition, if you have a vast space, then two panels will do the job. - Step 2: Choose the Right Material for Your Shade
Ideally, perfect materials to use to cover your patio include:
Choose strong and durable materials so that they can withstand both heat and cold. Do not worry about their cost since they do not affect their durability. Besides, knowing how to install them is easy and affordable if you have the right resources at home. - Step 3: Measure and Cut the Fabric
After choosing the best material for your shade, you need to measure and cut it. Make sure it is enough to meet your needs and not come in contact with any objects such as furniture. - Step 4: Install Adequate Posts for Your Shade
The number of posts required will depend on the area you need to cover. At least 4 posts should do the job. You can adjust it if necessary. However, make sure that they are sturdy and rigid enough to support all of your materials securely. - Step 5: Secure Everything with Screws and Nails
You may use screws and nails instead of staples since they will keep everything more secure and sturdy. Do not forget that the shade will work best if its materials do not come in contact with any part of your patio. - Step 6: Enjoy your new shade
You can now relax comfortably, knowing that you no longer have to worry about the glaring sun. Moreover, you can remove it whenever you want to use your patio for any other purpose. - Step 7: Add an Extra Layer of Shade if Necessary
Suppose the sun seems too powerful even with your new shade. Then consider adding another layer on top of the existing one. However, make sure it is lightweight so that it does not affect the overall structure of your patio.
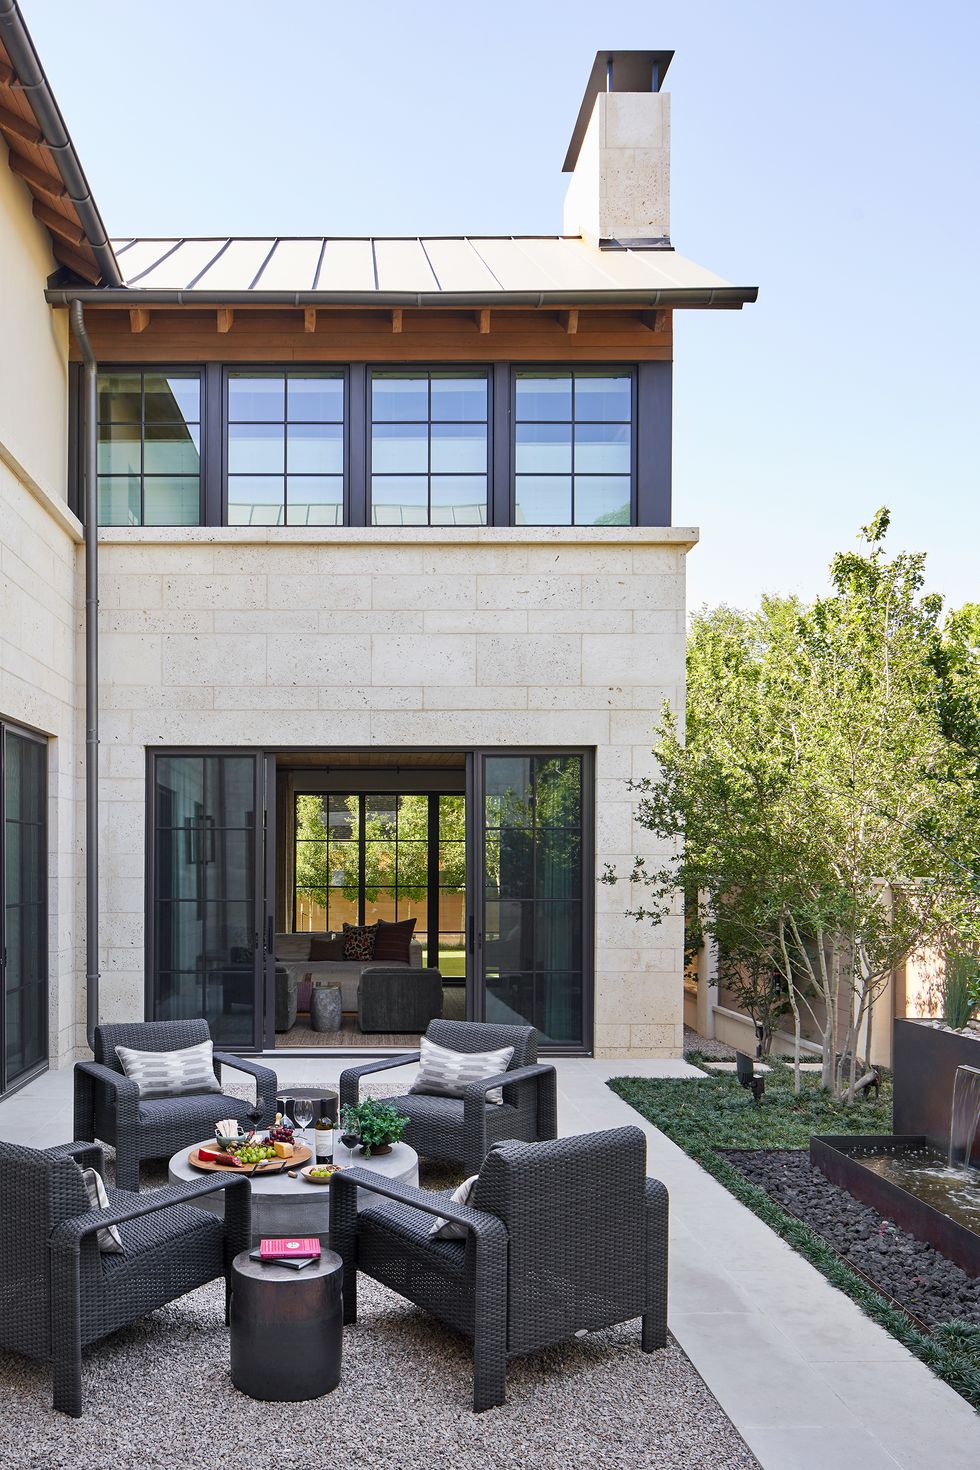
5. Spruce It Up with a Fire Pit
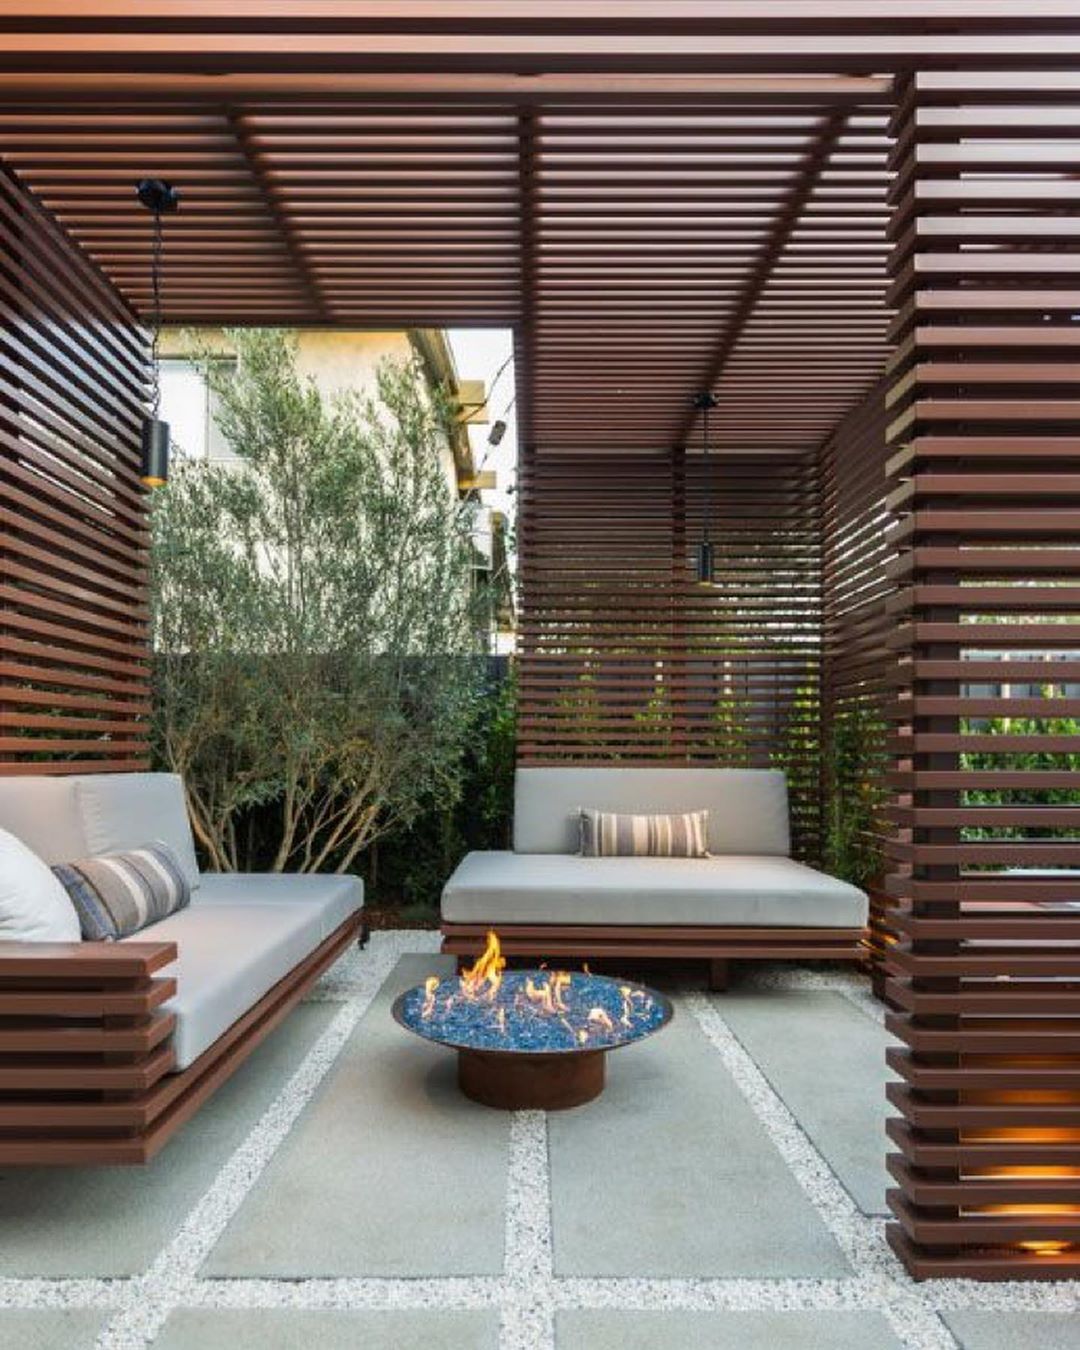 Hanging out in the backyard at night can be the best way to release stress. You can even enjoy the cool breeze and twinkling stars. However, it can be too cold outside, which can ruin your stargazing. Therefore, you need to consider installing a fire pit.
The fire pit can also enhance the minimalist look of your patio, depending on the design. Thus, you have to invest in the one with a simple design and clean-lined edges like a rectangular fire pit made of concrete.
If adding a new firepit is a new thing for you, pay attention to this next piece of advice:
- 1. Consider your Size first
You need to consider several things concerning your fire pit size. You will need to determine the width and length of your patio, the opening in the wall, and the size of your fire pit. - 2. Make Sure It is Strong
The materials you choose for constructing your fire pit should be strong enough to withstand wind and rain with no weakening or peeling. Moreover, they should be resistant to changes in temperature. - 3. Get Help if Necessary
If you are doing it yourself, ask friends if they can help you construct it since an error can cause some damages to your patio later on. Then, make sure that all of the materials fit together perfectly before starting. - 4. Materials you need to prepare such as gravel, sand, and water
- 5. Consider the Right Type of Material for your Firepit
There are many types of fire pits on the market. Therefore, you need to get one that blends well with your furniture and patio color scheme. Moreover, it should complement your overall interior design. It is important to remember that something is good does not mean that it will work in other situations. For instance: a fire pit made of glass and metal will be great if you want to add a contemporary touch to your patio. However, it will look weird if you try to create an eclectic look by hanging kerosene lamps around it. - 6. Fire pit accessories you need to prepare such as:
6.1. Metal grate, list of fire logs
6.2. Lighting equipment such as kerosene lamps, timer, and propane tank
6.3. Firepit materials you need with your fire pit ranging from sand to concrete
6.4. A few buckets of sand and gravel for the base area of your fire pit
6.5. All-natural clear pebbles or rocks for your fire pit design
6.6. Your CO2 extinguisher to put out the fire when it gets too big - 7. How to install your firepit
You can make a simple fire pit with only a few materials. However, a fire pit made of glass and metal will require a little more time to complete. If you want a professional job, consider hiring a contractor or an experienced builder.
If you want to do it yourself, the instructions are:
Step 1: Build the bottom part of your fire pit
The bottom part is essential for your fire pit since it helps control the spread of the fire. It also prevents sparks from blowing into your face or going too close to your patio. You can build your bottom part in various materials such as concrete, glass, and pebbles. If you use concrete for this purpose, make sure that it can withstand temperature changes and is thick enough for strength and durability.
Step 2: Add the metal grate if necessary
Make sure that your fire pit is ready to handle a fire. Moreover, put your firewood in the metal grate so that it looks more elegant.
Step 3: Install or cover the walls of your fire pit
Since having a glass or metal wall is optional, you have to consider it if you want an open concept design for your patio. The other option is to cover it with bricks, stones, or other safe materials to use it as a table when there is no fire in there.
Step 4: Start building the layers of concrete around your fire pit
Since concrete is water-resistant, you need to start this process when it’s dry. - 8. Consider the Appropriate Style for Your Fire Pit
Fire pits come in different styles with different advantages and disadvantages. For instance, a traditional-style fire pit will look great in urban areas, whereas a contemporary-style one will work well in rustic or modern settings.
4. Bring in the Festive Mood with an Outdoor Kitchen
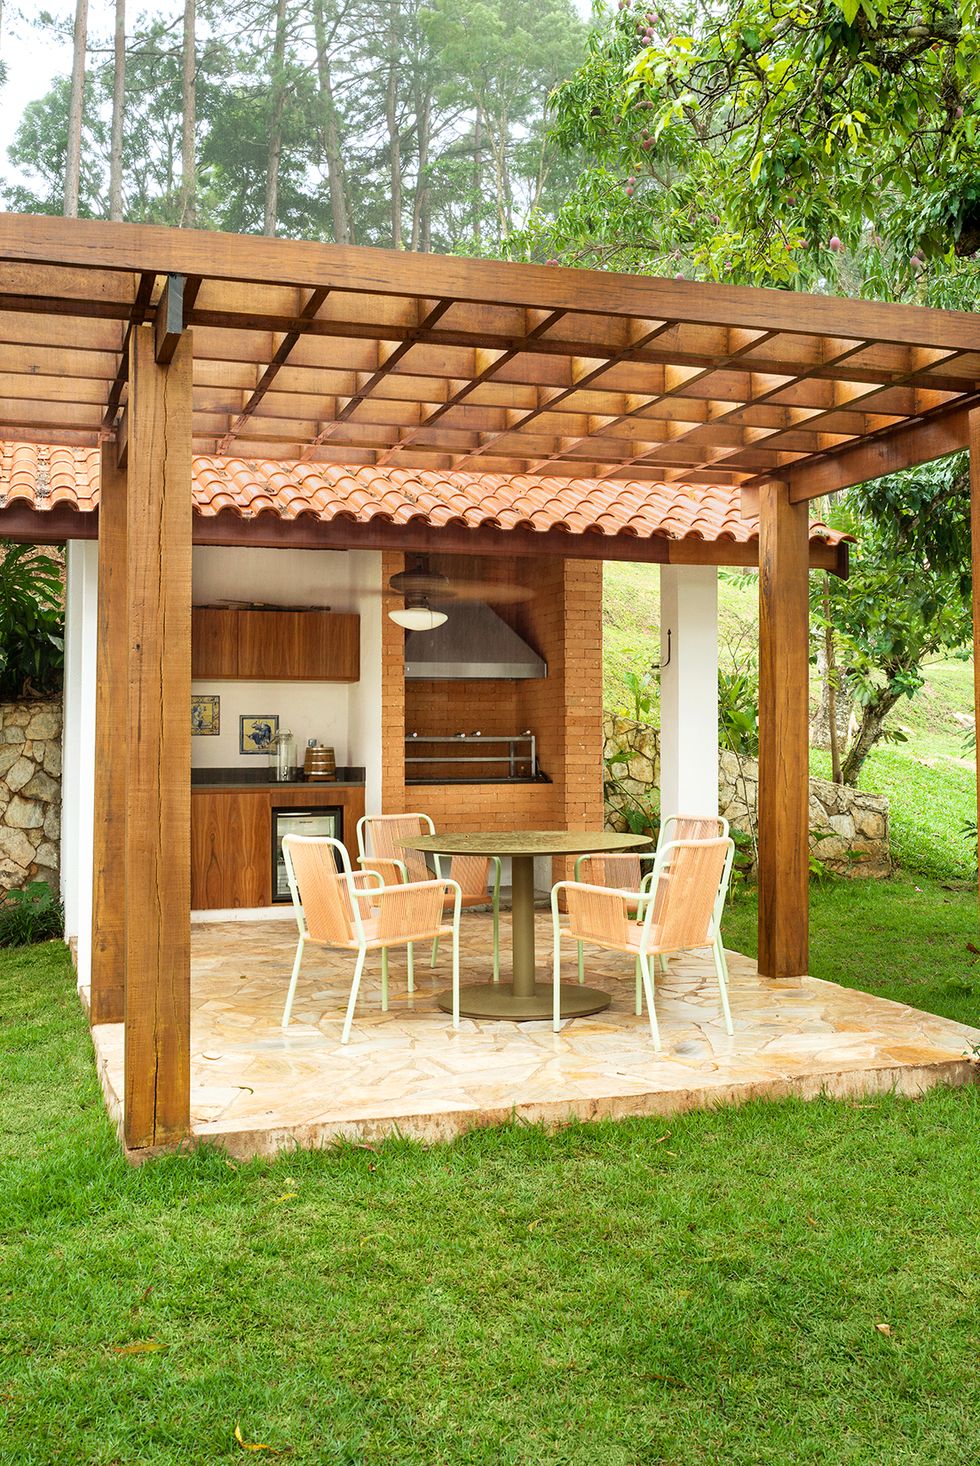 Have you ever thought of inviting your neighbors or friends to come over for a barbeque party? That must be awesome!
To enhance the festive mood, you need to build an outdoor kitchen on your patio. Although you might not use it daily, it is still worth the money. Just imagine you are enjoying the scenery, and you suddenly want to grab some snacks or coffee. You do not need to make a run to the kitchen inside your house anymore.
3. Enhance the Serene Look with Water Feature
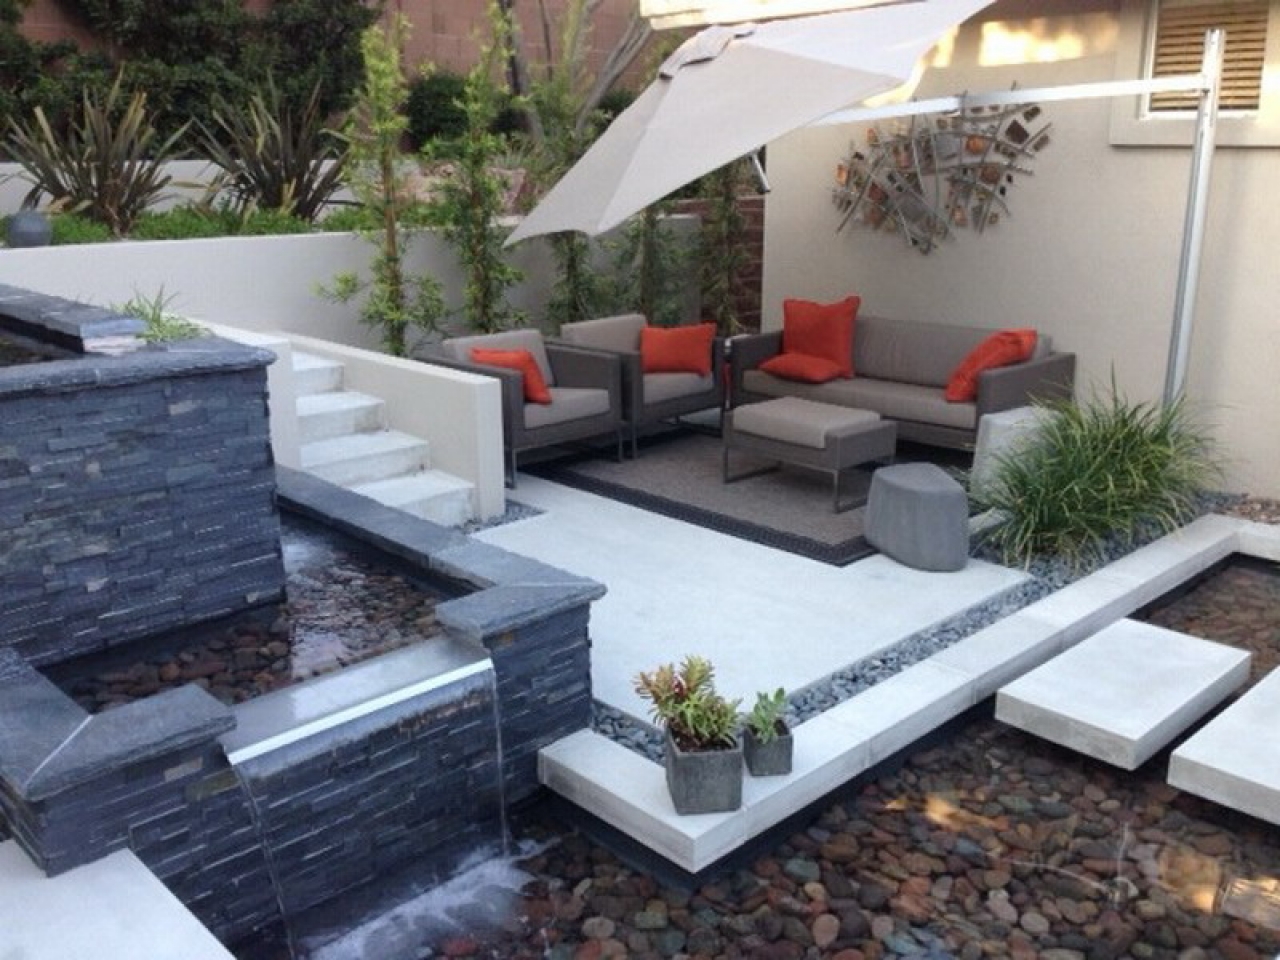 The water feature can incorporate a relaxing ambiance into your patio. Thus, you need to install one.
You do not have to build a hot tub or a swimming pool, though. A fountain with a waterfall can add a significant impact on your patio. Just make sure you conceal tubing, pumps, or pond liner well.
To build your first water feature for cheap, your instructions are:
- 1. Place your Waterfall
The height of the waterfall depends on the size of your patio. It can be anything from 3 to 8 feet tall. Also, consider whether you want a small or large waterfall. - 2. Add Gutters and Downspouts
If you want to make it look realistic, ensure that gutters and downspouts are installed since they will channel water away from your patio. - 3. Choose the right water pump
There is a wide selection of pumps for sale online. So, it is vital to choose the right one for your water feature system. Before buying them, check out their power capabilities, motor power, noise levels, speed levels, and more. - 4. Attach the pump to the water feature
If you are building a small water feature on your patio, it is enough to buy a pre-made system. However, if you want it to be big on your patio, consider designing one first on paper before purchasing anything. - 5. Attach the Water Filter System
The added advantage of having a water filter system is that it can filter water from any pond or garden hose and then push them into your waterfall to give it an authentic look. To build this part:
5.1. Mount your water filter system
First, mount your pump and filter in the same area to facilitate the entire system’s more effortless flow and function.
5.2 . Attach line connectors to your filter
Next, it is time to attach the water lines to your filter system. It is best to buy pre-made pipes and fittings since they will save much time and effort. However, you can also make them if you have the necessary tools or skills and desire to do so.
5.3. Mount the filer in a convenient place
Lastly, it is time to mount your filer somewhere that you can easily access without climbing over your waterfall.
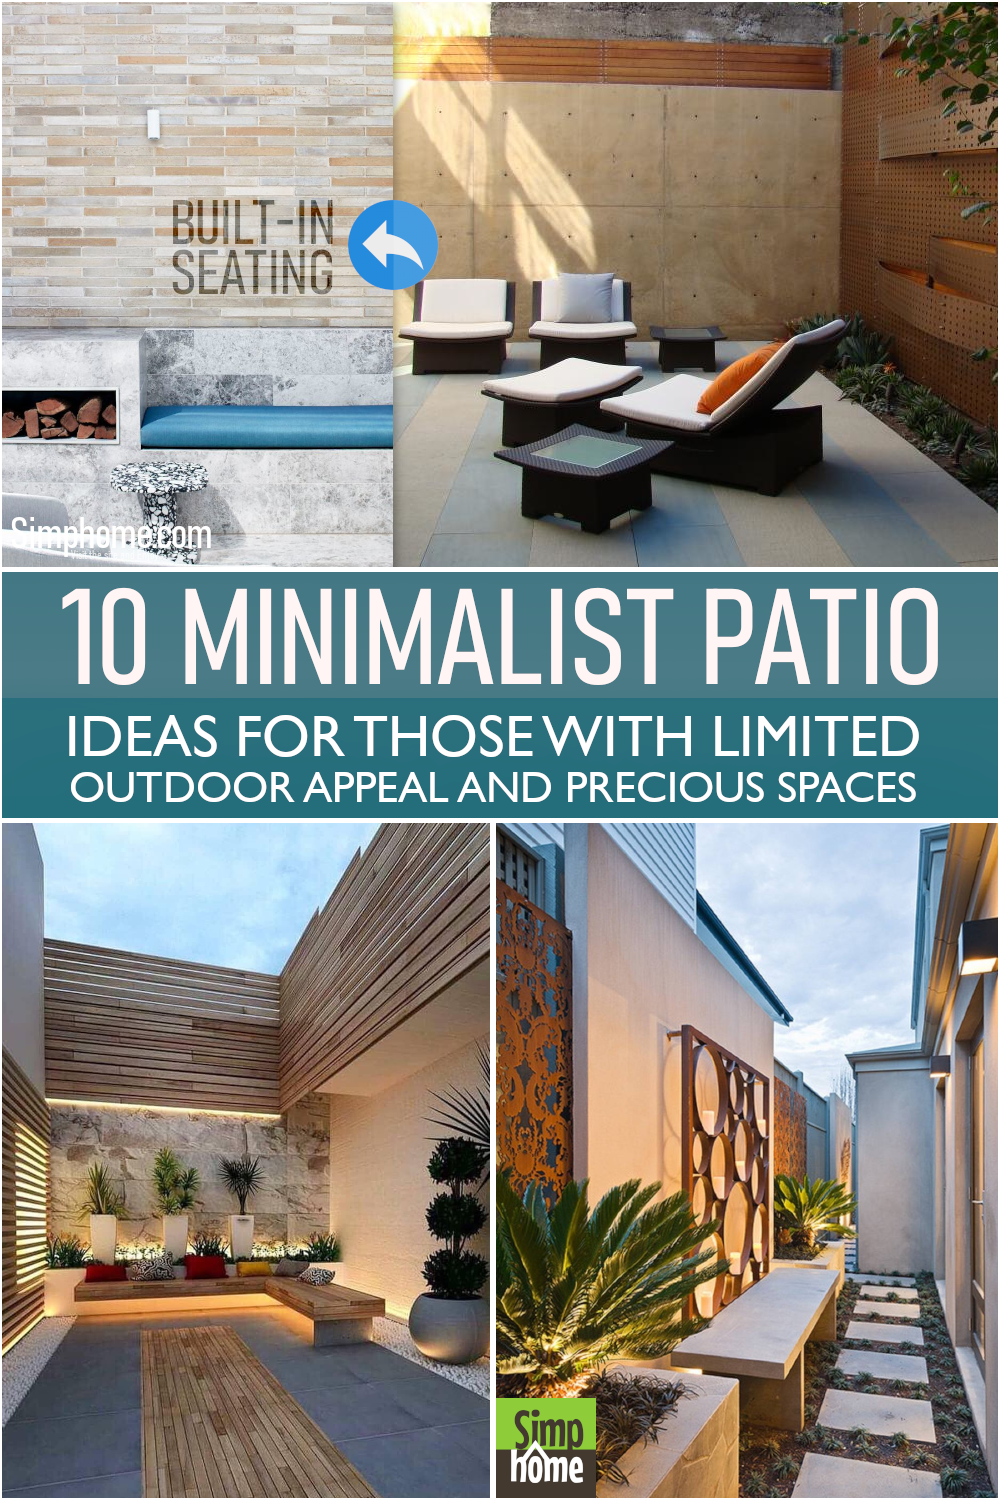
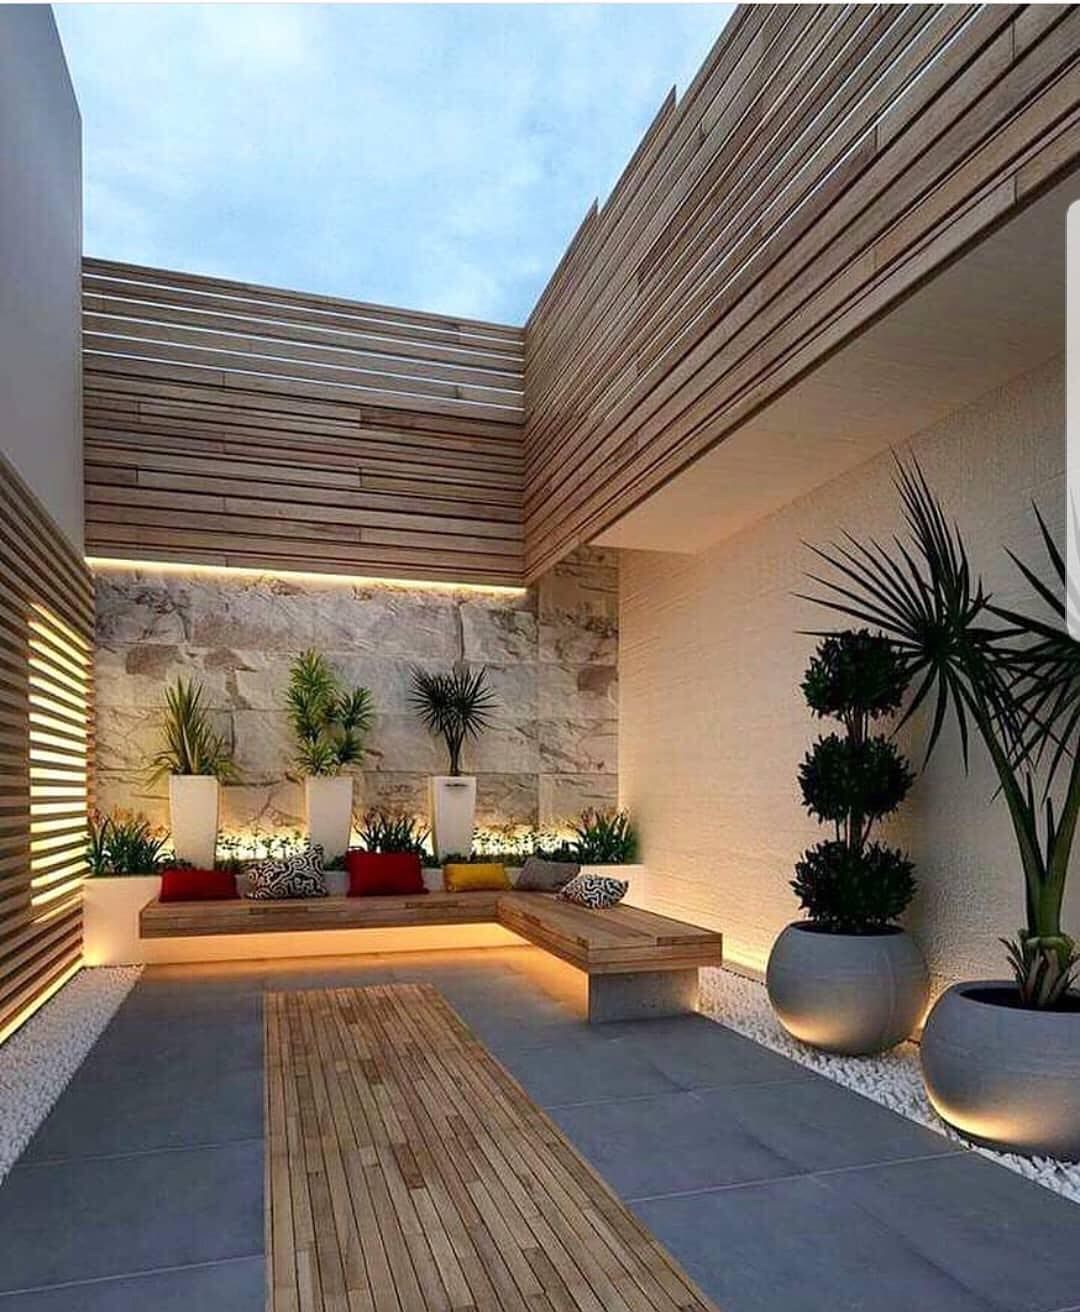
2. Built-In Furniture for a United Look
 Investing in some furniture is necessary. However, you can opt for built-in benches and stools instead of buying some fancy sofas, which can be pricey.
This patio, for example, features a built-in bench and fire pit. Marble tiles cover the entire surface, from the floor up to the bench and fire pit, which creates a united look. Top the bench with a teal cushion to add more comfort and a pop of color.
Choices you can consider such as:
- 1. Build a Wood Storage Bench
This way, you will get a built-in bench with storage. It is cheap, comfortable, and functional at the same time.
You can store your blankets, pillows, or even firewood inside of it. If you only need storage, consider building a simple bench with storage drawers instead of on your patio. - 2. Build an Island with Seating Bench
The island is also an excellent choice to consider on your patio since it can handle more weight than chairs or couches. Also, you can choose to build it for eating or serving purposes on your patio. - 3. Build a Dining Bench
Consider attaching some storage drawers, shelves, or cabinets underneath your bench to look more elegant if you want a dining bench. - 4. Build a Storage Bench with Front Doors
Just make sure to build your bench with front doors first. You can also use it to store firewood or patio accessories. - 5. Build an Outdoor Kitchen Table
Build an outdoor kitchen table for more functionality on your patio instead of buying some regular tables. Moreover, you can also use it as extra seating if necessary. The design is highly
Lastly, Number 1. Try Floating Sofas
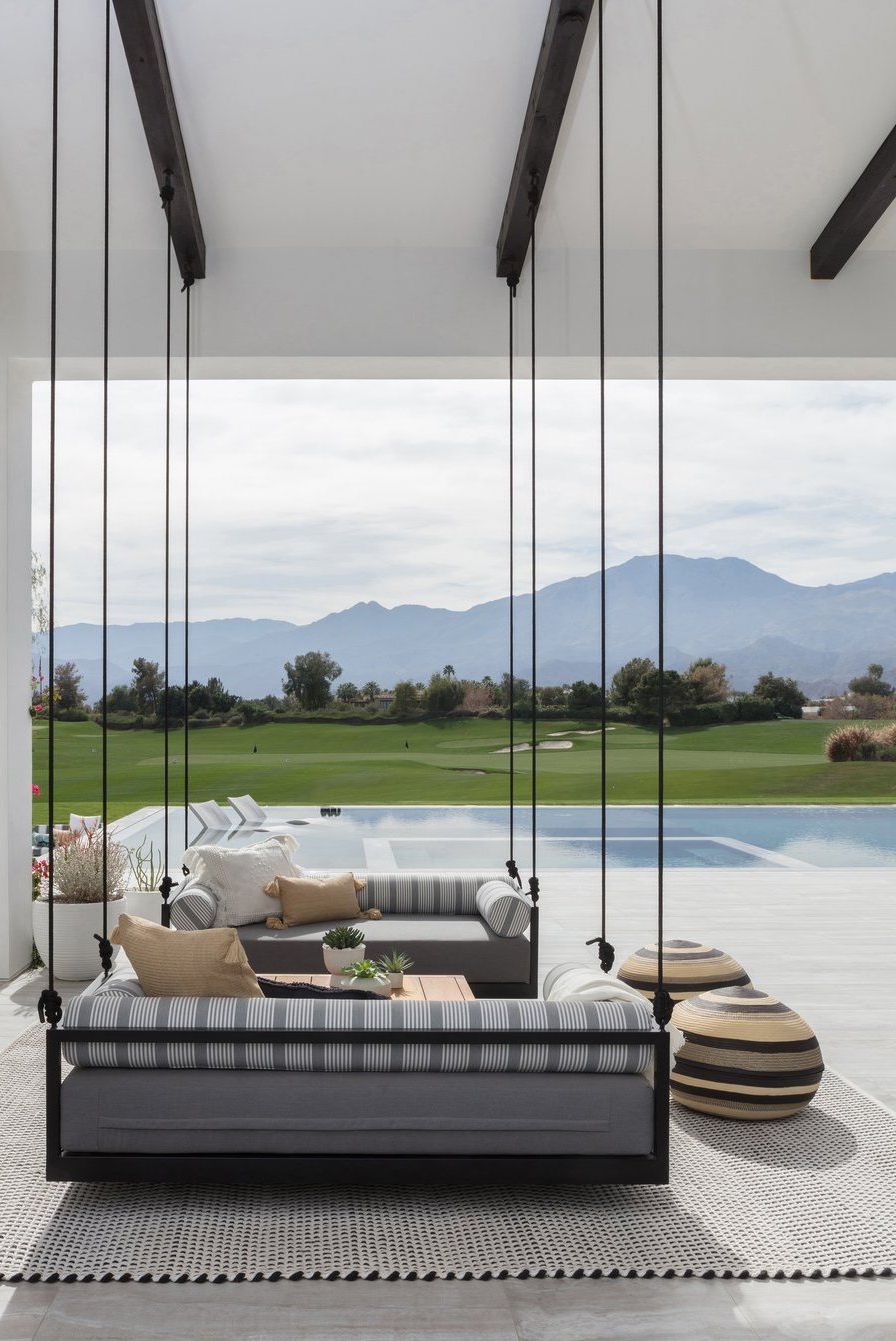 You have been focusing on the simple and clean-lined designs when carving out a minimalist patio. Then, you forget that you deserve a comfortable place to lounge on. Why don’t you try investing in a swing sofa?
A swing sofa offers a more relaxing ambiance. It is not only comfortable but also more visually appealing than the average seating.
Instructions:
- Step 1: Find the Right Seat Cover
The seat cover is crucial when building a swing sofa. It can either make or break your design. When choosing your seat covers, be sure to select suitable materials like cotton and linen since they are easy to maintain and look comfortable in most minimalist homes. - Step 2: Choose Between a Straight or U-Shaped Design
You can choose either a straight or u-shaped design for your swing sofa. Both methods look excellent in most minimalist homes. However, if you want something more versatile, consider building an L-shaped seating area on your patio that is covered with a canopy with chairs and a sofa seating area. This way, you can use it even when it rains or when the sun is shining brightly outside. - Step 3: Add More Seating
A swing sofa is useless if you don’t have anyone to sit with. Therefore, adding more seating in chairs, tables, or benches on your patio is essential. They are excellent choices for when you have guests over. - Step 4: Add Some Storage
Last but not least, add some storage to keep all your outdoor accessories organized. You can consider building a small table with stools underneath for this purpose. As a final touch, you can consider adding handmade Outdoor Chandeliers or the cheap ones you can find in Amazon or thrift stores or garage sales near your house complex.
Conclusions:
So, if you are looking for some way to make your patio look more relaxing and chic in your minimalist home, try adding a swing sofa to it. You can make it look more stylish by adding decorative pillows, baskets, or cushions on top of the chair with the backrest covered in matching fabric.
As many people say, being simple yet attractive is much better than being sophisticated and fussy. These 10 minimalist patio ideas have proved it. Now, you can enjoy lingering in your backyard without the hassle.
References:
10. Houzz.com, Housebeautiful.com
9. Plantcaretoday.com, Shelterness.com
8. Shelterness.com, Plantcaretoday.com
7. Yocumrealestategroup.com, Hgtv.com
6. Thespruce.com, Mydomaine.com
5. Renoguide.com
4. Housebeautiful.com
3. Pinimg.com
2. Housebeautiful.com
1. Housebeautiful.com