Key Takeaway:
- A minimalist organization idea does not have to cost you a lot of money. As long as you don’t lose confidence in your organizational skills, you can apply this tip inexpensively.
- Finding the right materials is essential to your success. However, there are plenty of ways to save.
- When implementing a minimalist organization idea into your home, you should change how you think about things. For example, a more minimalistic bedroom will start with smaller, more basic furniture pieces that are easier to come by (such as those found at thrift stores or garage sales).
- Collaborating with your spouse or partner is the first step to successfully organizing. Once you get organized, you can better divide up the tasks in your space. One person will take care of one aspect of the space, and another will care for other things.
- Convenience is something that many people forget when trying to be minimalist (or even while going through a minimalist organization). This idea also means creating a convenient space where everything is a moment’s reach away and creating flow in the spaces so that everyone can get things done without hassle or confusion. A big part of being minimalist is simplifying tasks that do not detract from convenience.
- Use vertical space as well as horizontal space to your advantage. There are plenty of ways to do this with DIY organization ideas, such as using the backs of doors or adding bookshelves to walls.
- Minimalist organization ideas can be used in various household capacities, from simple tasks like meal preparation and laundry to more complicated tasks like creating a reading nook or organizing toys. Your minimalist organization ideas can help you in many different ways, and the more effort you put into them, the more it will pay off for you in the long run.
- The key to being a minimalist is not about getting rid of things but changing your mindset about your possessions. And how they relate to your life and happiness overall.
- You can utilize even small spaces for a minimalist organization idea. There are ways to create more space for yourself and still be minimalistic with organizing your things. These methods include using the backs of doors, wall storage, shoe organizers, and bookshelves.
- It’s important to have confidence in your organizing skills because if you don’t have them, you will turn to an expert or expensive help in getting organized in a space that may not work for you on an emotional level.
Dwelling in a small house is no picnic. You might wish you could live in a bigger home. Unfortunately, you cannot afford one. Therefore, you have to put up with what you get.
Instead of complaining about the tiny space, you can begin to think about making it the most comfortable place to live.
As a good rule of thumb, you can earn comfort if you get rid of clutter. Thus, you need to check out these 12 minimalist organizations and DIY project ideas for small spaces. As usual, follow the simphome link inside the description to rewind the video. This time, when you’re lucky, you won’t find any video ads, even insignificant banners ads, on the right side of the blog post.
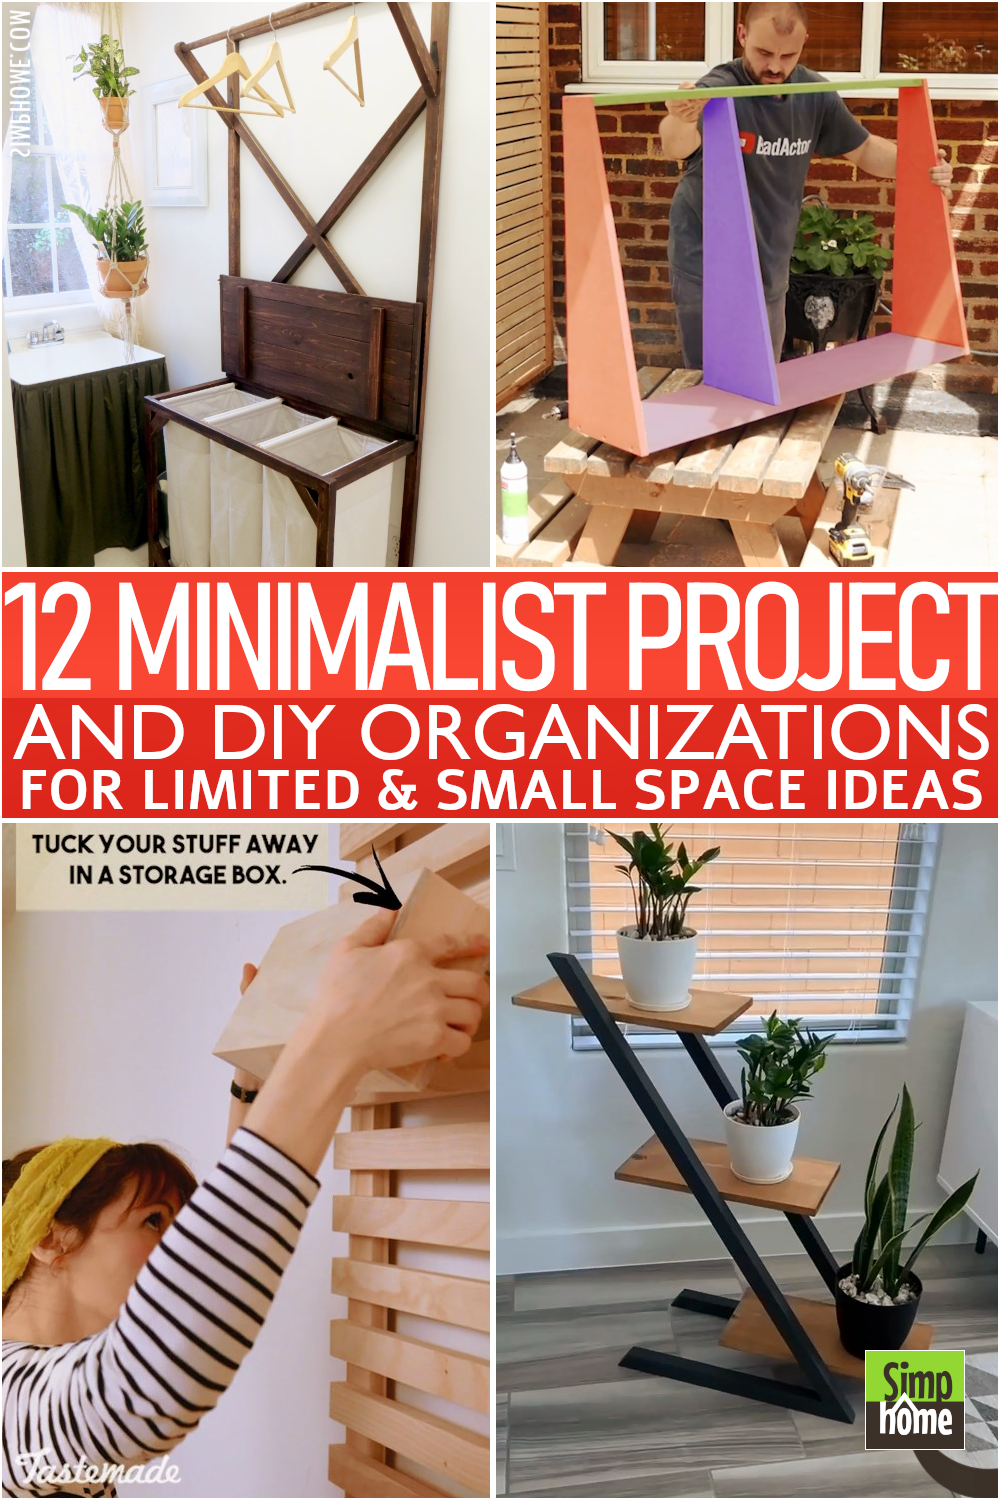
🔊12 Minimalist Organization And DIY Projects For Small Space Video:
List Entries:
12. A little storage cheat trick by @Ocvintagecharm
Some people do not enjoy making a piece of furniture from scratch. They would rather purchase a ready-made one and then tweak it a bit. Although it may not like what they want, it still does in a pinch, just like this one.
These cubbies feature some drawers that you can use to store small items. However, the drawers do not have any drawer slides, which makes them hard to pull.
Well, do not worry! You can still make them practical and functional by adding the soft side of Velcro to the sides and bottom of the drawers. This way, you can pull them out easily.
You may also want to add baskets to the cubbies. Try attaching the soft side of Velcro to the sides of wicker baskets and the bottom of the plastic ones so that you can pull them out without breaking a sweat, just like the drawers.
IDEA No. 1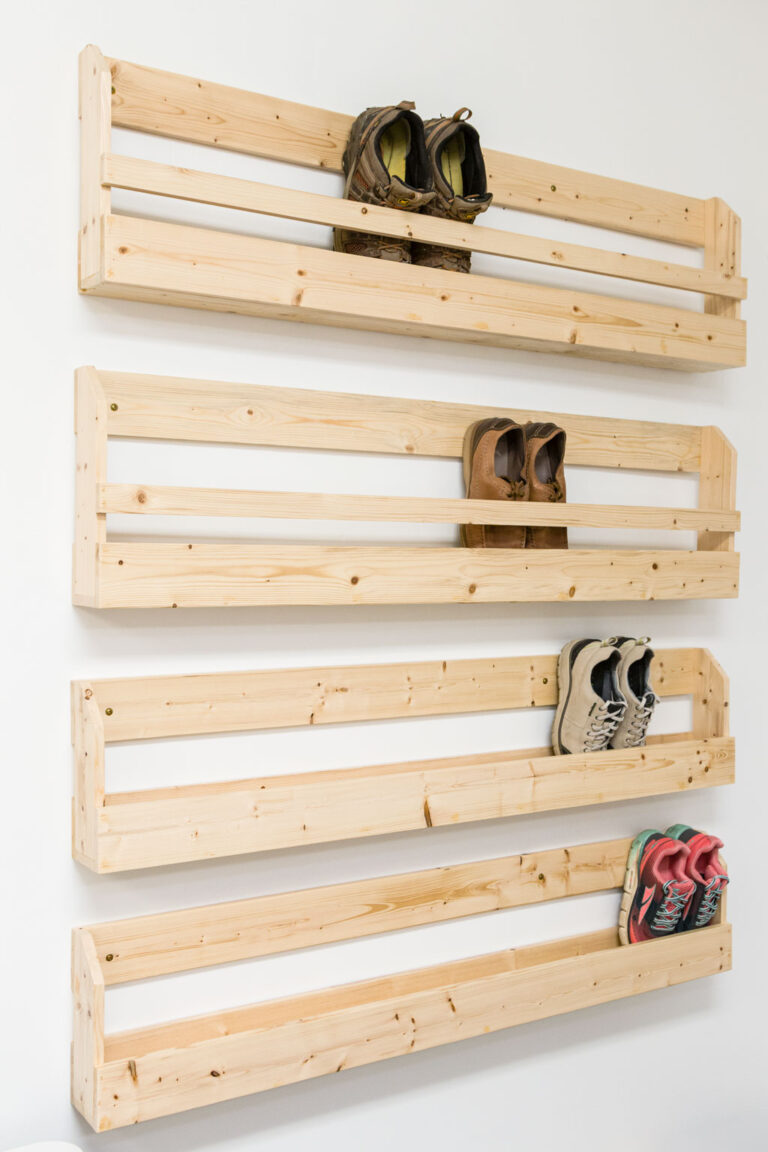
Do not let a small space become a big obstacle for you to be stylish. If you have some problem with shoe organization, chill out! We’ve got your back.
This wooden shoe rack will help you organize your shoes better without taking up the floor space. Most importantly, it is easy to DIY.
To make this shoe rack, you will need three pieces of lumber. Each is 1 “x4” x8′. Then, cut them to size. The length of the shoe rack will depend on how many pairs of shoes you want to store.
You will store your shoes by putting them inside the rack. Therefore, the end boards have to be precise so that your footwear can fit snugly into the rack.
The end boards must be 12 inches if your shoe size is 9 and up. If it is 8 and below, cut the boards into 10 inches. After that, you can assemble the pieces using wood glue and fasteners.
IDEA No. 2
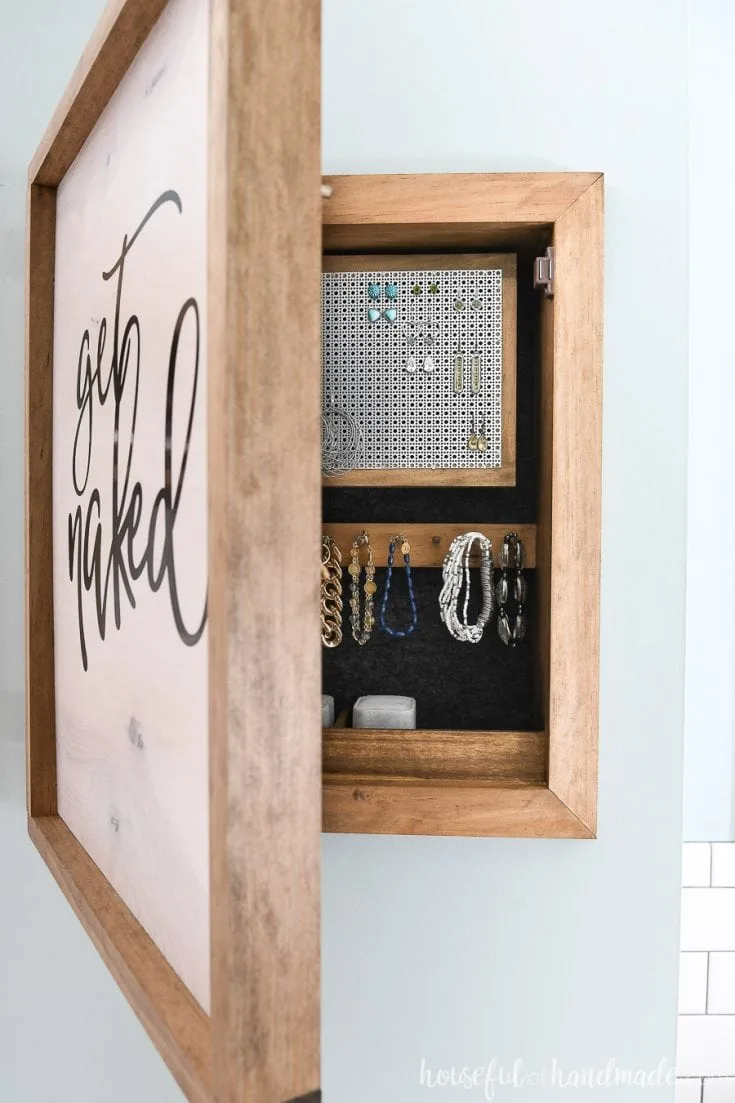 Another thing that can level up your stylish look is jewelry. However, its tiny sizes are prone to clutter. You can better organize and hide it away with this DIY organizer to overcome this problem.
This cabinet features pegs on the back of the door to hold necklaces. You will also find some dowels that hold bracelets.
Inside the cabinet is a decorative metal sheet attached to four wood pieces. You can use it to store your earrings. Next, install hinges so that you can access them more easily.
Consider gluing felt inside the cabinet and on the back of the door. This way, you can protect your jewelry. Moreover, it adds some style while concealing the flaws due to the pocket holes.
Finally, wrap it up with any fun or cute wood sign or artwork you love. It has to fit the cabinet perfectly because you will use it as the door.
10. The DIY TUTORIAL FOR MAKING YOUR OWN LAUNDRY SORTING HAMPER + HANGING ROD
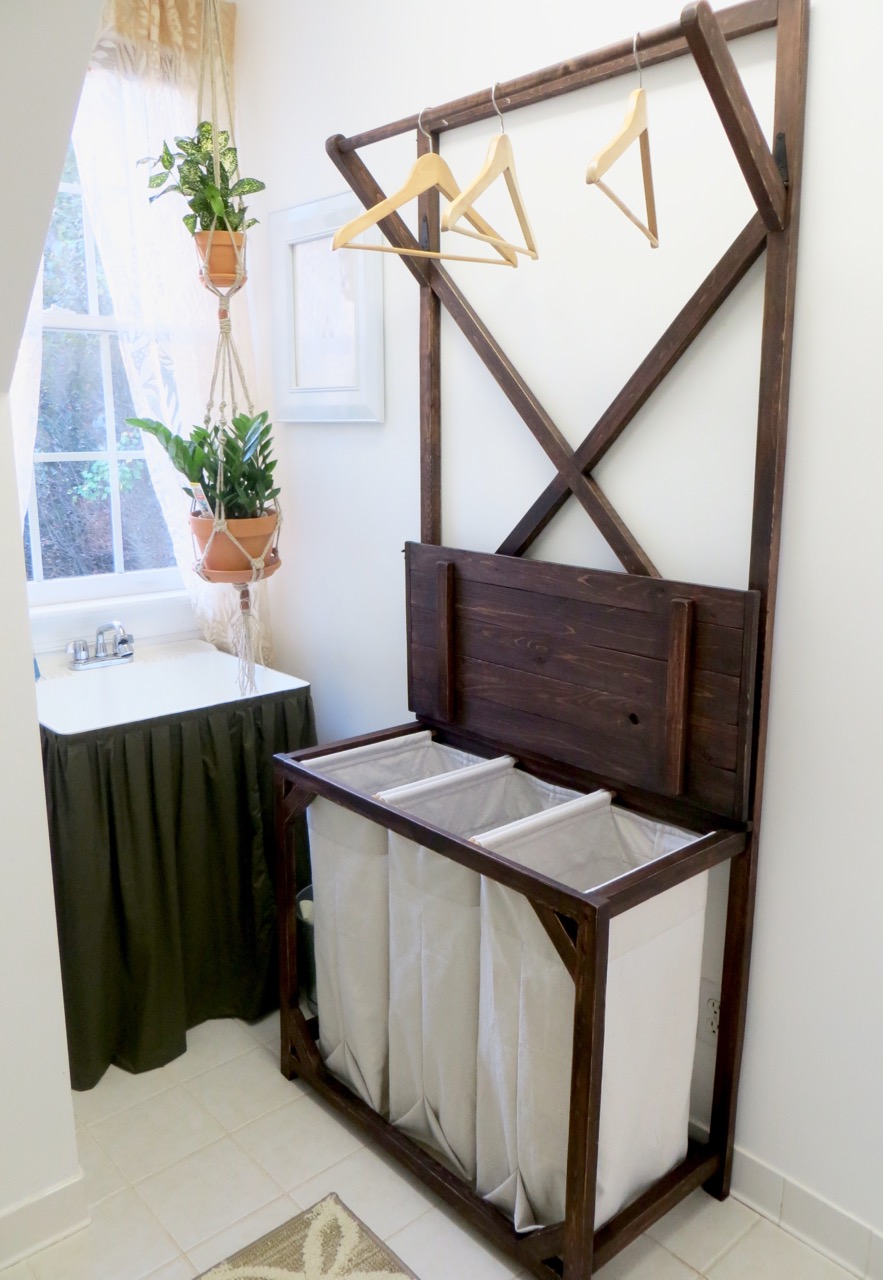 Laundry hampers are essential because they ensure you do not scatter your dirty clothes. However, they can be an eyesore sometimes. Thus, this DIY project will come in handy.
You do not have to be excellent at woodworking to do this project. You will need to rip down 2 “x10” x8′ wood board to make the frame. You will also need some other materials like strap and tee hinges.
This laundry hamper organizer features a lid that will be a perfect workplace for folding. It also conceals the dirty laundry nicely.
You will also need to make the fabric bins from 6’x9′ canvas drop cloth. They have to have strip panels for your dowels to slide in easily.
9. Another hamper hack, but this time with A reversible bag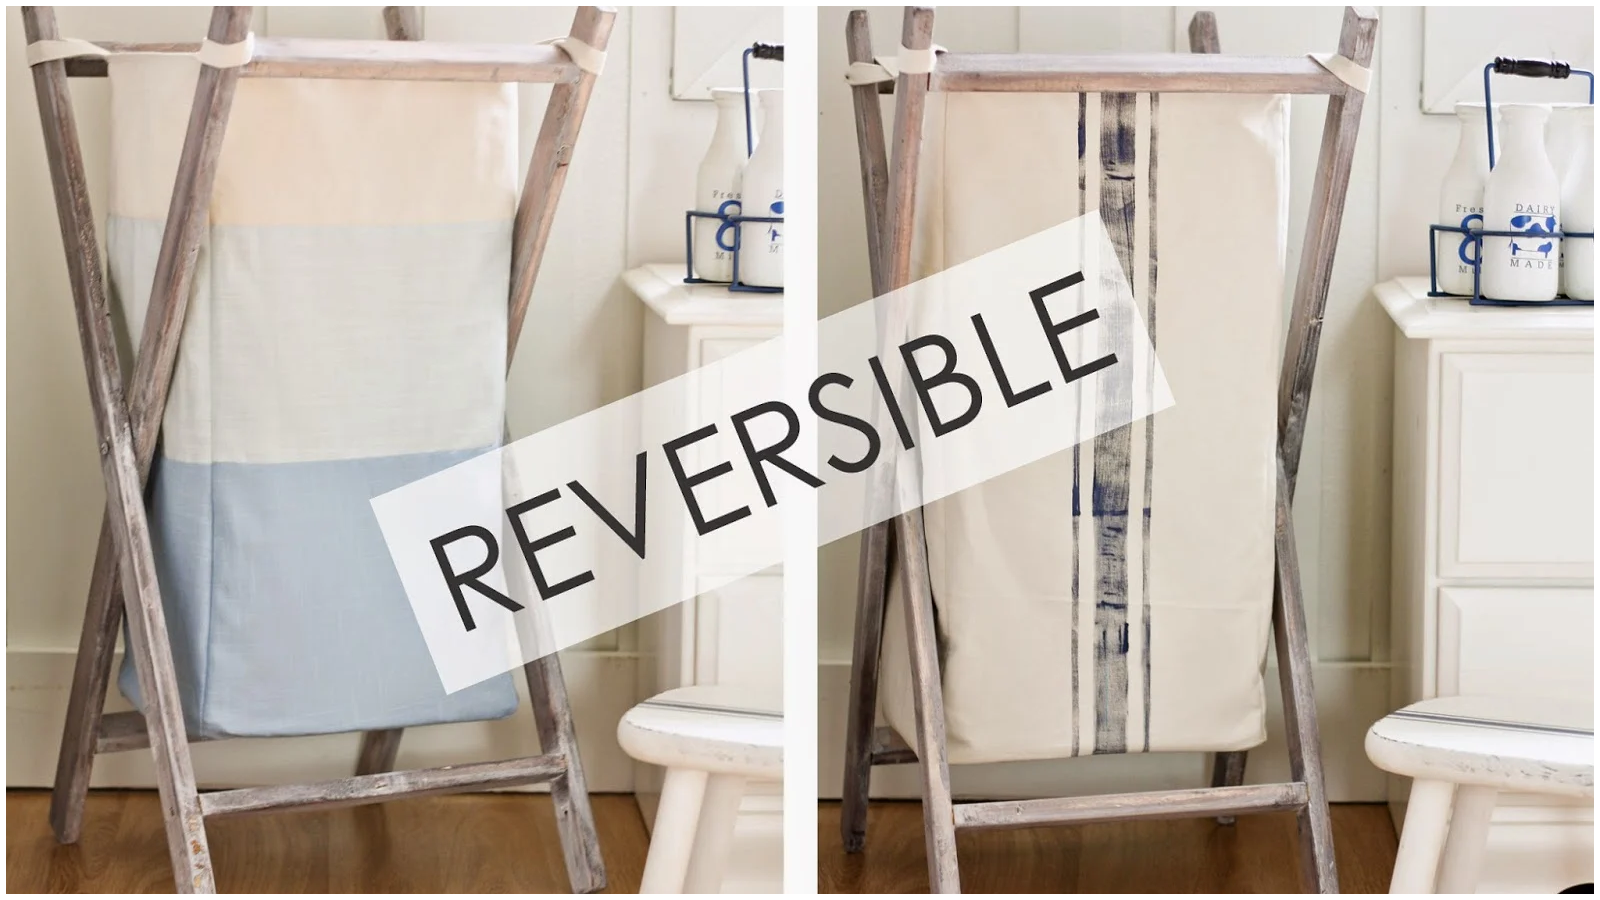
Doing the laundry can be somewhat exhausting. But who can resist this cute reversible bag? You will find this household chore fun with this hamper.
To make this hamper, you will need two sticks of 1 “x2″ x8′ of furring strip and cut them to 4 long pieces of 34″, two short pieces of 13 ½”, and another two short pieces of 12″.
When assembling the pieces, you will need to screw a #10 bolt and washer through 2 long pieces of wood. Then, grab your wrench and a lock nut.
After that, twist it onto the other end of the bolt. Do not make it too tight, though. Twisting it until it fits snugly in place would be enough. Otherwise, you will not be able to move the frame. Then, do the same steps to the other side.
Once you have assembled the frame, you can make the hamper bag from the fabric you like.
8. The DIY Plant Stand idea @neatly.living
Adding a lively lift to your home by displaying greenery has always been great. To level up this idea, you will need a chic plant stand. Unfortunately, a stylish one can cost at least $45. Thus, making it yourself is your safe bet.
This plant stand is stunning and easy to make. You will only need 2x4s to make the frame and three wooden boards (or even cutting boards) to put your flowerpots.
You could also paint the boards any color to give them a better look to complement the idea. Then, your flowers will never get lonely on the plant stand you made yourself.
7. Another crazy transformation to utilize dead space under the staircase from @Pwd.joinery
One of the most awkward areas in a house is the space under the stair. You might think you can turn it into a closet. Well, the truth is you will leave a small opening in the corner untapped because you can do nothing about it.
Are you sure you cannot do anything with the corner space under the stair? Try making these hidden shelves. These shelves fit snugly into the area under the stair. Thus, thorough measurements are necessary. Each compartment features drawer slides that allow you to access the shelves easily. Most importantly, these shelves do not take up more floor space and block foot traffic.
Other relevant ideas you can take to optimize the room under your stairs:
- No 1. Build shelving: You can build shelving that is combined with the ladder. Then, it will make it easier to store everything you wish to hide away from sight.
- No 2. Add a low shelf: For example, you can add a low shelf for holding books, movies, or toys. Another useful addition is under-cabinet lighting.
- No 3. Accessories like wicker baskets or driftwood lamps make great decorative elements for the corner space under your stairs.
- No 4. Stairway bookshelves: The best option is to give your kiddos access to their favorite bookshelves in your home library from the upstairs hallway.
- No 5. A simple coat rack can also be useful in this area. Also, you can attach a shelf to the wall above it.
- No 6. Turn this dead space into a home office or craft room with a whitewash look.
- No 7. Lastly, you can choose colorful accent walls that match the style of your stairway.
Relevant list:
10 Small Kitchen Under Stair Ideas
10 Under Stairs Living Room Ideas
6. A DIY Coffe Bar Transformation idea @thethompsonhaven
Having a spacious house means you can enjoy the privilege of having a coffee bar. You can create one in your kitchen despite the limited space. You need to find the perfect spot for your coffee bar.
An opening like this one would make a perfect coffee bar. You need to install wood planks to cover the walls. Then, make some shelves to store sugar, coffee, tea, and stuff.
Then, build the countertop that helps you concoct fine ingredients to make a cup of coffee. You will also need to create cabinet doors to conceal the area under the countertop. You can make it from furring strips and burlap.
5. The pallet storage system from the @Tastemade
Are you looking for an easy storage solution? This one would be merely a breeze.
You need to get wood pallets. Then, install a French cleat to hang the pallets. Next, screw your storage boxes to the wood pallets. You can also add as many shelves as possible if necessary.
Before you follow the idea, the ideal preparation is to make sure the pallets are dry and clean. You will also need to consider slat spacing when selecting the wood for your storage. Last but not least, you can use a square and pencil to draw out your design beforehand.
After you complete every direction in the video, you can use the pallet storage solution to organize everything you like. The idea is best to express your creative talent in woodworking, organize your clutter, and save the environment from wood waste.
4. The DIY Shelves for Small Space Idea @rachlvalente
A wall-mounted shelf has always been everyone’s go-to storage because it is straightforward and practical.
You can build a simple shelf like this one by screwing a wooden board into the wall. You will also need some L-brackets to support the shelf for peace of mind.
Detail instructions:
- You need two wood boards, a piece of ¾” plywood, and a ¼” hardboard.
- Cut the hardboard into the desired size. Then, screw the board to the plywood with the help of some wood screws.
- Make sure it is square as you can use your level to ensure it is properly aligned with each other (use clamps to keep everything in place).
- Now, you can attach your brackets by screwing them onto the shelf and into studs in the wall- make sure that everything is plumb for a nice fit on both sides of your shelf.
- Last but not least, you can attach your brackets by screwing them onto the shelf and into studs in the wall- make sure that everything is plumb for a nice fit on both sides of your shelf.
3. The DIY Kids Closet Organization
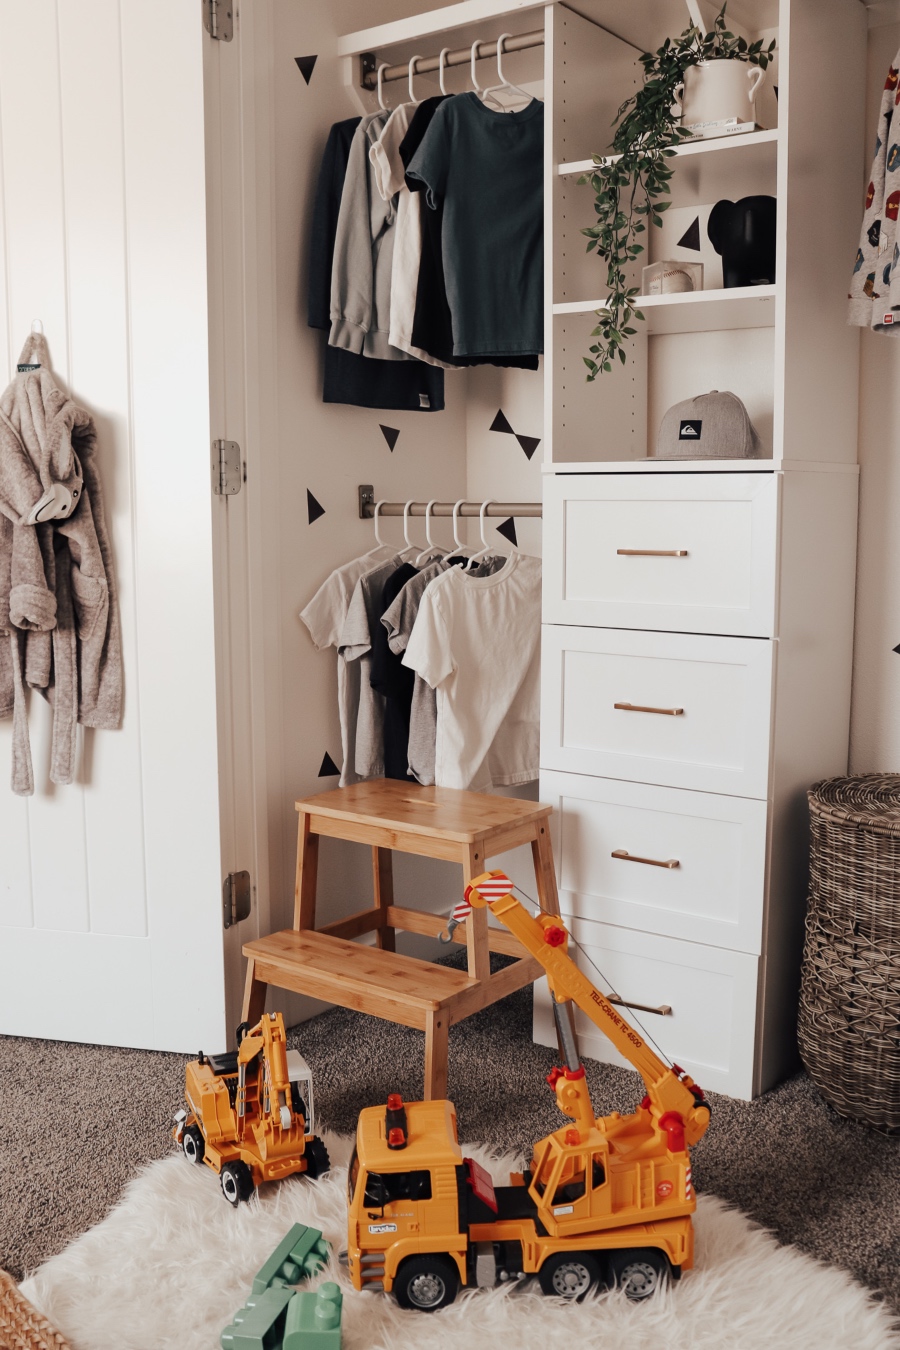
A shelf and a rod? It is definitely a waste of space. You can make it better by adding more rods and shoving built-in shelves and drawers in the middle of the closet. This way, you can have more space to hang your kid’s clothes and store the folded ones.
Try adding more fun by attaching wall decals inside the closet.
Detailed instructions to copy the idea:
- Start your project with some measuring.
- Now, you need to make one wooden frame for the closet organizer.
- Attach a rod to the wall on either side of the closet organizer with drywall screws.
- Add mesh hanging hooks on both sides of the rod and at least three rods. Then, attach more rods for extra storage space inside your closet organizer (use more hooks if needed).
- Add shelves and racks in other areas inside your closet organizer (add as many shelves and racks you want).
- Last but not least, install shelves, rods, and hooks in the closet according to the size of your storage.
2. A complete tutorial on how to build your own kitchen island from pallets @Globus-baumarkt.de
Wooden pallets are eminently versatile. They are not only suitable for craft but also for storage. You can even make a kitchen island from them.
To make a kitchen island, you will need two untreated euro pallets and three pieces of tabletops to create a countertop and two shelves. Consider installing casters to make it easier to move.
The preparation you must take to replicate the ideas start with wood pallets.
You are ready to go now,
- You can start assembling your wood palette
- First, cut a large rectangular hole at one of the corners of your pallet (approximately 25″). Then, insert the pallet into this hole and screw a wooden board into the frame, leaving space for your casters (approximately ¾”).
- Next, you need to use a ¾” x 4′ x 8′ piece of wood for the bottom shelf and 2.5″ x 3.5″ x 2′ for the top shelf.
- Drill four holes for the screws leaving enough space for your casters (approximately ¾”).
- After that, you can attach your tabletops to the wooden pallet with screws and wood glue. You will also need some wood stain to add more gloss and attractiveness to your kitchen island.
Lastly, Number 1. Storage that your phone will thank or your pug @Diyonabudgetofficial
The area behind a loveseat or classic couch is another awkward space. It leaves a tiny room, but you cannot store anything in it.
You might not find any shelves that can fit in. It does not mean you cannot have them, though.
You can turn this awkward space into a functional one by making these shelves. Since the area is quite awkward, you must adjust the size and shape.
Once you have made the shelves, you can drill a hole on top using a drill bit for a charger port.
To copy the idea, beyond following all instructions on the video, you need to consider these few details:
- Make sure you have the right-sized pallets for your shelves (the smaller the pallet, the lower and longer it will be).
- You need to place them to be stapled together horizontally and leave a little space to staple in vertically.
- Measure the length of the shelf you would like, and ensure it is wide enough to accommodate the items you want to store below it. Therefore, think about what items are going on the shelves above it!
- After that, add a little notch in one corner of each of your pallets, and then cut out any horizontal slats that reach down to this notch for strength.
- Then, you can make the shelf shorter by cutting off the part on which you will rest your items.
- Last but not least, staple together the two small and one larger pallet and then cover it with a few coats of paint to fit your décor and increase its life span.
Conclusions:
So organizing a cluttered space does not have to cost you a lot. You can do it yourself or with a little help from your family. These ideas do not require you to spend much, but they are the best ways to organize a cluttered space and make it look more organized and clean.
In the end, Dwelling in a small house is not always a dead end. Consider that unfortunate event as an excellent opportunity to be more creative and allow one of these 12 minimalist organizations and DIY project ideas for small spaces to boost your creativity and inspire your interior transformation to a newel level. Regardless of how small the transformation value would earn you
References:
12. Tiktok.com/@ocvintagecharm
11. Kippiathome.com, Housefulofhandmade.com
10. Theprojectlady.com
9. Makeit-loveit.com
8. Tiktok.com/@neatly.living
7. Tiktok.com/@pwd.joinery
6. Tiktok.com/@thethompsonhaven
5. Tastemade.com
4. Tiktok.com/@rachlvalente
3. Theblushhome.com
2. Globus-baumarkt.de
1. Tiktok.com/@diyonabudgetofficial