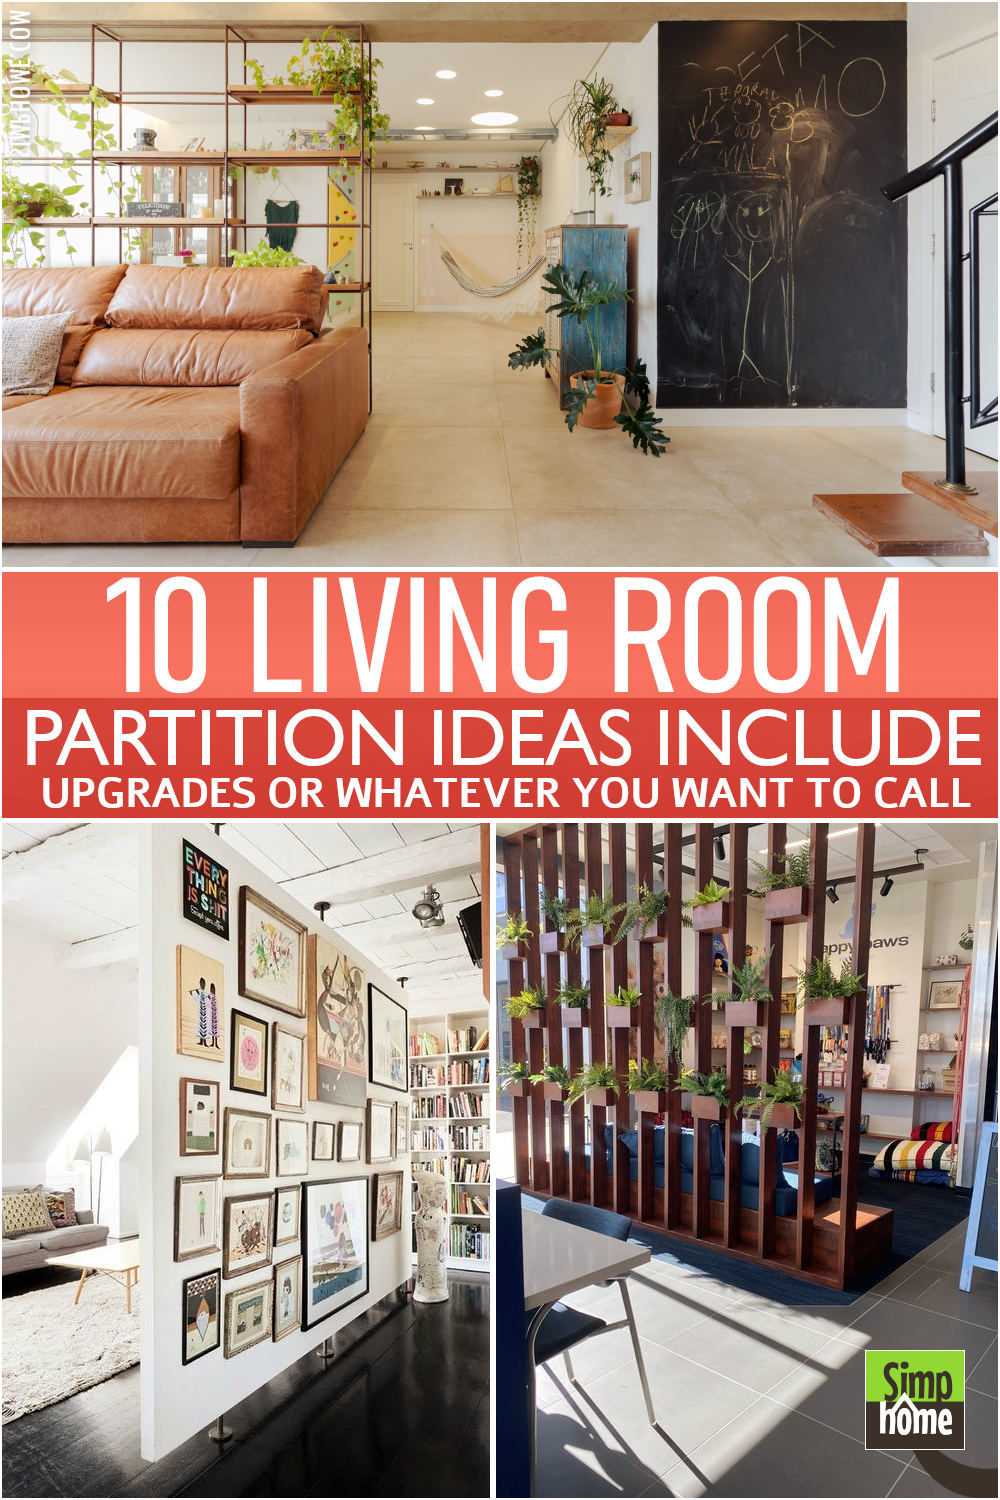
If you are looking to maximize your living space but want to feel closed in at the same time, you should consider having a living room partition installed.
Key Points:
- Speaking of a living room, some people tend to think they can put a couch in any space they want, but most are unaware that couches are uncomfortable sitting on for hours or even minutes without creating backaches and aches. So if you’re going to enjoy conversations with your guests in your living room, you need something comfortable while a seated long term like sofas or other furniture with arms.
- To split your living area, you don’t have to be an expert. With some old doors and a bit of your hard work, you can create a space for your kids to play in or for extra privacy.
- You only need two doors, one hinge, some notches, and hammers to put together the living room partition.
- Living room partitions can often double as curtains or blinds. The possibilities are endless, so you really can’t go wrong with this design.
- Your kids will love having their play area but still be able to see their parents when they need them.
- You can place a living room partition both in your living room and another area of your home.
- This design is versatile enough to be used (with a few alterations) in other home areas.
When a living room should occasionally double as a guest room, that is the time for you to outline your spaces for various functions. You might think of building a wall, which is not straightforward and practical. Thus, you can choose the easiest way, investing in a partition to provide extra privacy.
You may come across a lot of room dividers.
Before choosing one, let’s have a look at these 10 living room partition design ideas below to gain inspiration. As usual, Simphome presents you with the list.
🔊10 Living Room Partition Designs Video:
List Entries:
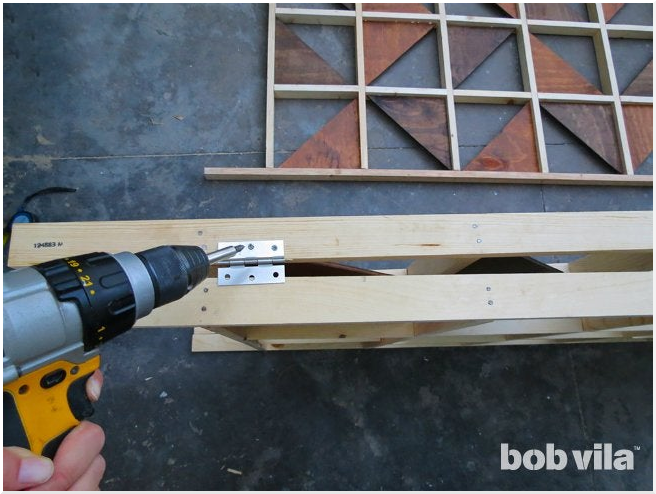
10. A Stunning Geometric Room Divider Idea
 It does not matter if you have an open-concept floor plan or even a small condo whose living room usually functions as a guestroom, too. For this reason, you will need a chic room partition.
Instead of purchasing a fancy room divider that may cost an arm and a leg, you can try making this stunning geometric partition.
Before making it, you need to prepare several materials, such as 6mm plywood, circular saw, handsaw, palm sander, wood stain, brush, lumber, hammer, nails, wood glue, varnish, hinge with screws, and a drill.
Later, perform the steps below:
- Use a circular saw to cut your 6mm-plywood board.
- Then, cut each across the middle from corner to corner, so you get the 54-right-angled triangles.
- Sand all the triangles’ sides with 120-grit paper. Wipe and stain them all.
- Start building the partition frame from the lumber by making 73-inch pieces, 7 32-inch pieces, and 12 10-inch pieces for each panel.
- Remove the 32-inch pieces, apply the wood glue to both ends and replace it between the posts,
- Once the basic frame of your panel is ready, add the smaller vertical divisions within each row.
- Fill in the rows with the 2, 4, and 6 with 2 10-inch dividers apiece and 10 inches apart.
- Fill the gaps with the stained triangles.
- Voila! You complete your panel.
- Don’t forget to connect the three panels with the hinges.
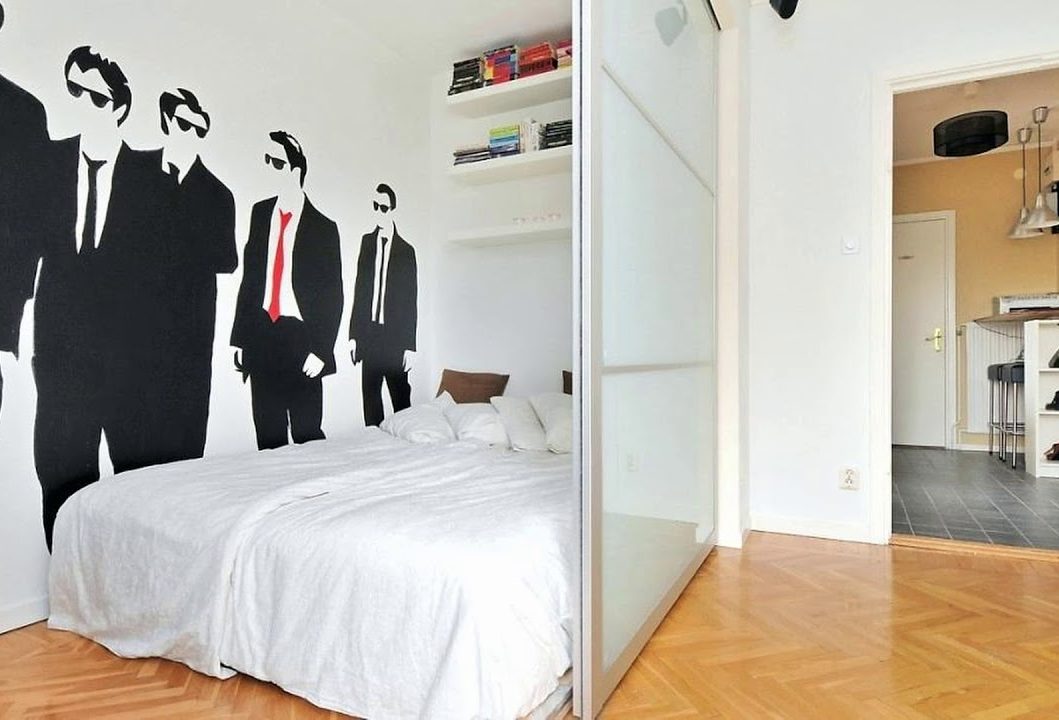
9. A Frosted Glass Wall Partition idea
 A frosted glass wall can make a great room divider. Not only does it provide more privacy, but it also creates some style.
This frosted glass door separates the living room from the additional bedroom. It is such a brilliant idea, isn’t it? Even better, you can make your own frosted glass wall yourself if you have only a tight budget. This idea requires one material only; PAX.
- You can begin with measuring your bed size and then mark off the new room so that the bed and some clothing space can fit snugly. This way, you can save the living room space as much as possible.
- Next, whip up 2 wooden frames and mount them to the ceiling, walls, and floor.
- After that, mount the PAX doors and tidy up the frame.
- For a more enchanted look, try adding a little artwork.
8. An Indoor Vertical Garden Partition Idea
 If you are keen on growing indoor plants, a vertical garden partition is an excellent idea to consider. This is the way you create an earthy environment around the living space.
First, set up the partition in an area to separate your living space. Add 3 to 4 pots of indoor plants on the shelf. You can also place some books, trinkets, and more to add contrasting elements between nature and the other materials. As simple as that!
To replicate the project, your instructions are:
- No 1. Prepare some materials and tools, including MDF boards, screws, wooden planks, glue, and outdoor fabric rolls.
- No 2. Cut the boards to create the partition frame.
- No 3. Mount the boards to the wall and make sure you leave space for your vertical garden.
- No 4. Attach the wooden planks to the walls with glue and mount them to a certain height so that you can grow some indoor plants on them.
- No 5. Cut the fabric rolls into a suitable size.
- No 6. Search for the right plants to fit your space and plant them accordingly for your vertical garden.
- No 7. Once the plants are well-grown and rooted, you can easily remove a portion of the fabric roll so that you can remove it. Otherwise, it will be difficult to remove all of it because it is attached with some screws to secure them properly.
- No 8. If needed, replace the black plastic sheet, place it on a flat surface, and properly place the plants.
- No 9. Finally, hang all your plants over the entire partition to give a stunning effect.
7. A Bookshelf Room Partition Idea
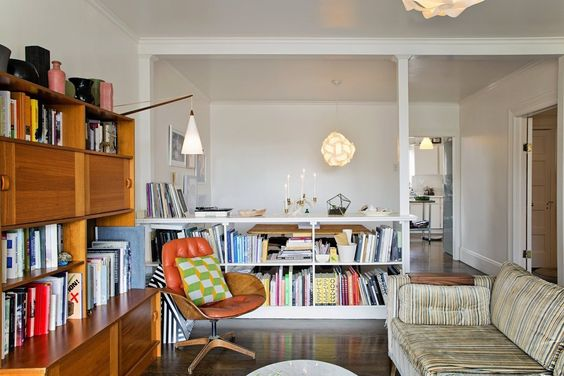 Do you love reading? So why don’t you bring them to your living room? A proper-designed bookshelf can be used as a living room partition, too. This way, you don’t have to choose the full-height option. Optimize the bookshelf storage, and you can store and display all your favorite books. Finally, a mini library is ready to broaden your horizon. More importantly, you can get your privacy.
To replicate the idea, first, you need to pay attention to your space dividing function. Then, prepare all the materials mentioned below:
- No 1. Prepare materials, including MDF boards, paint, and scrap wood pieces.
- No 2. Make the partition frame for two sides of your bookshelf.
- No 3. Cut the wood planks into 4 inches x 4″ pieces and screw them to both boards with screws.
- No 4. Apply the medium-thickness paint to both sides of the partition frame for a more realistic appearance, too.
- No 5. Place the bookshelf on the table.
- No 6. Label both sides of the bookshelf, carefully depending on how you want your books to appear.
- No 7. Now, it’s time to add some units of bookshelves with holes or glass frames to store your favorite book or collection of them.
6. A Large Panel Divider Idea For Art Display
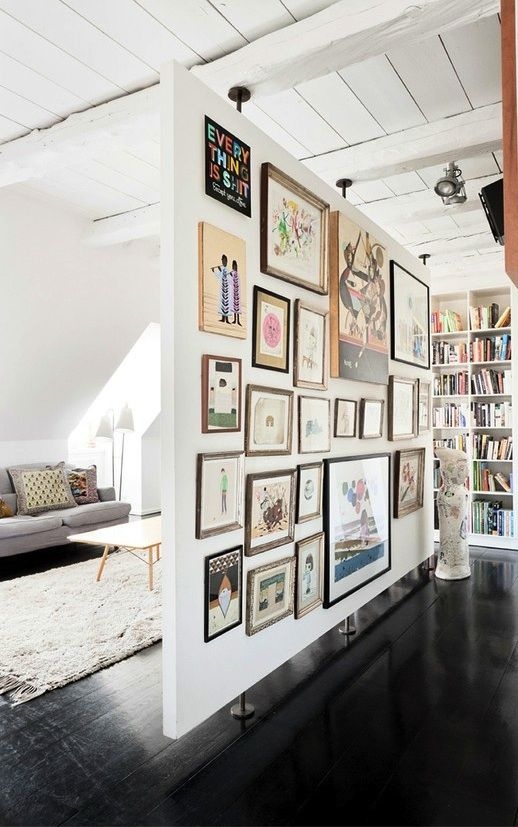
- You need to prepare the MDF panel as the wall panel, rust primer paste, and plastic handle.
- As a result, you can get a natural-looking wall that shows a beautiful artistic impression.
- The material is 4′ x 8′ in size and can be used in other areas as well, too.
- To begin with, add 2-inch nails to every side of the panel. Then, place the other nails in specific locations to create a square.
- After that, connect the panel of both sides with a plastic handle.
- If needed, apply one layer of rust primer on both sides and let it dry.
- Once it’s dry, sand the rough surface and wipe it clean with a damp cloth for a more natural look.
5. A Modern Storage Solution and partition idea
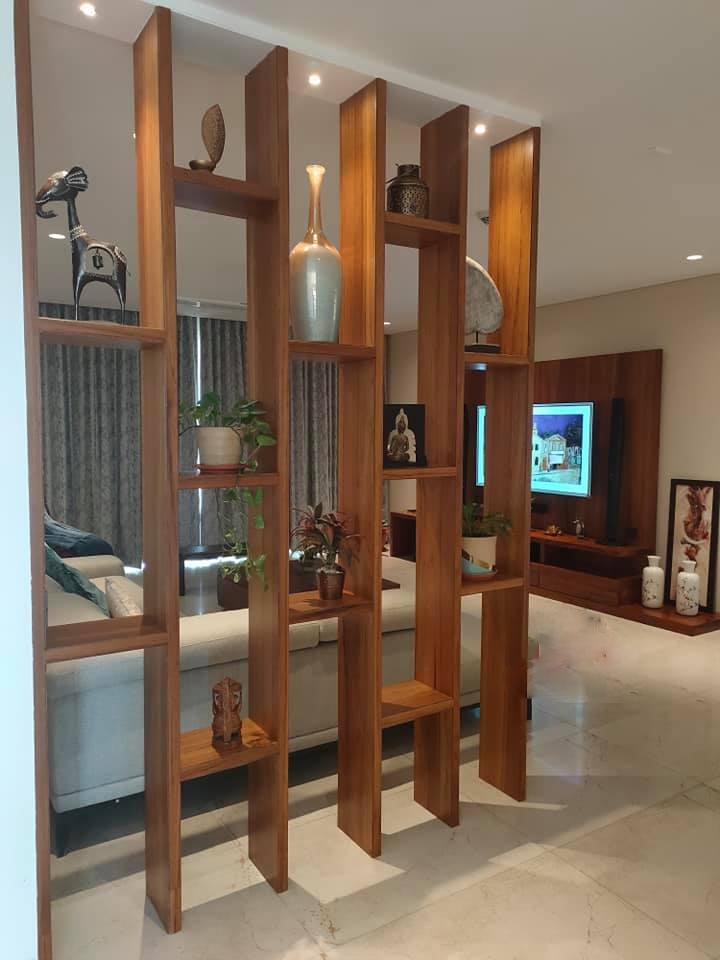 Modern houses usually feature an open floor plan. It means they lack walls, jumbling one room and another. If you think a permanent wall is not an option, you can try this multipurpose partition.
These shelves separate the living room and the adjacent room. They also provide ample space to store and display your family’s treasure.
Do not overload them, though. “Less is more” is always good in a modern home.
To replicate the sweet idea, first, you need to acquire some wooden materials and precise measurements.
You can use bookcases, metal hangers, or even plastic boxes for the partition itself.
An extra one as a door stopper is also good. You can simply nail a round bar to the bottom of the cabinet you prefer. The further detail is just to design and organize your books and knick-knacks. Customizing this ingenious storage solution is no rocket science.
For some choices you could try, you could:
- No 1. Start to collect some hardcover books of a similar size and find the perfect shelves for them. You have plenty of choices (see alternative solution No 2, below) and pretty good options to fill the shelves with your collection of books.
- No 2. You can create your custom-sized bookcase, or you may simply use ready-made ones. If you need some inspiration to make a custom bookcase or just buy one, IKEA is a pretty good source.
- No 3. Use the same principle to create your custom-sized hanger. This idea is the perfect solution if you need separate rooms, but cheap ready-made hangers are not available.
- No 4. You can use plastic boxes as a partition and make them look like bookcases with these tips:
First, paint the boxes with a flat white color. After they dry (yes, you should allow them to dry completely), attach these cute book labels on the visible partitions. They could be your child’s favorite books. - No 5. If you want to emphasize the partition, use some lace and a curtain for the shelves.
You can attach curtain hooks on partitions or just put a heavy object on top of them if you do not have any nearby nails.
The idea is the most important thing here, and the rest is up to you. Any modification in size and decor will work great if you keep this principle in mind. - No 6. You can go the cheap and simple way and create your closet, which will replace the need for a partition.
If you do not want to go through the hassle of making a custom-sized closet, you can simply buy ready-made ones with dividers. They are cheap and work perfectly fine.
4. A Colorful Glass Partition Idea
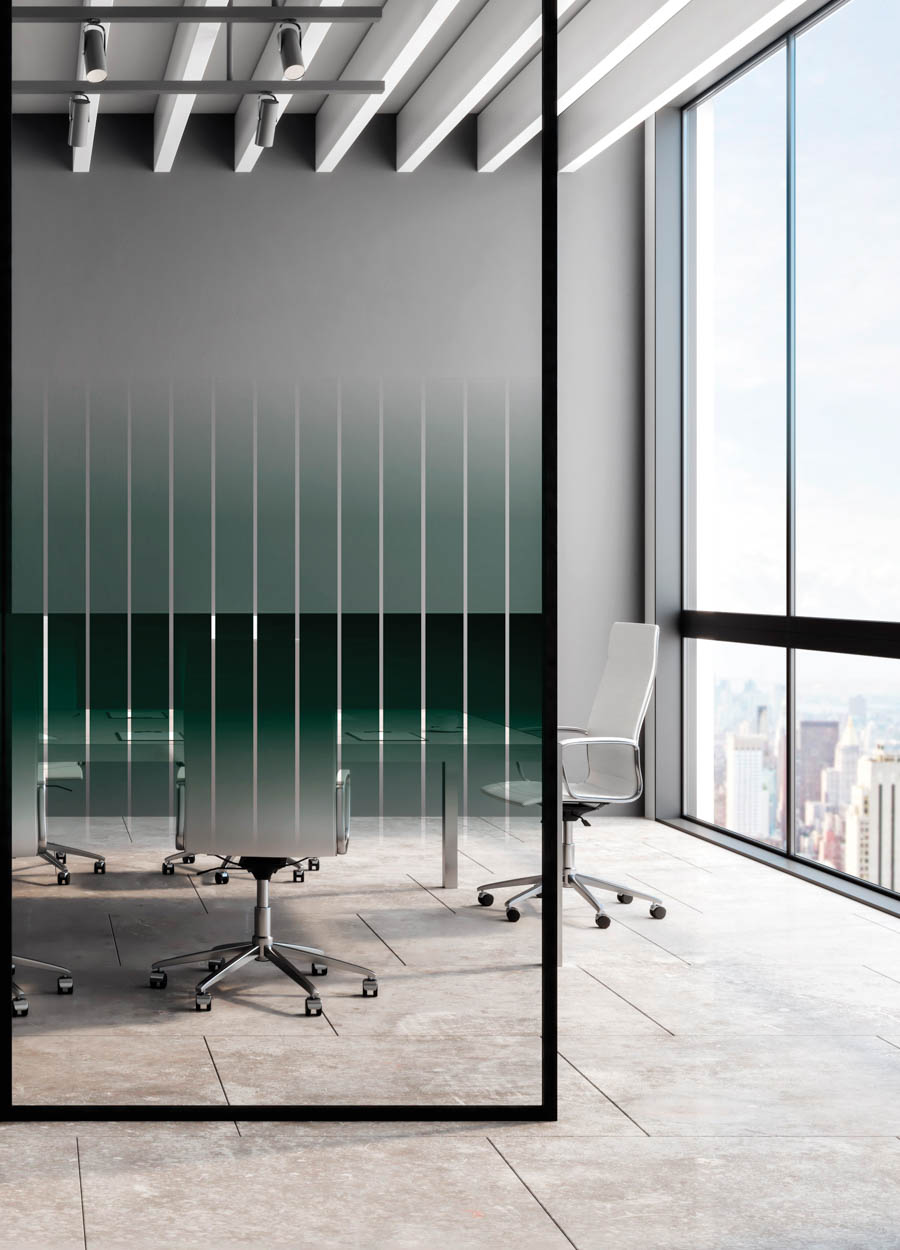
Another great idea to divide the large dining and living room space is a glass partition. This way, you can use either sliding or folding glass dividers.
Opt for a colorful glass partition if you want to bring a cheerful atmosphere into your house. It will surely intricate the patterns and designs to lighten up your space. Further, this option also serves visual access to the entire room.
3. A Stone Wall and Fireplace Partition Idea
 You cannot opt for a rustic room partition because you have a modern house design. Indeed, it is a good idea to choose a stone fireplace as an additional charm to your modern living room.
This stone fireplace will not only keep you warm during the chilling night but also separate the living room from the dining room. Opt for an electric fireplace to maintain the modern vibes because it can mimic the mesmerizing look of a wood-burning and coal-burning type without messing the living room with ash.
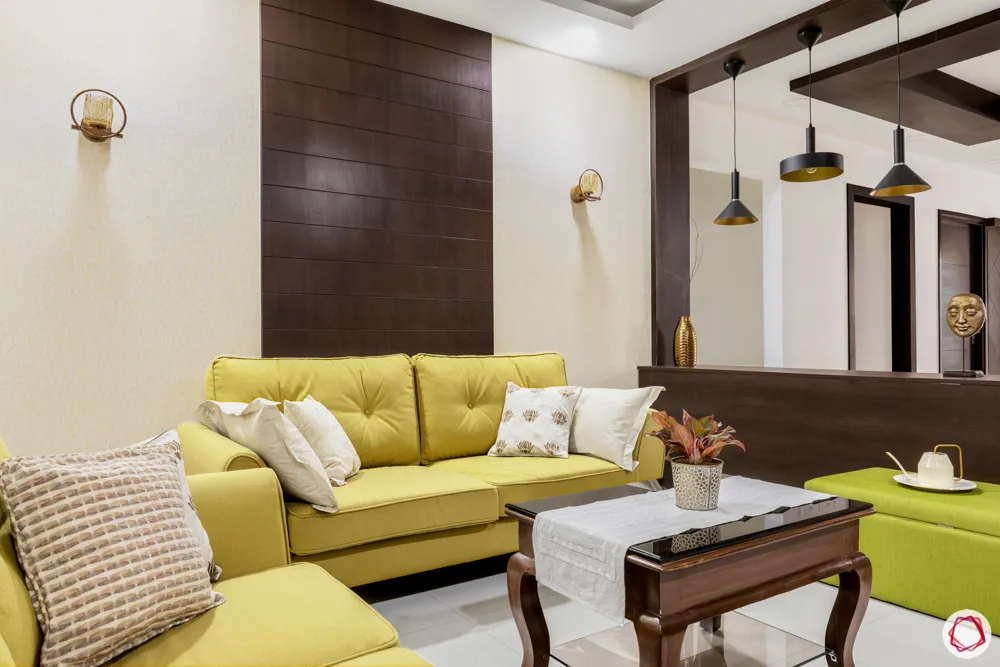
2. A Traditional Asian Room Divider Idea
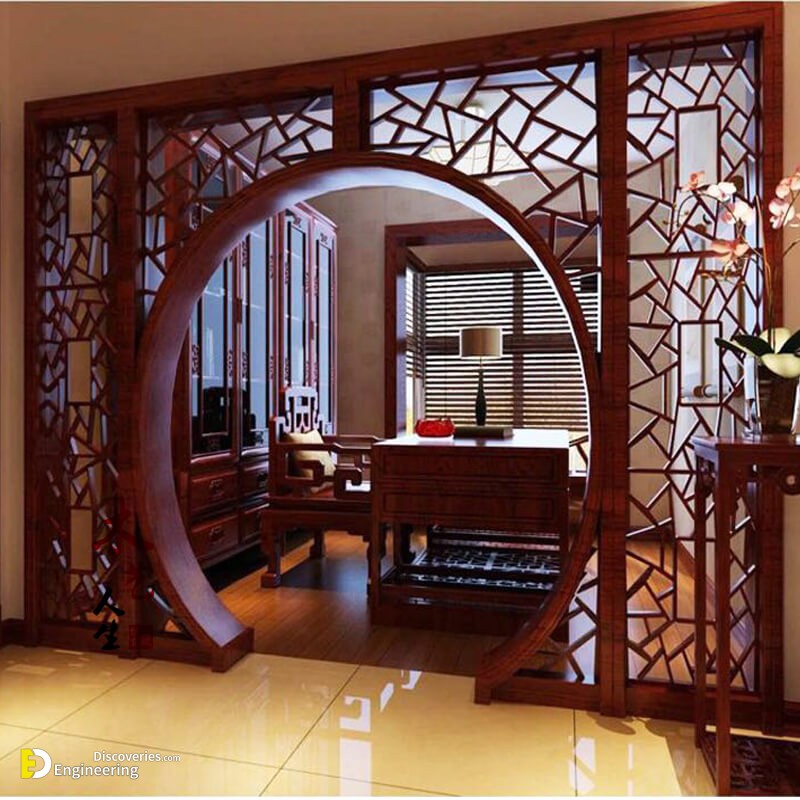 When stepping into this living room, you will notice the Asian vines instantly. The use of low-level furniture and dark-brown wooden trims have said it all.
The most conspicuous thing in this living room is the partition that separates the living room from the dining room. It does not block the view. In fact, it highlights the dining room instead. A traditional-looking ceiling fan and a low-level sofa successfully separate the dining room from the living room. The spacious living room has a wall to place a storage unit.
Replicating the project without a gifted hand and expertise is hardly possible; for that reason, one thing to consider before consider even trying the project is to consult an expert or an interior designer and then decide whether you can afford the cost of such a professional.
As extra choices (that will probably cost much less), you could:
- No 1. Using some types of doors. Examples: sliding or folding doors; Dutch doors and screens.
- No 2. Use a curtain or a cloth to be drawn when you need to have guests in your room.
- No 3. Use casual curtains instead of velvet ones, which will keep your living room light and open.
- No 4. If the price is high enough, you can always go for one more entrance to divide the living room from the dining room – like an extra door (since most modern homes have more than one entrance).
- No 5. If you still have a window to divide the rooms, use it. Make a curtain or blinds and hang them.
- No 6. Use screens.
- No 7. Use faux walls or partitions like plastic ones, often found in garages or sheds.
- No 8. Use false wall panels (wooden, decals, etc.) to make the ‘wall’ you need.
- No 9. Use adhesive security film to stick these decorative walls.
- No 10. Use a wallpaper technique; you can create a curved wall using the pattern of an arch or a straight line using it horizontally.
A Window and Skylight Can give you a new Partition Idea too
A window (or skylight) is a great way to separate spaces from one another, but never take this decision lightly because you are responsible for the rest of your house. For instance, if you have a window or skylight on your roof-top, a ceiling or roof leak may damage your walls and other things.
If you are going to put in a window, then make sure it doesn’t go all the way up to the ceiling as the low windows do. It should be just above it.
If you don’t have enough room or don’t like how they look, use a window blind to separate a space. You can use this idea to make a nice frame for your windows or skylights.
You could even purchase some translucent wall panels and work them around the window to get this effect. It looks great, but it might create privacy problems hanging low like a tent over the bed or couch.
Detailed instructions:
- No 1. Start the project with the necessary measurements.
- No 2. If you were thinking of a wall-to-wall partition, then the good idea is to start with the length and height of the window or skylight first and then work out from there.
- No 3. Decide how much room you will have for the actual walling material – so that you can choose from either prefabricated or manufactured options.
- No 4. If you want to go with prefabricated or manufactured options, then pick your wall’s type of material and width.
- No 5. If you are going to make it yourself, then start by cutting and installing a temporary wall that is just high enough to figure out where to put the ‘art’ elements like the shelves and plant boxes.
- No 6. Cut and prepare the wall panels.
- No 7. Mark the wall with a pencil to put the recessed lighting, low-voltage wiring, and mounting blocks.
- No 8. Use an electronic stud finder to locate your plumbing pipes and lines, ductwork and wires, insulation, etc., so you won’t hit them while you put in the actual partition.
- No 9. Put in the panels.
- No 10. You can use a level to ensure that you are not leaving any wiggle room on either side of the panel.
The design part here is deciding what your partitions, wall coverings, or curtains should look like and working with the layout of your space to allure your visitors and make your interior feel more spacious homey.
1. A Crockery Unit Partition Idea
 If you seek a budget-friendly room divider, the crockery unit partition will be your safe bet. The designer uses a laminate crockery unit from the Livespace catalog in this living room. To help separate the spaces, add a few statement pendant lights in the area.
To follow the project, first, you need to gather your measurements, materials, and tools. To tweak it a bit, preparations you need to collect include a piano hinge, wood screws, wood-cutting blade, tape measure and pencil, utility knife, glue gun, sandpaper. Other than instructions you can find after following the reference link, you need to look for other well-written room divider design ideas to guide you.
Improvement instructions:
- 1. Start the project by preparing the crockery cabinet. Use sandpaper to smooth out the surfaces with rough edges. Then, spraypaint it in any color of your choice, but ensure that it will blend in with your room or home interior design.
- 2. Next, you need to sand down the existing wood-cutting blade and use another one with a sharp edge. Cut sections from plywood 5cm from the back of the cabinet to serve as structural support for the glass doors.
- 3. After the glass doors are in place, use a pencil and a tape measure to mark the position of the piano hinge. Remember that the piano hinge should hang on both the outside and inside your cabinet. Use a utility knife to mark where you will drill holes for wood screws to fix the hinge.
- 4. Add the partitions with the lights added to them. You can use any light fixture you want as long as it blends in with your home or room interior design or theme.
Conclusion:
There are always great ways to play with the open-concept floor plan. Start your discovery with one of these ten living room partition designs, and then experiment with different designs suited to your home. Your limit is only your imagination, so try to develop better ones than these. Be happy you have options out there, and don’t be afraid to make changes depending on the needs of your room since you never know when the next great design idea will come along!
Finally, remember to keep safety in mind while doing the project.
References:
10. Bobvila.com
9. Ikeahackers.net
8. Recommend. my
7. Recommend. my
6. Home-designing.com
5. Housing.com
4. Housing.com
3. Housing.com
2. Housing.com
1. Livspace.com