Working from home has become the new normal for many people, and the living room is often the most versatile space for setting up a home office. However, creating a functional and stylish workspace in a shared living area can be challenging. However, with a few simple tips and tricks featured in the resource, you can transform your living room into a comfortable and productive home office.
The Importance of Ergonomics
When designing your living room home office, ergonomics should be at the top of your priority list. A poorly designed workspace can lead to discomfort, pain, and decreased productivity. Make sure to invest in a comfortable chair with good lumbar support and adjust the height of your desk to ensure that your computer screen is at eye level. This will reduce the strain on your neck and eyes and help prevent back pain.
Creating a Focal Point
To create a defined workspace in your living room, you need to establish a focal point. This could be a desk, a bookshelf, or even a large wall unit. By creating a focal point, you’ll be able to separate the home office area from the rest of the living room, making it easier to focus on work.
Maximizing Storage Space
A cluttered workspace can be a major distraction. To keep your home office organized, consider incorporating storage solutions such as floating shelves or a combination of drawers and open shelving. This will help you keep your desk clear and make it easier to find what you need when you need it.
Making the Most of Natural Light
Natural light is essential for a productive workspace. If possible, position your home office near a window or skylight to take advantage of natural light. If you’re unable to do so, consider investing in a full-spectrum light to mimic the benefits of natural light and boost your productivity.
Adding Personal Touches
Finally, don’t forget to add personal touches to your living room home office. Whether it’s a vase of fresh flowers, a statement light fixture, or a gallery wall of family photos, these small details will make your workspace more inviting and help you feel more at home.
With that in mind, here are,
10 Living Room Home Office Ideas
You can adopt to improve your working space today
A workstation integrated with the living room is the best strategy for those working remotely. Again, it is perfect for a small house with limited space. Without having to do a complete renovation, you only need to add a few multifunctional attributes to that space, and everything will be perfectly furnished.
Or, do some DIY projects of room dividers to separate your working area from the family room to create one you love.
Think about where you can work with total concentration and then relax on the living room couch after doing everything. But don’t fret. We have compiled ten living room home-office ideas you can adopt here!
10 Living Room Home Office Video

10. A Desk for Multiple Users using IKEA Alex Drawers
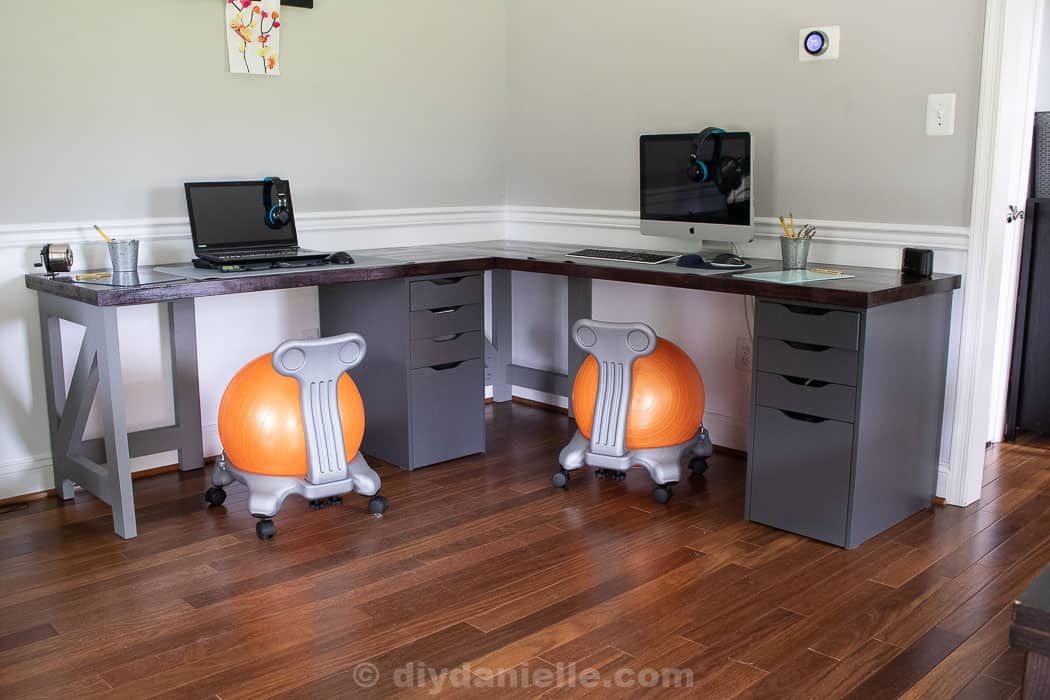 Elevate your IKEA Alex Drawers into the corner desk for two as you desire. This option will be beneficial for saving your budget and space in your living room.
Position your two IKEA Alex drawers close to the corner of your room. Now, you can use wood butcher blocks for the desk. One butcher block is 58″, and the other is 83″.
- Then attach them using flat braces resembling the L shape.
- Make a 2″ hole cut on the back of the desk, then sand it through to smoothen the edges and surface.
- Next, apply stain and Poly as many layers as you want on the bottom and top sides.
- Place the butcher block on top of the Alex drawers, and add two legs of 2x4s 27.5″ tall. Ensure the legs have vertical, horizontal, and diagonal support to reinforce your corner desk.
- Attach the butcher block desk to the legs using 1.5″ corner braces.
- Meanwhile, use large command strips to attach them to the drawer’s countertop.
9. A DIY Small Floating Corner Desk Idea
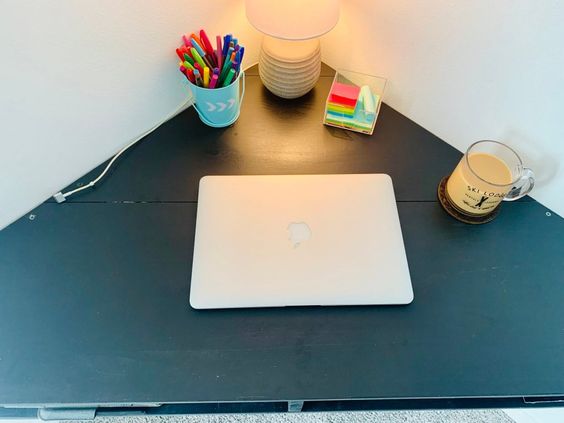 A corner desk of this kind is perfect for a tiny living room. And it won’t require many supplies except for a few pieces of 1″x6″x10′ wood plank. Cut the board into two parts of 40″, then make a 45-degree angle cut on each end. Ensure to keep the bottom side 40″.
Attach the two boards with screws to form a triangular desk frame with an angle of 90 degrees. Place the frame on top of the three 1″x12″x8′ boards that have been placed aligned. Trace the edge, mark the line, then cut the boards according to the size.
You will use them as the top surface of the desk. Do this step again to create the boards for the bottom side. Next, make a 24″ piece as middle support between the desk’s bottom and top surface.
Assemble the bottom side boards to the frame using screws, proceed with installing the middle support, and end with attaching the desk’s top surface boards. Stain and paint every part of the color you want. After that, install it on the corner wall with the height you need.
8. Create A Billy Room Divider for your Home Office
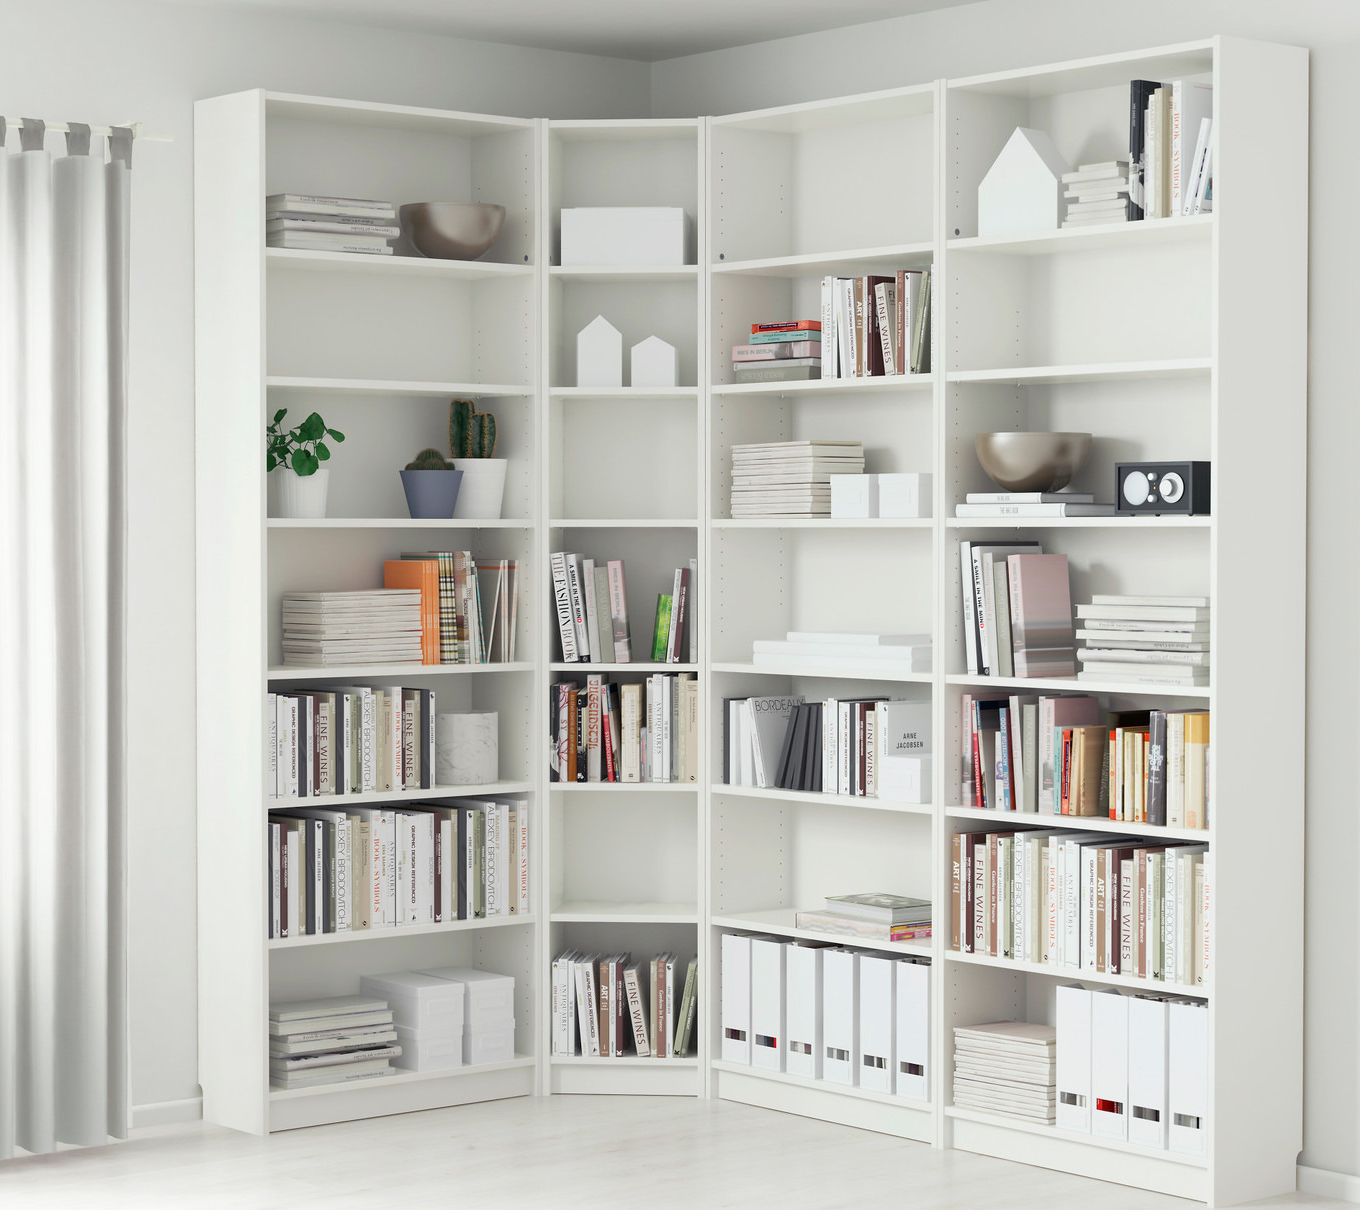 Suppose you want a little privacy to keep you out of distractions. In that case, you can build a partition that separates your workstation from the living room. Here, the hidden Billy room is effortless to create.
Assemble 3 Billy bookcases of 80 cm wide with 1 Billy bookcase of 40 cm wide. Position them to form an enclosure with a customizable size according to the workspace you want.
Make sure the bookcase’s front side faces the living room while the back faces the working space as its faux wall. Set some parts of the bookcase without backer boards, so it can be a “window” to provide ventilation for the office room.
Remember to create the nook for the printer and other working stuff too. After that, cover the back side of the bookcase with MDF, then wallpaper them. Install baseboards, add molding, and trim the exposed edges to create a perfect built-in look.
Another Billy bookcase project is here with a more open office divider and extra storage. The first step is to attach two bookcases using screws at the front part and cover the back side of the bookcase using Plywood board.
- Next, attach a 1″x3″ board at the bottom side between the bookcase and the plywood to strengthen the structure. Place the bookcase facing the office spot so that you have extra storage.
- Prime the plywood surface. And once it is dry, stick the wallpaper to give it a pleasant and attractive texture. Remember to make a hole for extension cords. Place it anywhere according to the needs.
- Use 1″x4″ wood to create the frame for the top shelves.
- Cut the wood into several parts you need. Measure them as 86″ tall and 63″ wide, assemble every aspect using screws, and then paint.
- In the last step, install the top shelves to the base bookcase and screw on the side. You can also add brackets attached to the wall for extra support.
- For the final touch, hang the driftwood in the center of the top shelves and two-sided frames as decoration (Watch the video instruction here).
6. Organize Your Printer and Cricut Machine Better with This DIY Printer Stand Idea
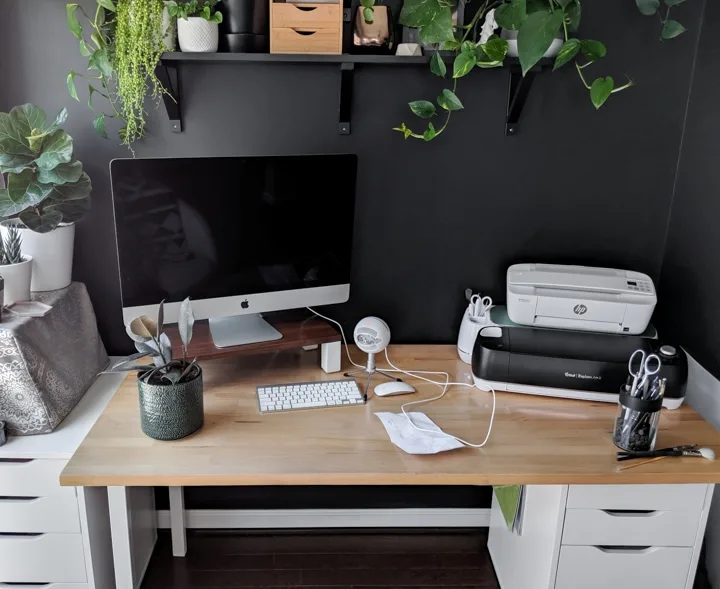
Maximize vertical space on your desk with a printer stand and storage for your Cricut machine. Pick a 1″x8″ poplar board and cut it into two pieces of 26 1/2″ each. Use this material for the shelf pieces.
Light sand and then add three layers of polyurethane to give it an exciting finished look.
Next, create the legs using 2″x2″ pine boards cut into eight pieces of 6 1/2″ each.
Sand, then spray paint with your preferred color and let them dry. Use wood glue and a nail gun to assemble the shelf pieces with the legs. Ensure to set it vertically.
Once everything is finished, you can place the Cricut machine on the bottom part, the printer on the middle shelf, and some greenery on the top as the decorative ornaments.
5. Make Your own DIY File Organizer Cheaply
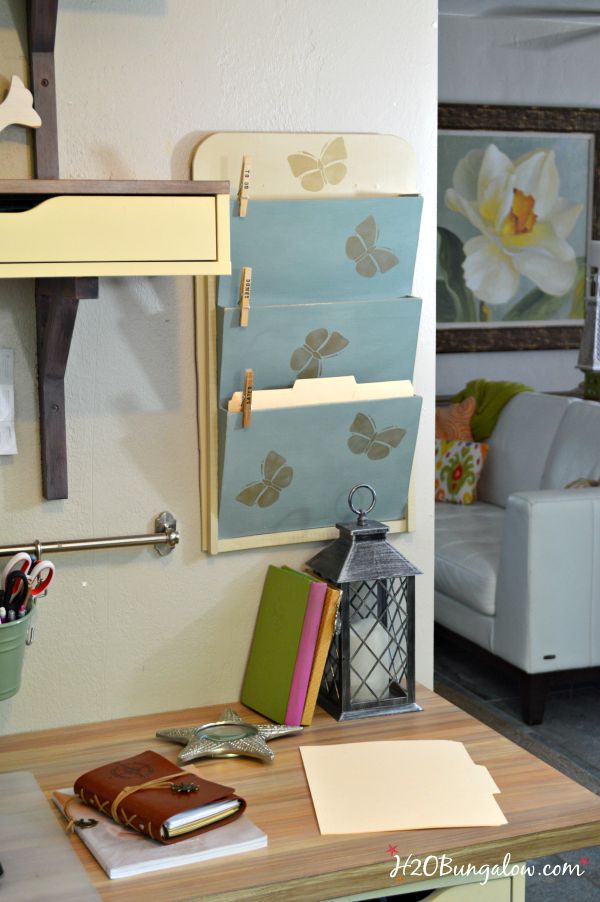
A file holder is always necessary for a home office, especially the hanging one. Thus, you can save desk space and use every part of the wall nicely.
- First, you must print out the template for the side support, trace it on a wooden board, then cut it using a jigsaw. Make two for this piece.
- Sand every edge as well as the surface to make everything even.
- Cut two 13″x9 1/4″ sheets for the front of the file pocket and one 13″x8 1/4″ sheet for the lower file pocket front. Remember to cut the backboard wider than the pocket parts.
- Paint everything.
- After that, glue the side trims to the side support and let it dry for hours.
- Next, glue the file holder fronts to the side supports. Start from the center one, the top part, then end with the lower pocket front.
- Finally, install the hanging hardware and the last trim for the bottom front of the file holder.
4. A Rolling Printer Cart Project Idea
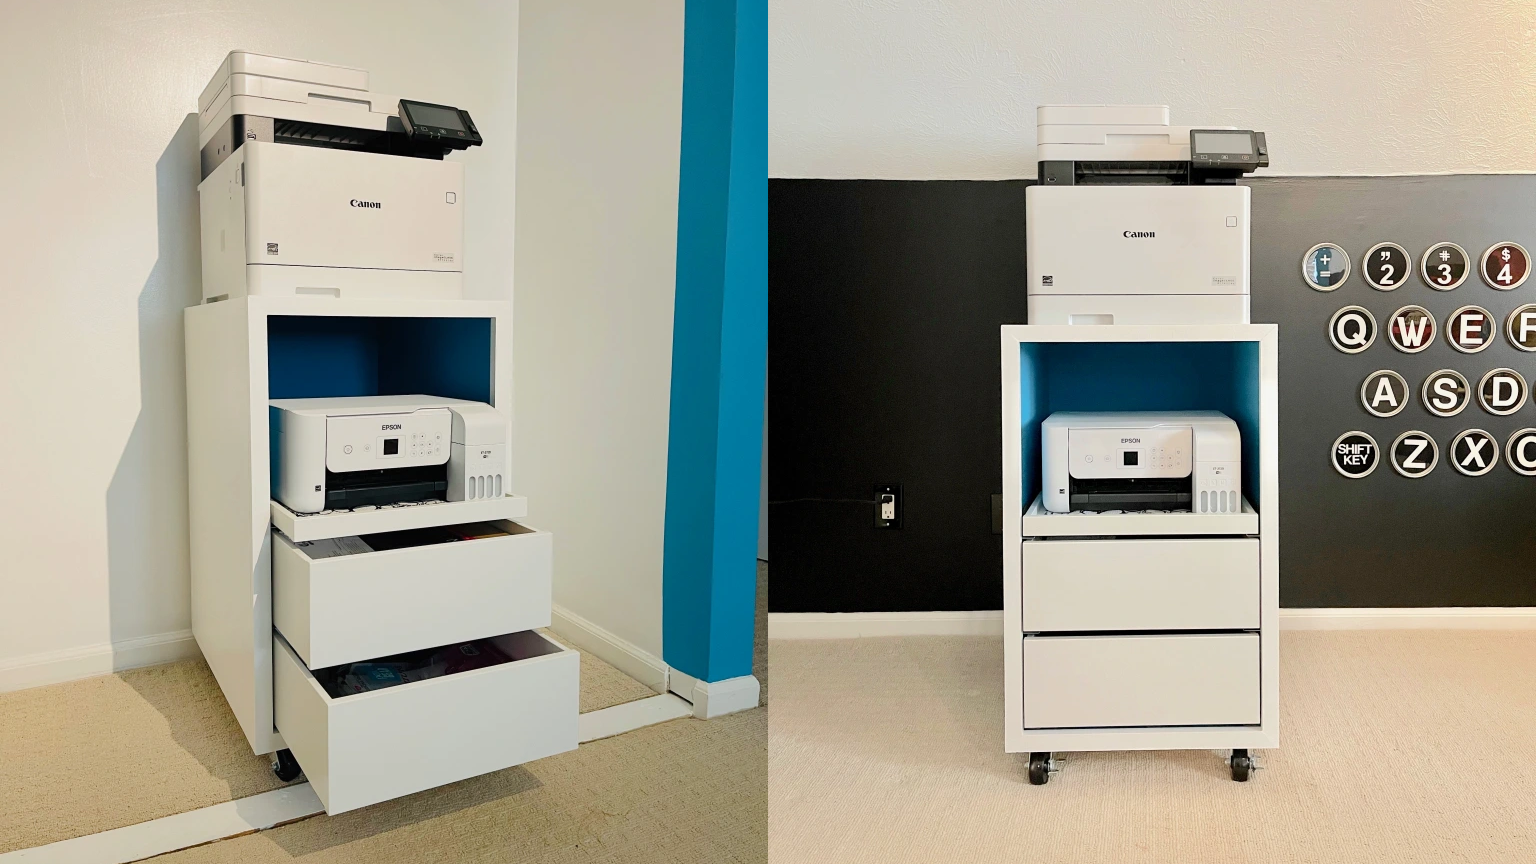 It is possible to build your printer cart yourself. The primary material you need is five pieces of plywood cut into a precise square.
- Make sure you have two boards of 23″x19 5/8″ for the top and bottom structure, two boards of 23″x29 3/4″ for the side supports, and one panel of 18 7/8″x29″ for the rear of the printer cart.
- Sand them evenly.
- Assemble the five pieces using wood glue to form a carcass for the printer. Add trims to the edge for a nice finished look.
- Drill the pilot holes for the drawers, sliding trays, and wheels. Ensure you have a nice spacing between the drawers. It’s better to use IKEA drawers and sliding trays for time and cost efficiency.
- Sand the whole unit and then paint it white for a minimalistic look.
- Finally, install the hardware carefully.
3. Turn IKEA Stuva into a Printer and Cardstock Organizer
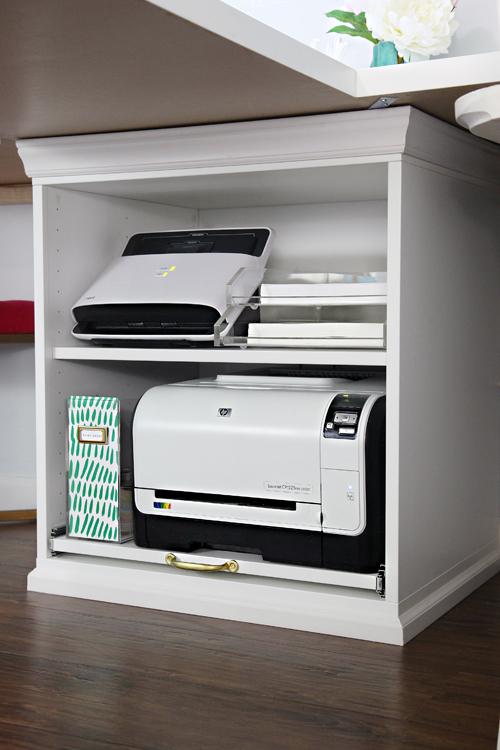 The IKEA Stuva box with pull-out shelves is the most convenient in your living room office. It is perfect for storing your printer unit as well as the cardstock.
- With box dimensions of 19 1/4″ deep x 23 5/8″ wide x 25 1/4″ tall, you only need to attach 18″ heavy-duty rails to create a sliding tray for your printer unit.
- Attach the glides to the inside part of the lower cabinet using screws.
- Then measure the width of the glides and adjust the shelf size accordingly.
- Pre-drill holes on the shelf sides, then install the rails using screws. Ensure the shelf is sturdy enough to be paired with the glides.
- Next, snap the rail to the glides. Now you have a Stuva box with a pull-out shelf. Make it easy to reach by adding a drawer pull in the shelf front part.
Also, remember to make a hole at the backside for the printer and scanner cord extension. You can install molding on the top and bottom gaps for extra furnishing to make it look naturally built in.
2. A Simple Computer Desk Project Idea
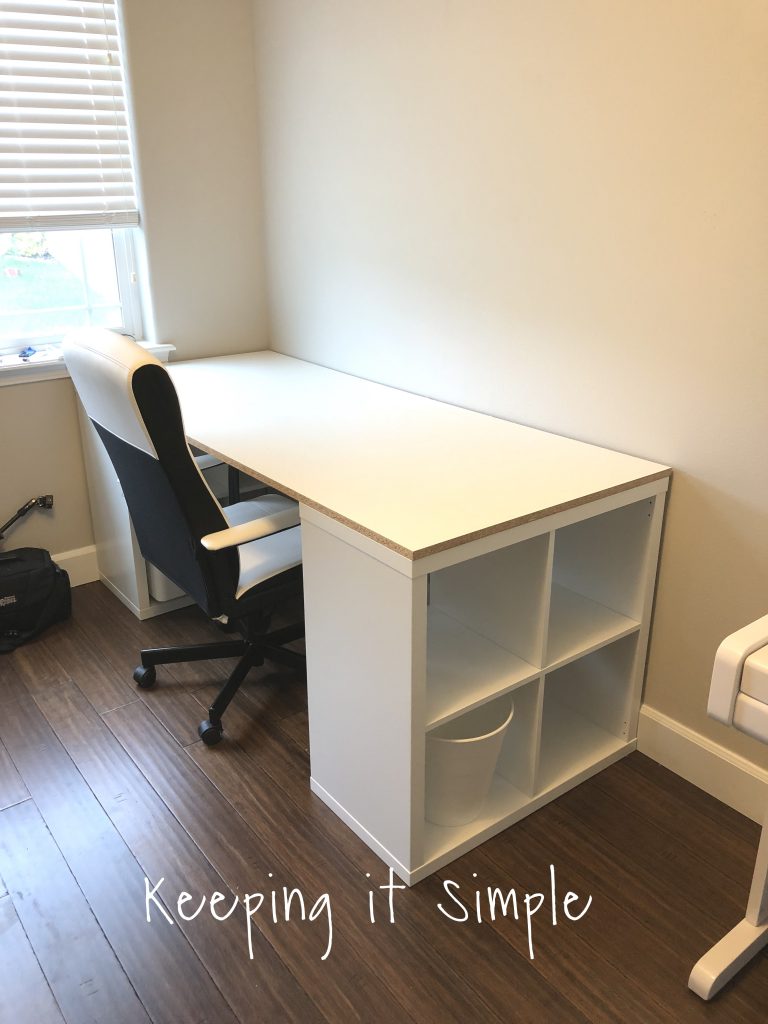 Make a computer desk by yourself, and it’s super fun and simple. Make the most of the two IKEA Kallax Shelves you have. Assemble it according to the instructions, then make them as support on both sides of your computer desk.
- For the top of the desk, you can use melamine cut according to your needs. The default is 30 1/4″ deep and then 72″ wide, but you can make it bigger or smaller.
- Place the melamine desk on the Kallax shelves, and attach them using liquid nails. Put some heavy things on top of the desk, press it down, and let it dry for hours.
- Add MDF trim around the desk edges, then paint them for a nice finished look.
- Lastly, put bins for extra storage on your Kallax shelves.
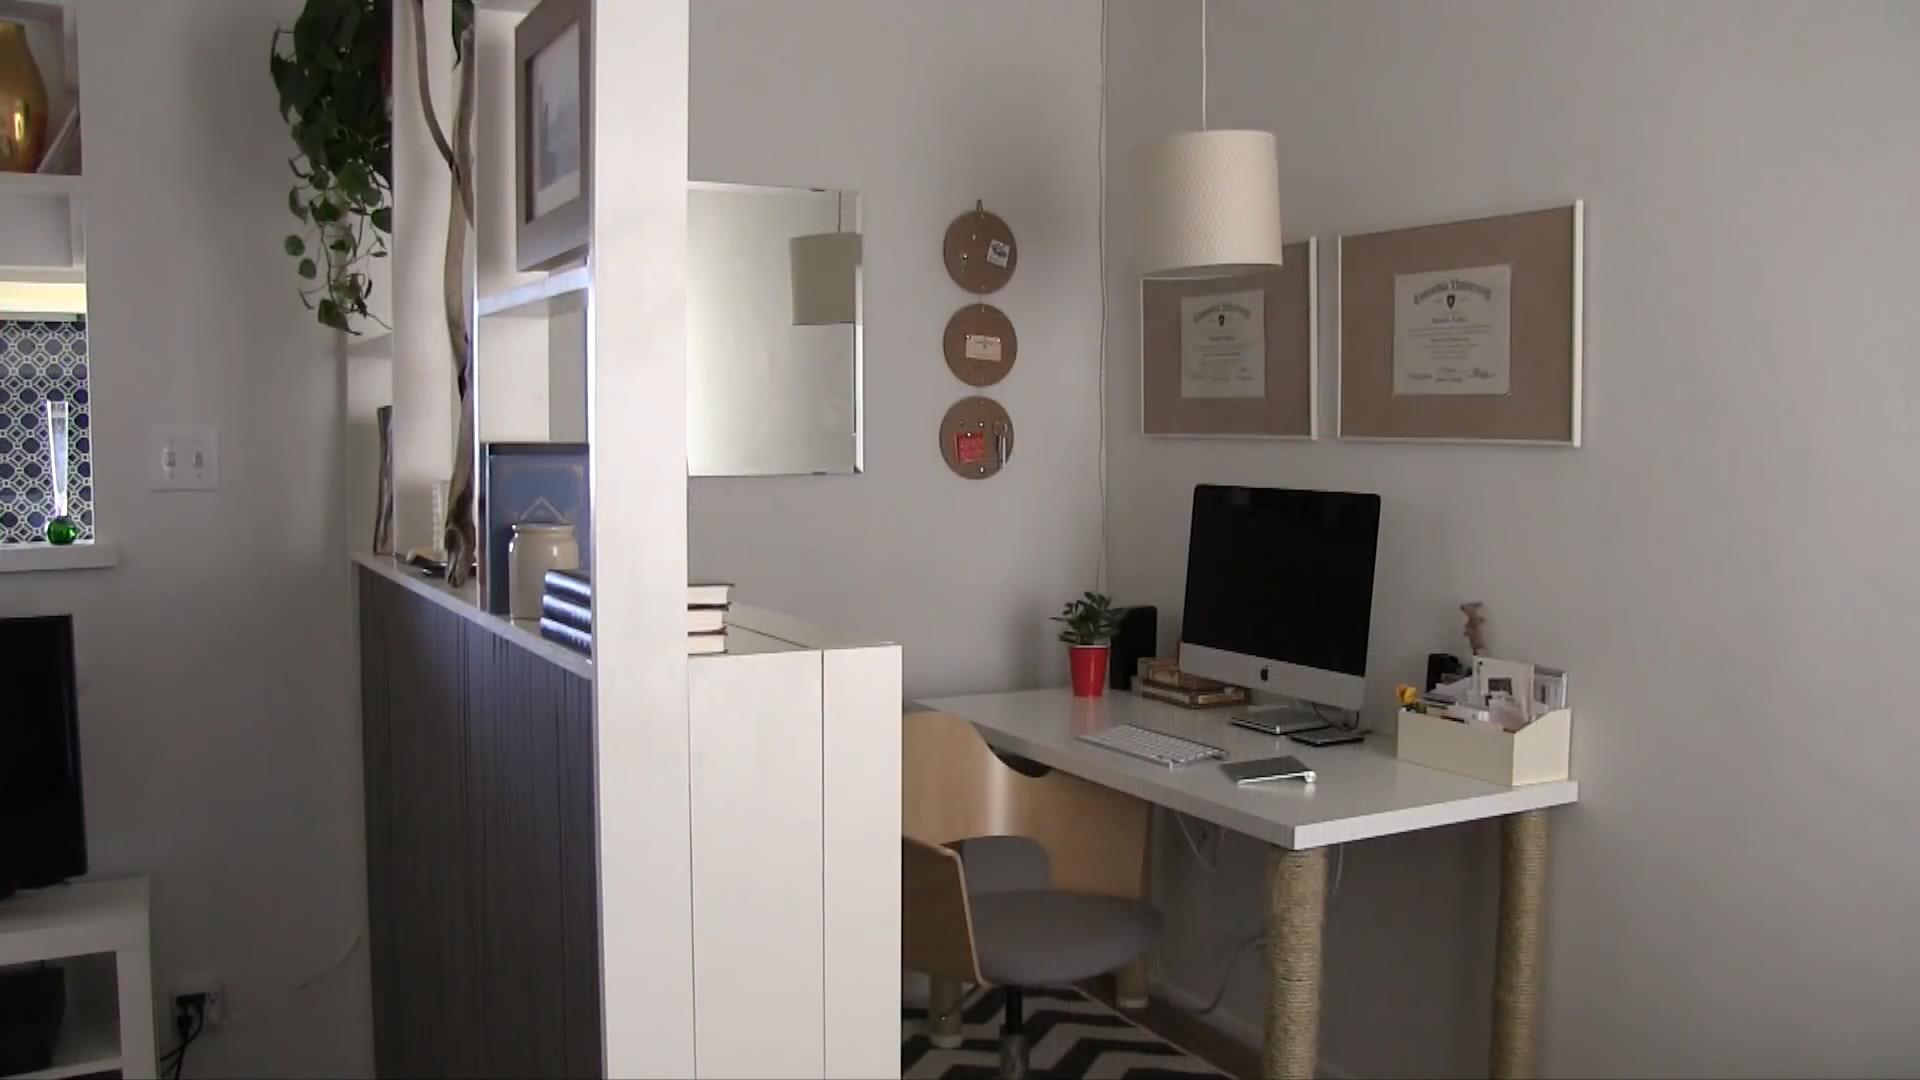
A Wall With a Built-in Desk Idea
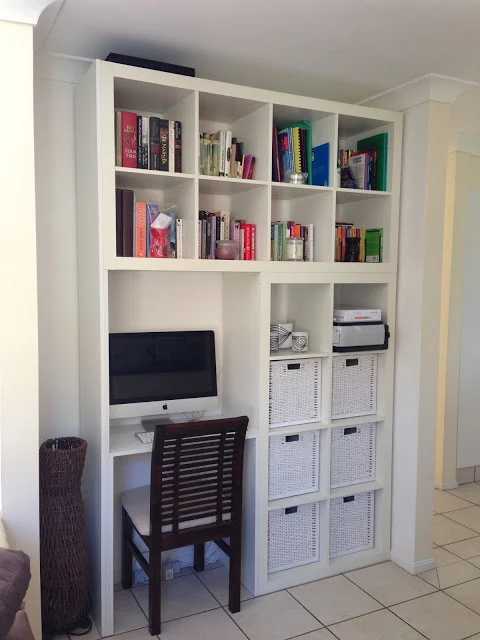 The last option, make all your working stuff within reach with this wall-built-in desk. Everything comes from two Expedit bookcases and some sheets of melamine.
- Arrange the bookcases to form the letter L, attaching each part with brackets. Be careful when doing this step.
- Cut the melamine into six parts with the size according to your needs.
- After that, arrange the first three melamine pieces to form an outer frame which will later become support on one side of your bookcase.
- Stand up the bookcase, move it close to the wall, and hold it down for a while.
- Slide the well-assembled melamine sheets close to the bookcase unit, then attach them to the upper bookcase using screws and nails.
- Install other remaining melamine as extra support and desk. Be sure to strengthen nails and screws to keep your unit in place. You can add more brackets on the top of the bookcase and attach them to the wall for more security.
So, those were ten living room home-office ideas that are practical and easy for you to duplicate. Immediately find your favorite and create a comfortable one!
Conclusion:
Bring the comfort of your living room to your workstation by integrating the two spaces. It’s a smart solution for those working from home, especially for those with limited space. No need for a major renovation; just add a few multifunctional elements to the room, and you’re all set!
With these simple tips and tricks, you can create a functional and stylish living room home office that maximizes your space and boosts your productivity. With the right decision, time allocation, and execution, You can turn your living room into a comfortable and productive workspace by incorporating ergonomics, creating a focal point, maximizing storage space, making the most of natural light, and adding personal touches.
References:
10. Diydanielle.com
9. Harvestedhome.co
8. Ikeahackers.net
7. Engineeryourspace.com
6. Bybrittanygoldwyn.com
5. H2obungalow.com
4. Instructables.com, Justmightdiy.com
3. Iheartorganizing.com
2. Keepingitsimplecrafts.com
1. Ikeahackers.net