Key Points:
#1: Start with a deep, large basket for all of your cleaning supplies
At first, it might be hard to get comfortable with using the basket in the laundry room because it looks so different from the baskets you have been using before. However, we should not let these differences scare us away from using them! One thing that you can do to make it feel more like an organized tool for your laundry room is to use a large mesh container.
#2: Put small baskets or boxes on the floor for your detergent, bleach, and other items
Once you get the hang of it, you can start putting these items on the ground for easy access. Just make sure that these are not too close to the washing machine so that they do not get broken.
#3: Trays and bins for all of your other cleaning supplies and miscellaneous items
With things like paper towels, dish soap, dryer sheets, toilet bowl cleaner, pet shampoo, etc., there will be so many different containers that you can put in there.
#4: Set up a pile of wood to hold all of your laundry detergent bottles
You do not want to mix up your detergent brands and colors, so you should be very specific with what you put where. However, if the top part of your basket is full and the bottom part is empty, then you may add a wooden box (or something similar) on the floor to hold used detergent bottles.
#5: Use an old bookshelf for all of your cleaning supplies as well as other miscellaneous items
Another type of container that we can use is a bookshelf. You can use this for smaller items you do not need to go on top of the shelf.
#6: Set up a cart to hold all of your cleaning supplies and other miscellaneous items
You can also use the cart to hold a laundry hamper underneath. Then, once you are done folding and putting away your laundry, you can place this basket at the bottom.
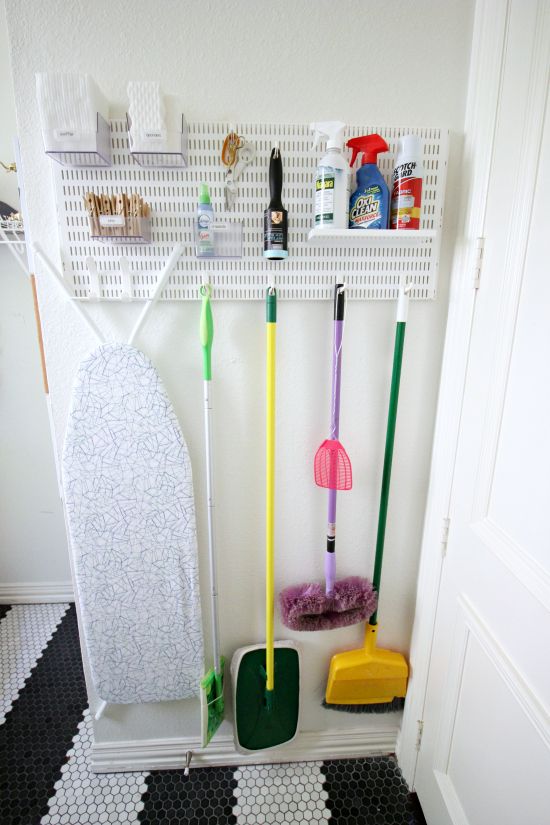
#7: Add shelving units as well as hooks/shelves on the wall by your washer and dryer
Although we may add shelving units above our washer or dryer in our house, we need something to hang on the wall for our less important products.
You might think that people are unlikely to step into your laundry room, so you can let clutter conquer it. Why bother? You are not going to impress anyone.
Keeping things organized is not always about impressing other people. It is all about making you feel comfortable instead. Think about the good mood you acquire when doing the laundry because of the tidy space.
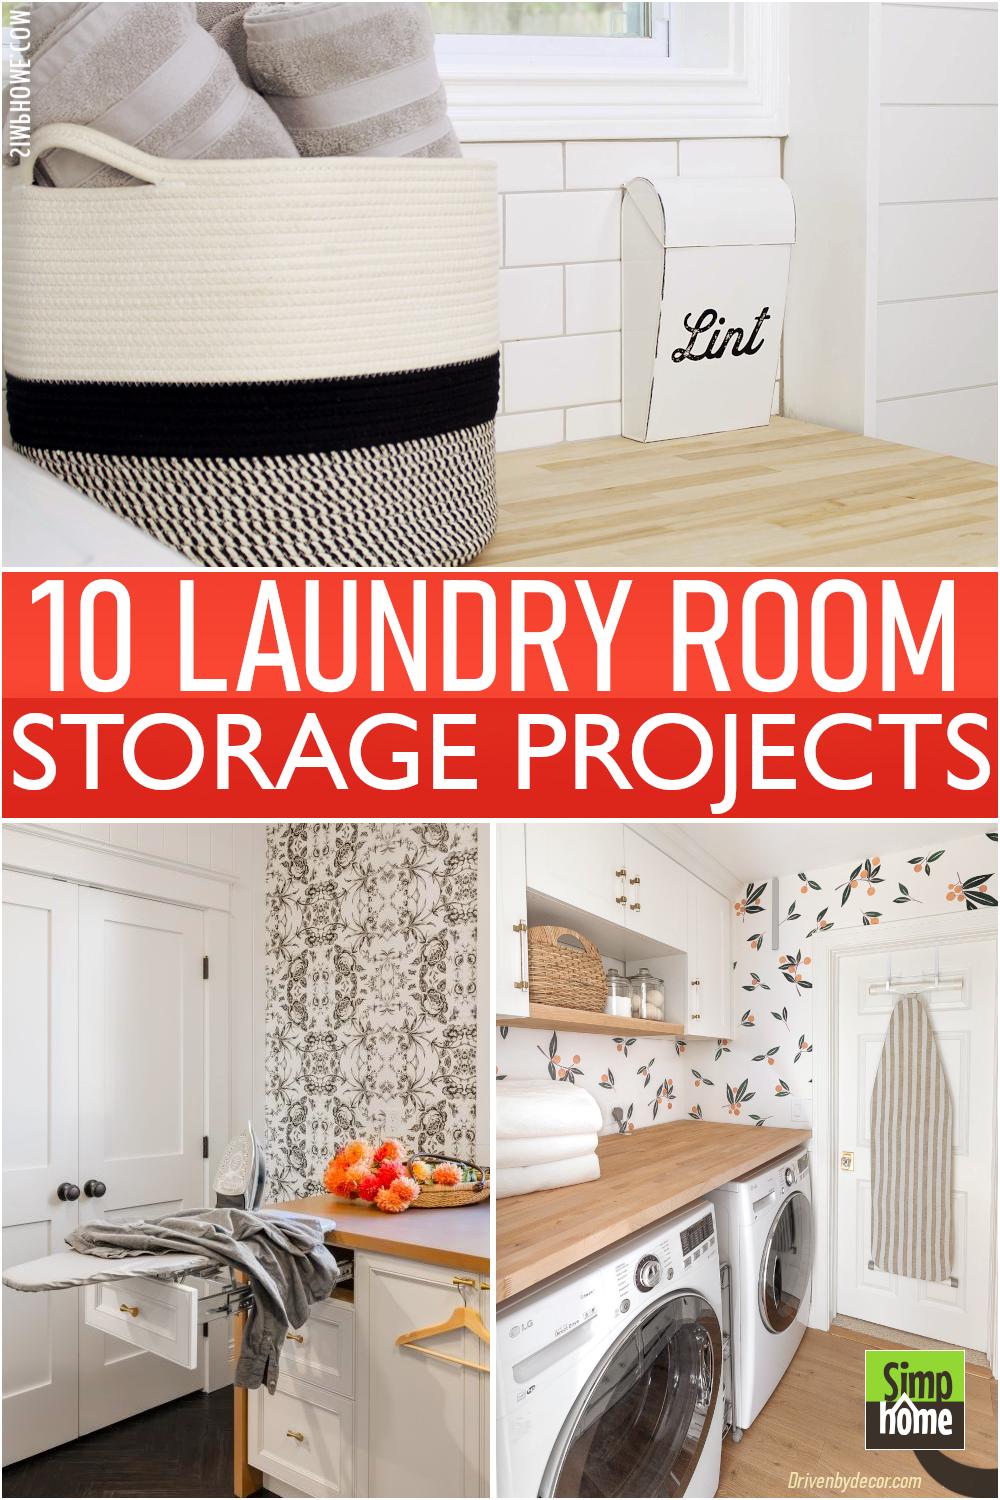
It sounds fantastic, doesn’t it? So, what are you waiting for? Make this idea tangible by implementing these 10 laundry-room storage project ideas.
As usual, Simphome presents you with the list.
🔊10 Laundry Room Storage Project Ideas Video:
List Entries:
10. Use Containers to Store Laundry Supplies
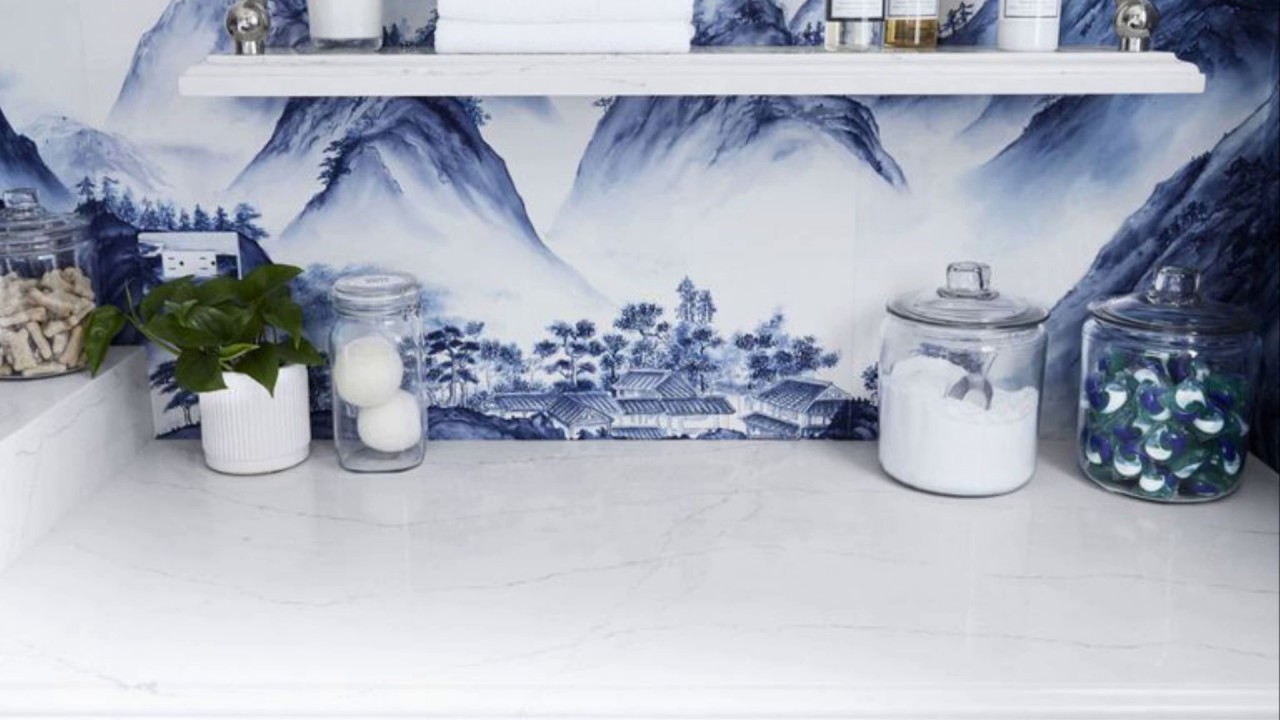 Some people are reluctant to transfer their detergent pods from the original packaging to a pretty container. If you feel the same, try storing laundry supplies in mason jars or any container you like and see how they affect your laundry room.
Containers, such as mason jars, are not only good at helping you organize your laundry supplies. They can also spruce up your laundry room.
You can find a lot of pretty containers in stores. Try to purchase some and tweak them a bit by labeling them or wrapping a ribbon around them to make them even more appealing.
This way, your laundry room becomes fascinating with various colors and textures. More importantly, you can scoop the detergent more easily now.
Relevant details:
- If you want to store your detergent pods, you can just remove a small portion of the original packaging. You must keep most of the packaging to know what and what brand it is.
- Laundry detergent pods are available in many brands. So, you can transfer different brands’ pods from their original packaging to different containers and mix them up to add color and style to your laundry room!
- Add Pouches for Storing Small Items
Small items will get lost in an open space if you decide not to use a container for storage. It is annoying because no matter how much effort is put into organizing this type of stuff, they will eventually get lost. - This is something you should try. Pouches are not only good at holding small objects, but they can also turn the whole room into a pile of goodies.
- Place a Pouch in a Drawer
This idea is simple but effective in storing small items such as pins, scissors, thread, and other items that can get lost if they are not put away neatly. - Try Using Baskets for Laundry Stuff You Use Daily
Baskets are especially good at making your trip to the laundry room fruitful because you can stack them up and take anything of your choice immediately without rummaging through anything. - Use a Laundry Basket for Storing Small Items
Using a basket is great when you store small items in your laundry room, but it is also great for organizing things you regularly use, like tissue paper or shaving cream. - Use a Double-Sided Holder for Electronics
Reflection is another nice thing that can help you organize your electronic devices, such as speakers, chargers, and other devices. - Add Shelving to Dress Up the Walls of Your Laundry Room
Everyone has used an ironing board. One thing that makes ironing work easier is seeing everything clearly from all angles when ironing clothes and reaching every spot easily.
9. Be Stylish and More Organized with IKEA Cabinets
 Getting rid of clutter does not only mean you stash away everything to make the space tidy. You should also consider accomplishing this mission while sprucing up your laundry room.
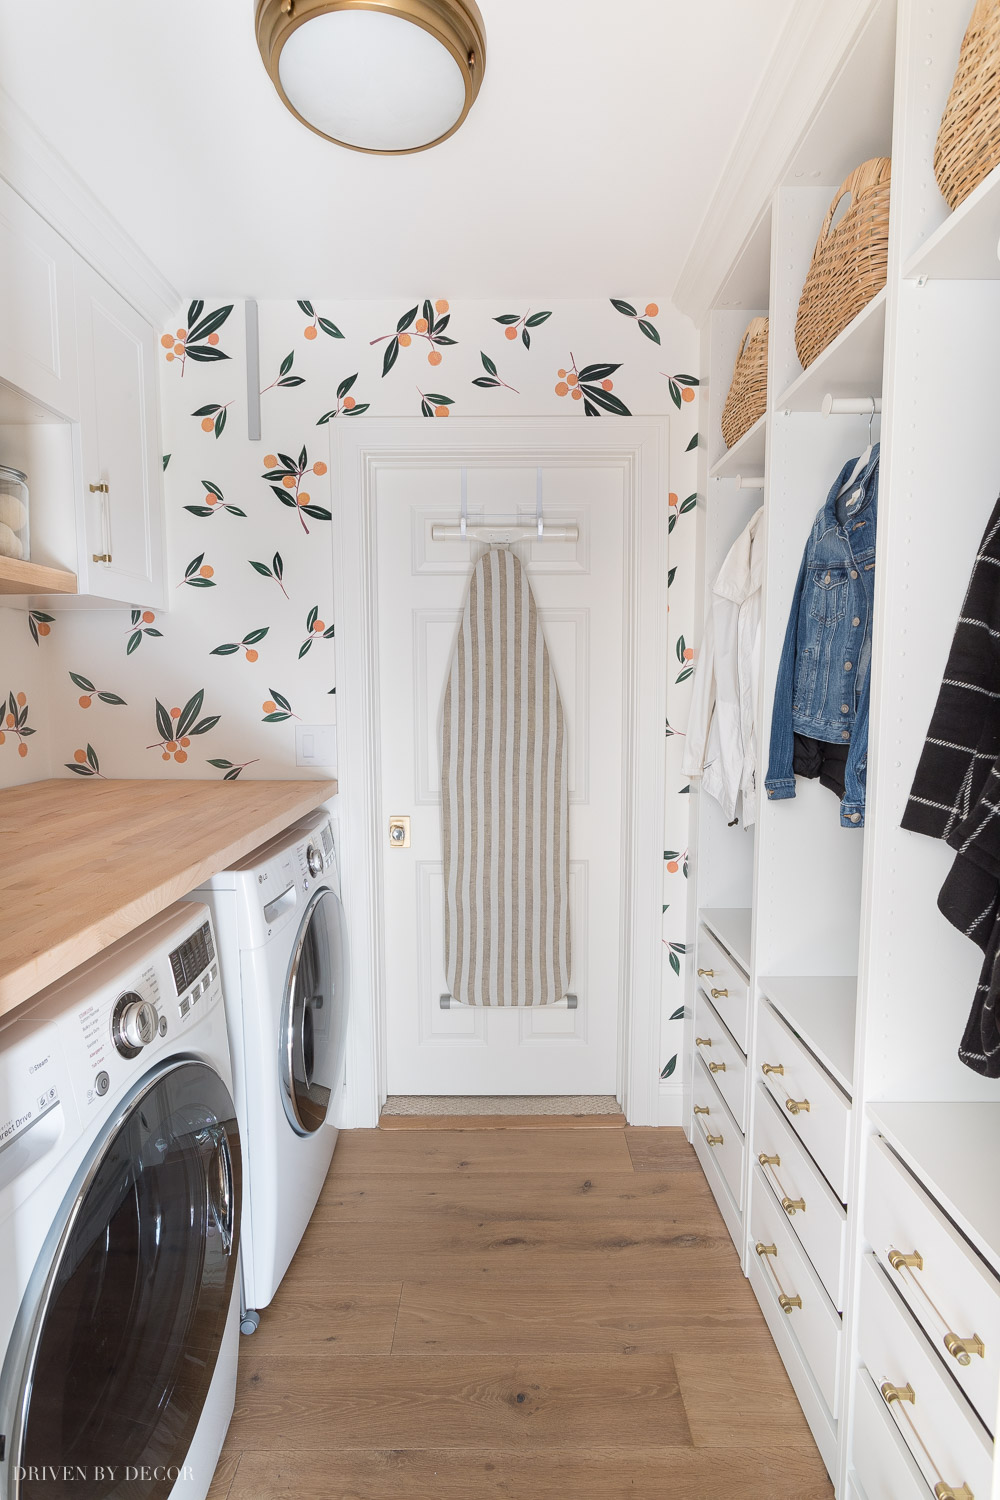
This laundry room, for example, may inspire you with lots of brilliant ideas that can help you eradicate clutter while making the space look chic.
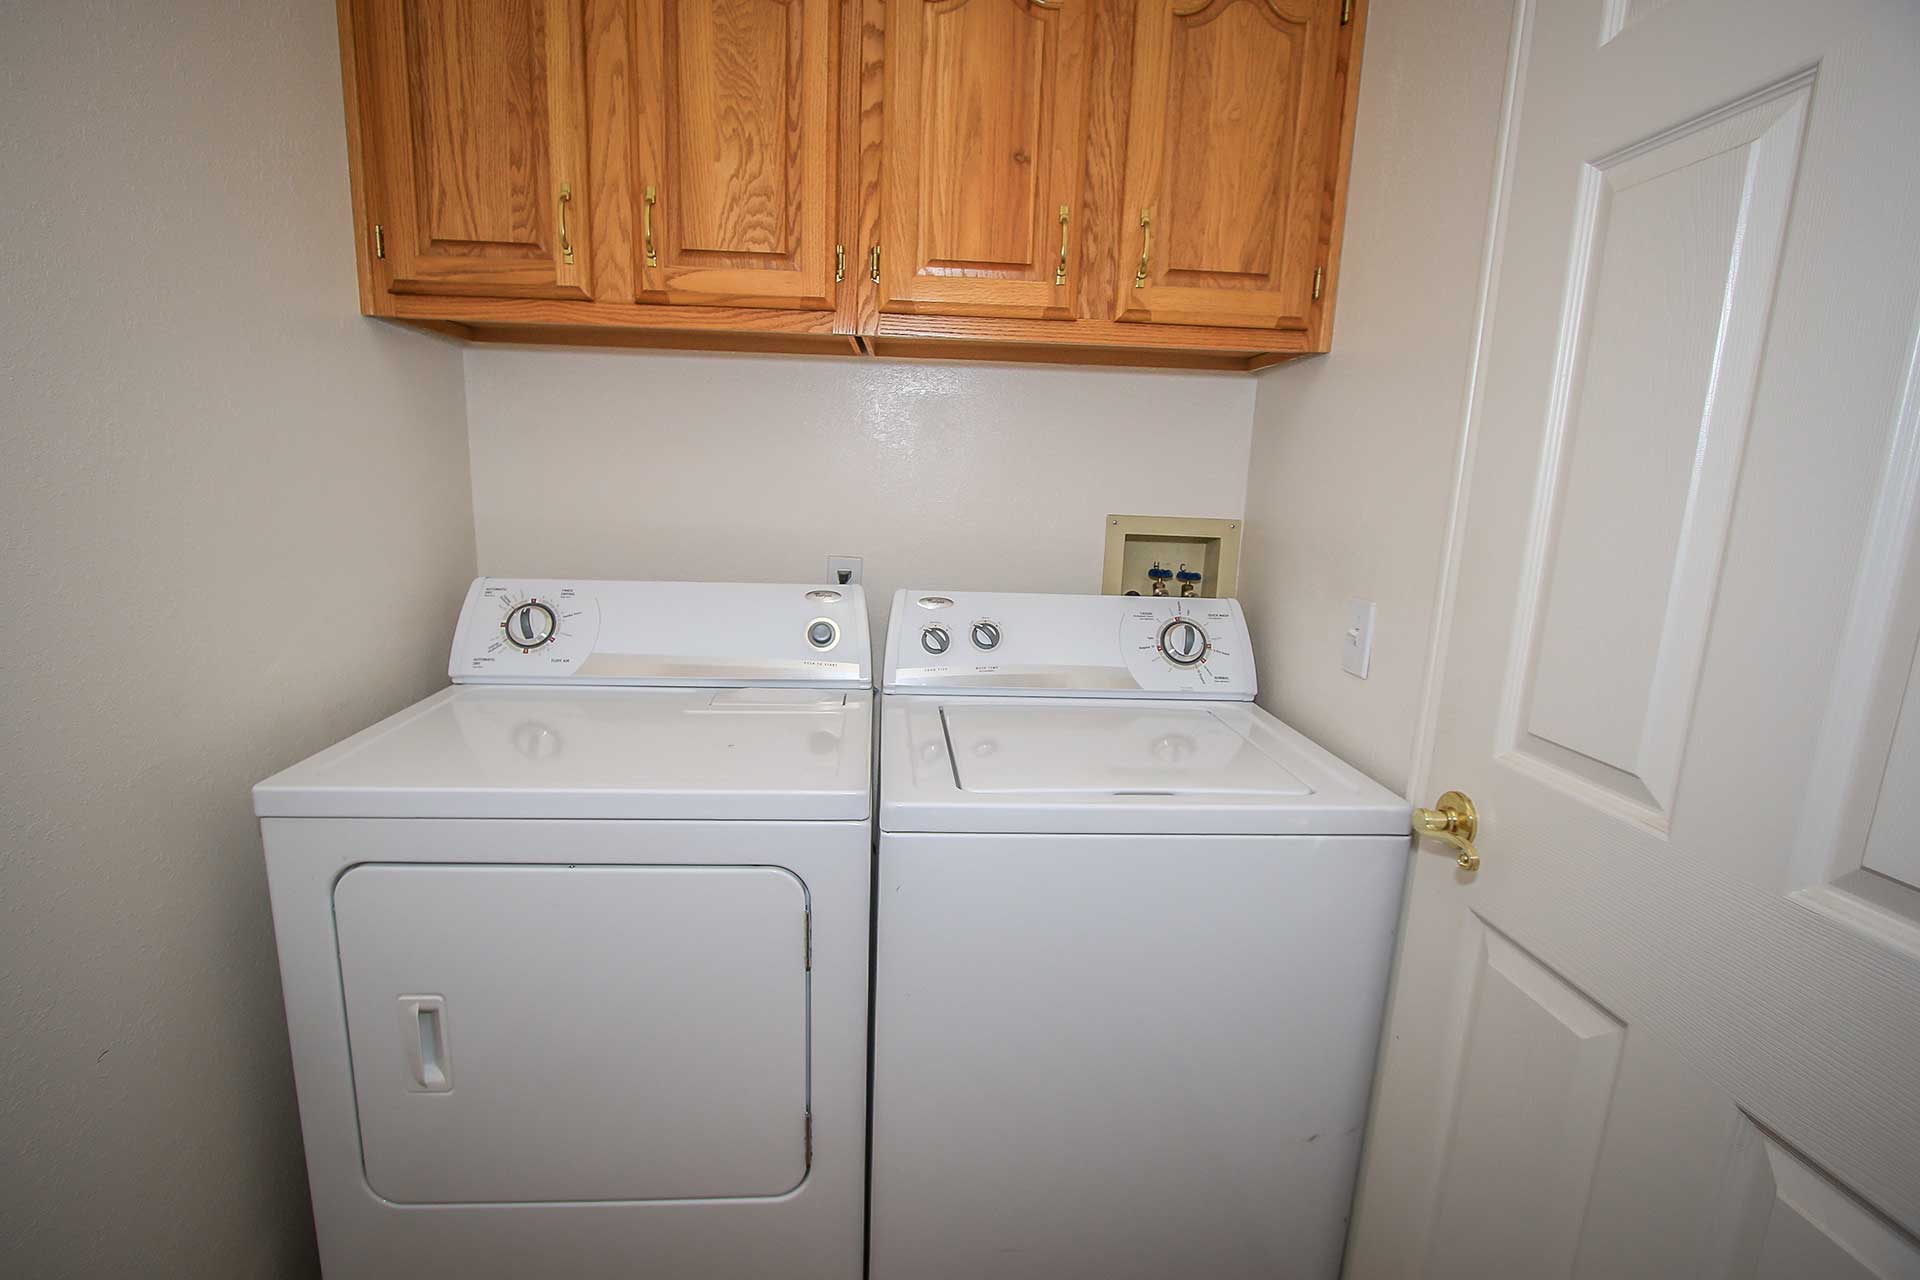
- First, consider adding a gap in between the washer and dryer. This way, you can shove a petite storage rack in between, which is handy for your laundry essentials.
- Next, top your washer and dryer with a butcher block. This way, you have a worktop to fold the clothes. Above the countertop are stylish cabinets of IKEA Sektion frames and Axstad doors.
- On the opposite side are IKEA Pax wardrobes to make cubbies used for hanging coats and storing shoes.
If you are interested in adopting this idea, make sure you buy hinges and shelves for the inside of the cabinets, as you will not get them when purchasing IKEA Sektion frames.
8. Laundry Caddy to the Rescue
 Build a laundry caddy to put your detergent, fabric softener, and stain remover in one place. To do this, you need to get a box from the local paint store and a piece of wood.
General instructions:
Begin by measuring the width and depth of your box, then count how many pieces you will need to make your caddy, based on the size you want.
The first piece is cut with a saw to fit around your washer or dryer. The second piece is drilled with 1/4 inch holes along one end, matching the 1/4 inch holes in the first piece making up the sides.
7. Invest in Magnetic Organizing Rack
 If you do not have more space for storage, you can install shelves on your washing machine. You are not going to drill holes and screw it, though. You only need to invest in this smart magnetic organizing rack.
This rack is super handy because it provides ample storage for your detergent, stain remover, and other laundry supplies. When you need them, you can grab them in no time. Most importantly, it features a strong magnet that allows it to attach to your washer or dryer firmly.
Relevant details:
- Step 1: Measure the length of your washer or dryer, and also consider its height to make sure the rack will not interfere with its operation.
- Step 2: Purchase two stainless steel mounting boards that are just a little smaller than the length and width of your washing machine; get two sturdy shelves for each board; then attach some strong magnets at both ends of each shelf. It is worth noting that you can use any flat object as long as it is magnetic.
- Step 3: Attach the two mounting boards to the side of your washer or dryer and place the two shelves on top of it to easily reach your detergent, stain remover, and other cleaning supplies.
6. Upgrade Your Existing Cabinets
If that is the case, consider refacing your cabinets to make them look fresh. This way, you can refresh the look without splurging on some new cabinets.
- To make your old cabinets look more attractive, you need to sand them down thoroughly. That way, you can apply any finish you desire more easily.
- Then, paint them Dove Beige chalk paint by Deco Art.
- Then, get a stencil with any pattern you like. For a simple yet more attractive look, you can opt for the one with a herringbone pattern.
- After that, use painter’s tape to hold the stencil in place while you paint the cabinet doors with grey taupe chalk paint.
- Finally, hang the cabinets back to their place and assemble the doors and hardware.
5. A Smart Multipurpose Cabinet
 Add a bit of vintage look to your laundry room by making this chic and handy cabinet.
- You only need to make a frame with some shelves from ¾” wood x 3-1/2″ wide x 8-1/2′ long. Then, cut it to size.
- Ensure the cabinet has the same dimension as your old washboard with a corrugated metal section. It will be better if the washboard is the top of the washboard is an inch longer than the top of the cabinet.
- Then, assemble the washboard to the cabinet using hinges.
- Finally, add a doorknob, and your vintage cabinet is ready.
- To make it handier, you can get some soda caps and insert an adhesive magnet into them to use them to hold important memos.
4. Do some minor laundry closet makeovers
 If you do not have extra space for a comfortable laundry room, you can always use your closet to do this task.
Since it is impossible to put your washer and dryer side to side, you had better shove them to one side of your closet and then stack them up. This way, you can use the opposite wall to install some shelves.
Consider installing bi-fold doors to make the laundry room more accessible.
Basic instructions:
- Step 1: Measure your closet’s height, length, and depth. Then, count the number of bi-fold doors you will need to fit the space.
- Step 2: Purchase some solid wood doors. You can use one bi-fold door for every two solid wood doors you purchase. Use hinges to attach each door and then nail them to the wall. Once everything is in place, make sure they are aligned evenly and at least an inch or two between them, or they will not open smoothly.
- Step 3: Measure the height of your stacked washer and dryer, then purchase a pole to slide through your bi-fold doors with ease (make sure it is long enough).
- Step 4: Plane your door hinges and attach them to your cabinet. Then attach the pole to them and use an Allen wrench to firmly set it.
Additional idea:
Mock Up Your New Closet
If you are not happy with how your old laundry room is organized, this guide can help you make it better. You just need some cardboard and glue.
To do this, you first need to draw a layout of your new closet on a piece of paper. Draw out everything first, such as each shelf width, length, and depth. The final result should look similar to the one shown in the picture below.
3. Hide the Ironing Board away
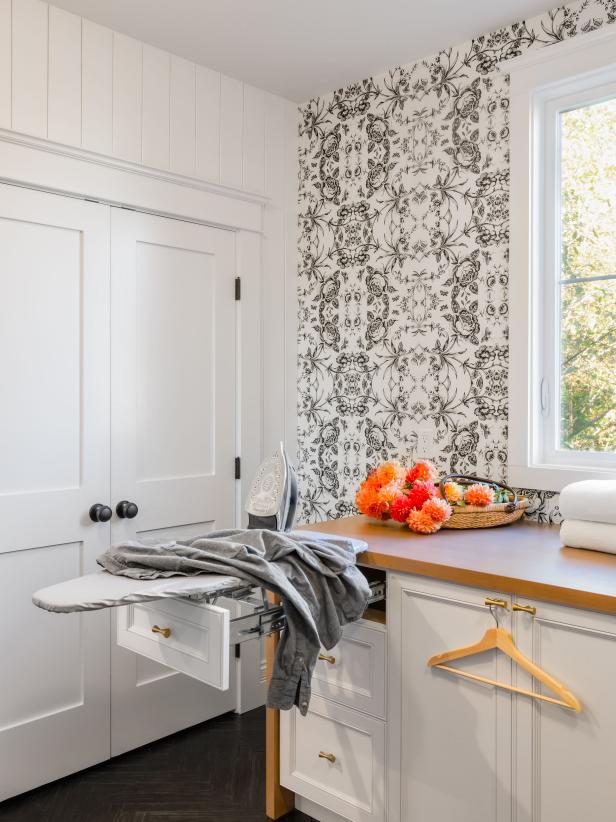 Ironing is the real chore. Nevertheless, you still have to do it anyway. It worsens when you have to set up the ironing board and tidy it back by hanging it on the door or stashing it away in the cabinet once you are finished.
Now, you can iron your clothes without the hassle by investing in this custom roll-out drawer. The drawer allows you to pull out the ironing board whenever you need it. Once you are finished, you only need to push it back into the drawer.
General instructions:
- Step 1: Measure the length of your closet, then purchase two roll-out drawer slides from a home improvement store.
- Step 2: Attach the slide to your drawer and then position it in the desired place firmly against the wall. Ensure that there is a gap of at least 1/2″ between it and the wall so you can pull out or push back in with ease.
- Step 3: Place an ironing board cover on top of your ironing board and secure it with clips. Then, attach it to the slide to pull out or push back in easily when you are finished doing your ironing chores (make sure there is an extra inch or two gaps between it and the slide).
- Step 4: Measure the height of your board and cut a piece of plywood to the right size. Attach it to the back of your ironing board, and then plane it to be even with your ironing board.
- Finally, attach the slide to this piece of plywood and push or pull it out when you need to do some ironing.
Additional idea: If you don’t have enough space for the ironing board, you can use a closet rod instead. Make sure that it is mounted at least 20″ above the floor to extend far enough when hanging clothes on them.
2. Sort Your Laundry Easier
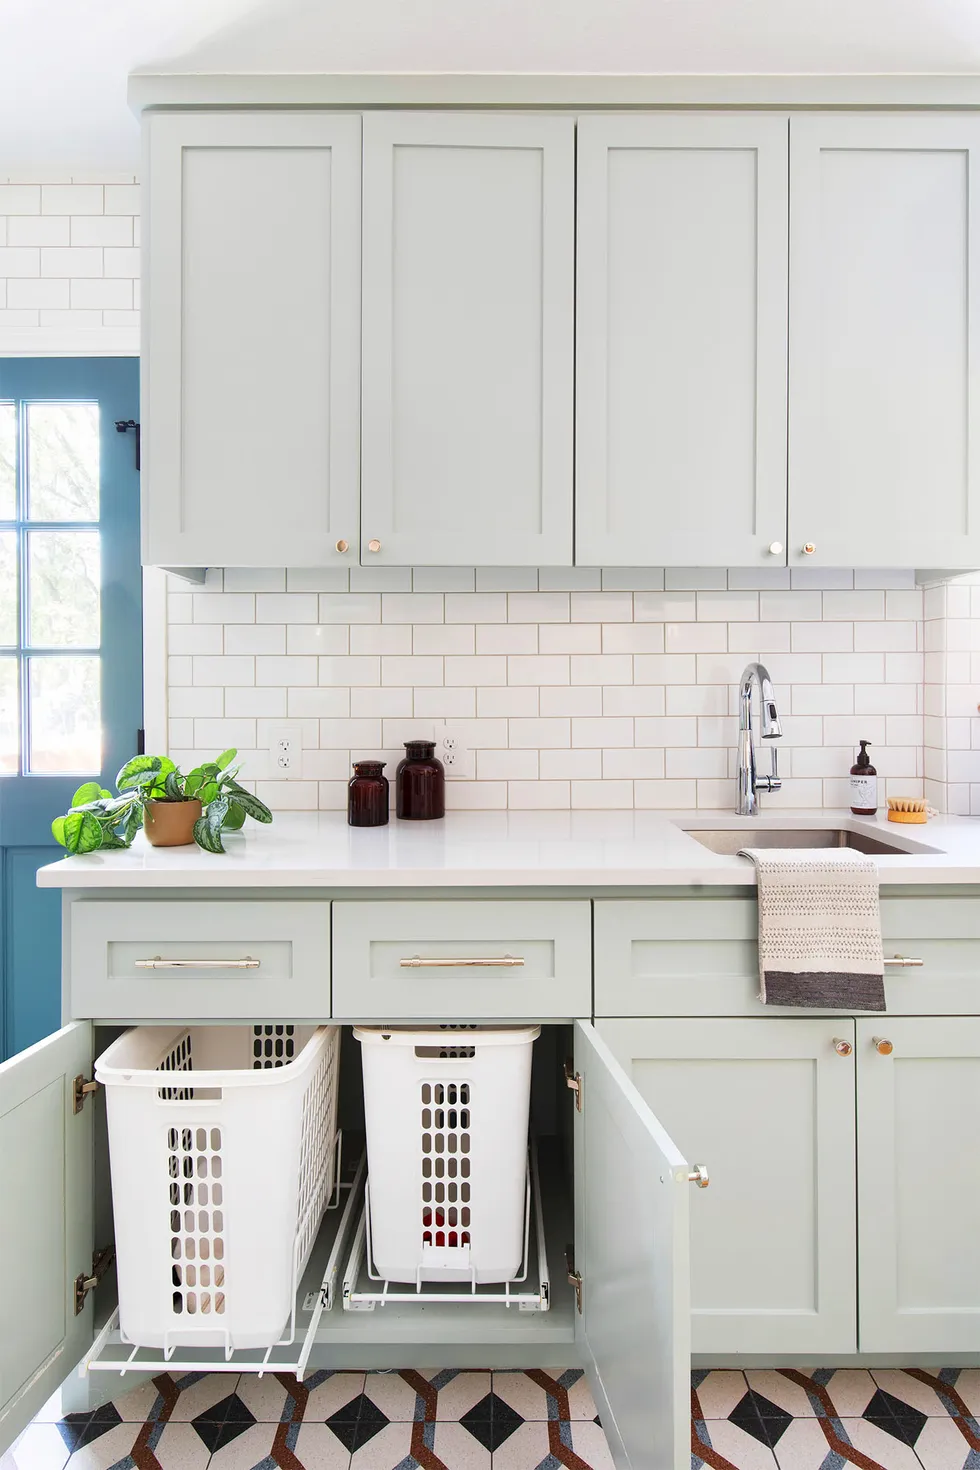 Lower cabinets are a perfect place to stash away your laundry hampers. However, you have to bow a bit to access them.
Instead of bowing whenever you need your laundry hampers, you can install pull-out racks on which your laundry hampers can sit. You can also place two or three baskets to help you sort your whites, delicates, and darks.
Also, you can add a small shelf for holding your detergent and fabric softener, so you can easily refill them when you are doing laundry.
- No 1. Add Drawers to Hide the Laundry Hampers
Sometimes, we become frustrated when we keep having to search for our laundry hampers. We want to organize things better, but a large laundry room is out of our budget.
We have to be more creative with our storage alternatives to fit everything in just a small space. Therefore, adding a few drawers will help us achieve this goal and improve the organization of our clothes. - No 2. Install a Filing Cabinet
If you’re only procrastinating because you can’t find your laundry hampers, then this project may help you.
You need to find some decorative drawers at the hardware store, then install them next to your washer or dryer for easy access. You can also install a small shelf next to the drawers for holding your detergent and fabric softener. This idea will help you organize things quickly, and it will be easier to refill these items as needed. - No 3. Install a Laundry Room Cupboard
Most traditional closet organizers only have one big drawer in front of the door, while side-by-side cabinets have two drawers. However, a pull-out closet organizer is even more convenient because it can be placed against the wall and accessed from two sides.
Also, this type of closet organizer has shelves on top of the drawers for storage purposes. They also come with a shelf that extends to the ceiling so that you can store lots of items in them. - No 4. Install Shelves Above Your Clothes Dresser
If your laundry room is small, installing shelves above your washer and dryer will provide more storage space. This way, you will be able to use all three sides of your closet area and have all of your clothes nicely organized on the shelves. Just imagine how convenient that would be! You can hang your clothes on the shelves and organize everything by type, color, or size. It will also help you save time whenever you’re looking for something to wear because all of your clothes are right in front of you.
Step 1: Measure the height and width of the space above your washer and dryer. Then, purchase some shelf supports to make sure they are strong enough to hold your new shelves.
Step 2: Attach them firmly with screws or nails to remain firmly in place.
Step 3: Attach your shelf supports to the closet rod and measure, cut, and install the shelves.
Step 4: Organize your clothes nicely in this new space. It will be easier to access these clothes because they are right there in front of you. - No 5. Build Shelves along the Sides of Your Laundry Room
Building shelves on all three sides of your laundry room will provide even more storage for your clothes. Even though this project will take more time, it is worth it if you are truly looking for some clever storage solutions that will help you organize things better and save space at the same time.
Lastly, Number 1. Make Your Door Work Harder
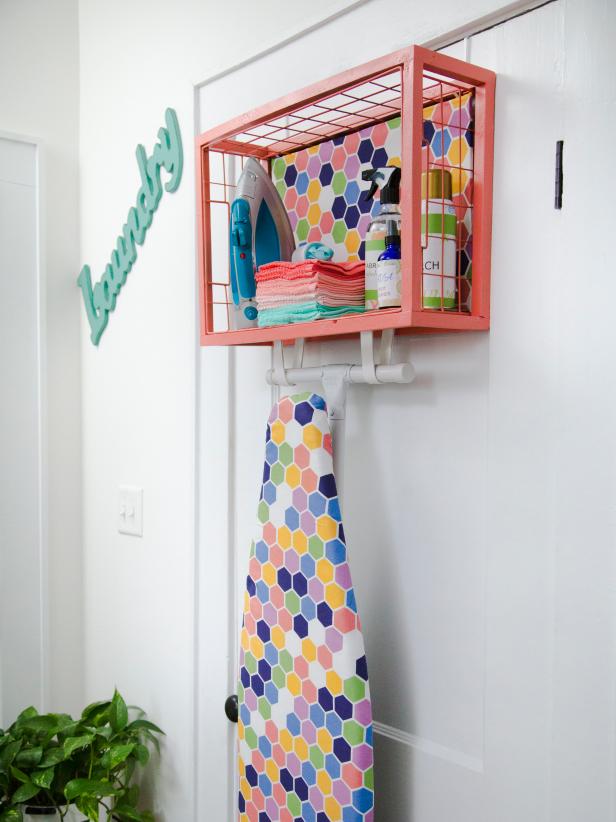 Using the door as an additional storage solution is not a new thing. Still, it always works like a charm. The door of your laundry room offers you many possibilities. You can install hooks, shelves, or even this cute rack.
To make this cute rack, you need a metal basket. Then, paint it the color you love. You can also lay fabric that matches the ironing board at the bottom. Next, hang the rack on the door. Then, add straps and a rod to hang the ironing board.
Relevant instructions:
1. Gather Materials:
A. Screen door (a wooden one if you can find one that is big enough)
B. Scissors
C. Ruler
D. Metal basket (to place the ironing board on)
E. 1/2″ PVC pipe
F. Head clamps (for securing the pipe to the door frame)
G. Plywood (to make a shelf)
H. Drywall anchor to install the plywood on 1×4 wood (attaching it to the door frame).
(Note: If you don’t have this, you can use your screws. Please make a small hole at the bottom of the doorknob and insert the screw).
2. Measure the Length of the PVC Tube
A. Measure the height of your window and then measure the width at which you want to hang your ironing board and add 2 inches to it (i.e., 18″.) Then, measure your door width and add 3/4″ at both sides (i.e., 15″). Subtract these numbers from your first two measurements, giving you the length you need for both pipes (i.e., 6 1/2″). Also, divide this length by two and multiply it by 2 (i.e., 6 inches). This idea will give you the length for each pipe (i.e., 3 1/2″).
B. Cut the pipes in half with a hacksaw, and then use a chop saw to cut the ends at an angle (i.e., 45-degree angle).
3. Secure the Ironing Board on the pipe
A. Cut two holes (1″ in diameter) at the bottom of your basket (i.e., 1 1/4″ from each side). Then, you need to secure it on top of your pole with two screws driven through the middle of your basket and into your PVC pipe level inside of your laundry room.
4. Install the Back Panel
First thing first, Cut a piece of plywood that is 12″ x 12″, then attach it to the inside of your laundry room door with drywall anchors (if you don’t have these, then use your screws). Then, cut an opening at the top and place a shelf inside to form an L-shape.
- Step 1: Measure the height of your ironing board and divide it by two (i.e., 7″). Then, add 2 inches to this number (i.e., 10″).
- Step 2: Add this number to the length of your PVC tube and multiply by two.
- Step 3: Cut the door panel to your desired width. Then, paint it with fabric paint. Let it dry, and then hang it on your laundry room door.
- Step 4: Attach the pipe to the wall using head clamps or screws.
When you want to take your clothes out of these storage solutions, just lift them and place them on the table for sorting. This idea can be a nice way of organizing things because all of your clothes are right in front of you, and you can access everything easily.
Keeping things tidy all the time may not be a piece of cake. Nevertheless, it is not impossible either. Therefore, these 10 laundry-room storage project ideas will come in handy.
References:
10. Housebeautiful.com
9. Drivenbydecor.com
8. Sunlitspaces.com
7. Housebeautiful.com
6. Cuttingedgestencils.com
5. Familyhandyman.com
4. 2beesinapod.com
3. Hgtv.com
2. Goodhousekeeping.com
1. Hgtv.com