There are three major categories for increasing property values in any given neighborhood or area. These are general improvement types, such as adding more bedrooms, bathrooms, garages, porches, decks, etc., special features within an existing structure (such as new siding), and structural changes like moving walls out of plumb line. In this post, we discuss how each one affects house value.
General Improvement Types:
Adding extra rooms
Adding additional living spaces, such as another bedroom, bathroom, study, recreation room, game room, sunroom, porch, deck, patio, garage conversion, attic conversion, basement conversion, etc., will not only upgrade the convenience and functionality but also adds the extra market appeal of your house. That’s because some buyers want their homes to accommodate large families or multiple generations of family members. A buyer can be your luck or a big missed opportunity
Your next house owner also looks forward to having space for entertaining guests at parties, weddings, graduations, baby showers, Thanksgiving dinners, Christmas celebrations, summer cookouts, Easter egg hunts, New Year’s Eve bashes, Fourth of July barbecues, Mother-Teacher Conferences, Super Bowl Sunday gatherings, and so on.
Adding a second story
Second stories have been shown to boost resale prices by up to $25,000 over comparable properties without them. Adding additional floors might do even better, but experts say that the added expense and inconvenience outweigh the benefit. It requires extensive work, including electrical, plumbing, heating/cooling, chimney construction, roof repairs, foundation repair, landscaping, driveway installation, interior finish upgrades, exterior painting, and other details. If you’re thinking about building anyway, why stop there? Why not just build two houses instead of one big one?
Garage conversions
Garage conversions may seem tempting since most people use their garages for storage. But unless you plan carefully, converting part or all of your garage into living space could lower your property value. For example, converting your garage into an apartment lowers your property value because tenants tend to take less care of apartments than homeowners typically do. And depending upon where you live, converting your garage into a rental unit may require a city permit. Also, if the property has enough parking already, converting the garage doesn’t necessarily mean gaining more usable space. Make sure there are no plans to expand the size of your current garage.
Special Features Within Existing Structures ~ New Siding
Installing new siding usually increases your home’s value between 1% and 2%. However, if you install poor-quality materials, your investment could lose money. To avoid expensive mistakes, ask local contractors which type of siding works best in your area and which ones cost the least. Most cities now require new siding to meet certain energy efficiency standards. Make sure your contractor knows whether yours does.
Roof replacement
Roof replacements increase your home’s value from 3% to 6%, although sometimes much higher amounts are possible. Even though you won’t see the results immediately, a good roof lasts many years and makes the biggest difference in terms of long-term protection against storms and high temperatures. When replacing shingle roofs, remember that asphalt shingles last longer and generally cost less per square foot than wood shakes or metal tiles.
Deck addition
Adding a deck boosts your home’s value anywhere from 5% to 20%, depending upon several factors. First, decide whether you want to go vertical or horizontal. Vertical decks provide greater privacy, while horizontal decks give you more outdoor entertaining space. Next, choose among materials such as cedar, redwood, pressure-treated pine boards, composite material, concrete block, masonry piers, steel posts, and vinyl. Finally, determine whether you want to hire professionals or do the job yourself. Structural changes like moving walls out of plumb lines require more communication than changing your gigantic photo frames.
Replace windows
Replacing old single-pane windows with newer double-paned models raises your home’s value anywhere from 4% to 15%. Windows should ideally allow natural light to enter evenly throughout the day. Poorly designed windows let too much heat escape during hot weather and warm sunlight through icy winter days. Depending upon your climate zone, older windows may need to be replaced every 10 to 25 years.
Install a central air conditioning system
Central air conditioners raise your home’s value from 7% to 17%. Although installing a central air conditioning system costs thousands of dollars upfront, it saves hundreds of dollars annually in cooling bills alone. Besides reducing electricity consumption, air conditioning systems reduce noise pollution, improve indoor air quality, and help prevent fires.
Improve insulation
Insulation improves your home’s thermal performance, reduces energy losses, and helps save money on utility bills. While insulating your attic may sound complicated, it doesn’t have to be. There are kits available that offer great bang for the buck.
Replacement doors
Replacement doors increase your home’s value from 8% to 19%. Doors should complement your architectural style and match your color scheme. Consider door styles, hardware choices, trim options, window treatments, and paint colors before selecting new doors. After choosing your doors, contact a professional installer who understands framing and door sizing requirements. Door selection takes time and expertise. Don’t rush into decisions.
In conclusion, remember that improving your kitchen isn’t just about aesthetics; it’s about maximizing functionality and creating livable space. The kitchen can create functional open floorplans, free up valuable countertop real estate, enhance cooking versatility, and eliminate wasted space. Easy access to utilities, such as water lines, gas lines, electric service panels, cable TV wiring, telephone wiring, computer network cables, and Internet connections, keeps appliances and tools at hand.
Keeping kitchens organized and clean eliminates clutter and maximizes productivity. Lastly, upgrading cabinets and drawers offer maximum durability and longevity and produce a lasting impression.
Outside our particular topic
Adding a garden shed, fence replacement, or porch extension can enhance a home’s curb appeal and, thus, its value. On the flip side, building extensions can quickly lead to higher utility bills, particularly if you leave them unoccupied overnight. Therefore, weighing your options carefully before embarking upon any construction plans is advisable.
Nevertheless, consider creating a loft conversion if you want to add value to your property. Loft conversions aren’t solely reserved for upper-class properties anymore. Thanks to the rising popularity of micro-apartments among young couples, converting garages and basements has gone mainstream. If you have a spare bit of land within walking distance from your front door, this could solve your housing problems. Of course, it depends mainly on the layout and dimensions of your basement/garage.
It’s also possible to improve house value by simply landscaping the surrounding grounds. By planting shrubs and flowers, you can bring nature indoors, enhancing the general ambiance of your home. Furthermore, you can extend your gardening season by growing vegetables. Although it requires a more initial investment, harvesting homegrown produce saves you money on groceries in the long run.
Finally, to achieve maximum returns from your renovation efforts, you shouldn’t forget to factor in the potential rental income generated by the finished product. Obviously, this strategy applies mainly to homes close to city centers. Nevertheless, renting your property could prove profitable if you live near a beachside resort town.
12 Wooden Project for the Kitchen Video:
The kitchen is the most hectic area in a house. Here you can find the hurly-burly of morning routines, such as preparing breakfast. Since you have to do it quickly before everybody leaves for work or school, you should have easy access to every kitchen utensil, spice, and ingredient you need.
Unfortunately, buying cabinets, shelves, and other kitchen organizers can be costly. Therefore, making them yourselves is your safe bet.
If you think constructing kitchen essentials yourself is arduous, you will change your mind after watching these 12 wooden projects for the kitchen.
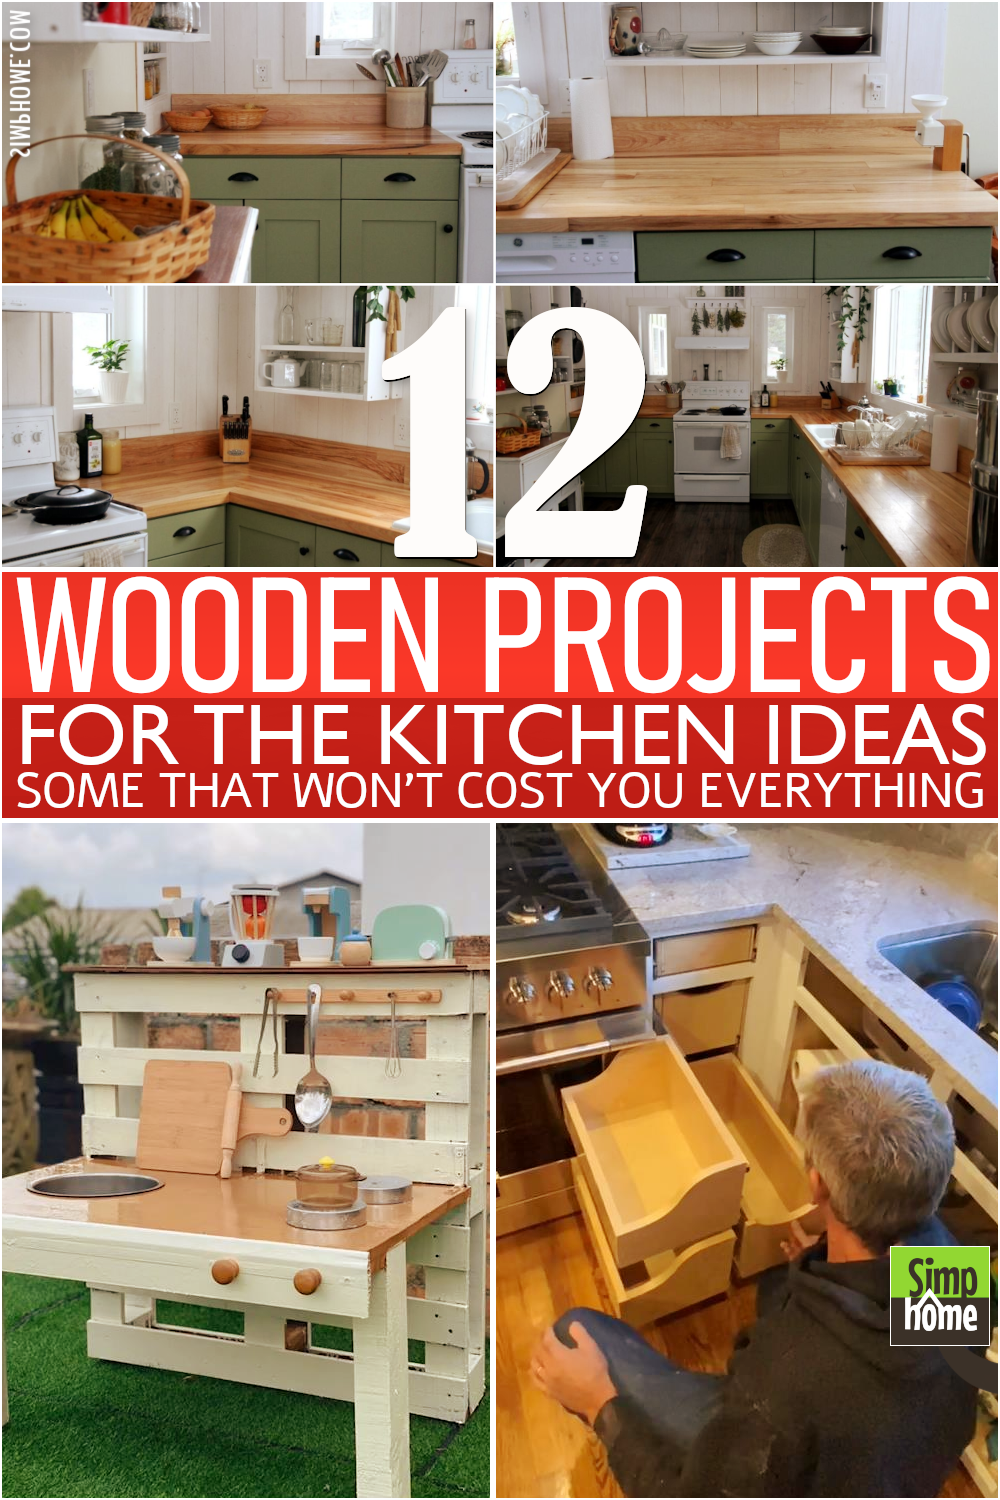
List Entries:
12. A Mud Kitchen project for the daughter @Dibamizi
Although it is not a real kitchen, and you cannot use it in your cooking space, this idea is still worth the try. At least you can make your kids happy and more creative.
To make this mud kitchen, you only need a wooden pallet and some boards.
- First, get a washbasin and use its bottom to determine the hole’s size.
Then, cut out your wooden board until you get a hole. Your washbasin is supposed to rest snugly in it. - After that, use brackets to attach the board to the wooden pallet.
- Next, install the wooden legs to support the countertop.
- Then, paint the mud kitchen and install trims, hooks, and knobs.
11. Recycle Old Wooden Spool to Unique Corner Table from @Samantha Arseneault
Like wooden crates, a wooden spool is also highly versatile. You can use it as a piece of furniture that completes the rooms in your house, including the corner of your kitchen.
To create a corner table for your kitchen, you can dismantle your wooden spool. Then, cut one of the circular parts to fit the corner of your kitchen. Next, cut the other circular part into a smaller size because you will use it as the base.
After that, sand the pieces down thoroughly so that you can stain or paint the wooden spool. Then, assemble them. Finally, you have a cozy nook to enjoy breakfast in the kitchen.
10. From the hardwood flooring (with all its flaws) to a new kitchen countertop
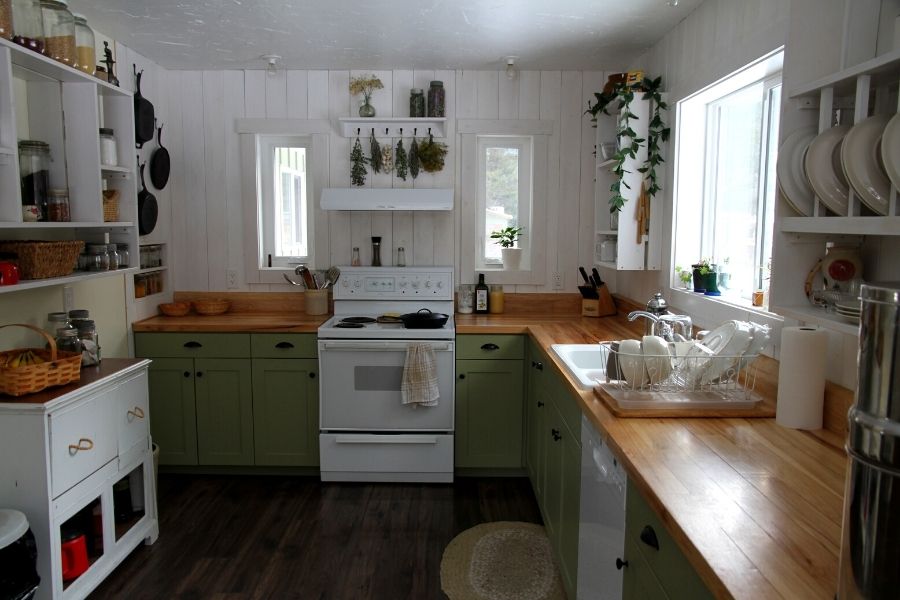 Have you ever thought about using hardwood flooring to create chic countertops for your kitchen? If you feel it is impossible, you need to give this idea a try.
- First, you have to get hardwood flooring without beveled edges. If it is hard to find, at least you can purchase the one with the slightest bevel on the running edge.
- Then, install a subsurface of plywood so that you can staple the hardwood flooring to it. If your kitchen applies an L-shaped design, consider laying your hardwood flooring in a “stair-stepping” layout.
- After that, take another piece of flooring and cut it if necessary to give a more finished look to the counter edge. Next, sand the countertop thoroughly. Then, fill in the cracks with waterproof glue and apply two coats of Varathane.
- Finally, use some pieces of flooring to create the backsplash.
9. The floating corner storage solution from Create-enjoy
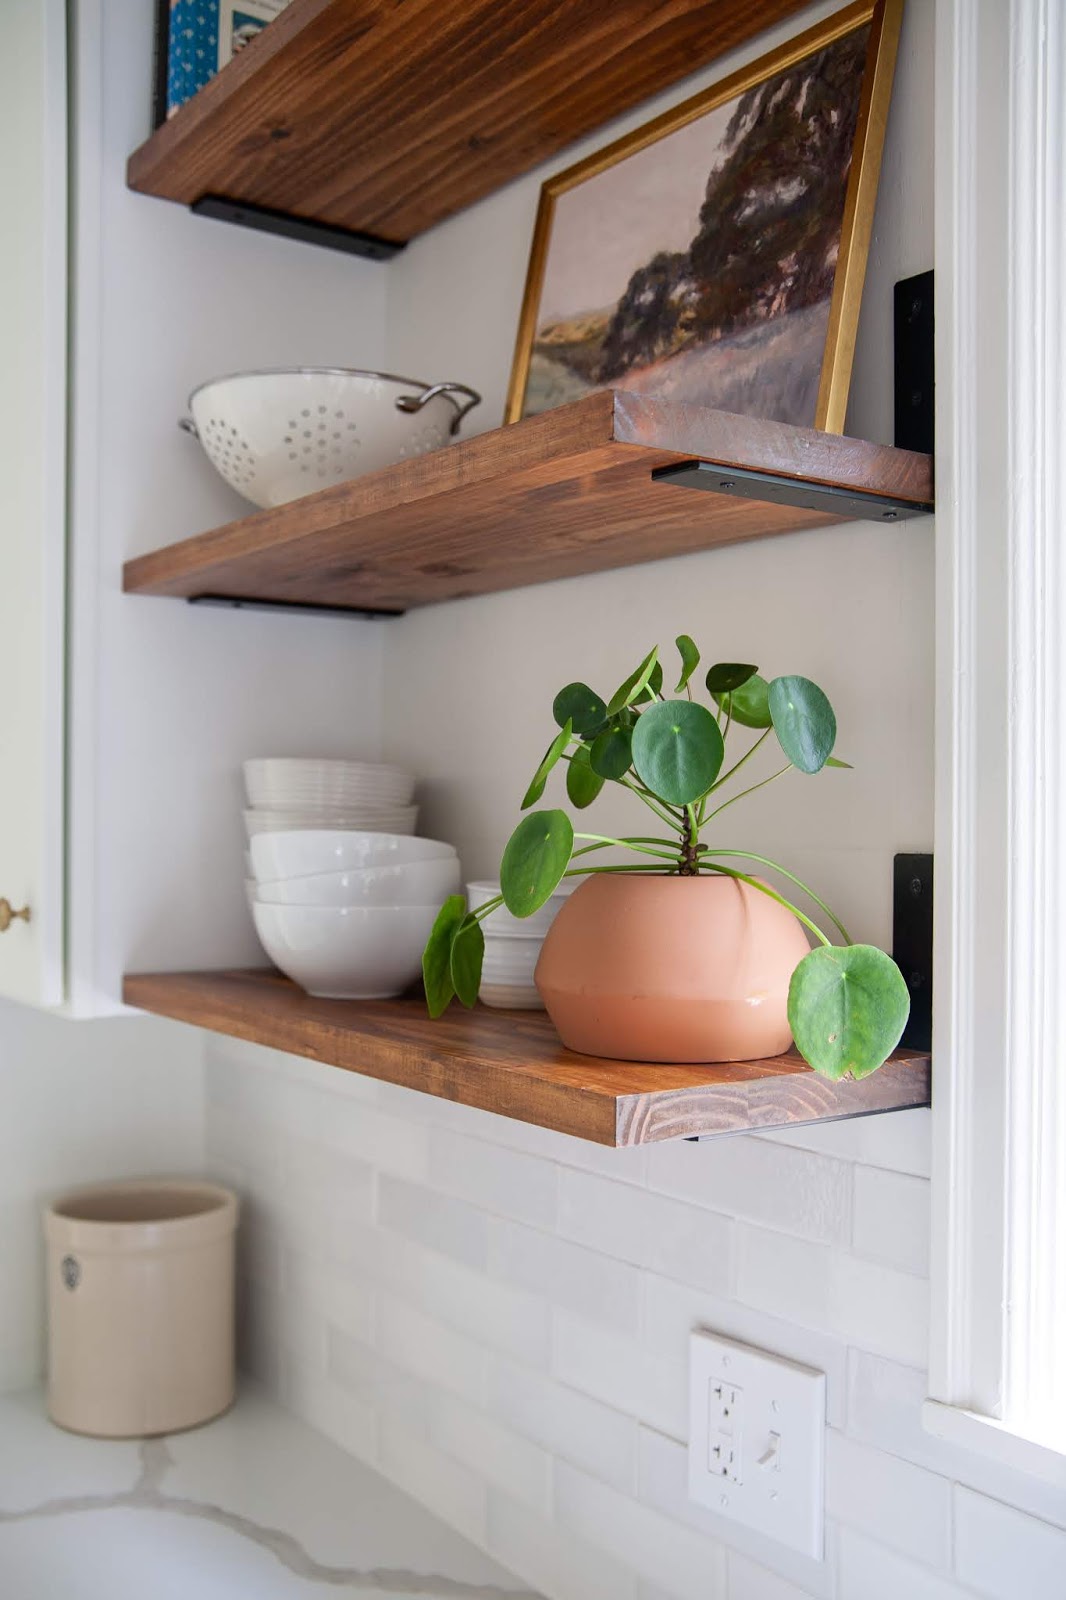 The kitchen is usually prone to clutter. It happens because you store kitchen utensils, silverware, condiments, spices, and many other things here despite the limited space.
You must incorporate more storage solutions into your kitchen to overcome your problem. And one of the most convenient and effortless things you can do is make some floating shelves.
Constructing floating shelves is not as hard as you may think.
- You only need some sturdy wooden boards. Then, cut them to size.
- After that, sand them down thoroughly before applying any stain or paint.
- Next, install heavy-duty brackets on the wall. Then, screw your boards onto them.
That’s it! It is easy peasy, isn’t it?
8. A Detailed DIY Drawer Organizer from @Benderhomes
The drawer is a convenient spot to toss anything you want to be out of sight. Therefore, it is an ideal house of clutter. You might think you have beat clutter. The truth is you only make it worse because you will find it hard to find the measuring spoon you need.
One of the ideal solutions for this problem is a DIY drawer divider. You can actually find it in stores easily. Still, making it yourself is your safe bet because you can adjust its size and design to your need.
- First, take everything out of the drawer to plan the design. Try placing your spatula or any long kitchen utensil into the drawer to determine the length of the box.
- You will also need to use a measuring tape to determine the height of your drawer divider.
- Next, get some wood strips and cut them to size. You will also need scrap wood to create a spacer that you will use when assembling the pieces.
- Once the divider is ready, insert it into the drawer and nail it to keep it in place.
7. From @Woodhouse studio, A woodworking inspiration to hide the best snack from the kids or stash of gold from criminals
This ingenious storage is the best place to hide your favorite snacks from your kids or your treasure. Besides, it is a genius way to use your cabinet’s corner space.
To create these drawers, you must install the drawer slides on the left sides of each box. You will also need to install drawer slides to the bottom and top of the cabinet to enable the boxes to move aside. This way, you can access the hidden drawers.
6. Watching someone craft this DIY Wood Carved Salt Cellar is oddly satisfying @Tastemade
This cute wood carve will complete the look of your dining table. It is much better than serving some salt in a saucer. Besides, it is easy to make.
You only need to trace the spoon onto the wooden block. Then, use a half-round wood chisel to cut out the wood. After that, sand it thoroughly before applying sealant. Finally, place the salt into it and lay the spoon on the notch.
5. A Recipe stand wooden idea from @Movingwiththemillitary
Sometimes we like to try something new, including a new recipe. Since it will be the first time you cook that dish, you will need to reread the recipe during the cooking process. Thus, you will need this recipe card stand.
- This recipe card stand is straightforward to make. Even if you are new to DIY projects, you will surely nail it.
- You only need to get two pieces of wooden board.
- Then, screw them together. Consider gluing them before screwing to make the assembling process easier.
- Next, you can explore your creativity in decorating it. For example, you can add a bow tie made of a burlap ribbon.
- Then, attach a clothespin to hold the recipe of the dish you will cook.
4. Another idea to upgrade your indoor kitchen garden @Farmernicknyc
If your kitchen lacks space, which hinders you from growing herbs, you can try making this plant table.
This plant table consists of two shelves. Each shelf can hold up to sixteen different plants.
You only need to create sixteen 4-inch holes in one board to hold terracotta pots. Make sure you stagger the holes to get a better plant viewing. Then, apply any finish you want before assembling the pieces.
3. This time, when you don’t have any more left inside your kitchen for the more green organisms from @Skylerlace
Has the previous idea not satisfied your green thumb yet? Try this one to grow more plants in your kitchen.
You only need to create a wall hanger with cedar wood. Then, purchase several 6-inch plant ring hooks. Next, screw them to the board. Your wall hanger is ready to hold your plants. You only need to hang it on the wall using a French cleat. However, you can always try painting your terracotta pots to match the design of your kitchen.
2. A Wooden cover stove Idea
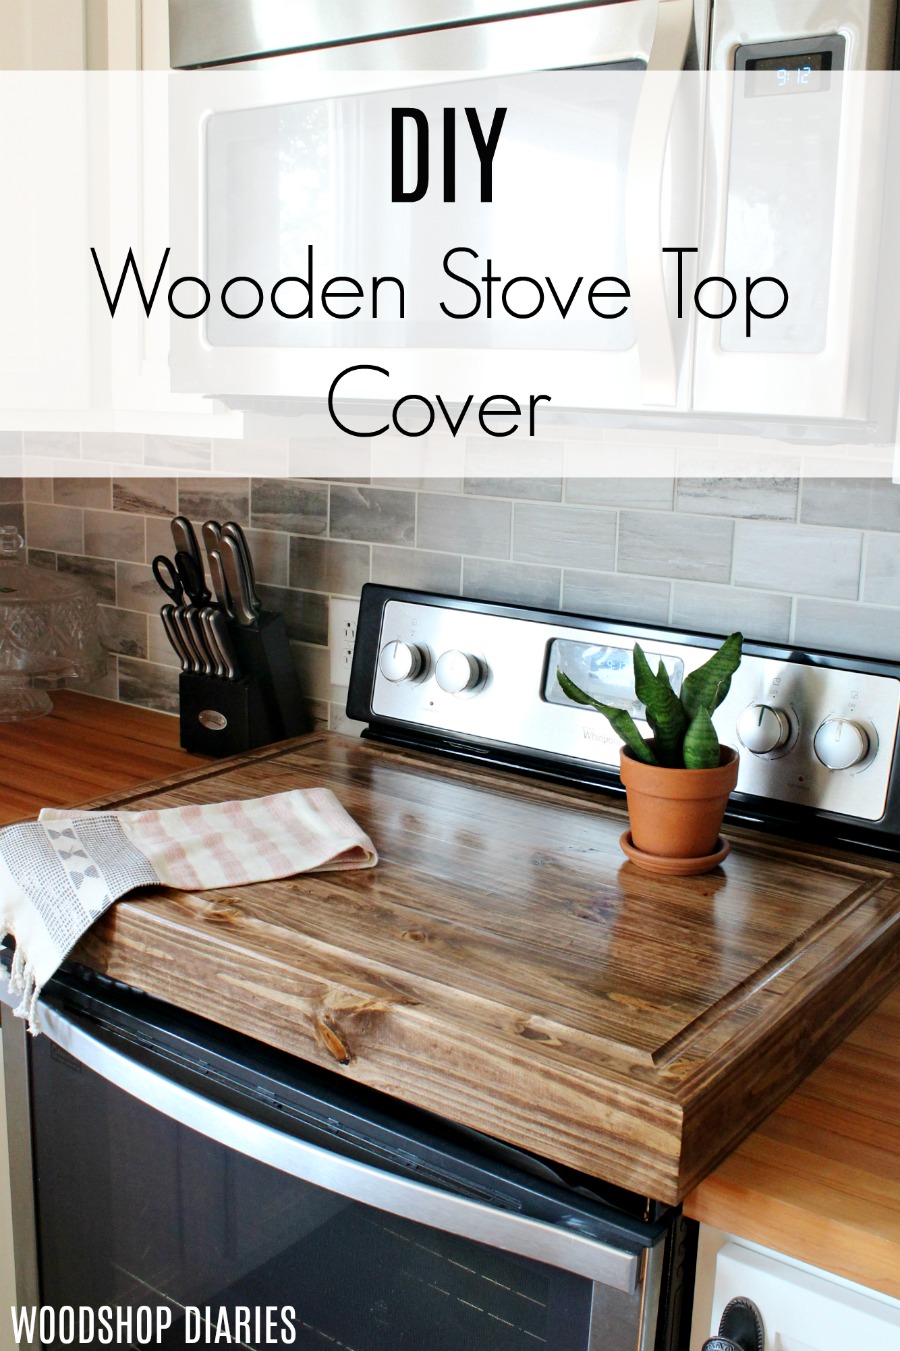 If you are not into cooking and barely cook something, you may find your stove collecting dust, which is awful. But you can solve this problem by creating a stove cover from tongue-and-groove pine. Besides being a practical cover, it can also be a good cutting board.
Consider adding a juice groove to make the cover look more appealing. Besides, it can also help you catch any liquid or spills from the cutting board. Before constructing this cover, remember that you make it from wood, which is inflammable. Thus, do not cover the stove when you use it or it is still hot.
1. Or follow a similar trick from @Nifty
Tongue-and-groove pine is not sturdy sometimes. Therefore, you can try to create this stove cover from plywood or cedar. The advantage of this stove cover is that it is multipurpose. Besides covering your stove and holding dust at bay, you can use it as a cutting board and serving table. To enjoy the full version of the video you are currently watching, spare a little time to visit the link provided inside the description.
So, What do you think? Woodworking projects are not always complicated, are they? These 12 wooden projects for the kitchen are easy to accomplish. Besides, they will improve your cooking space in no time. So, what are you waiting for? Go grab your tools, roll up your sleeves, and get ready.
References:
12. Tiktok.com/@dibamizi
11. Tiktok.com/@samanthaars3
10. Atraditionallife.com
9. Create-enjoy.com
8. Tiktok.com/@benderhomes/video
7. Tiktok.com/@woodhousestudios
6. Tiktok.com/@tastemadehome
5. Tiktok.com/@movingwiththemilitary
4. Tiktok.com/@farmernicknyc
3. Tiktok.com/@skylerlace
2. Woodshopdiaries.com
1. Tiktok.com/@nifty