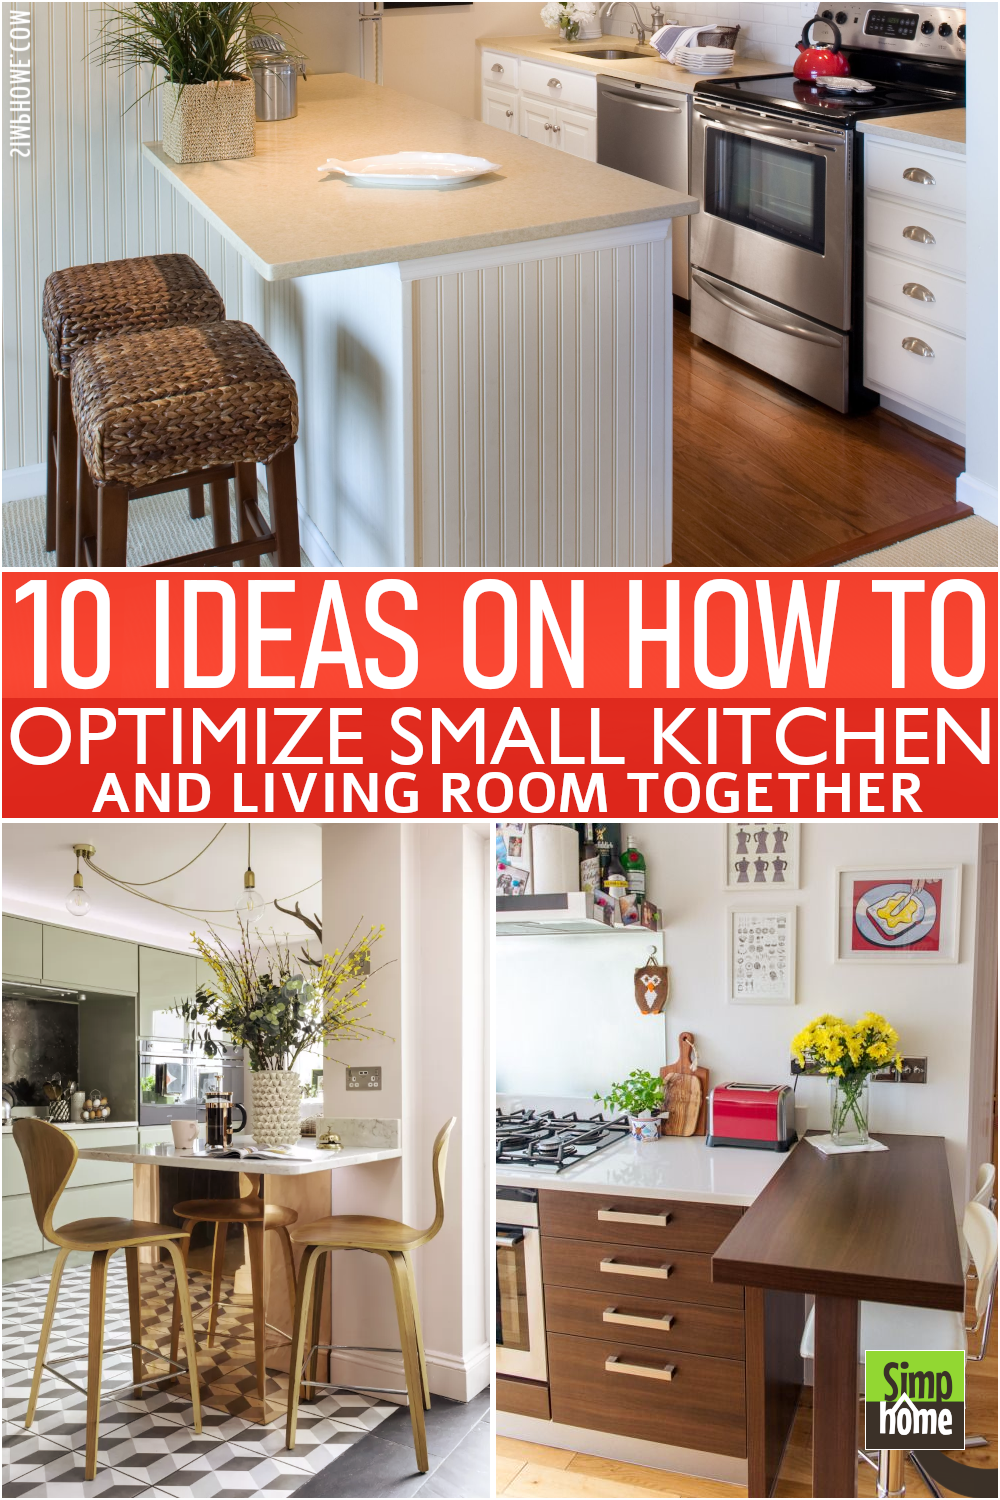
Key Points:
- Optimize your small living room with a minimalist space, using furniture with no unnecessary decorative elements.
- For the small kitchen, try a space that is accessible and functional.
- Don’t forget to consider multiple ideas so that you can design your unique living room and kitchen in the future.
Tips for Small Living Room & Kitchen Spaces:
Alternative no.1 – Maximize Your Space With Minimalist Furniture:
It is essential to manage your small living room with minimalist furniture. It can also help you to create an elegant atmosphere in your home. Choosing neutral color tones for all house rooms will make your home look warm and cozy. Choosing open shelves over other unnecessary items will also help you save space on your walls.
Alternative no.2 – Create Your Own New Style:
There are many ideas for creating a unique style for your home. See all the parts of your small living room or kitchen in contrast to one another. You can make a list of ideas you want to work on and think creatively. You can use anything you have in the house, so don’t worry about spending much money on it.
Alternative no.3 – Accessible Space:
When designing small spaces, it is important to remember that people often use these areas all day long while working and eating. So it’s important to design them as functional and easy-to-use spaces as possible.
Alternative no.4 – Think Creatively:
Sometimes, it’s not about how many colors you can use. It’s about how you combine your colors to create a unique style that can look good. Try new colors and materials in your home. You don’t need a colorful space because you can also make it simple and elegant. Think about what accessories will be good for the rest of your house and the furniture you want to use in your small living room or kitchen.
Alternative no.5 – Better Organization:
When organizing all of your things in the small living room or kitchen, always keep in mind if they will fit or not. Every item should have enough space for you to enjoy it, use it, and put it back easily.
Alternative no.6 – Be Flexible:
Each family member may have different opinions on making their living room or kitchen more functional and stylish. So, it is important to listen to them. Try new ideas and adjust things based on their feedback if needed. Make sure that all family members are satisfied with the design of their small spaces.
Alternative no.7 – Mix & Match Furniture:
One of the best ways to create a unique style is by mixing and matching different furniture pieces in your small living or kitchen space. It will give you added variety without taking up too much additional space in your home.
Alternative no.8 – Prioritize Space:
It is important to prioritize how to use the space you have in the living room or kitchen. In many cases, it will be better to choose a small item that will fit perfectly into your small room instead of selecting a large piece that will take up too much additional space.
Alternative no.9 – Clean Lines:
Use clean lines on your furniture and decorations for your living room or kitchen. This style will help avoid cluttering in these spaces and make them look bigger. It is also important because it can help avoid unnecessary accidents happening in these rooms.
Alternative no.10 – Use Decorative Items Wisely:
Choose wisely if you still decide to go with decorative items in your small living room or kitchen. You should avoid using too many small decorations as this will not make your space look classy and elegant. If you want to add more color, try to use neutral items instead of large colorful decorative items.
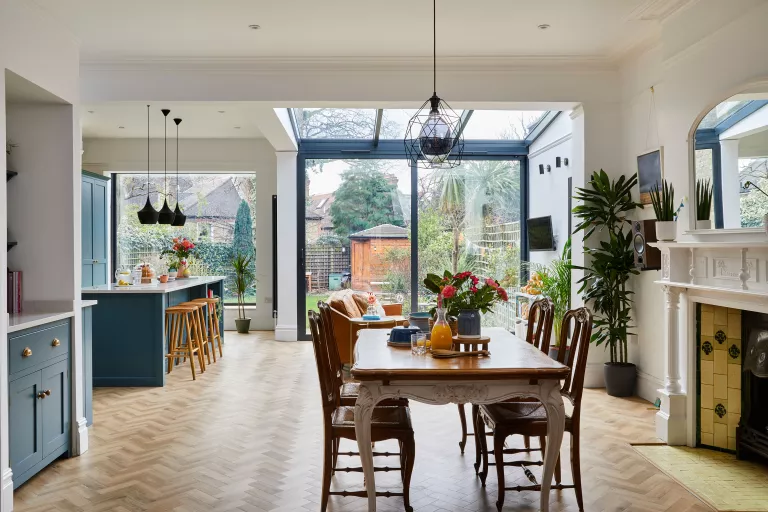
The open floor plan can be your greatest bet when space is limited because it eliminates the walls separating one room from the adjacent area. As a result, you get a more spacious house.
Often, the open floor plan results in a kitchen and living room combo, which entails several benefits and drawbacks. The good news is you will not feel boxed in when you cook.
However, you will lack some privacy. It is still worth trying because this concept is practical and aesthetical.
If you are looking for some inspiration to make the most of the open floor plan, check out these 10 ideas on how to optimize small living room and kitchen space together. As always, Simphome presents you with the list.
🔊10 ideas on How to optimize Small Living Room and Kitchen spaces Video:
List Entries:
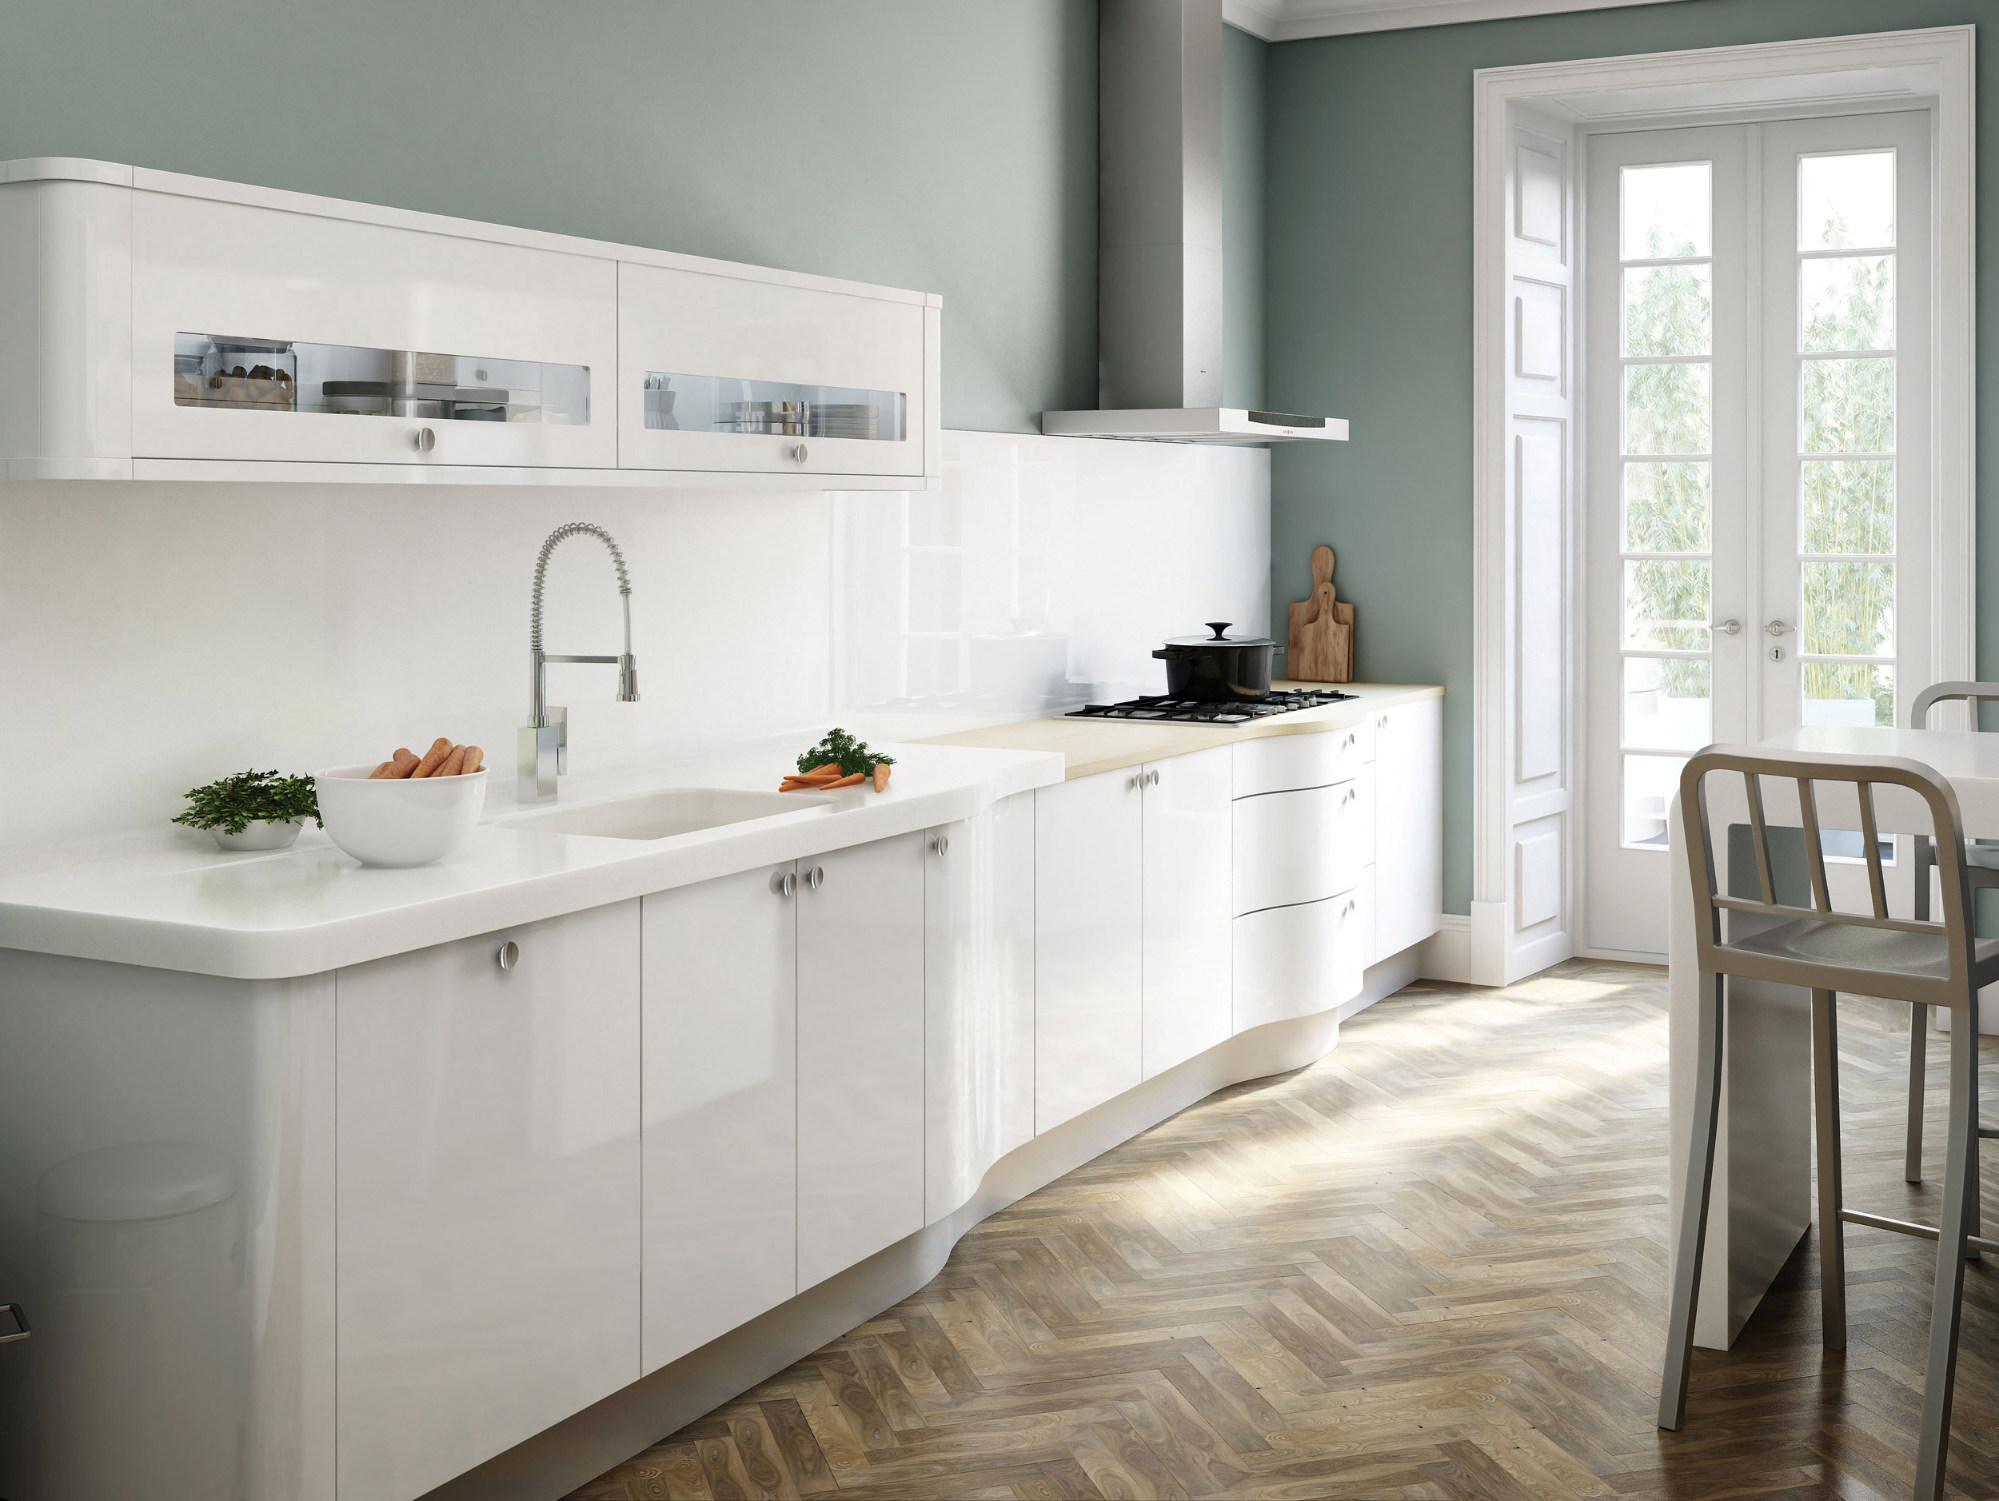
10. Make Your Kitchen Invisible
 This idea is best if you want to make your kitchen less visible. The most obvious option is to design it white, so it will not be noticeable because it blends with the walls nicely.
This kitchen, for example, comes in an all-white scheme. The ceiling, walls, and appliances are all white.
The glossy paint and sleek design reflect light from the windows that make this kitchen almost disappear. In addition, keep kitchen furniture to a minimum. Surely you won’t like to look at a cluttered kitchen while relaxing on your sofa.
Avoid wall-mounted storage and stow your kitchen tools in lower cabinets.
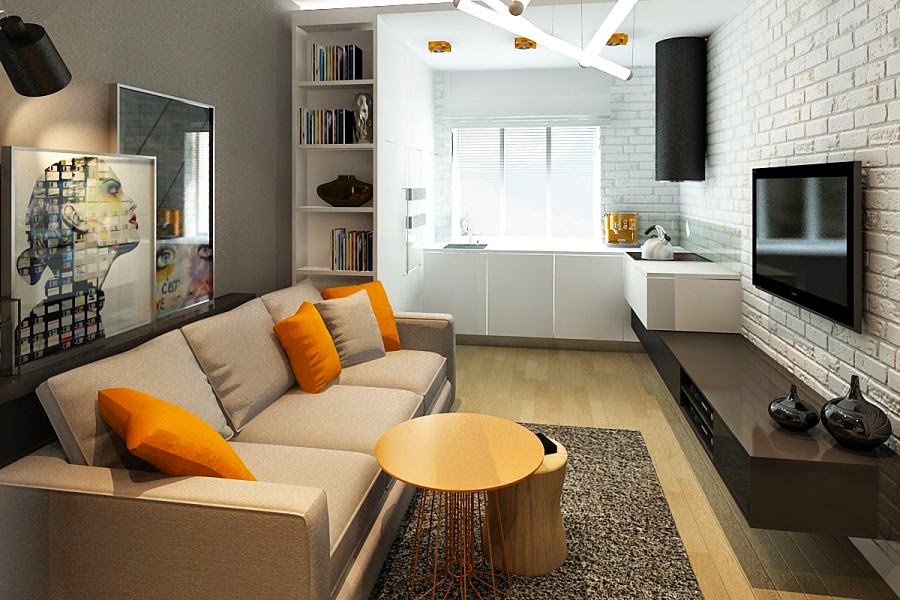
9. Define Each Room
 When designing an open-plan kitchen, you have to stick to cohesion and harmony. Especially when you want to make each area have its own identity. The simplest way to achieve it is by adding rugs or artwork to define the spaces.
First, plan the boundaries of each area and picture where you will want your sofa to sit. Use colors, textures, and materials that complement one another to specify a zone—for example, browns for the living room and glossy for the kitchen. More importantly, avoid locating the sofa facing the kitchen directly.
8. Add a Chalkboard
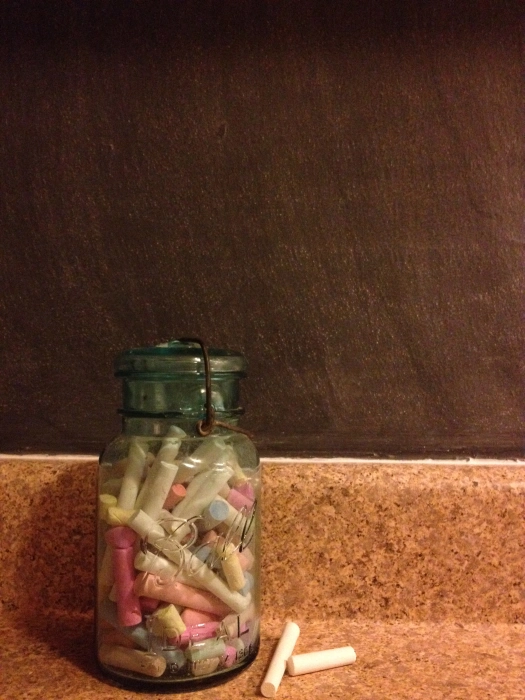 A chalkboard can make your living room and kitchen look fabulous. It is a chic statement for your space. Even better, you have a big spot to scribble what you feel. You will never be disappointed to have one in your home.
Now, look at your living room and kitchen to decide where to place the chalkboard. Consider painting a wall using chalkboard paint. It will give you a lot of space to list your out-of-stock grocery or notes for your family.
If you think painting the whole wall is too much, you can work on your backsplash, the area behind the door, or the corner of the room. To avoid your chalkboard from chipping, let the paint dry for a couple of days. Then, create a thin layer of chalk dust by rubbing the entire surface with chalk and then whip it off.
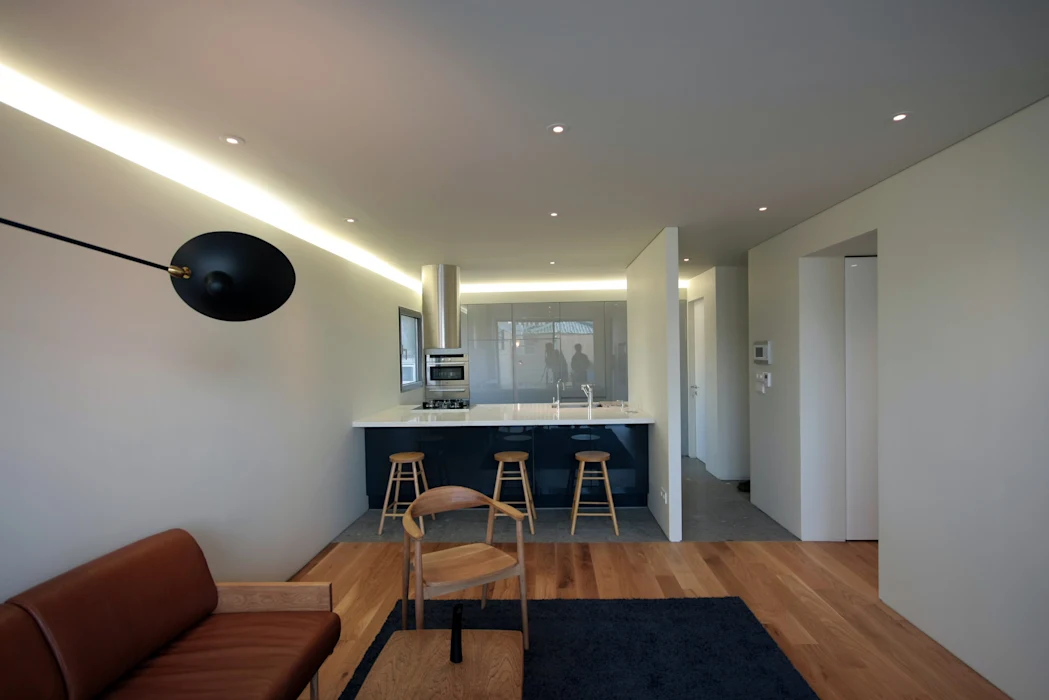
7. Consider the Room Flow
 When you decide to have a living room and kitchen combo, consider how you will move within the space. The room needs circulation between each zone.
Visualizing the open-plan space can help you design the space effectively. Consider the distance of the kitchen from the seating area because chatting in the living room with a background noise of clattering pans does not sound interesting.
You will also need to be thoughtful when picking the furniture. Big furniture tends to impede your movement from one zone to another.
Always consider the arrangement when you start designing your layout. Try to minimize changing direction when you move about the room, especially around the chunky flow of cabinetry.
6. Choose Your Style
Contemporary consists of modern and minimalist components. It combines old, new, and casual yet gives a sleek aesthetic look. The traditional style provides a sense of cleanliness, comfort, and an inviting look. Traditional practicians usually use whites and browns as the primary color.
Modern style carries on sleek and sophisticated, exotic and high-end, also clean lines and minimalist. This style keeps the space bare to a minimum which is best for small spaces.
5. Maximize Natural Light
 Lighting can define each zone in an open plan layout. Moreover, the living room and kitchen lights have different functions and should be operable on a separate circuit. If you have enough sources of natural light, go for it.
Skylights, clerestory, and glazed doors can flood your space with natural light. Though appealing, you still need to consider the window position, so your living room and kitchen will not feel like a greenhouse during the summer.
Another option for having more natural light in the room is painting the walls with light colors. They will reflect the light and make the space feel brighter. However, avoid using brilliant white paint. Otherwise, your kitchen and living room will feel cold.
Relevant Instructions:
- Step 1: Prepare the surface
Before applying your chalkboard paint, make sure that you have prepared the wall or piece of furniture to get a smooth surface. It is generally recommended that you sand down the area. Avoid using too much water because it could seep into the chalkboard paint and make it peel off. - Step 2: Apply the paint
Using a roller, apply two coats of red chalkboard paint to your wall or furniture. Make sure to wait for at least 24 hours before writing on it to allow the paint to cure. If your surface looks more like wood rather than a glossy finish, you can use sandpaper to create a wooden effect. - Step 3: Create a thin layer of chalk dust
Use equal parts of white chalk and water to create a thin, paste-like consistency. Then rub the entire surface with the paste to fill in the pores and leave a dusting effect. - Step 4: Finish the look
You have your chalkboard or furniture that you can write on or wipe off with a dry cloth.
4. Remove Upper Cabinets
 You need to set cabinetry carefully because it is a part that affects the room flow. And to make your kitchen blend seamlessly with the living room, think about removing the upper kitchen cabinets. Without them, the space will be visually cohesive because your eyes will look at the same level.
How about the loss of storage? You can utilize the kitchen island or have some hacks with lower cabinets. There are some videos about extra storage for your kitchen in this channel you could follow.
3. Add a Focus Diversion
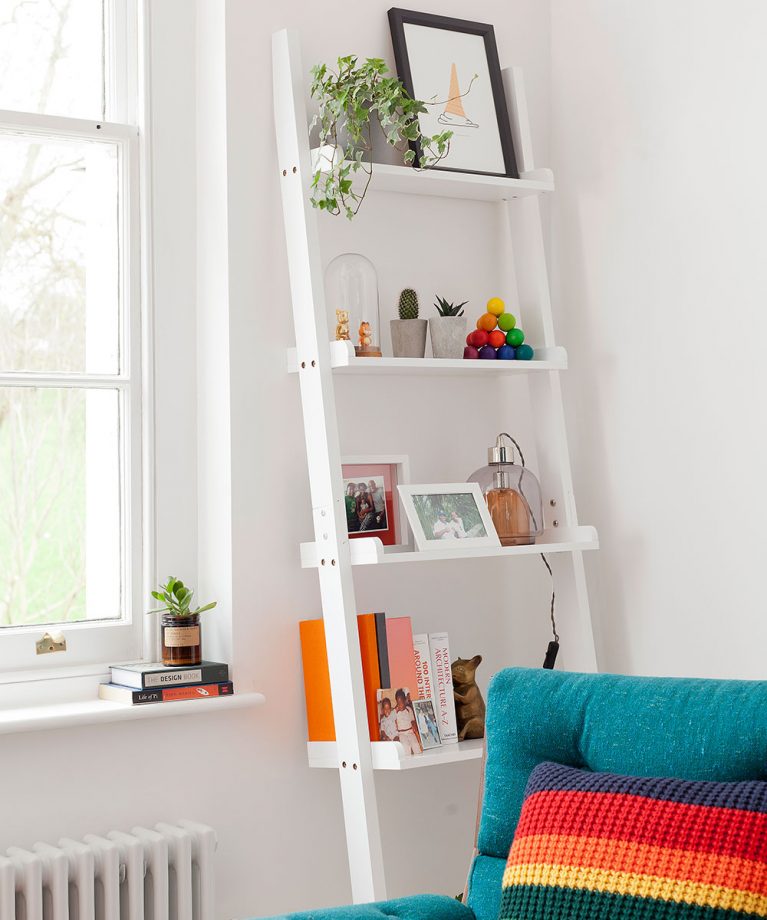 This ladder-style shelving is excellent for diverting the attention of onlookers. It provides valuable storage for your recipe books and novels with a minimal footprint as a versatile storage solution. If you want to make it yourself, here are the steps you could follow.
- First, measure and cut two pine boards for the side, four or more for the shelves, and several smaller cuts for trimming.
- Second, glue the back trim to the shelf pieces and let them dry.
- Third, attach the shelves to the sides with nails. Ask for help to hold the pieces while you use the nail gun. Fourth, add side trimming to the shelves.
- The last step is finishing the leaning shelves using stain or paint.
2. Optimize Your Kitchen Island
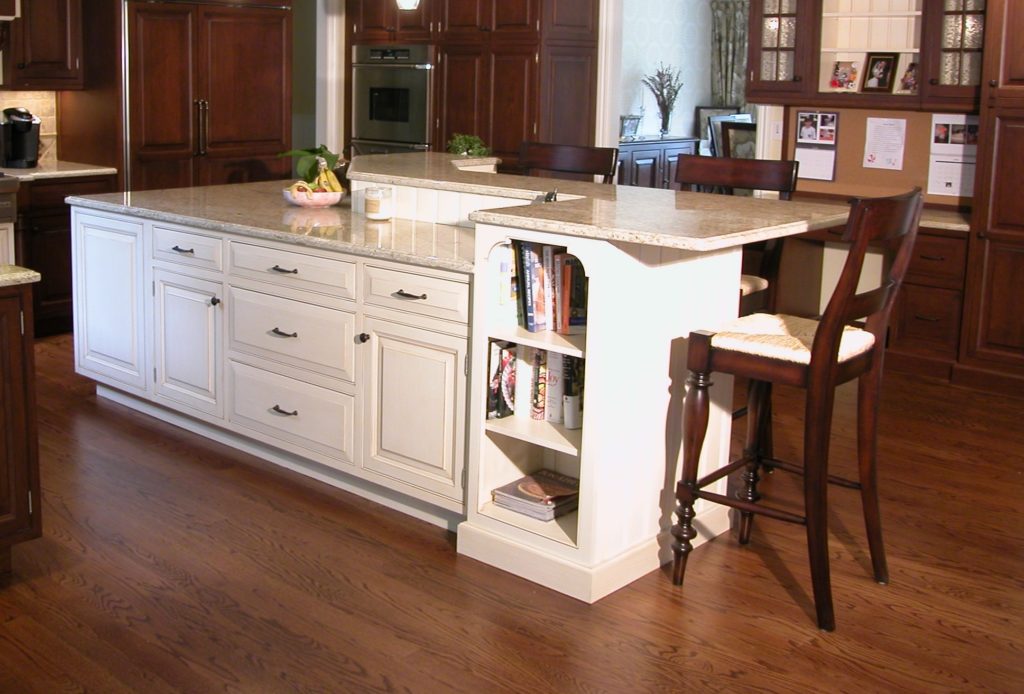 A kitchen island can be a workspace, storage, seating, and room partition. It is a good solution if you have limited space but want to make your kitchen feel separated from other areas.
Find a kitchen island that fits proportionately into your space. You can have it made or DIY it. Don’t hesitate to design it in a non-standard shape as long as it boosts mobility and flow.
When you have the perfect island, think about the appliances and fixtures. Choose items that you use every day. The next consideration is the number of seatings you will use and how you will store them.
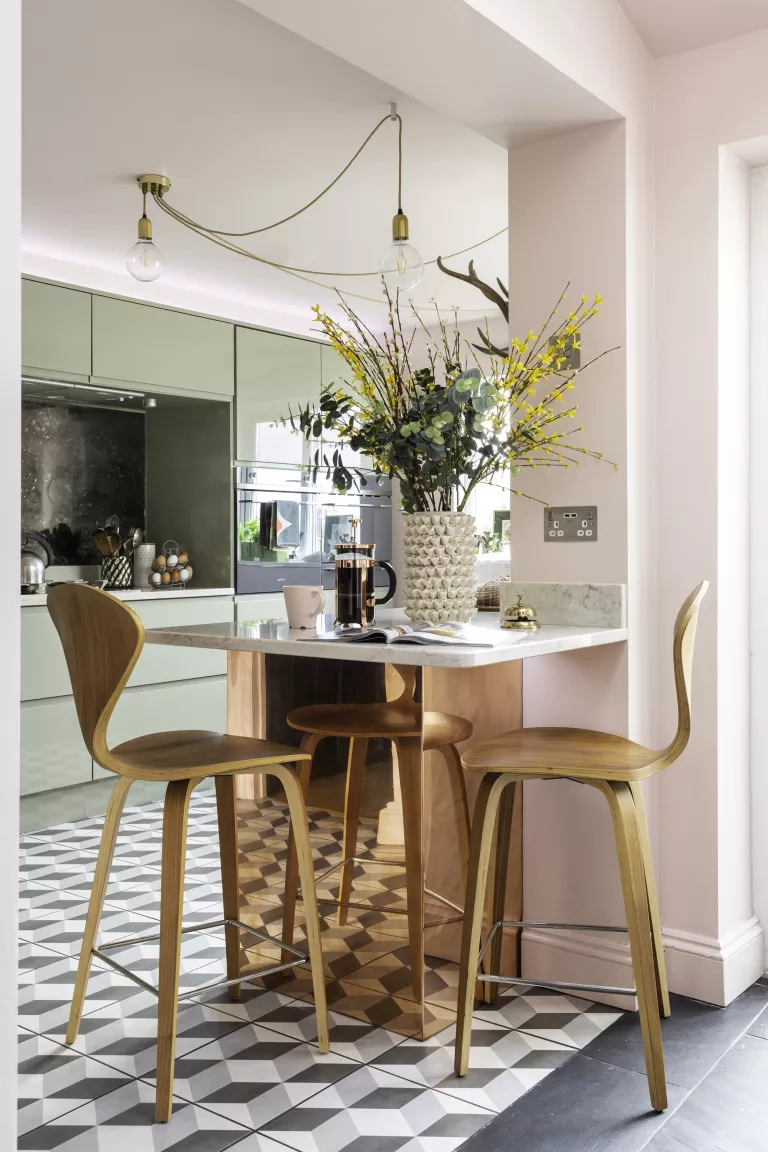
1. Add Breakfast Bar
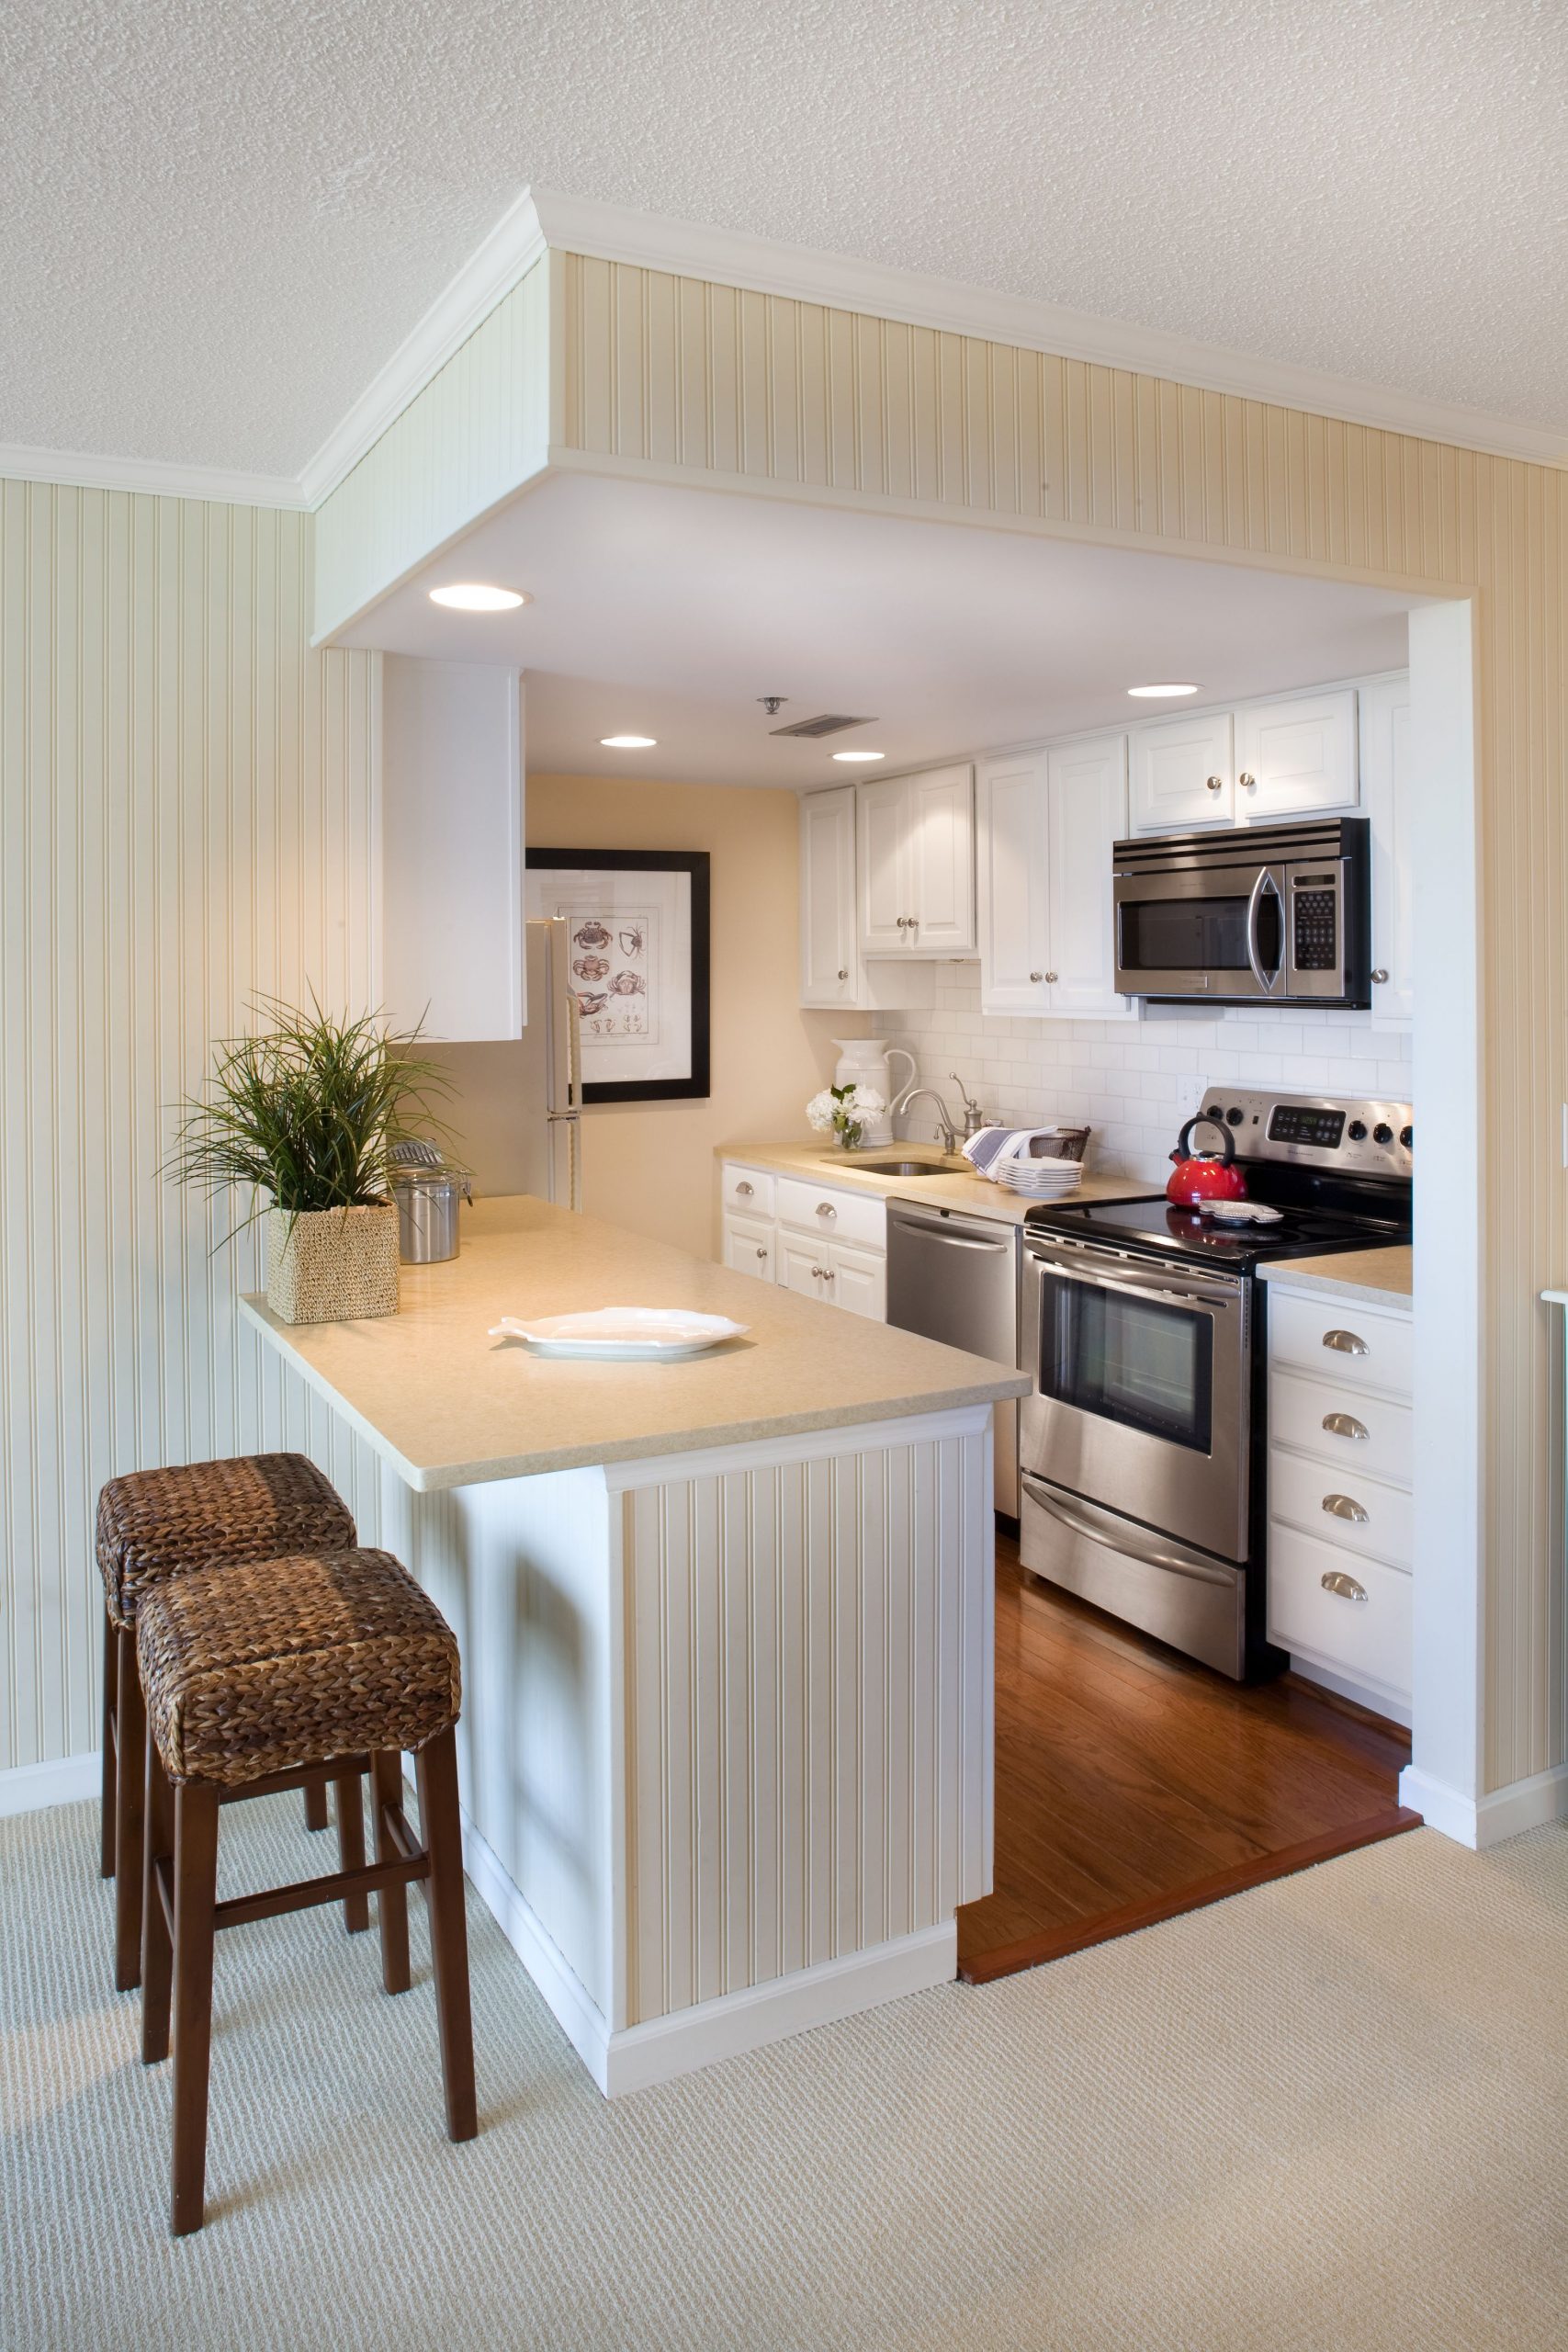 For your tiny kitchen, a dining table is questionable. But, installing a breakfast bar can solve the problem because it will look stylish even in a compact space.
The best bar you can get is by constructing your own. That way, your breakfast bar will fit perfectly in your kitchen. You can install a drawer or cabinets in the lower part for extra storage or let it bare and open to create a spacious feeling.
It is quite an easy DIY if you want a simple one. You only need two panels of worktop attached to the wall and two stools inserted below the panel.
Relevant Instructions:
- Step 1: Remove the old drawers
Open the cabinets, lift the shelves, and take out the drawers. Remove all of your under-mounted equipment. Take out all unnecessary pieces of cabinet doors, etc. - Step 2: Remove all of your appliances
Remove all of your refrigerators, stoves, and microwaves from the kitchen. Take off the countertop. - Step 3: Clean your cabinets
Start cleaning now because it will take a lot of time to get rid of dust there. You can use a moist cloth to wipe them down or a mild detergent to wipe them clean. After that, wipe dry with cloth or dryer sheets. You have to remove any moisture you have left behind. - Step 4: Measure your openings
Measure the space for your opening for a worktop, stove, fridge, and microwave. Measure the height and length from where you have cut out the cabinets until you reach where your refrigerator will go. If you are making a built-in island, remember to measure the wall from which you cut out along with the width of your island. - Step 5: Cut out a hole for your appliances & cabinets
Depending on what type of cabinetry you have, this is where it can get tricky or extremely simple. Either way, consider what will be on top and bottom of each cabinet/appliance unit before cutting. - Step 6: Lay down the worktop
Lay down the worktop of your choice onto the cabinet area. Make sure that it is level, and then screw it into place using a drill with a hammer handle to not crack your worktop. - Step 7: Cut away any “excess” places
Ensure that you have allowed enough space for all appliances to function appropriately. Step 8: Measure and cut holes for plumbing pipes, electric wires, etc.
Before starting this step, make sure that you have turned off all water taps and power supply to your water heater because it will be easier than trying to turn them off afterward when everything has already been cut out. - Step 8: Place your appliances
Once you have cut out their respective buttons, you can place all of your appliances into the worktop area (if you are unsure, look at your original cabinets and check where the buttons are). Ensure that all of your appliances are level in the back and front. - Step 9: Add electrical connections
Use a guide to make sure that you can connect all of your electrical wires to the proper terminals using a screwdriver to avoid damaging or accidentally making any mistakes with wiring connections. - Step 10: Install drawer units
Your drawer units should have been pre-cut, but if not, use them as guides when installing them onto the cabinet. - Step 11: Install appliance doors
Simply slide the appliance doors on, and then put everything back together. You may have to have a little screwdriver help to get them in there, but you should be able to do it by yourself, depending on the design of your drawers. - Step 12: Install sink unit
This one is easy because you’ll just have to fit your sink underneath the cabinets, and then it’s up to you when it comes to deciding whether or not you want an overflow under your worktop.
Additional idea:
Redirect the eye to create space. Use a visual element to set your kitchen apart. You can find many designs and styles, but the key is you should consider your kitchen area. Get the one that suits you at present.
The most effective way of doing this job is by arranging or painting items such as appliances shelves and coordinating colors. Or make the set looks nice to each other. It makes the room look cleaner and more spacious even though you have only a small space for cooking.
Conclusion. Open plan kitchen and living room is not a new idea. Your job is to make it as fluid as possible and simplify the furniture without sacrificing functionality.
Preparing meals while hosting guests or family can be more entertaining. These 10 ideas on how to optimize small living room and kitchen space together can give you some insights.
References:
10. Homedit.com
9. Homify.co.uk
8. Homify.co.uk,Thespruce.com
7. Realhomes.com,Realhomes.com
6. Realhomes.com
5. Realhomes.com
4. Grundig.com
3. Idealhome.co.uk,Brepurposed.porch.com
2. Topinspired.com,Signaturekitchensinc.com
1. Topinspired.com,Theusedkitchencompany.com