
Slide Out Bed Design
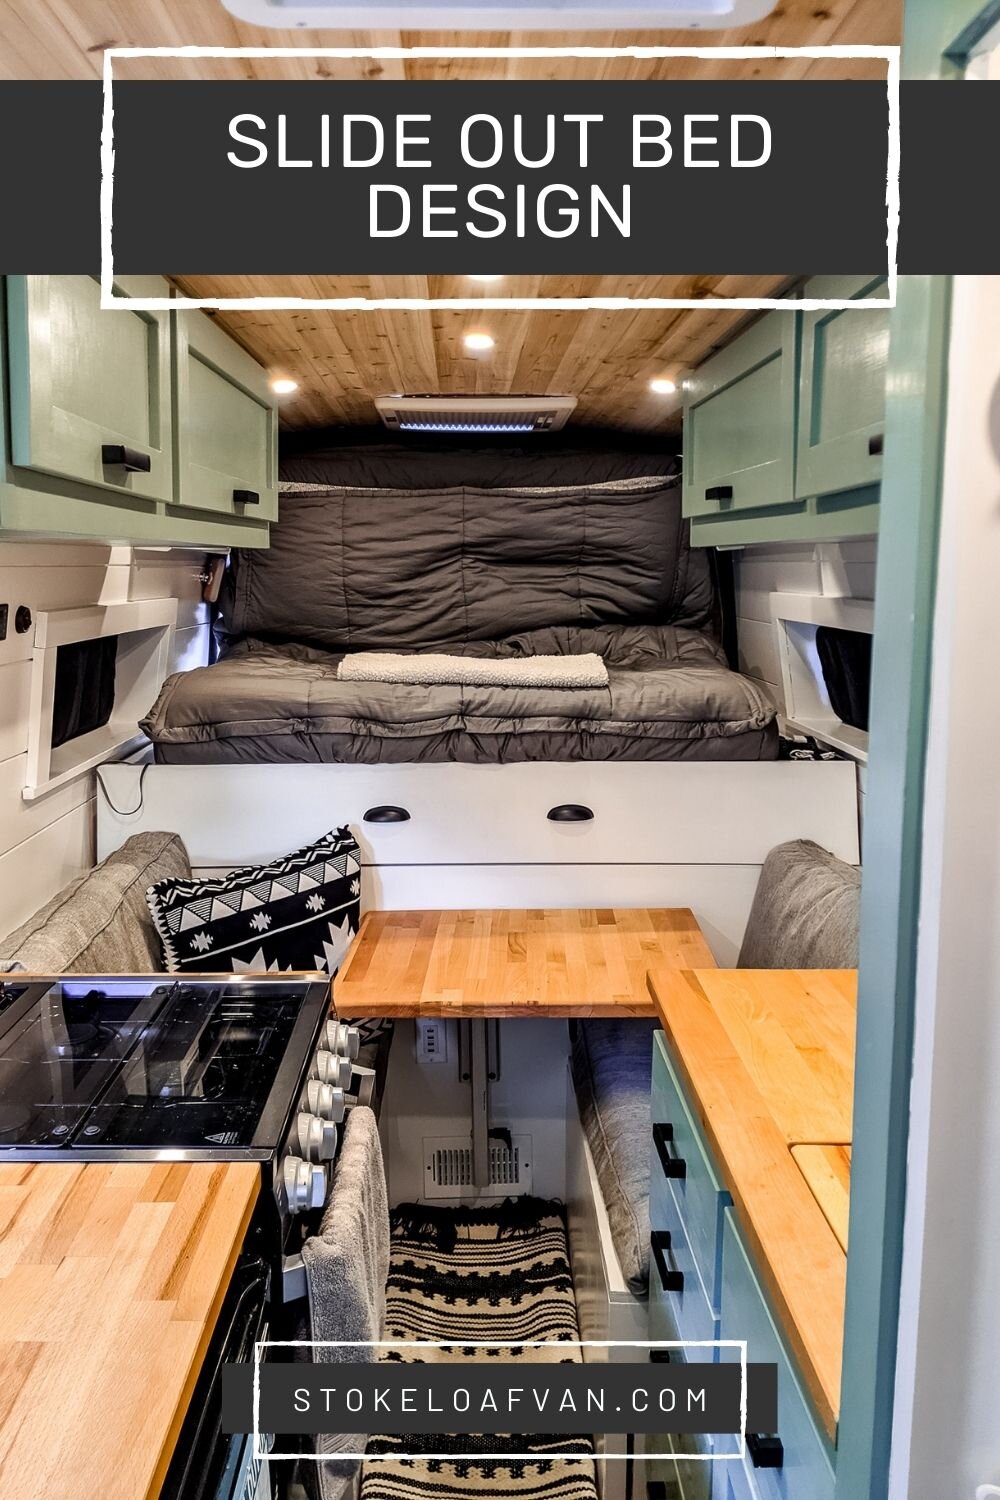
Everything in a van build is a bargain of “trading this, for that”. Even so, we wanted so badly to get the perks of a fixed platform bed without sacrificing living space in the van. This led us to create and implement the Slide Out Bed Design in our van!
When we were discussing what we wanted from the layout in our van build the same key items kept coming up:
Adequate Garage space: for snowboards, tools, crash pad, and extra hiking and climbing gear
A seating space we could use easily, every day.
Not having to make the bed every day (like you would with a full dinette conversion) and not wanting to give up cabinet space to store the linens during the day.
If you already know you love this design and want the build guide:
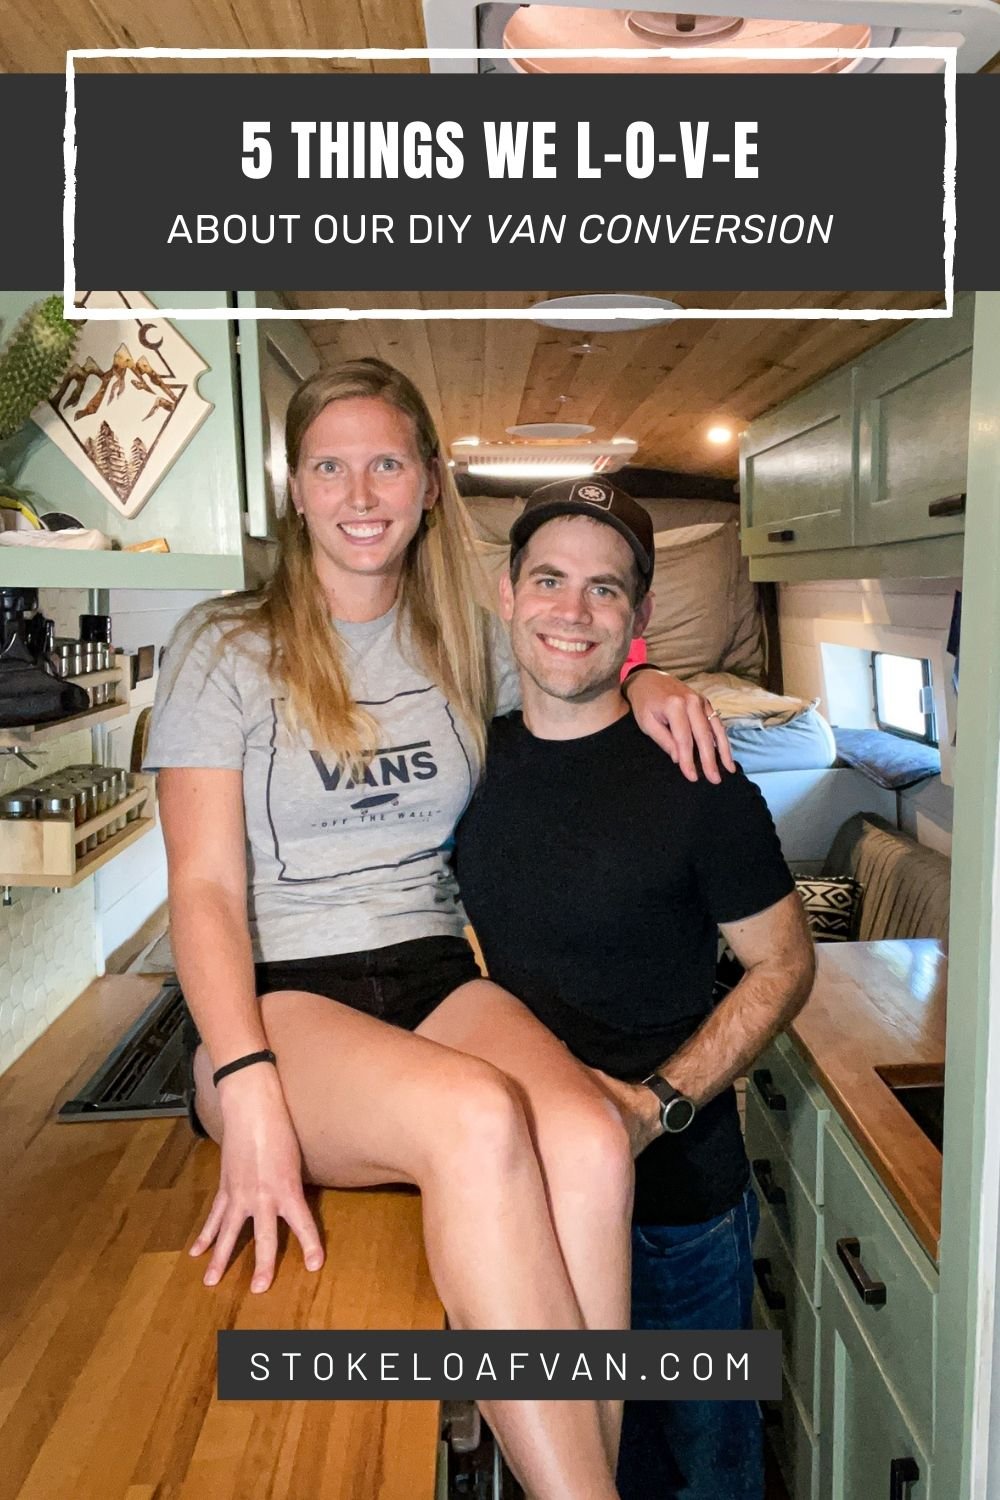
5 Things We Love About Our DIY Van Conversion
In this post we discuss the things we love most about our DIY van conversion. Hopefully this helps you deisng your own tiny home on wheels.
WHAT ARE THE PROs & CONs OF THIS BED DESIGN
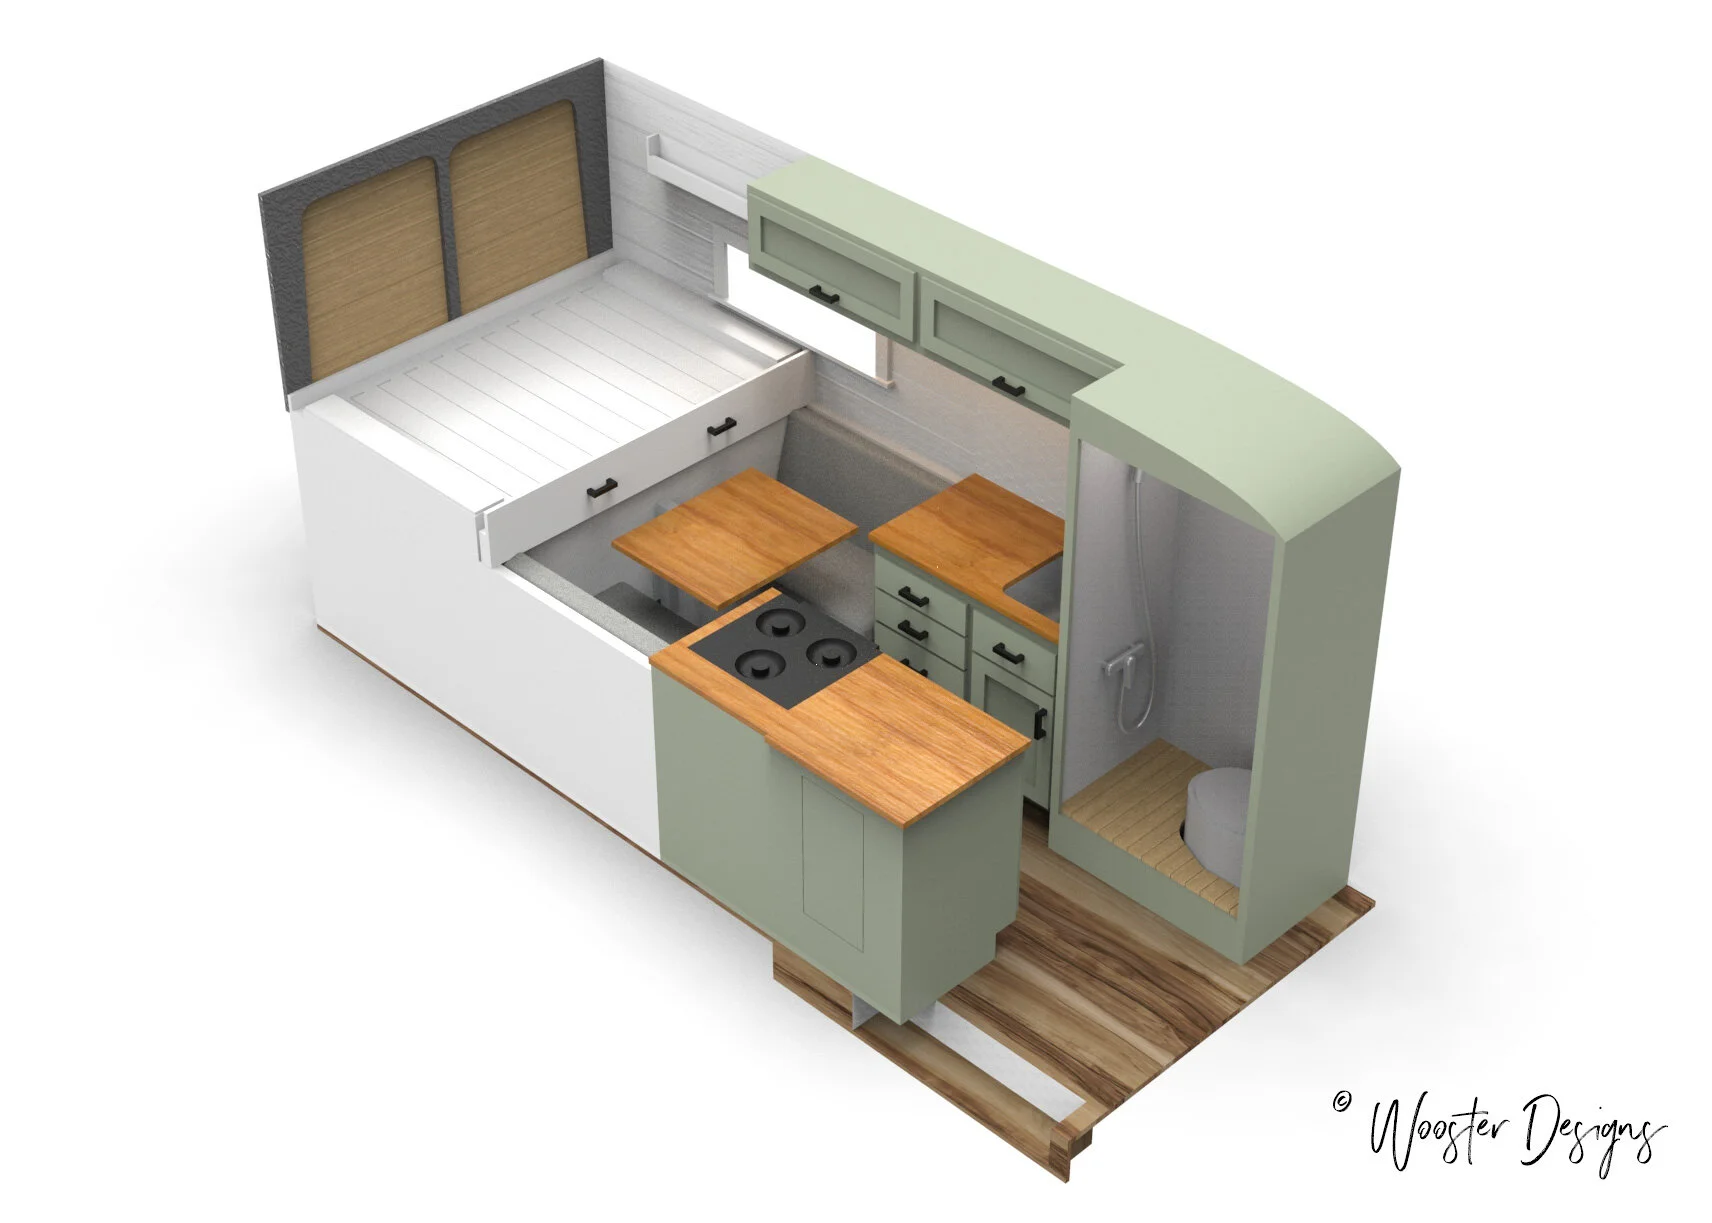
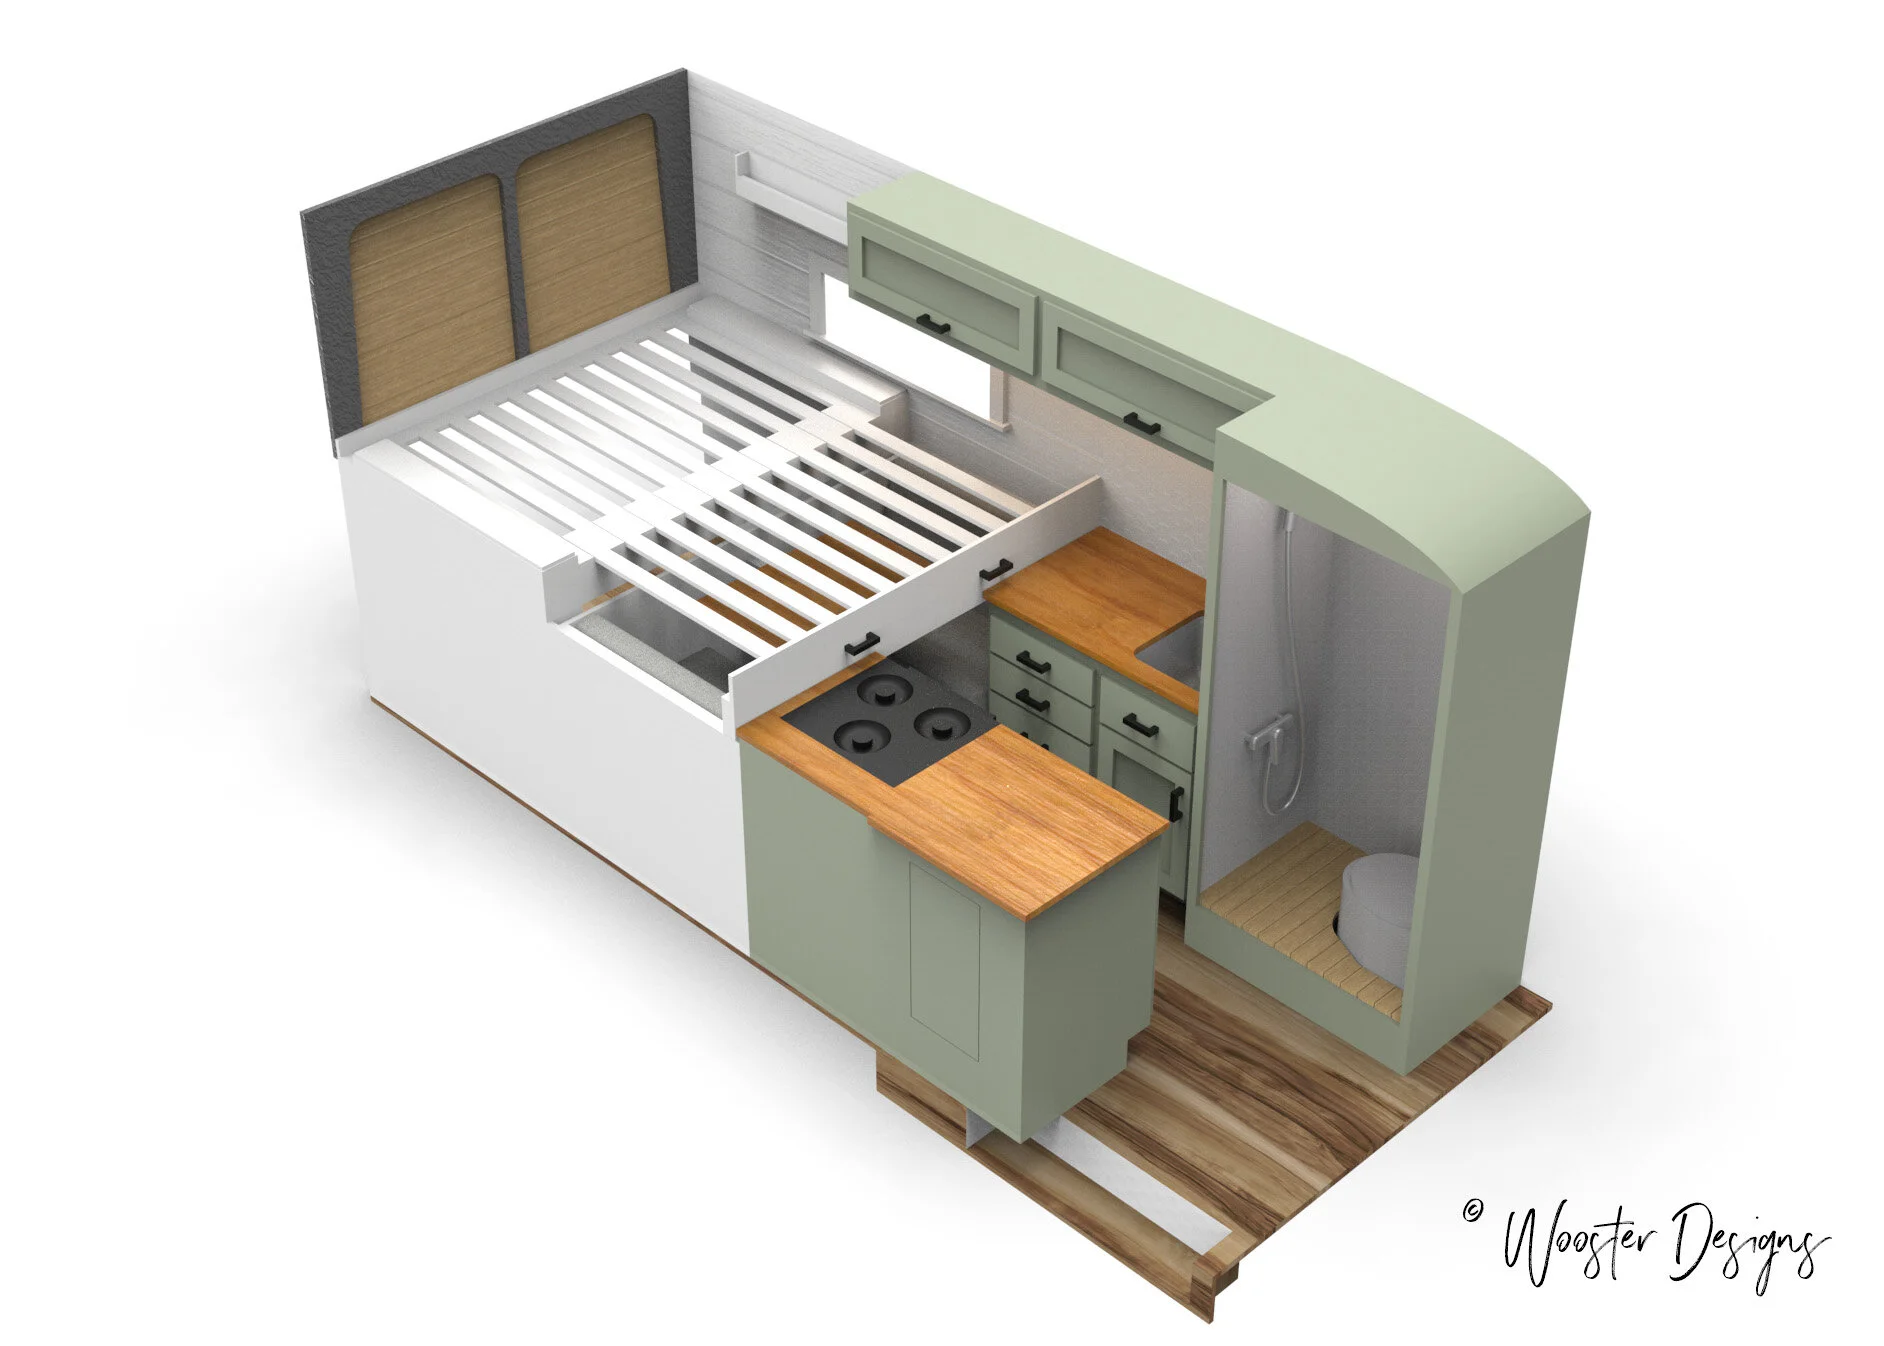
We went through several different design options in CAD (computer-aided drawing) and eventually fell in love with the slide-out concept we have today. While we still ended up trading some of this for some of that, the pros outweighed the cons for us.
PROS:
Large Garage Area
You get half of the depth of a fixed bed garage which is plenty of space if you are not traveling with bikes.
Plenty of room for gear: snowboards and skis (under 160cm), climbing equipment, crash pads, hiking, and backpacking items.
Larger Living Area
By only having half of a fixed bed you regain about 3’ of living space in the van. This is enough space for a day-use booth area.
Bedding Stays on the Bed
Zero storage space allocated to bedding
With a dinette conversion setup, you would need to set aside adequate cabinet space or headliner space to store all of the bed linens and pillows during the day.
The bed does not need to get made every night before bed.
We use Beddys bedding on our bed. It’s essentially a sleeping bag made of regular linens and it zips up so you don’t actually need to make the bed and it stays in place when the bed is pushed back.
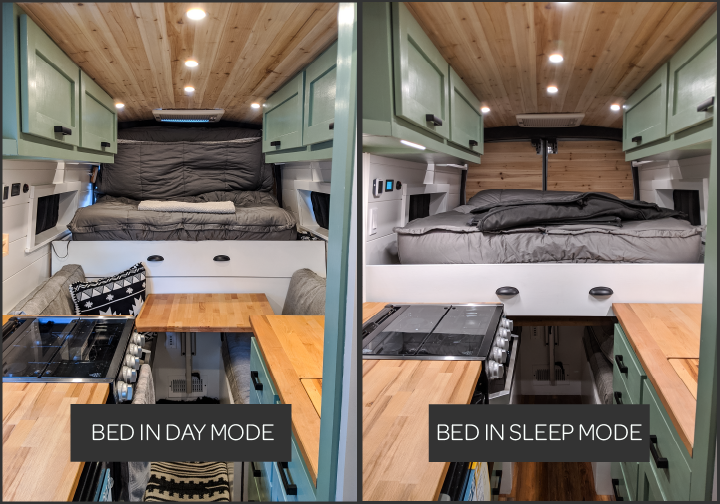
Quick to convert between day and sleep mode
Pull the bed slide out in the evening for sleep time and then slide the mattress up in the morning
Daybed for napping
If one of us wants to take a nap we can curl up on the bed while the other continues working at the booth or in the main living space.
CONS:
It takes 2 people to convert
You could cut the mattress in half and stack the pieces or place them in an L configuration when it’s in day mode as a solution to make it doable for 1 person.
Keep in mind the mattress cut would be right in the middle, probably where your hips rest when you sleep.
Not quite enough room for all-size bikes in the garage.
Our garage height is 34” so you could fit some models in there sideways. A good rule of thumb is 40” is the height to fit 90% of all bikes.
Our bed is a touch too high to sit comfortably.
We designed the height of our bed off of our benches which have a comfortable back height. However, we had intended to use a 4” mattress and on that, we could sit up comfortably.
We ended up switching to an 8” mattress which eliminated the extra headroom we had to sit comfortably.
Rendered views & animations of the bed in its pushed in/day position and pulled out/night position
HOW DO YOU FOLD UP THE BED?
We get this question and several others all of the time, so lets go through a little Q&A:
Did you have to cut your mattress or buy a special one to get the fold?
No! Its just a normal foam mattress!
Can you fold the bed up with out going outside?
Yes. You can slide the bed up or down inside the van.
Will the mattress fall out when you open the back doors?
No! We have a header board at the top of our door opening that holds the mattress in place when its up so you can open the doors.
If you do not build this header piece, then yes, it could fold out when you open the back doors.
Does the mattress every fold forward when its in day mode?
No! The mattress stays upright no matter what roads we put it through!
Check out the video below to see how we put the bed up and down.
BED CONSTRUCTION & TIPS
We’re going to show you a few pictures of our bed while it was under construction and a few tips if you want to use this design in your build. If you are looking for exact materials, dimensions, and renders for our bed design - check out our Slide Out Bed Build Guide.
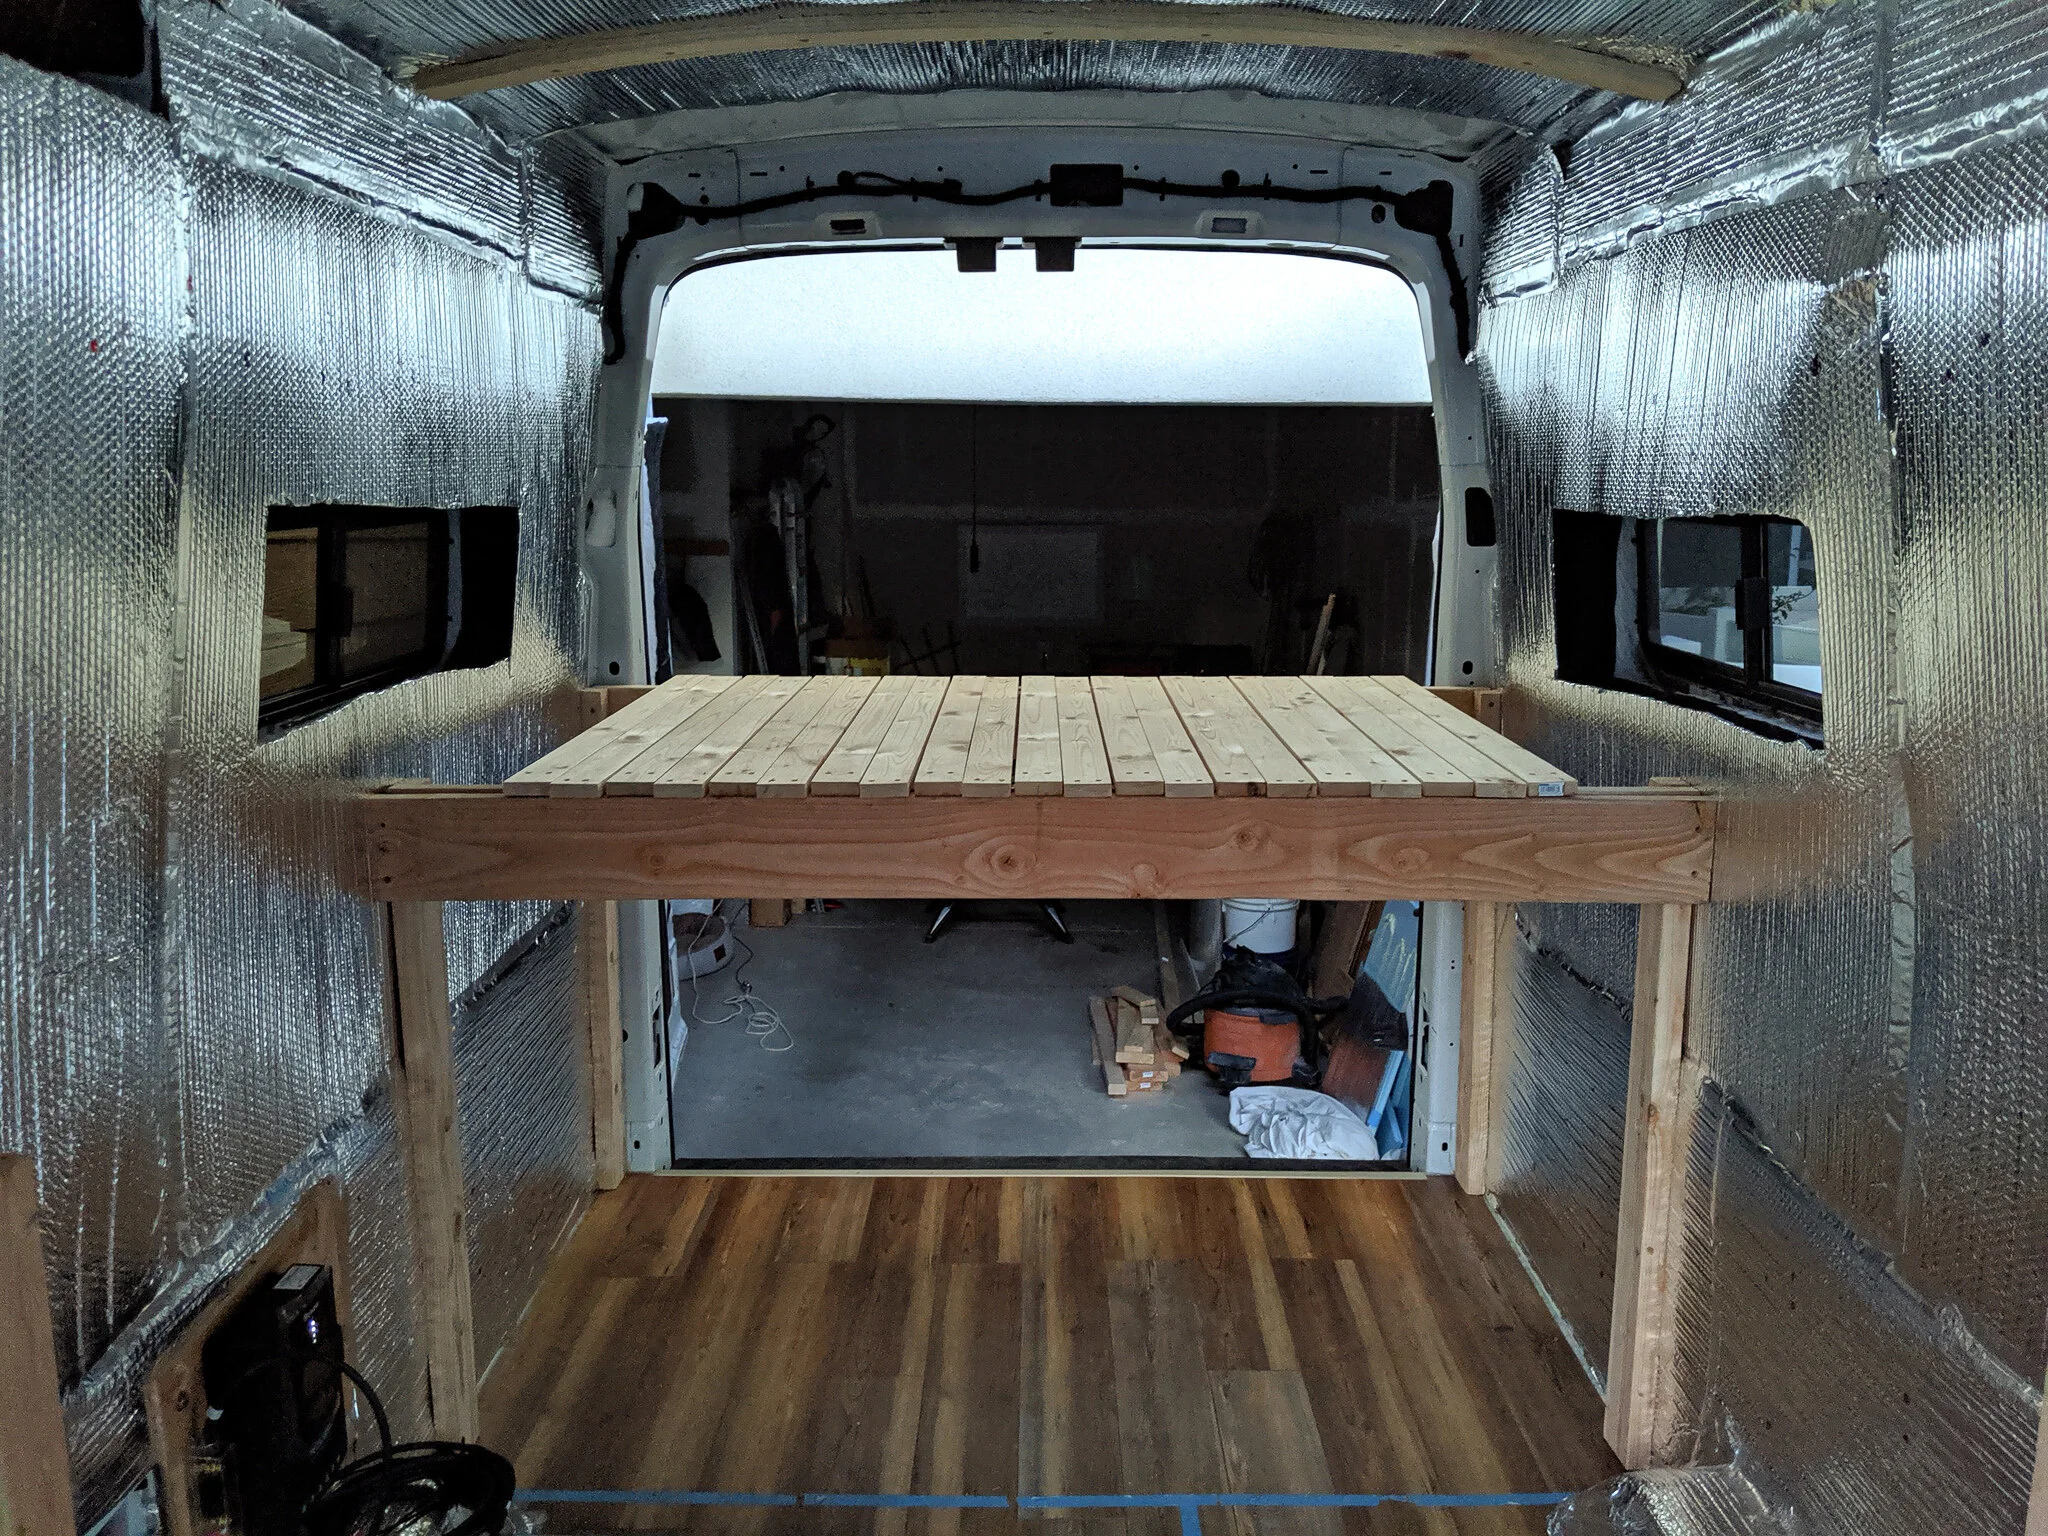

We made our bed very early on in our build. It was actually our first lumber project (besides ceiling furring strips/strapping). We wanted to do this so we could use our bed for weekend trips while we were building. Having our bed off the ground would give us storage for gear, coolers and dog crates while we traveled in our van shell. The pictures above show the bed in its in and out position at the beginning stage of the build.
Because we built the bed build so early on, we had temporary posts in the front to hold the bed while it was in the sleeping position. There was no track for the bed to slide on, at this point, so we would just pull it out and set it on the front bed posts (which had stoppers on the back side to make sure the bed stayed in place). You can see in the above pictures that the bones of the bed design are actually quite simple. The entire bed is built from lumber. There are no bearings or tracks used in our design.
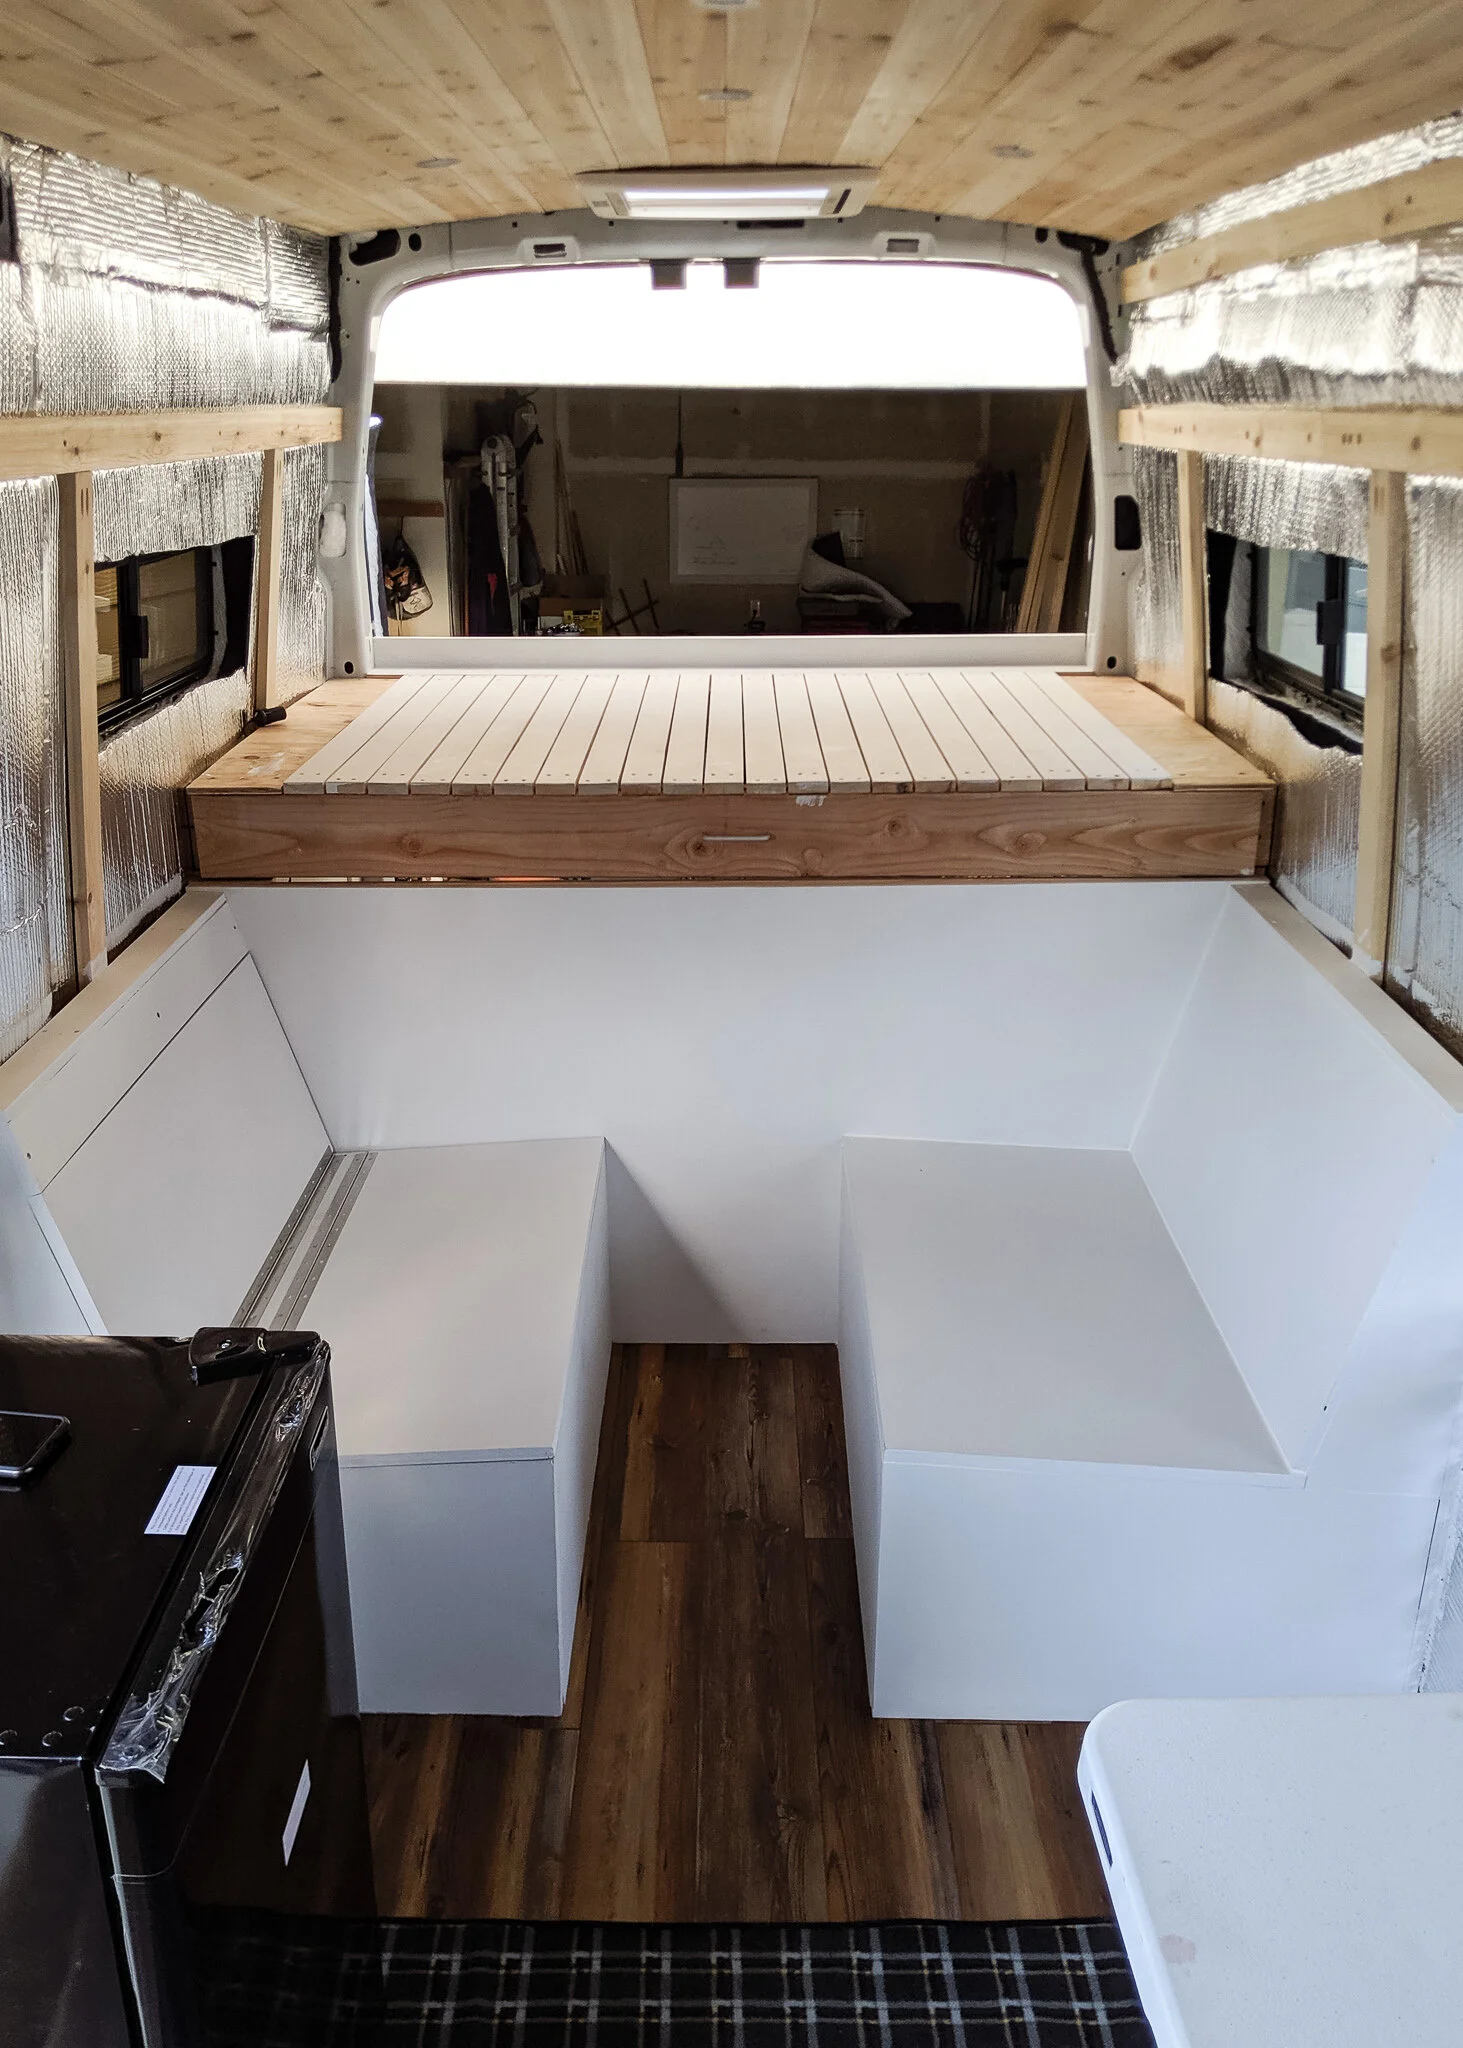
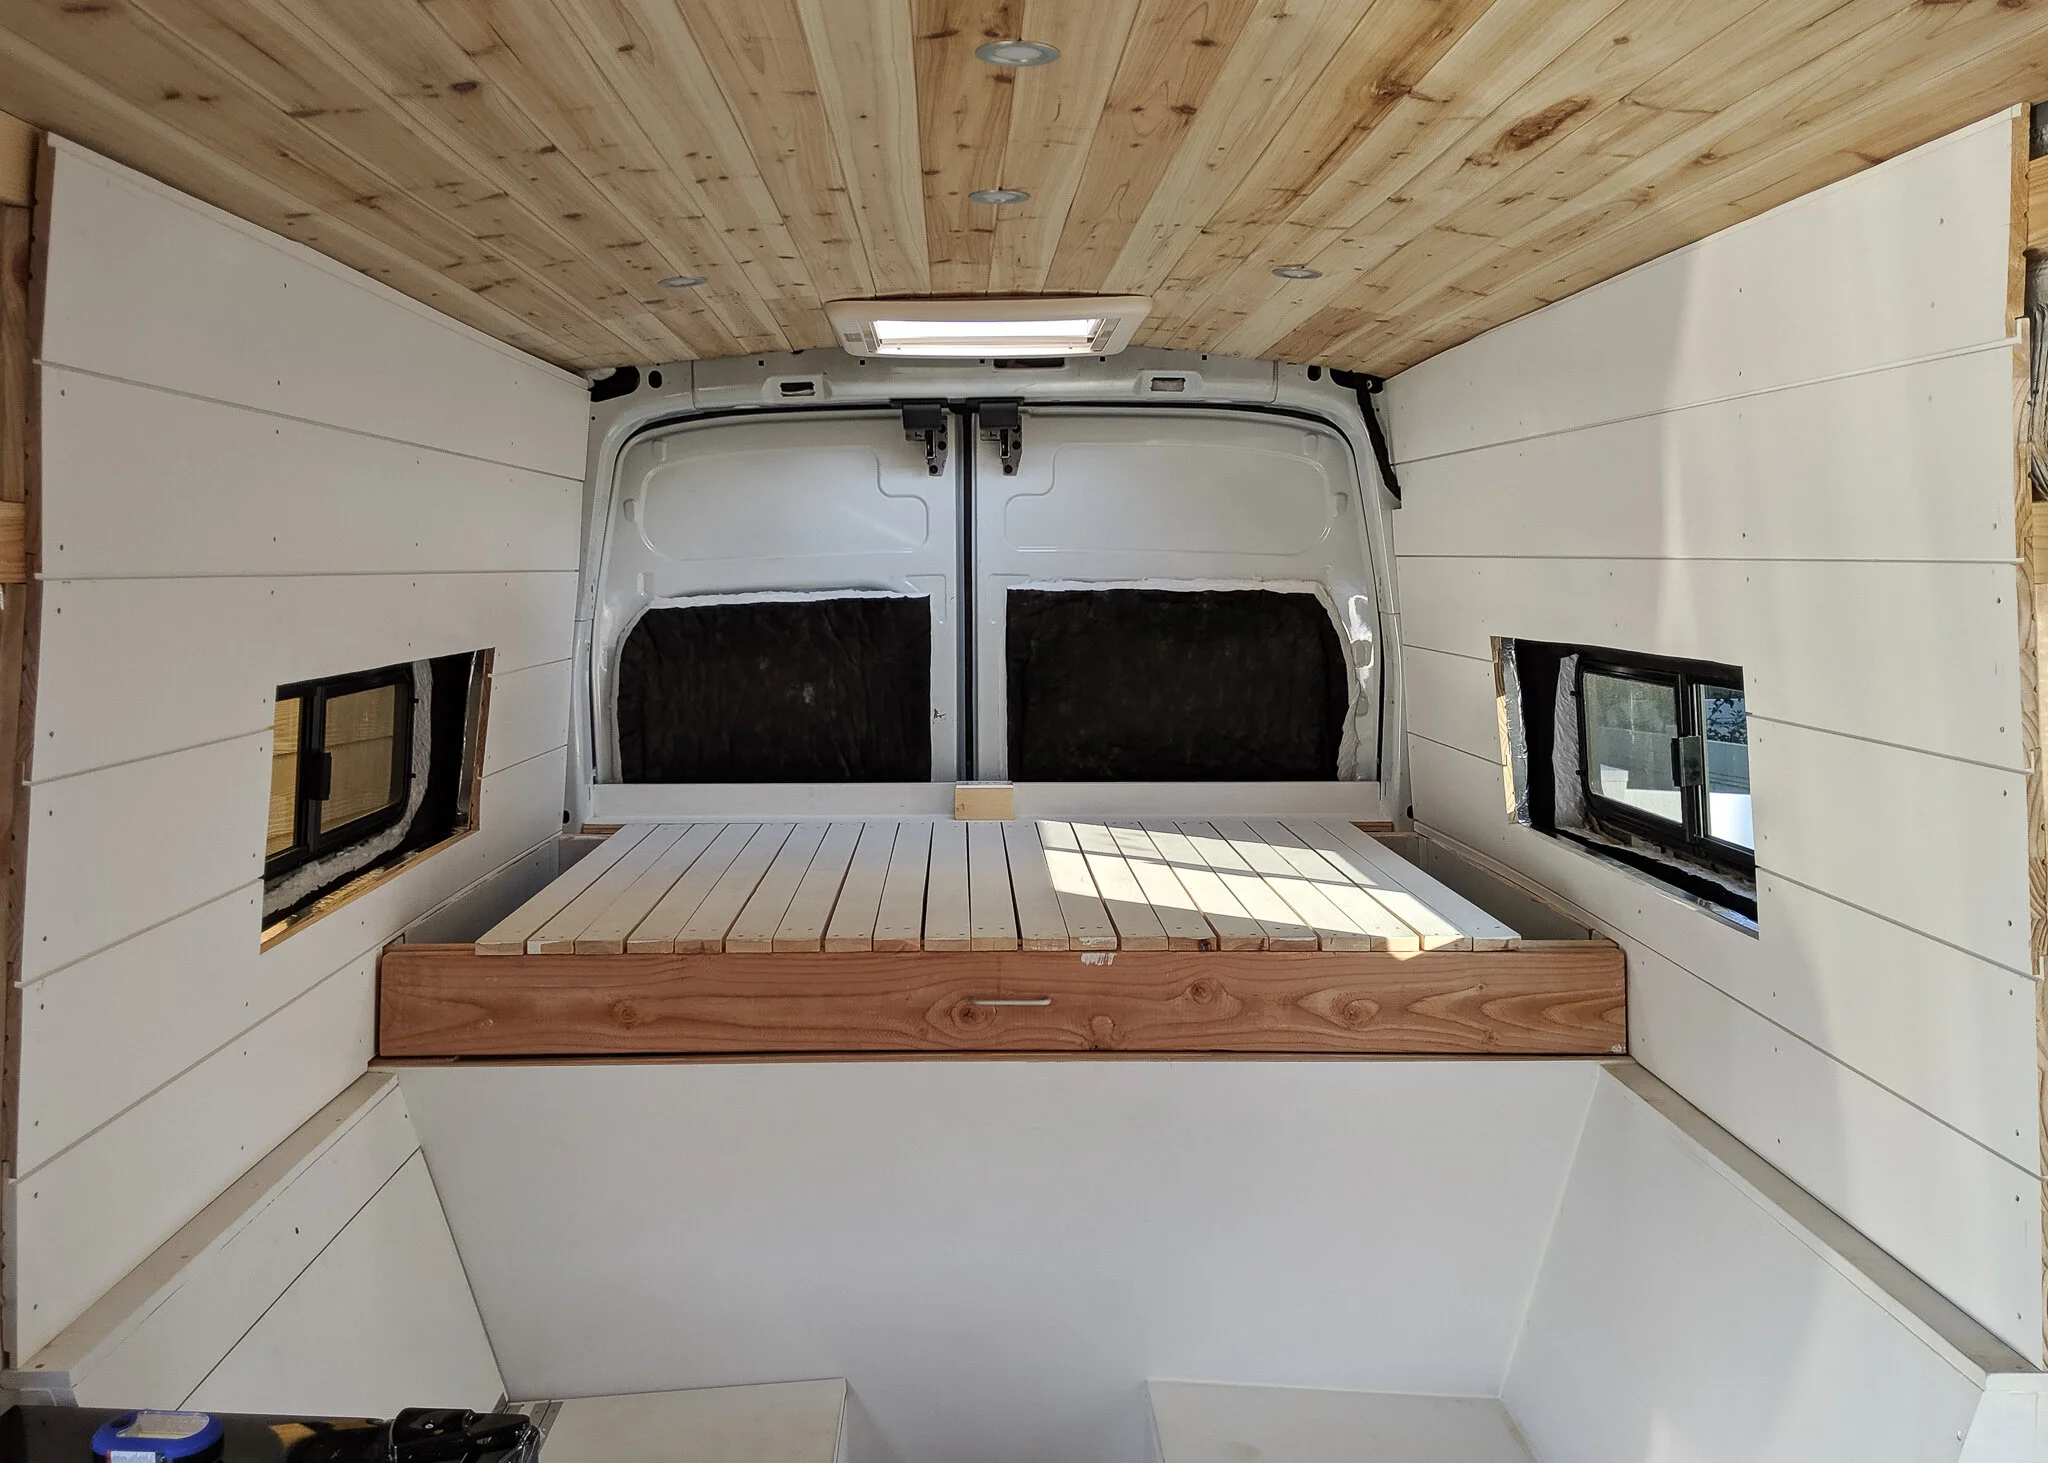
As we continued our overall build, the top edge of the benches became the slide support for the bed and we were able to remove the temporary support boards. In the first picture above, you can see that without the walls there was still an inch or so on either side of the bed. At this point the bed still had some play when we would pull it out. In the second picture, we have the shiplap walls in place and those shored up the bed design and eliminated any excess play in the slats.

We recommend using a jig or a tool to keep the spacing between your slats consistent. The more consistent your slat spacing is the easier your bed will slide in and out because the they will not bind on one another.
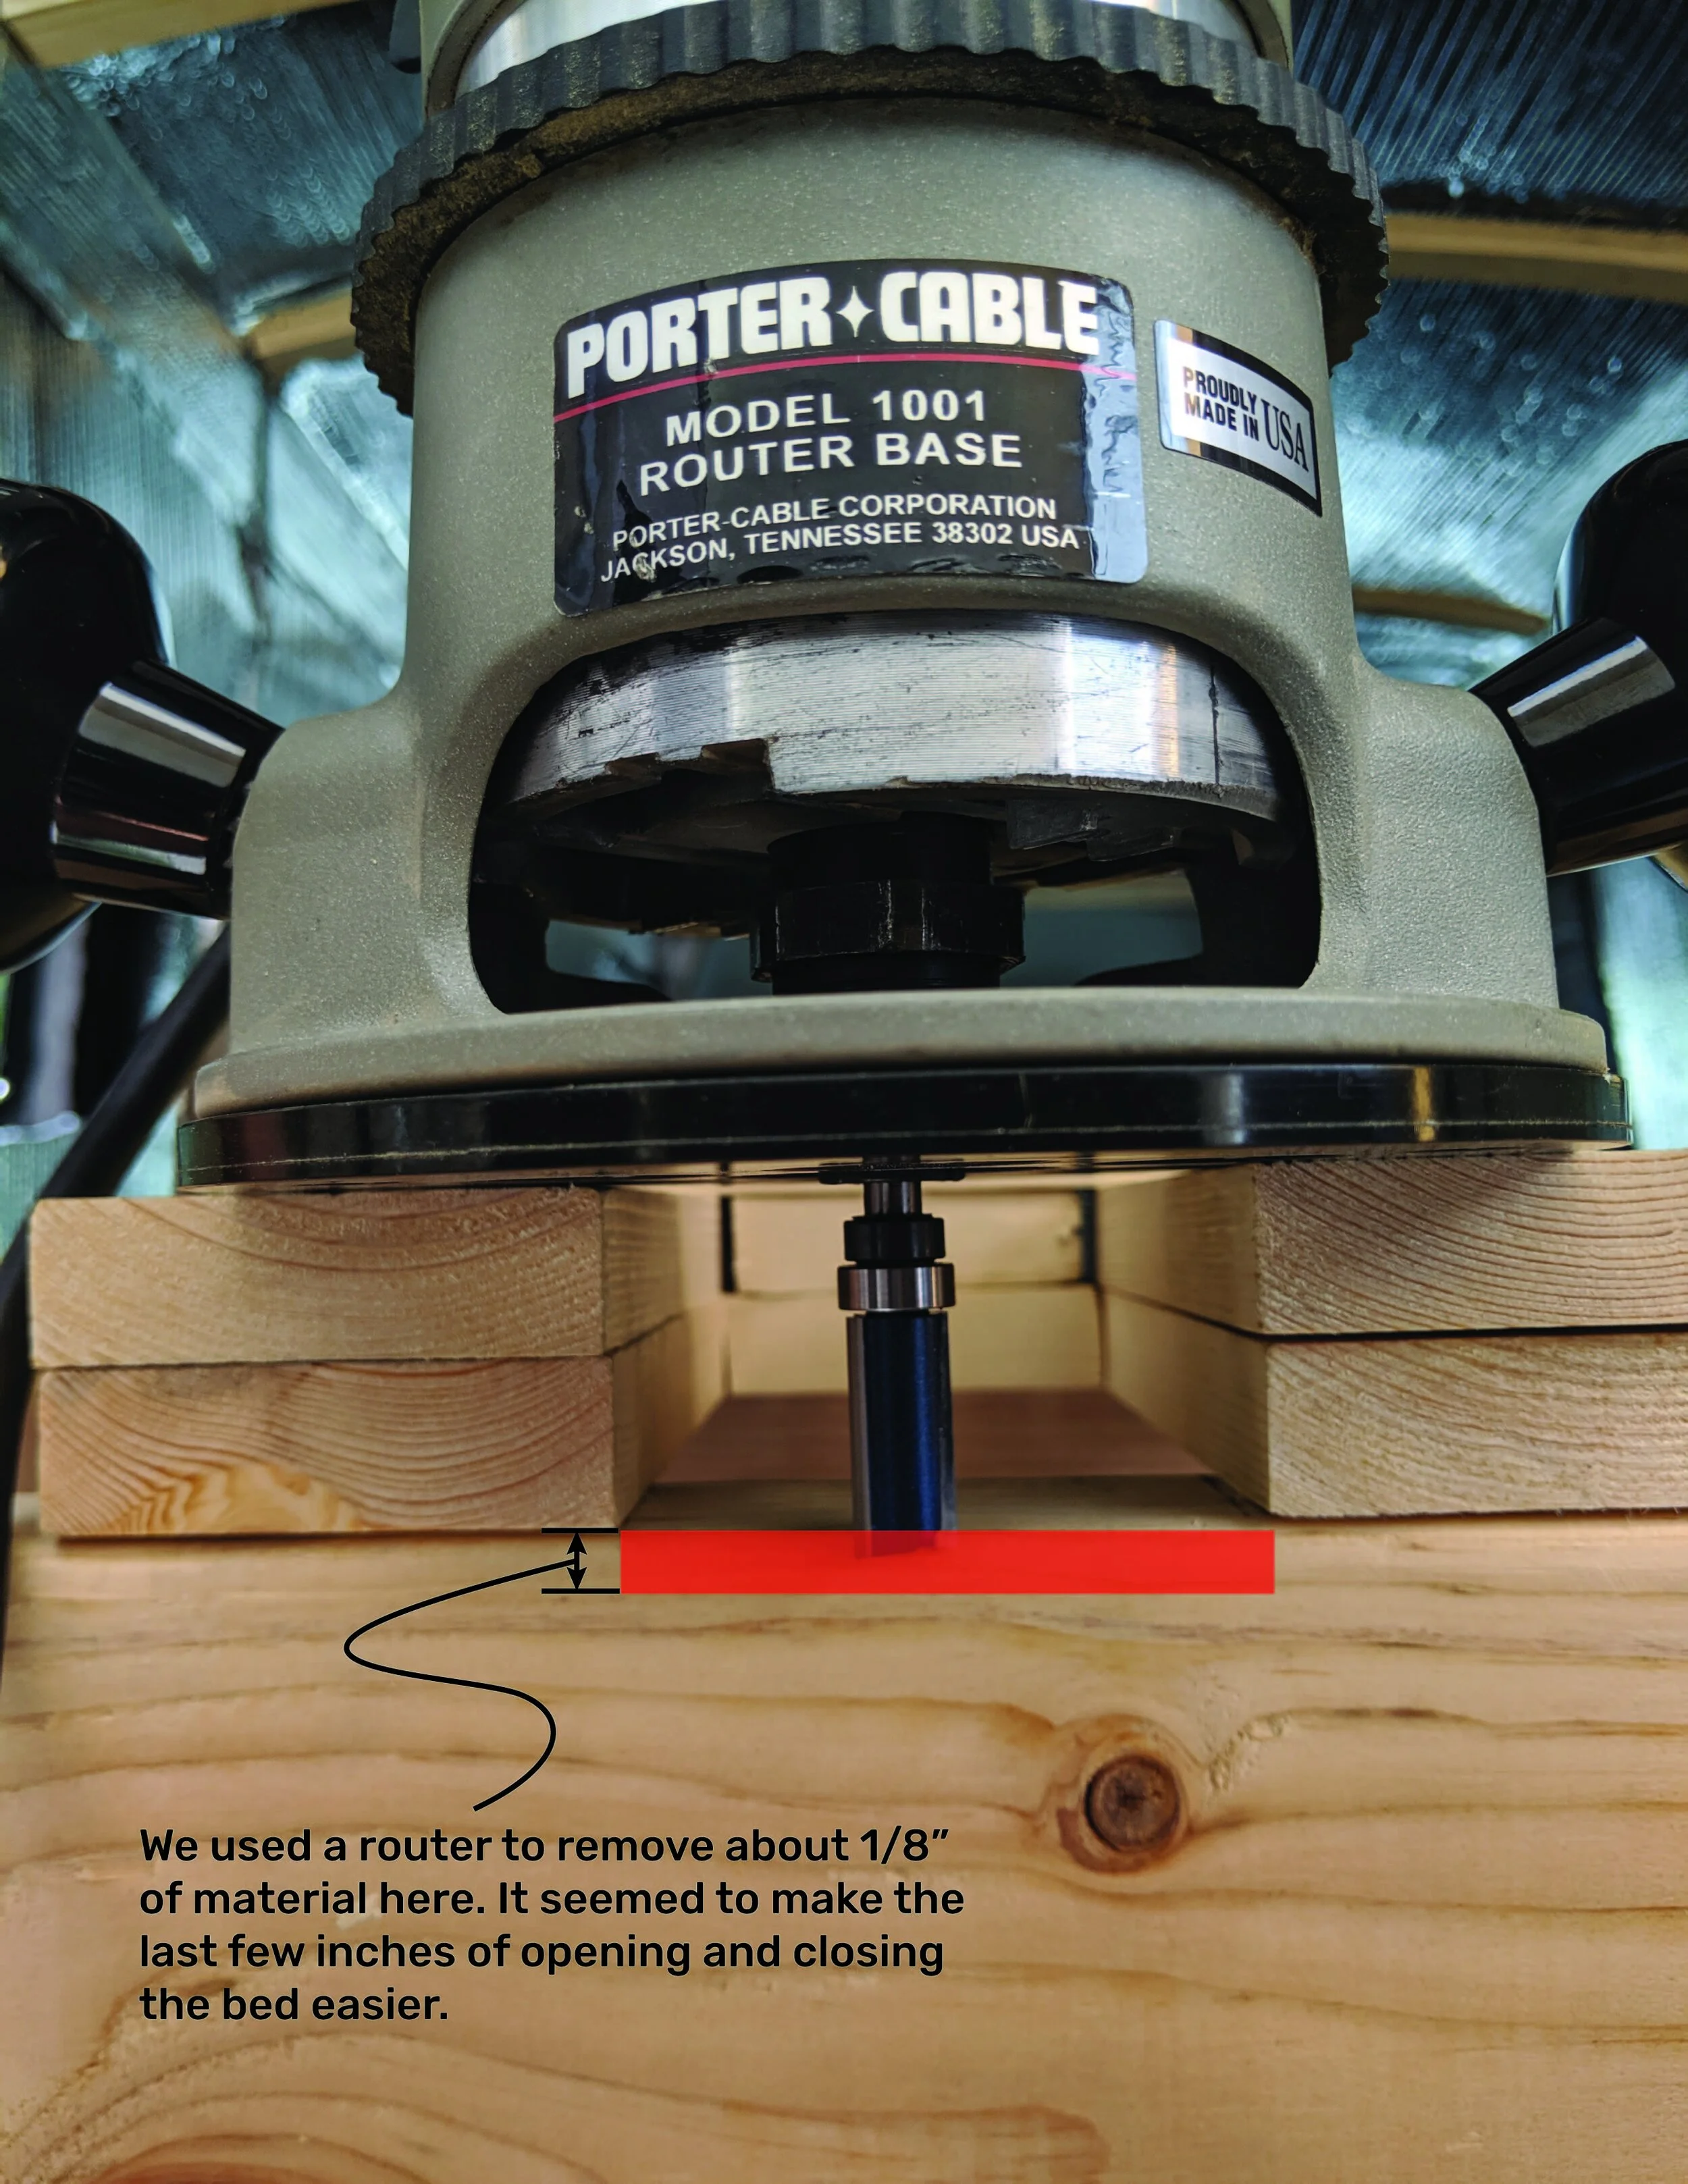
We used a router to create a slight clearance for the slats that slide in and out. This made the last few inches of sliding the bed back into place easier. We also used the router to knock down the sharp edges of the bed slats to make sure the wood wouldn’t tear up our bedding or mattress.
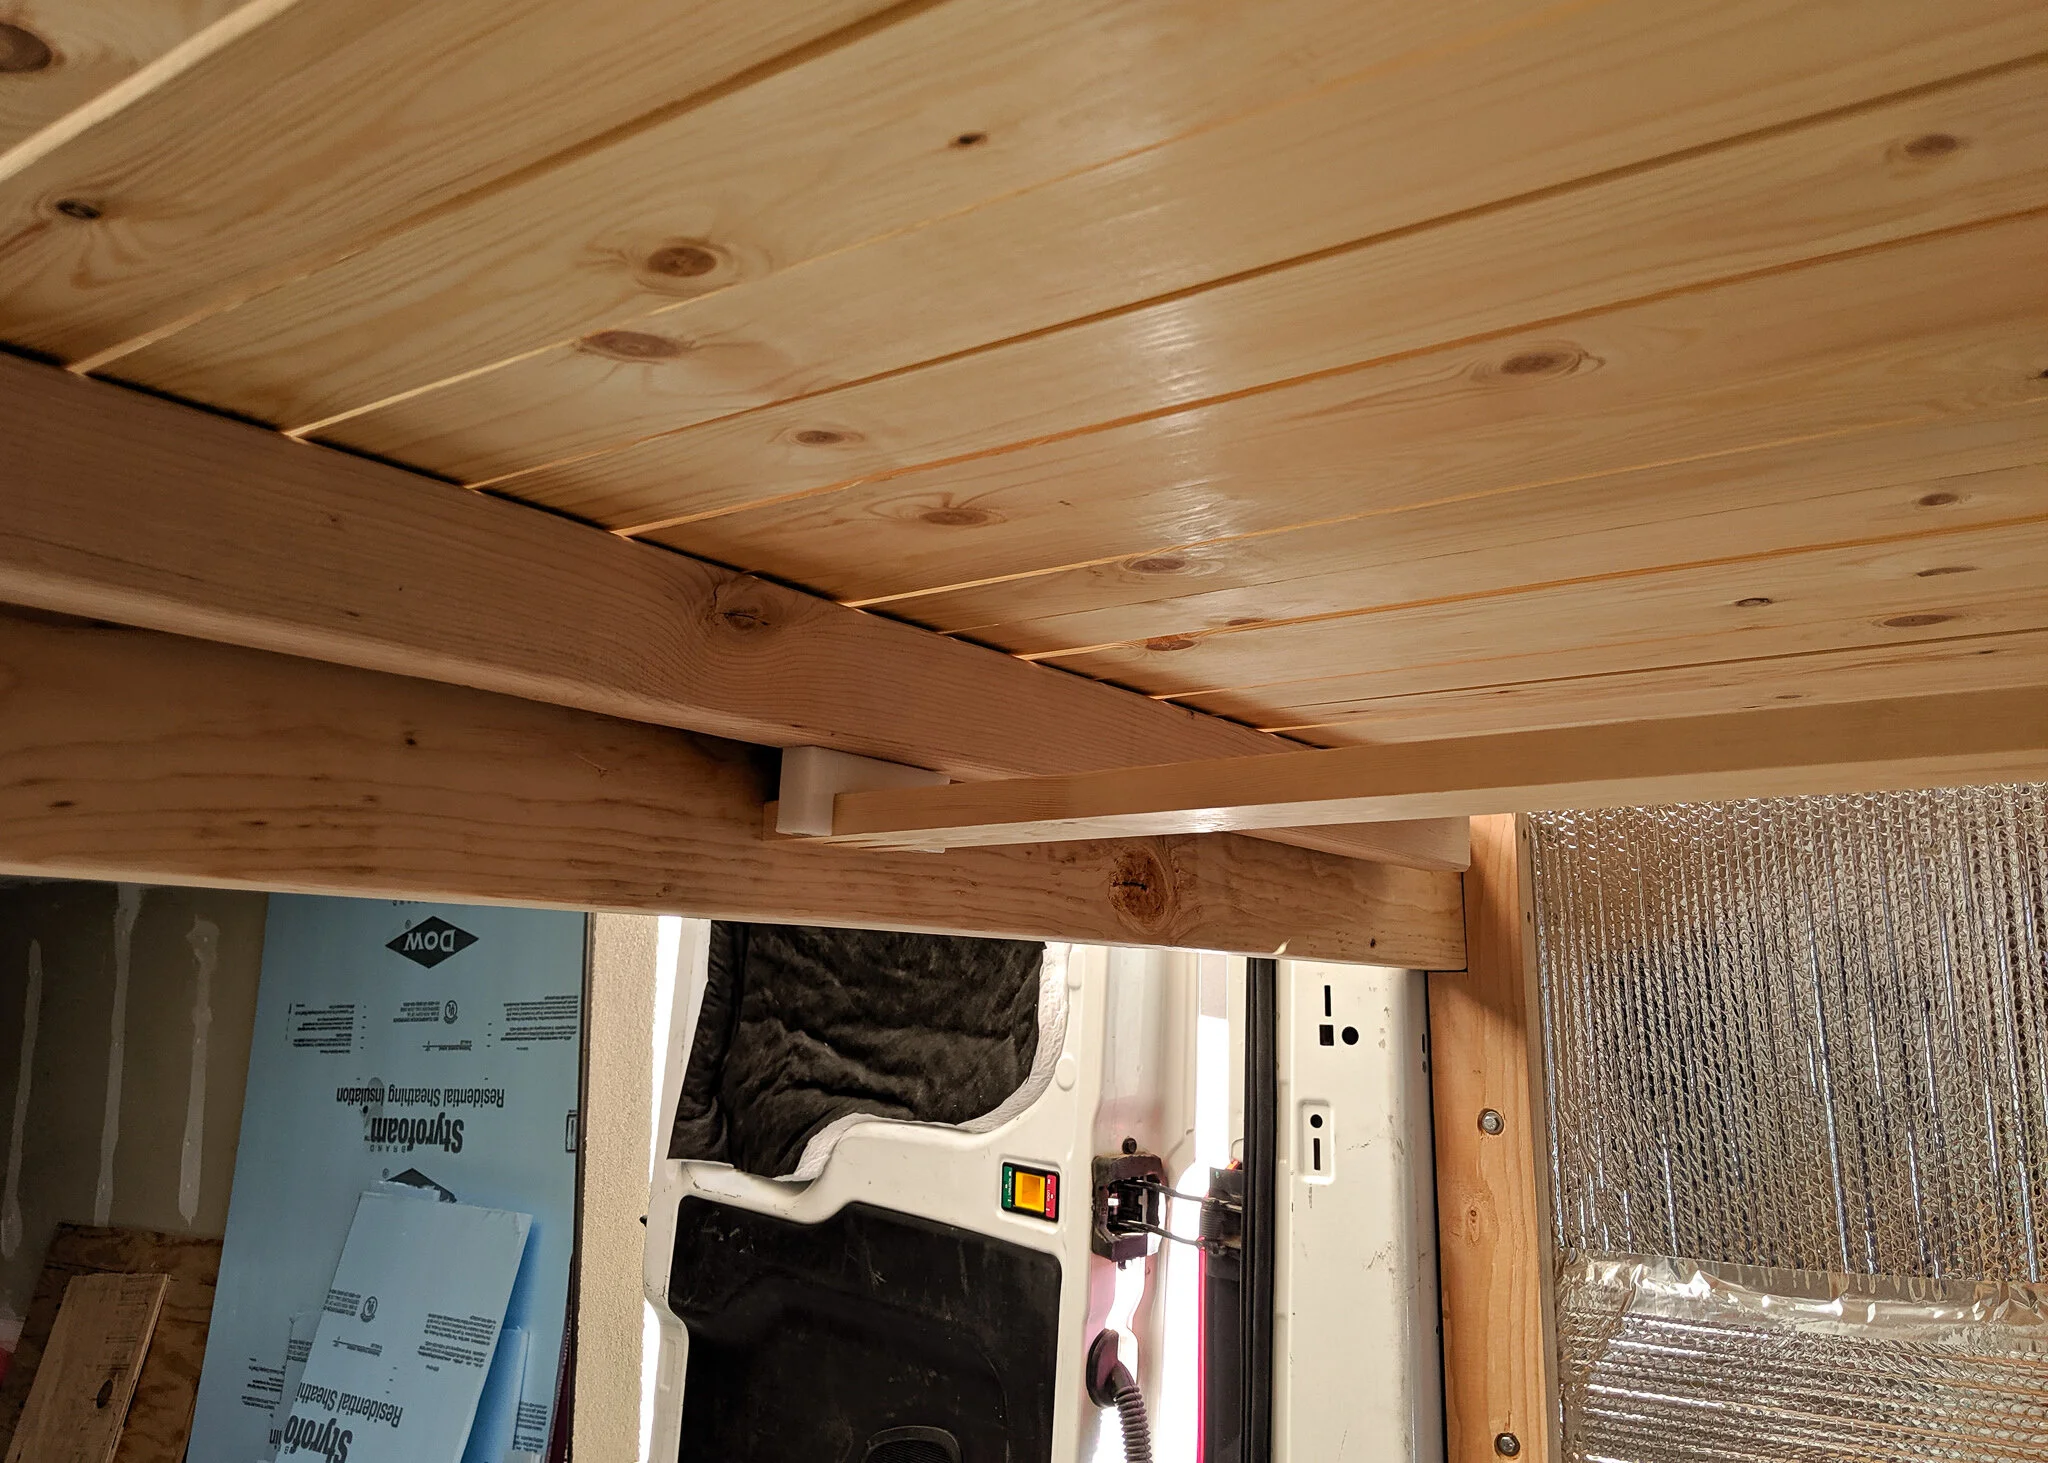
Originally we had a guide rail underneath the bed with a UHMW Plastic guide block to help keep the bed from binding when we would pull it out. At this early phase of the build the guide rail was helpful. However once the walls were in place and the van was fully built, we did not find the guide rail helpful - if anything it made things stickier. We ended up removing it. Removing it also created more garage height for containers.
If you are loving this design and would like to use it in your van build, we have full plans for our bed available in our online store!


