DIY Walk In Closet Plans (with Step-by-Step Instructions)
Building your own walk-in closet system can be a great way to keep your closet organized and save money in the process. Store-bought solutions are often made of cheap materials or are too expensive to purchase (sometimes both). Additionally, not all walk-in closets are built the same.
By going the DIY route, you can build something specific your closet's exact dimensions all the while building a piece that is more sturdy and cost-effective than what you would purchase in most retail stores.
Well, that's exactly what Ronnie did when he built this custom DIY walk-in closet system using Kee Klamp fittings and pipe. In this project, we cover the full details of Ronnie's amazing closet system, the fittings needed to build one just like it, and lay out the exact steps you need to put it all together. So follow along:
Ronnie's Walk-In Closet Project Details:
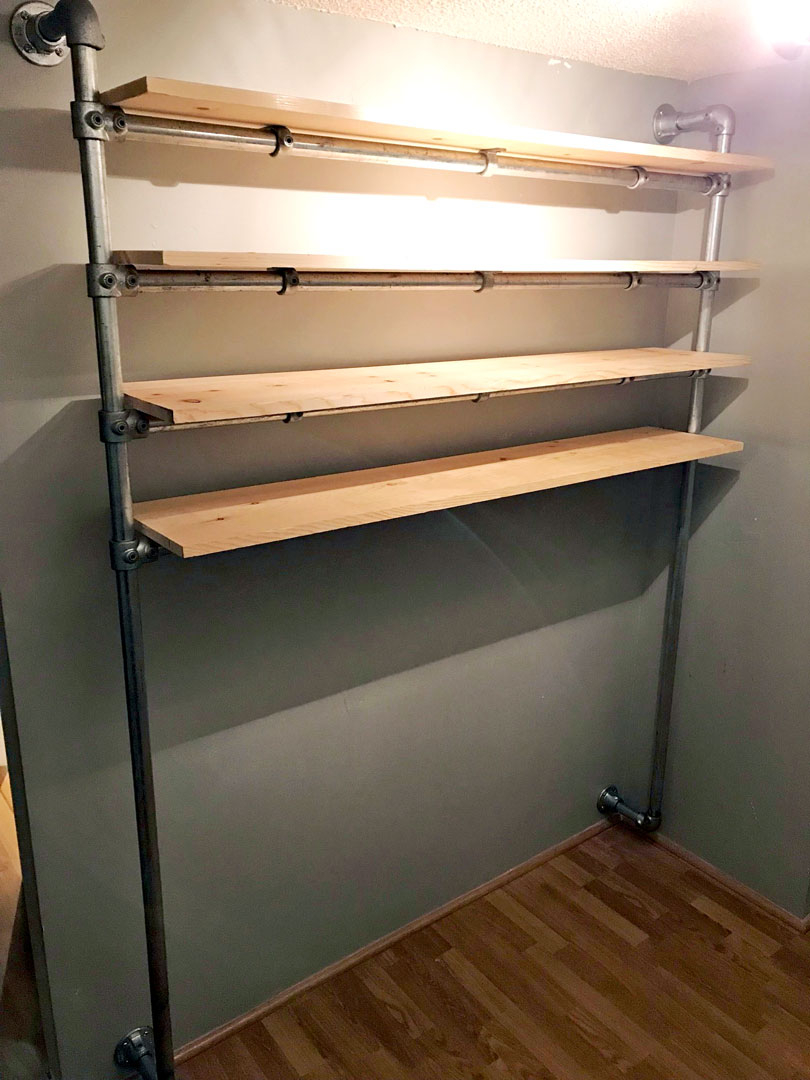
Ronnie's walk-in closet system consists of three main components: a wall mounted shelving unit and two wall mounted clothing racks.
The wall mounted shelving unit extends the majority of the closet wall. It is mounted 7" from the ceiling and the unit extends 6" away from the wall. The Kee Klamp fittings then add approximately an additional 2" to the unit depth. The shelving unit is mounted 6" from the floor to allow room for a vacuum to slide underneath.
Additionally, instead of mounting the unit to the floor using Flange fittings, the unit wraps back into the wall using a combination of the 90 Degree Elbow fitting and Flange fitting. This makes adding or removing shelves much easier. Ronnie only has to remove the 90 Degree Elbow at the bottom to add or remove a shelf.
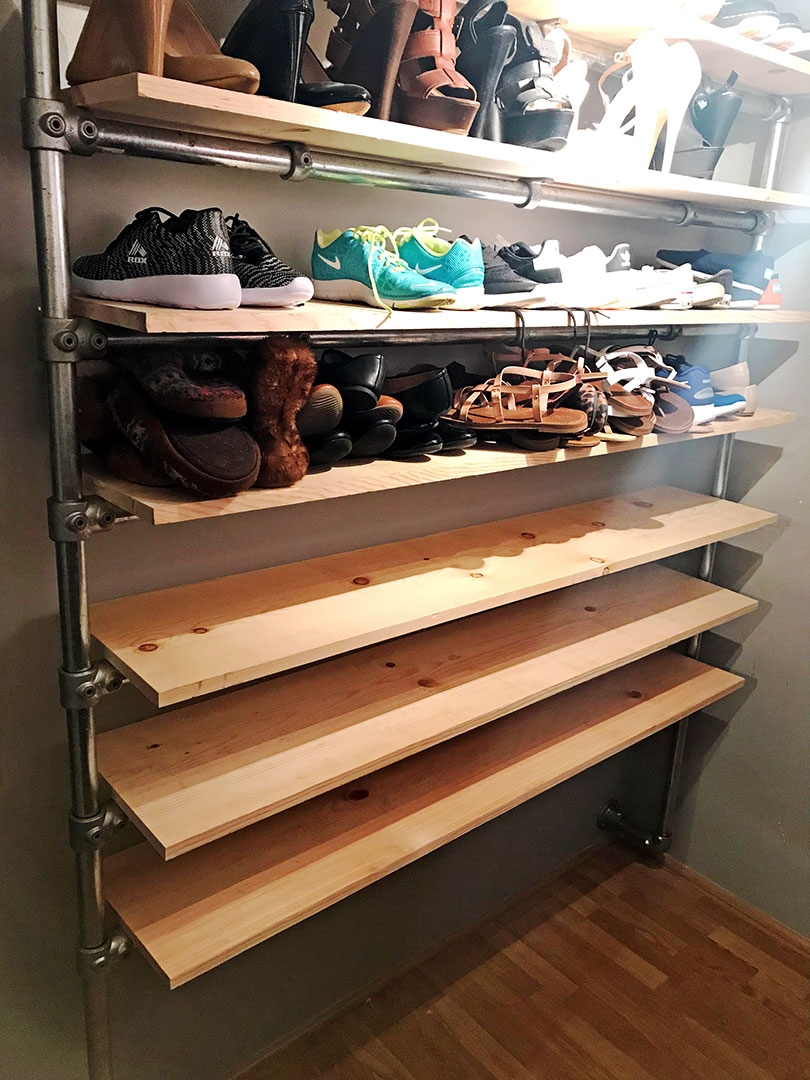
The shelf boards were built using 1/2" thick Common Board from Home Depot. The boards are 12" in depth. When mounted to the shelf frame, the total depth of the shelves is approximately 15".
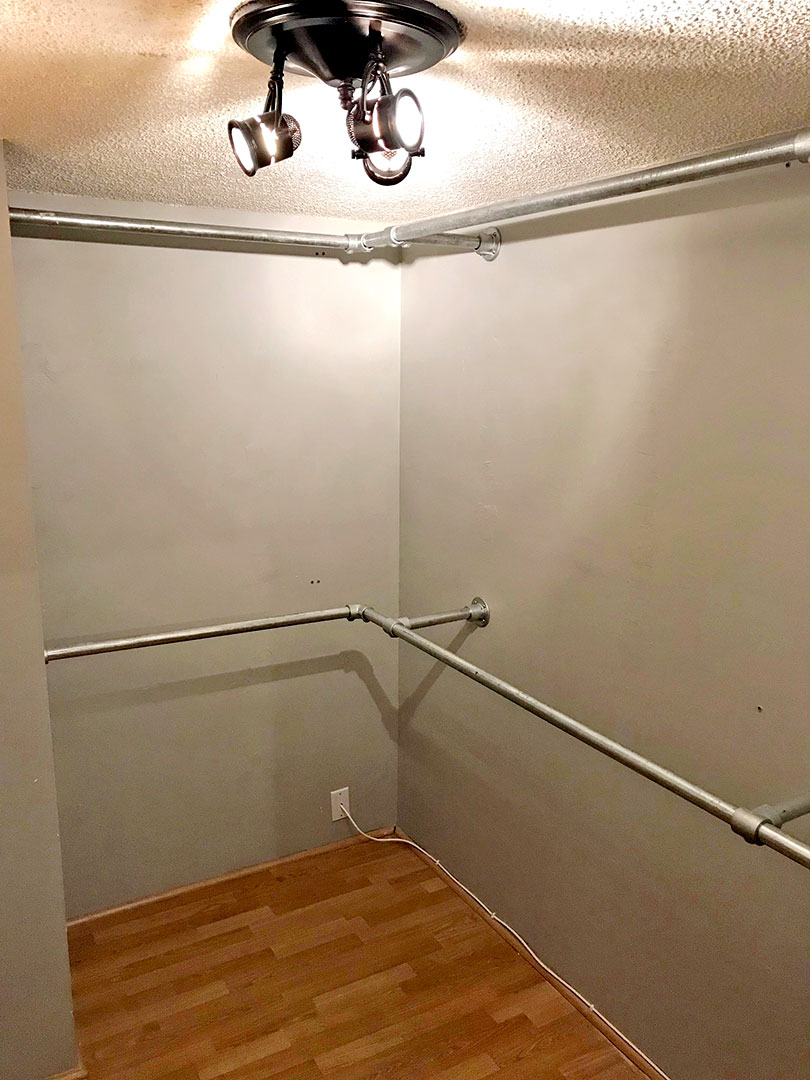
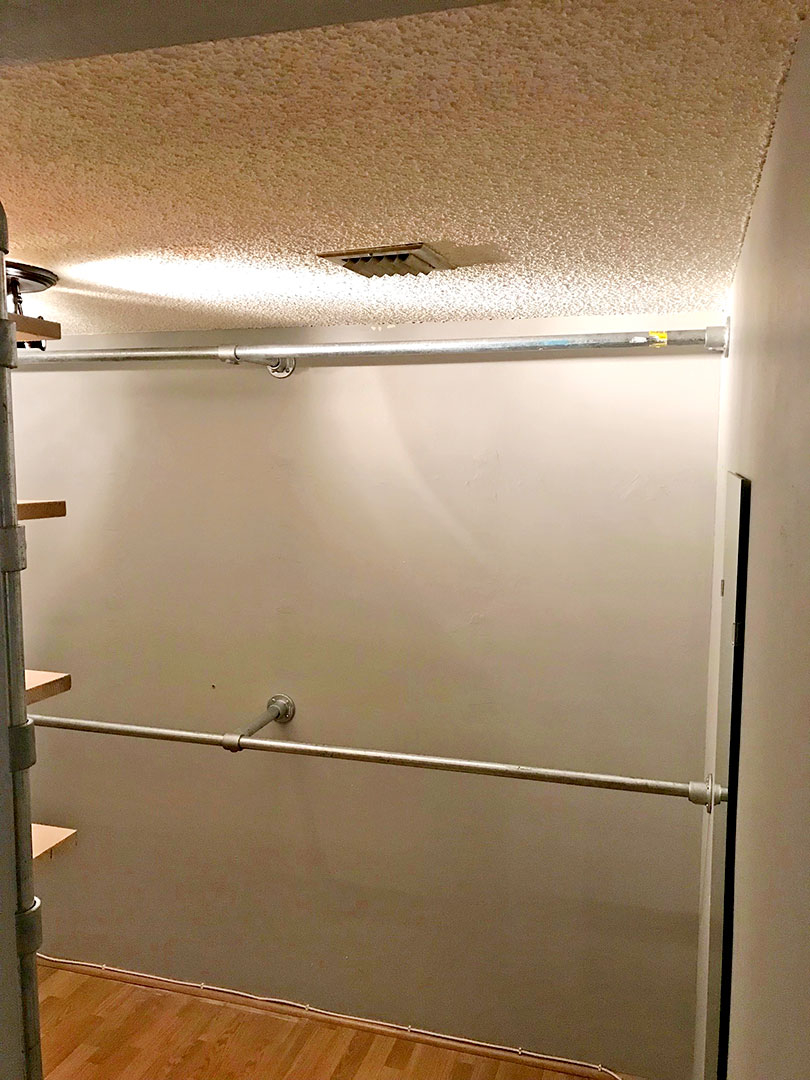
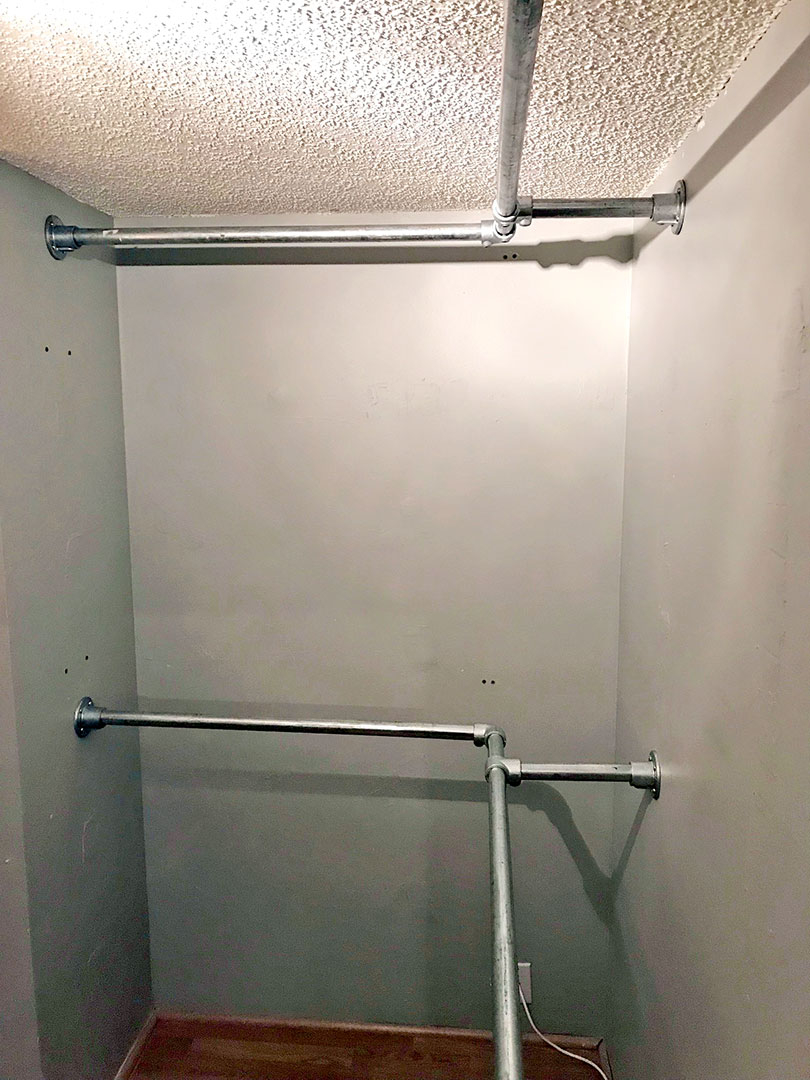
There are two wall mounted clothing racks to complete the closet system. In Ronnie's 82" high closet, the top rack is mounted at 72" off the ground while the lower rack is mounted at 36" off the ground. The fittings used for the clothing racks include the Flange, 90 Degree Elbow, and Single Socket Tee fittings.
Here's what Ronnie had to say about the project:
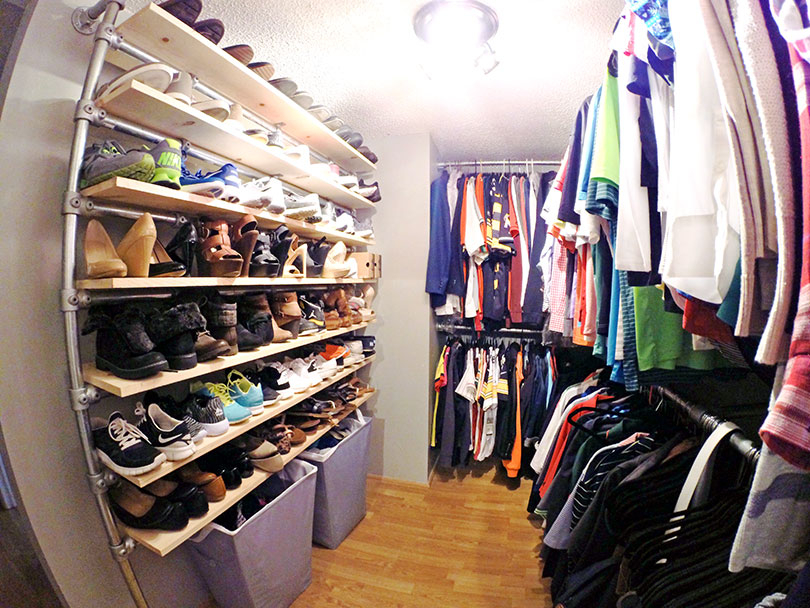
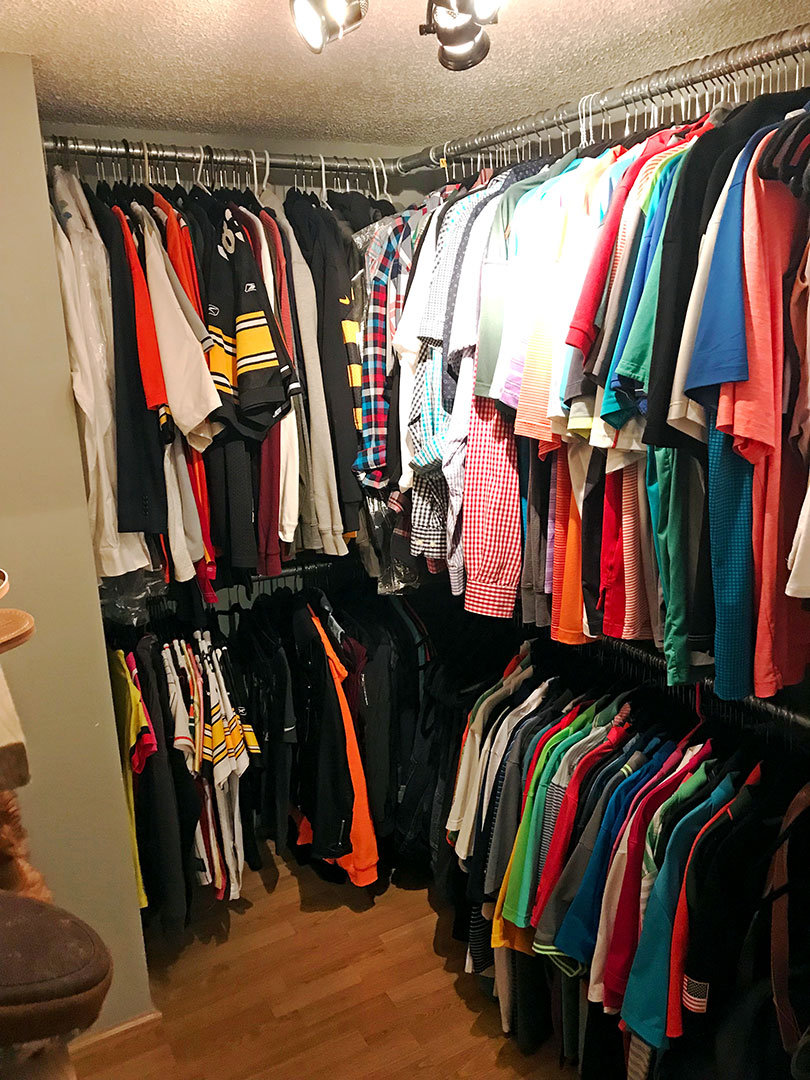
"The system has worked out amazing! My walk-in closet went from being cluttered with shelving and clothing racks to a more open and organized concept. Prior to installing this system, I had two other setups. The issue with other systems is that the boxes/casings demand space and take away from the size of the closet.
In this instance, the Kee Klamp system allows us to utilize the entire space of the closet without the clutter of oversized shelves/drawers. Also removing those shelves and drawers eliminates the junk from accumulating in your closet. Designating the shelving specifically for the shoes and the remainder of the closet for hanging clothes has kept my closet extremely organized. My level of satisfaction is 10 out of 10!"
Fittings Needed to Assemble the Closet Shelf:
Below, are the fittings you will need to assemble the walk-in closet shelf.


How to Assemble the Closet Shelf:
With any Kee Klamp built project, the order in which you approach the assembly process is entirely up to you. There is no set order. However, we've listed steps below for our approach to assembling the walk in closet shelf.
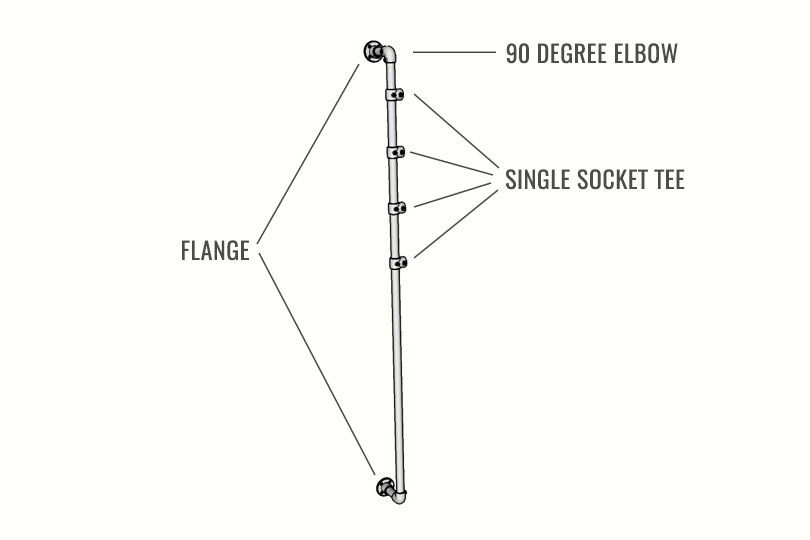
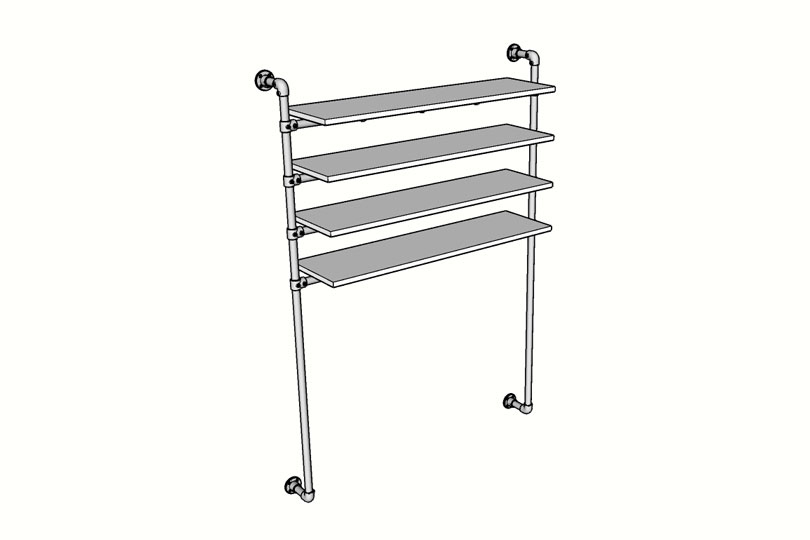
First, to assemble the shelf, we recommend starting off by putting together the vertical supports. There are two vertical supports.
Each will use two Flange fittings, two 90 Degree Elbow fittings, and four Single Socket Tee fittings. The Single Socket Tee fittings will be used to mount each shelf. If you'd like more or fewer shelves, add or remove Single Socket Tee fittings for your desired number of shelves.
Follow the diagram above to assemble the vertical support. Then, repeat the same process for the other support. Make sure to set the same height for Single Socket Tee fittings on both supports. This will ensure your shelves are level.
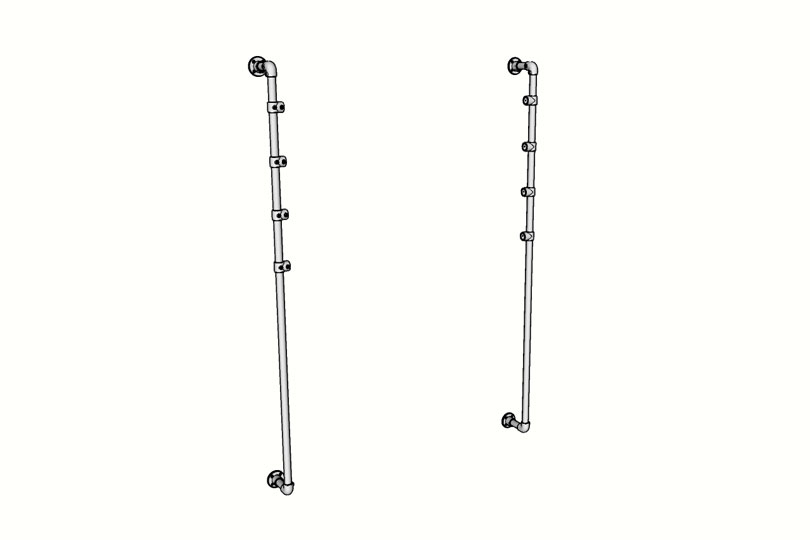
You should now have both vertical supports complete as pictured above.
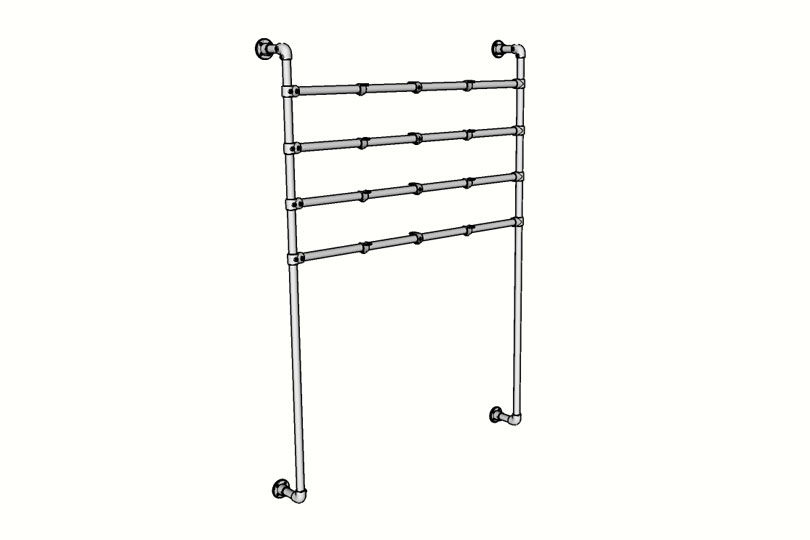
Now, you can join the two sections together. These sections can be joined together by connecting the horizontal sections of pipe (that will be used to support each individual shelf). When adding these supports, make sure to first slide on three Fixing Pad fittings onto each horizontal bar. The Fixing Pad fittings will be used to attach the wood shelves.
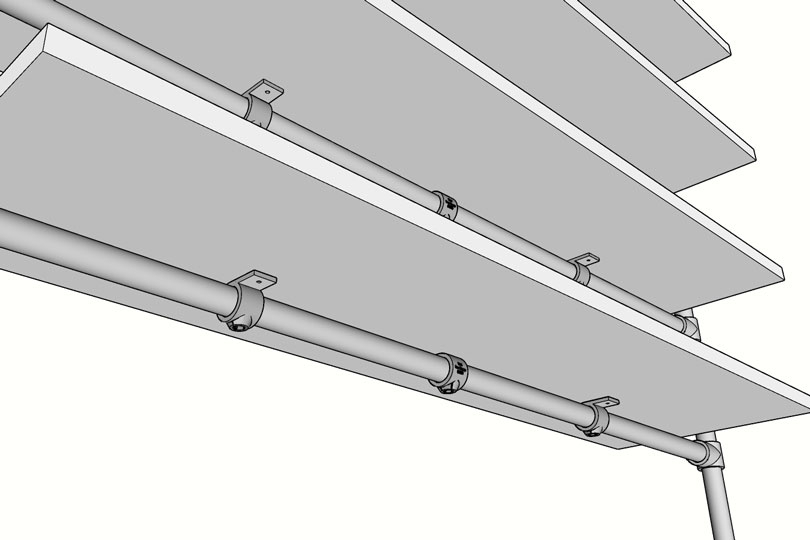
With the frame complete, the wood shelves can now be added. The wood shelves will rest on the tab of each Fixing Pad fitting. Each Fixing Pad fitting has an open slot on the tab portion of the fitting. This can be used to mount the shelves to the frame.
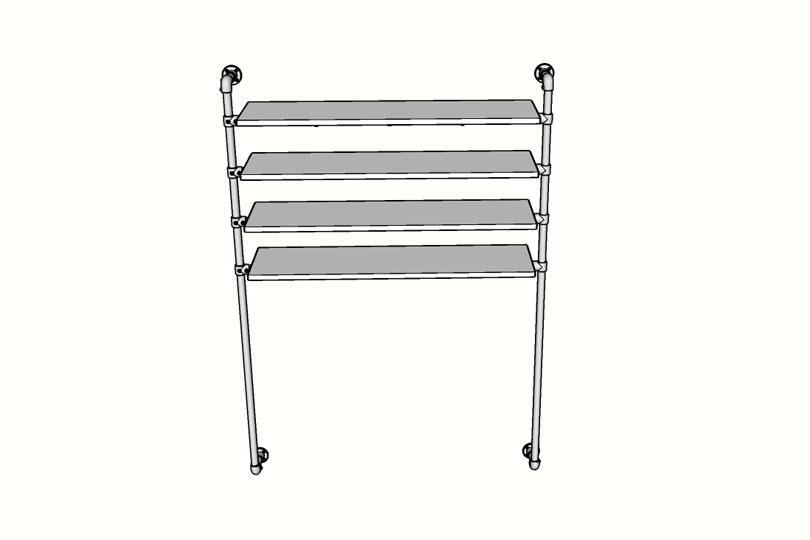
With each wood shelf added, you should now have a complete walk in closet shelving unit just like the one Ronnie built.
If you have any questions on the fittings you need to built this project, or need some help designing your own custom solution, please reach out to our team for help. We offer free design assistance and can help you to create a project that fits your application perfectly.


