HOW I MADE A STRIP PANELLED WALL WITH HIDDEN STORAGE
You might remember I created a 3D wall panelling behind the desk in my office – well this was a sort of practice for another project we wanted to do in the house. In the living room, there was a small under stair area that needed some storage built in, but we wanted something streamlined that created a design feature too.

So I’m a bit obsessed with this strip panelling look, but I sketched out a panelled wall this time with a cut out door in it to provide hidden storage. There’d just be one horizontal cut along the door, and other than that, it’s seamless!
By the way, it’s actually my step-dad Matt doing the work in these pictures – he’s a carpenter by trade, so therefore a pro, and made the whole thing look easy.
I think it’s a project you could take on yourself if you’re pretty proficient at DIY however you may need help in actually making the strips and cutting the MDF to board out your space if you don’t have the proper tools and space to do it. Otherwise, call on a professional!
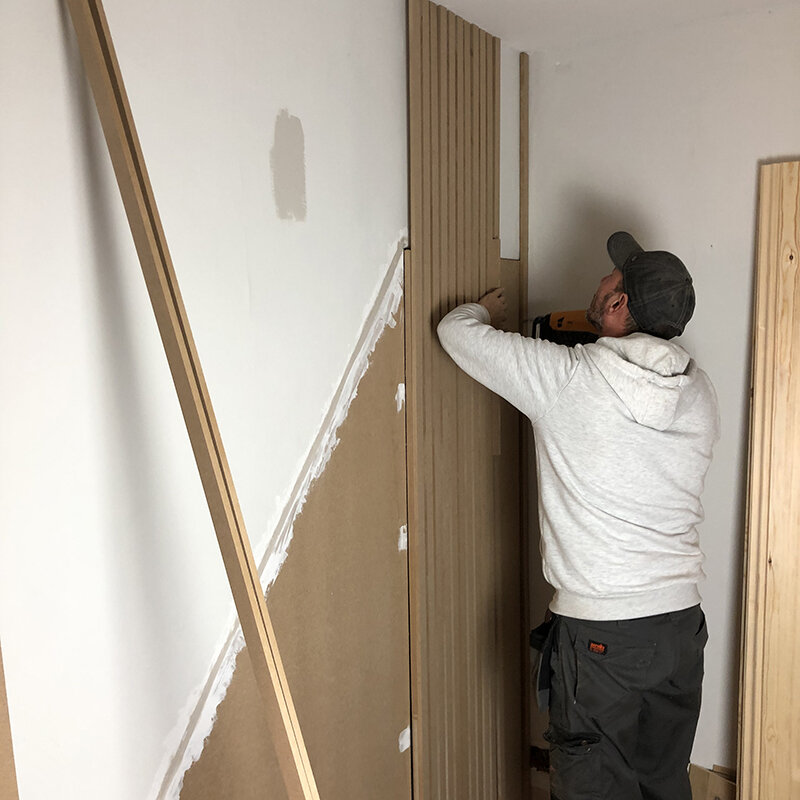
Our strips were 30mm wide, which needed to be cut on a circular saw in Matts’s workshop, but we cut them down to right height in the room, as we hadn’t laid the floor when we gave the original measurements. The MDF we chose was 12mm thick - thick enough to make the slats dramatic, but just had to be conscious of the weight implications, especially since we were doing a door.
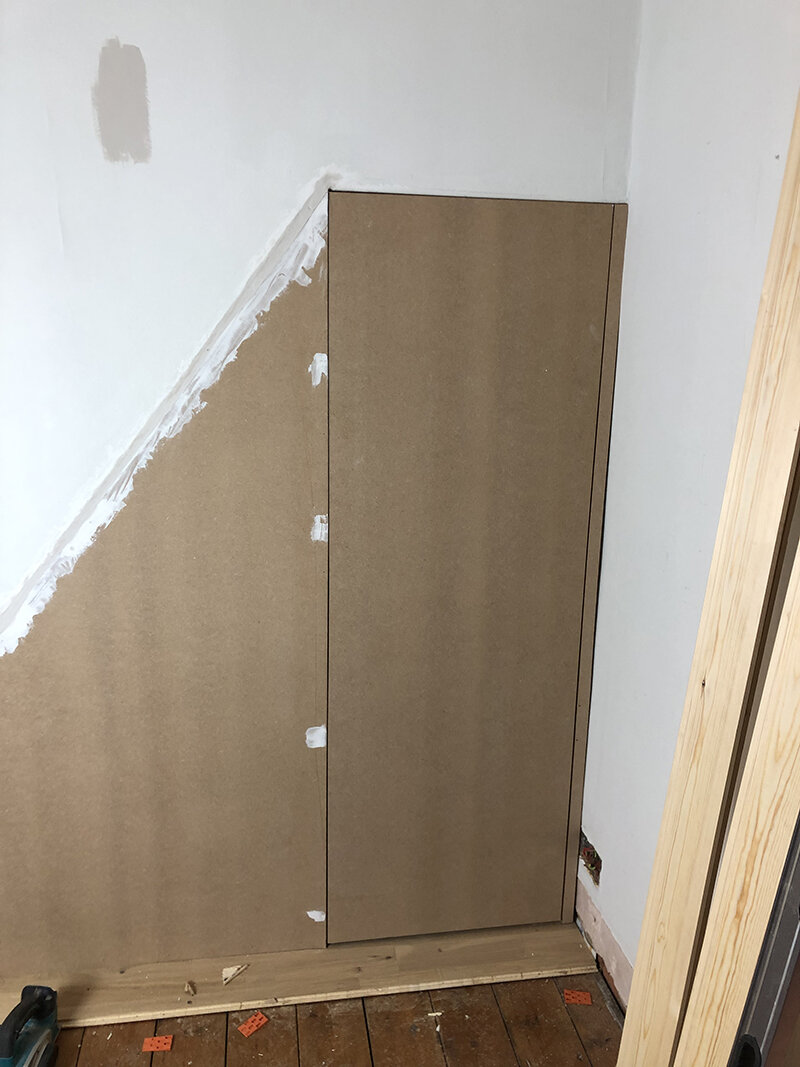
We started by filling in the void of the under stairs area, boarding up with MDF by building a frame with timber battens around alcove (except for the base of where the door would be) with one supporting strut down the middle. The piece of MDF on the left hand side is fixed, so once that was fitted, we could fill around and sand to create a flat surface. The door itself is fitted onto soft-close kitchen style hinges onto the right hand side. On the left, the central strut sits just to the side of the door, which meant we could attach push-close mechanisms


In hindsight, I would have painted the wall behind first, but I actually changed my mind on the colour after the first coat, so it didn’t matter too much, but if you’re trying this yourself, get painting the wall now!
When it came to attaching, we used a nail gun for efficiency, but if you don’t have one/are terrified of them, you can go it with a hammer and nails for sure. We started with the first piece where the door would open - part of the trick of disguising the door is to have a strip right against that edge. Once one piece was in place, we took a piece of left over MDF, turned it sidewards and used it as a spacing measurement for the wall, running it from the top down as we nailed each slat into place.
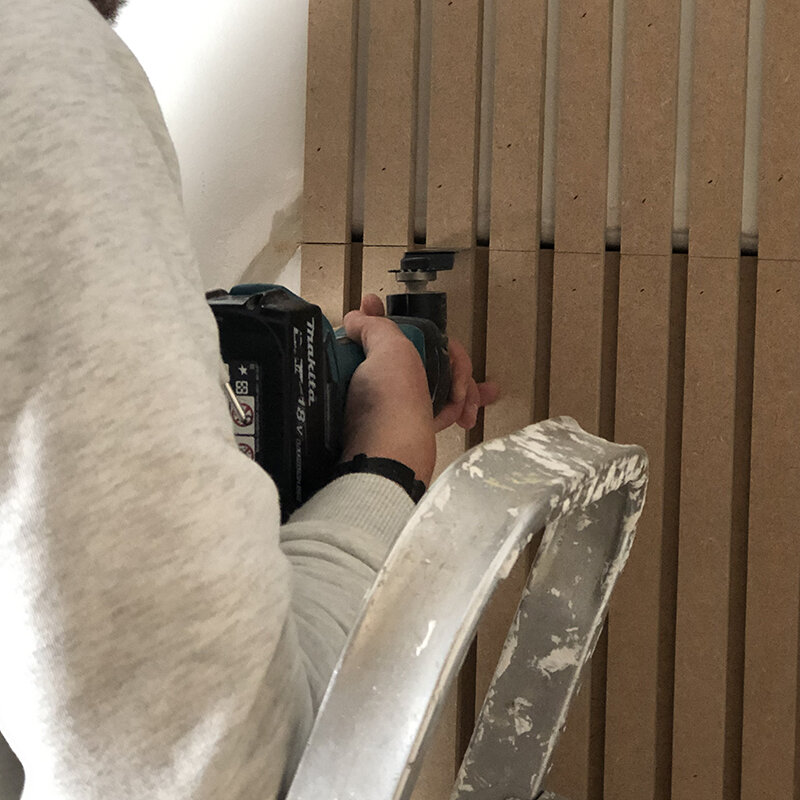
We covered the door first, and then decided to cut out the door. We used a multi-tool and it worked well - a good budget inclusion for your toolbox if you’re into DIY for sure.
Now, when we fit the door, we did play around with the hinge alignment to get the level correct, but once the slats have been mounted, it will be a lot heavier, so you may need to try again to keep it lined up perfectly when the battens are cut.
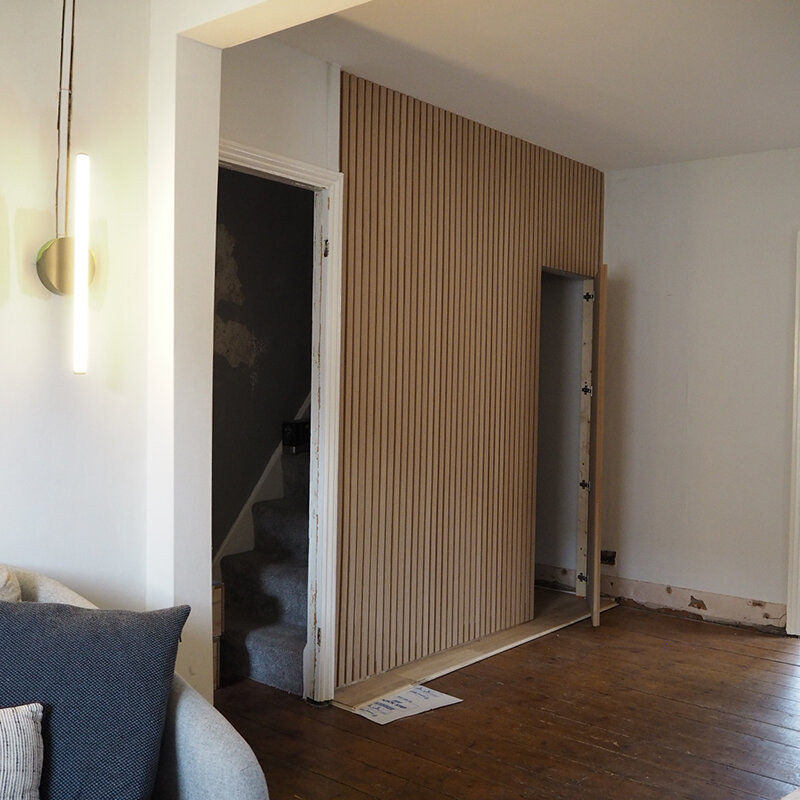
After the door was sorted, we continued on in the other direction until the wall was completely finished. We didn’t plan too much to get the perfect spacing where it would end on a full slat on either side of the wall, but it turned out pretty well, and you can always slightly nudge the measurements on the last few by a small amount to achieve it without anyone noticing too much.

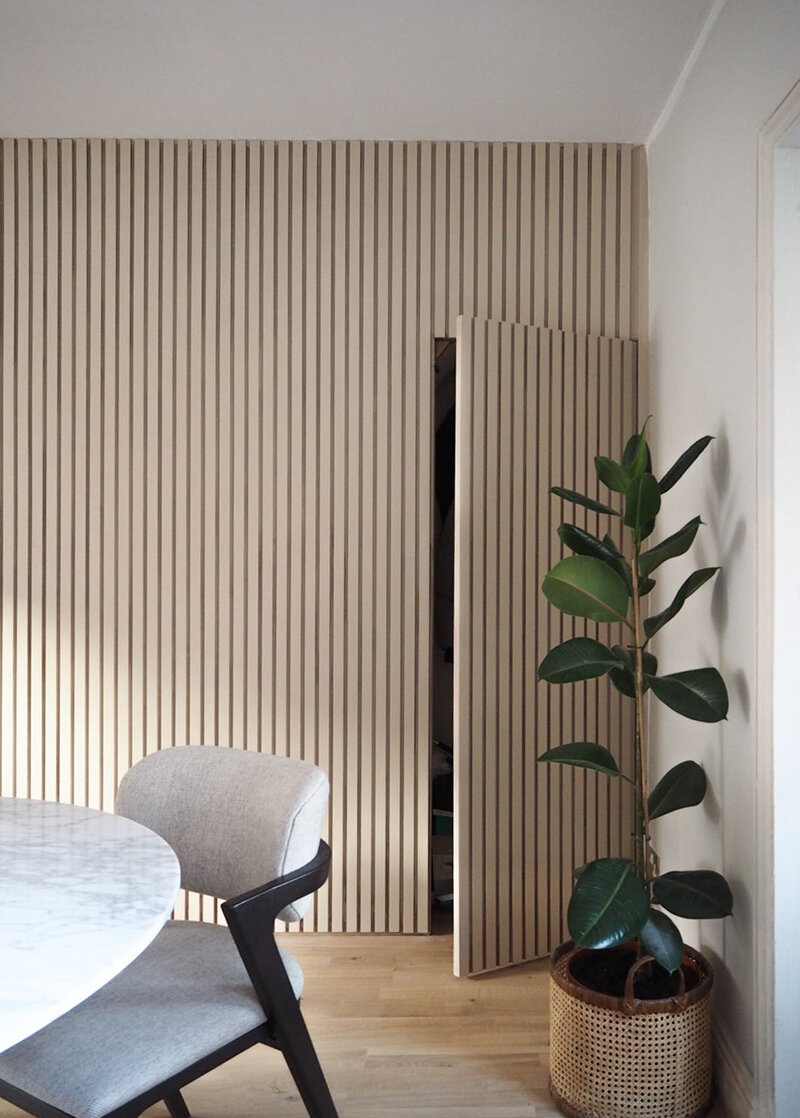
It took us a while to decide on the colour, but we eventually decided on Earthborn’s Little Rascal shade in Eggshell - a slightly more dramatic taupe than we’d used on the walls, but still tonal, so it didn’t make for too crazy a feature wall. I would say that it’s probably worth priming the wall first, as the cut sides of the MDF in particular are thirsty for paint, so makes sense to use a cheaper primer than a more expensive paint of your choice.
What do you think of this panelled wall DIY? Let me know in the comments.