THE NO BUDGET CLOSET DOORS!
Today I’m sharing my DIY closet doors!
HELLO beautiful people! It’s finally been warming up and raining A LOT this year! It feels like more rain than any other year since we’ve moved to idaho. This doesn’t bother me though😬! I love rain and enjoy it quite a bit😍😊. Thankfully this wave of warm weather allowed me to make some new closet doors.
What about you? How’s the weather been where you live? Is it raining as well?
OKAY! Closet Doors! First off I will admit I went to home depot to purchase doors. I was thinking to buy just plain panels and maybe dress them up a bit. However I didn’t find any that fit my budget and they didn’t have plain ones.
When I say budget let’s not forget Tony ( hubby) didn’t want doors to start off with. His idea of a closet is an open concept where clothes are visible and easier for him to access. So in other words I guess I should say there was NO budget at all! 😆LOL!
Don’t get me wrong I love to have ease of access to anything but, who ever said they love their ugly closet to be 100% visible all the time! 😫NOT ME!
I knew somewhere in the back of my head I would need to make DIY closet doors! HOW? I wasn’t sure yet!
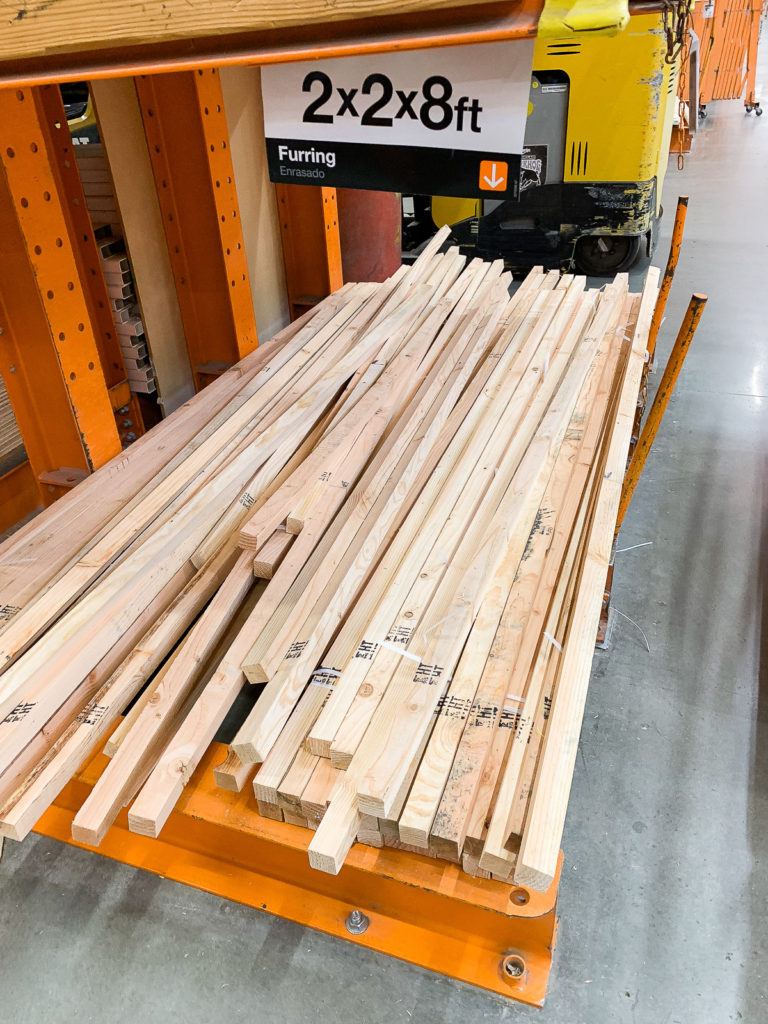
It wasn’t until I came across these 2×2’s that I had an idea. The idea was to build a frame for each door panel and I could either cut plywood to fill in the centers or use fabric to fill the centers. This sounded easy enough to do by myself too. I say this because I knew Tony wouldn’t be helping much with this project at all. He helped a bunch with the dresser which made him behind at work so I knew he had a lot of catching up to do. He also agreed to let me make them if I did it on my own. HAHA😂 BOY OH BOY. Let’s just say, this was a challenge from the start!
OTHER DIYS YOU’LL LOVE:
- DIY CONCRETE PLANT STAND USING A BUCKET
- DON’T THROW AWAY YOUR TINS CAN!! HERE’S HOW TO MAKE A HERB GARDEN WITH THEM!
- NEED CUTE GARDEN DECOR??! HERE’S HOW TO MAKE CONCRETE PUMPKINS!
- A DIY MEDIA SHELF IN 20 MINUTES
- DIY CHALK LABELS FOR YOU HERBS
HOW TO MAKE YOUR OWN CLOSET DOOR PLANS!
If you can get passed this point than your past the hardest part! I swear this took me a whole day to figure out! ( fyi – I suck with numbers)
Since I wanted to make bi-fold doors I knew it would be harder than sliding doors. You need to take into consideration the door hinges and just space needed for them to fold. Apparently I couldn’t find a good example online of how to size my panels correctly, which was a bit frustrating. My biggest question to start off was… HOW MUCH SPACE SHOULD I LEAVE BETWEEN EACH PANEL? I ended up calling my dad. He’s built a few houses in his lifetime I figured he would know a thing or two. His answer was 1/4″ of an inch. BINGO! I was on a roll again!
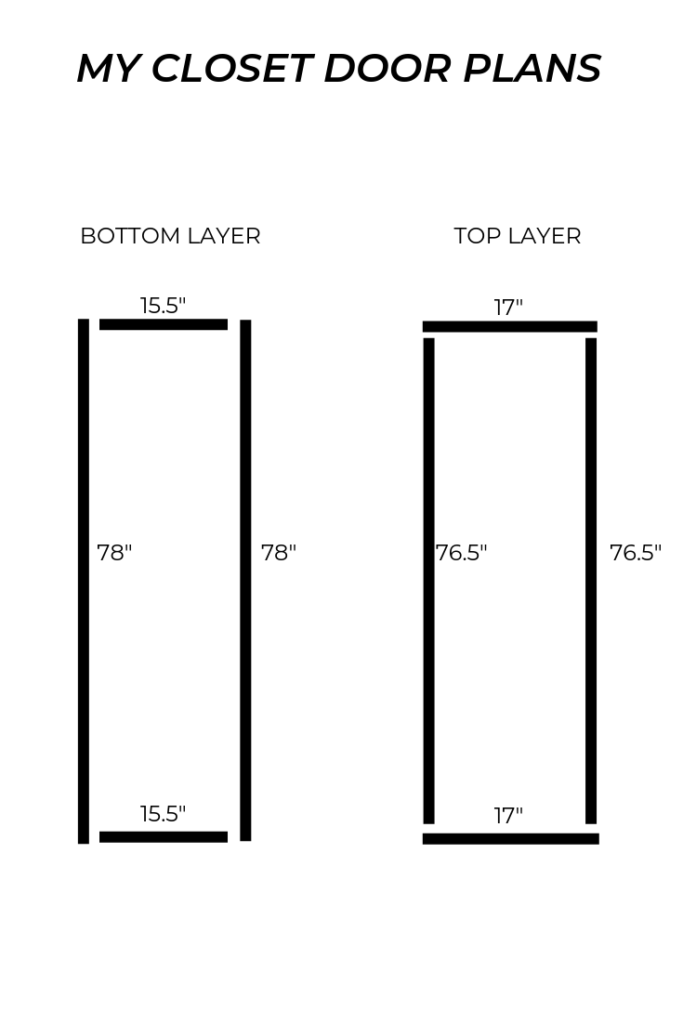
Here’s what I came up with. The finished dimensions for each door needed to be 78″ height and 17″ width. ( I would make a total of 4 doors to go in my closet opening)
How to customize your own –
Okay here’s how I did it! Take the width of your closet door opening and divide in into 4. Then subtract 1/2″ from the width of each panel and 3/4″ of an inch from the bottom. ( the reason I say 3/4 from the bottom is because I did 1/2″ inch shorter than my closet door opening an it was still too big)
( okay okay… so this would give you 1/4″ inch of room between each panel ( 1/2″ divided in two is 1/4″ ) and making them 3/4″ shorter will give enough room at the top and bottom of your closet doors to slide open and shut)
PRETTY EASY RIGHT?!!
Each panel consists of 4 pieces referred to as top lay and bottom layer. They are attached together to create one panel. The reason for two layers is so you can secure the panels together with screws from the top. (this method allows more screws and seemed sturdier)
I made a video assembling the pieces together ( scroll to the bottom to watch the video) . That’s pretty much it for these DIY closet doors! If you figure this out it was the hardest part for me.
WHAT KIND OF WOOD CAN YOU USE?
Even though I picked 2″x2″s to work with we ended up splitting them in half to create top and bottom layers for our panels. This requires a table saw which I’m sure isn’t something everyone owns. In fact I rarely ever use ours! This was the only thing Tony agreed to help me with. YAY! So glad he did because I’m deathly afraid of our table saw. That thing does not like me! HAHA😂! We have a past!
Solution for a NO TABLE SAW situation would be to use 1″x 2″s from home depot. They’re already thin enough and would make the perfect thickness once layered to create a solid panel. Which makes me wonder why I didn’t use these in the first place. 🙈LOL! ( I secretly wanted Tony to be a part of this project 😆shhhh don’t tell him)
WHAT IF YOU HAVE NO CUTTING TOOLS AT ALL?
–>> MAKE IT WITH JUST A DRILL!
Okay so I’ve said this before and I’ll say it again! 😬
Home depot can actually cut your wood to size. ( I’m not sure they have a table saw to split it though so it would only work with 1″x2″s)
If you bring your plans and just have a bunch of dimensions you can save yourself a ton of time getting all your pieces cut this way for your DIY closet doors.
Than just load it up in your car and when you come home all that’s left to do is assembling all the pieces. Just make sure you have your dimensions right. You don’t want to waste all that money on wood you can’t use.
(also make sure and get a few extra pieces because sometimes the wood can split or have knots)
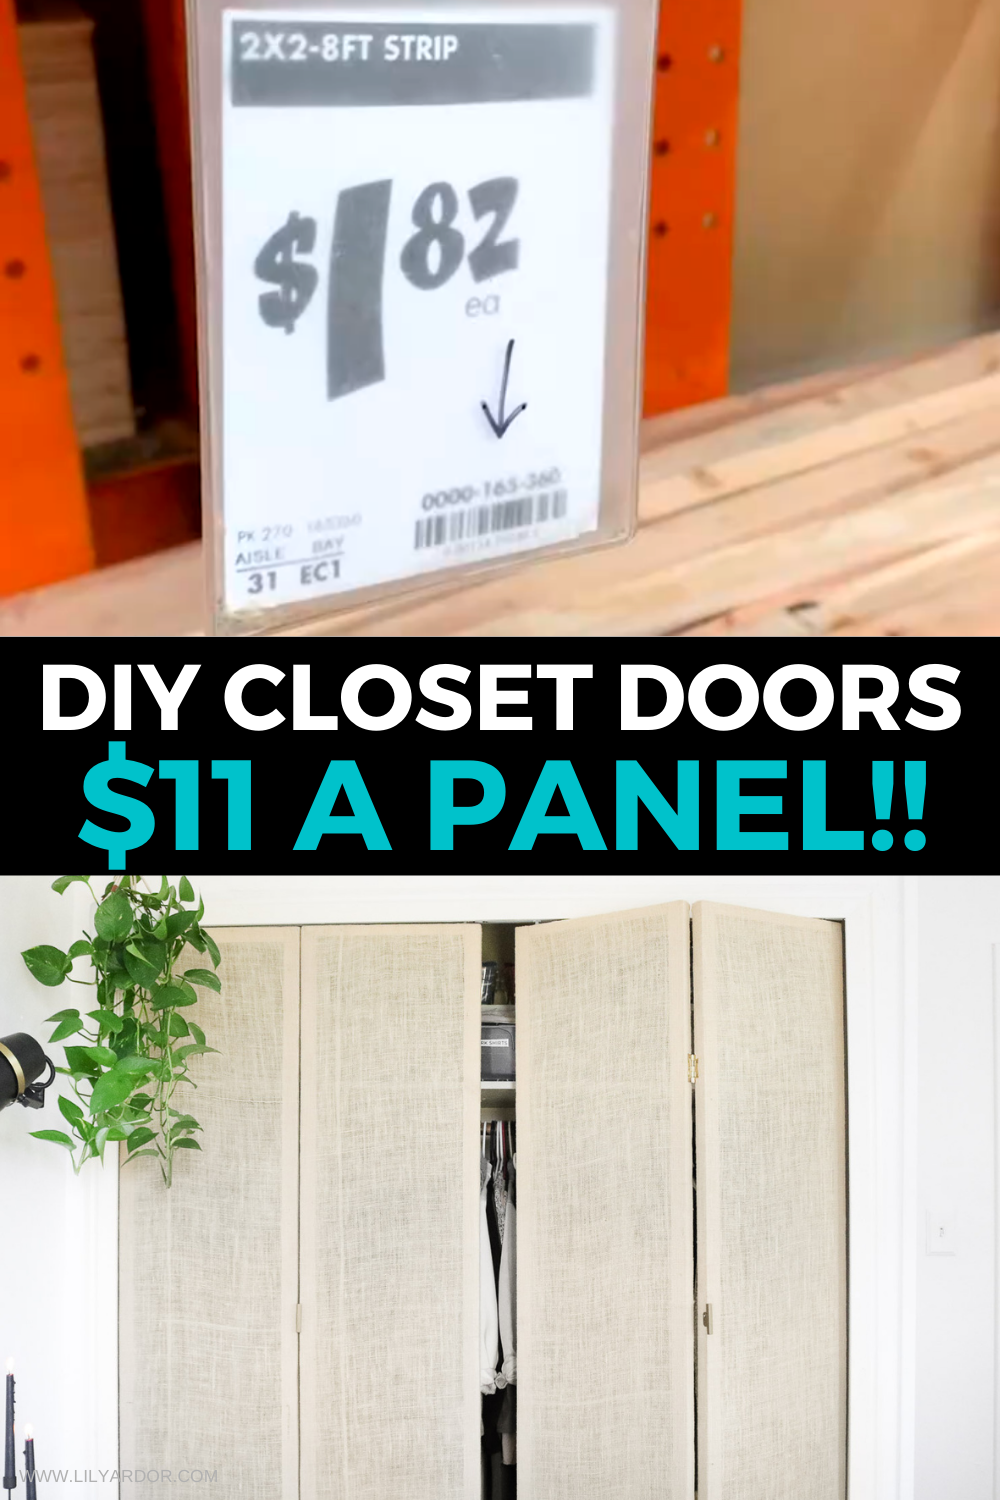
TOTAL COST: $45
WOWWZERS!! YEP!! That’s all it cost me for all 4 closet door panels! ( this doesn’t include the bi-fold door hardware, which was another about $40. )
TIME NEEDED:
Not going to lie this is a time consuming project. Although this probably had a lot to do with me figuring things out. 😑LOL!
Cutting and assembling the panels was done within a few hours. Not long at all. Then adding and staining the fabric was another about 3-4 hours. I spread this project out into a few days.
Could this be done over the weekend? YES TOTALLY!
Supplies:
- 9x 2×2’s or 18 1″x2″s. ( get a few extras just in case) Not all closet doors are the same size please buy wood accordingly.
( make sure and pick out the straightest wood. Also plan to make the doors as soon as you buy the wood as it may warp if you let it sit a while.. mine started warping after 4 days and idaho is not very humid at all)
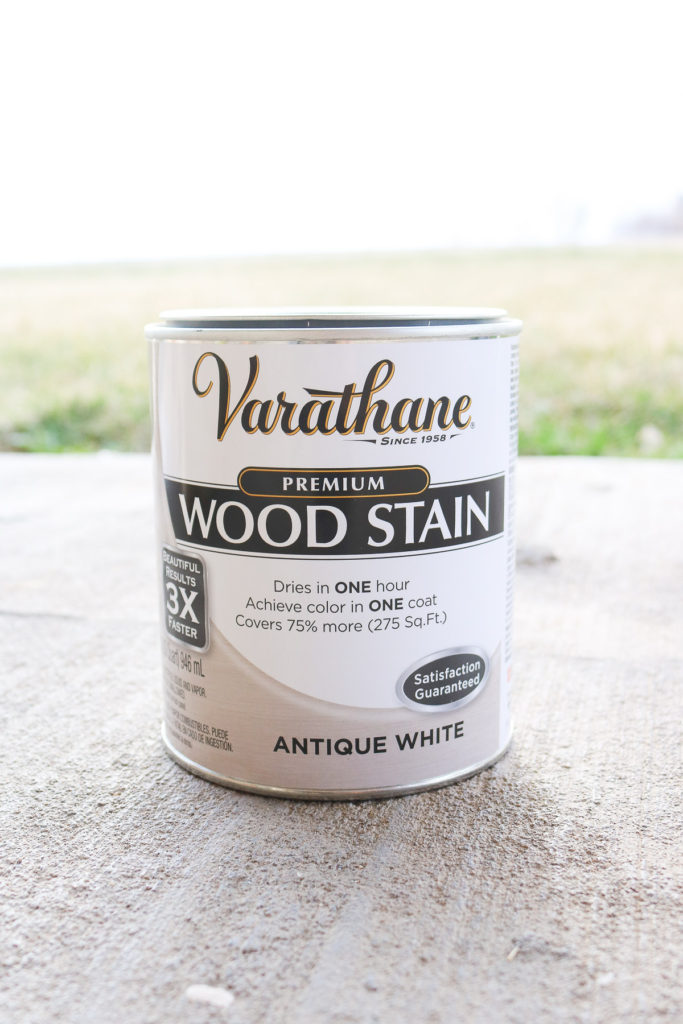
- wood stain ( optional )
- burlap, any fabric or, you can even use thin plywood ( I used 5 1/2 yards of burlap) ( I purchased my burlap at joanns fabric. I used the color oyster. If you prefer to shop on amazon here’s the closest thing I found on amazon. https://amzn.to/2T9dr32 )
- stapler
- screws ( drill)
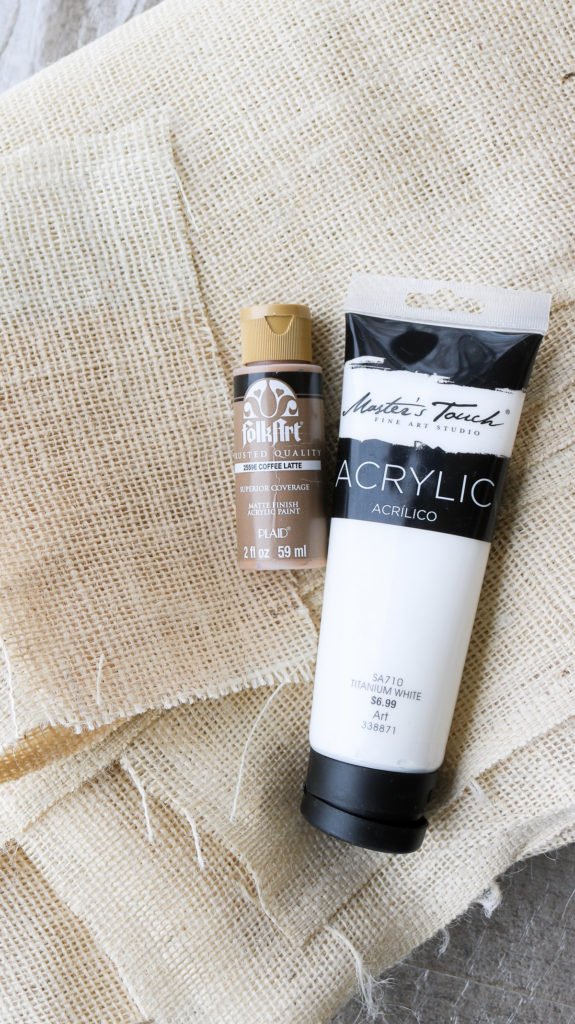
- acrylic paint to stain burlap ( also optional)
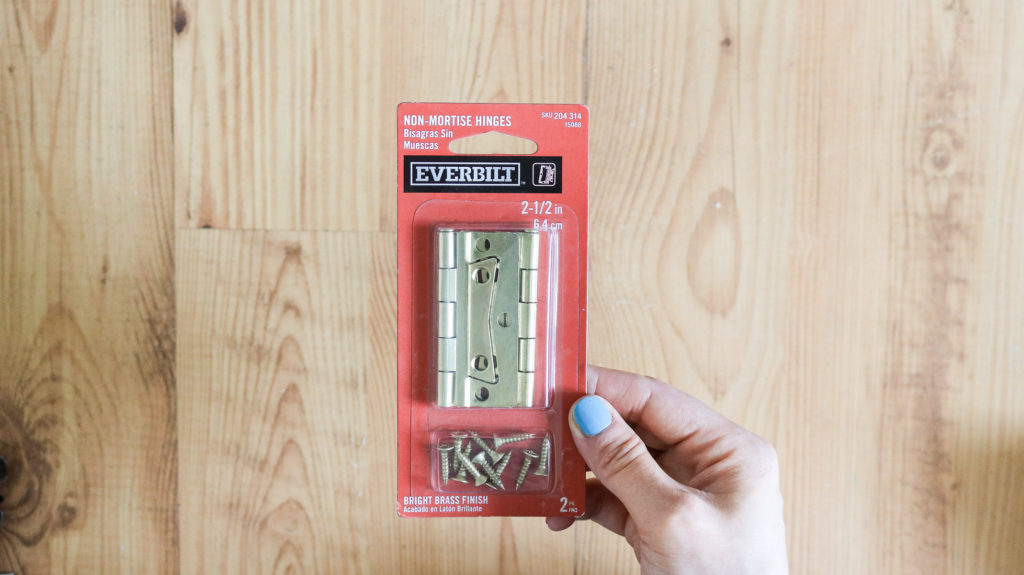
- closet door hinges ( you can get similar ones here – https://amzn.to/2QIY6ov )
- bi-fold door hardware (I bought mine at homedepot. It also comes with wooden closet door knobs) ( amazon sells hardware for a great deal here- https://amzn.to/2UPSytZ )
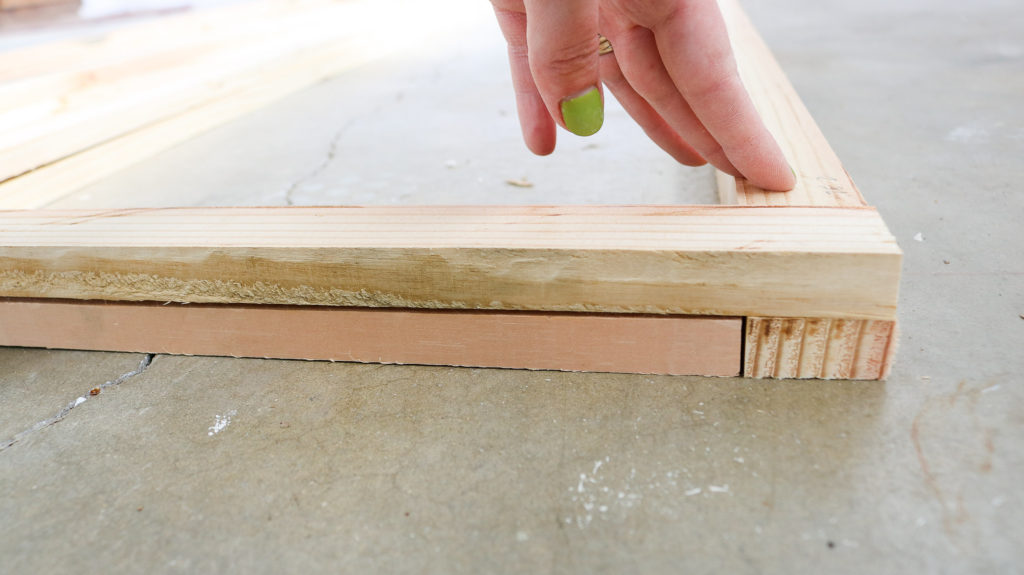
Okay here’s a quick snippet showing how the panel looks close up with the top and bottom layers. ( before secured with screws)
TO STAIN OR NOT TO STAIN?
This is the wood stain I decided to use and JEEESH this stuff STEIIINKS!! Like real bad😫! First off let me say, the reason I decided to stain my wood is because I wanted an even look under the burlap. I was afraid that since some of the wood looked darker than the other pieces it might be visible under the burlap. Now that I think about it I honestly regret using this stuff. I should of just used diluted acrylic paint. It’s been 2 weeks airing out in our car port and it still stinks. It’s definitely fading but, somehow I have a feeling it’ll always stink a little.
I should mention that I didn’t apply clear coat over the stain at all. Not sure if this would make a difference in smell at all. (update: the smell took about 3 weeks to fade. I was starting to think these DIY closet doors would be a flop )
When applying my stain I didn’t let it sit long at all. I pretty much wiped it off as soon as I applied it.
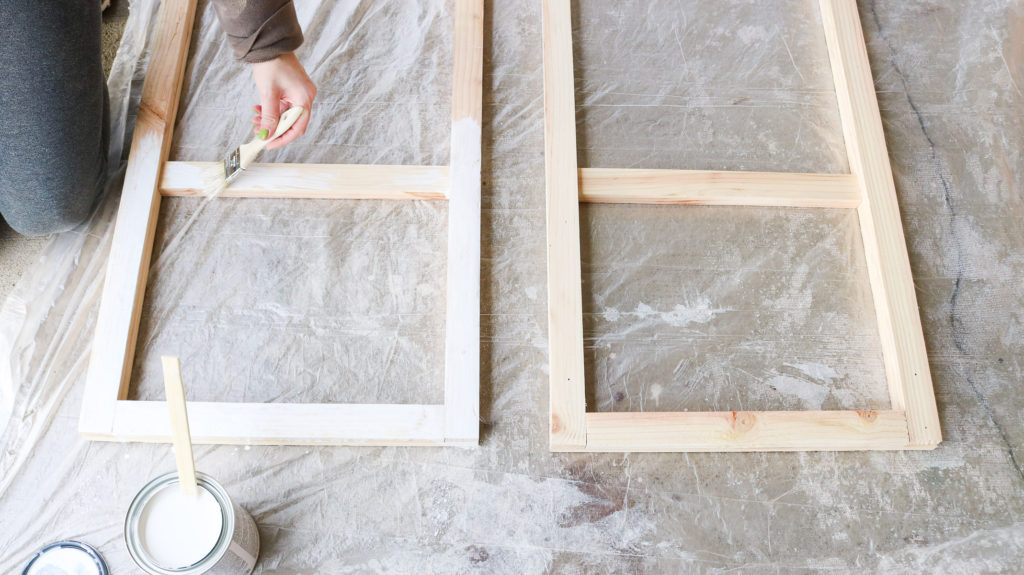
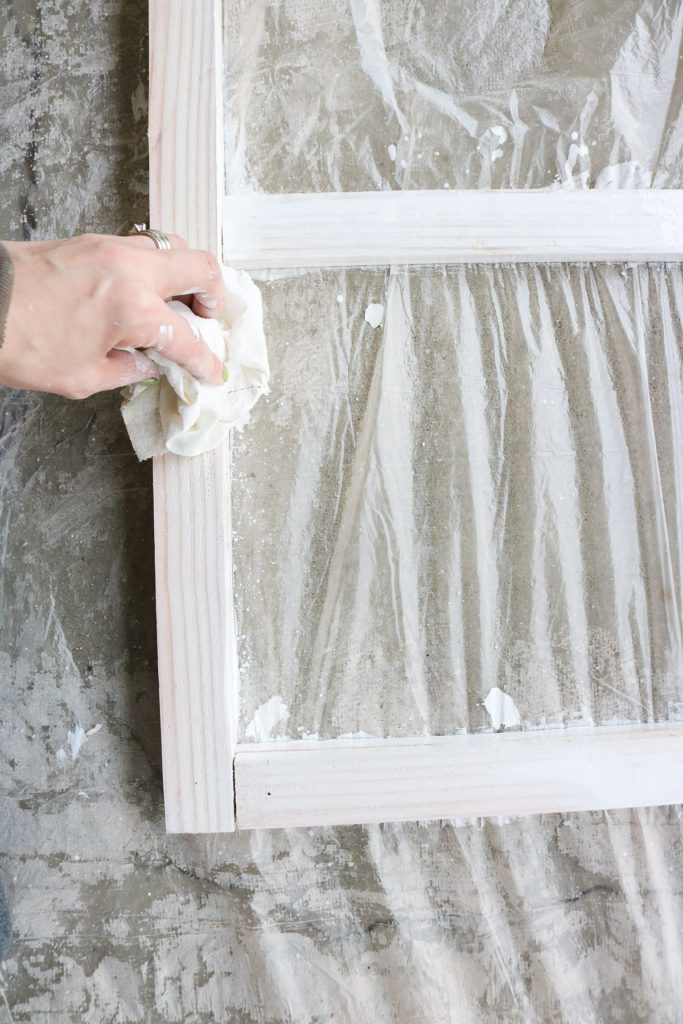
Here’s what the panels looked like once stained. 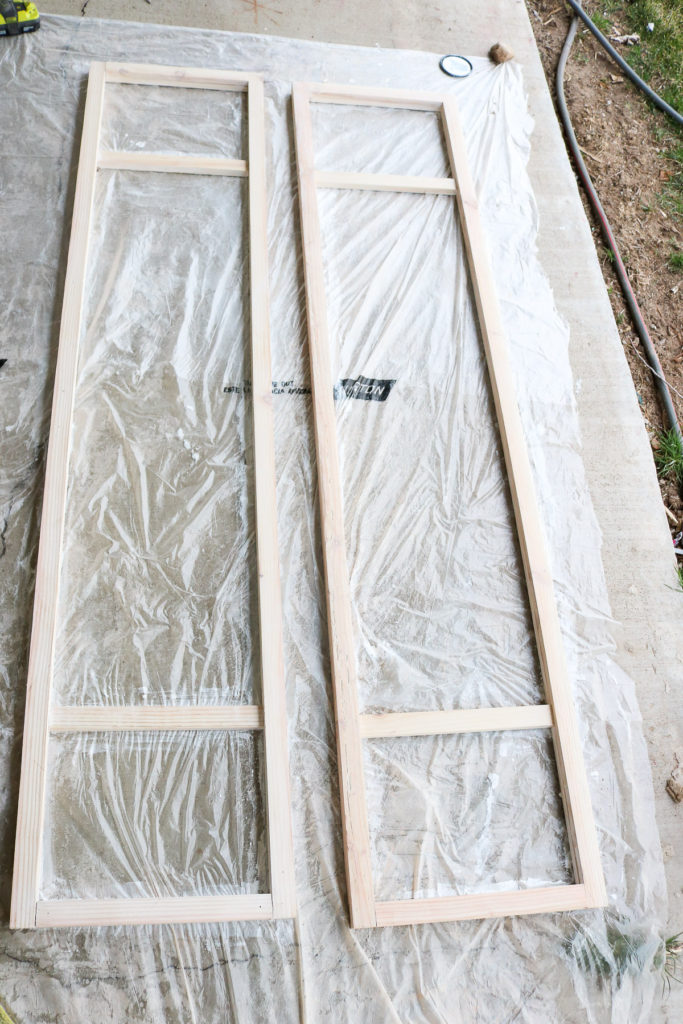
Why I stained my burlap!
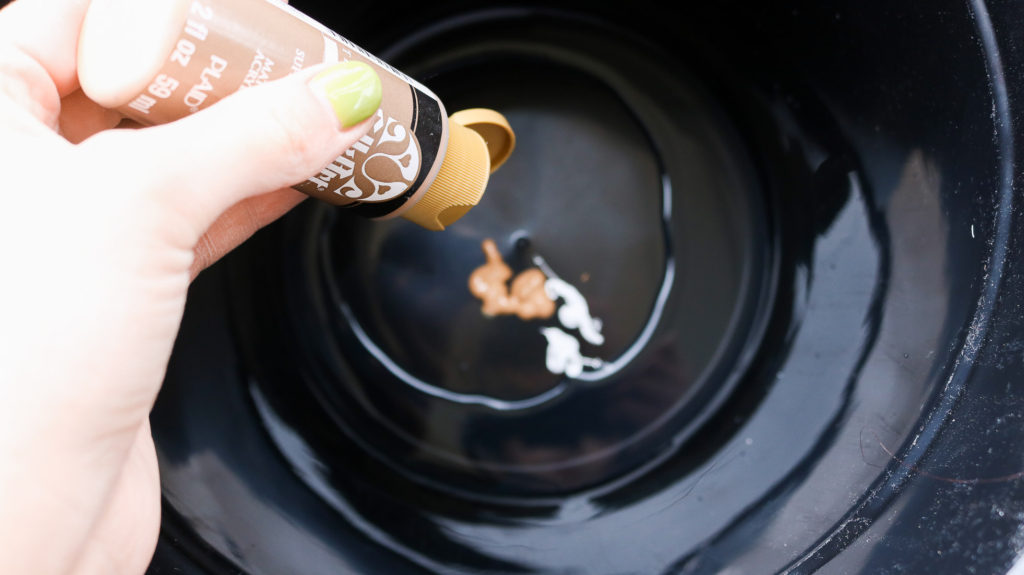
Before starting on these closet doors I was super inspired by rattan! If you’ve never heard of it it’s very similar to cane webbing! When I looked into purchasing some rattan or cane webbing I found it ranged around $7 a sq foot! Pretty pricey and again not in my budget! That’s when I decided burlap was the way to go because it was the perfect texture and only about $3 a yard. I decided to stain it because it was too light in color and more yellow then cane webbing. I used some acrylic paint that I mixed with water and brushed the mixture on. ( folkart coffee latte and titanium white) Once the water was added the mixture was pretty diluted. Don’t forget to do paint swatches before painting all your burlap. Also keep in mind it will be a few shades darker once it dries. That’s why my mixture looks super light and milky.
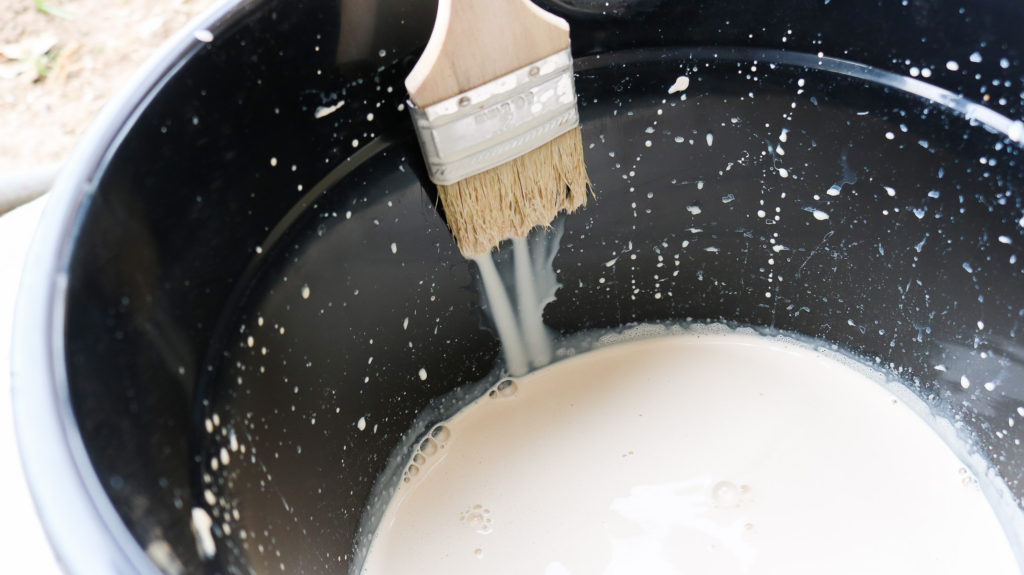
To get that perfect faux rattan look I know my paint mixture looked super light and milky and it seamed like it wouldn’t make much of a difference to the burlap but it does! Trust me! I went through a lot of swatch tests before I ended up with this milky stain mixture. Here’s a snippet showing the difference in color.
( burlap at the top right of the photo is stained vs the small piece of burlap on the left bottom isn’t stained) 
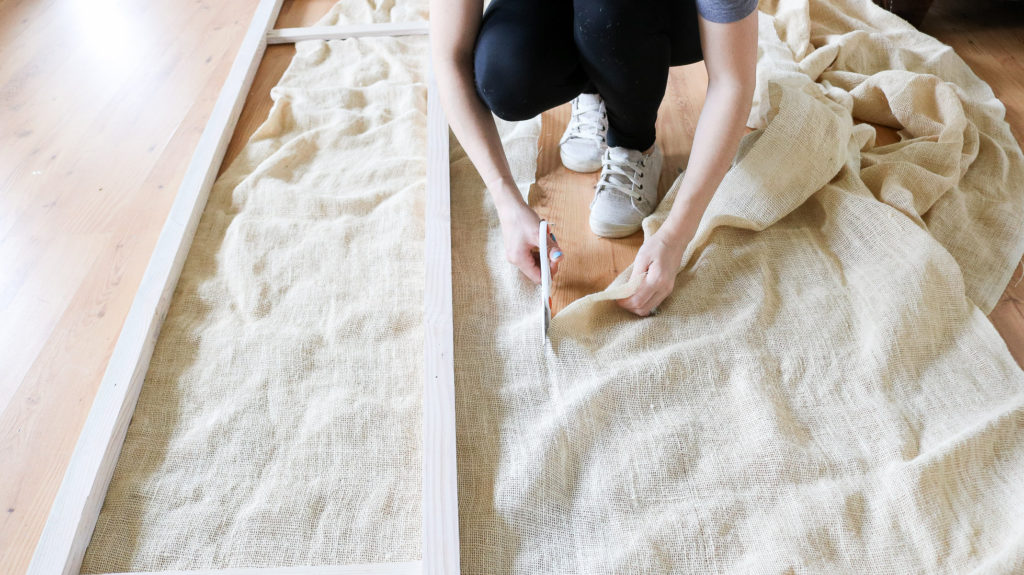
Attaching burlap to your panels!
This is pretty straight forward. I cut the burlap big enough to wrap around each panel and ironed it before attaching. Then I used my stapler to secure first the top then the bottom of the burlap to my closet panel (tighten while stapling). Following that I moved onto the sides of my panel. It works best if you staple one whole side of your burlap to the panel than move onto the other side and stretch tightly while attaching the second side.
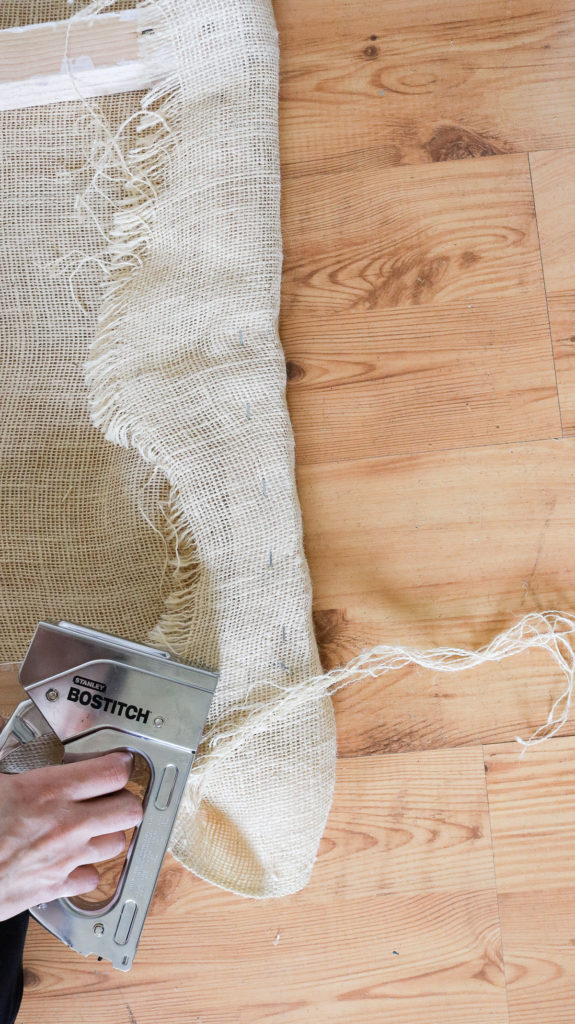
To finish off my corners I simply pulled the fabric back neatly and stapled. ( video shows more in depth – scroll down for video)

Installing your doors!
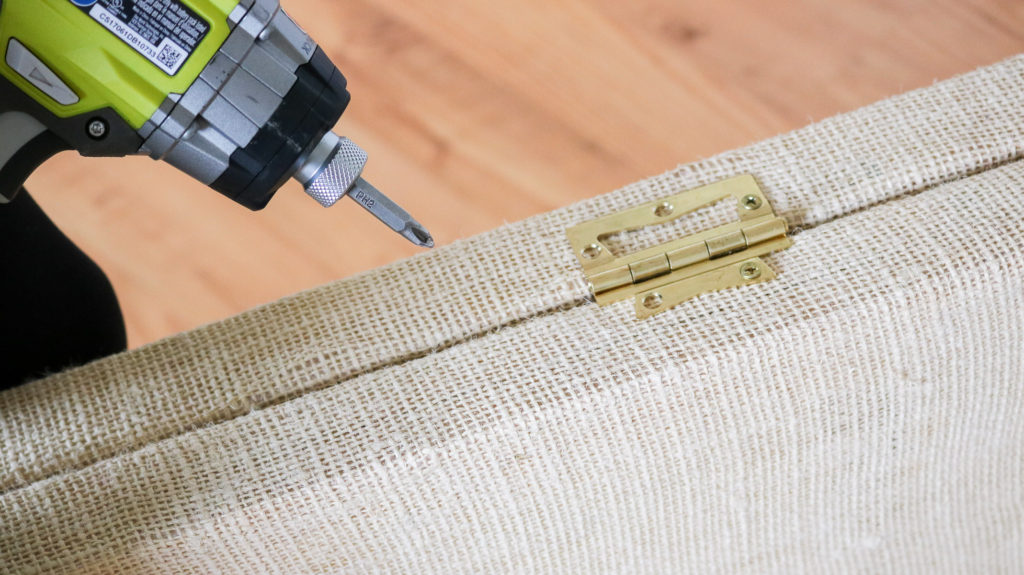
Finally installing the doors. I attached some of these non-mortise hinges. I was told they’re made specifically for closet doors.
To attach them I simply lay the doors next to one another and used the screws provided to attach them.

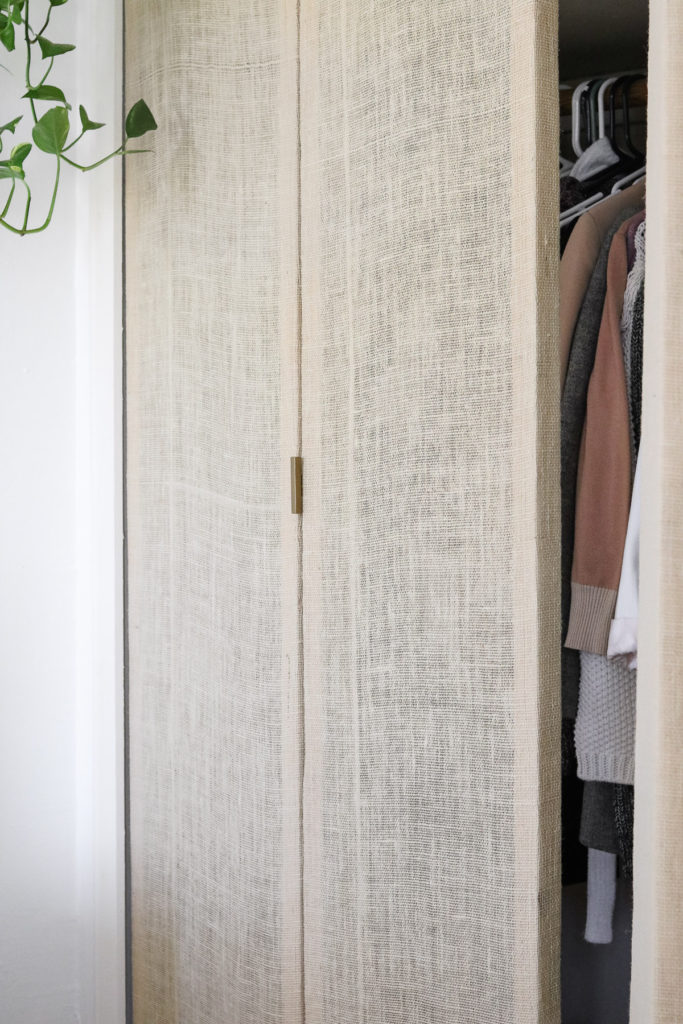
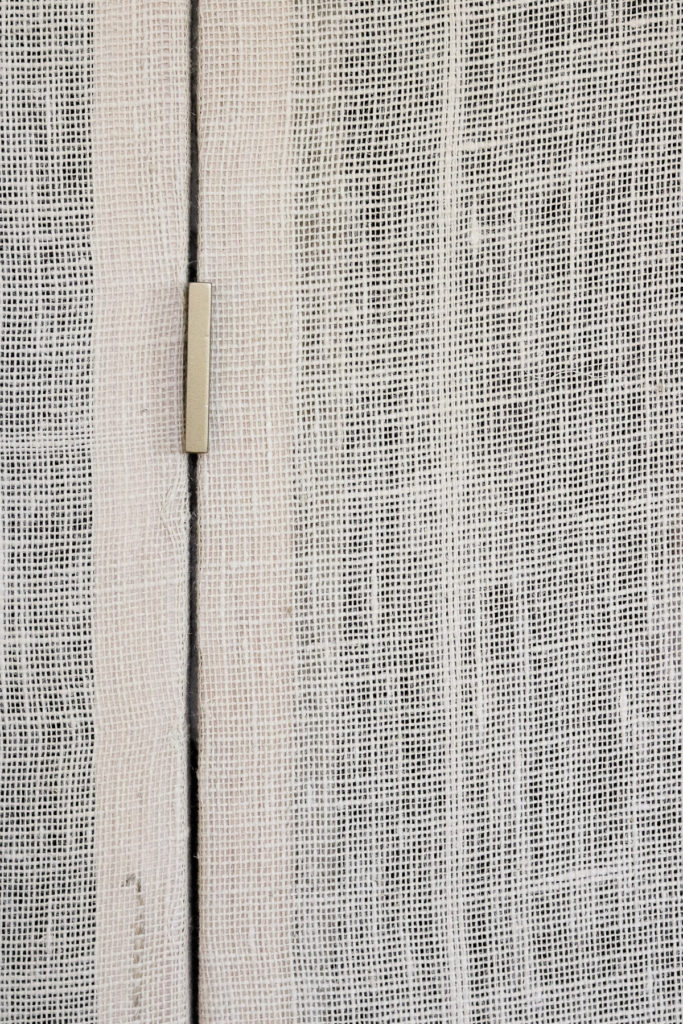
Tony also made me these super cute door handles that I special ordered from him! 😋LOL!
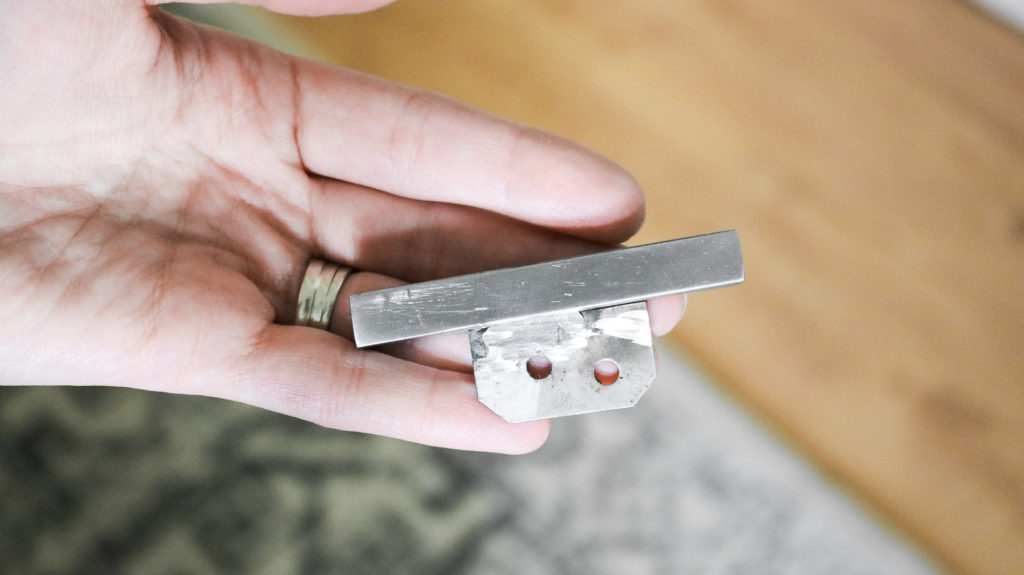
Aren’t they sssso cute!! I love how simple they look.

OTHER DIYS YOU WILL LOVE:
- DIY FAUX CACTUS PLANT
- RECYCLE EGG SHELLS FOR WALL ART!
- WREATH BOW HACK IN MINUTES!
- RECYCLE FLAT SHEETS INTO WALL ART!
- DIY NIGHTSTAND FROM 2X4’S
Installing the hardware + Video!
So I’m not going to lie the hardware installation was the most intimating part for me but I honestly wouldn’t change a things about these DIY closet doors! It was actually a pleasant surprise because they were a lot easier to install then it seamed. Since I was so carried away figuring it out I totally forgot to take photos. I did however make a video of it. If installing hardware for your closet doors is something you want to learn this video might be helpful.
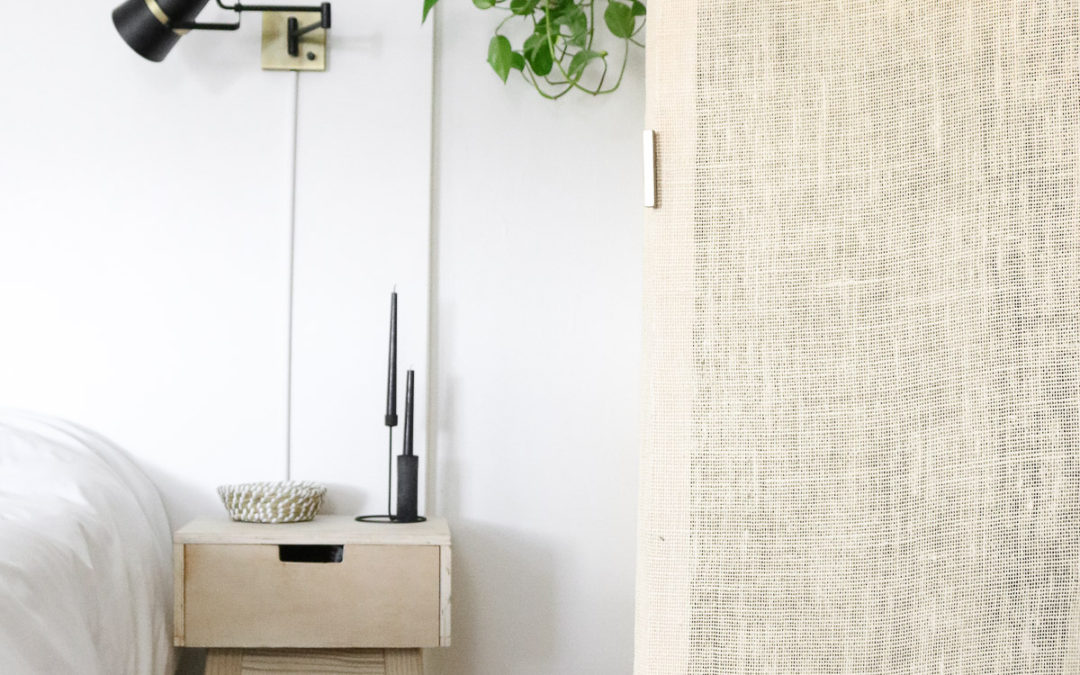
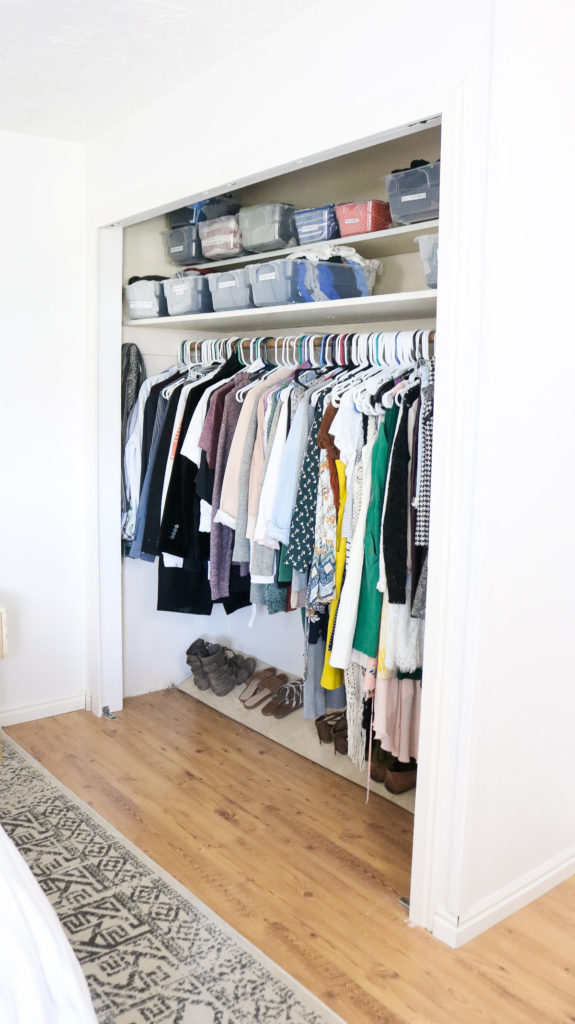
Okay finally here’s what my closet looks looked like before!
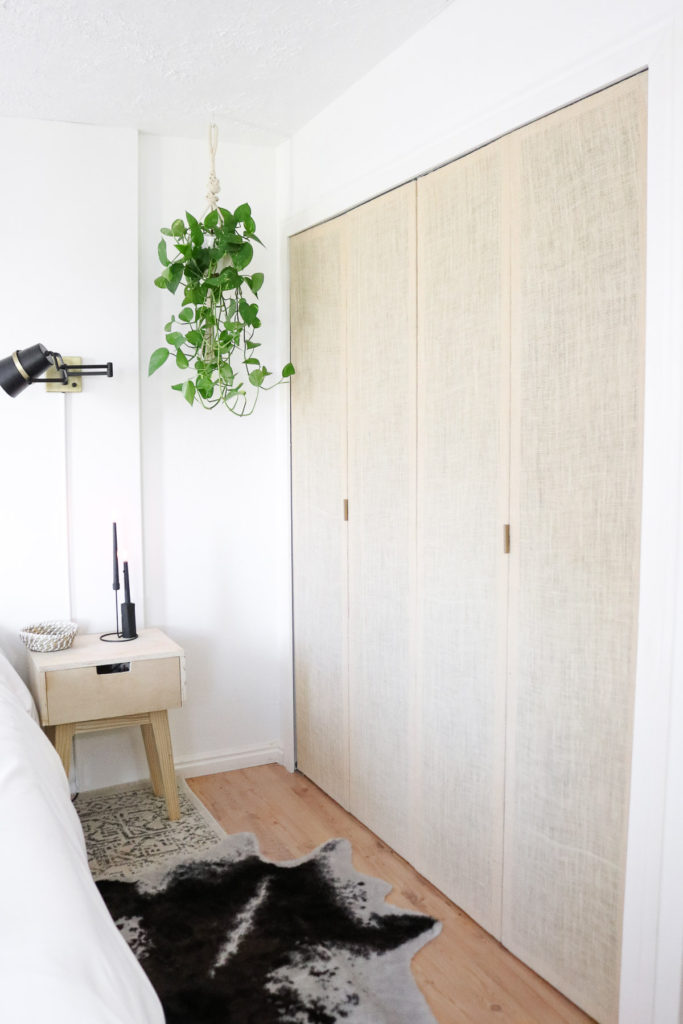
Here’s the AFTER!!!
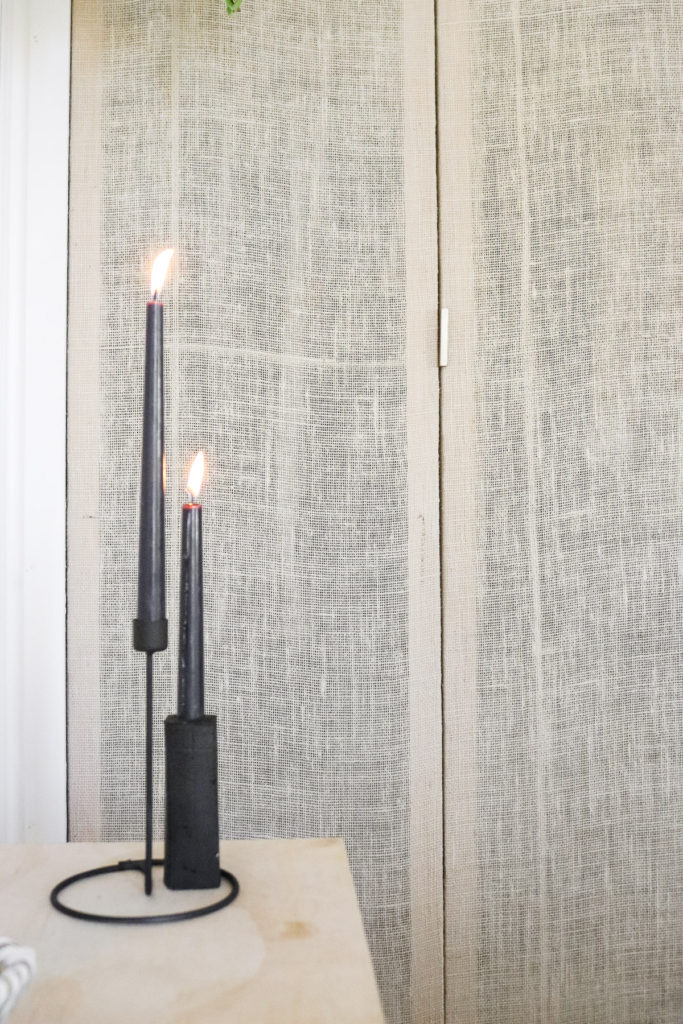
Also shown in these photos are my new candle holders😍😁! A few weeks ago I really wanted some black candle holders. Hobby lobby had cute ones but, I decided to make my my own. I got some metal at home depot and Tony helped me shape into a candle holder. It was super easy to make and took under 15 minutes to finish. The solid one is made from concrete. 😀
I love how the burlap stands out against white walls.
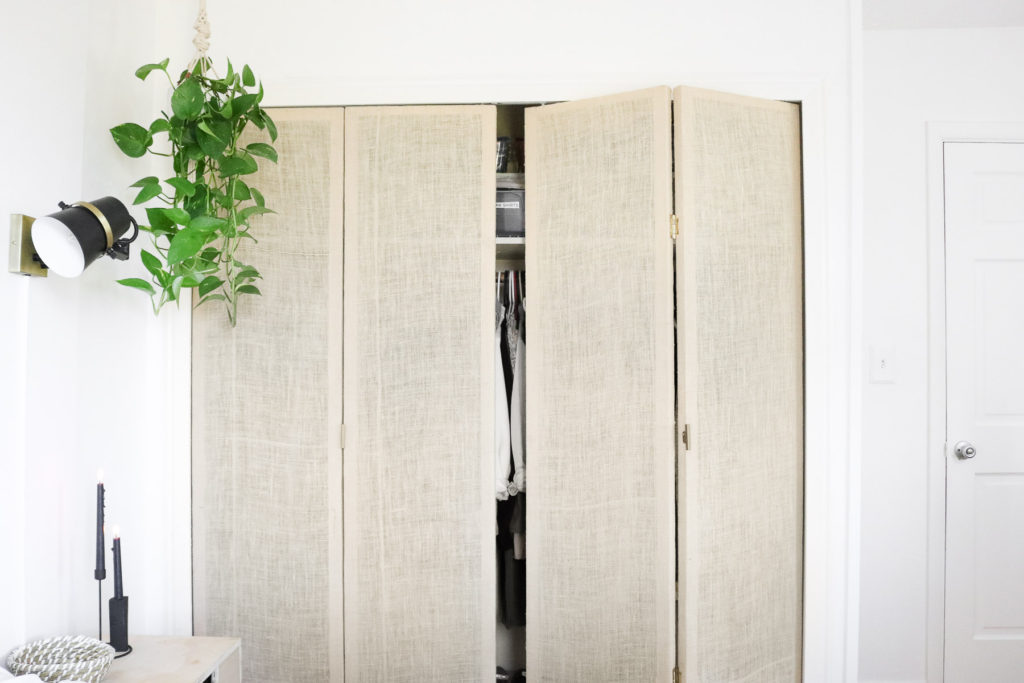
OMG that sheer finish burlap gives these closet doors! I LOVE LOVE LOVE IT! Just the look I was going for.
That’s it for these DIY closet doors! I hope you’re inspired to make your own. You can also add this burlap effect to furniture, and walls 😬!
Here’s a pin a for you to add to your Pinterest board. You can add this to your 😃 diy decor board. Click on the photo to pin! ( photo below)
Happy Crafting!
I’ll see you next time!
xo,
Lily-
OTHER DIYS YOU WILL LOVE:
- DIY FAUX CACTUS PLANT
- RECYCLE EGG SHELLS FOR WALL ART!
- WREATH BOW HACK IN MINUTES!
- RECYCLE FLAT SHEETS INTO WALL ART!
- DIY NIGHTSTAND FROM 2X4’S
Wow it looks so good !! You are amazing at what you do! Love the candle holders as well!
I was just wondering, since the burlap is a but see through, are you able to see colorful clothing/stuff in the closet through the burlap door?
Thank you girl! You’re too sweet! I’m so glad you love the candle holders! 😀
No you actually can’t see colorful clothing. 😀
I love the way these turned out! Is the link you provided (from amazon) for the burlap the one you actually purchased? I love the color of yours after staining.
I looked on the Joann’s website too and it looks like there are multiple colors to choose from when purchasing burlap. I’m hoping to get the correct original burlap that will allow it to stain as light as yours appears.
Thank you Amanda, I’m so happy to hear you liked it. No it’s not that exact one I purchased. I got mine at Joanns fabrics when I tried to find it on joanns.com they didn’t have the right color so, I linked it to the closest thing I could find on amazon. OH WOW Didn’t realize joanns sold multiple colors once pushed on the item 🙁 . If purchasing from joanns I used the color oyster. The lightest color burlap you can get. That’s the one I used. Here’s the link to Joanns – https://www.joann.com/burlap-fabric/prd23682.html#icn=search&ici=burlap&start=1 Let me know if you have anymore questions 🙂 I hope your project goes great 🙂 🙂
You can use the 2×2’s just as they are however you’ll need to figure out a way to secure them and still keep it sturdy. I would use a double kreg jig to make slanted holes. Than I would glue and secure with screws.
This is GENIUS! I love money saving home decor like this.
Thank you Tanya! 😀 Same here!
We just used this to make my son’s closet door and love it! I need that handle now though!! How did he do it?? Or do you know of anything similar that could work like that? I’m not seeing anything else I like..
Hi Jamie, sorry we didn’t record a DIY for the knobs but here’s something similar I found on amazon. https://amzn.to/3vse61k
These are really nice!!
So happy you liked it! Thank you Kelly 😀
I am inspired by you!! My husband loves the Dallas Cowboys and do you think it would be too hard to line everything up if the material has a print?
Hi Anita! Oh my gosh I am so happy to hear this was inspiring! Yeh I think any fabric would work the same 😀 That sounds so cool! Let me know how it goes!
Yes, I agree, you ARE a genius, Lily! I now have an affordable replacement for the doors on my closets! Only 3, and they’re not double doors like yours, they’d take only 2 panels each. Well, 4 if you count front and back. But I need to ask — did you make sure the door opening was plumb before you started? If so, was it? If it wasn’t, what adjustments did you make, and how?
Thank you!
Sue
Hi Sue, Thank you so much for your kind words! sorry it took me so long to reply. I had to ask my hubby what plumb meant LOL! Still not really sure what that term means but, If you’re wondering whether the door opening was a perfect square it wasn’t. I had to adjust the door quite a bit to get them looking even.
Hi I’m planning on making some canvas doors also.
Wondering if you’ve got any suggestions where I can get wardrobe sliding runners?
How fun! Do you mean the sliding door hardware? I got mine at homedepot I think or I’m pretty sure amazon sells it as well.
This is great! I’m looking to make some custom sized doors for my rental apartment. They’re not normal sizes but I can’t imagine renting it out without doors on the bedroom closets!
I think I’d like to put panels in to make it more sturdy and easy to clean. Do you have suggestions on what I could use and how to insert them since they’ll be a little thicker than cloth?
Maybe really thin particle board?
Thanks glad to hear you liked this. You can use thin plywood from homedepot it’s fairly affordable. We used it for out barn doors.
Beautiful! I hate normal closet doors, especially the sliding mirrored kind. These are a great improvement.
Oh my gosh me too Jane! Those mirror doors are so hard to keep clean. I’m glad you liked these I’ve really been enjoying them.
Beautiful !!!! I love the look !!!
I love a design challenge and it feels so good to make something yourself , and make it to your own likes & needs ! Also , great job with your tutorial 😊
Thank you Pamela 😀 YEs I couldn’t agree more! It feels great to make challenging things. I love how these turned out! YAY! I’m so happy to hear you loved the tutorial!
Thank you. Wanted nice closet doors but way too expensive. Bumped into you and i felt sich a relief.
Thank you again . Great idea. Will take me a whole year lol joking. Will do. 12 door panels! Will be a pro by time i finished.
LOL! I totally get you and I’m glad this was helpful 😀 Oh boy! 12 panels sounds like a lot of work! You’ll be a pro for sure 😀 😀 😀
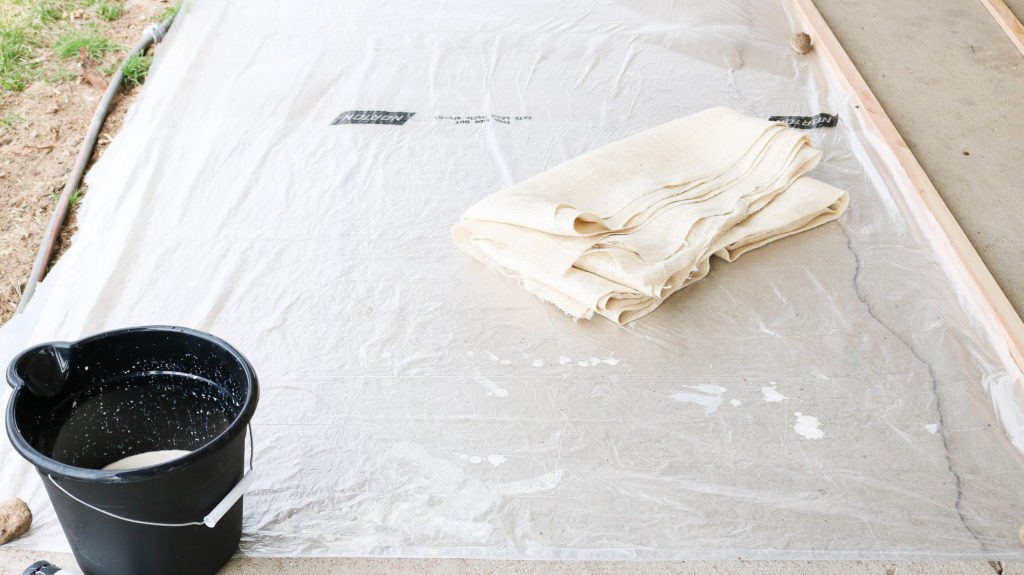
The closet doors are stunning and classy. I love your idea. I am just wondering how you actually stained/painted the burlap. Did you spread the burlap out onto say a plastic liner on floor? Did it dry fairly fast?
Hi Brenda, thank you so much! Yes I spread it out on plastic. It does dry in a couple hours out on the sun but I tossed it in the dryer to quicken the process. It was dry in about 15 minutes.
I am very impressed with your idea and hard work and your results are beautiful. They will also allow your clothes to “breath” which is old school but actually important. I am glad you were successful and I know you put a lot of time and energy into this. I was you many years ago. I loved the “doing it myself” concept and I definitely did it with out help from anyone. The hardest part is hanging bi fold doors and getting them level. I hope they last a long time. I do remodeling now and have thrown out more bi fold doors than I can count. If at some point you want traditional bi fold doors, check if your community has a Restore. It is connected with Habitat for Humanity and people like me often donate useful items from remodels to them for them to resell. Also Lowes has the plain bi fold doors for $50 a pair including hardware. They definitely are ugly and need to be finished but with your creativity you could handle it. Best of luck in the years ahead. Idaho is a beautiful state, much underrated.
Oh gosh I couldn’t agree more! Hanging them was pretty hard. OOH yeh we do have a restore. I didn’t think to check them out! I definitely keep them in mind next time. Thank you. WOW $50 isn’t bad at all! Thank you so much! YES!! Idaho is amazing!
It looks wonderful, you did a terrific job!
Thank you so much Valerie!
These are so so great!! I’m loving rattan right now but it’s so expensive so your doors are perfect! Two questions:
1) I’m moving into an apartment without a closet so I’m thinking of buying a freestanding wardrobe from ikea (which will probably be a light ish weight material) and I’ll have a single hinge door. Do you think it would be too front heavy and topple over? Or are the doors not that heavy?
2) did staining the burlap change the texture of it at all or just the color?
Thank you so much for posting this! I’m so excited to have found such a great diy rattan look!
Yes you’re right its super pricey. No the doors aren’t that heavy. I’m not really sure how heavy the ikea shelf is though. You can also make them from 1″ by 2″s they sell at homedepot. That’ll make them weigh even less. I don’t think the burlap changed in texture at all. It seems a bit sturdier but not a huge difference. Sure 😀 Thank you. I’m so happy to hear you liked this idea!
Thank you so much for the inspiration. I was looking for a way to update my closet doors without spending a lot of money and this was it. I had closet doors, so I ended up using those and my only expense for this project was the burlap which was under $20.
The door came out great! Thanks again!!
I’m so glad to hear this was helpful. OOH Love the idea of using old closet doors. Thank you for sharing Galina. 🙂
Thank you. Saving this for future reference as I HATE mirrored closet doors. Would you be willing to say where you got the light fixture that’s on the wall above your nightstand? It’s just what I’m looking for.
I’m glad you liked this Jane 🙂 Same here hate cleaning those mirrored ones! The light fixtures were from wayfair.com
So beautiful! What a great idea, love it!
Thank you Karen 🙂
This is sooo beautiful!!! Not to mention how much money you are saving by not using plywood to make your front door panel! Genius and absolutely gorgeous!! I am kind of sad I didn’t come up with this fabric idea myself as I am always looking for ways to save money…sigh!! 👏👏👏
LOL! you’re funny Ruth 😀 Thank you so happy to hear you loved it! 😀
Hello, I’m currently in the process of making these for my small closet and I used your formula for my measurements and it didn’t seem to work. It’s 1.5 inches off on the top side. I can’t figure out where I went wrong
OH NO!! Sorry to hear that. I’m not really sure where it could have gone wrong. I know it’s a lot of work to make the doors maybe you can make it work add a thicker trim to the top and maybe a 2×4 behind it so you can get it to be lower to the ground. Not sure if that makes sense.
I recently bought a house that was made open concept by previous owners by knocking out a wall. It’s nice. However, I need that wall back but dont want anything permanent or expensive. I just need to corral a large puppy in one section of the house while I’m gone to work. Her staying in her kennel isn’t going to work because I’m gone so long. I have a doggy door, so I’ve got to section off the dining room again. I’m going to use your design to achieve this. I’ll have to do different measurements, but I have an good friend that is mathematical! This teacher is SO excited that her fur baby will be comfortable while Mommy teaches the humans.
Thank you. I’m looking forward to learning from your other projects too.
OH YAY! I’m so happy to hear this was helpful for you Melissa 🙂 I glad to hear this will solve your prob with your puppy.
I absolutely love these! Do you think I could attach them with hinges straight to the wall? I don’t have the sliding hardware installed at the top of the closet frame. Was wondering if you think hinges screwed into the sides of the closet frame would work?
Hi Kelsey, I’m so glad you loved them! 🙁 gosh to be honest I’m not sure how it would work with hinges I’m not great with hardware at all but, thinking it might need the sliding hardware to work. Maybe a home depot associate can be of more help.
Hey there! Absolutely love this DIY project; thanks for sharing! I’m going to attempt these for my closet! 🙂
Do you have any ideas about where to find door handles like the ones your husband made? I love them, but can’t find similar ones!!! The closest I’ve gotten is finger pulls for kitchen cabinets.
Does he sell them online anywhere? 🙂
Hi Emma, YAY! Happy to hear you loved this. Oh man no I’ve haven’t seen any anywhere. I was also thinking the kitchen pulls would be the closest to these. sorry wish I could be of more help
these doors are beautiful!! we have a narrow dressing area and the by-folds we have intrude on this small area. somewhere in instructions you mentioned sliding doors and that’s the customization I want for mine. there are 4 panels per opening, measuring 80″x12″ the only thing I’m wondering about which hardware to purchase? I’m wondering if 4 tension rods would work, unhung with eye hooks or some kind of rings.
these doors are perfect!! we have a narrow dressing area and the by-folds we have intrude on this small area. somewhere in instructions you mentioned sliding doors and that’s the customization I want for mine. there are 4 panels per opening, measuring 80″x12″ the only thing I’m wondering about which hardware to purchase? I’m wondering if 4 tension rods would work, unhung with eye hooks or some kind of rings.
Hi grace, I’m not really familiar with sliding door. If I were to do slide doors I would probably do 2 doors because of how much space it would take up. Not really familiar with sliding doors that have 4 panels. Maybe make them thinner in general and use basic sliding door hardware? Hardware for 2 sliding doors but in your case it’ll be 4? Sorry wish I could be of more help
Hello! I love these doors. I am going to try them in my guest room. Made a curtain on the cheap a few years back that I have never loved. My only question is the size if the “top and bottom” panel. In the picture they look flush. I read your comment about being able to open and close properly, but the picture doesn’t show that. I must be missing something…
Hi Andrea, I forget to mention that I added trim around the door after installing the doors. Sorry 🙁 my bad! It looks flush because the trim around the edges was added to give it an aligned look. LEt me know if this makes sense. I totally get it. I had curtains I wasn’t a fan of for years. Just got rid of all my curtain in the living room 😀
Closet doors are really cool! Fantastic idea. But I really need to inform you of something. Than vs then- The way to keep the pair straight is to focus on this basic difference: than is used when you’re talking about comparisons; then is used when you’re talking about something relating to time. Than is the word to choose in phrases like smaller than, smoother than, and further than.
What a great idea. Brilliant and clever. They look gorgeous. Thanks for the detailed instructions, too.
Thank you so much Dorothy! I’m so happy to hear you liked them 🙂
Thank you, I just finished mine! Wish i could include a picture, they came out great!
OH how fun! Do you have instagram? Would love to see. You can follow me @lilyardor if you have instagram.
Great job. How did you finish off the inside of the doors. Burlap frays like crazy. I’m wondering how you made it look neat on the inside once you had stapled (and trimmed, I expect) the burlap.
Thanks
Once the edges were stapled it’ didn’t fray too much. I only had about 3/4″ inch loose. Yes definitely trimmed it down pretty short so it didn’t have much to fray with. You can try applying something to cover the raw edges however I didn’t mind it since my doors are closed most of the time.
I have been thinking about doing this and using artificial turf to cover the frame for “grass” doors in a children’s room. I am wondering, though, why did you buy 2″ x 2″ ‘s and then split them just to screw them back together again? Why not just use the 2 x 2’s as the frame?
You can use the 2×2’s and make jig holes and secure them together. WE split them and attached them together because I wasn’t familiar with the kreg jig tool.
Thank you