If you’re limited on space in your home, extra storage can be hard to find. Whether you’re trying to use every last inch of your studio apartment or live in a tiny condo or single-family home, creating additional storage space sometimes means getting a little bit creative.
Here’s one spot you may not have thought of: Underneath your bed! It’s one of those places that is either crammed with random toys, long-lost socks, and dirty clothes or forgotten about entirely as a potential storage area. Underbed storage is most popular in studio apartments and small, big city apartments. But make no mistake— beds with storage underneath are a great option regardless of your home’s layout or where you live.
What’s even better? We’ve got a fantastic under bed storage DIY tutorial that makes creating this extra organizational space a breeze.
How do I build storage under my bed?
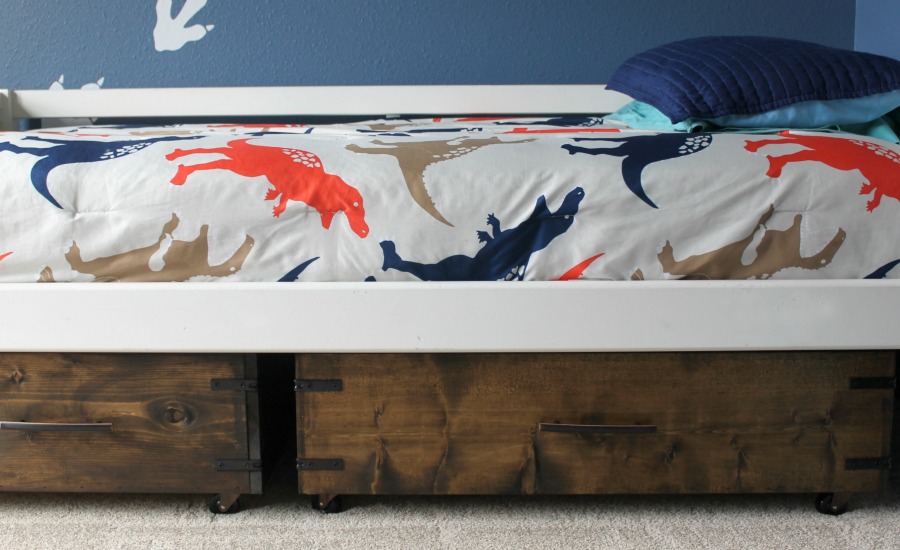
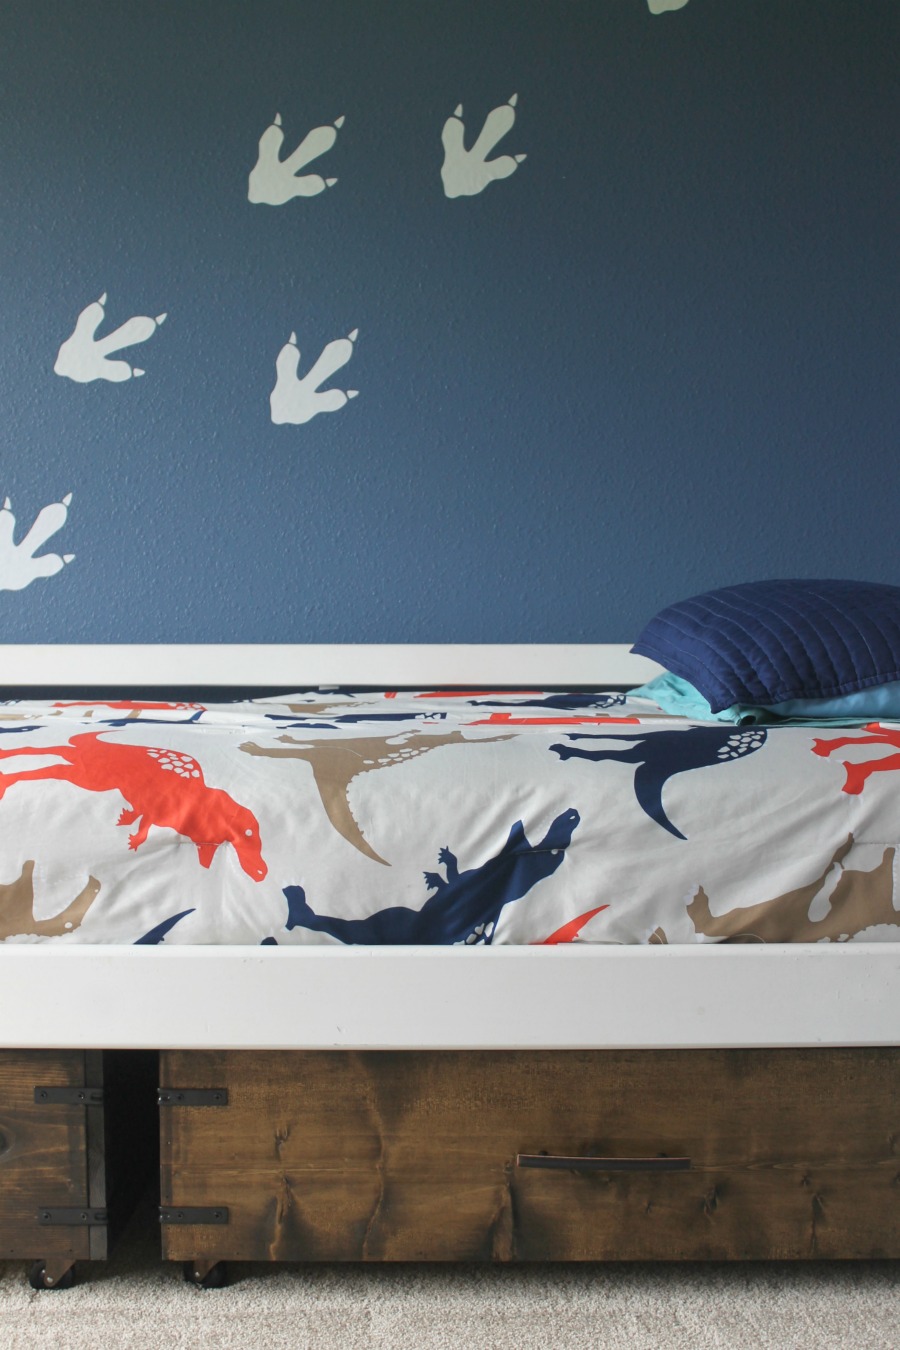
While there are plenty of premade, store-bought options for under the bed storage, I love these underbed storage DIY boxes I made. These drawers give you tons of extra room to house everything from seasonal clothes, holiday decor pieces, unused bedding, and anything else you need to find a long-term home for. Not to mention they also look adorable at the same time! It’s a win-win.
If you’ve never attempted a DIY project before, don’t panic. This under bed storage DIY is super easy to put together and relatively inexpensive, too. These drawers could make for a great beginner’s DIY project and can be completed in one afternoon with just a few supplies.
Related: 6 Ingenious Small Apartment Storage Ideas to Maximize Space
Under Bed Storage DIY: A Step-by-Step Guide
For this project you’ll need a few supplies:
- 2-foot x 3-foot piece of plywood
- 1×12 cut into four pieces (two 37½-inch-long pieces and two 24-inch-long pieces)
- Table saw
- Nail gun
- Nails
- Corner brackets (8)
- Handle
- Castors (4)
- Drill
- Hand sander
- Sandpaper
- Stain
- Wood glue (optional)
***Use extreme caution and common sense when using power tools. Follow all manufacturer’s instructions, wear safety gear and build at your own risk.***
How to Make Under Bed Drawers
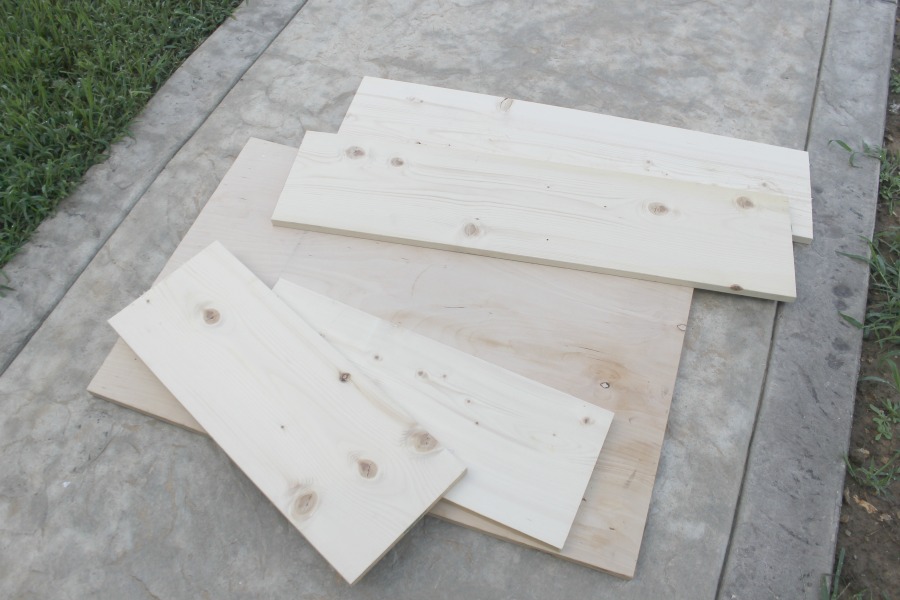
1. Cut out the wood.
First, you’ll cut out your wood using a saw.
We just built a house, so the plywood I used for this project was once our temporary countertop in the kitchen. I was so happy to re-purpose them into something fun for our new home! For tips on picking the right wood for your project, check out my DIY kitchen shelves tutorial.
The bottom plywood piece I used was 2-feet by 3-feet. The sides are cut from a 1×12 board. We cut two 24-inch boards and two 37½-inch boards to make these.
Note: Be sure to measure the space under your bed before beginning. You’ll need to adjust these measurements as needed to fit your own space.
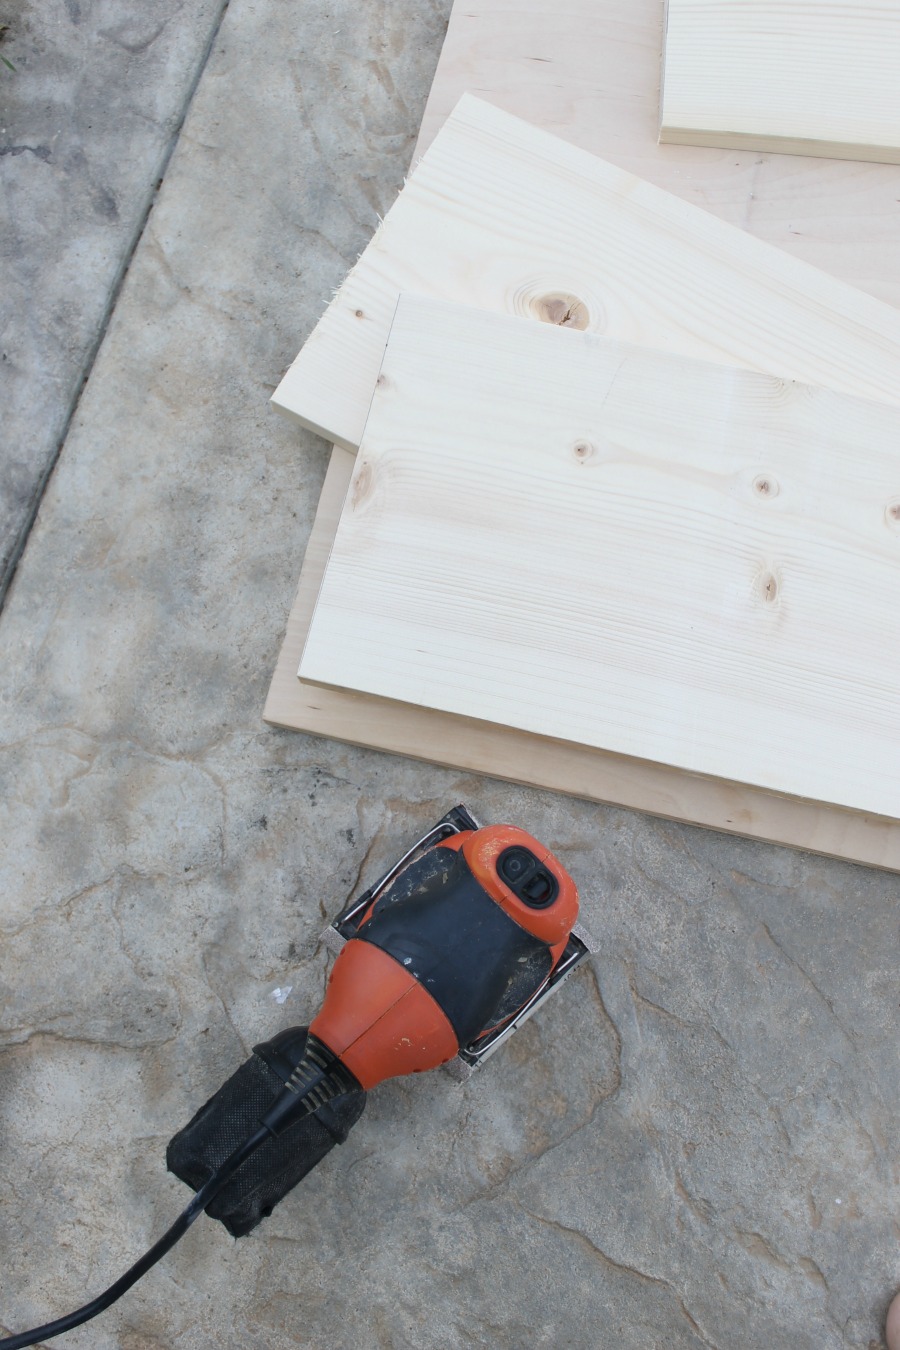
2. Sand your wood pieces.
Next, you will sand off any rough edges on your wood boards with a hand sander. Not only does this elevate the look of your under-bed storage drawers, but it keeps them sleek, smooth, and, most importantly, safe for any room in your home. That includes kids’ rooms, and anywhere that’s pet-accessible.
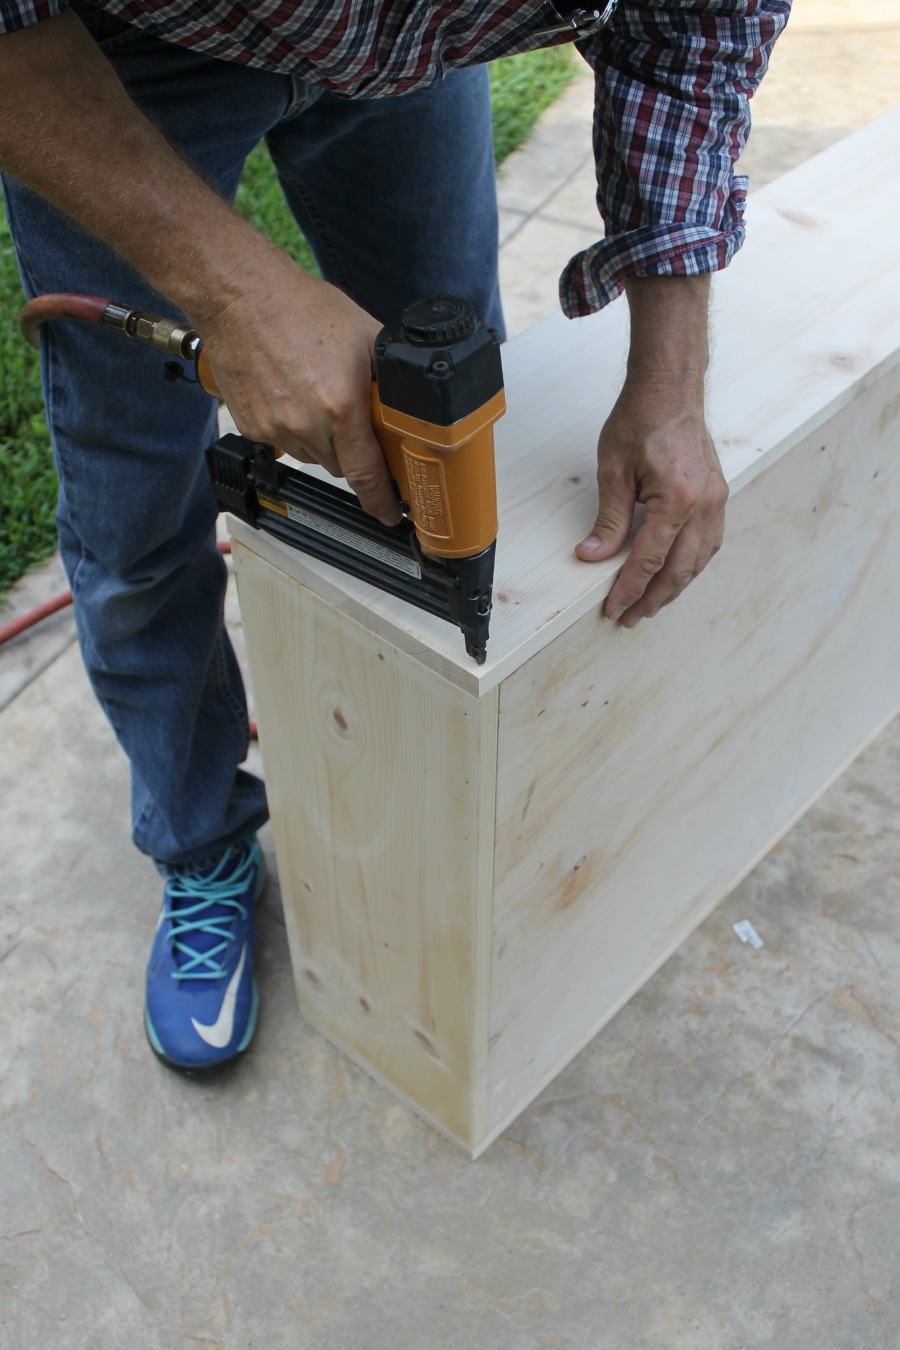
3. Assemble your under the bed storage box.
Next, you’ll assemble your underbed storage drawer using a nail gun. Nail guns are my new favorite tool. They make everything so much easier, and you can barely see where the nail went in!
We attached the two short pieces first. Put a nail on each corner and then nail along the entire edge every couple of inches. For extra strength, you could add a small amount of wood glue along the edge before you nail your sideboard into place.
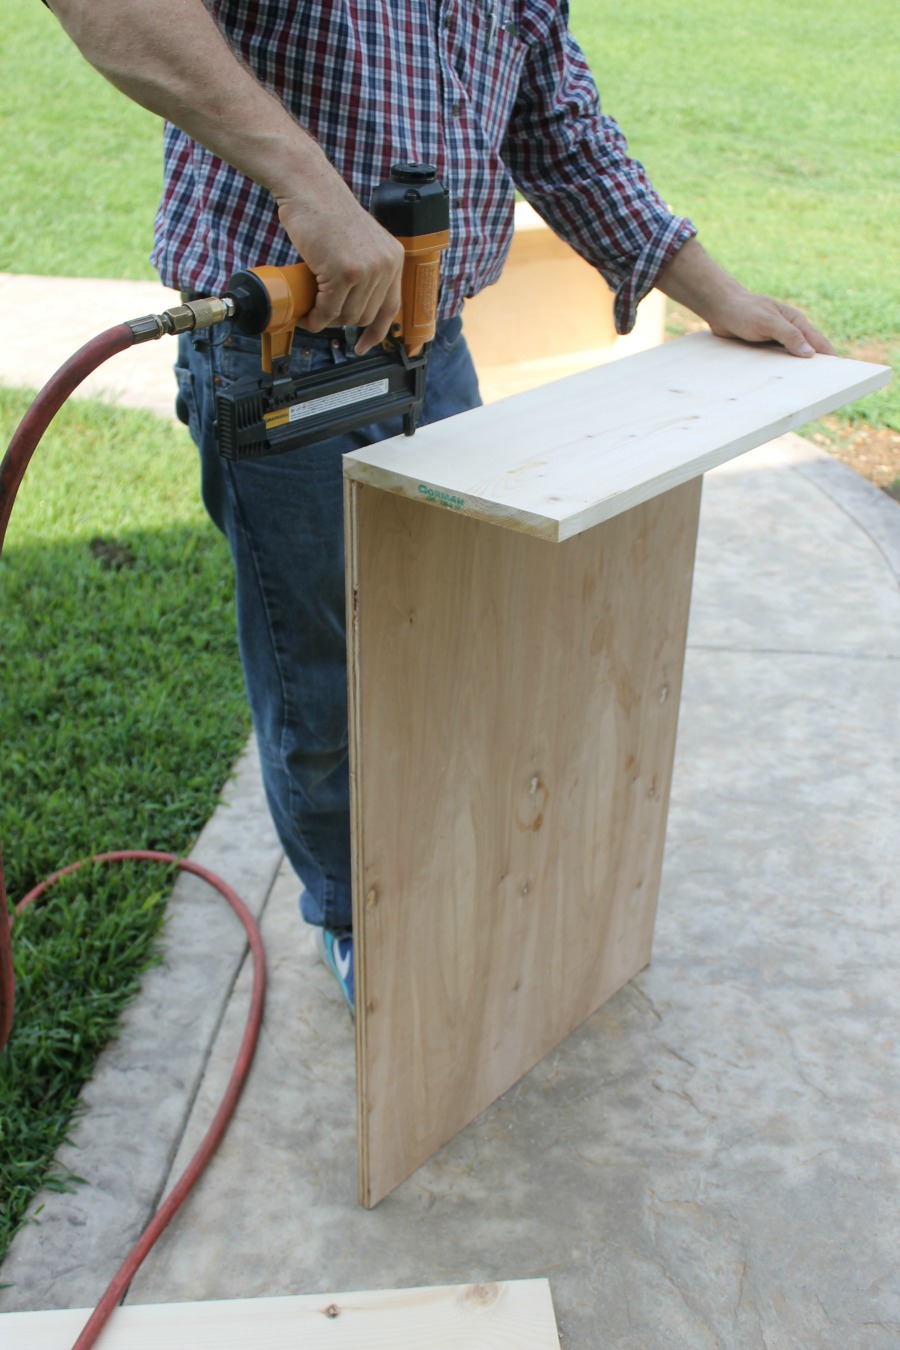
We flipped it over and added the other 24-inch piece with our nail gun to the other end.
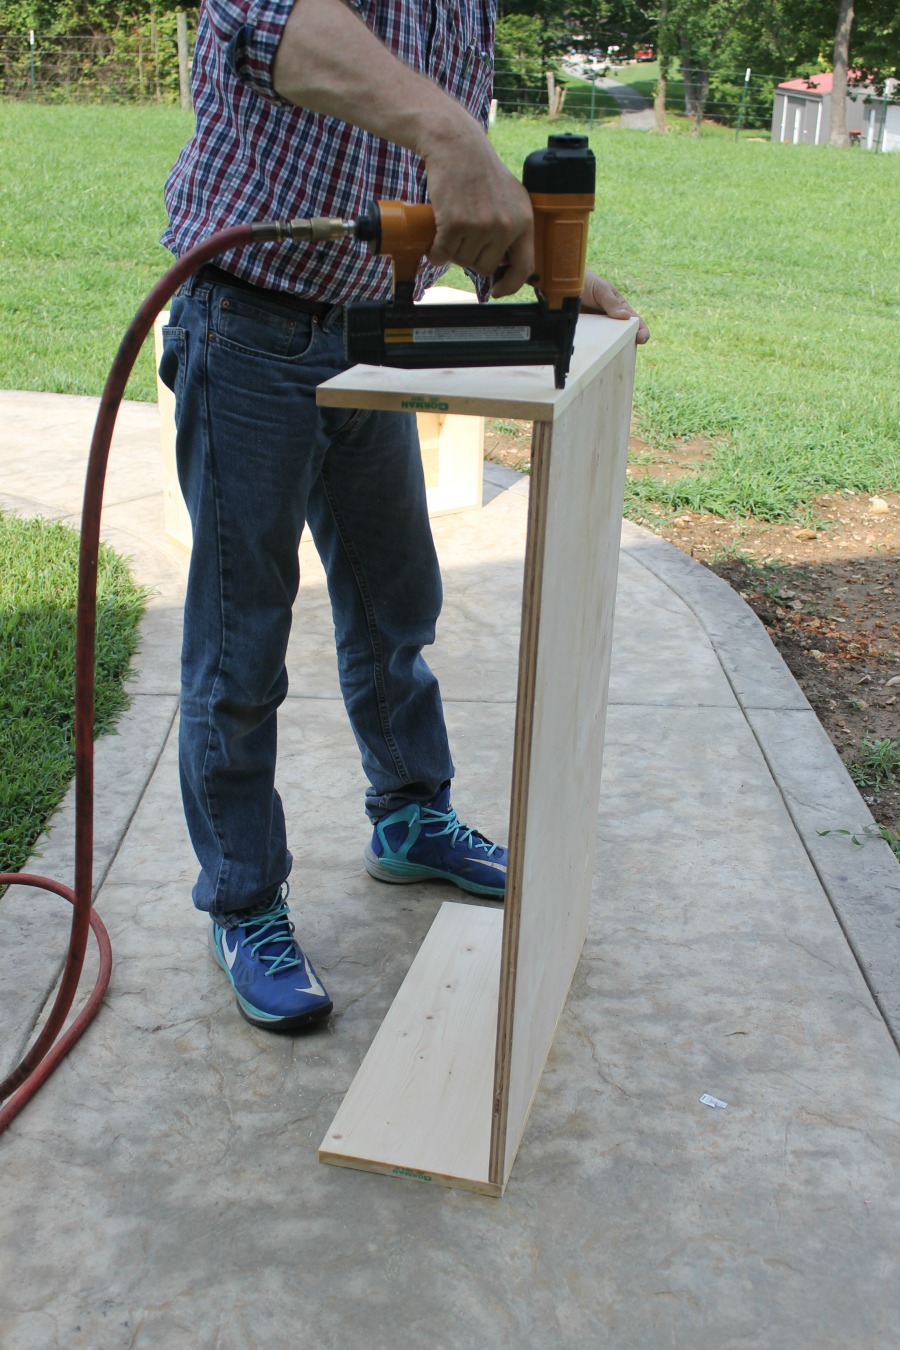
Then, carefully lay the storage box on its side and nail the longer side piece into place with the nail gun.
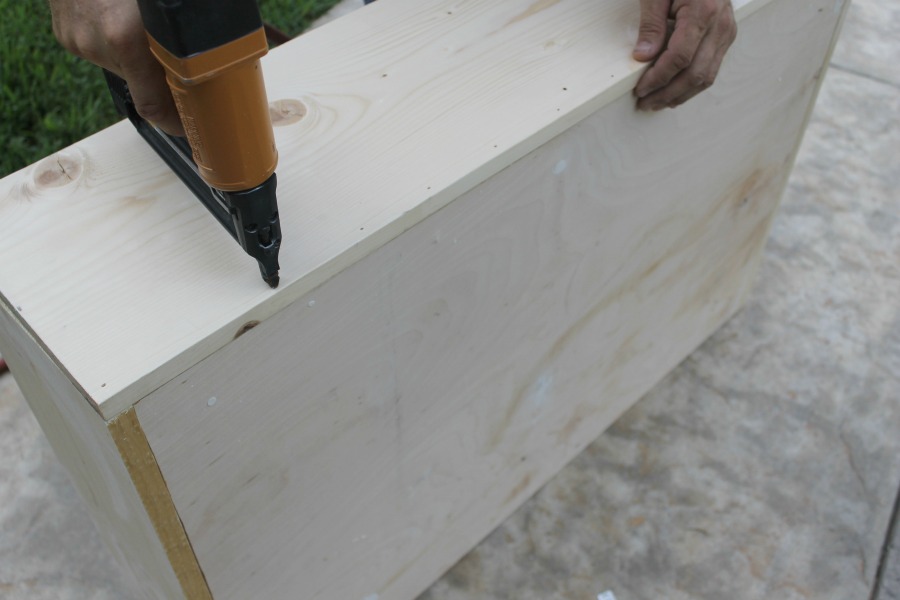
Flip it around and secure the final piece into place using the nail gun and nails every couple of inches all the way around, including the sides.
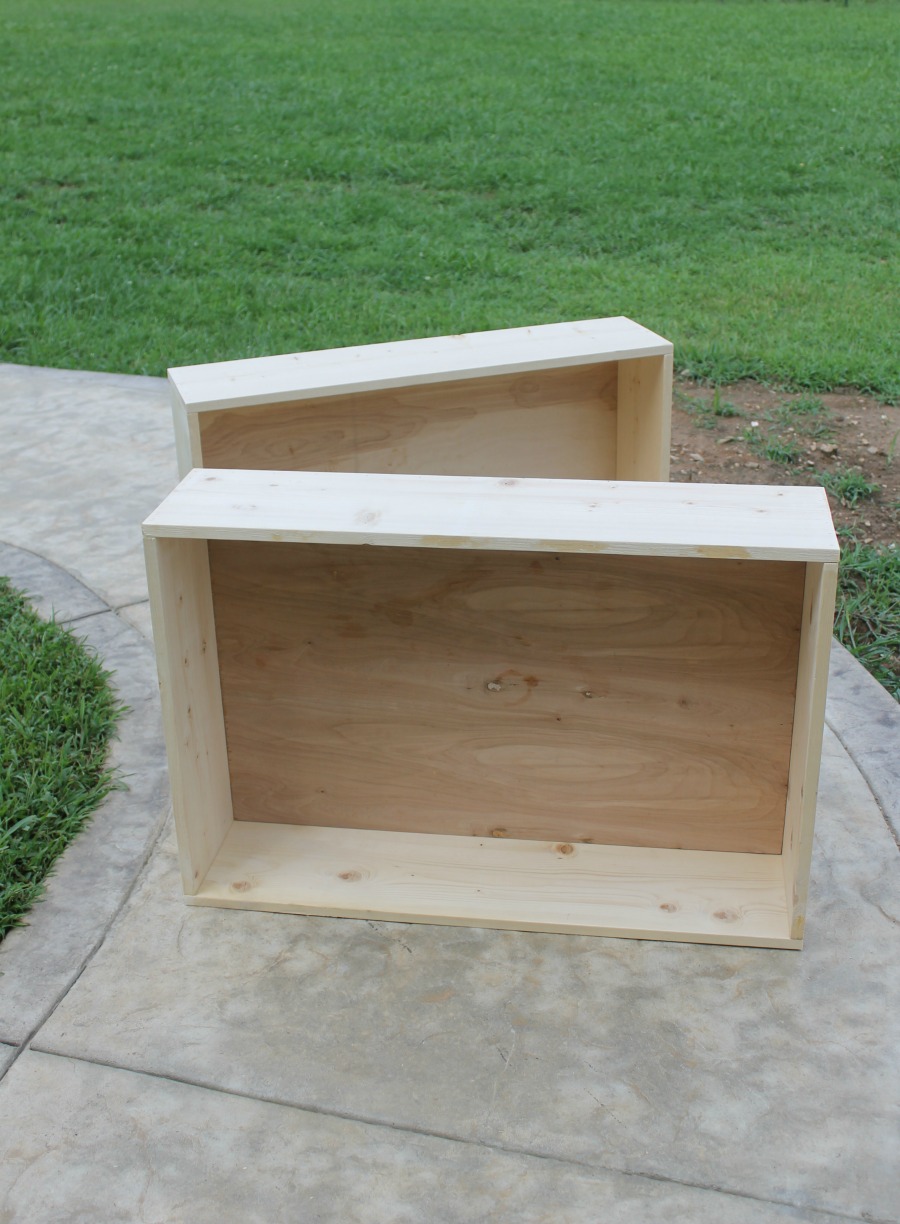
I actually made two of these boxes to fit under my son’s bed, so I repeated all the above steps to make another box, just like the first one. We highly recommend doing this if you have the space for another under bed storage drawer! You can also adjust this DIY to make a smaller underbed box if you still have room left over but not enough for a drawer of the same size. Don’t be afraid to think outside the box! (See what we did there?)

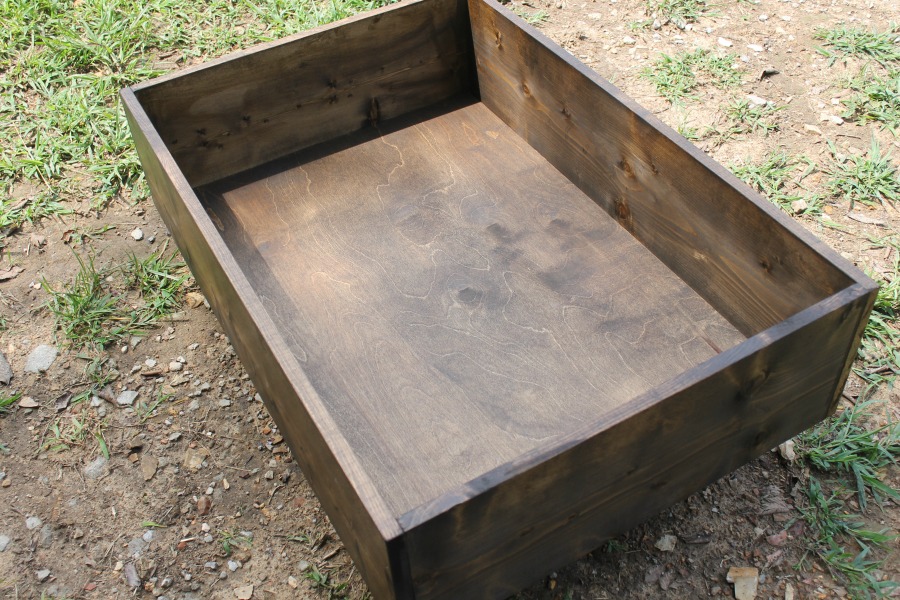
4. Stain your storage box.
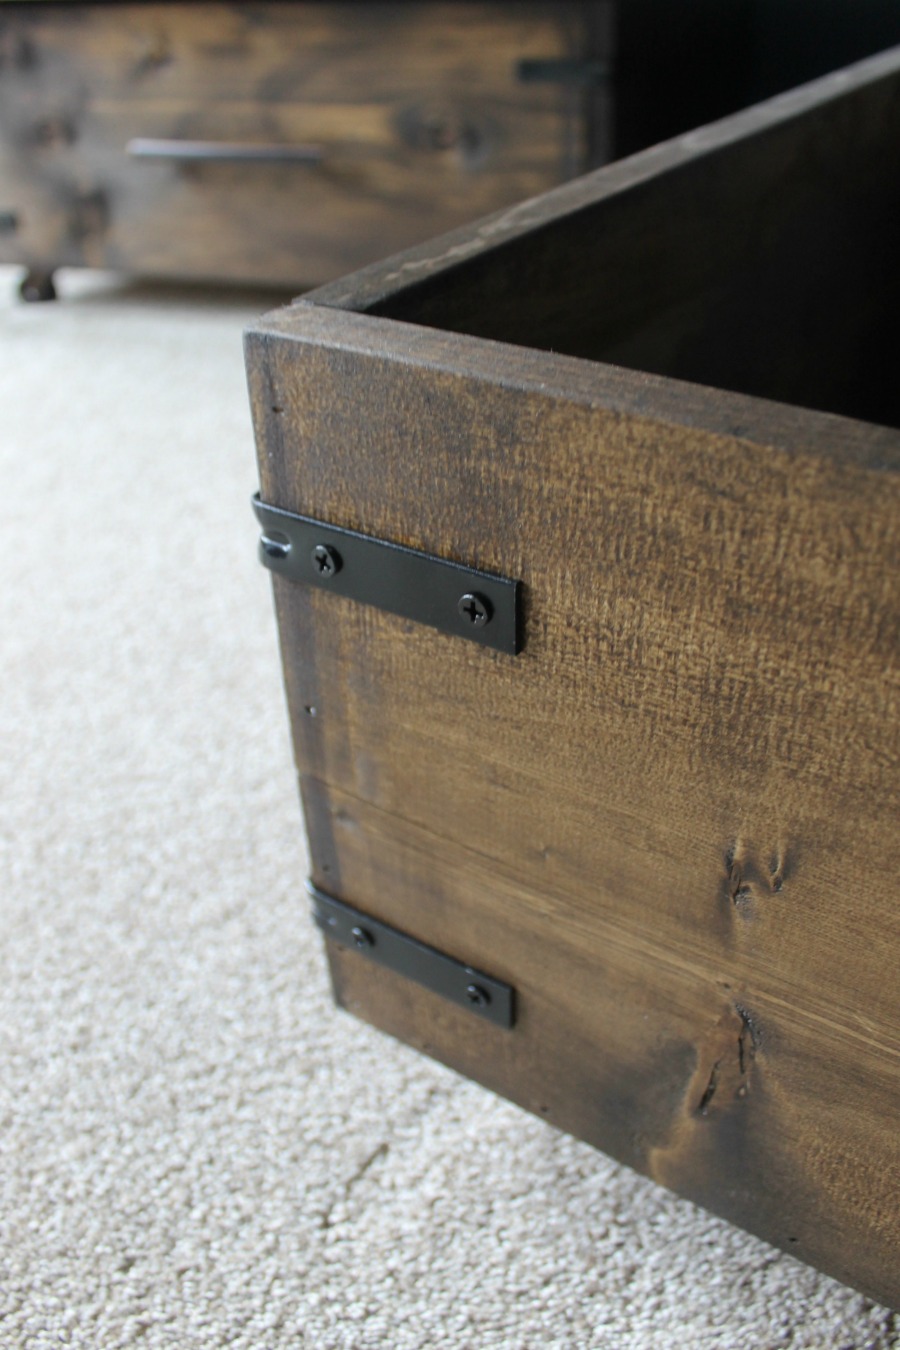
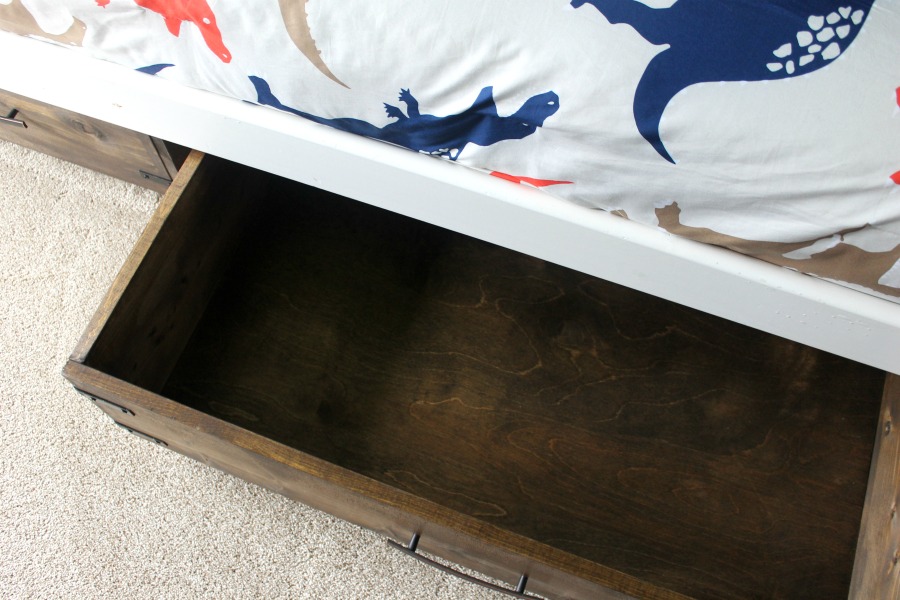
This is my favorite step— staining! Wood looks so pretty when it’s stained. I used my favorite color again for this project, which is none other than dark walnut. It’s the same stain I used on the open shelving in our kitchen, on our garage storage shelves, and on our huge farmhouse bench. I really love it!
Always use protective gloves and an old rag when I stain any DIY creation. I dip the rag into the stain and then rub it into my wood along the grain. Then, I wipe off any excess and let it dry. For this project, I used one coat of stain. Just make sure you stain inside your box as well! Pay attention to those corners and watch for any drips. Wipe them away before the stain dries.
Another great option would be to paint your DIY under bed storage box a fun color. You can match the color to your room’s aesthetic or just pick your favorite color. Either way, it’s a fun, unexpected surprise!
5. Attach the hardware.
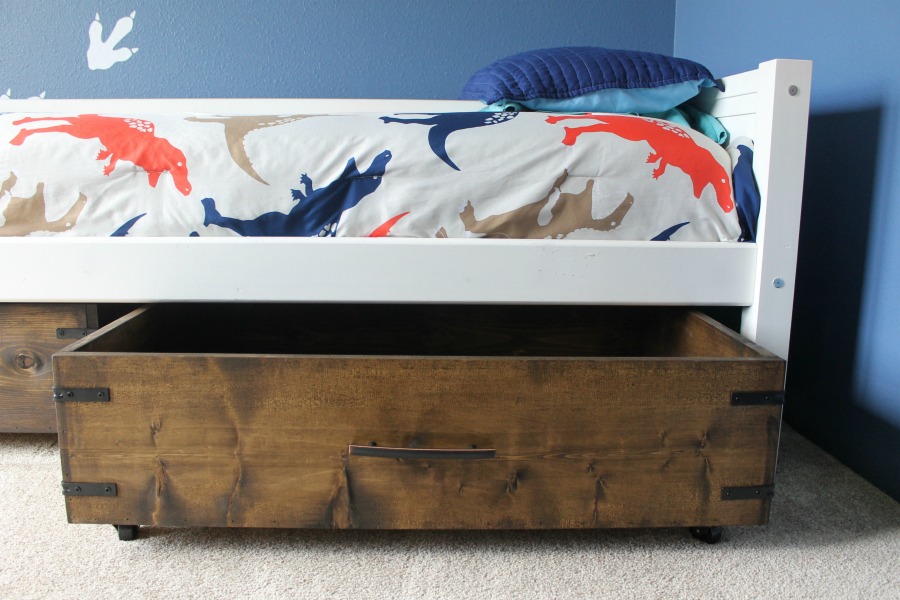
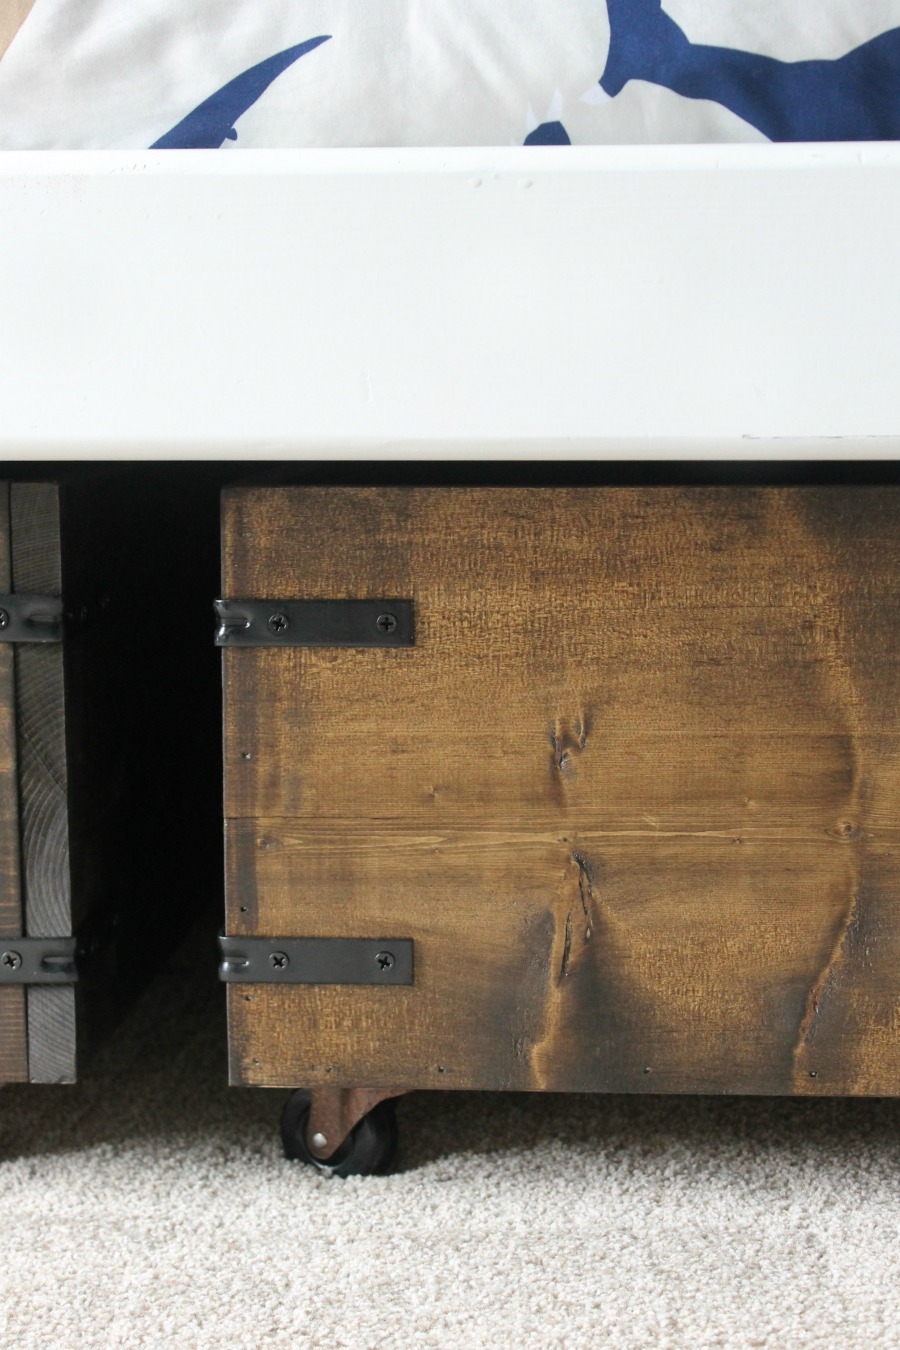
Let your boxes dry for a good 24 hours. Then attach casters to the bottom of your box. I got the casters that swivel around. They make it super easy to maneuver your storage boxes from underneath the bed when you need to access them.
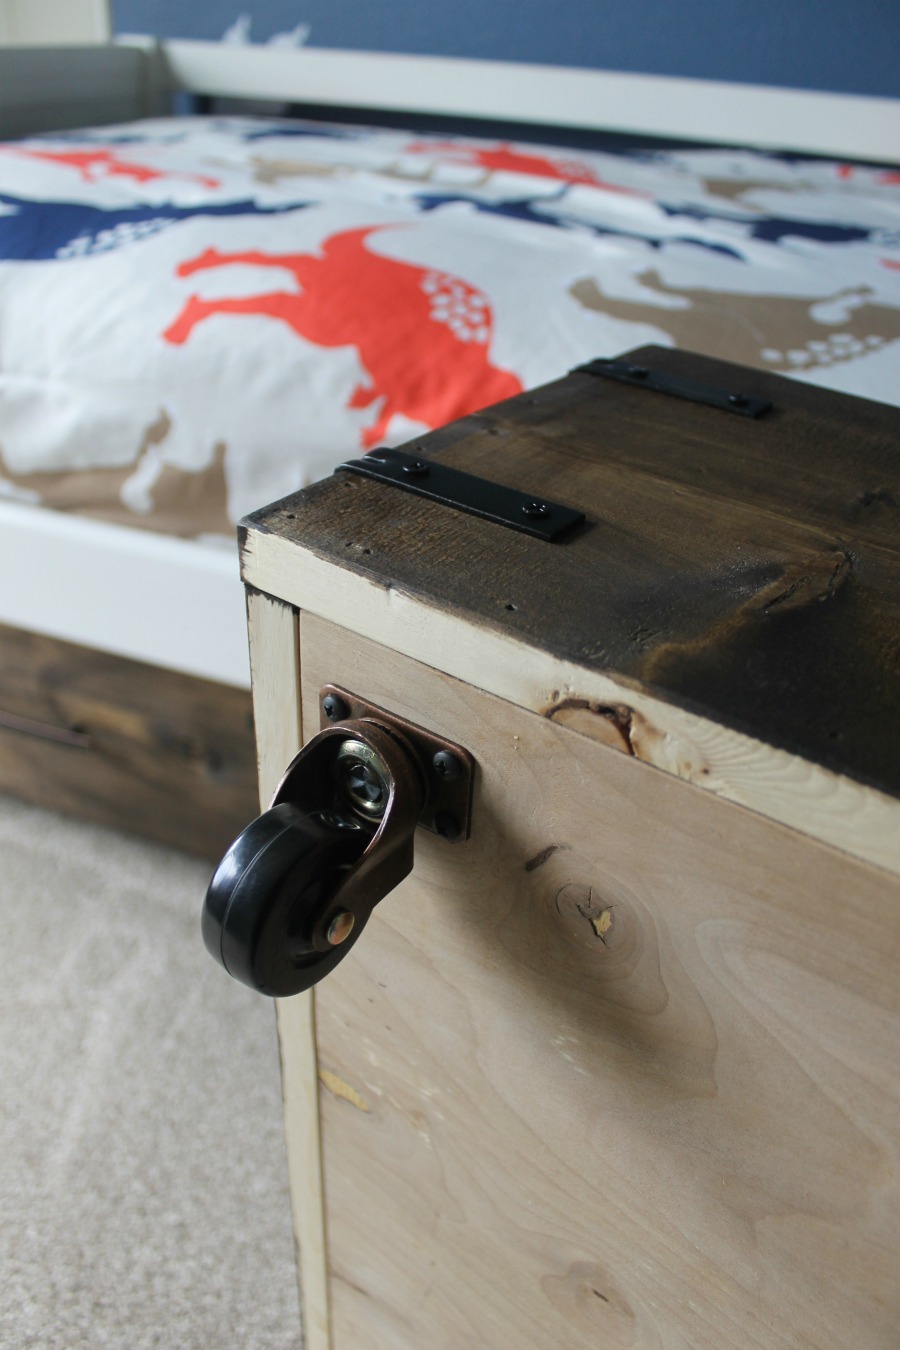
I attached two corner brackets on each corner. I love how it adds to the look, and it will add a ton of extra support to the sides of these boxes.
The last thing we did was add a nice big handle right in the middle of the front of this under the bed storage box. After that, it’s all set to go!

Is Underbed Storage a Good Idea for You?
These boxes are nice and HUGE! Whether you’re looking to store clothes, shoes, toys, books, or anything else, they can easily fit just about anything. I love that they are easy enough for my little guy to pull in and out from under the bed. (Who doesn’t love it when the kiddos can help organize their own things?)
Could you use some extra storage in your home? I’d love to hear about your experience if you put your own unique spin on this under bed storage DIY!
Tackle These DIY Projects Next:
- How to Make a DIY Garage Pegboard for Easy Tool Organization
- How to Make a Dream DIY Dressing Room
- This Beautiful DIY Storage Ottoman Will Make You Want to Build One of Your Own
Update: This post was originally published on September 28, 2018 by Ginger Bowie, and was revised again on March 22nd, 2023 with further information from Emily Malkowski.