


How to Make a Modern DIY Wall Shelf
I’m always looking for new wall decor. It seems like there are endless blank walls to decorate or to just redecorate for fun, right??
Making my own wall decor allows me to fully customize it to the space, making it the ideal measurements and color. This time I decided to take on a modern DIY wall shelf. It’s a fun, quick project that will add a modern customized look to your home.
Make sure to sign up here to stay up to date on my latest DIY projects!
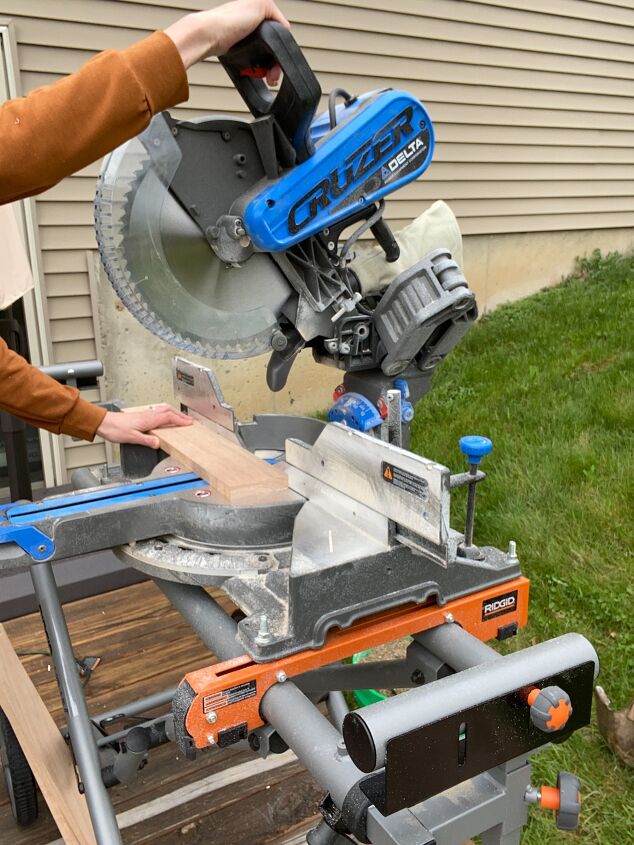
Step 1: Cut Wood with a miter saw
Using your miter saw, cut your 1×4 into three boards, each 20″ long. Cut your 1×2 into four boards cut at a 45 degree angle on both ends: two boards at 5″ long and two boards at 24 1/2″.
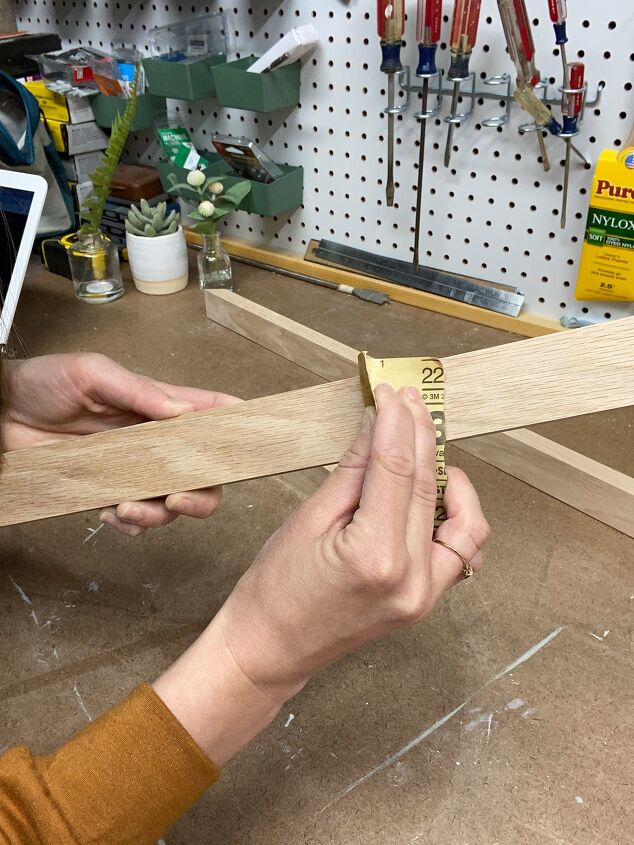
Step 2: Sand the boards and remove any dust
Sand your boards using 220 grit sandpaper. Remove any dust using a tack cloth.

Step 3: Assemble frame using 1×2 boards
Using corner clamps to hold it together, glue and nail together the four 1×2 boards into a frame. Make sure that this frame is the exact size so that the 1×4 boards will fit very snug inside of it.

Step 4: Fill nail holes with wood filler
Overfill the holes slightly (you will sand them down once dry). Allow ample time for the wood filler to dry.
Sand down the wood filler using 220 grit sandpaper until the surface is smooth.
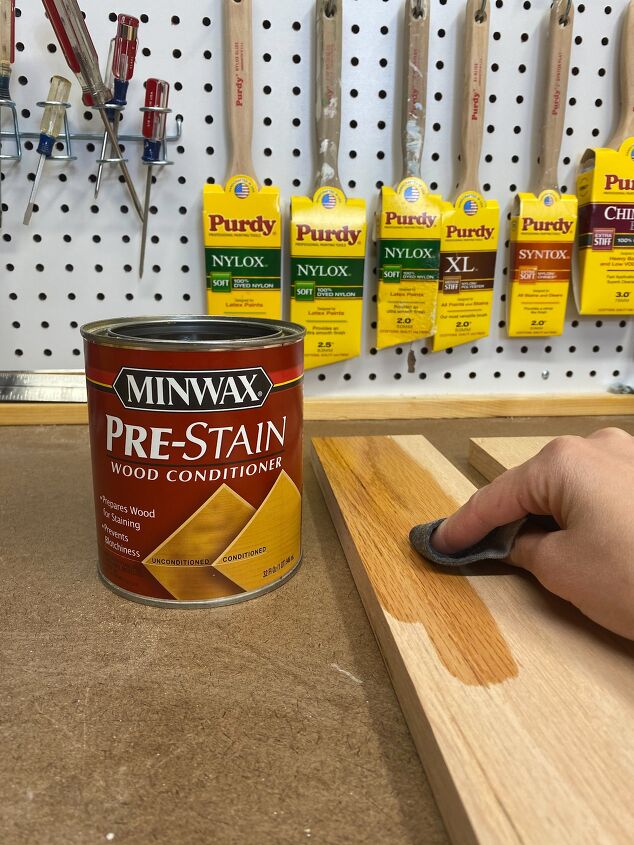
Step 5: Apply Minwax Pre-Stain Wood Conditioner
Pre-stain wood conditioner is really important because it helps your stain go on evenly. I chose to use an oil-based wood conditioner because I’ll be using oil-based stain. If you plan to use water-based stain, just make sure to use a water-based wood conditioner.
You first apply it using a rag or Purdy White Bristle brush. Wait 5-15 minutes and then wipe off any excess using a clean rag.
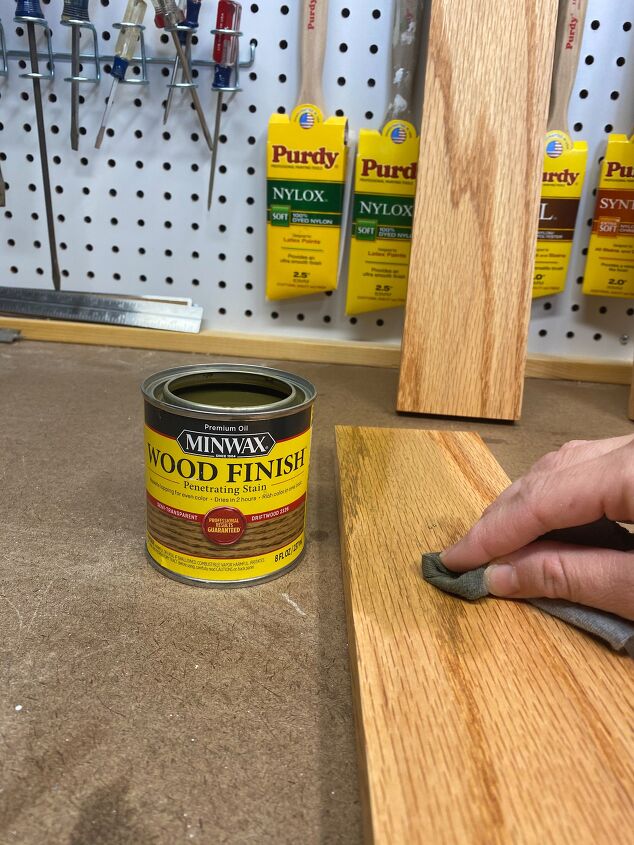
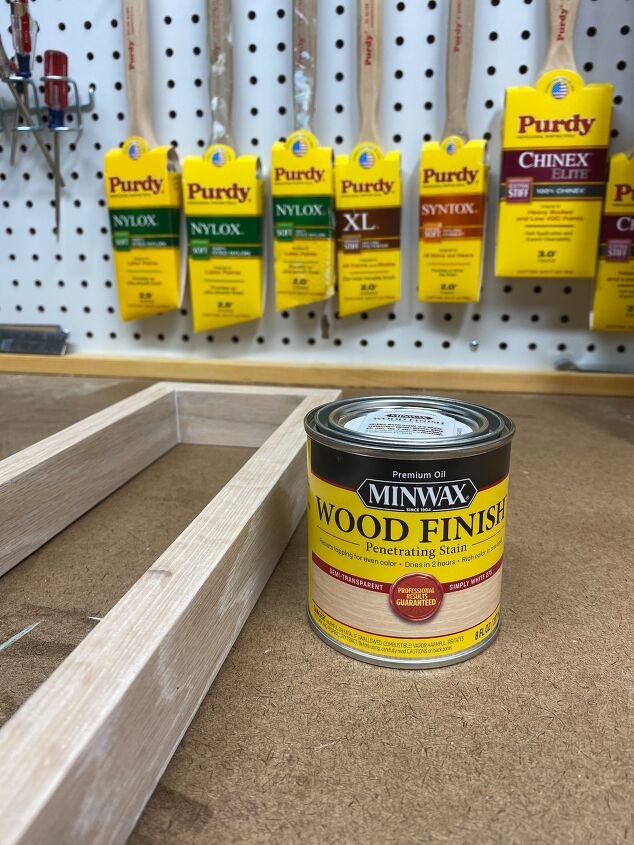
Step 6: Apply Minwax Wood Finish Stain
Within 2 hours of applying the oil based pre-stain wood conditioner, apply your stain using a rag or Purdy White Bristle paintbrush.
Allow the stain to sit for about 5-15 minutes. I only waited about 5 minutes since I wanted a lighter stain color. The longer the stain sits on the wood, the darker the color will get. After this time is up, wipe off any excess stain with a clean rag.
I chose to use the color Driftwood on the 1×4 shelves and the color Simply White on the 1×2 frame. I applied one coat of stain on each. Minwax stain is incredible – it does such a great job of enhancing the natural wood grain.
Step 7: Attach the shelves to the frame and add D-rings to the back
Using both glue and screws, attach the shelves to the frame, paying attention to spacing to get the exact design you like best.
Attach D-rings to the back of the frame for hanging purposes.
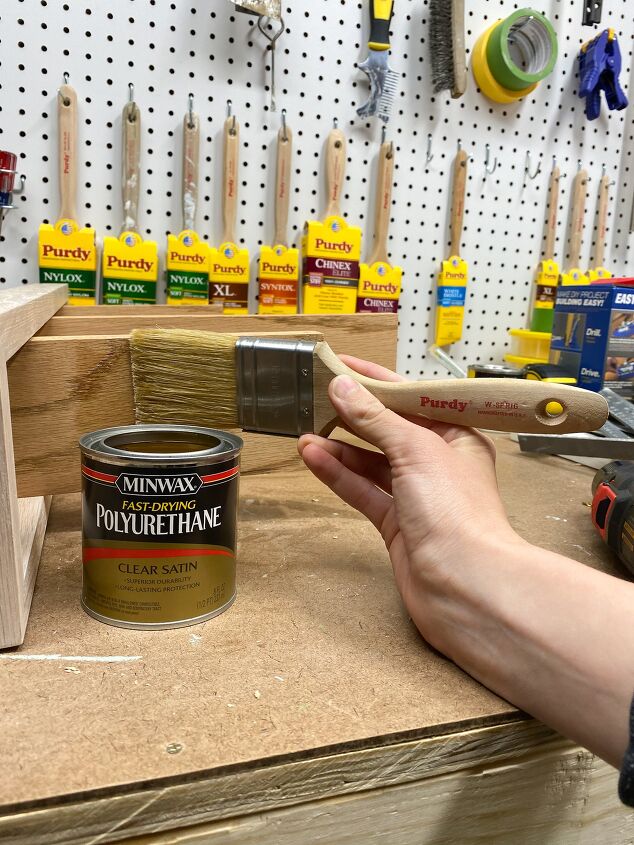
Step 8: Once the stain is fully dry, apply Minwax Fast-Drying Polyurethane
It’s always a good idea to add a protective layer to the top of stained wood. Minwax Fast-Drying Polyurethane is a great option for protecting wood that has been stained with oil-based stain.
Apply a thin layer of it using a natural bristle brush like the Purdy White Bristle brush.
After it has dried, lightly sand it with 220 grit sandpaper and put on a second coat.
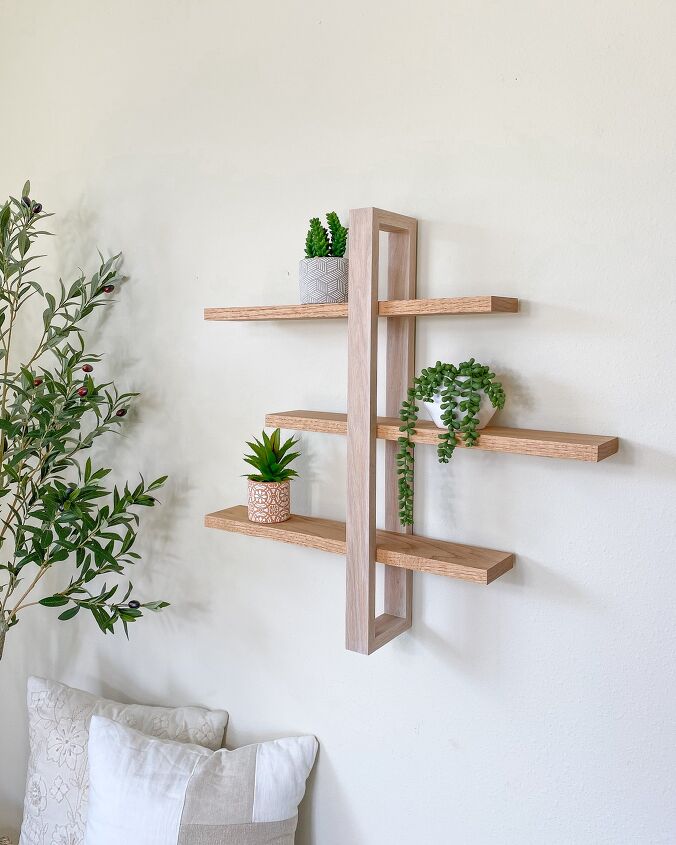
The Finished Modern DIY Wall Shelf!
It’s done! This modern DIY wall shelf can be hung in so many places in a home: an office, a living room, a bathroom and more. It is a fun and unique twist on standard shelving options.
Want more DIY?
Head here to learn how to make a modern console table and another variety of modern wall decor.

Comments
Join the conversation
-
Love it!
-
Terrific design


Frequently asked questions
Have a question about this project?
Do you work for Purdy? LOL
JK, I like the shelf
How did you attach the shelves to the frame?
Just saying "step7" doesn't answer the question,,, I do not see any screws,,,, tells us in great detail and many pictures how to cut, sand, stain and seal, but no pictures on how to actually put it together 🤔
How and where do we place the glue and screws?