
How to Build a Super-Spacious Storage Bed

Updated: Apr. 29, 2024
Multiple Days
Intermediate
$251-500
Introduction
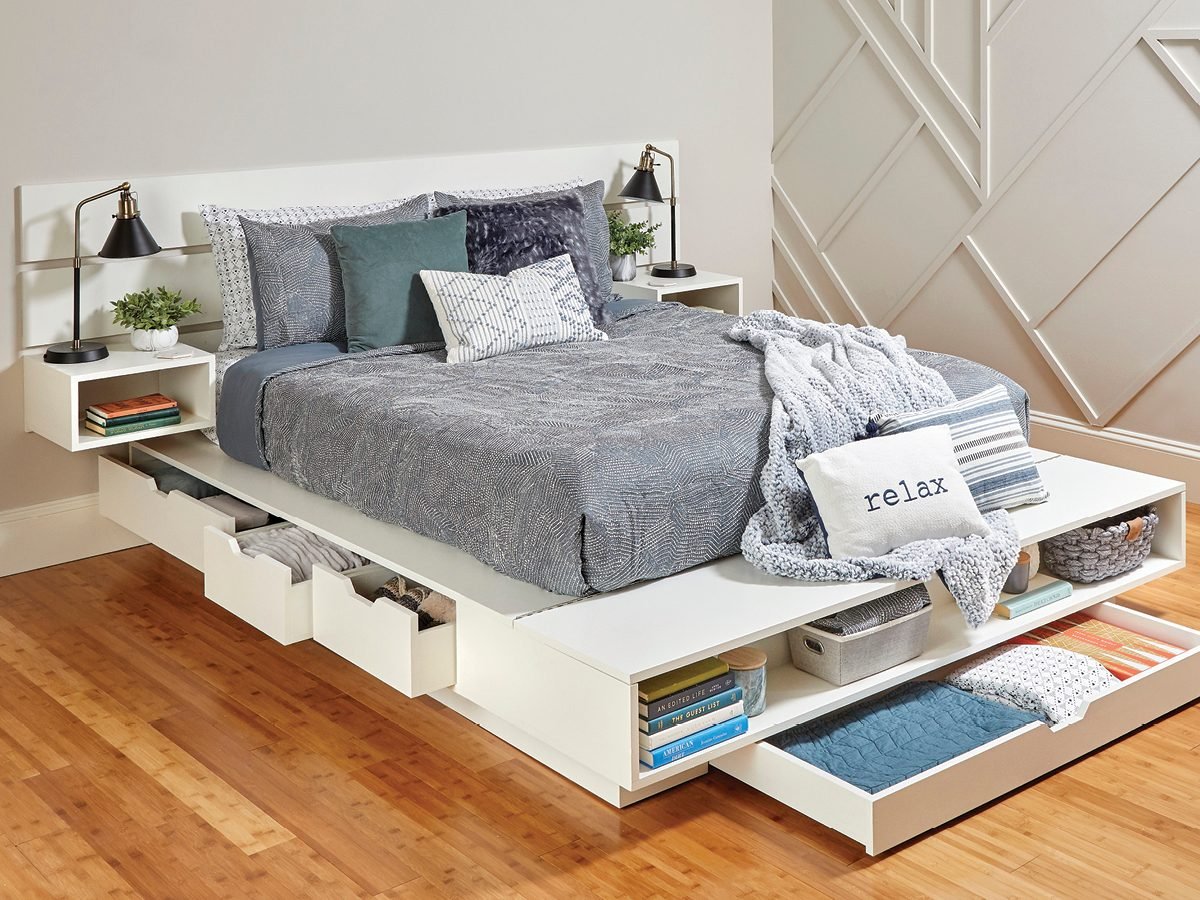
My growing family is quickly outgrowing our small home. Toys are overtaking the living room, and closets are more than full. My wife and I needed a new place to put stuff without adding any more space.
Our bed was the answer. It was already sitting there taking up space — why not take advantage of it for storage? So I built a few simple boxes and drawers and assembled them to make a cool platform bed frame. Here’s how I did it.

Tools Required
- Basic hand tools
- table saw
- jigsaw
- circular saw
- drill
- 18-gauge brad nailer
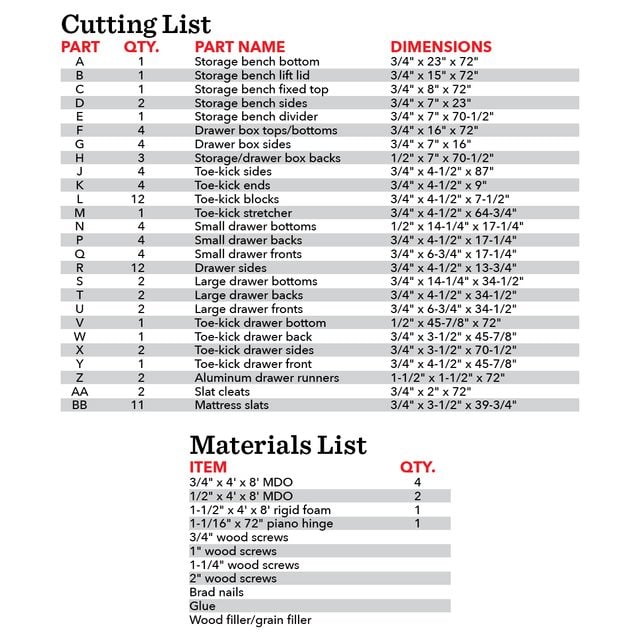
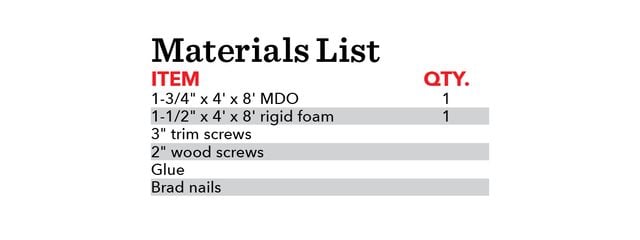
Materials Required
- 3/4" x 4' x 8' MDO
- 1/2" x 4' x 8' MDO
- 1-1/2" x 4' x 8' rigid foam
- 1-1/16" x 72" piano hinge
- 3/4" wood screws
- 1" wood screws
- 1-1/4" wood screws
- 2" wood screws
- 18-ga Brad nails
- Wood glue
- Wood filler
It’s Like Adding More Closet Space!
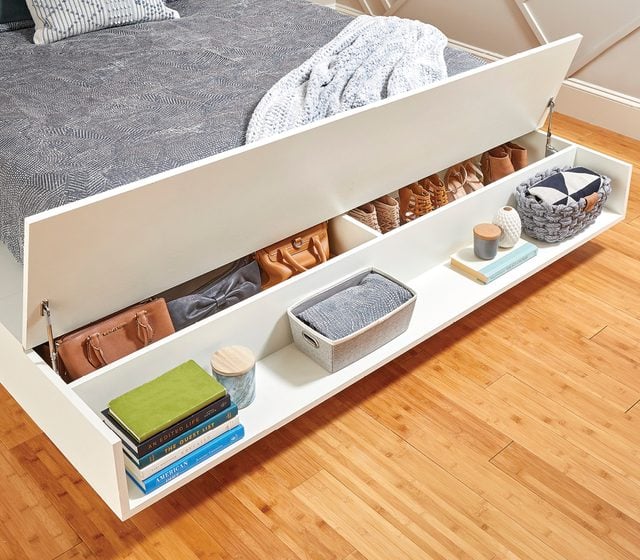
A typical linen closet offers about 50 cu. ft. of storage. By enlarging the footprint of this queen-size storage bed by six inches on each side and 16 inches at the foot, I added the equivalent of almost half a linen closet in previously wasted space.
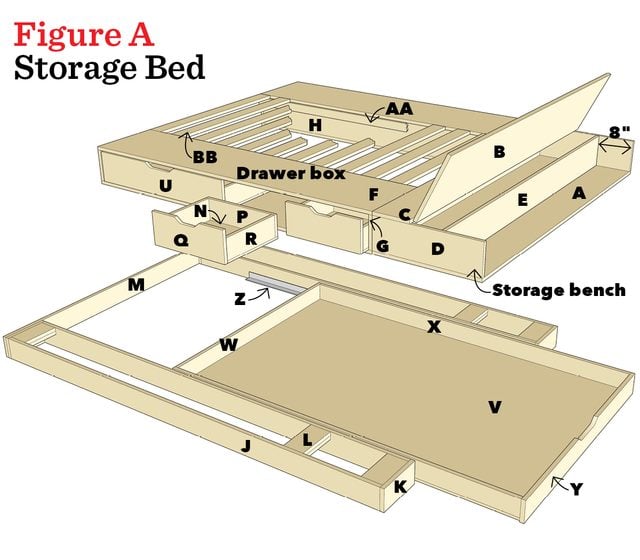
Project step-by-step (17)
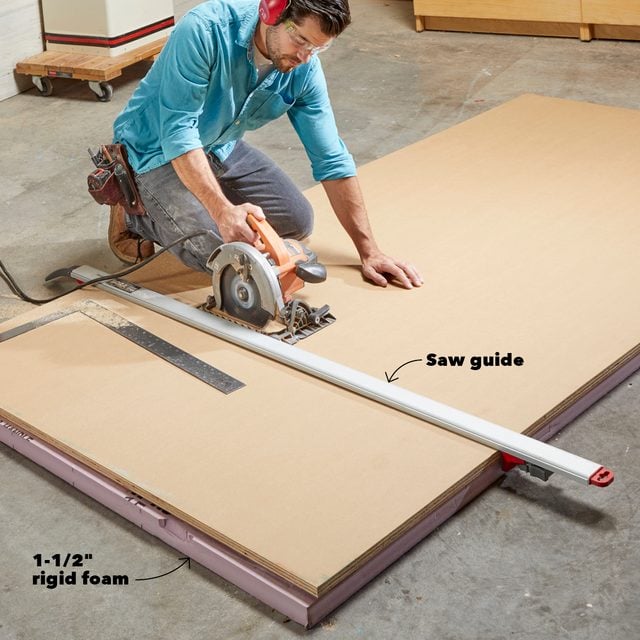
Slice Up the Plywood
Large sheets of plywood are difficult to cut on the table saw, and making crosscuts is unsafe.
- Set the sheet of plywood on a piece of rigid foam and make the cuts on the floor.
- The foam won’t dull the blade, your parts won’t crash to the floor, and you won’t need sawhorses.
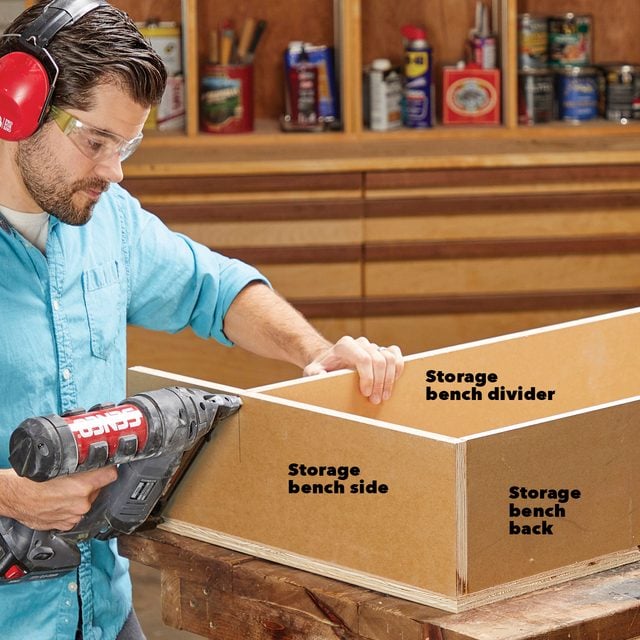
Assemble the Bench and Boxes
- Glue and nail the sides to the bottom.
- Then fasten the back to the sides and bottom with glue and brad nails.
- Attach the extra divider in the storage bench the same way to support the lid.
Pro tip: Keep the tops off until the insides are painted.
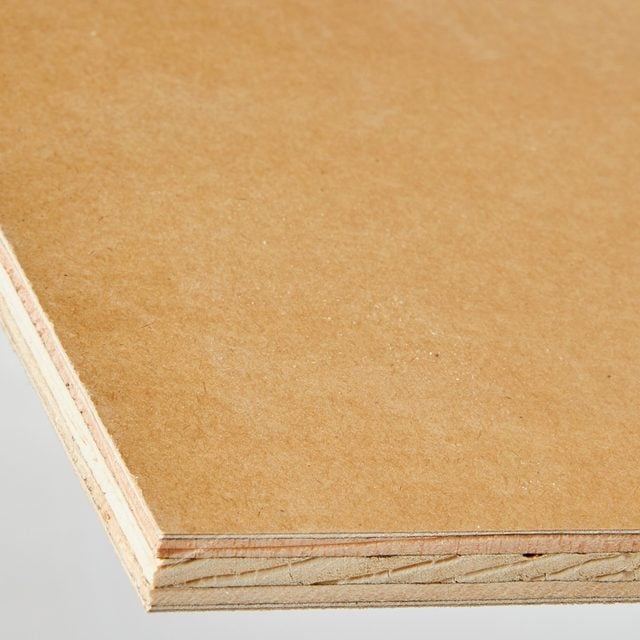
Painted Project? Use MDO
Medium-density overlay (MDO) is just like regular plywood, but has a smooth layer of resin on the faces that’s perfect for painting. Also called “sign board,” it’s available at home centers for about $60 for a 3/4-in., 4 x 8-ft. sheet.
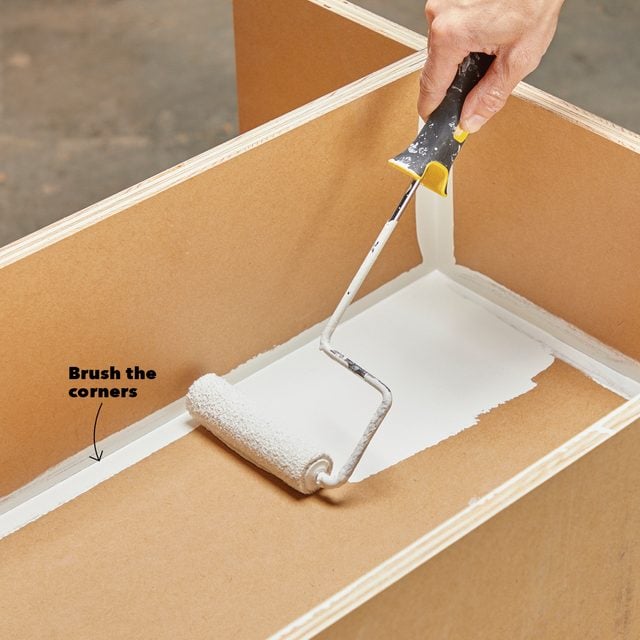
Paint the Inside
- Apply a coat of primer and one or two coats of latex paint.
- Use a brush on the corners and roll the flat areas.
- When the paint has dried, fasten the tops to the drawer boxes with glue and brad nails.
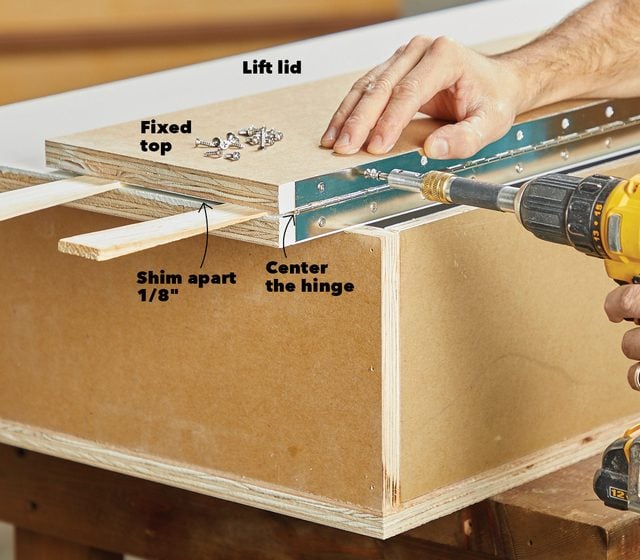
Fasten the Hinge, Install the Lid
- Stack the lift lid (part B) and the fixed top (part C).
- Flush up one of the long edges and shim the edges apart about 1/8-in.
- Center the piano hinge between the two parts, then pre-drill and screw it to both edges.
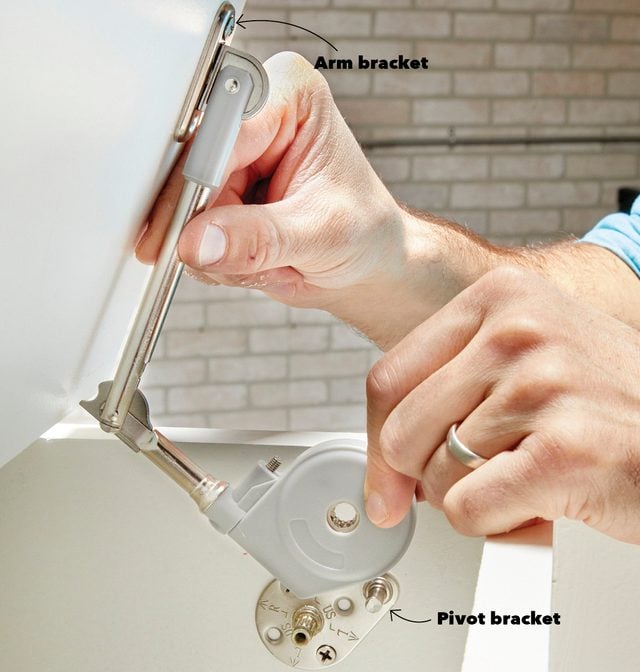
Install the Lid Stay
The soft-close lid stays hold the lid up while you grab pillows and blankets from inside and keep it from slamming when you close it.
- Attach the pivot bracket to the side, then open the lid and extend the arm.
- Fasten the arm bracket where the arm lands on the lid.
- Repeat this on the opposite side.
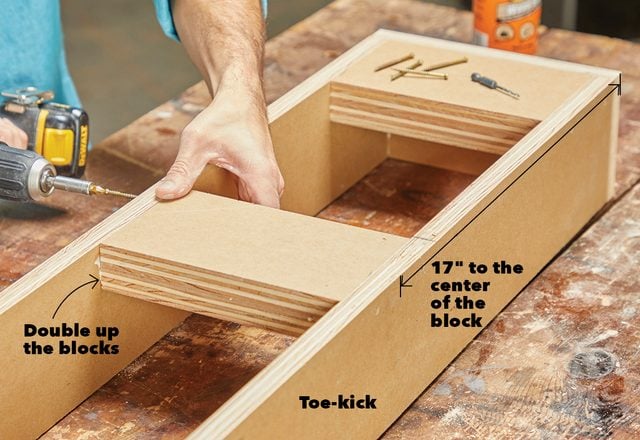
Build Toe-Kicks
- The toe-kicks raise the boxes off the floor and keep you from stubbing your toes as you get into bed. Simply glue and screw the ends to the sides.
- Attach three blocks flush to the top of the toe-kicks, one at each end and a third centered 17 inches from the front.
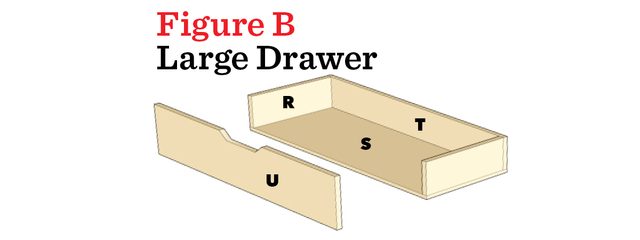
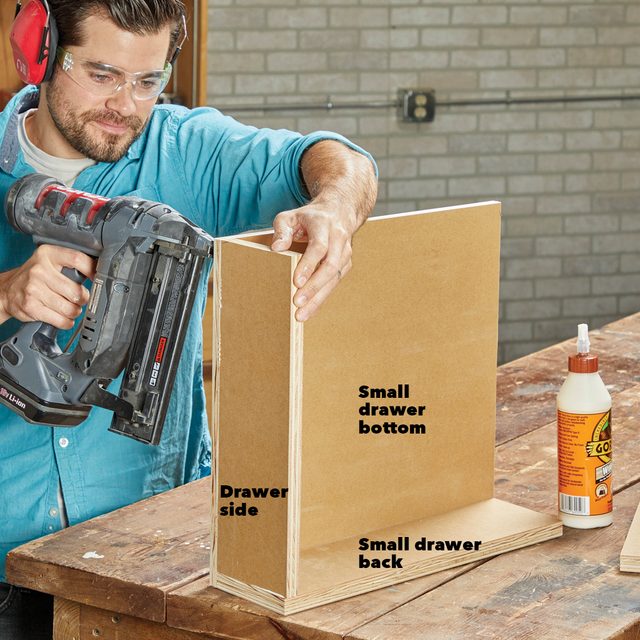
Build the Drawers
- Cut the bottoms of the drawers to size from 1/2-in. plywood
- Fasten the drawer backs through the bottoms with glue and brad nails.
- Then fasten the sides the same way.
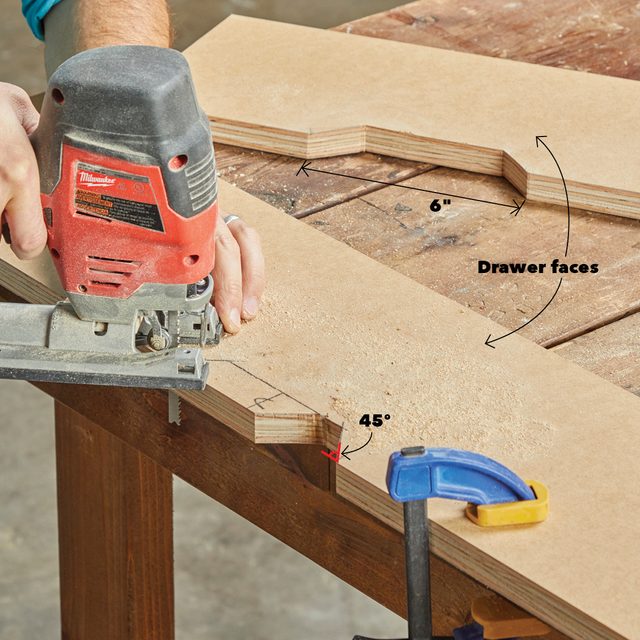
Cut Drawer Pulls
Instead of cabinet hardware, I cut out a handle for each drawer.
- Find the center of each drawer and measure a six-inch opening.
- I traced the shape and cut it out with a jigsaw.
- Then I attached the face to the drawer.
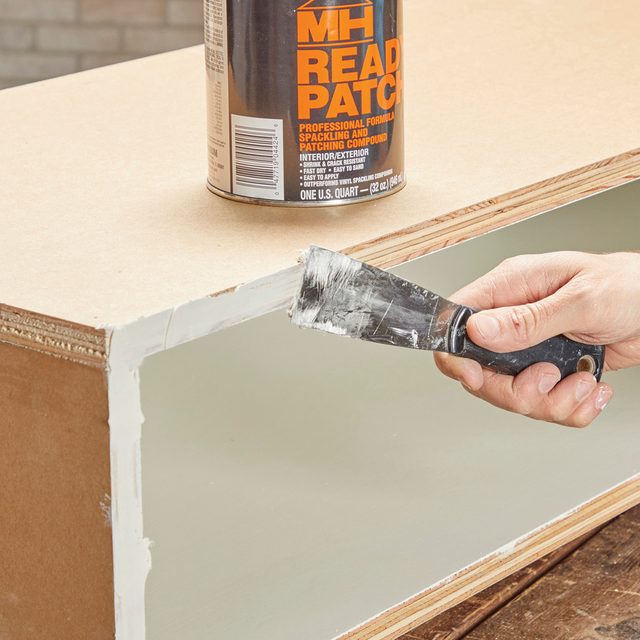
Fill the Edges
- To prep the plywood edges for paint, apply a sand-able filler with a putty knife.
- Let it dry, sand it down, then prime and paint all the parts.
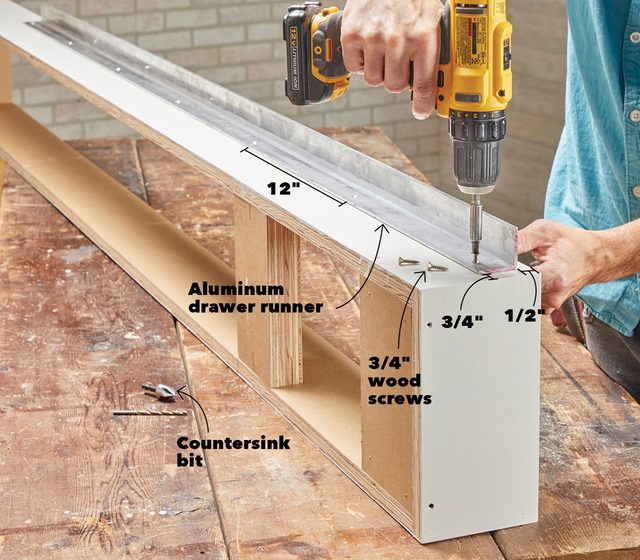
Attach the runners
- Drill pilot holes in the aluminum angle every 12 inches.
- At each hole, bore a countersink so the screw heads won’t protrude.
- Screw the angle to the inside of the toe-kick.
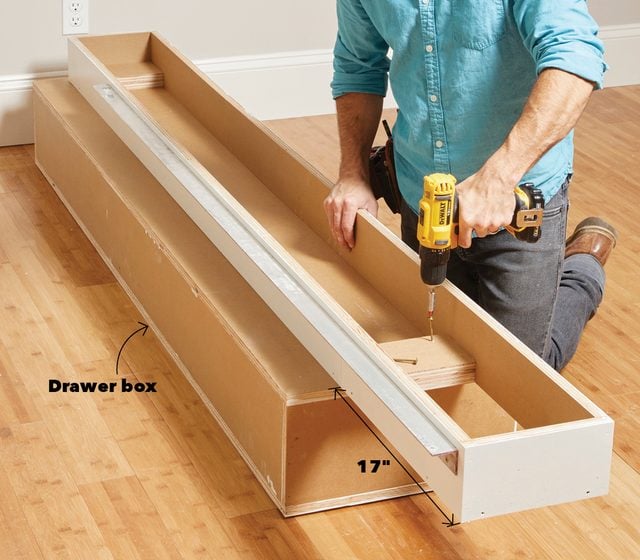
Attach the Toe-Kicks
- Flip the drawer boxes upside down and center the toe-kicks, which should overhang the front by 17 inches.
- Screw the toe-kicks to the bottoms of the boxes with 2-in. screws through the blocks.
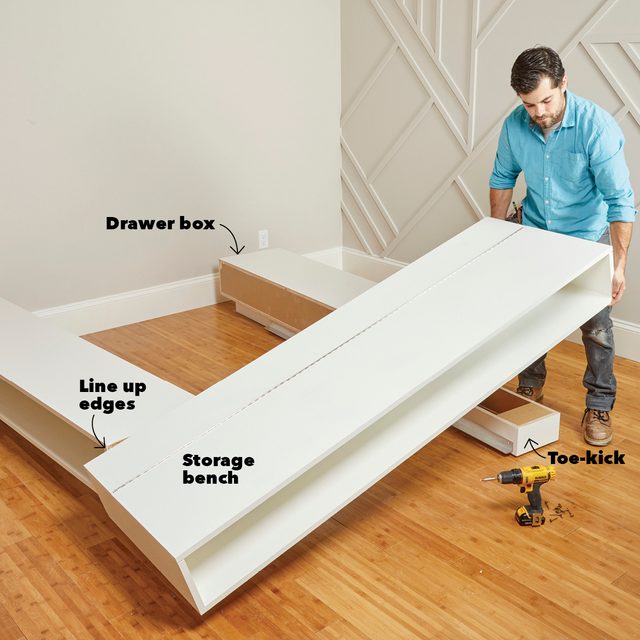
Assemble the Bed
- Flip the boxes upright and space them apart.
- Place the storage bench on top of the overhanging toe-kicks, then line up the sides of the bench with the drawer boxes.
- Screw them together from the inside with 1-in. screws and into the blocks in the toe-kicks with 2-in. screws.
- Then connect the back of the toe-kicks with the stretcher (part M).
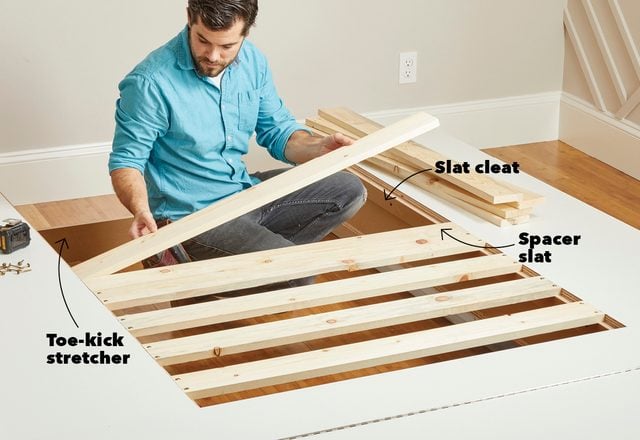
Fasten Slats
- Position the cleats on the inside of the bed assembly 3/4-in. below the top of the boxes and use 1-1/4-in. screws to fasten them.
- Cut slats from standard 1×4 boards to fit between the side boxes and fasten them to the cleats with two screws on each side.
Pro tip: Use one of the slats as a spacer to position them evenly.
You could use a sheet of plywood instead of slats, but I found the standard pine boards or furring strips to be much cheaper. Once the slats are on, the bed is ready for your mattress!
You could end the project here with just the platform bed. If you would like to add a matching headboard and nightstands, continue to the following steps.
Sleek & Simple Headboard
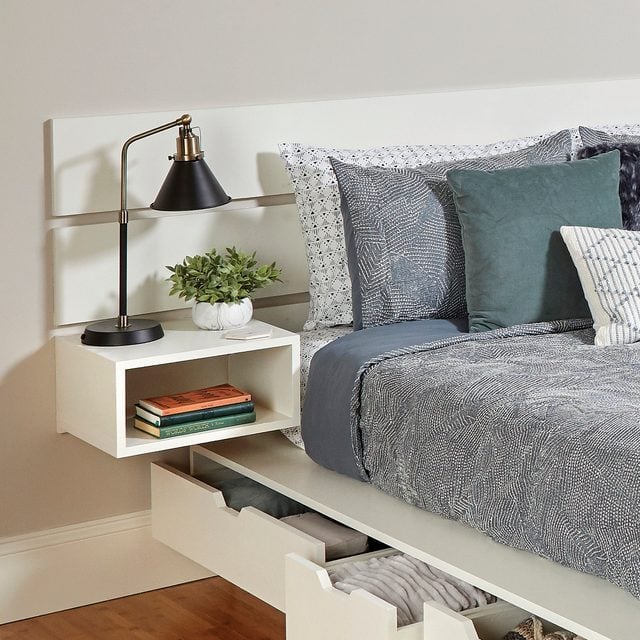
I designed this headboard and nightstand combination to match my storage bed, but it would work well with other beds too. All you need is one sheet of plywood and a few hours to put it together.
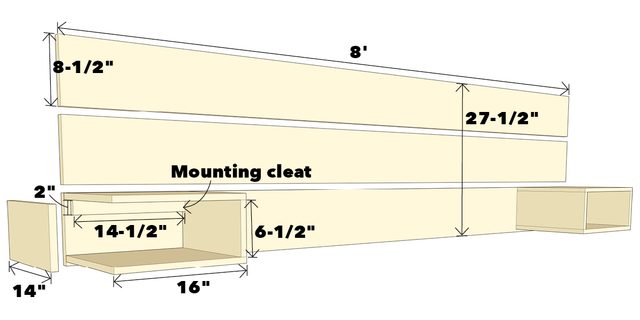
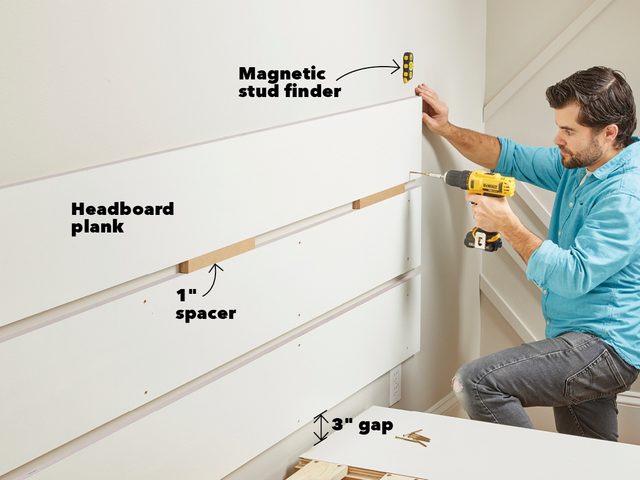
Screw Planks to the wall
- Fill the edges and paint three 8-ft. lengths of plywood cut at 8-1/2-in. wide.
- Center the first strip three inches above the bed and attach it to studs with trim screws.
- Use a few one-inch spacer blocks to evenly space the next two strips above the bed.
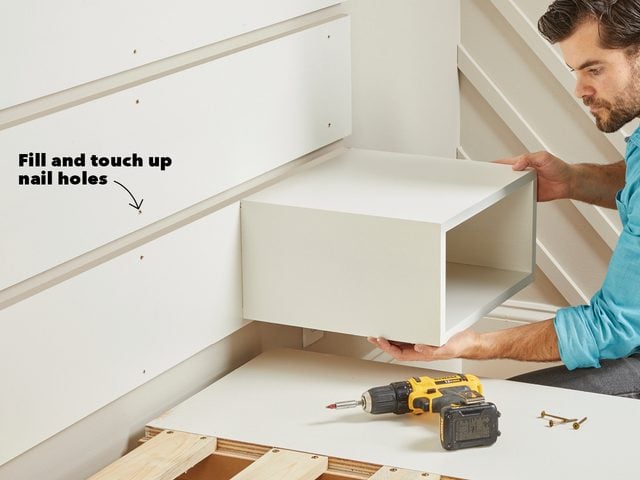
Hang the Nightstands
- Screw the nightstands to a plank. I positioned mine flush with the top of the lowest plank, but you could mount them at any height.
- Then fill the screw holes, touch up the paint and you’re done!
Originally Published: January 22, 2021