Additional kitchen storage - DIY pull-out kitchen pantry
Hello my dear DIYers! I'm so glad you stopped by and I really hope this post will be useful for you.
I'm Kristina, a dreamer and doer behind this blog. And this slide-out pantry shelf tutorial will be the first and probably the only post in English here. I do get messages from people from other countries with questions about measurements and instructions, just looking at the drawings is sometimes not enough. So I decided to spread love and share an English version of this DIY-story.
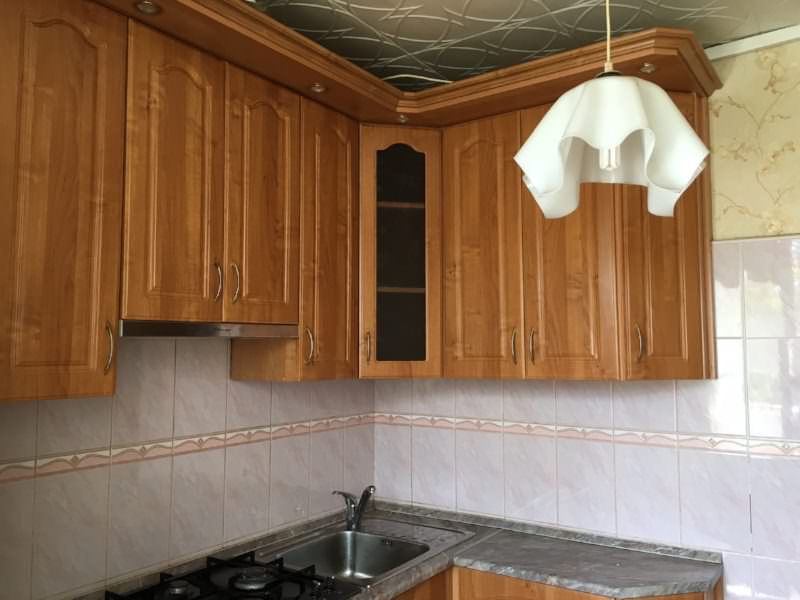
Here's a photo of our kitchen that really needs a major remodel and it most definitely will get it soon because we got heavily flooded by our upstairs neighbours. Nevertheless our DIY pull-out pantry stayed safe and sound in the middle of total devastation.

The total cost of this shelf was 1200 Russian rubles which is about $22. Yeah, I know it might look super cheap to you but exchange rates get wild sometimes. If you ever build one, please drop me a line. It'd be interesting to know how much it cost for you in your country.
Please note that all dimensions and measurements I provide were the actual dimensions and measurements of actual materials available in a Russian lumber store.
I know that some of you use inches and feet, it's a total blackout for me. Try using this website to convert cm to inches and decimals to fractions.
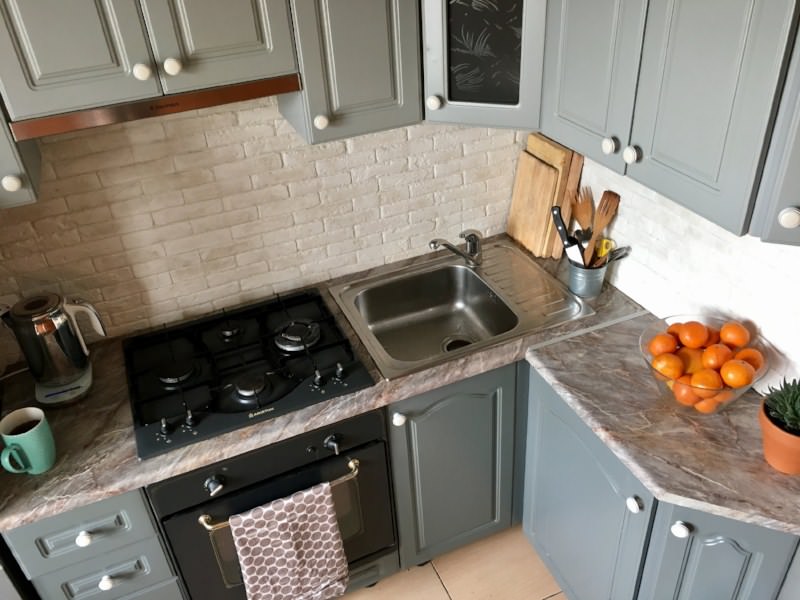
And just to entertain you I'll post a few photos of our Soviet-style kitchen before and after our super cheap express makeover.
When you're a young couple you have to be creative :)
Before
After

Materials and tools used:
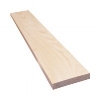
1 x Pine Board 20 х 140 х 3000 mm (in millimeters)
1 x Pine Board 20 х 140 х 1500 mm
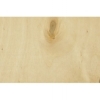
1 x Sheet of Plywood
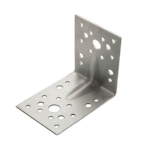
8 x Corner L-brackets (better some heavy duty reinforced kind)
4 x Aluminium Tubes 10 mm in diameter, 2 meters in length
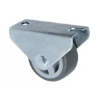
4 x Furniture Casters
a Wood Drill with a Drill Bit 10-12 mm in diameter (should be no more than 2 mm wider than your Aluminium Tubes)
a Hacksaw/Higsaw for cutting metall or a proper Rotary Tool
Wood Glue
Screws
Paint (optional)

Step 1. Basic measurements

The space between our fridge and the side wall was 16 cm.
1 cm on each side is enough for the shelf to roll in and out freely. So we subtract 2 from 16 and get 14 cm (or 140 mm).
This will be pantry's WIDTH.
Measure the depth from the face of the fridge to the back wall. Ours was 58 cm (or 580 mm).
That's the DEPTH of our pantry.
If there are anything at the back that might get in the way of your rolling shelf, like wires, sockets or gas tubes, make your pantry's depth shorter.
The HEIGHT of our pantry was supposed to be exactly the same as the height of our fridge. That makes 151 cm (or 1510 mm).
You of course will have different measurements based on the actual space you're building it in.
Step 2. Calculating dimentions of all parts
Frame
The Top and Bottom Panels are drawn in blue. Calculating their dimensions is easy. You already got them after measuring the space between the fridge and the wall. The pine boards that I got from the store were 2 cm thick. That makes:
2 x panels 2 x 14 х 58 cm
Now take the overall height 151 cm and subtract the height of the Casters you bought. My casters were 8 cm in height including metal base. Then you should subtract the thickness of the Top and Bottom Panels all together (2 cm x 2). At last we get 139 cm which is supposed to be the height of the Front and Back Panels. They are grey in the drawing. That makes:
2 x panels 2 x 14 х 139 cm

Shelves
You can make your shelves out of the same pine board that you use for the frame. I used a sheet of plywood 0.8 cm thick (or 8 mm).
The amount of shelves depends on two things - what you're going to store on them and on the thickness of the boards you use to make them.
My very bottom shelf is for storing bottles and they require about 35 cm in height. All other shelves are for glass jars, spice and vitamins containers etc. I decided to make the shelves for them 20 cm high.
Earlier we found out that the Front and Back Panels (the grey ones) are 139 cm in height. That's what we will be dividing into sections. Based on my dimensions I got 5 sections 20 cm each (their shelves are pink in the drawing) and 1 section of 35 cm in height. This very bottom section doesn't have its own shelf, it "uses" the Bottom Panel (blue) instead.
The Shelves are of the same width as the pantry itself but they should be shorter in depth Take 58 cm (pantry's overall depth), subtract the thickness of the Front and Back Panels and you will get your shelves' depth:
5 x shelves 0,8 x 14 х 54 cm

Shelf restrainers
Each shelf needs restrainers which can be made of metal or wooden rods. I bought very light aluminium tubes 1 cm in diameter and cut them into 14 pieces with a jigsaw.
I know the drawing above shows only 12 pieces. That was before I realized that tall bottles need to be secured with the second row of rods. If you make 12 and just place the two bottom rods higher you won't be able to store short jars at the bottom shelf, they'll just fall out.
You fix the rods to the pantry by pulling them through predrilled holes in the Back Panel and placing them into half-drilled holes in the Front Panel. This means your rods should be 1 cm shorter than the depth of the pantry. That makes:
14 x rods 57 cm long and 1 cm in diameter
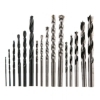
Note: In order for the rods to stay in place tightly with no additional fixing make sure you use a drill bit that's the same diameter as your rods or not more than 2 mm wider. If you use a much wider drill bit your rods will be constantly falling out. I used #10 out of the set pictured.
So once again - a list of parts:
I know that I should re-draw my sketches with English captions and probably add Imperial units of measure. But, sorry, all those feet, five eighths of an inch and 2 49/64" are just too overwhelming for me. All I could remember is that 1 inch equals 25.4 millimeters. When I used this website for unit conversion it told me that 1 centimeter equals 25/64". Really???
Anyway that means the thickness of the pine boards I used is 25/32". Wouldn't that just make my crazy drawings look even crazier?

Instead I'll try to translate the drawing in the text:
Front and Back Panels - GREY - 2 pieces
THICKNESS: 20 mm / WIDTH: 140 mm / LENGTH: 1390 mm
Top and Bottom Panels - BLUE - 2 pieces
THICKNESS: 20 mm / WIDTH: 140 mm / LENGTH: 580 mm
Shelves - PINK - 5 pieces
THICKNESS: 8 mm / WIDTH: 140 mm / LENGTH: 540 mm
Rods - 14 pieces (or 12)
DIAMETER: 10 mm / LENGTH: 570 mm
Casters - 4 pieces (or 2)
DIAMETER: 75 mm / OVERALL HEIGHT WITH MOUNT: 80 mm
Step 3. Assembly
Sand all parts before assembly!

Bottom Plank
I found it easier to start assembling my pantry shelf with the bottom part. I chose heavy duty non-swivel and non-locking casters. I think swivel casters are unnecessary here and may cause problems in such a tight space if a wheel turns and gets stuck.
The most important thing here is to perfectly align them and to spread them as far apart as you can for additional stability.
I saw that some people used only 2 casters in their DIYs, but I decided that my pantry shelf should be able to stand upright on it's own when it's pulled out.
Side note: of course I couldn't help taking a little ride on this thing around our apartment as soon as I mounted the casters :)

Front and Back Panels
Using a pencil mark the lines where your shelves should go. Then measure and mark about 5 cm above those lines and about 1 cm from the edge. This will be the place where you will drill holes for your Rods.
I have already mentioned that the Rods are supposed to be installed through holes in the Back Panel and inserted into half-drilled holes (or whatever it's properly called in English) in the Front Panel.
What I mean by this is that you don't drill them all the way through, you stop 1 cm earlier. Thus the front of your pantry shelf will stay visually intact and the Rods will be secured from falling out.
Scotch tape your drill bit 1 cm up from the tip or mark a guide with a marker so that you know when to stop drilling.

Shelves
If you use pine planks that are thick enough to be secured with nails do that.
I used plywood that was only 8 mm thick and that meant that I wasn't able to nail my plywood Shelves directly to the Front and Back Panels. So I had to come up with some other solution.
I cut 10 rectangular pieces out of the same sheet of plywood and screwed them to the Front and Back Panels as shelf support. Which is not bad at the end of the day because nailheads are now not visible from the front.
Tip: make these supports slightly shorter than the width of your pantry
Frame
Now assemble the outer frame using corner brackets.
Reinforced brackets with a stiffening plate in the middle are durable and strong enough to keep the angle at 90 degrees without your shelf wabbling. If you think that may not be enough use crossing metal needles as additional support at the side that's closer to the wall.
IKEA sells those crossing supports under the name "cross-brace". Is that what they're called?

Painting
I primed and painted my pantry shelf the same color as I used on our kitchen cabinets. After the paint dried I installed and glued the Shelves to their supports with a wood glue. Then threaded the aluminium Rods in place.
It's been more than a year now but I haven't still decided on the type of handle or knob to screw to my rolling pantry. And honestly I keep forgetting about it. Maybe one day..
Meanwhile this fairly simple shelf amazes me every day. It successfully occupies the tight space that used to be wasted and contains the same amount of junk as two upper sections of our kitchen cabinets. AND my dear husband who likes cooking thinks I'm a hero :)