

I LOVE having photos in our home, we have a lot of wall space but it’s all so open I definitely struggled with what to hang where after we moved in. Our home is very open concept. Gallery walls are perfect for large walls like mine, they help add height and some drama to a boring space!
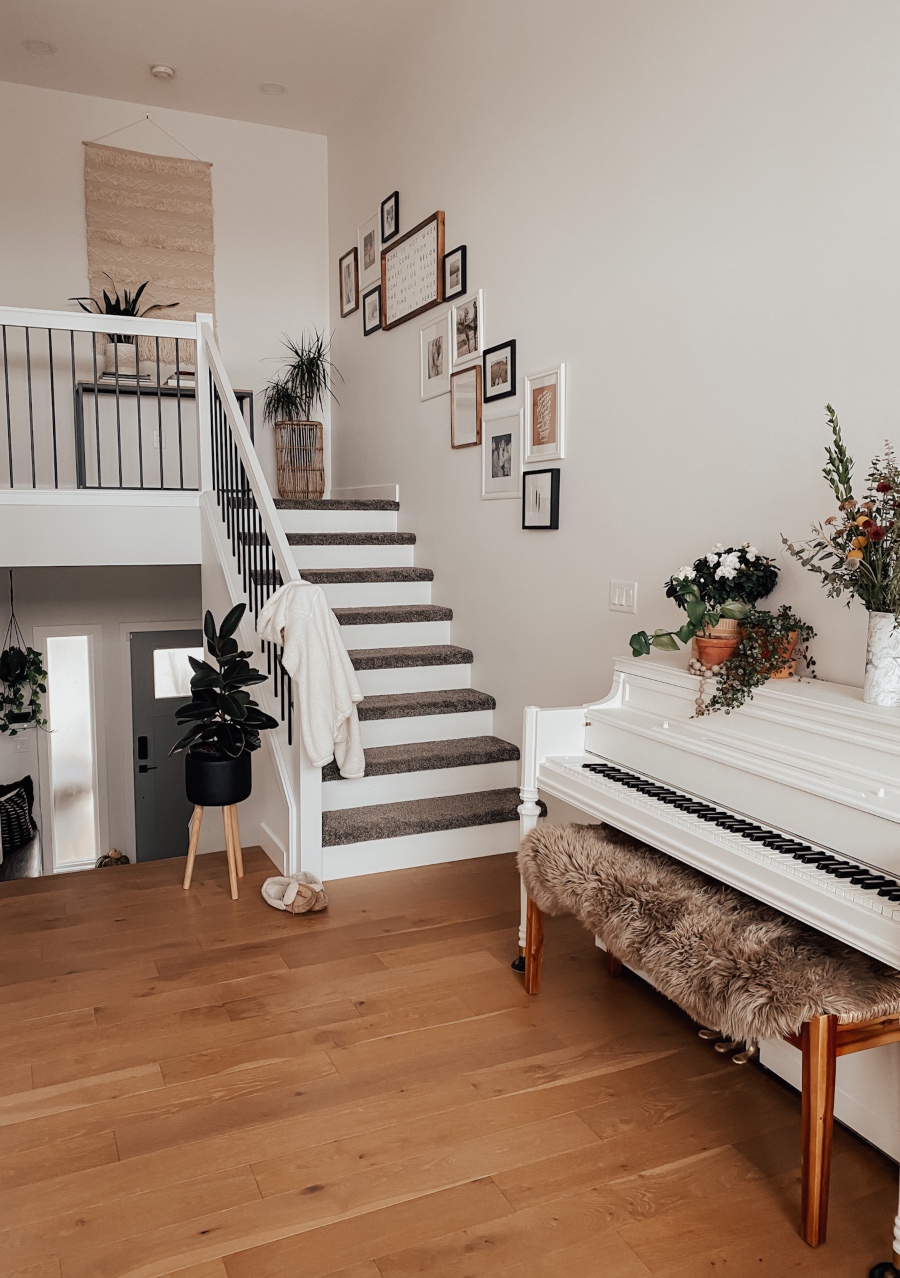
Our staircase, for instance, the whole one side of our home is visible and you can see up the staircase, there is a small landing at the top and then the door to our bedroom. I knew I wanted to do something fun along the stairs. I created our eclectic boho inspired staircase gallery wall and it was one of the first things I put up in this house when we moved in. I also haven’t changed it which speaks VOLUMES to how much I love it lol! I almost always switch things up!
I’ve collected a few of my go-to tips for creating a gorgeous gallery wall and compiled them all into this post. I have a few gallery walls that dot our home; the staircase, our dining room area plus our daughter’s room had a big gallery wall as well (I rearranged it the other day – I’ll do a mini room tour soon!) They’re so fun to create and can make a fun statement so I say go for it if you’re on the fence about putting one up. Check through these tips to help guide you and most of all, have fun with it!

I love this photo collection, I did a mix of family photos in colour and black and white, as well as some art prints (I also have a family drawing in pencil crayon my son made when he was 3 and it’s easily the most cherished print on that wall to me). The only thing I’ve changed is I added a few more frames to the top and bottom to round it out (I shared that process on my IG this summer when I decorated the mini landing area at the top of the stairs).
My 5 tips for creating a beautiful gallery wall,
… and it starts with planning. Yes, this is the boring part lol. This is where I always went wrong before too. I’m big on just winging a project and ending up with 25 nail holes and frames that are all over the place. Slowly (very slowly) I finally learned that taking the steps to do it right the first time ensures that it looks amazing and I’m not changing it or swapping things out 3 weeks later.
#1 – My favourite tool to visualize a space
To test out how something will look. I like to upload a photo to Canva (it’s a free site you can use!) and then copy and paste in something similar to what I have planned so I can see first hand how it will look. I don’t spend a ton of time doing this, it’s sort of sloppy and it’s just to give me a general idea if what’s in my head will actually look nice in real life. I also use Canva to create quick design boars before jumping in and decorating a room. It’s been a game changer for me. Here’s one I did quickly to get an idea of the colours I wanted in our living room.

#2 Cut out the frame sizes in paper
This was the best thing I did for our gallery wall along the staircase (also the most tedious and annoying to do, if I’m being totally honest). There were several frame sizes I had for the gallery wall plus I was using frames I already had on hand so I wanted to make sure the spacing between everything and the proportions were right. I adjusted the paper frames until I loved the layout and then hung the actual frames up. I don’t use this when I’m creating a grid gallery wall, instead I use…
#3 A laser level, my new favourite tool
This was the mvp when I hung up our grid gallery walls (in the dining room and my daughter’s room). No guessing on the spacing or if a frame is level with the row – trust me it makes it so easy.

#4 Mix and match the photos
Depending on the gallery wall, think outside the box and mix family photos with art prints for a fun, eclectic gallery wall. I also did a mix of black and white and colour photos along our staircase. Check magazines for pretty prints (Magnolia has some nice ones you can frame) and check stock websites for free art as well!
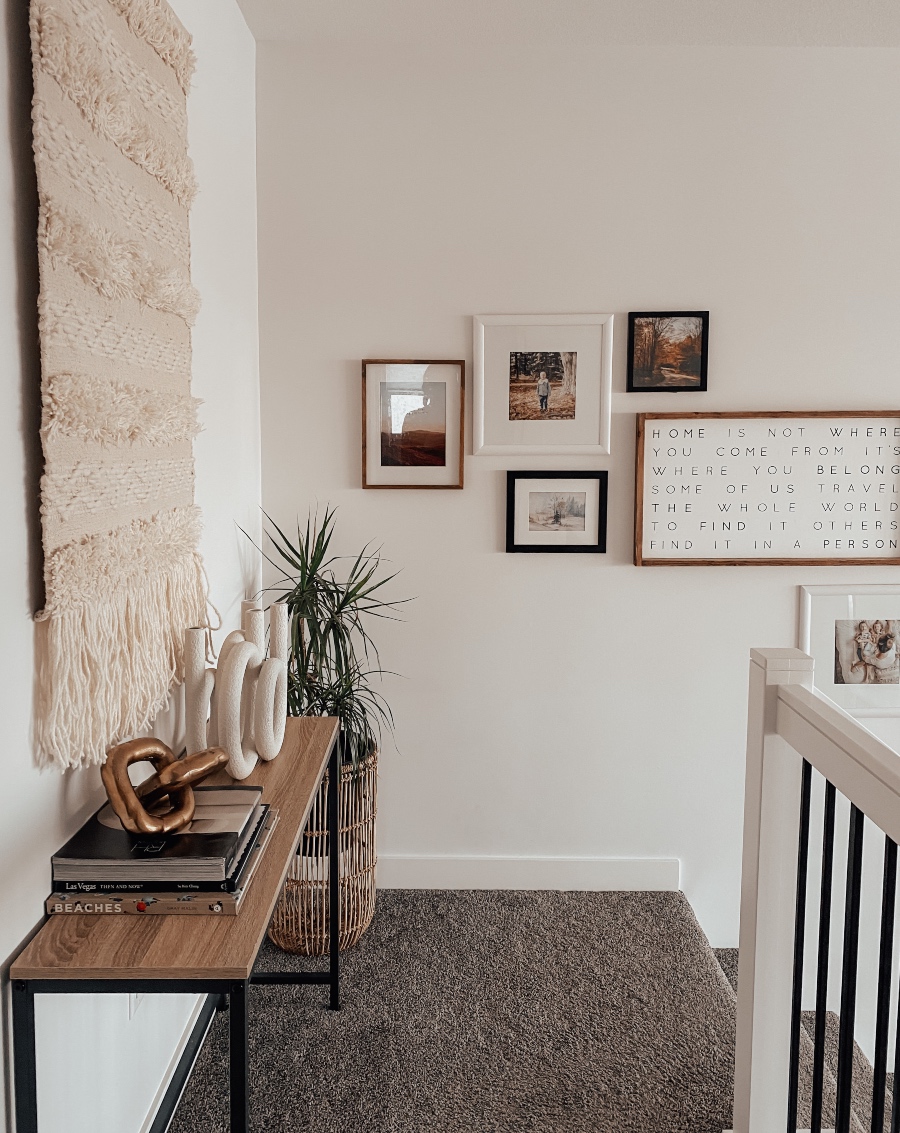
In the photo below, the top two art prints are from a magazine and the bottom painting was one that Kiel’s grandma made.

#5 How to keep your frames in place – my favourite tip ever!
I love this little hack so much! Take a little piece of sticky tack, and once you have your frame level, add the sticky tack to the bottom of the frame and secure to the wall. This is amazing if you have little ones too! The frame stays put even if they bump or try to move them! I used this in our old hallway gallery wall (I did floor to ceiling but don’t have any photos of it) and the kids walked by and touched them and looked at the photos constantly but they stayed put!

If you have any questions about the gallery walls I’ve created or just in general – let me know via comment or email or dm me on my Instagram!
Have a great day!
x Megan


21 Comments
Thanks! I think I did around 1-2 inches between ◡̈
Love it! What is your spacing between the black frames??
Hi! It’s from Urban Barn ◡̈
Beautiful! Could you share the credenza details? Where can we purchase it?
The frames are from Opposite Wall, Ikea has some really great dupes though!
I think it depends! I have such an open concept home and it can feel busy to me quickly, which is why I went with black and white to keep it simple. I also have our gallery wall along the stairs which is more colouful so I didn’t want it to compete with that. It’s totally your preference though!
I’m switching my gallery wall in my dining room to a gallery wall of family photos. I’m going to do six photos. Can I do a mixture of black and color or just pick one?
I love the thin black frames you have! I want to upgrade my gallery wall frames. Where are they from??
Thank you! They’re from Urban Barn 🙂
Love this! Where did you get the leopard throw pillows??? Love those!!
Thank you! It’s from Rugs USA 🙂
Where did you get your rug? It’s so beautiful. The styling with your couch, throw pillows and throw is amazing!
lots of great tips- I’m trying to put together a symmetrical wall like you have in a hallway
ALSO love the woven wall hanging — where did you get that? or did you make it?
It’s from Urban Barn 🙂
Who makes that sideboard in the photo with the black frame gallery? I’m obsessed!!
Hi! They’re 16 x 20 and I have them matted to 8 x 10 🙂 Thanks!
Hi what size are those frames? Absolutely love the way you styled your home!
Hi! Our wall colour is Summit by Cloverdale Paints – our ceiling…. I’m not totally sure tbh, sorry!
Hi! We used ‘summit’ by Cloverdale paints throughout our home on the walls… the ceiling pant is very similar but not an exact match. I’ll have to see if I can find what was used 🙂
Hello. Wondering what your wall color is ..? Is the ceiling the same?
Thanks!