
Budget Friendly Modern Girl’s Bedroom with Vintage Touches
A complete bedroom makeover for a young girl with a ton of DIY projects. Modern wainscotting with plywood, a DIY loft bed, refinished vintage furniture, and a multi-colored floral wall stencil to look just like wallpaper all give the room a vintage modern feel with budget friendly projects.
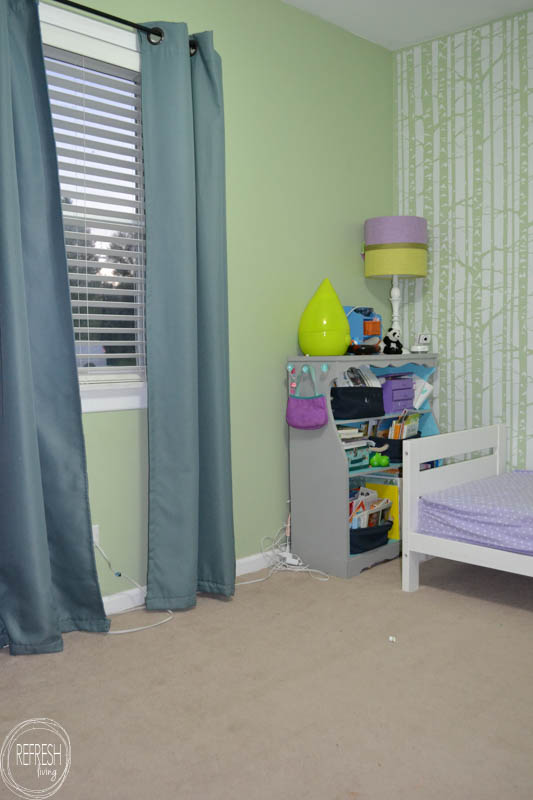
My girls have been sharing this room for over 6 years, first the older two shared this room, and then the third moved in about a year ago once our fourth girl was born. Needless to say, the room is not very big, and things were feeling very, very cozy. Especially the closet and dresser – they were literally overflowing with 3 sets of clothes.
Here’s how the room has looked over the past 8 years:

This post contains affiliate links. Please read my full disclosure policy here.
I set out to transform this room into a bedroom for my oldest daughter, who is now 10.
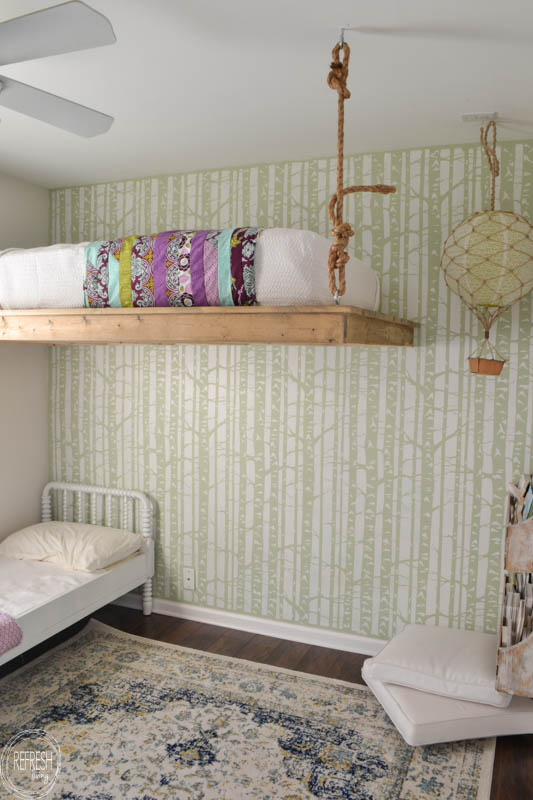
Here’s how the room looks now!
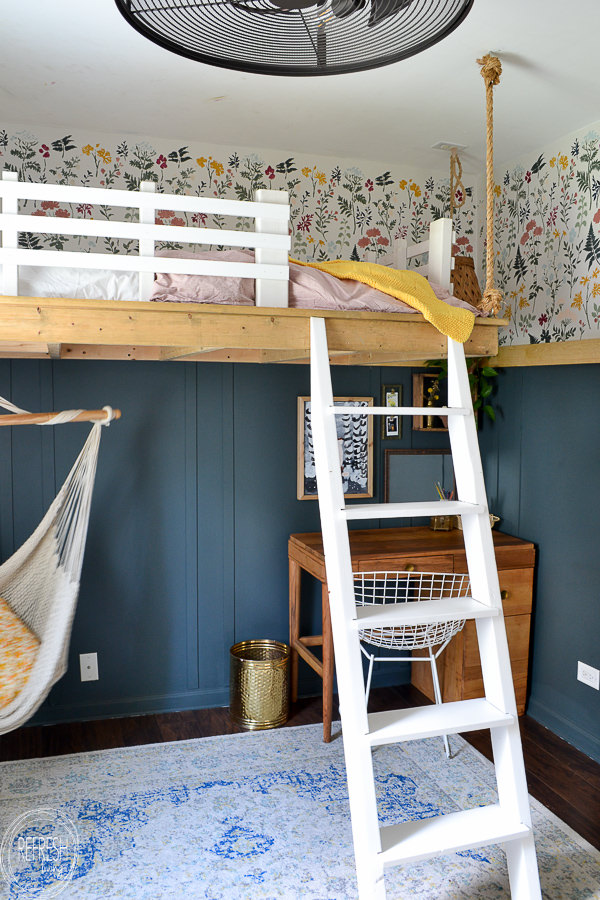
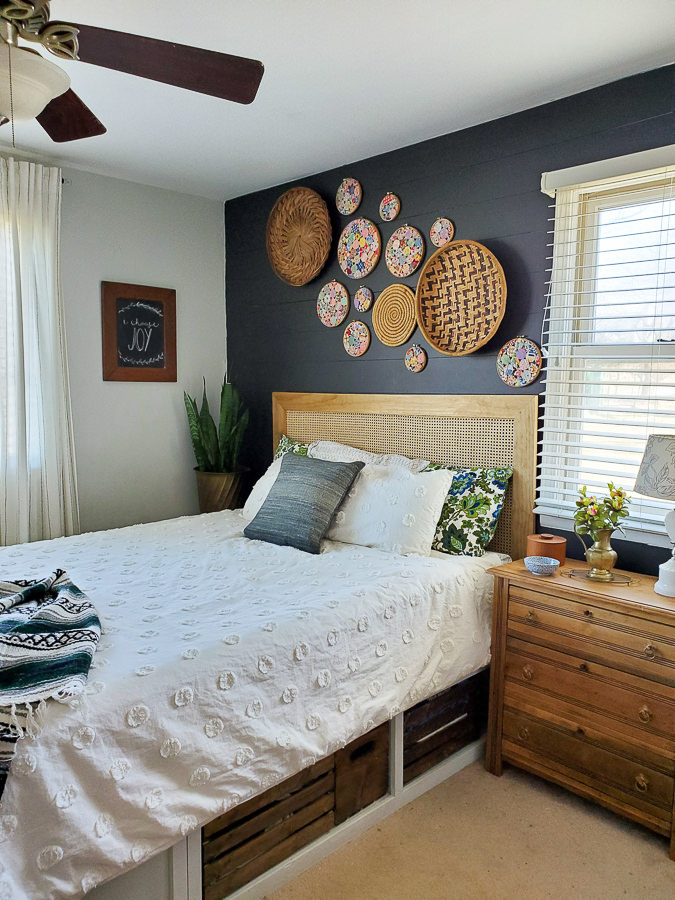
As you can see, the lofted bed is still here. (Here’s the tutorial on how to build a loft bed.) I had no intentions of getting rid of it, as it helped to free up so much floor space in this small room.
But, I finally finished the ladder and installed a ceiling fan that is actually safe for a lofted bunk bed. (Here’s a full post on the best ceiling fans for rooms with bunk beds.)
For at least 2 years we just had to turn the ceiling fan off at night so the girls didn’t lose a limb climbing up to the loft, so it feels so good to have that project checked off the list.
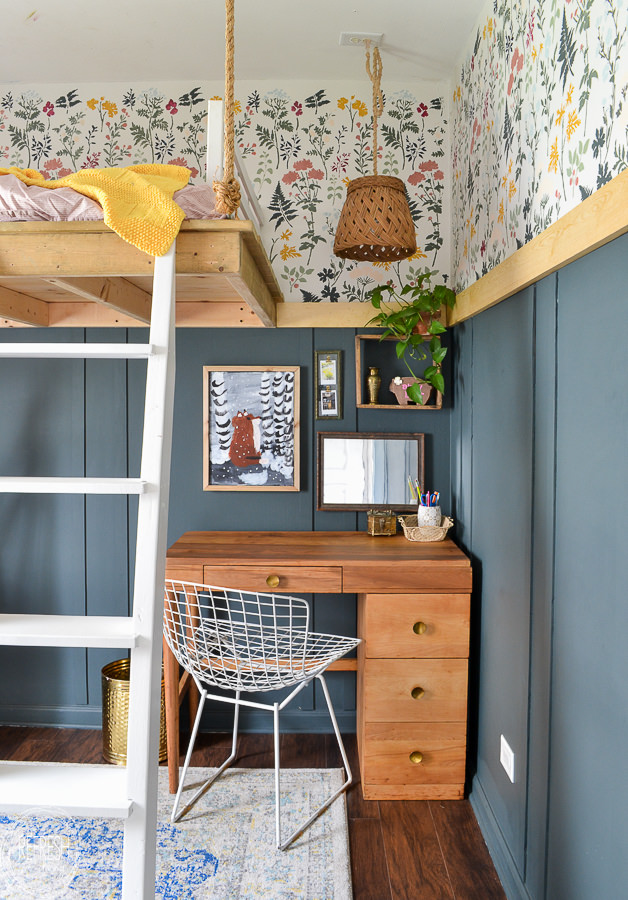
Now that there’s not one (or two!) extra beds in the room taking up floor space, there is finally room for a little desk. I found this simple vintage desk on Facebook Marketplace, stripped it down to the natural wood, and sealed it with clear coat acrylic.
The chair was an estate sale find that I went to for the sole purpose of (hopefully) taking home one of the three chairs that the pictures showed. I waited for the last day of the sale (1/2 off day!) because I didn’t want to pay the original $40 they were asking per chair. Thankfully, there was still one left when I went on the morning of the last day!
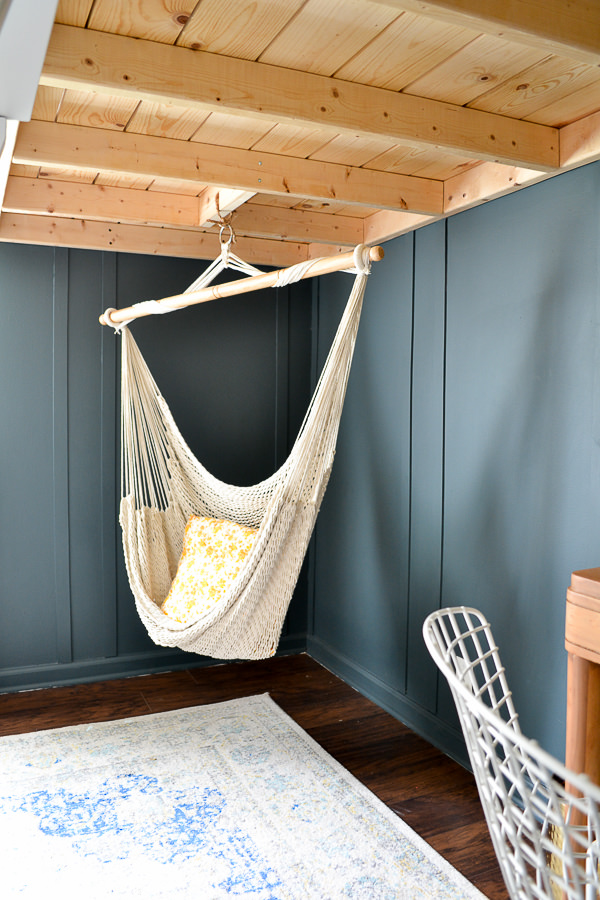
All of my girls are in love with this hammock chair, and thankfully they’ve all agreed that anyone can use this chair as long as they are reading (or looking at pictures, since the 3rd is only 3).
It’s actually even bigger than I thought it would be, so I had to twist the rope on the top bar to shorten it up so it didn’t hit the floor. The girls can sit in it, or there’s enough fabric to extend their legs and lay in it too!
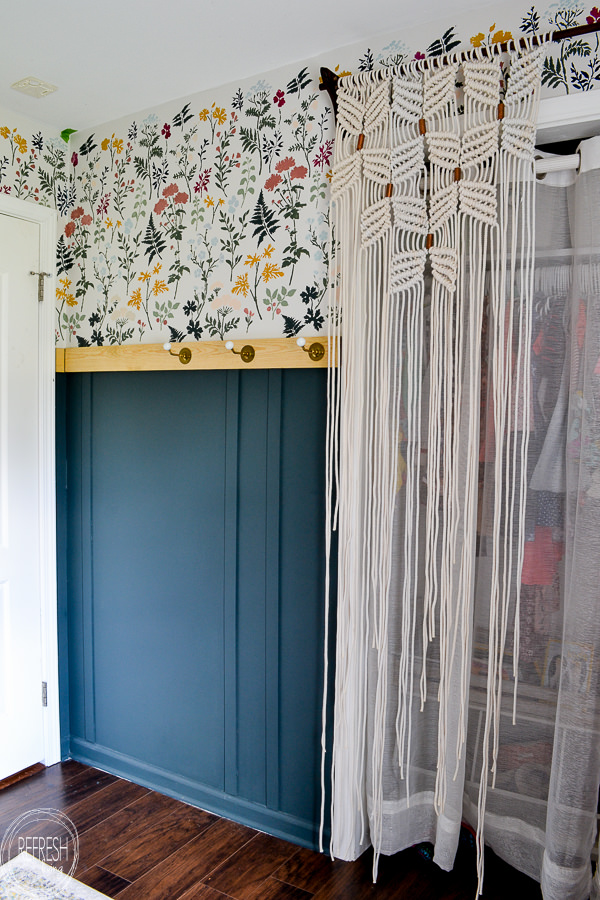
I made this macrame curtain last time I updated their bedroom (at the same time I built the loft bed) and decided to keep it as well. I love how it distracts from seeing inside the closet since it doesn’t have any doors, and I just wasn’t willing to part with it considering how much time it took for me to make!
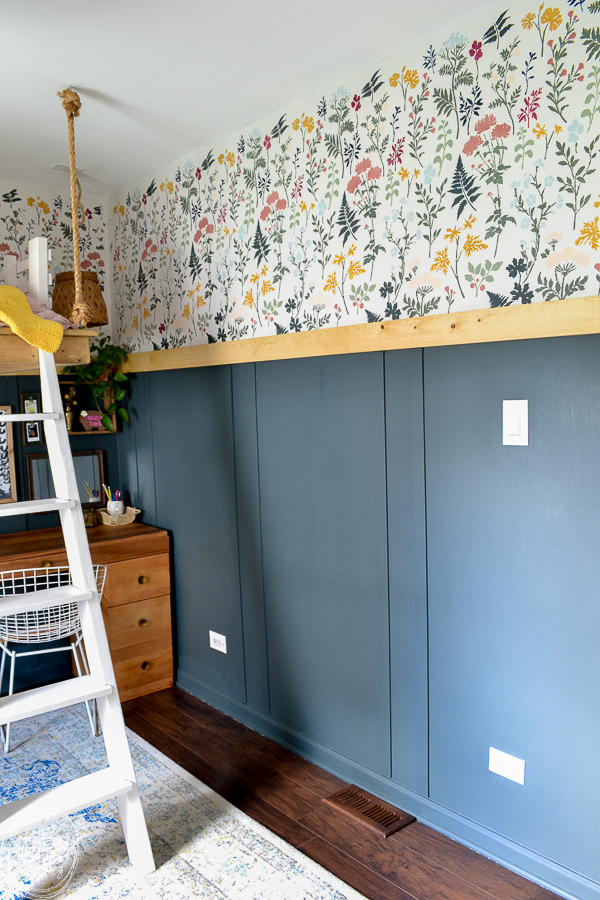
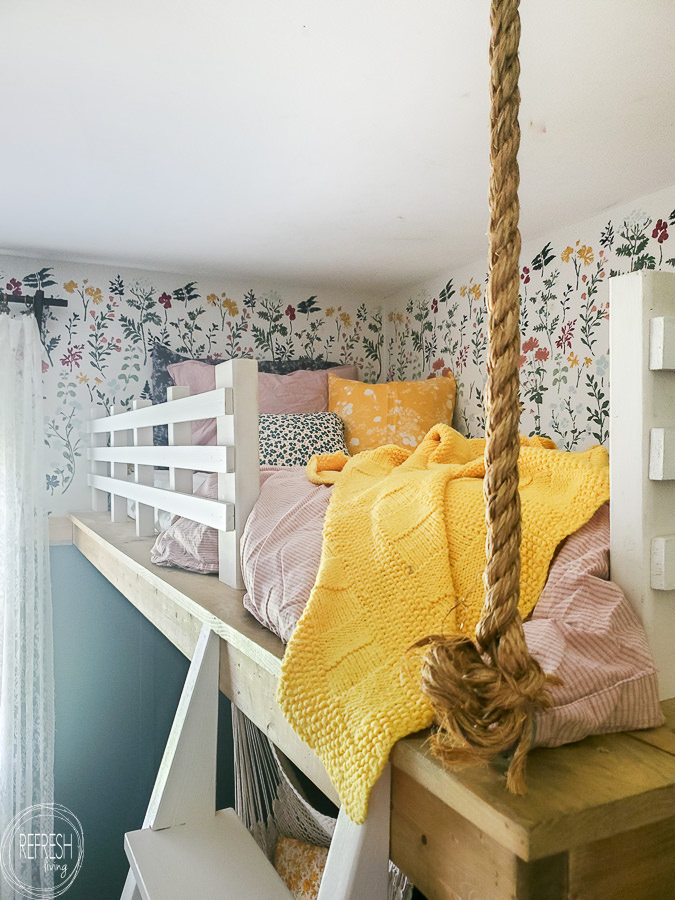
And, of course, the walls obviously look just a little different than before. This faux DIY wallpaper that’s actually just a stencil ended up taking way longer than expected. The first few were fun, and then it just got a little monotonous so I would wait days between doing each one to muster up the motivation to tackle the next one. In the end, I’m so glad I did it, and my daughter loves it, so the time spent was well worth it.
I wrote a whole post on how to stencil with clean lines and no bleedthrough, along with tricks for painting multiple colors on a stencil to give you the look of wallpaper. Stenciling this floral pattern saved me so much money. Wallpaper was looking to be around $350 for the amount I needed, while this stencil (Woodland Botanicals from Cutting Edge Stencils) and a couple of small bottles of acrylic paint (most of the paint I used was leftover paint I had in my stash) cost a total of
My daughter has requested a little bookshelf for up near her bed, which I still need to build. I plan to make these easy shelf book or picture frame ledges I made in the nursery a few years ago.
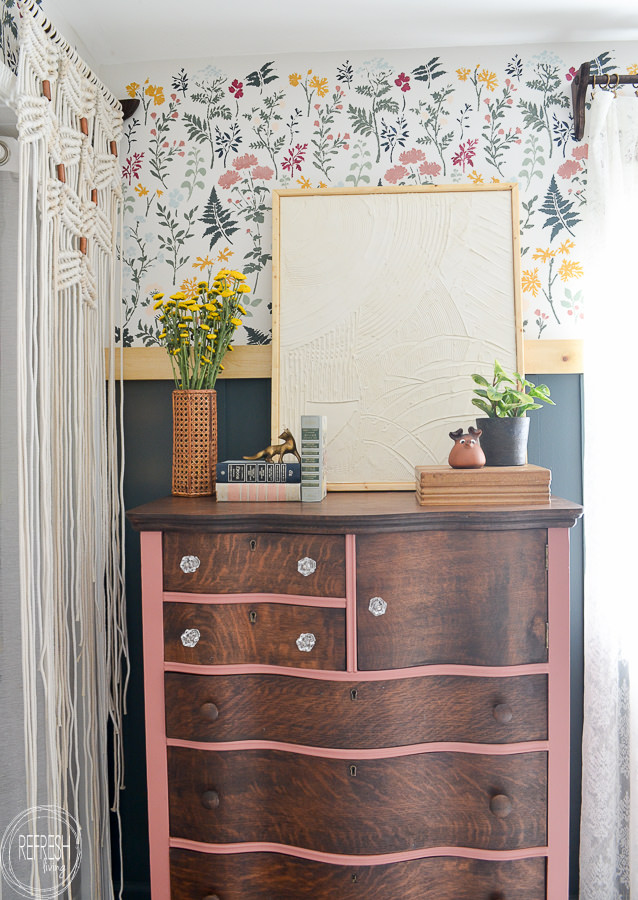
I still love this dresser I found at our local Restore about 10 years ago. Its veneer is still in great condition, and those serpentine drawers are just everything! Here’s how I refinished this vintage dresser several years ago. This time, I just used a sample can of paint on the sides to give it a fresh new look.
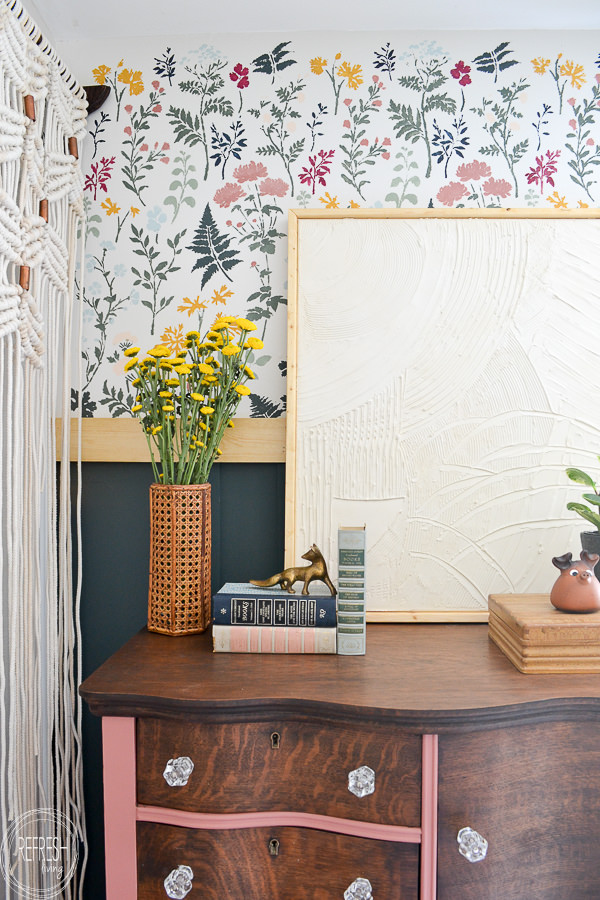
I wanted a large scale piece to put on the dresser, but with how busy the wall stencil is, I needed something that didn’t have too much color.
I made this very amateur piece of art by slapping some leftover drywall mud on a piece of canvas, and used a couple of trowels to give it different textures. Here’s a full tutorial on how to make this DIY drywall mud art.
Budget Breakdown
Because I believe that making your home beautiful and a place you love can be done without spending a lot of money or buying everything new, I wanted to include how much I spent on the items in this room.
- Wall stencil ($46) and paint – $50
- Wall paint (Midnight in NY by Behr) for bottom of wainscot – $30
- 1/4″ plywood board to use for wainscot stiles – $18
- 4″ pine boards for top rail – $20
- MCM desk from FB – $30
- Hammock chair – $50
- IKEA duvet cover and sheets – $30
- Canvas for DIY wall art – $12
- Leftover clear coat and stain for desk and white paint for ladder – $0
- Reused the rug (even though I was so tempted to buy a new one!) – $0
For this update, I spent about $250, but if you add in the other DIYs from the last room update (macrame curtain rope cost $50 and the wood for the loft bed cost $40), the total still comes in below $350. Building the bed and buying second hand furniture definitely helped me to create this look without spending much money at all!
Just realized I forgot to include the cost of the ceiling fan. That was almost as expensive as the entire room – $160. But, it was a necessity and was the most budget friendly option I could find.
I rounded up a few products you could buy instead of DIY with a similar look.
I love decorating (and redecorating!) my home. This hobby of mine could become very expensive, very quickly, but instead I make it my goal to decorate by reusing, refinishing, and thrifting.
There’s something about pulling together a space with “leftovers” that is just so fun for me. Here are all the rooms I’ve transformed on a tiny budget.


Post by Jenny Leads
Jenny is the voice behind Refresh Living. She has a passion for helping people to create a home they love without spending a lot of money.
what an awesome space, jenny! love how you did the beds!
Oh my gosh I just love the wall treatment! The blue on the bottom and the florals on top are just perfect! Such a lovely girls room!
I love all your bright spaces – but those colourful stencilled walls just might be my favourite ever!
I adore all the details so much that it is hard to choose a favorite! Those walls are sooo gorgeous and I bet they love the beautiful loft bed. Kudos!!!
Absolutely amazing what you accomplished on that budget. This room looks great!
I stumbled upon this post and are absolutely in love with this room!
I have a couple of questions. Did you use thin plywood boards between the paneling or is it just the you painted?
Also I am in love with the stain on the bed (or is it even stained? Haha) if so what is it called?
Thank you ❤️
Thanks so much, Luisa! The bottom are strips of 1/4″ plywood just attached to the wall and then into between is just the wall (basically just the cheap way to create the look of wainscotting). The stain is driftwood color by Minwax and it is on basic pine wood. I hope that helps!
How did you attach railing to lift bed?
What an awesome room. Just a question, is that rope able to take the weight or the bed with your daughter?
This is a great question, and I realized looking back at the loft bed post, it wasn’t answered or shown in an image. I will definitely add that. So it’s actually wire rope (sometimes called aircraft cable or wire cable) that is attached to the two eyebolts. Then, I just wrapped a large piece of rope around it so it was easier to grab and looked nicer. Because, you’re right, I think the rope would not offer the strength needed.
You did such a great job on this room. My daughter loves it. I was just wondering where you got the the pillowcases and pillow covers. I really like that they’re not matchy matchy.
Hi there. Thanks so much! The duvet cover and sham are from IKEA, and then the others I made from some vintage fabric (that I think I found on Etsy). I have this problem with always wanting to change out pillow colors, so I’ve found the only budget-friendly way I can do that is if I make them! 🙂
Hi. The link to the stencil is not that floral one. I was looking to do it and it took me to the wrong one.
Thanks so much for letting me know. Here is the link to the stencil I used: https://www.cuttingedgestencils.com/woodland-botanicals-wall-stencil.html
I will update the post to be sure it’s directing to the right one. Thanks again!
Just coming upon this, Jenny. Gorgeous!!
Hey Jenny,
What type of paint did you use to do the wall stencil and what colours did you use?
Hello! I used wall paint samples and small acrylic paint (the ones sold at craft stores). Honestly, most of them were leftover from other projects or ones that I mixed together so I don’t really have exact color names. Sorry about that!
I love the hanging lamp! Where did you purchase that?
Hi! I made it from a hanging pendant cord and a basket turned upside down with a hole drilled in the bottom for the light socket to fit through. 🙂