This post contains affiliate links where a small commission is received for the sale of products linked at no additional cost to you. I only partner or promote brands and products that I believe in or have tried myself.
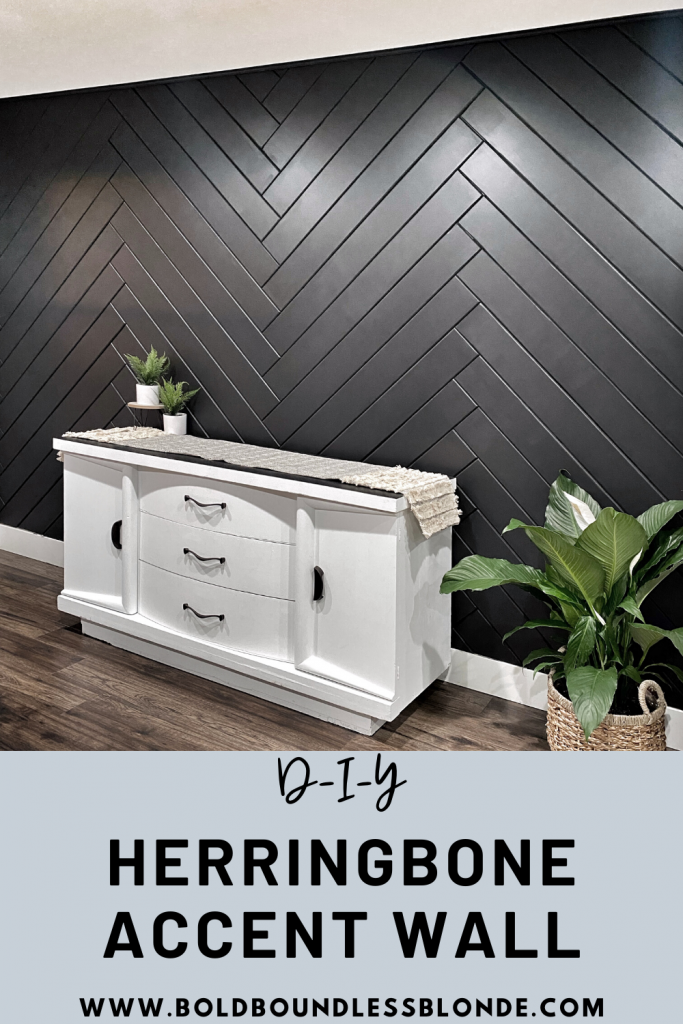
Over the weekend I tackled this DIY Herringbone Accent Wall in our Dining Room and I am in love with how it turned out! My inspiration came from Holly & Brad @ourfauxfarmhouse! They are my favorite account to follow on Instagram! They have a Herringbone Accent Wall in their office and it is stunning! I have more plans for this wall, but for now I couldn’t wait to share!
Supplies
- 1/2″ MDF – Cut into 5 3/4″ Strips
- Router with Roundover Bit
- Brad Nailer – This one is on SALE!
- Paint – I Used SW Tricorn Black
The MDF comes in a 4×8 Sheet. If you have a table saw and the setup you could cut this yourself. If not, Home Depot will cut it for you for a small fee. I would recommend cutting it in 5 3/4″ x 8 ft Strips, then cutting them in half when you get home if you have a miter saw. This will reduce the number of cuts that you have to pay for by half!
Step 1 – Router Edges of MDF
Once you have your MDF cut into strips, you will want to router the edges to give the boards dimension. I bought the cheapest router I could find and I do not reccomend doing this. I spent way more time trying to get the guard to stay consistent and readjusting the bit that I should have. Looking back I wish I would have bought a fixed base router and been able to avoid these issues. I ruined several boards because of the bit not being in place, so hindsight, I probably would have saved money by buying the more expensive router. Especially since I still had to buy the Roundover Bit separately. The router I linked above is still very affordable, has a fixed base, comes with bits, and a carrying bag! If I do another project like this I will definitely be buying this router instead.
You will want to router all 4 sides of each board. For more detail, check out my Herringbone Accent Wall Instagram Highlight – HERE.
Step 2 – Mark Your Wall
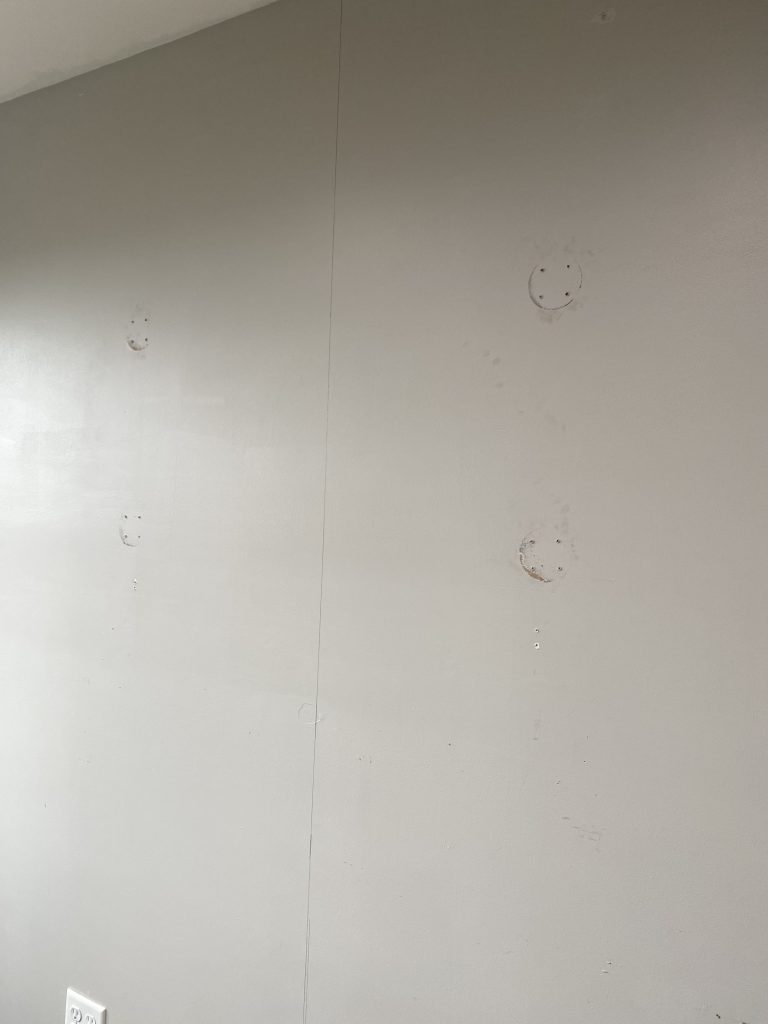
I measured the entire length of the wall and divided it by 2 to get my center. I used a level and pencil to mark down the entire height of the wall. This helped me keep by boards straight when doing my starter row as well.
Step 3 – The First Cut
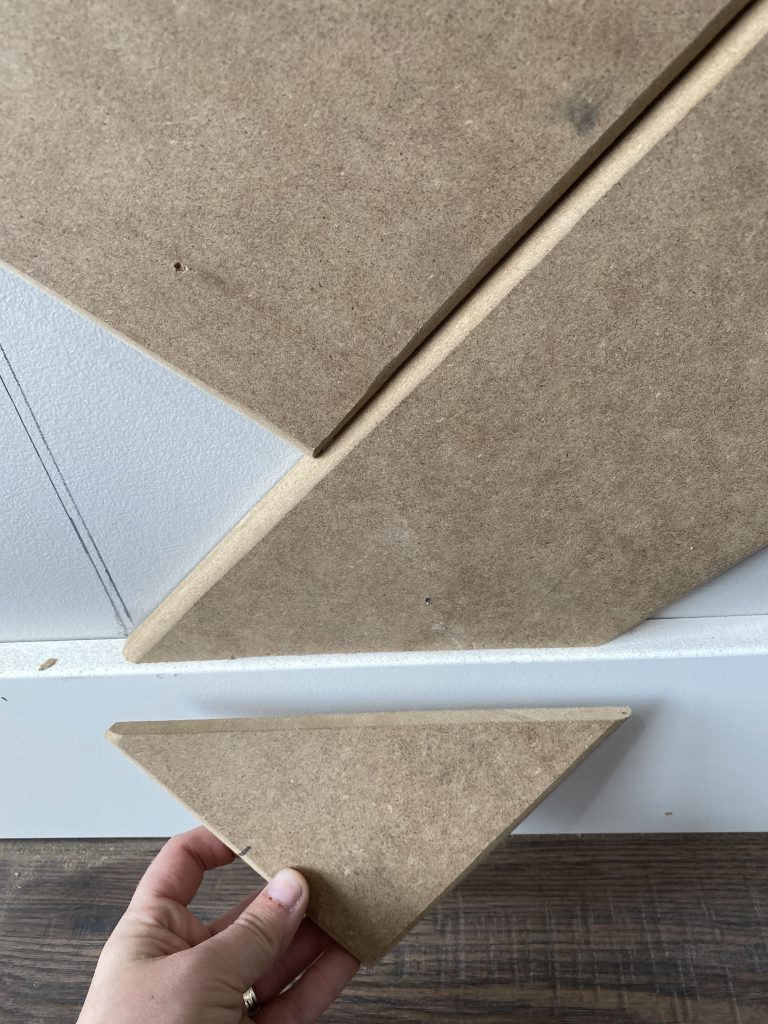
My level did not have a 45 degree bubble on it, so I was at a loss on how to make sure that my boards were at the correct angle. After about 15 minutes of trying to figure it out I decided to just cut the bottom corner off of a board at a 45 degree angle, and start from the bottom instead of the middle.
This ended up working well and was much simpler than trying to guess where to start. I then took the triangle that I cut off of the first piece and used it to make sure that my next piece would line up correctly before nailing it in place. (see below)
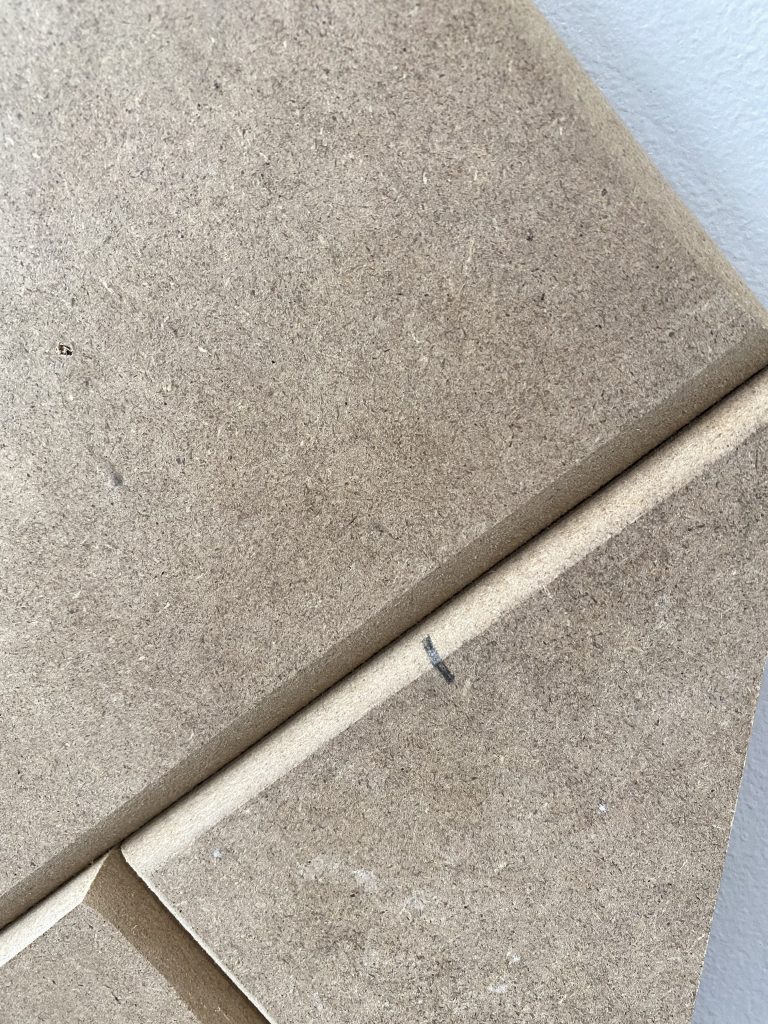
I put two-three nails in each piece to hold it in place. The first thing I did was put up all of the full length boards. This went very quickly, again using my small triangle to make sure each board was lining up properly.
My wall was not very big so it did not have very many full pieces. The below photo shows the all of my full pieces and you could really start to see the Herringbone pattern start to form.
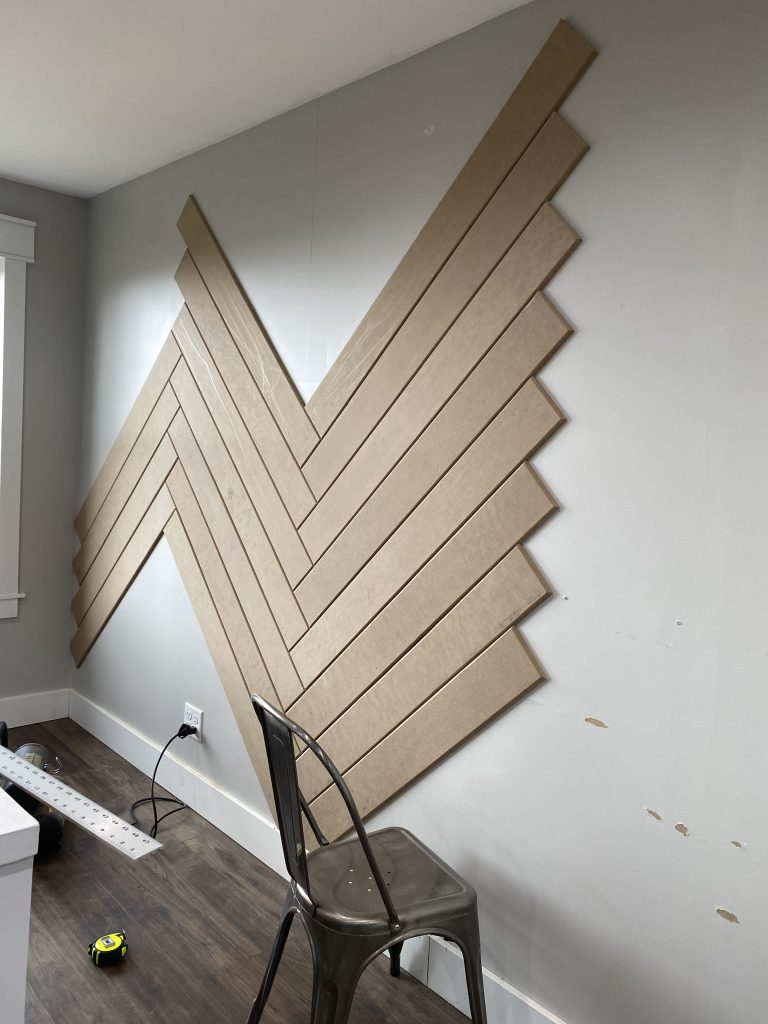

From there I worked from the center left, and then from the center right to finish the wall. I measured each board individually before cutting. I could have finished this wall in one day for sure if I had not ruined pieces from the Router. So I had to go to Home Depot again to get more material.
Step 4 – To Paint or Not To Paint
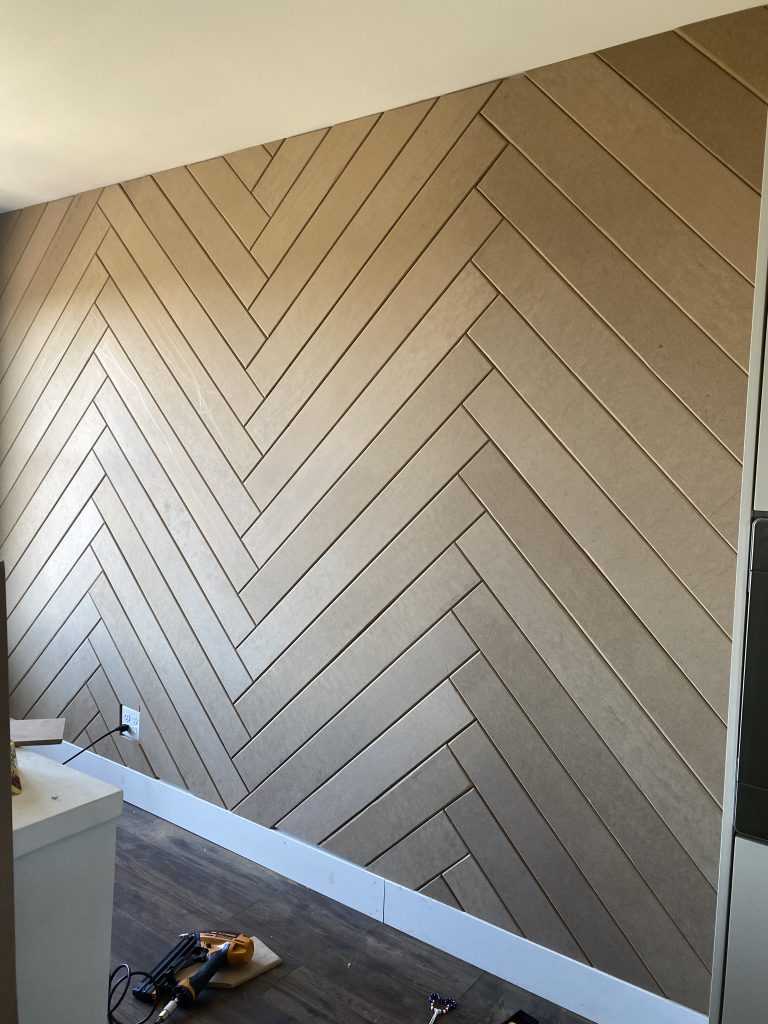
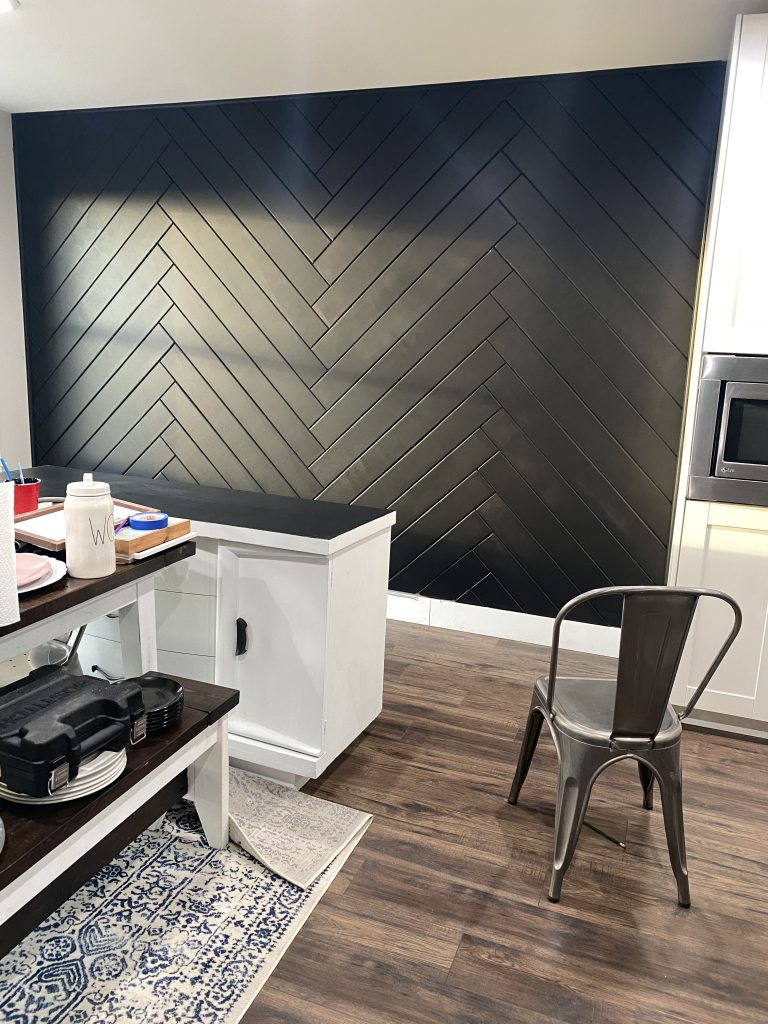
I actually really loved the way that the MDF looked unpainted. If it weren’t for the scuffs and marks, I would have left it natural. However, I am SO loving all things black right now, so SW Tricorn Black it was!
HOW BEAUTIFUL IS THIS HERRINGBONE ACCENT WALL!
I MEAN COME ON!!!!

The total cost for materials for this project was less than $75.00 and the impact is HUGE! Now that I have done it once, I feel like I could Herringbone allllll the walls 😉
If you prefer a video tutorial instead, check out my Instagram Highlight HERE
Don’t forget to check out my Resources Page to Shop My House!
[…] Black herringbone accent wall from Home with Krissy. White herringbone accent wall from Newbuild Newlyweds. […]
[…] Source: Home with Krissy […]
I followed your instructions and now have a beautiful black herringbone wall in my office! Thank you so much for giving the step by step instructions that were easy to follow!
How do you finish the corners, do you just leave the cut edge of the mdf exposed?
I put a trim piece there!
Can you use plywood instead of MDF?
You possibly could. However im not sure how it would go with the roundover.
Why did you choose to do 5 3/4 in? If 6in goes evenly into 48in?
When you cut the boards, your loosing a saw blades width each time. Therefore your very last one cut would be much too short 🙂
Can I use ship lap to avoid needing to use a rounter?
If your using traditional shiplap It would give you a nice gap between length wise, but there would be no gap in the short side. If that makes sense lol
What did you do around the outlets? Thanks!!
I just cut around the outlets. They will be kind of inset!
How Many MDF Panel boards did it take?
It took about 4 sheets total!
What color are your other walls leading up to herringbone wall?
They are SW Repose Gray 🙂
Hi! Can you tell me if you used satin or semi gloss paint?!
It is satin!
The round over is 1/4” if she used the one in the router kit she bought.
What size router roundover bit did you use? Mine does not look as rounded.
Honestly im not sure! It was whatever came in the multi pack from Menards. Im sorry!
It’s beautiful! Do you know the dimensions of this wall? I’m curious how my wall compares so I can estimate the cost! Thanks!
its about 8×11 🙂