
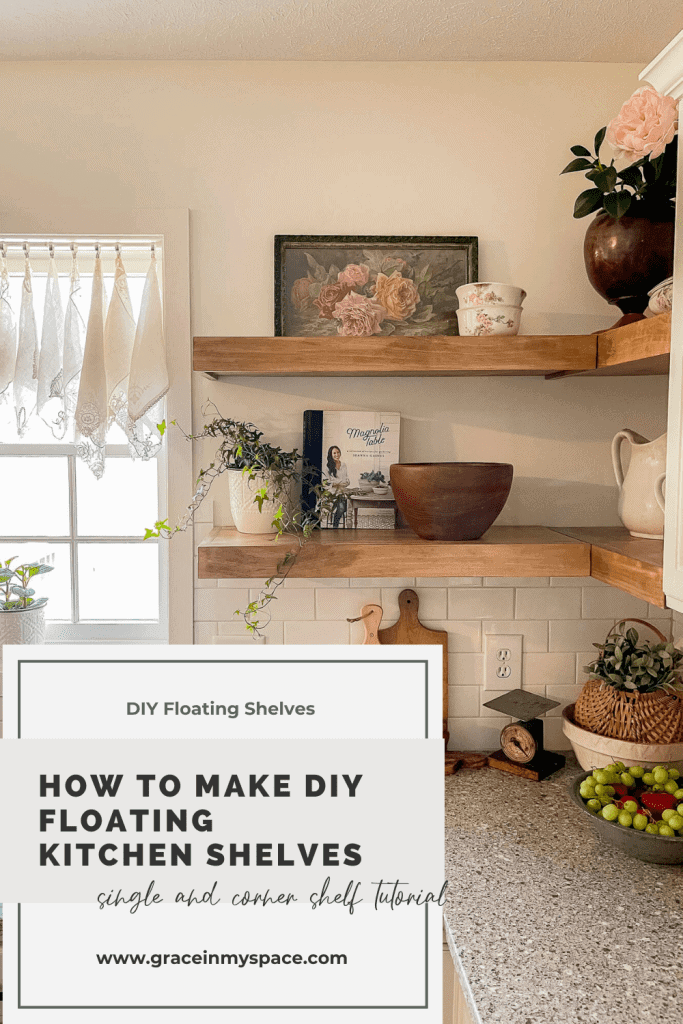
How to Make DIY Floating Kitchen Shelves (2024)
DIY floating kitchen shelves are a beautiful addition to any home, with any design style.
They are easy to customize, and a quick build! Today I’m excited to help you learn how to make DIY floating kitchen shelves!
This beginner tutorial teaches you how to make a single shelf or floating corner shelves for much less than custom shelving! You can build your own floating shelves to your specific measurements and create a beautiful display and storage solution in no time.
This post may contain affiliate links where I earn a small commission on your purchases at no additional cost to you.
Floating Kitchen Shelves for Beginners
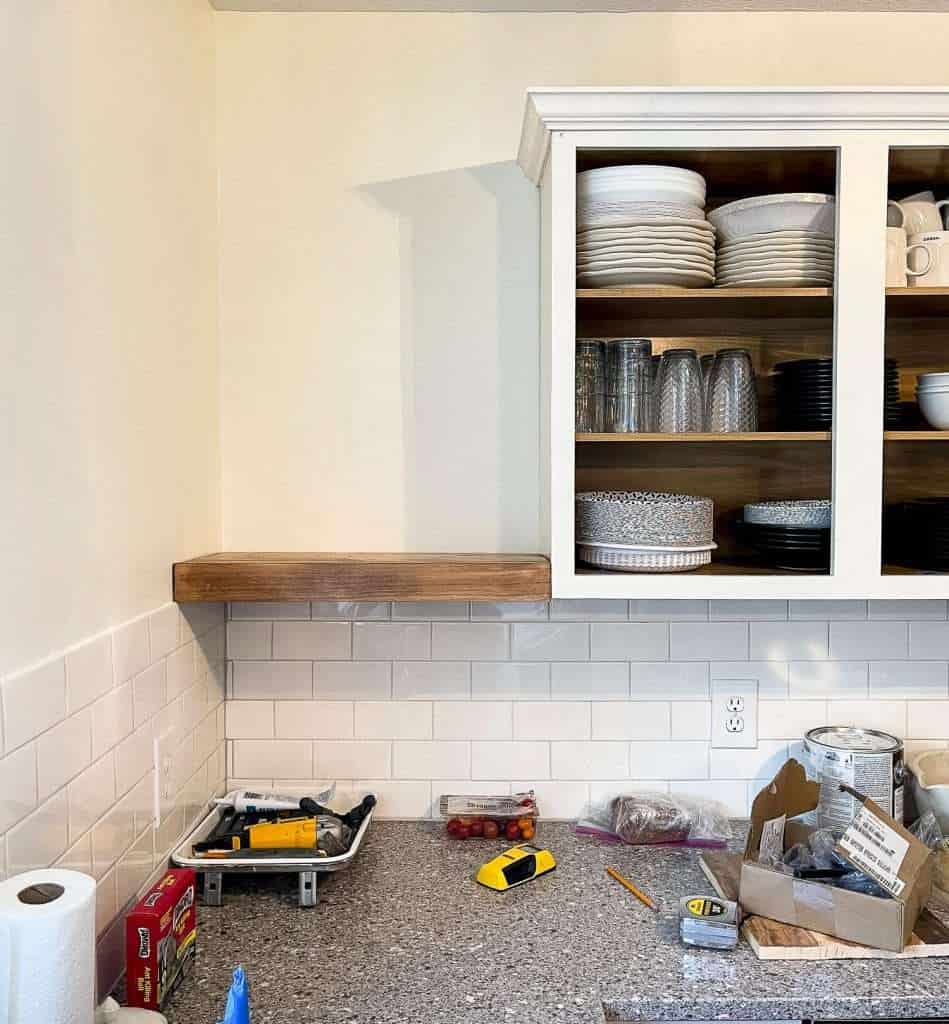
When my mom started her kitchen makeover she decided to take down one section of upper cabinets and replace it with open shelving. After looking into buying them for her, I found that custom floating corner shelves was going to cost around $800.
No thank you!
In the past, I’ve used simple brackets and 2x pieces of wood to create open shelving in my kitchen. This is the simplest way to add open shelving and you can find that shelf tutorial in my kitchen makeover series.
However, for this project, my mom wanted the look of chunky shelves with no brackets.
The only problem was, I needed to build DIY floating corner shelves. Not just single shelves. That’s where this tutorial comes in! This is a beginner friendly tutorial that anyone can do!
How to build DIY Floating Shelves
If you are looking for plans for how to build simple DIY floating shelves, rather than a corner shelf, this tutorial will still work for you!
Since I am building four single floating shelves to create two corner shelves, you can simply adapt the tutorial to your needs. Let’s get started!
First, let’s answer a few quick frequently asked questions.
FAQS to Know Before You Begin
Can floating shelves hold much weight?
There are a few factors that determine how much weight floating shelves can hold.
- Wood Material
- How it is installed
- Weight capacity of brackets
- Size of the shelf
Each shelf will have a different weight capacity based on the above factors. Hard woods will be able to hold more weight, however are typically more expensive.
For a basic kitchen floating shelf, you will typically not be placing more than 50-75 lbs on it. Most commonly used woods, like pine, poplar, walnut and plywood will have no problem with this weight capacity.
Second, your installation and bracket choice is probably the most important factor in weight capacity.
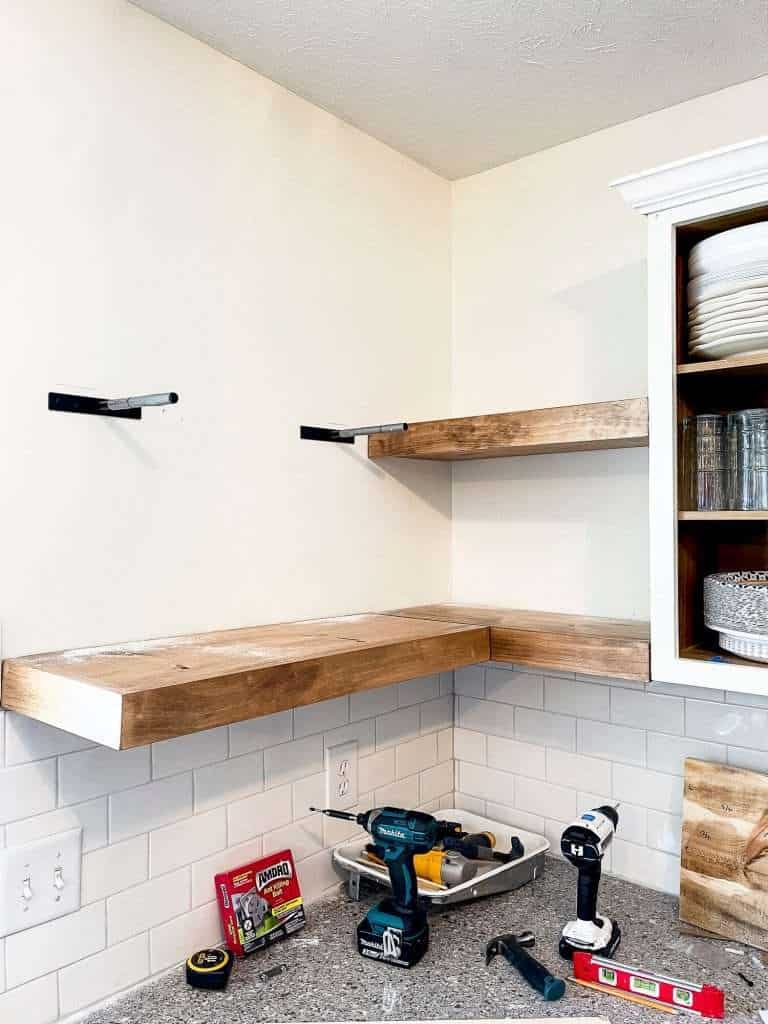
Installing into studs is extremely important so your shelf does not come out of the wall. Equally important is the bracket choice. The longer your shelving, the more substantial your brackets should be (with more rods). I’ll get into this more below.
Third, the size and depth of your shelf matters. The deeper your shelf, the more support it will need. At a 12″ depth, my shelves are about as big as I’d go for floating shelves made this way.
How do you secure a floating shelf?
Let’s talk more in depth about your bracket choice. No matter what you choose, make sure to secure it into studs with appropriate hardware.
In order to properly secure a floating shelf, you also need to ensure that your rods are at least 2/3 the depth of your shelf. So for my 12″ shelves, I needed 8-10″ rods.
Next, you need to look at the number of rods. Obviously, the number of rods increases as your shelf width increases.
Originally, we planned to use these single rods in pairs or a set of three, which would work fine for small shelves less than 10 inches. However, for our longer shelves, it would have been much easier to install with a bar of rods like this.
Using a full bar makes installation easier and more secure because there is no need to ensure that each rod is level. Simply level the bar and all the rods are precisely placed so your final floating shelf is level as well.
- Floating Shelf Sheppard Bracket 10″-70″ size options
- 8 Piece 8″ Individual Rods
- Hidden Brackets for Thin Shelves
These blind shelf supports are another viable option for smaller units or if you are creating an intricate design.
Materials for DIY floating kitchen shelves
If you’ve always wondered how to make a floating shelf, then I’m happy to tell you that it really isn’t complicated! Once you see how all the different pieces come together, it’s more like a puzzle than anything else.
What is the best wood to use for floating shelves?
Remember that wood choice is your preference and your material quantity will be different based on how large your shelves are.
Two of the most affordable wood choices are pine and poplar. I like the finish that poplar offers but it is slightly more expensive than select pine.
If you choose pine, make sure you are buying select pine rather than common boards. Common boards are cheaper, but often have knots and bows that make them much harder to work with.
Walnut, oak, cherry, and mahogany are all beautiful choices as well with varying price points.
To replicate what I’ve built you will need the following:
- 1×12 Select Pine or Poplar
- 1×3 Select Pine or Poplar
Material List for Shopping Day
Bring this list to the store with you and check it off as you purchase!
You can also find most of my favorite DIY materials all in one place on my Amazon Storefront, including my brad nailer.
- 1×12 poplar (measurement calculation below)
- 1×3 poplar (measurement calculation below)
- 1 1/4″ finish nails
- 2″ finish nails
- wood glue
- Brad nailer
- Miter saw or table saw
- Medium and Fine grit sand paper
- Wood filler
- Stain or paint color of choice
- Wood Conditioner (optional)
- Poly (optional)
- Stain rags or paint brush
- Tape measure
- Pencil
- Small Level for short shelves, long level for long shelves
- Brackets of choice from above recommendations
- Screws for brackets
- Stud finder
- Eye protection, hearing protection
How to Make DIY Floating Kitchen Shelves (Single or Corner Shelves)
Corner shelf plans
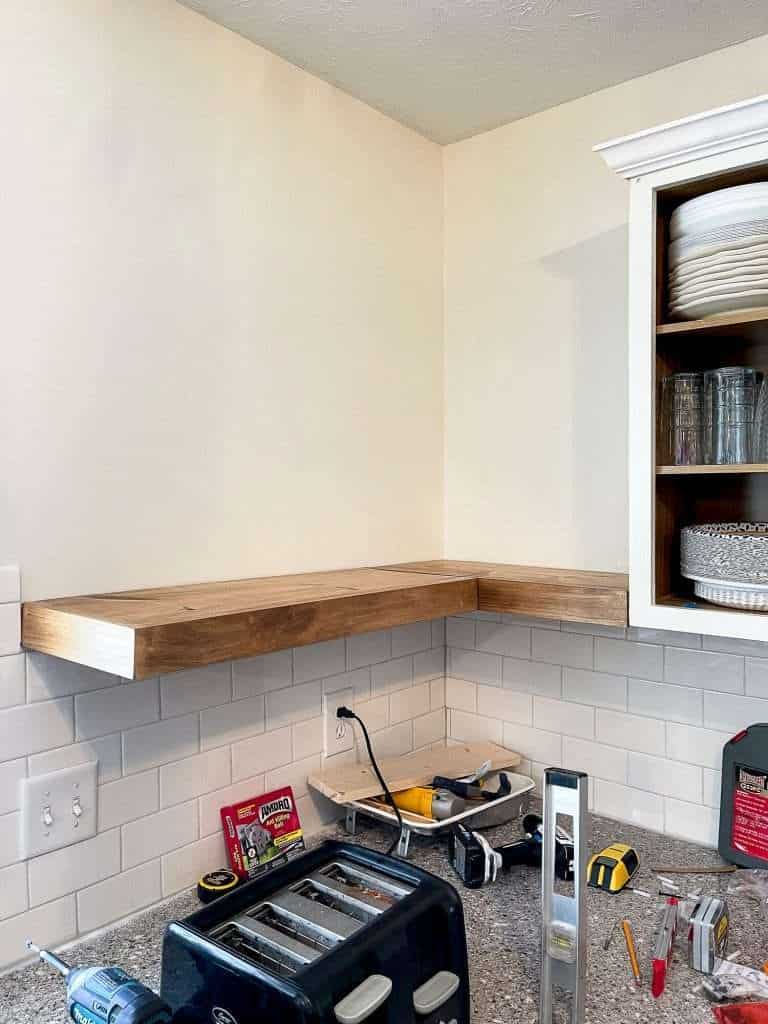
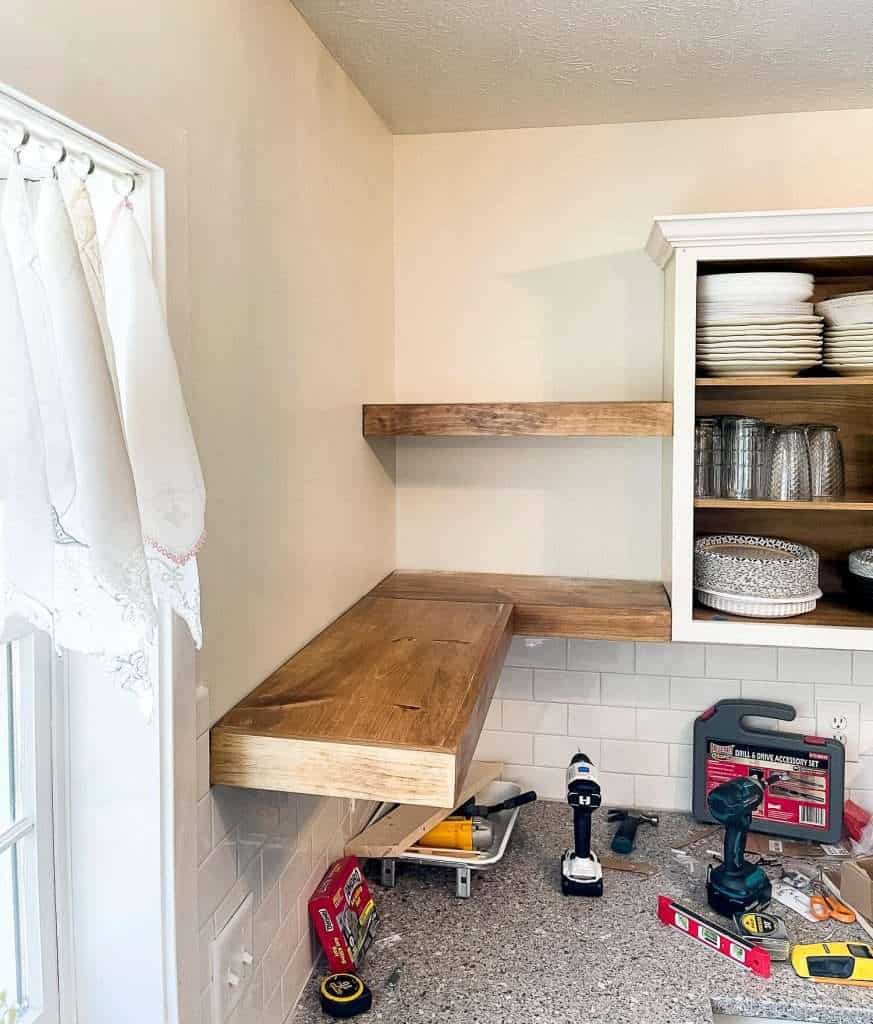
My DIY floating corner shelf is actually made up of two individual straight shelves. This is only one way to do this.
You can also cut out your top and bottom wood into the exact dimensions needed for your corner shelf, and then trim them out.
However, this is a much more complicated option, requires more tools, and isn’t very beginner friendly. So for the purposes of this tutorial, we are going to create two single shelves that turn into one corner shelf.
Floating Kitchen Shelf Measurements
The first step to a successful shelf build is measurements!
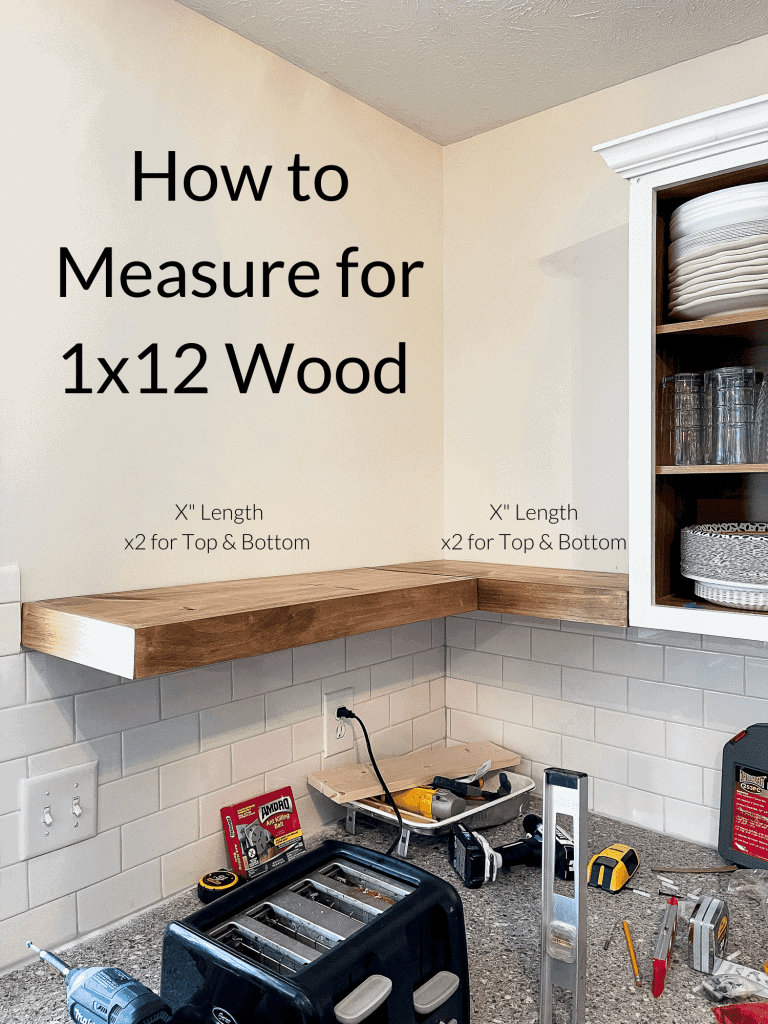
To determine how much length you’ll need of 1×12, measure the length of each opening and then double it.
For my back shelf, I needed 24″ x 2. For the left shelf, I needed 39″ x 2.
The top and bottom of the shelves are both made of 1×12 so that is why we are doubling that measurement. Add about 6 inches to this total to cut your spacers.
It’s also important to note that these floating shelf plans are completely customizable. You can choose 1×10 or 1×8 for the top and bottom as well if you don’t need a 12″ depth.
Next, measure your 1×3 face frames. This is the wood that will go around the perimeter of your shelf. This will be very specific to your shelf placement.
My shelves are sandwiched between a wall and cabinet, and then one shelf dead ends into the other. So I only needed enough 1x3s to cover the face of each shelf, and one end.
If you are placing your shelving in an open corner, you will need to account for the face and two ends for each shelf.
Using 1×3 wood for the face will give you a final thickness of 2.5″ on your shelf, accounting for the nominal measurements.
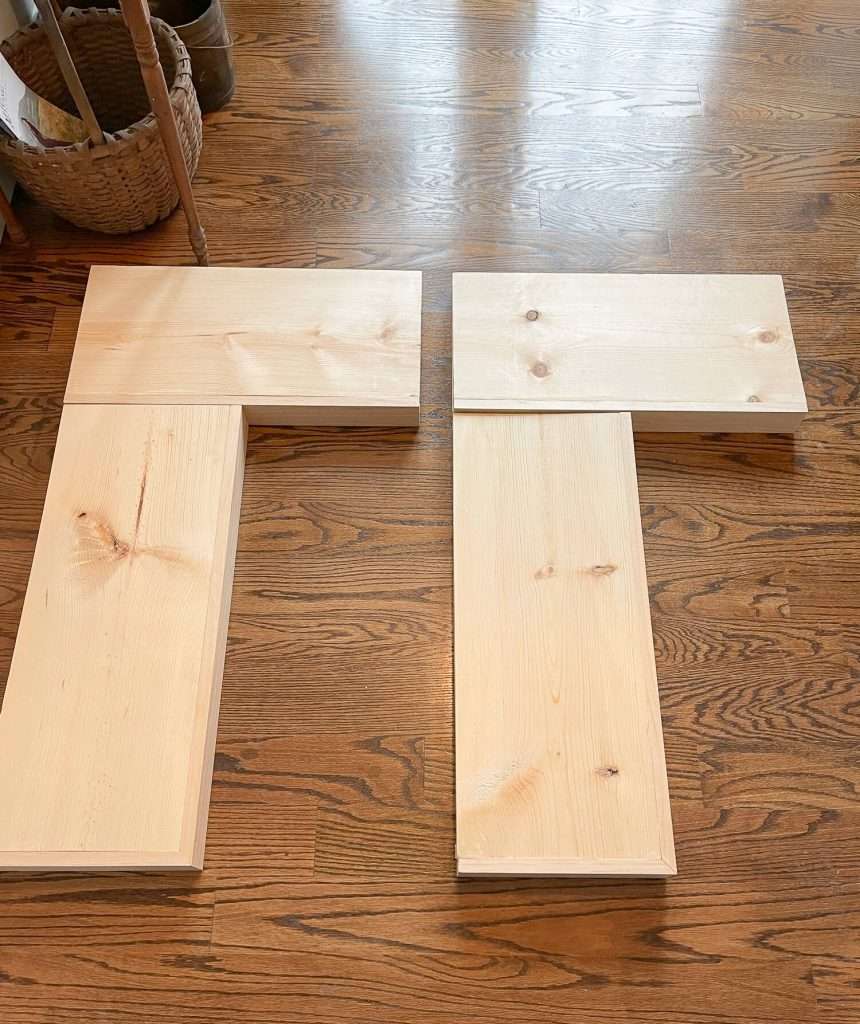
Cut & Assemble Wood
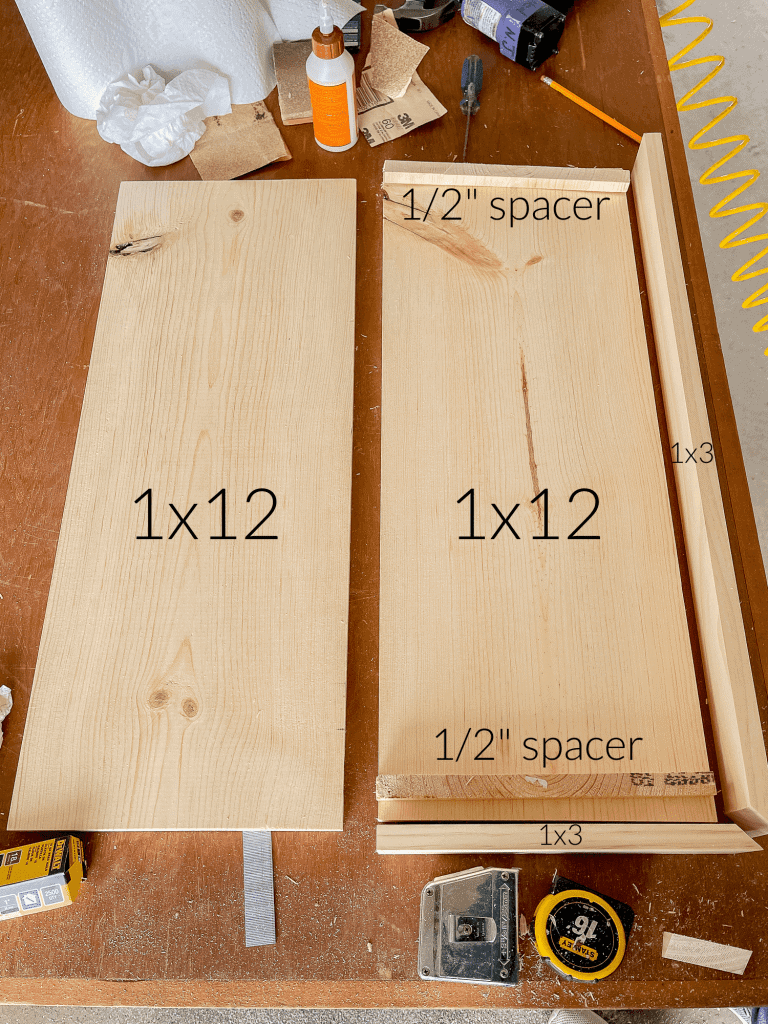
For your basic shelf, you are going to cut:
- 1×12 top and bottom
- 1×3 face frame around exposed edges
- 2 spacers per shelf
Once you have all your measurements, cut your wood per your dimensions using a table saw or miter saw.
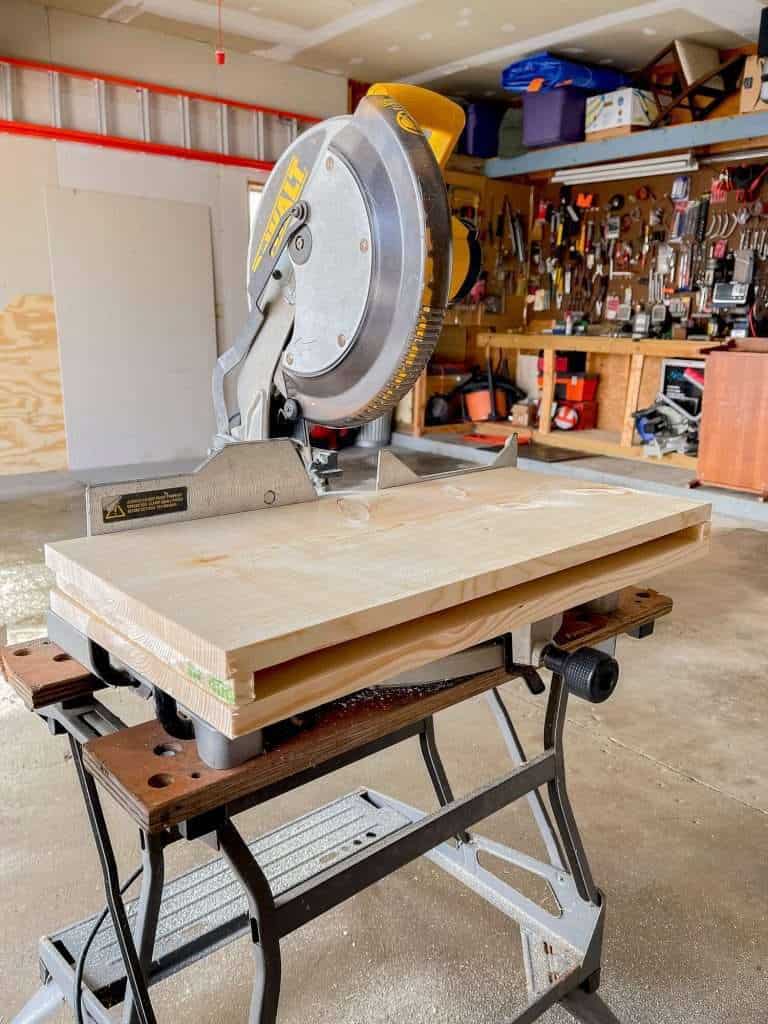
Use straight cuts for the top and bottom pieces. Then, use miter cuts for the corners of the face frame.
Using miter cuts isn’t 100% necessary if you’re a novice woodworker, but they create a much more finished look than straight cut joints.
The final pieces to cut are the spacers.
The size of your spacers will be determined by the diameter of your bracket rods. We used 1/2″ brackets, so my spacers are 1/2″. This will give a tight fit so the shelves don’t slide around on the bracket.
Cut 2 spacers per shelf, adding more if the shelf is extra long.
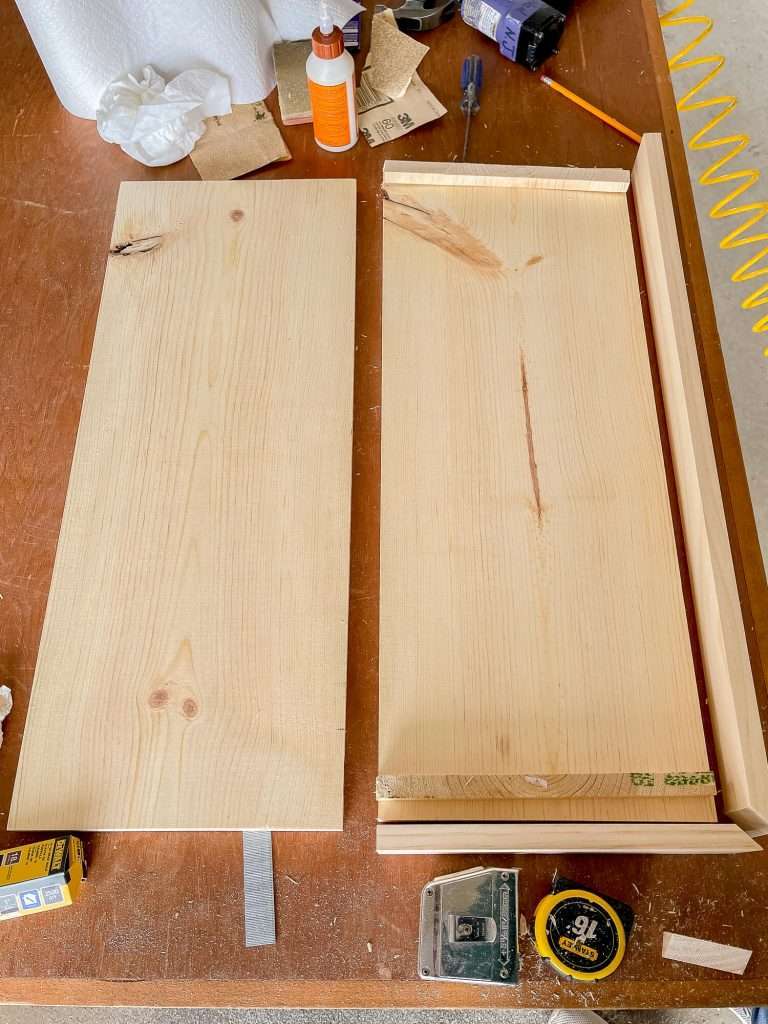
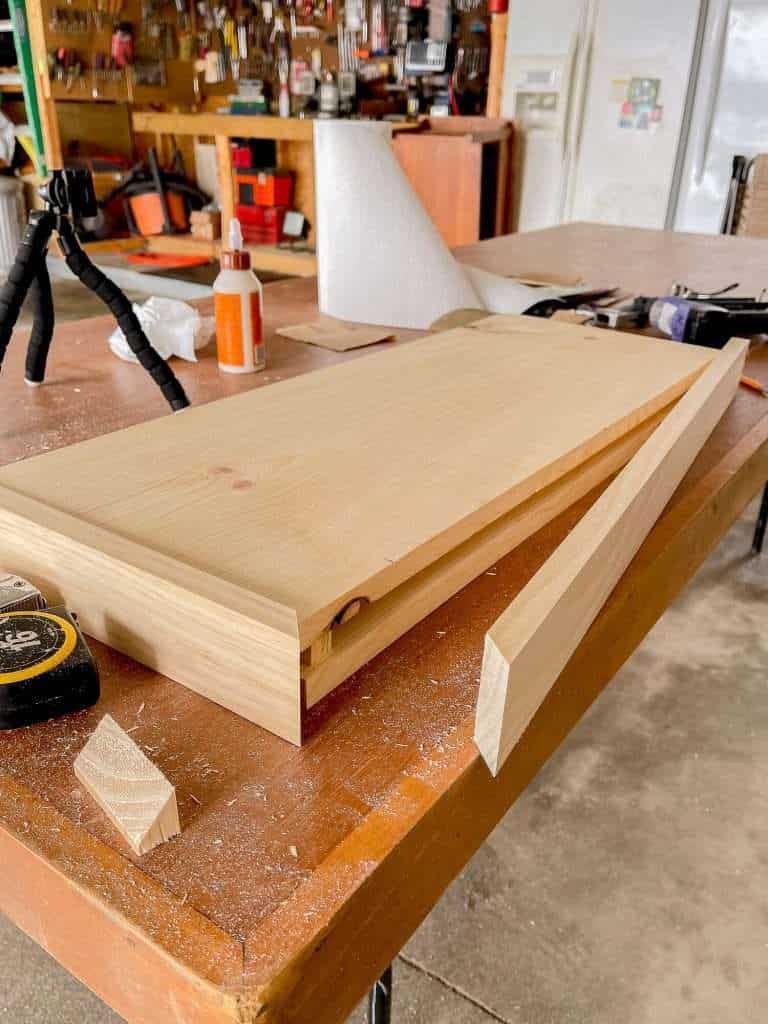
Assemble Your DIY Floating Shelves
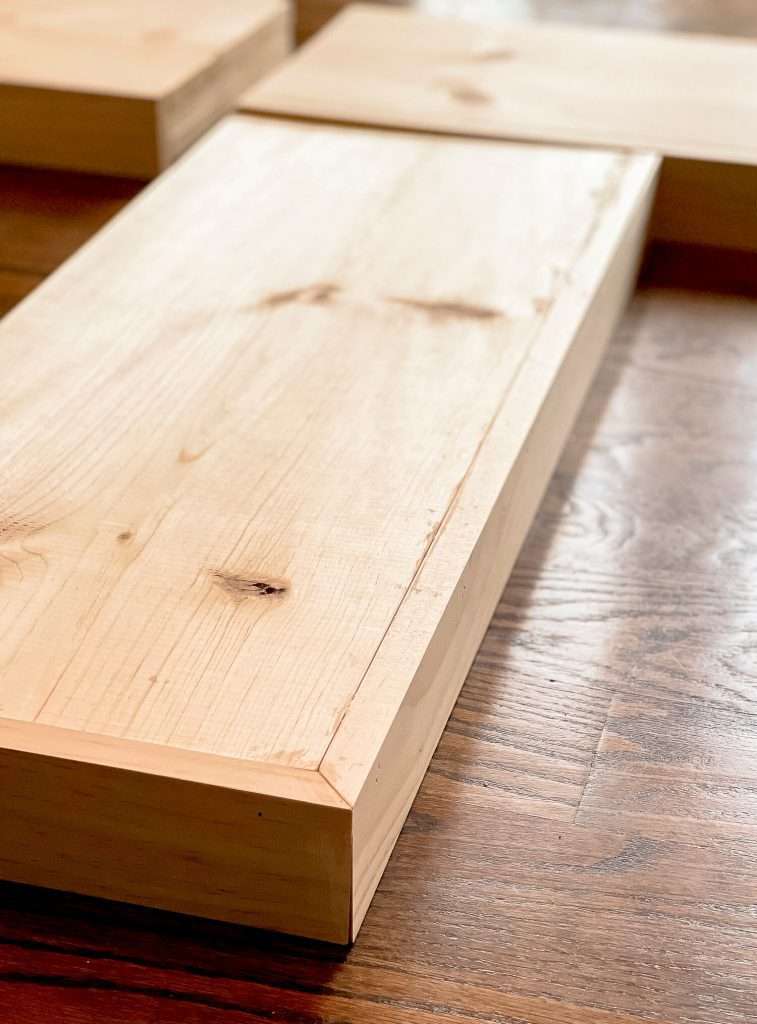
Once you’ve cut and dry fitted your shelves, it is time to assemble them. Using wood glue and finish nails, piece together your shelving.
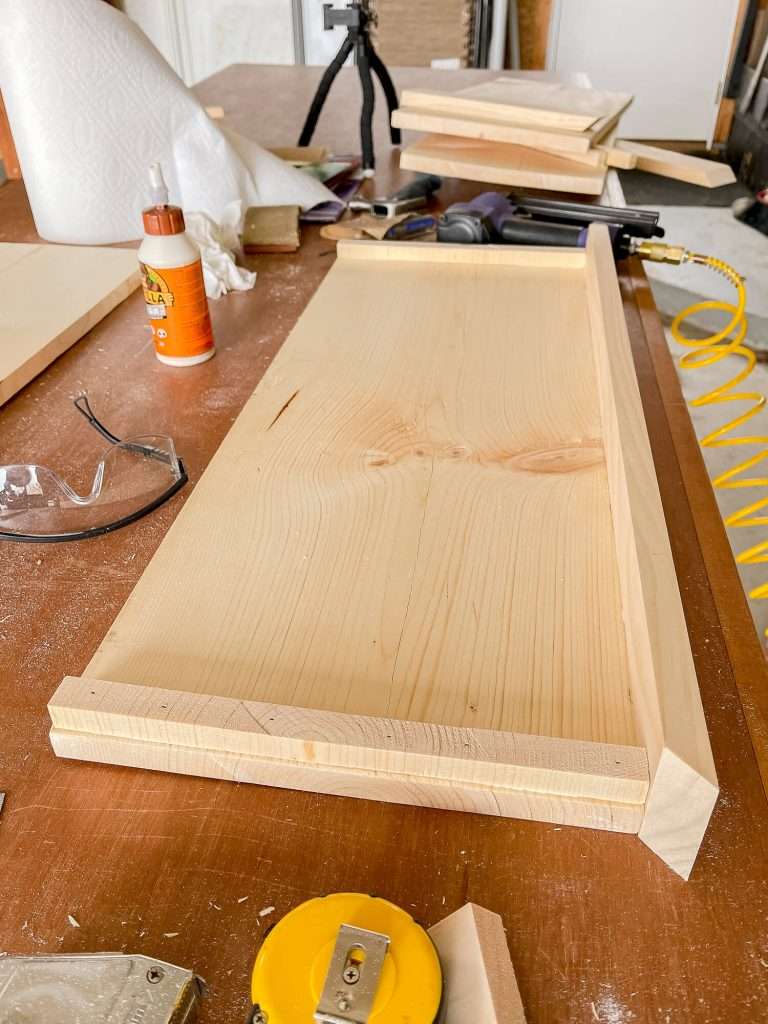
Start by laying your top 1×12 on a level surface. Attach the spacers with wood glue and 1 1/4″ finish nails on both ends. Then, attach your front face frame using wood glue and 2″ finish nails, making sure that the ends and top are flush.
Next, add your bottom 1×12 with wood glue and 2″ finish nails. And finally, attach your side 1×3 face frames with wood glue and 2″ finish nails.
It is important to note that the underside will not be flush with your 1×3 frame. It will sit below it, but this is not visible once installed.
If you want it to be flush, then your spacer needs to be adjusted and consequently, your bracket diameter will need to be larger.
Build each individual shelf needed to create your floating corner shelves.
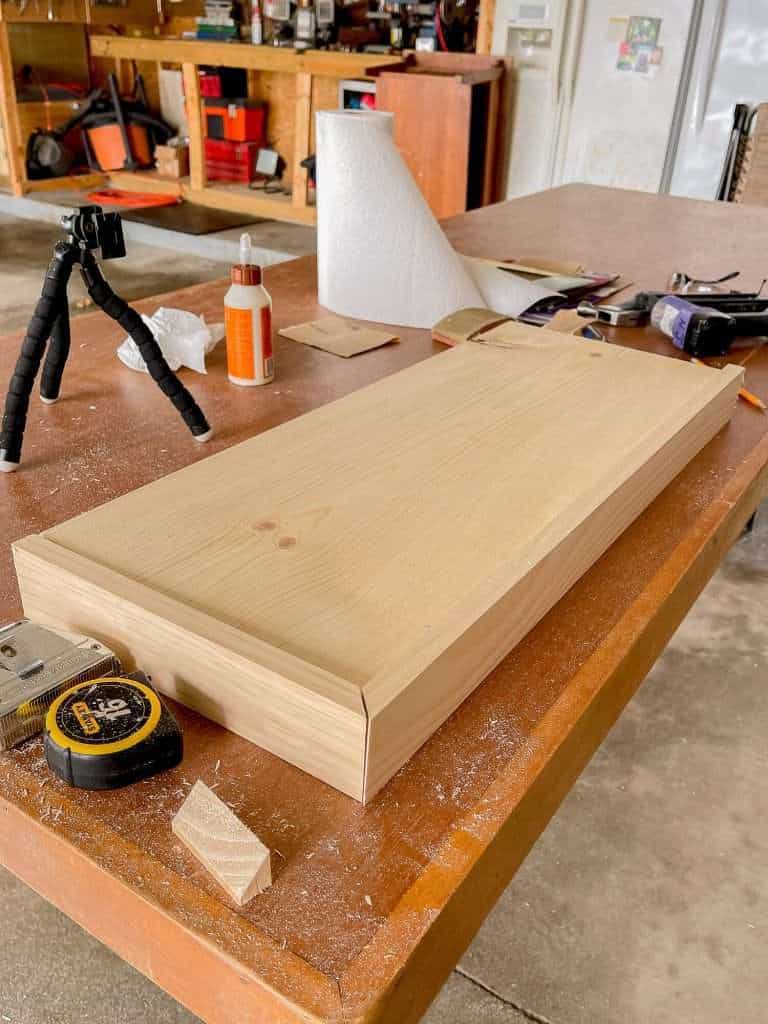
Fill, Sand, Stain
Once you’re DIY floating kitchen shelves are built, it’s time to put the finishing touches on them.
- Sand with medium grit sandpaper
- Fill nail holes
- Sand with fine grit sandpaper
- Apply wood conditioner
- Stain
- Polyurethane (this is my favorite water based poly)
First, sand all your wood evenly with a medium grit sandpaper to smooth out any cut marks. Once you’ve gotten your shelves smoothed down, apply wood filler to all nail holes and any joint gaps. Let dry.
Then, use a fine grit sand paper to get the smoothest finish and remove any filler residue. Not only will this be best to the touch, but it will also help your wood accept the stain better.
Once you’re shelves are prepared, apply a wood conditioner, if desired. This helps them absorb the stain evenly. If you wish to skip straight to staining, you can do so at this time.
Once your stain is dry, apply polyurethane to help protect the shelves and make dusting and cleaning easier.
Alternatively, you can also paint your floating shelves rather than applying wood conditioner, stain and poly. Simply prime and then paint your color of choice!
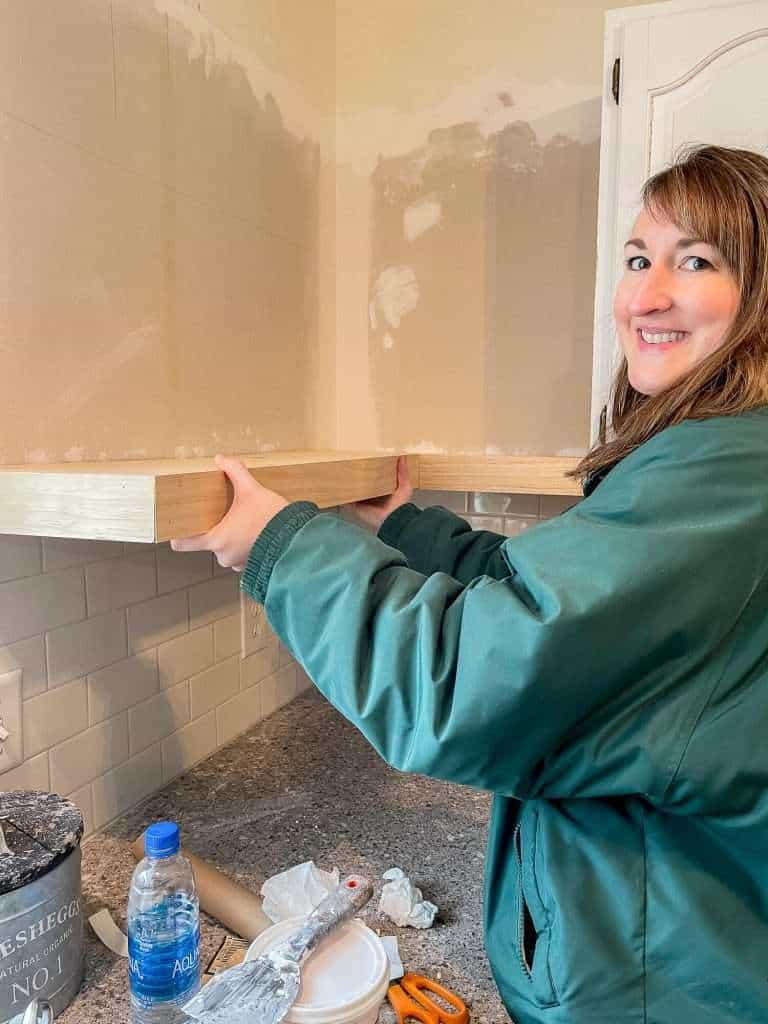
Installing DIY Floating Kitchen Shelves
You’re final step is to install your DIY floating kitchen shelves.
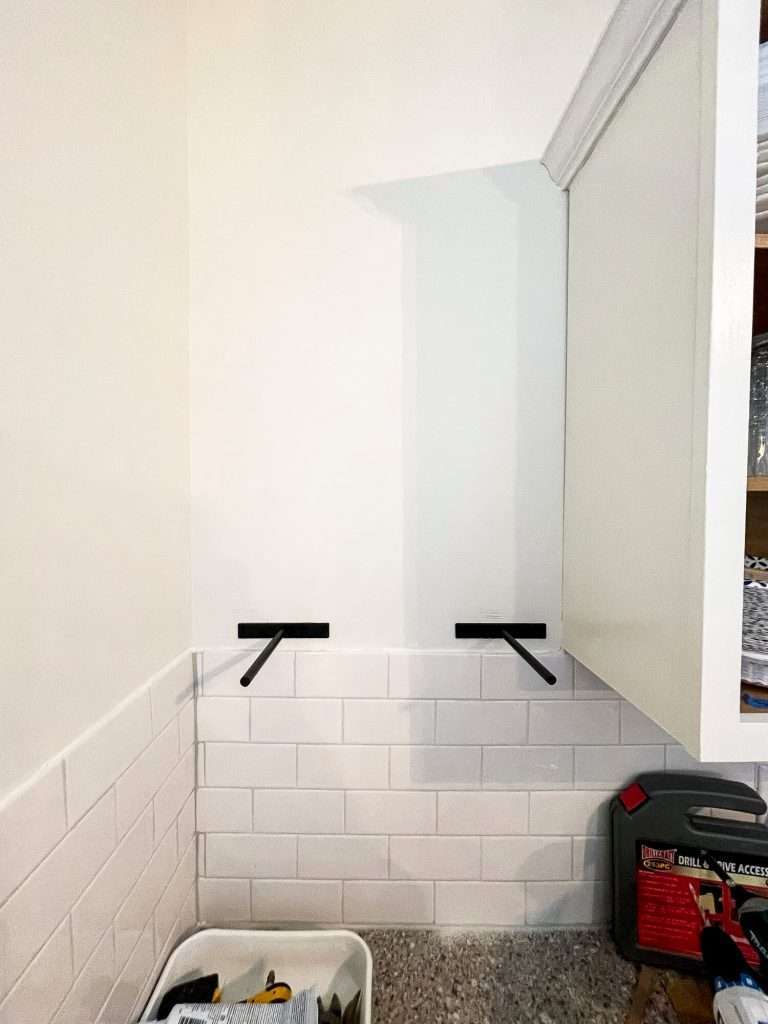
First, install your brackets according to their instructions. Pay particular attention to make sure they are level.
Next, slide your shelves into place. If you are building floating corner shelves, start on your back wall.
Then, install the side that will dead end into your first shelf.
Repeat until all your shelving is installed!
Extra Security
Depending on the strength and alignment of your brackets, you may find that the shelves aren’t 100% flush. To fix that problem, we added a small bracket on the underside of our shelving to keep them flush.
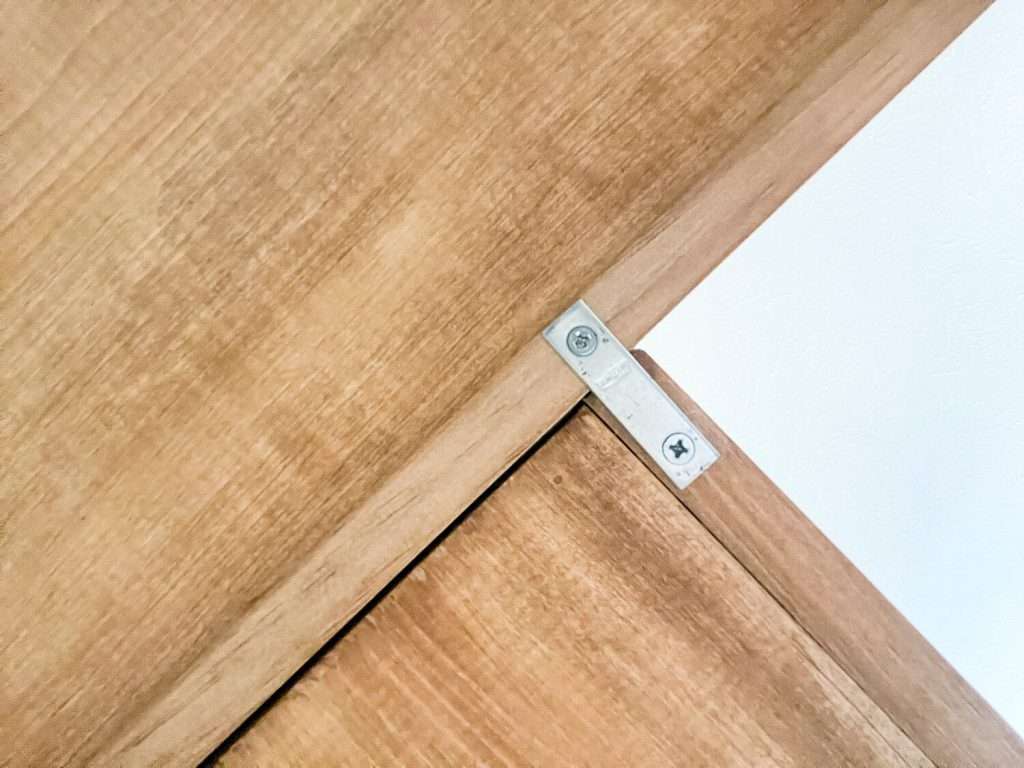
You may or may not find this necessary, but it adds a little extra security to ensure a seamless look for your DIY floating kitchen shelves.
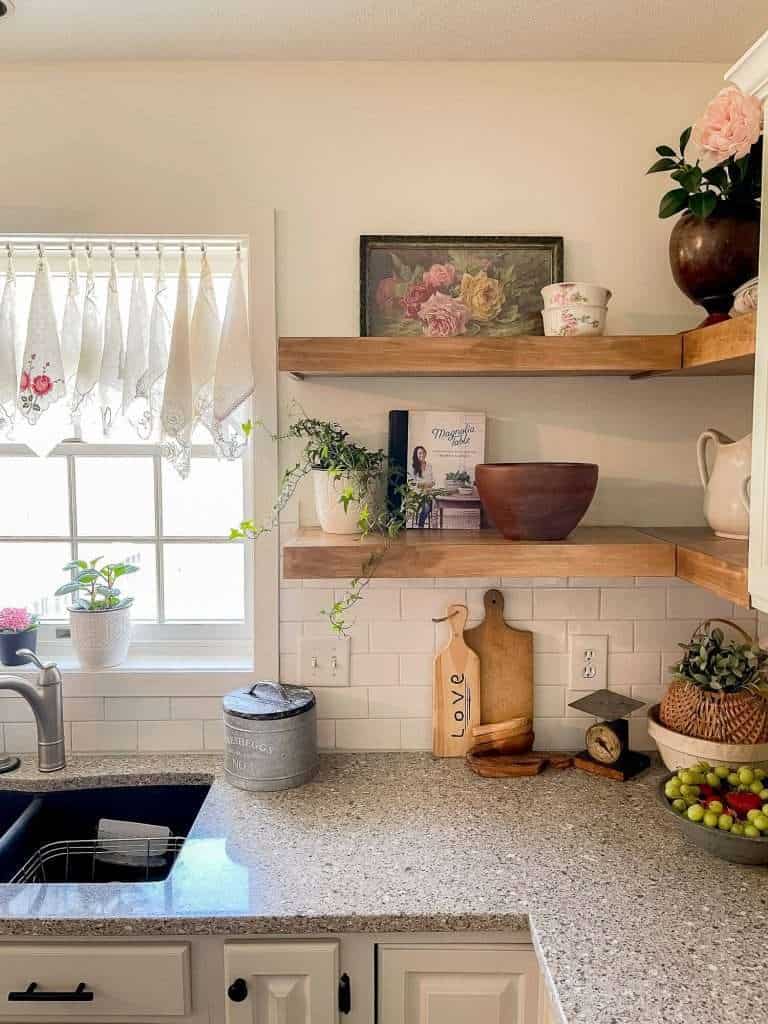
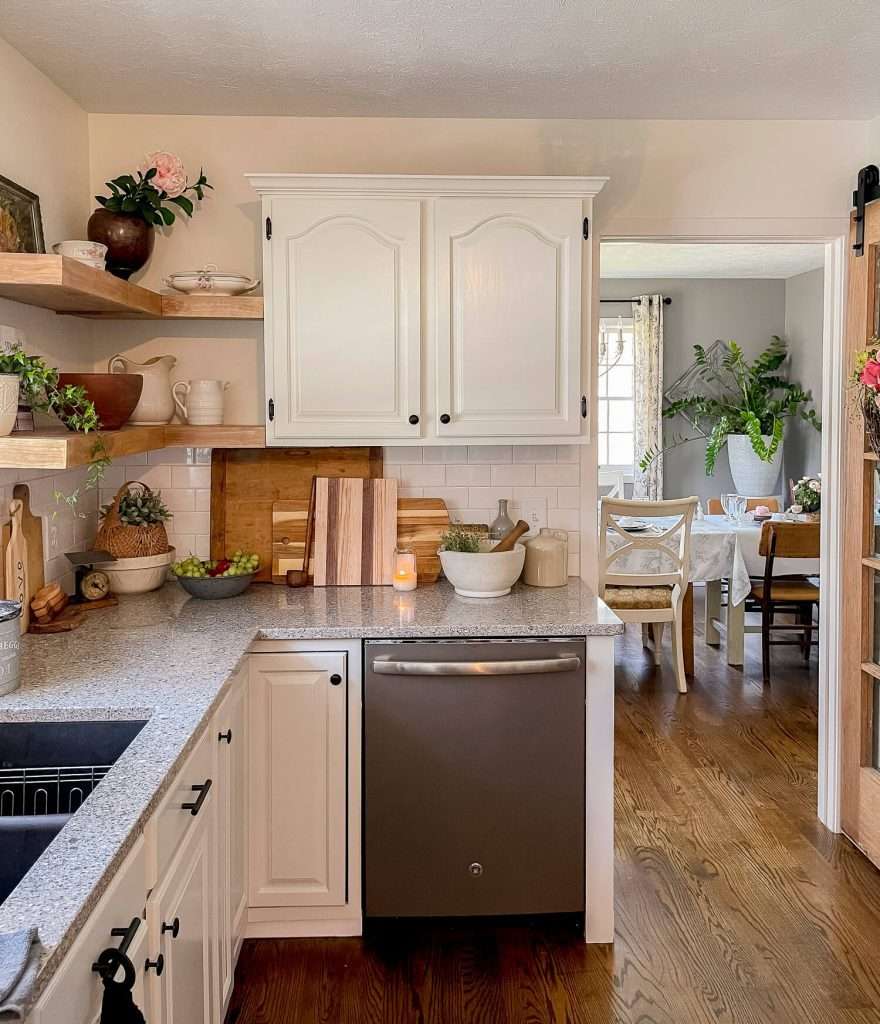
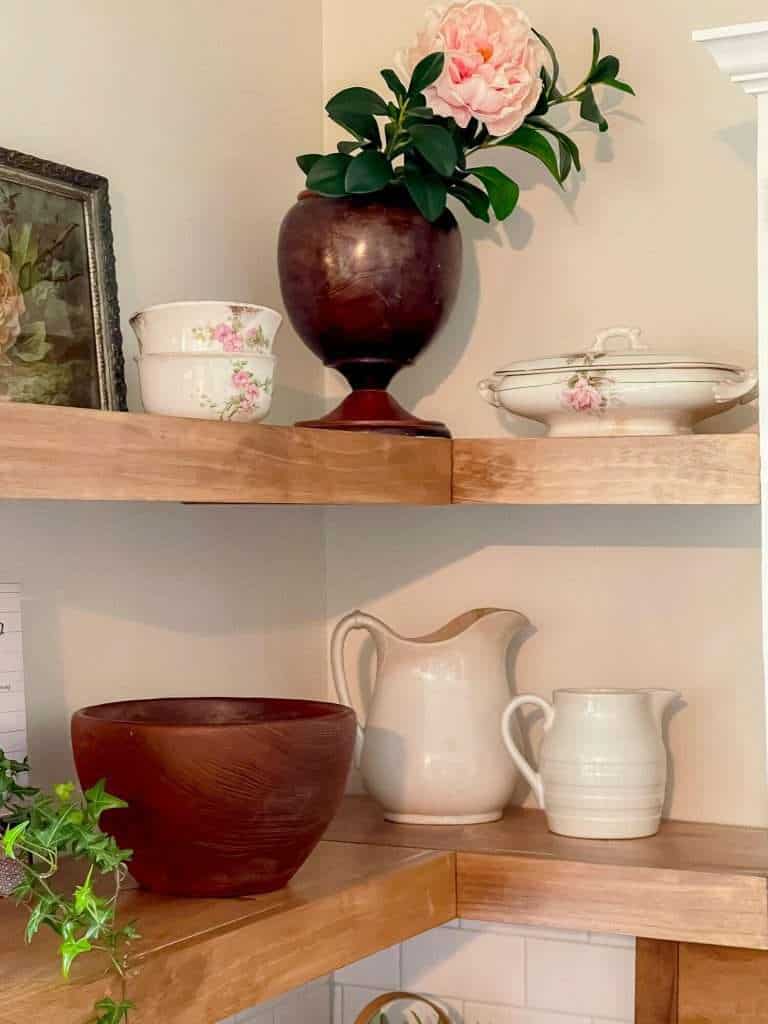
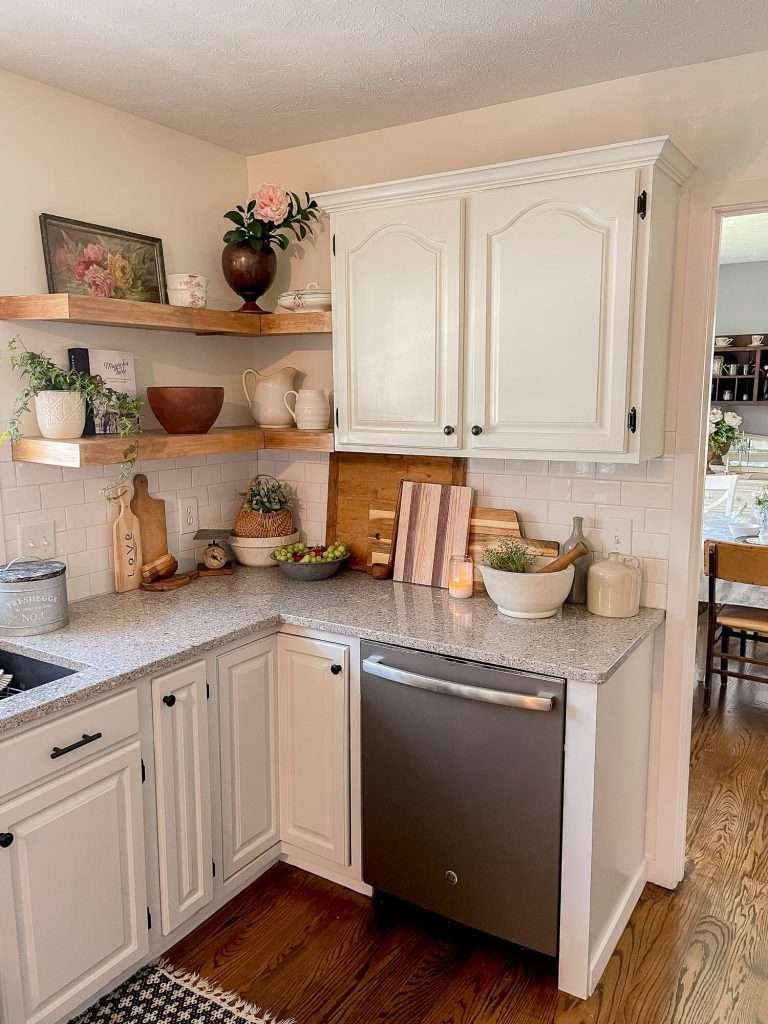
Decorate Your DIY Floating Kitchen Shelves
I love how these rustic floating corner shelves turned out! Now it’s time to decorate and enjoy! I know my mom has already been having fun decorating her new kitchen shelves.
If you’ve been waffling between adding floating shelves to your kitchen vs. upper cabinets, make sure to check out this post on 15 pros and cons to open shelving.

And, if you’re looking for decorating tips for your newly built shelves, you can see how I decorate my corner kitchen shelf for the seasons in these posts.
- Fall Kitchen Shelf Decor
- Summer Kitchen Shelf Decor
- Spring Kitchen Shelf Decor
- Christmas Kitchen Shelf Decor
Thanks so much for stopping by the blog today! Make sure to subscribe for all my freebies and tutorials to be sent straight to your inbox.
You can follow along with projects like these in real time over on my Instagram as well! And I share weekly videos on YouTube for more inspiration.
~ Sarah
You Might Also Like…
More DIY Projects

hi, grace nice post thankx
What a lovely design! I just moved to a new house (we’re redoing everything on our own.) Thanks for the inspiration! 🙂
Love these! Do you think this could be done with a wood cleat instead of the metal rods?
It’s possible, but just remember that a cleat will only support the backside so any weight on the front of the shelf may cause sagging.
A very beautiful and luxurious kitchen corner, I really like warm kitchens like that!
Such an amazing information
I just had to leave a comment and express how much I enjoyed this blog post. Your writing not only educates but also entertains. It’s rare to find a blog that strikes the perfect balance between informative and engaging. Keep up the fantastic work!
Thank you so much!