

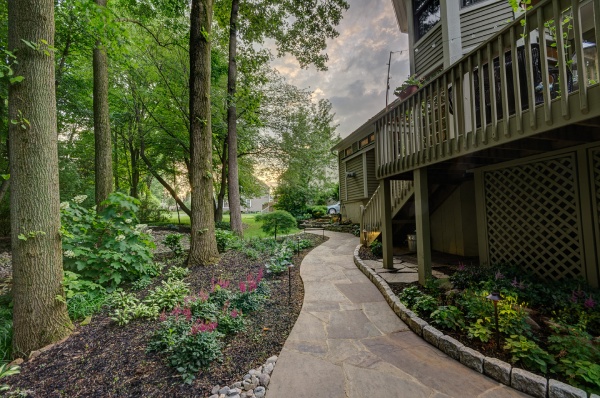
Do you feel that your garden will look more attractive with some aesthetic edging? If there are variegated plants in your garden, patio, or backyard, you would need them to place in strategic location according to their requirement of light. For example, keeping cacti alongside rose beds will not look good unless you have incorporated a lovely garden border. Gharpedia herein wish to give you twenty amazing garden edging ideas that you can do by yourself to keep plants in different segments and create a stunning landscape altogether.
Amazing Garden Edging Ideas
DIY Tip – 1: Brick Edging
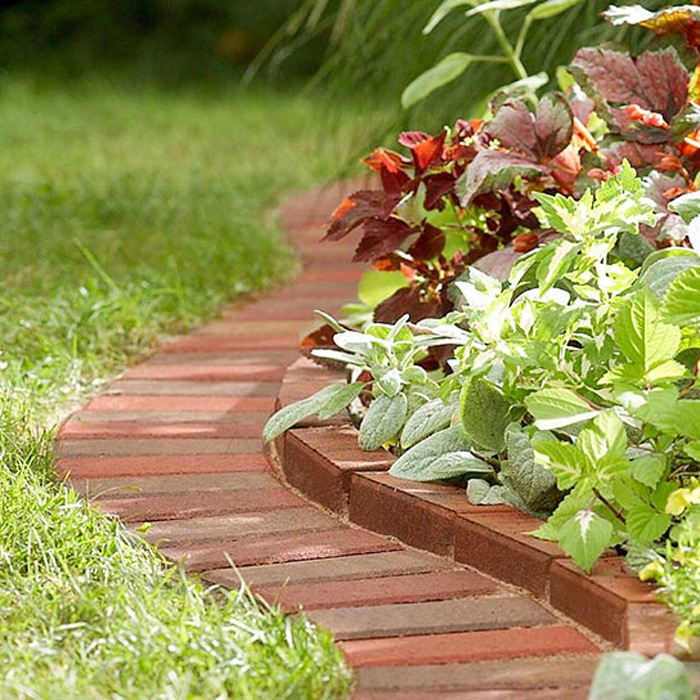
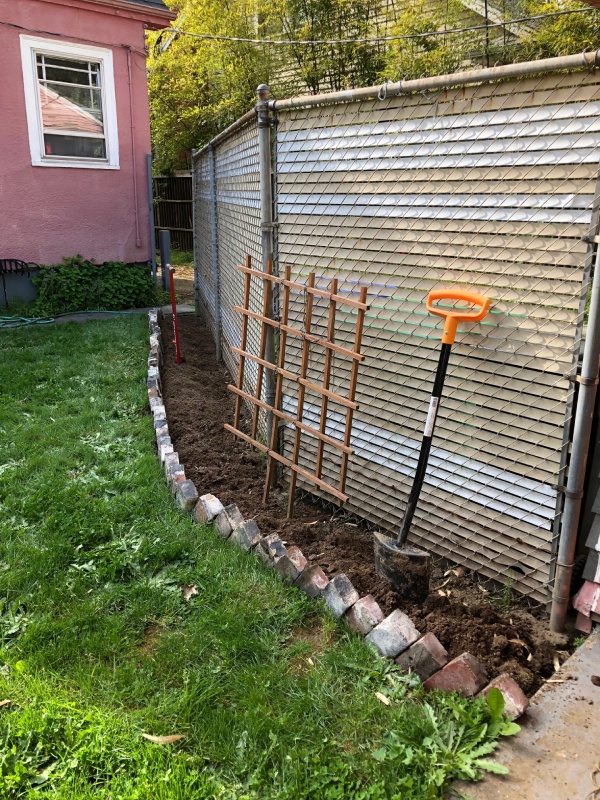
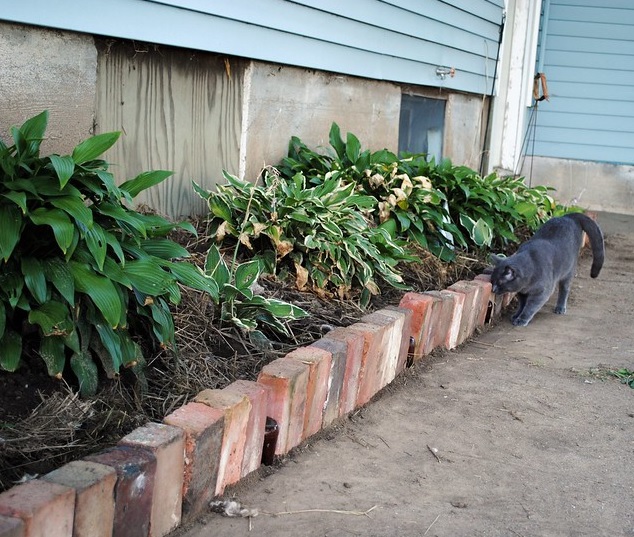
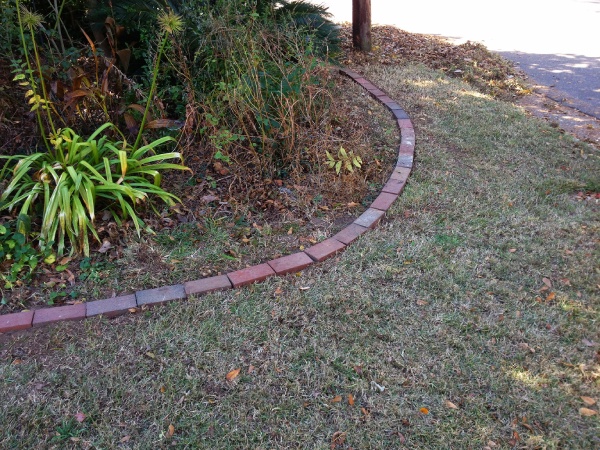
One of the most affordable and easy-to-install edgings for your outdoors, the brick edging can be done by an adult and it can be implemented within a single day. Multiple choices of bricks are available in the market, and no matter if you have preferred clay-brick or concrete block, or kerbstone, you can always create a perfect boundary between the lawn area and the planters or make a segment between two different types of plants.
You can either use concrete as the base or just dig the topsoil and create layers of compact paver base and stone dust to give a strong foundation to the bricklayers, especially in winter or damp monsoon. Align the bricks by using string, rope, backfill them and hose off properly to keep the edging firm.
Bricks may be laid on their side in a shallow trench, lying flat with the wide side down, or standing upright. Bricks can be used horizontally and vertically to edge your yard. It really brings the edge to a different level to combine the two techniques, though!
DIY Tip – 2: Wooden Log for the Win
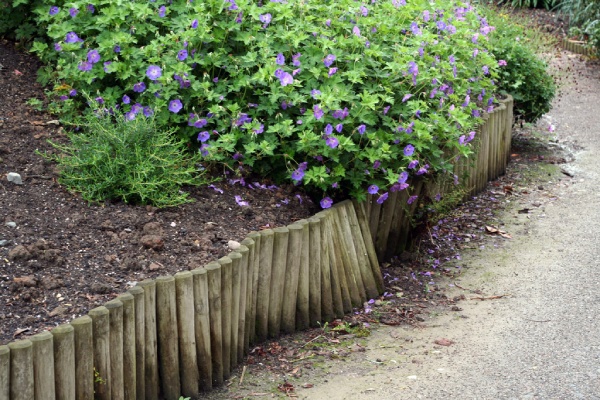
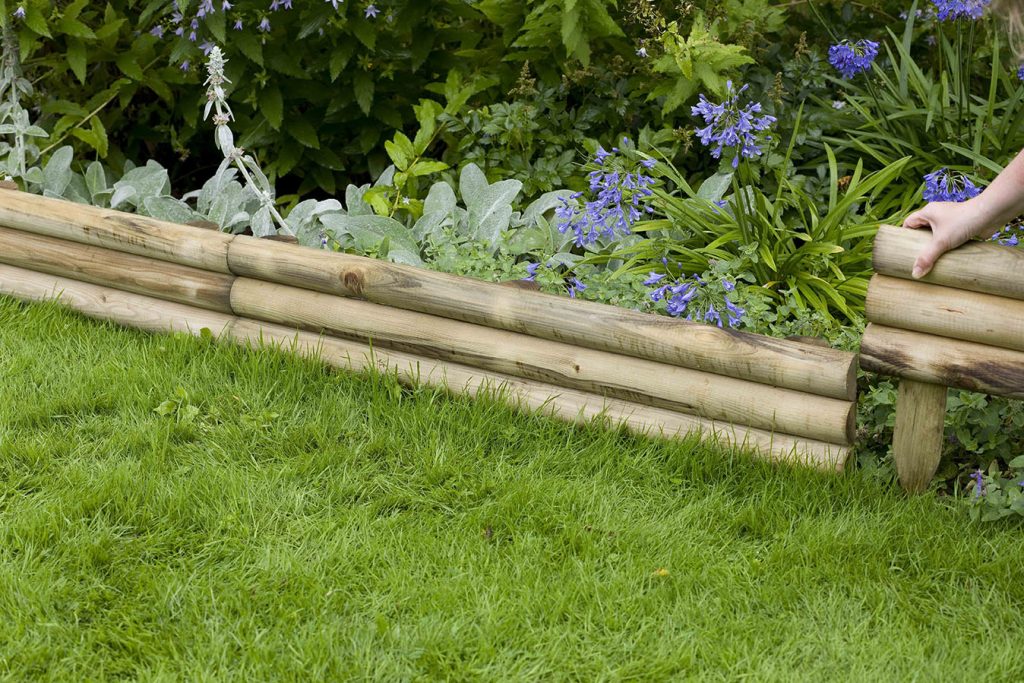
Nothing contributes more to the natural touch of your garden and backyard area than the wooden edging. You can use the superior birch and spruce logs cut in even pieces and place horizontally like a fence with the help of rope for a more visually appealing edging.
However, if you want a sturdier solution, you may go for timber and bamboo logs that are placed vertically side-by-side. You can keep them tightly attached to each other or keep a small space between them to pass hoses. In damp and cold areas, these might not be good options due to overgrowing moss, fungi and mushroom.
Bamboo logs are not only used for garden edging but also for making fencing. We have written a detailed article how bamboo can benefit you as a fencing material.

DIY Tip – 3: Put Cinder Blocks Edging
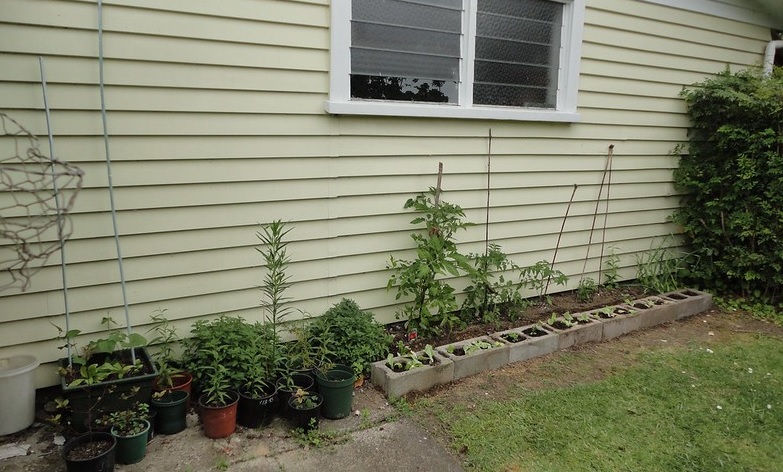
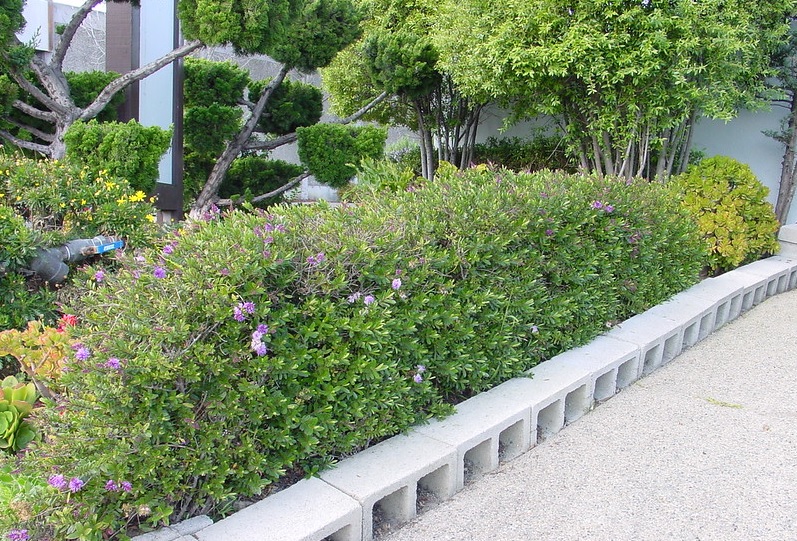
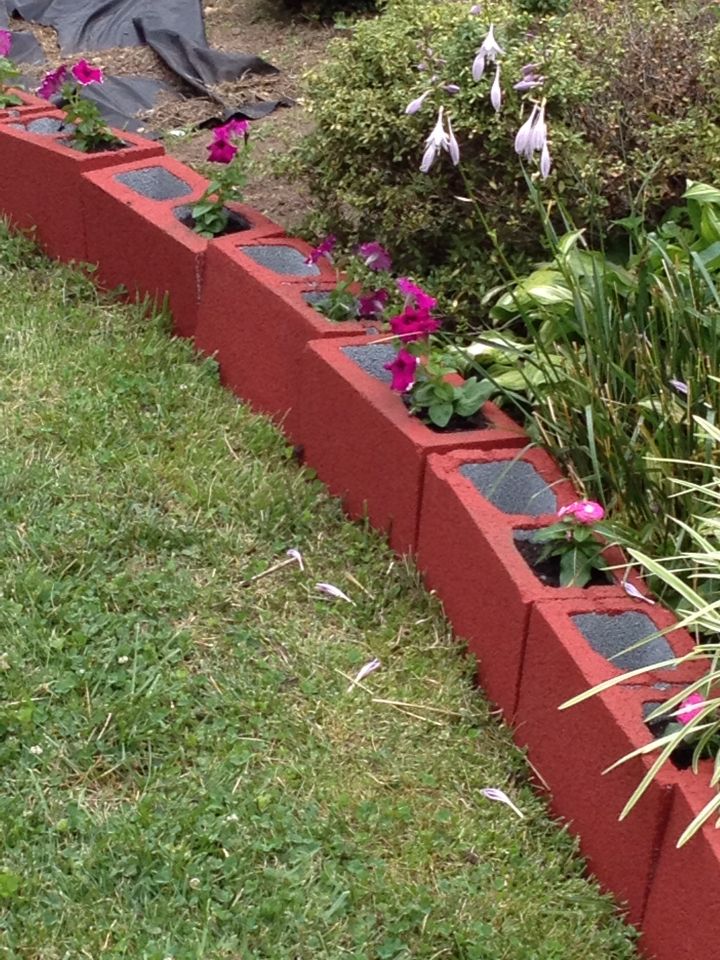
If you want a geometric touch to the garden and a driveway edging, the cinder blocks can be a more long-lasting choice than wooden edging. These are hardly affected by weather or harsh climate and hardly rot. You can install them just like brick edging where you lay the cinder blocks in the trench keeping on their tops visible from above or create the base with concrete to resist shifting, weed growth and durability.Quite an inexpensive solution to keep planters and walkway separate, the cinder edging can be utilized for holding planters if placed with the holes upward and for drainage if you keep the holes facing outward. You can paint them as well.
DIY Tip – 4: Cobblestone Edging
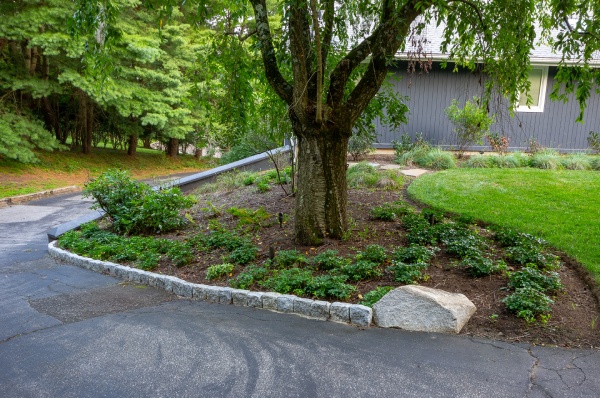
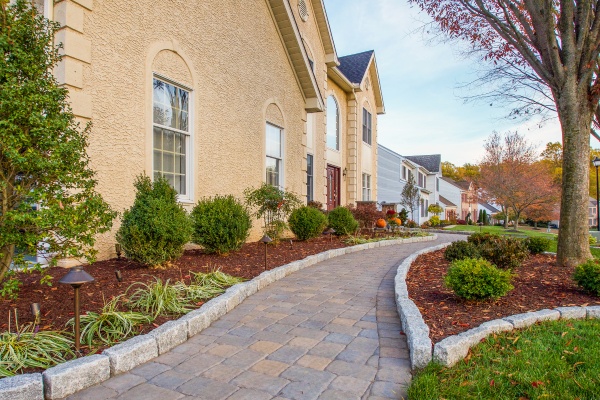
Having the rugged charm of the old English period, the cobblestone or granite edging on patios, driveways, walkways and natural gardens are available in both round and square shapes. This granite edging will add a soft touch to the harsh brick, gravel or flagstone walkways while being in sharp contrast with the greenery of the garden. Being heavy and hardy, this granite edging will also keep the landscaped plants safe while will indulge trimming weeds and mowing.
On measuring the dimension of the landscape and choosing the proper size (the bigger, the better), spray the surroundings. Dig the trench deep enough to keep one cobblestone leaving an additional 2-3” space where gravel or crushed rock can be filled up to a leveled base.
DIY Tip – 5: Pallets Edging

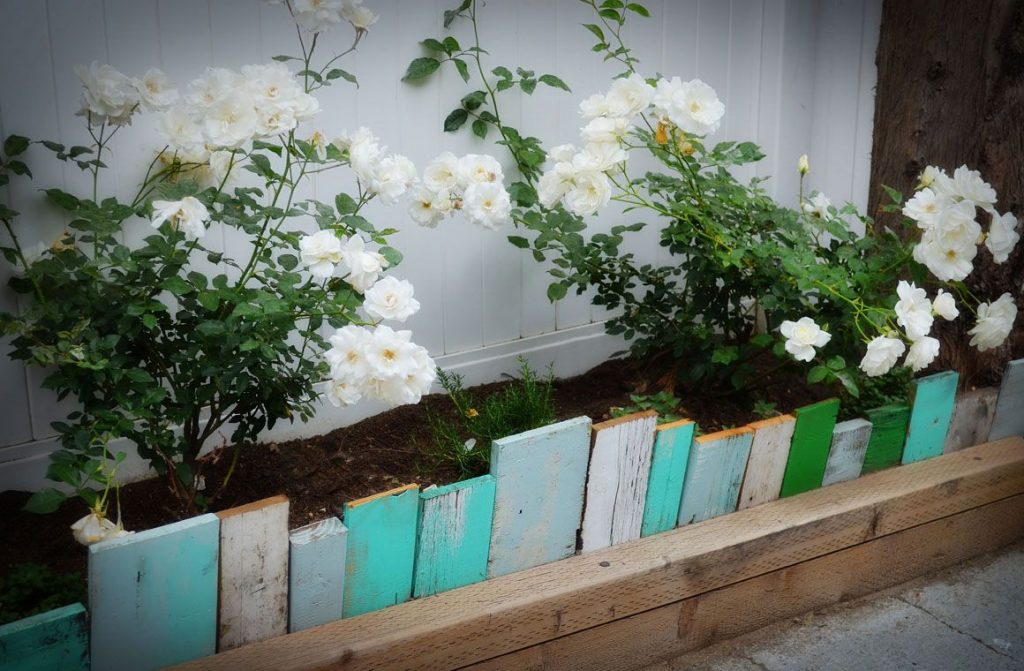
Reusing a used pallet can be one of the cheapest edging solutions in comparison to cobblestones and cinders. Old wooden crates or wooden shedding parts can be up cycled as fences of overgrown shrubs and hedges, as well as a boundary of small ponds and fountains in your garden.
Instead of using lots of floor space, you may create some vertical planters with the pallets, or you may create a small seed compartment or greenhouse or potting bench with few compartments below to place the garden essentials here.
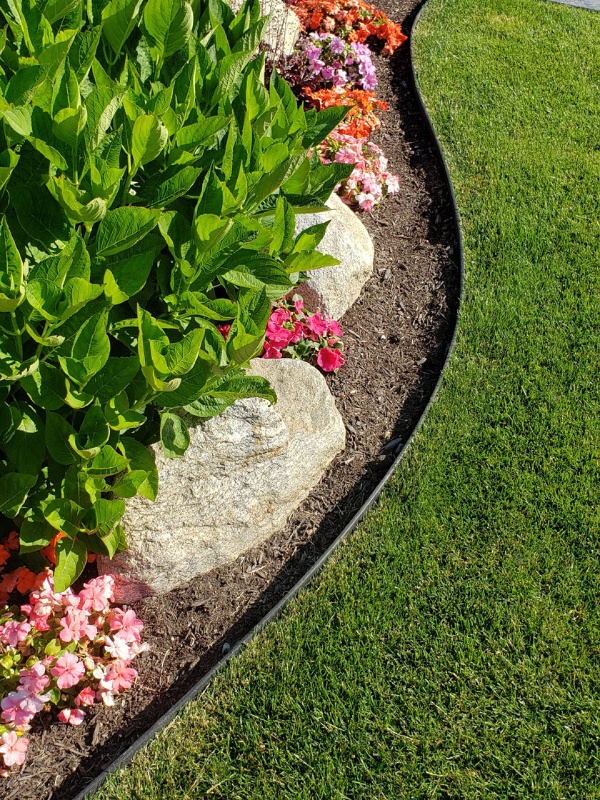
DIY Tip – 6: Rock Edging with Small or Large Stones
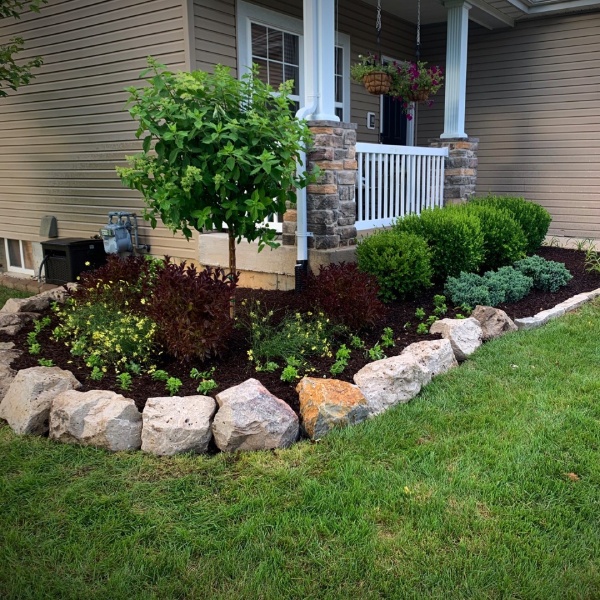
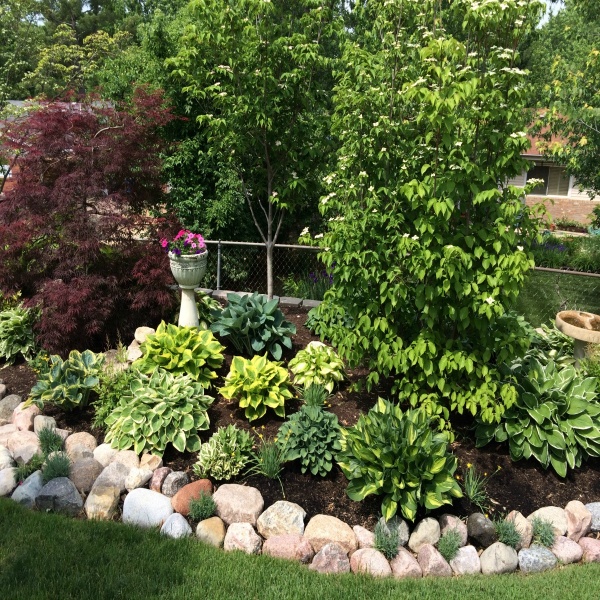
Undoubtedly the best in low-maintenance and usually long-lasting edging solution comes out from rocks of different shapes and sizes. If you live somewhere with an abundance of rocks, chances are that you might not have to spend a single penny in creating a garden edging with as many different types of rocks you want.
Mix and match with different sized rocks or go for the same shaped ones to create an even edging. Place some boulders strategically to add an aesthetic touch or place some of them near a pond or planters where you can sit and relax.
Apart from garden edging, we have explained some other ways of making your garden more appealing.

DIY Tip – 7: Coco Fibre Edging
You can either create coco fibre sheets at home with coconut fibres extracted meticulously or cut down labour by getting one online or from the nearby garden supply store. Although a bit costly, these fibre sheets are lightweight, easy to install on the soil and will last for many seasons, and commonly known as coco peat.
Coco fibres are permeable to air, water, and nutrients. Besides, coco peat is nowadays a common soil substitute, thereby; you can utilize these by planting some succulents to create a plant-based edging.
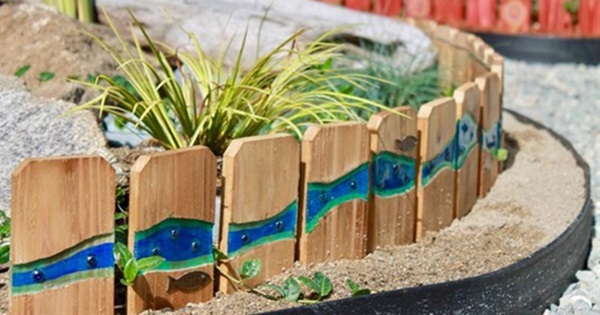
DIY Tip – 8: Farmhouse Inspired Twig Fence
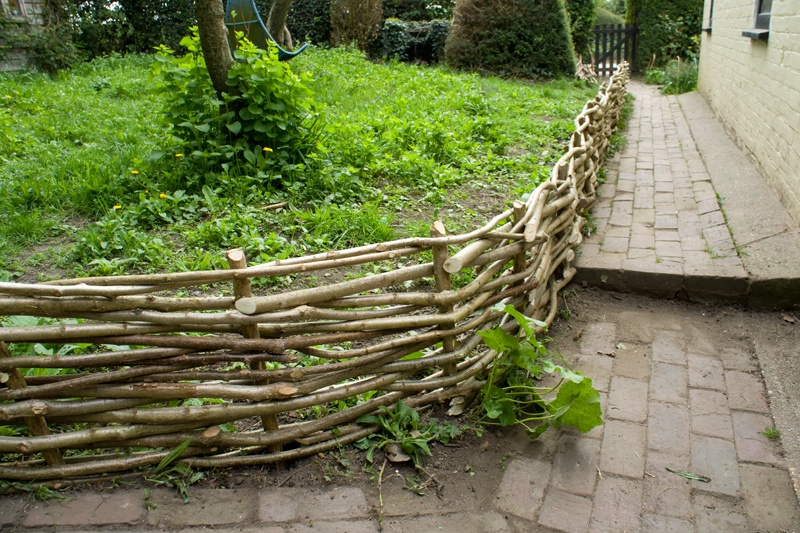
Just as described in various novels based on countryside, you can install a twig fence for a rustic look. You need to pass the twigs in a zigzag pattern to make the fence stand steadily. For better endurance, you should bind them with wires. Surround your flowers, new saplings and tall trees with twig fences to avoid damage from bad weather and pests.
Although cost-effective, these are not a long-lasting option because within 2-3 years, they mostly start to wither even though you have woven them tightly.
As we are talking about a cost-effective solution, do not forget to read Gharpedia’s article on money-saving landscaping tips.

DIY Tip – 9: Repurposed Tree Trunk Fencing
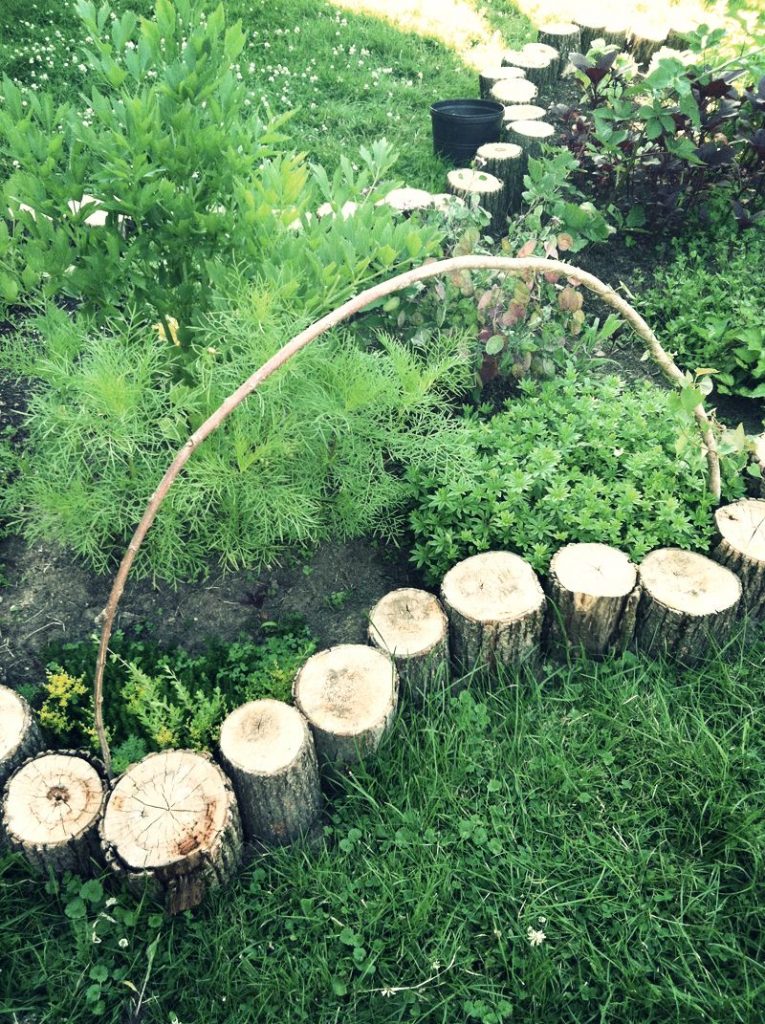
Just as repurposed wooden logs, you can recycle the tree trunks for using them as fences. You may place thick tree stumps strategically like a boundary between the lawn area and the plant beds so that anyone can sit back on the stumps if needed. You can also place planters on these trunks to create a more aesthetic appeal or add some garden decorative. The relatively thinner trunks can be used as the boundary between the plants and walkways
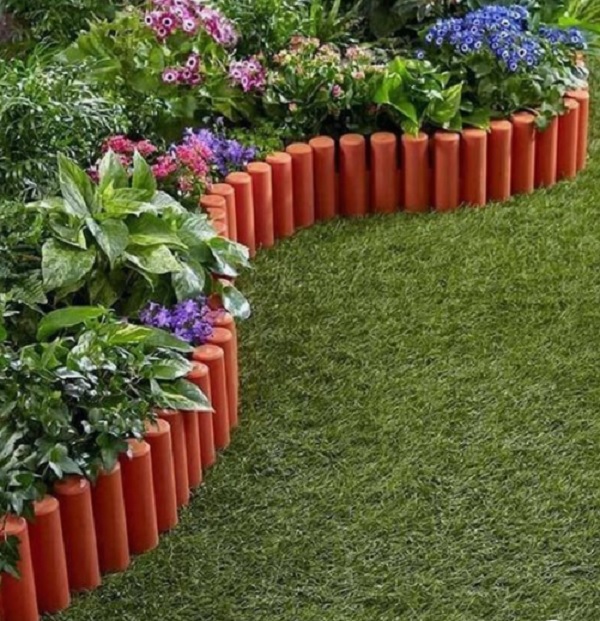
DIY Tip – 10: Terracotta Pipes Edging
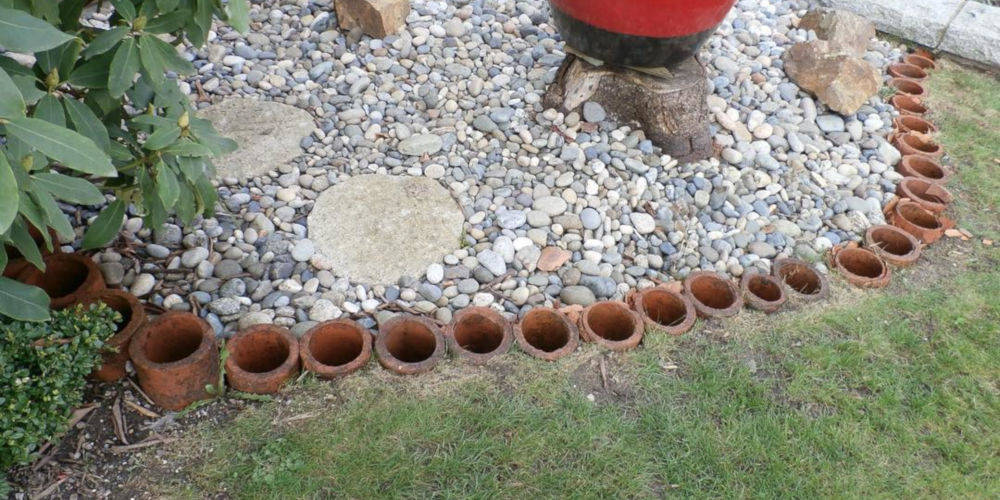
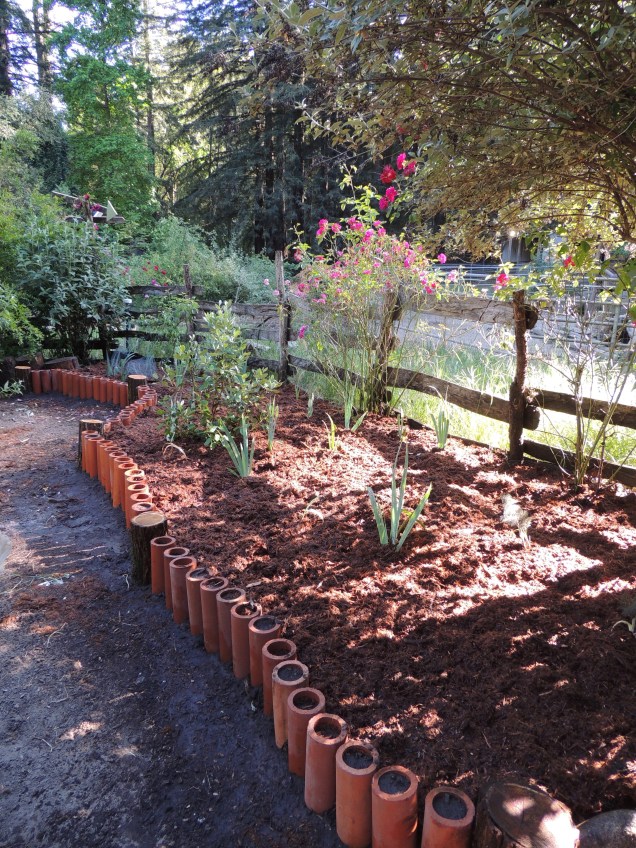
Terracotta or burnt clay pipes can be incorporated in the garden as a two-in-one fencing approach where hoses can be passed through the pipes for watering the plants. You can also cut several pipes in small pieces and place them snugly standing side-by-side to give a bamboo-fencing look. What is better, you can paint them accordingly for adding some vibrancy or plant climbers alongside so that they can grow with the support of these pipes.
DIY Tip – 11: Seashell Garden Edging
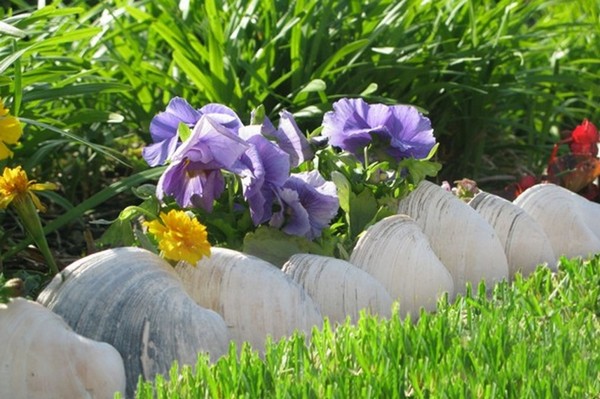
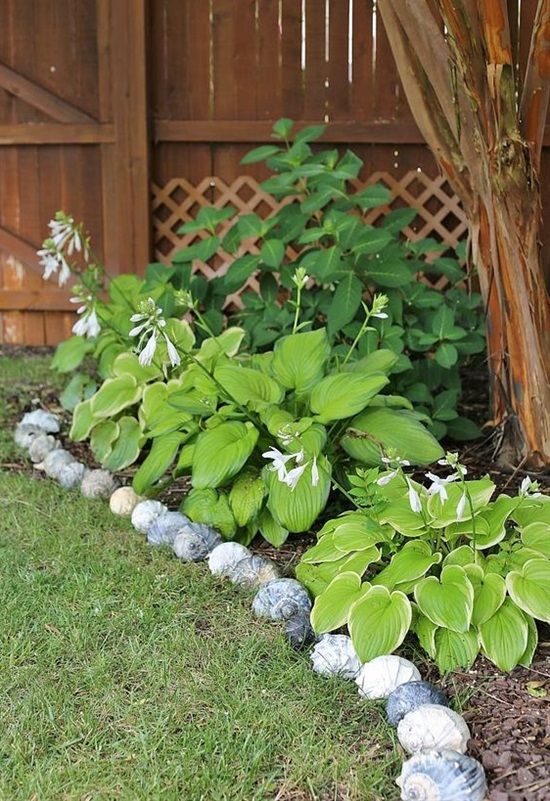
Looking for something extra-ordinary thing? Line up clamshells for your flower garden to create a beautiful border. With the help of grass and leafy greenery, large seashells can create a unique contrast. When you want a rock garden effect, you can crush some of the shells as well.
DIY Tip – 12: Gabion Wall Edging
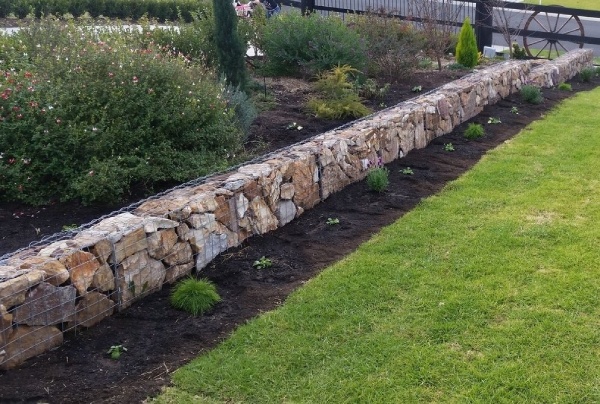
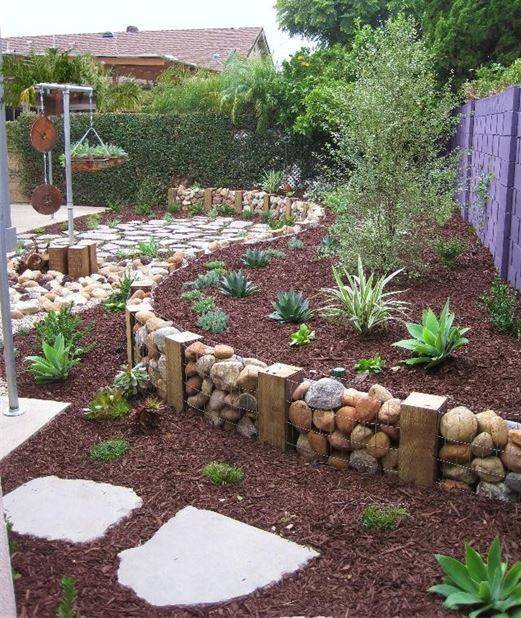
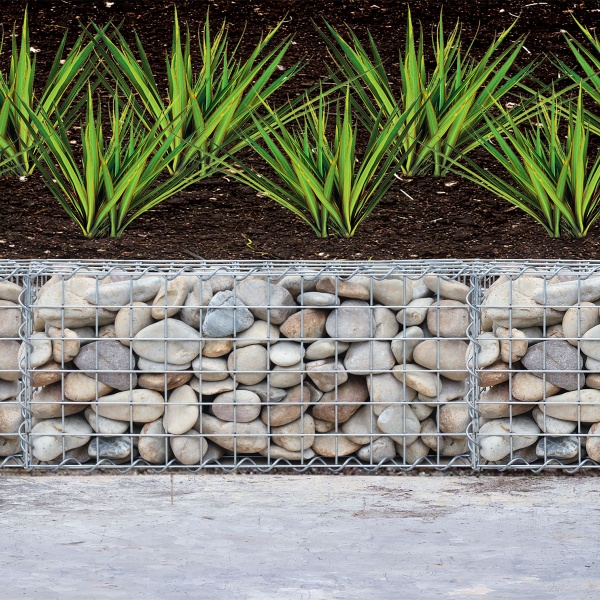
Use the gabion wall for edging if you want to give your garden a dramatic look. This is a great example of edging in masonry using stones of various shapes and colours to create an edge to separate the plants from the garden’s path. Gabions are also useful when you want to retain earth due to the level difference between two adjacent surfaces.
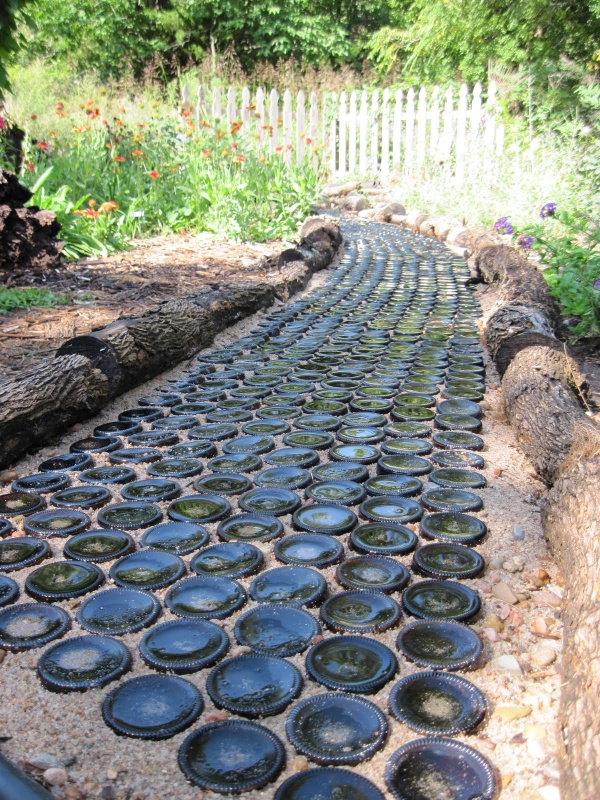
DIY Tip – 13: Glass Bottle Edging
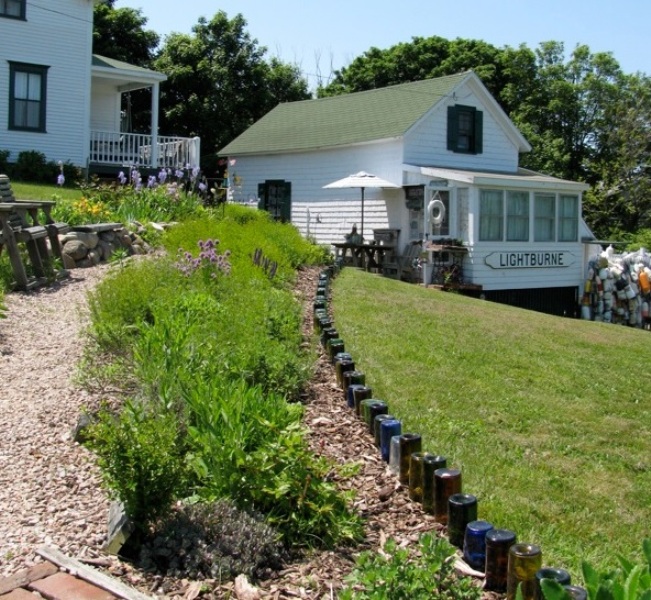
You can go your bit by repurposing your empty wine bottles in your garden for the edging! For raised flowerbeds and pathway borders, bottle edging is somehow perfect. Collecting a variety of colors provides some awesome visual appeal. Wine bottles typically come in clear or green glass, but striking blue bottles are also available. You will need to dig a trench to build the edge and bury the bottles as deep as you want. Only turn them upside down and bring them in line. This is one of the most cost-effective and ground-breaking garden edging concepts on our list which can have a very striking impact on your garden with minimum cost.
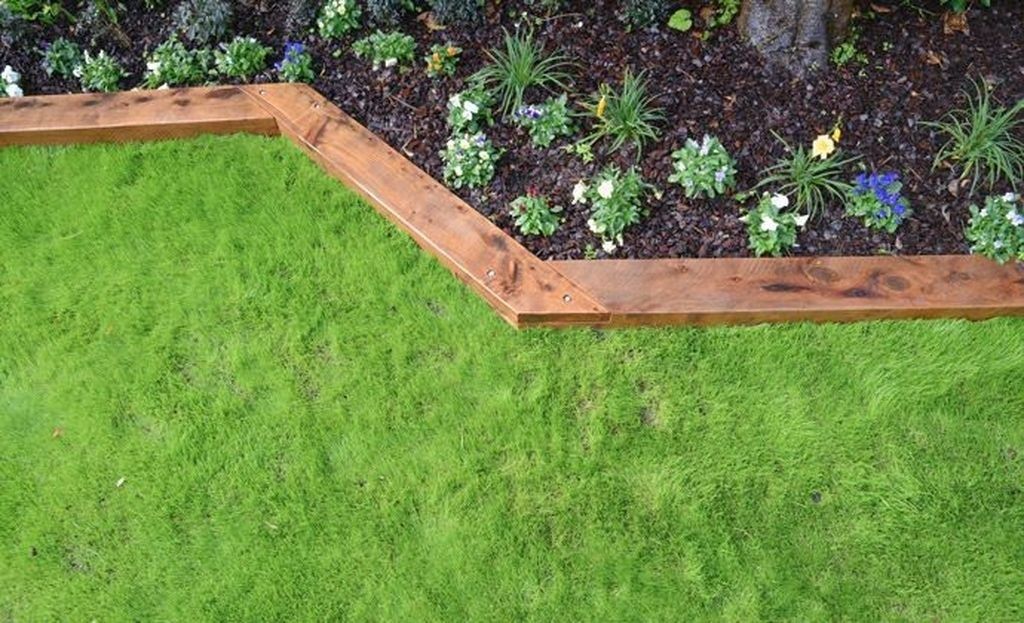
DIY Tip – 14: Poured Concrete Edging
For a newbie, this is usually not a DIY work, as you need to create a mould form before mixing and pouring concrete into the mould form. You should hire an expert, as errors cannot be easily fixed. It will last for a long time. However, the layout of the planting bed can’t be easily modified in future. If this seem to hard for your gardening skills, you can instead utilize ready-made concrete fence posts and lay them over the edge of your plant beds.
DIY Tip – 15: Rubber Edging
Today, a few companies produce rubber edges that can be pounded into any shape. As it is typically made of recycled tires, it is almost indestructible. They will last long but in formal or cottage garden settings, it does not look fantastic usually.
DIY Tip – 16: Tire Rim Garden Edging
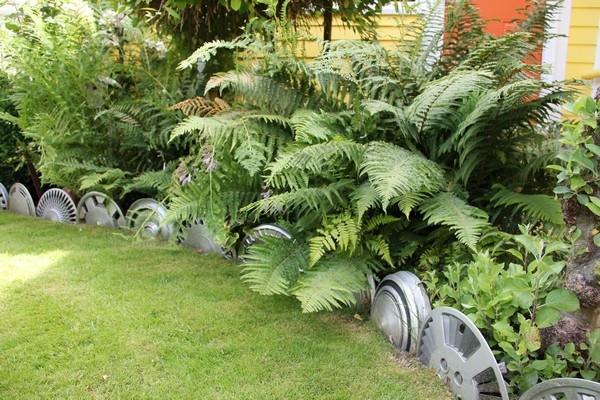
You were expected to see this one coming, right? This wacky take on garden border will add a unique touch to your garden, whether or not you like cars. Outcome? A memorable garden decor of which, you can be proud. It is durable too.
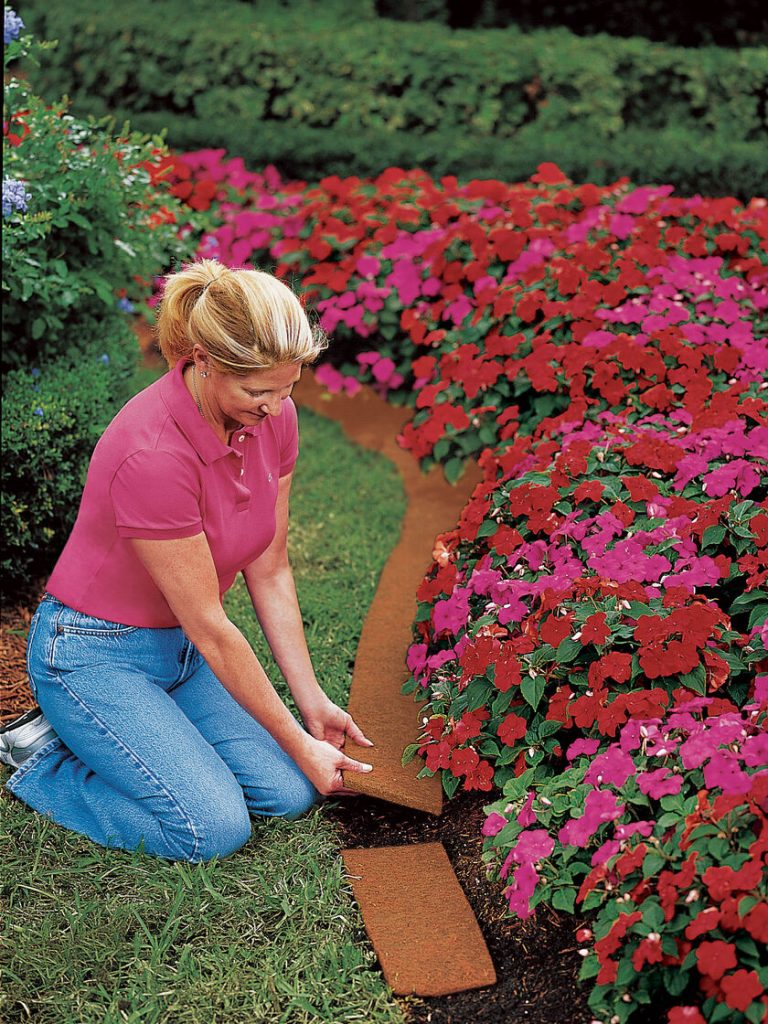
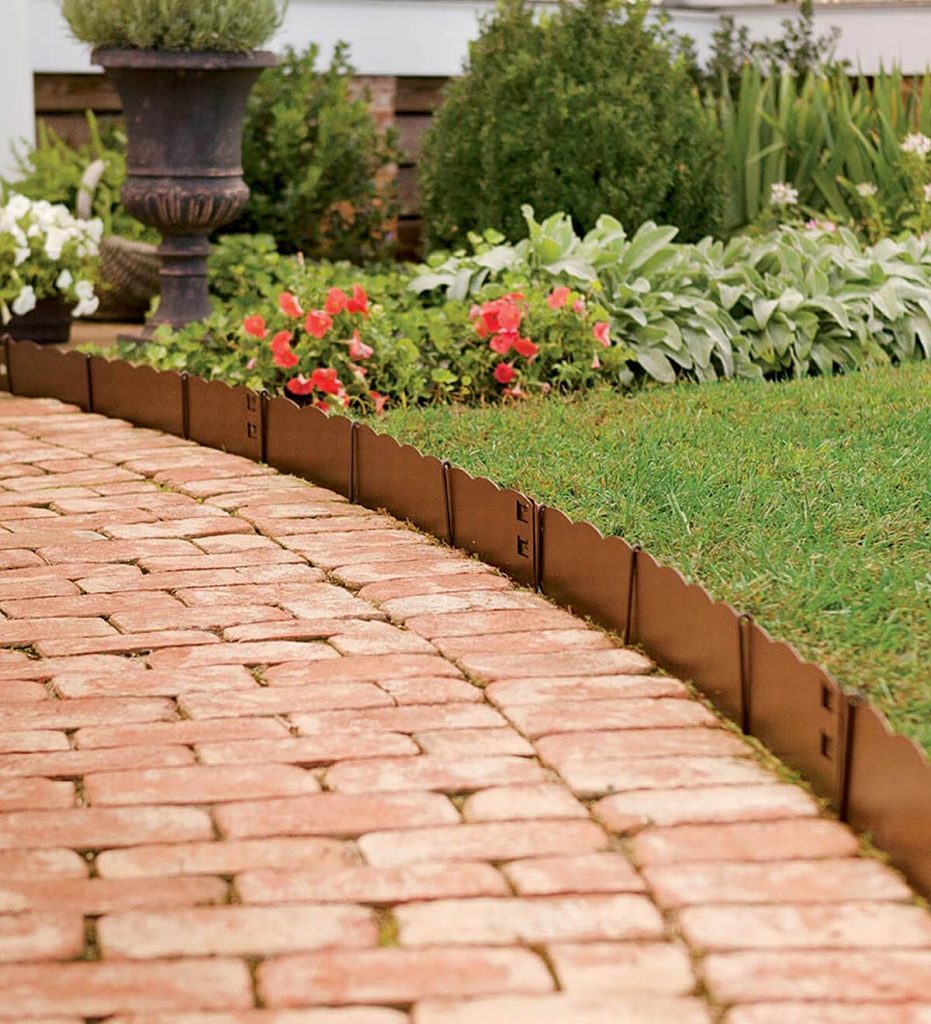
DIY Tip – 17: Plastic Mulch Edging
This basic but effective lawn edging option is easy to lay down and it is inexpensive too. But it is possible to buy the black plastic edging at any hardware or lawn and garden shop. Bury much of it to attract the eye to the flowers for a tidy lawn and garden space while preserving the clear thread. The best part about this black edge is its ability to build unique looks with lesser effort.
DIY Tip – 18: Decorative Flower Fence
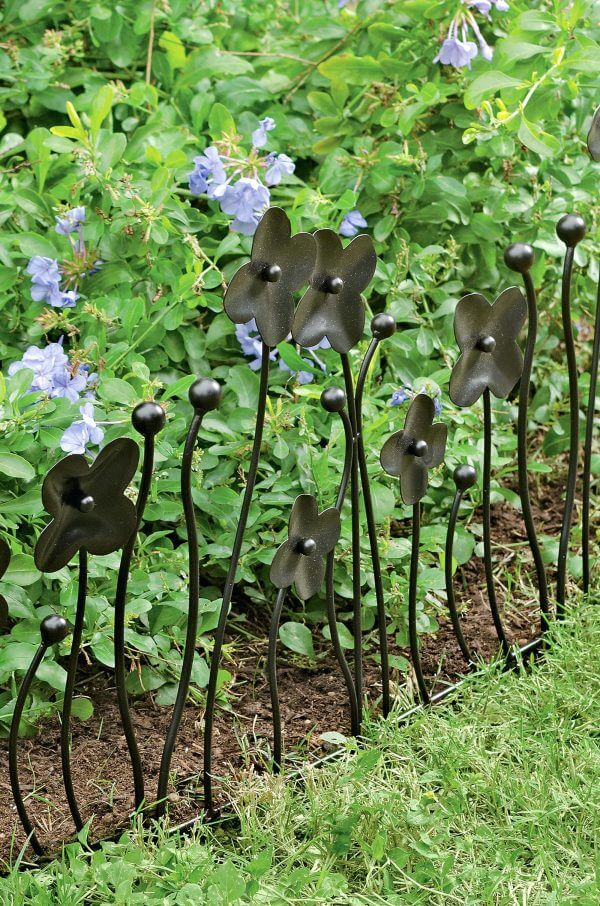
These flower-shaped edging posts are made of black coloured metal and are ideal for showcasing your small garden while bringing life to your yard. In their own way, the basic four petals and wavy stems make these stakes special. They behave like a small fence, but their simplicity makes it easy to find matching flowers.
DIY Tip – 19: Short Scalloped Copper Edging
Copper is ideal for drawing the eye to the place that you wanting people to look at. This concept of garden edging is suitable for parks, walkways, or landscaping to attract the eye to different areas. These copper-plated pieces also give your yard a clean look. To encourage the copper to add colour to the garden, be sure to use green plants with little colour.
DIY Tip – 20: Painted PVC Stakes Edging
These PVC stakes can be painted with any colour you want, stuck anywhere you want, and can be laid out in any shape you want, and its low maintenance has marked it as a quick and easy DIY garden edging choice for the enthusiasts. These are also very inexpensive and versatile making them suitable for all types of gardens. For more affordable home & garden finds, check out Big W’s weekly specials for some more ideas.
Conclusion
No matter how well maintained plants you have, the visual appeal might be lacking if you have not arranged the planters and plants properly. Those who find their paradise among the plants often feel the need of proper landscaping to make the garden look more pleasing to the eyes. The ideas shared here are some of the best ideas for borders for your garden. Try out any of the above-mentioned garden edging ideas or customize several of these according to your choice to make a unique combo.
Kitchen gardening is equally important, much like landscape gardening. So, we have published a few kitchen garden posts as well.
How to Start A Kitchen Garden?
Tips to Start Organic Kitchen Garden in Your Home!
Tips to Maintain Your Kitchen Garden This Season!
Agro Farm Houses
Image Courtesy: Image 7, Image 8, Image 11, Image 15, Image 16, Image 17, Image 20, Image 22, Image 23, Image 24, Image 25, Image 26, Image 27, Image 28, Image 29, Image 30, Image 32, Image 33, Image 34, Image 35, Image 36, Image 37, Image 38
Author Bio
Sanjukta Ganguly – I am Sanjukta Ganguly from Kolkata. I have 9+ years of experience in content writing. I have written for multiple niches and genres like, health, travel, pregnancy, love and relationship, dating, hosting services, and WordPress, Press Release, Web Designing, Case Study, Thesis, Proof Reading, Academic Writing, etc. I can handle the work of 4000-5000 words daily.


