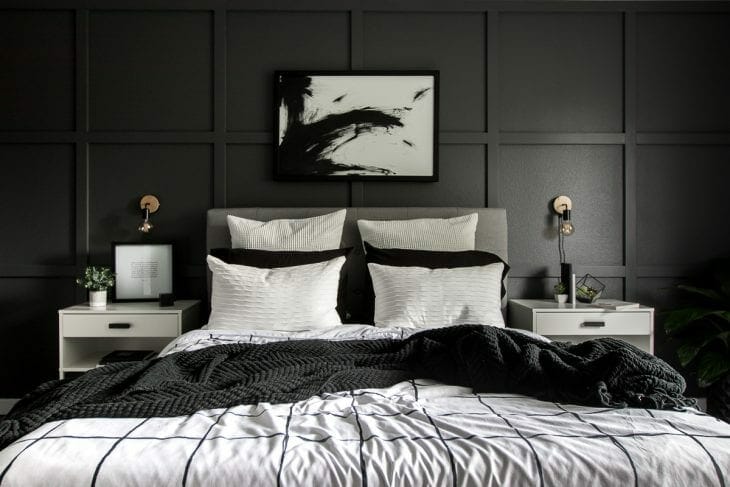
Make a feature wall in your bedroom with this simple DIY board and batten tutorial.
Wainscotting, beadboard, paint an accent wall, wallpaper, board and batten….there are so many different options on how to dress up a room. When we were in the early stages of planning for our master bedroom, I knew I wanted to do some sort of feature on the main wall. I loved the idea of doing a board and batten wall to give a subtle grid-like pattern to the space.
In case you haven’t seen our monochrome modern bedroom makeover yet, check out all the full details in this post to see the incredible transformation.
The board and batten turned out amazing and I’m so glad we decided to do it. It’s actually super easy to create if you can do basic math and have some time to measure everything a few times.
Let me show you how you can get this look with this simple board and batten tutorial and my best tips and tricks I learned.
*This post contains some affiliate links for your convenience (which means if you make a purchase after clicking a link I may earn a small commission, but it won’t cost you a penny more)! Click here to read my full disclosure policy.
What you need to make your board and batten wall:
- 11/16″ x 2.5″ primed MDF
- Finish nailer (since we’re attaching directly to drywall, the finish nailer is a better option than a brad nailer)
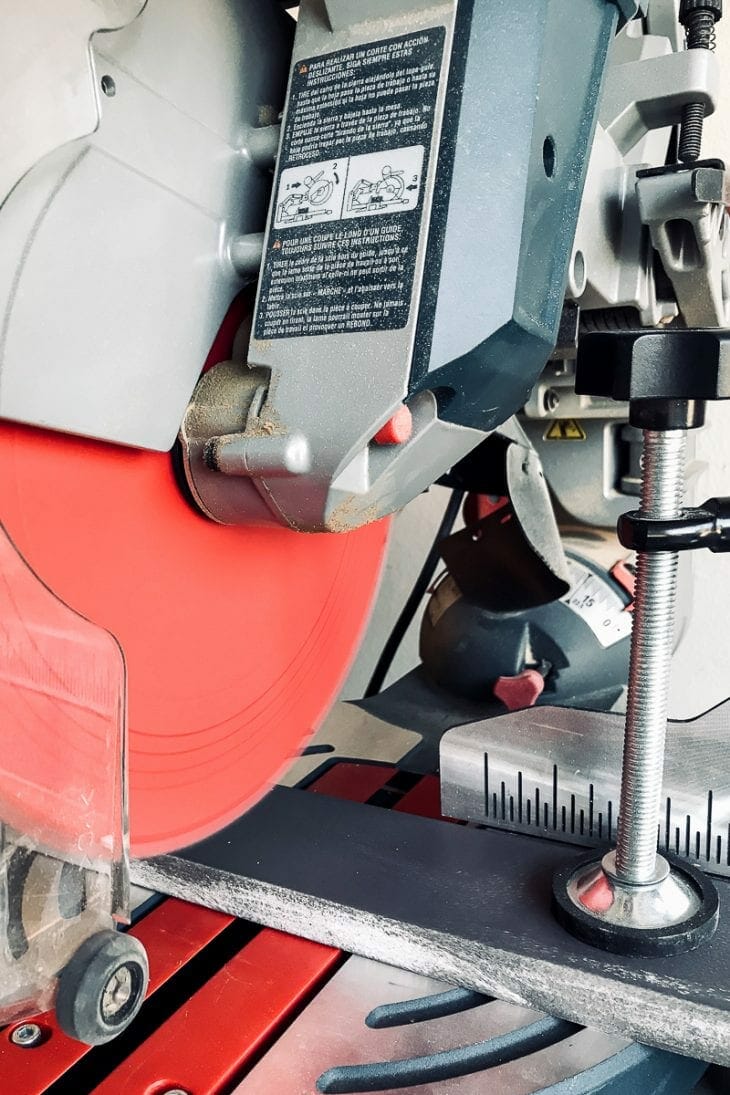
- Saw (a hand saw works if that’s all you have, but I suggest a chop saw to get all your cuts even)
- Level
- 2″ galvanized brad nails
- Spacer board
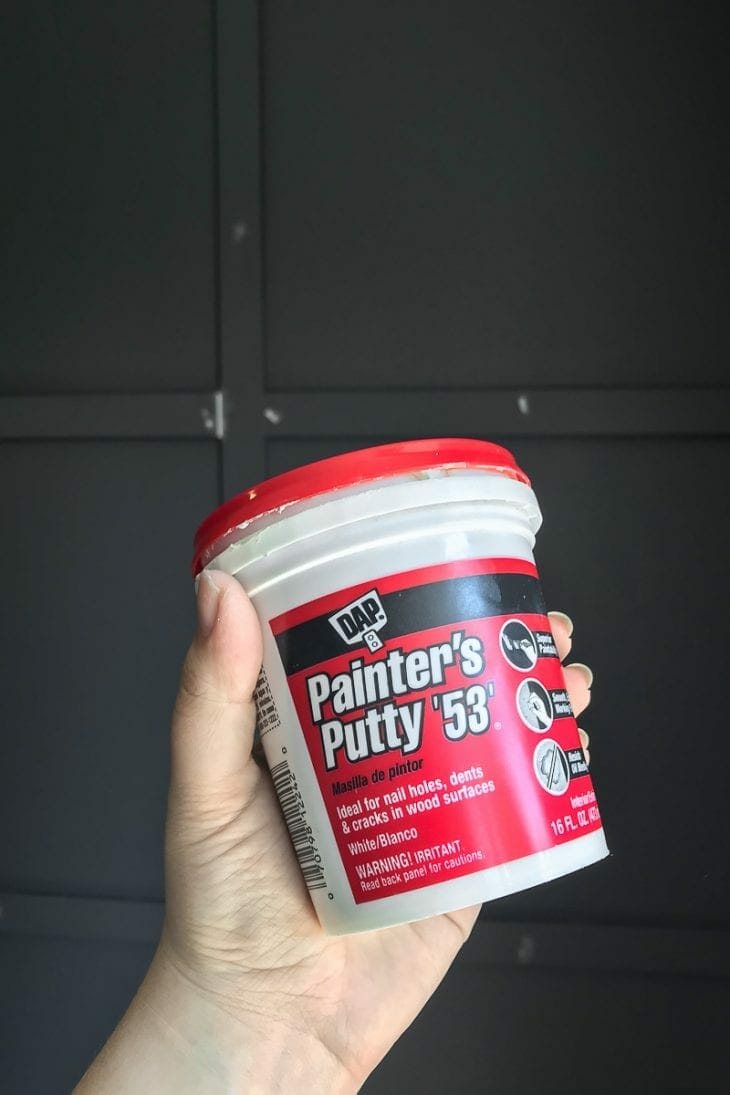
- Painter’s putty
- White acrylic latex caulk plus silicone
- Caulking tool kit
- Caulking gun
- Wall paint
Instructions
1. Measure Walls
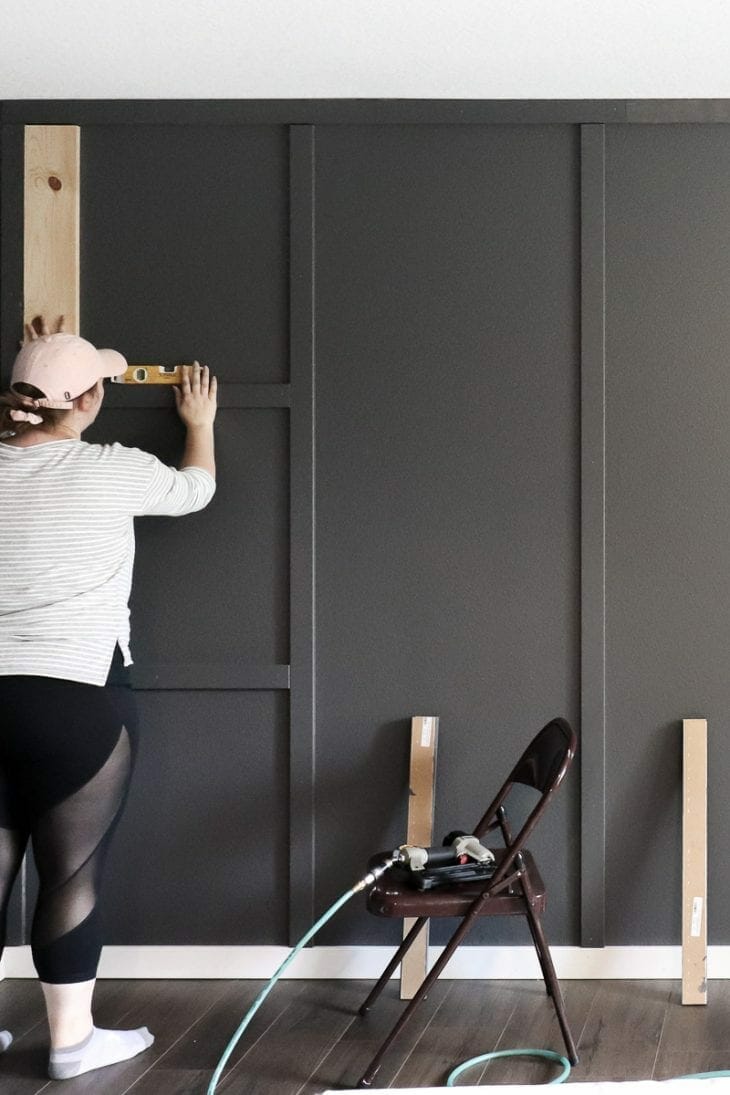
First, you need to measure your walls from side to side and from the top of the baseboard to the ceiling. Have someone help you because this needs to be exact (or as close as you can get to perfect).
Clara was a great little helper when I needed an extra set of hands.
2. Sketch
Once you have the measurements, it’s time to figure out your grid. This is going to depend on your wall size and the width of your boards. I wanted a pretty symmetrical look so I started out by adding a board to the top, side, and one in the middle. From there I played around with the layout until I figured out exactly how big or little I wanted the grid.
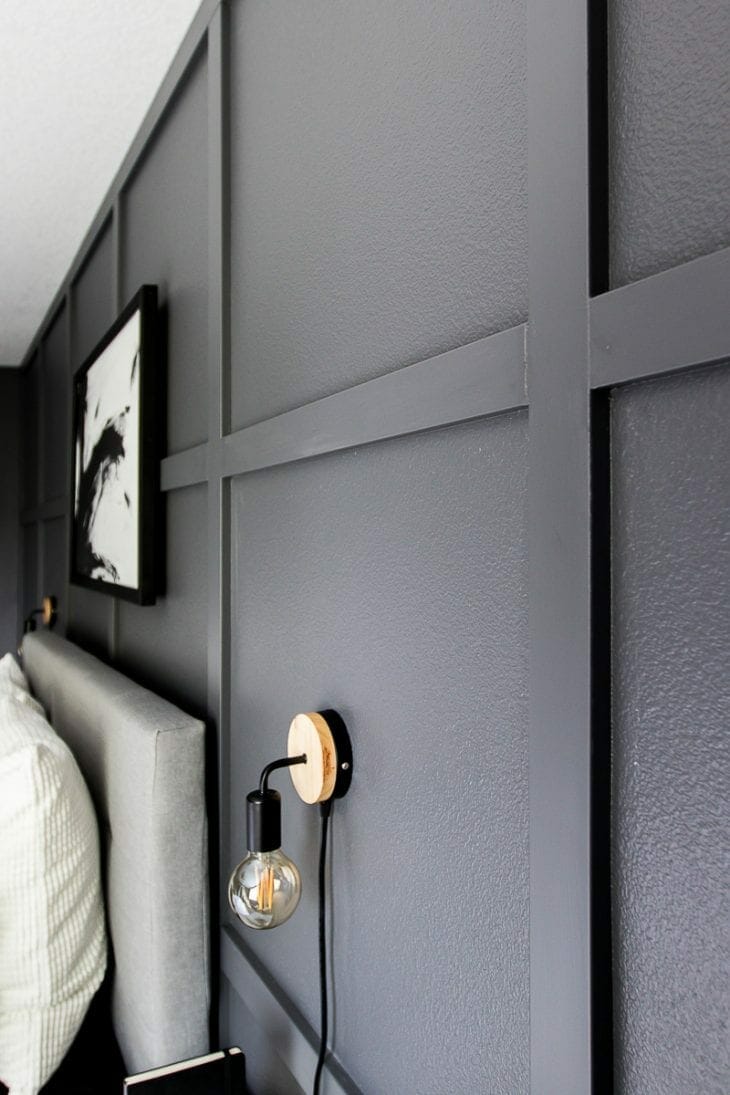
I’m a very visual person, so I drew out my wall in Adobe Illustrator with the exact dimensions and then added the width of the bed and two nightstands I knew we were going to be using. I realized at that point that the sconces could be perfectly placed in the center of one open area if I did my measurements right.
WIN!
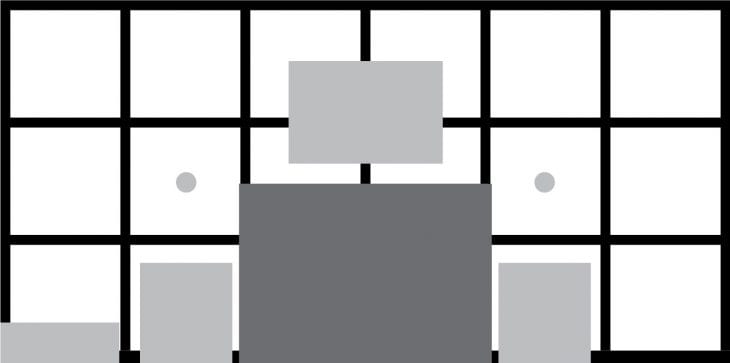
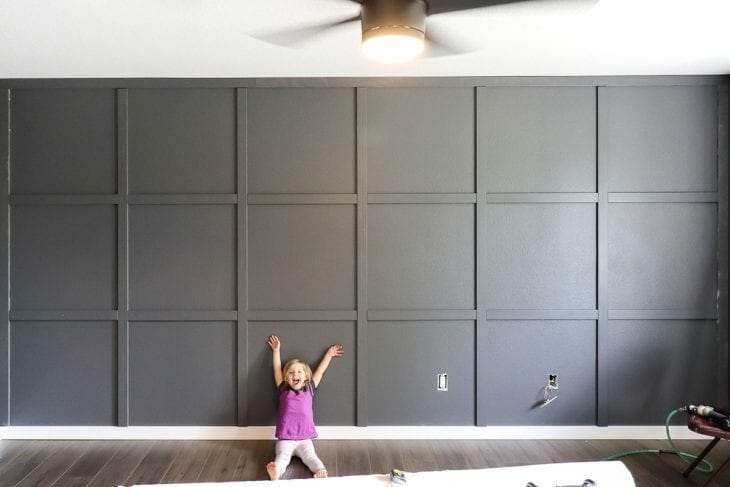
I was hoping to have perfect squares, but that wasn’t possible with our wall size, but it at least is close enough that no one will really notice it’s off just a little.
Once you know your measurements, figure out how many feet you’re going to need of boards. If possible, it’s good to get boards long enough that you can go the full floor to ceiling without having to put two boards together.
We used 11/16″ x 2.5″ x 10′ primed MDF so then we had enough height for our 8′ ceilings, plus enough for one cross piece from each board.
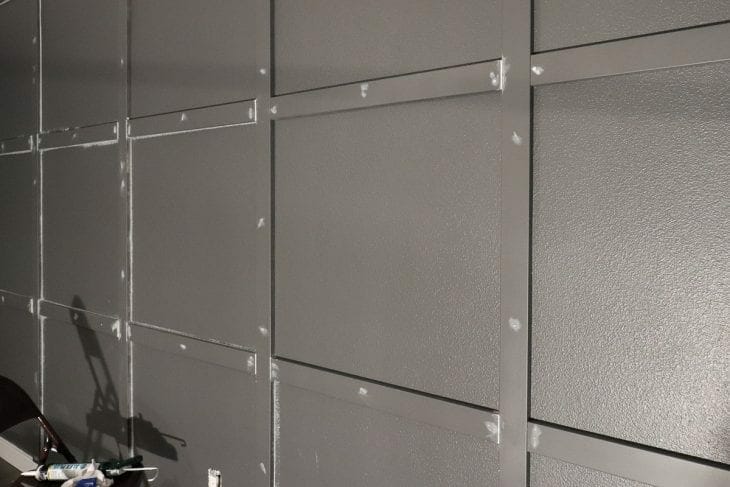
3. Paint
Before you start cutting and nailing, give all the primed MDF a good coat of the wall color paint. This will save you time in the long run. Our boards needed 2 coats of Peppercorn SW 7674, so I did one coat before it was attached to the wall, and then the second coat once the gaps were filled and everything was caulked.
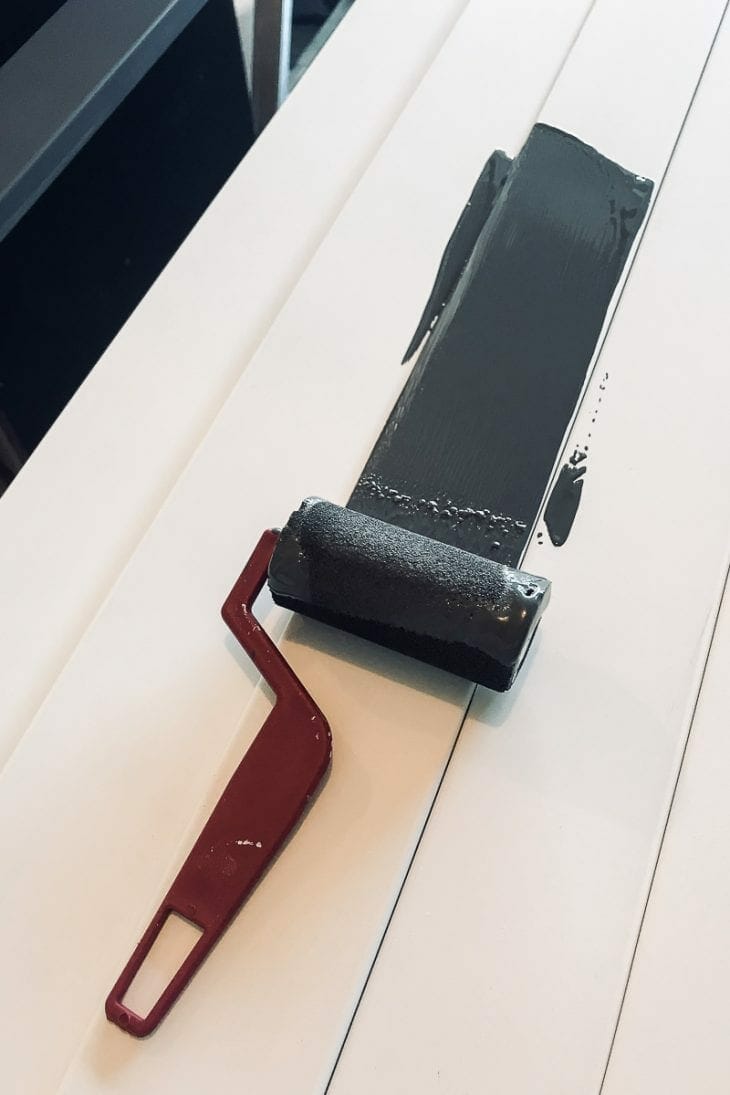
I found this little foam trim roller to be the best for painting the primed MDF.
4. Measure & Attach Header Board
Once you know where all your boards are going, measure the width of the wall one more time and then cut down your boards and attach the top board that butts up against the ceiling. Use your finish nailer to nail in every 10-12″ or so.
It’s best to use 2″ 18 gauge brad nails (the ones with the tiny heads) to hold the boards on best to the drywall.
5. Measure & Attach Vertical Boards
Once that top board is attached, measure the height between the top of the baseboard and the bottom of the board you just attached. Do a few measurements along the wall to make sure the height is the same. Ideally, your ceiling and baseboard will all be level, but it’s better to be safe than sorry.
I found that the right side of our wall was a little taller than the left side. I just wrote down my measurements and then made sure to label the vertical boards as I cut them so I knew which one went where.
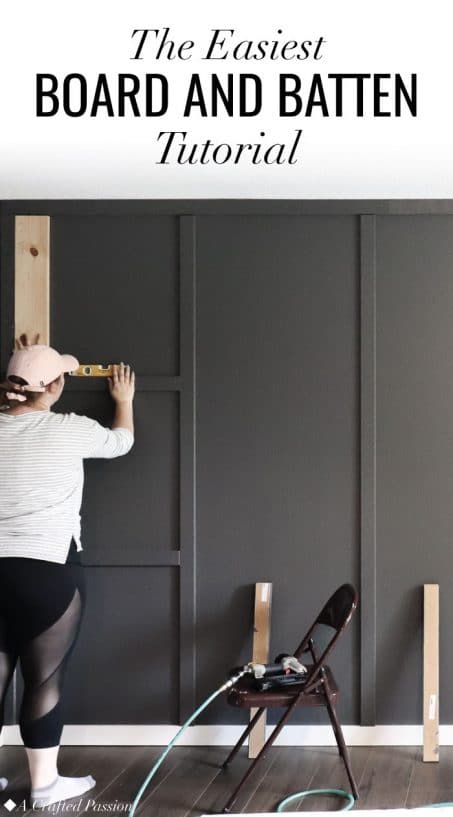
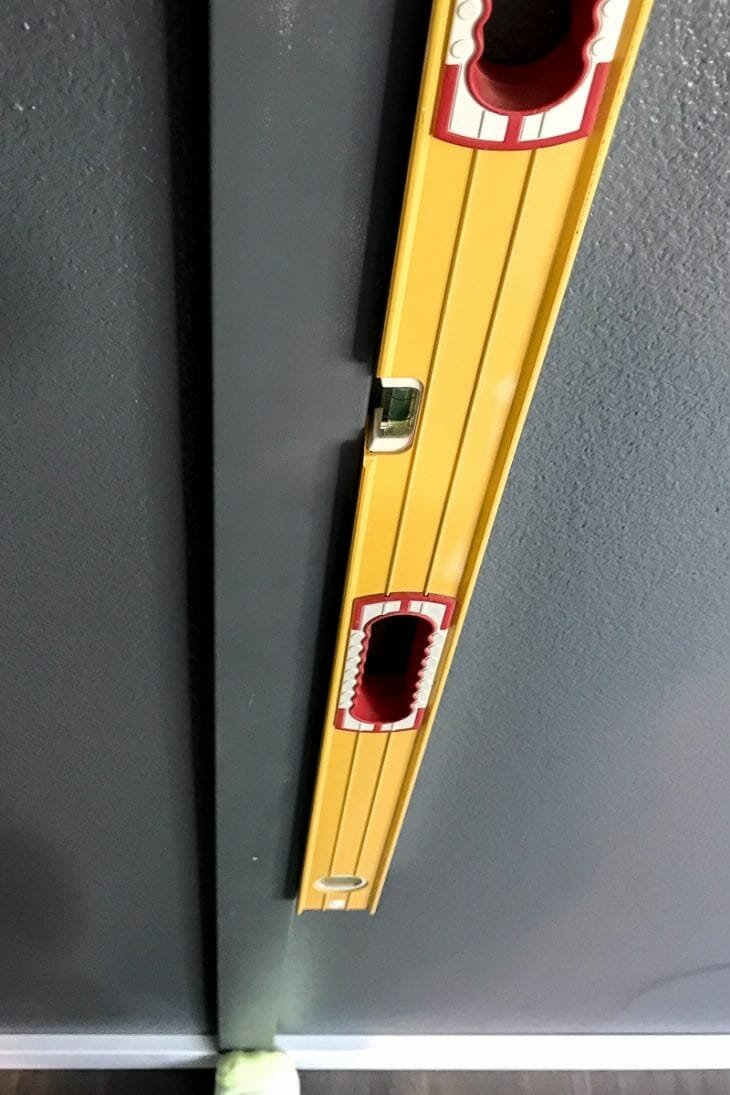
Once your vertical boards are cut to size, nail in your two side pieces framing the wall. Be sure to use a level to make the board straight. It’s easy to fill gaps, but not so easy to ignore crooked boards, and even the slightest bit off will be noticeable.
Don’t eye ball it. Whip out that level and make sure the boards are straight before attaching them to the wall.
Once you’ve got your side pieces, measure the distance between the vertical boards taking in to account the width of the boards. Be sure to measure from both the left and right just to make sure all your measurements match up perfectly.
I found it was easiest to measure from the edge of the first board on the left, to the center of the next vertical board, and draw a mark on the baseboard. I then centered the board on that mark, used my level to align the top of the board, and then nailed it.
6. Measure & Attach Horizontal Boards
Once all the vertical boards are attached, time to measure your horizontal board widths.
I used my notes app on my phone and numbered each area from left to right. So each section was numbered 1-6.
Then I measured the top and bottom boards and as I cut them I wrote which board it was on the back. They got their section number, plus a 1 or 2 depending on if it was the top or bottom horizontal piece. It made it really easy rather than having to lug the chop saw upstairs or running back and forth to double check cuts.
Cut a spacer board that is the exact distance between the horizontal pieces so all your horizontal boards are at the same height. This will make it super easy to place and nail up your horizontal boards.
Working down the wall, use your spacer board to get the correct height for your horizontal board and then use the level to make sure the board is perfectly level.
This is the upgraded version of the level I have and is so handy for projects like this.
Once it’s level, grab your nailer and attach it tight to the wall.
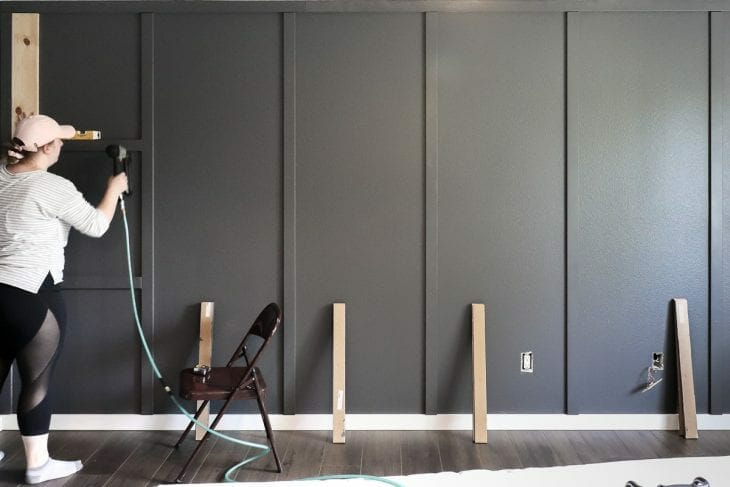
Continue along down the wall until you’ve got them all attached.
Although it looks great and makes such a difference, there’s still some touch-up work to do.
7. Touchups
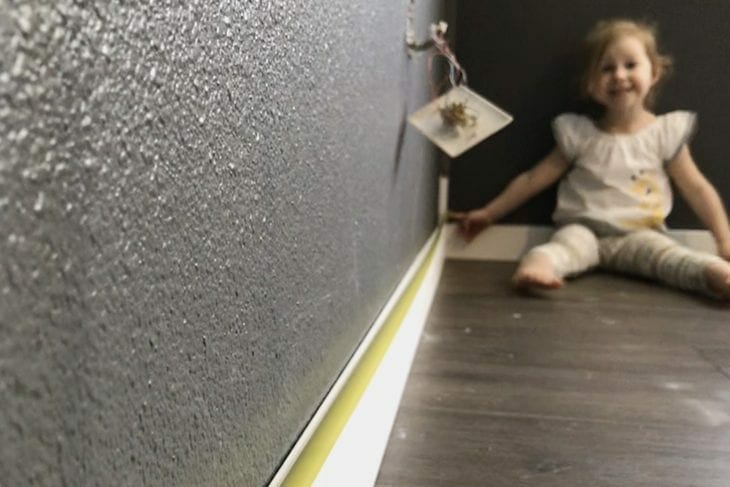
If you have large gaps between boards, use painter’s putty before caulking.
You can either cover the nail head holes with putty or caulk. I found it easiest to just fill them with caulk as I worked along the wall.
Using a caulking gun, apply the caulk to all areas where two boards connect. Be sure to cut the tip at a 45 degree angle when you’re starting a new tube of caulk. Do a small section at a time and then use the angled sealing edge to clean it up. I used the 90 degree edge for the sides of the boards against the wall, the 5 degree edge for any trim work, and the flat side for making a seamless transition between two boards that are connected.

You can use your finger or a damp cloth, but because I have somewhat long fingernails I found it was much easier to just use the angled caulking applicator.
The goal is to not be able to see where the boards connect. This was my first big project caulking and was quite a learning experience. If this is your first time caulking, just be patient, practice, and go slow. You’ll get a good rhythm once you get the hang of it.
If possible, I suggest practicing caulking in the corner of a closet or somewhere a little hidden if possible.
Once all your putty and caulk is dry, give any rough areas a light sand, wipe off any residue, and then give it all a coat of fresh paint.
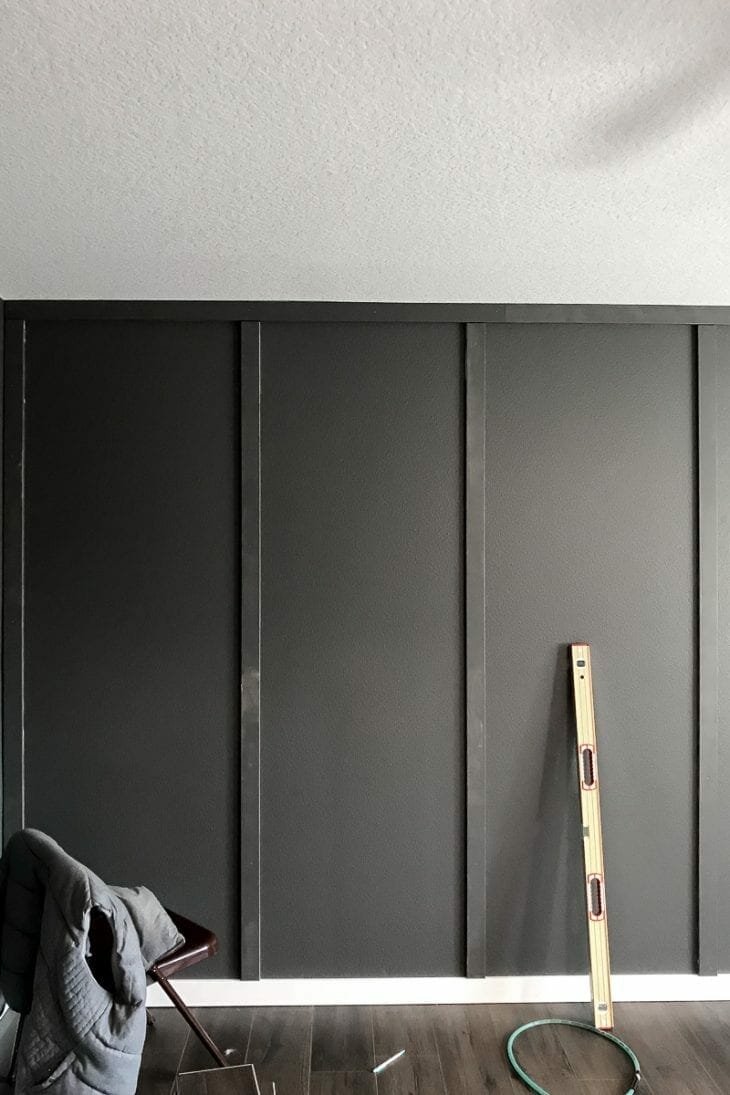
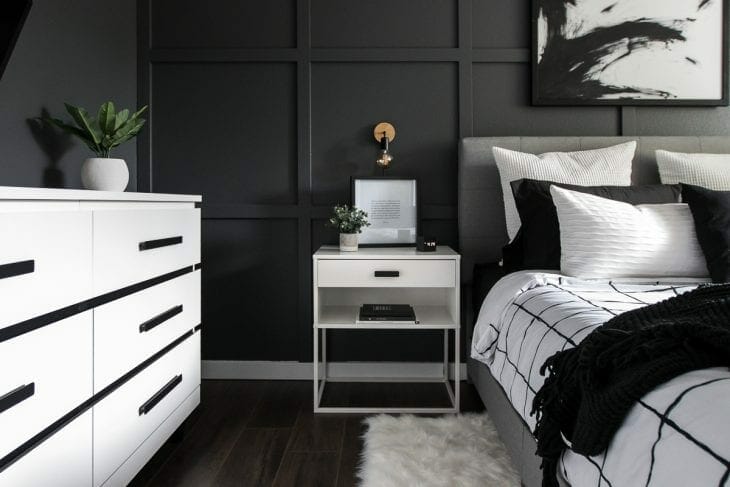
I love how this wall turned out and the board and batten really becomes a focal point in the bedroom. It really is so easy to do and I can’t wait to try the techniques I learned on this project for other home improvement things in our home.
What do you think? If you have any questions about the process, let me know and I’d be happy to answer them!


I love it! Where did u get the wall lights ? Thanks
Turned out great, you did an amazing job. Your bedroom looks it was designed by an HGTV host.
Hi Amanda! Your wall looks fabulous!
I’m curious about the size of your boxes. Do you mind sharing?
What size is the boxes?
Gorgeous! Love the color!!!
So helpful. I am going to be doing this in my sons room and I feel much more confident now. Could you tell me where you found your lighting for the sides of the headboard? Thank you!
Hi Stephanie! I’m so glad it was helpful. You can find the lights here: https://amzn.to/2GP8eXQ.
Hi Amanda, we are going to do with in our nursery. How long did this process take? We are experienced home reno but would be first time doing this type of work. Thanks!! Looks great!!
Love this! what is the length of your wall?
What is the name of the paint colour?
hi, I also want to know the name of the paint color. thanks