Kitchen Cabinet Facelift
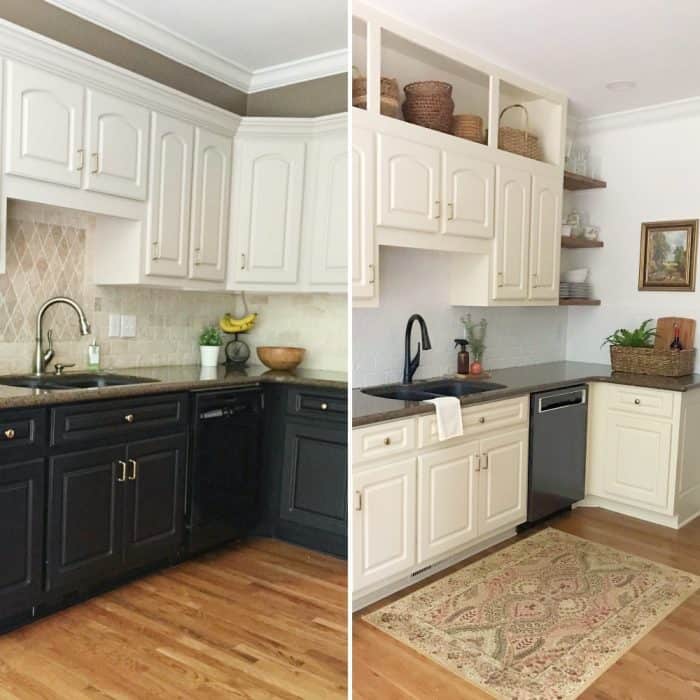
Try these simple updates to give your kitchen a new look without replacing your cabinets. All it takes for a kitchen cabinet facelift is your willingness to do it yourself.
Our recent DIY Kitchen Makeover was a labor of love for sure. Thank you all for your kindness on our project. As promised, I’m sharing all the details for each DIY. This post is dedicated to the kitchen cabinet facelift.

This post may contain affiliate links.
You should know…
- We have 9 foot ceilings in this part of the kitchen therefore making our cabinets look especially low. If you have 8 foot ceilings there will likely be less space for you to work with above your cabinets.
- We could have very well decorated with baskets on the top of the cabinets without any of this work but that wouldn’t have created the appearance of more space. Also, I believe the boxes will keep more dust away.
- Using the ceiling and the back wall as part of box saves time and money. I painted them the same as the cabinets so it looked like one piece.
- Keep in mind the upper box built to extend the height of the cabinets is not structural.
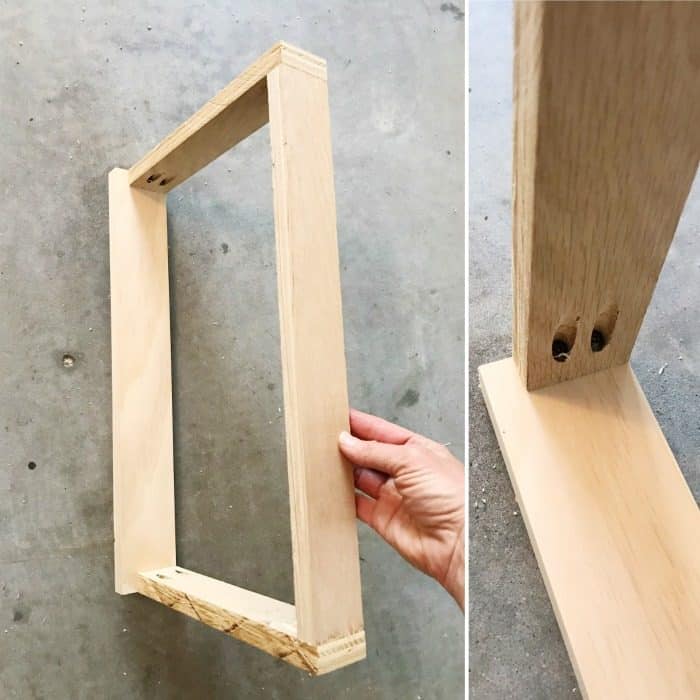
- The close up photo below of the end box frame was created using scrap wood. This is why all of the wood is not the same width. This box was being covered so we were able to utilize what we had.
This post will now be added to our before and after home decor projects tour.
Kitchen Cabinet Facelift Steps
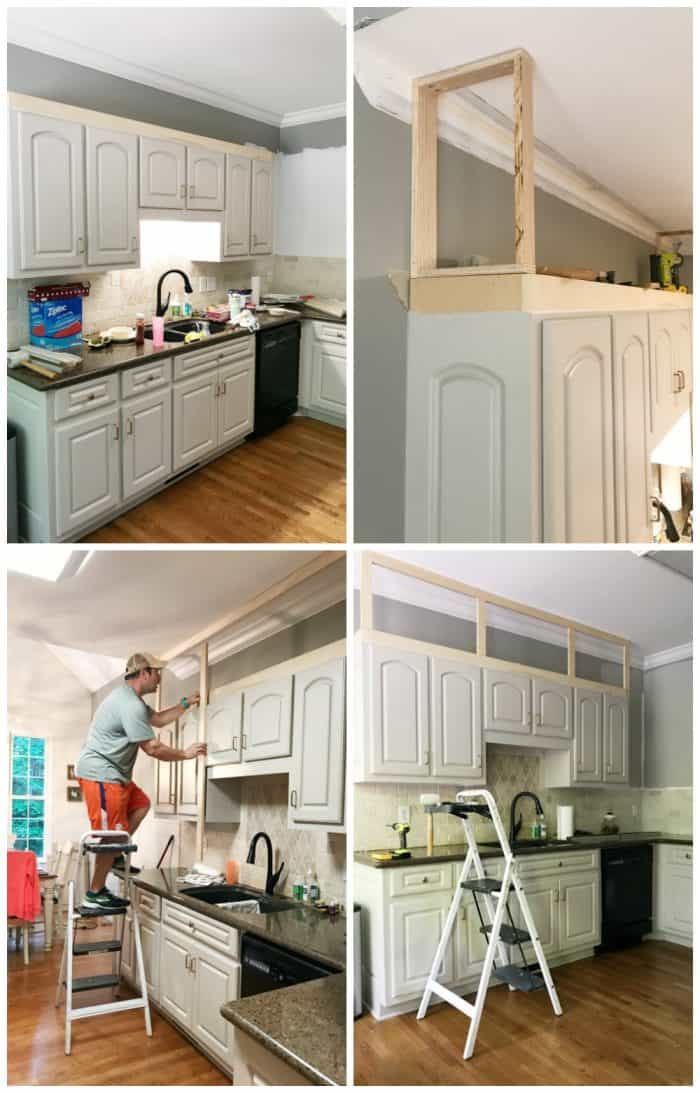
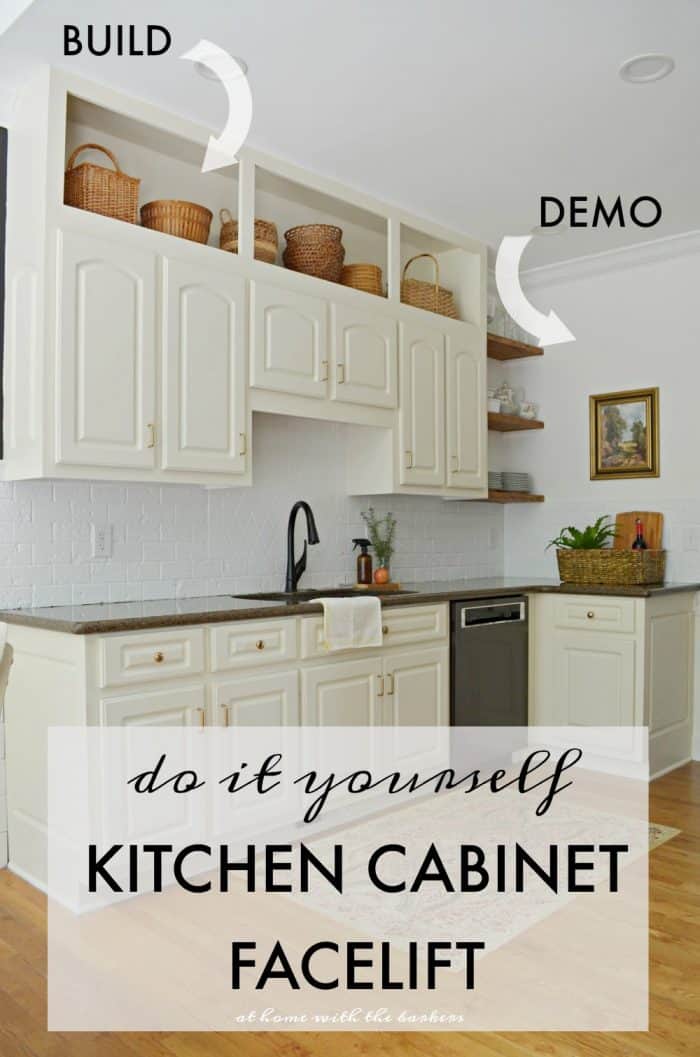
DEMO:
- Remove 4 upper cabinets to open up space and replace with open shelving. Do this carefully by scoring any caulk with a razor.
- Patch screw holes and repair drywall marks. You will need to check Youtube for drywall repair help, we aren’t the pros.
- Remove any crown molding from wall above cabinets. Be careful not to break. Part of it will be reused. Be sure to something like this tool to help.
- Remove molding from top of cabinets. You can see the unpainted area where the cabinet molding was covering. We didn’t want to add molding back to our cabinets.

BUILD:
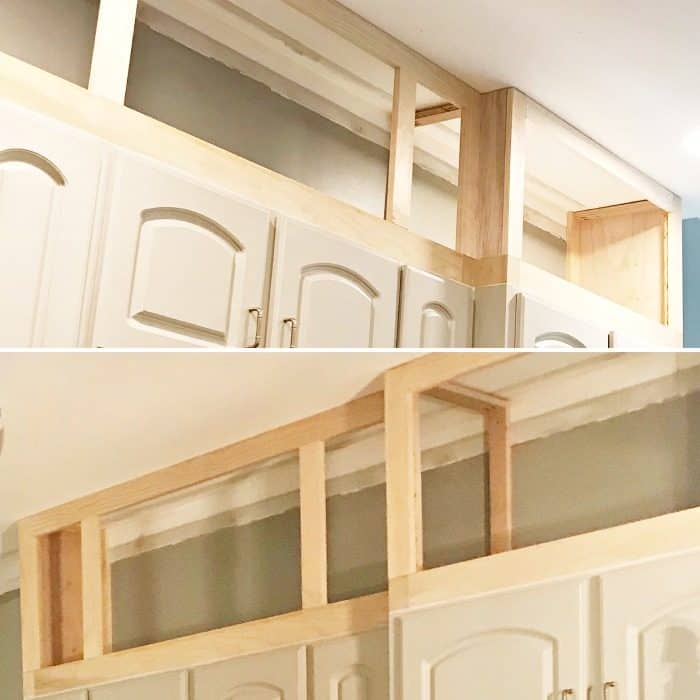
- Build partial face frame from 1 x 3 pine boards using pocket holes created with a Kreg Jig. Partial because you will not need a bottom piece. Only the 2 sides, top, and center pieces. Create this face frame to line up with the lower cabinet frame. You will need center wood pieces, they support the frame. I placed mine between each two lower cabinet doors. It was the right balance for mine. If you would still like molding on top of your cabinet boxes be sure to factor that in as well. This will require possibly a 1 x 6 on the top face frame. This frame will be nailed down first.
- Build end box/frame similar to face frame. Instead of largest side of wood facing out, this one has smaller size facing out. You need the bigger surface for nailing to wall and front face frame.
- Cut thin smooth plywood the exact size of your end box. You will need 2 pieces per cabinet end. One piece will be nailed to the inside of the box for a finished look. We used the precut birch plywood from Home Depot. This is the piece that will be flush with the front face frame. If you try to pre-attach this to the end frame you’ll have no way to then nail that frame to the wall and front frame.

I hope these details will give you enough inspiration for your kitchen. If you ever have questions please ask.
Everything we do in our home is based on trial and error. I am sure there are plenty of experts out there who might cringe at our work. BUT that is ok with us. This is our home and we are willing to do it ourselves, our way.
That is why I write these blog posts. For you to learn a little something but also to show you how non-trained homeowners work. There are times when a project needs a professional. Often though we underestimate our abilities to do the work.
I encourage you to think outside the box. Try new things. You will be amazed at the skills you can learn.
If you are new to DIY or you’ve been learning for a while, I recommended this post I wrote that can save you time, money and your sanity.
Click for the entire DIY kitchen makeover post and how to paint the backsplash.
Some times its the minor changes that make a big difference.
Wow, you did such a great job! I love the updated look. I am always shocked at how big of a difference updated cabinets make in your space. I recently decided to have my kitchen cabinets refaced and they look so much better! Thanks again for sharing.
Thank you for your kindness! You described my kitchen perfectly. I’m so glad you found me as well.
That’s a beautiful update, still perfect with the character of your home but like a completely different space – I love that you took away as much as you added, it’s so clean and fresh. I haven’t had the good fortune to read your blog before and very glad to have discovered you – thanks for sharing your work and ideas.