Showing posts with label Tutorials. Show all posts

It's all about the Birds.......

Get Inspired
I love reading other bloggers blog.......Not only do I feel connected to other artist by viewing their weekly thoughts, projects and ideas, but I get inspired myself. Inspiration is what fuels us artist. If you've read my blog long, you'd know I'm really into recycle, reuse, re-purpose-upscale creations. I've found some clever re-purposed projects I want to pass along to my friends~ enjoy


Mimi from Blue Roof Cabin made this innovative bird house. I love that it looks complicated to make, but it's NOT. And.. the list of items used can be found around your yard or at your local hardware store.
For the FULL TUTORIAL- please visit: Blue Roof Cabin♥.
Thanks Mimi for sharing~ 
How to Make a Bucket into a Bird House


How cute is this? The Gathering Place Design  has designed this inexpensive & simple wire cloche. Once again friends, most of these items you probably have around your house.
For the FULL TUTORIAL
please visit The Garden Place Design

Till next time..........

Water Jug Water Feature Tutorial

Galvanized Water Jug Tutorial
OK, so I've been tossing around this idea of making a small water feature to display outside of my back porch...I wanted something simple, something I didn't have to sink a ton of money in....if you're like me, I have enough of those projects going as it is.
Then...Perfect timing, I found a small water pump at a yard sale this past Friday. Get this... for only a big $1 ~Score~
I already had the watering cans ( BTW: I never pass up galvanized water cans) then it dawned on me to make this  fabulous inexpensive water feature. ....not to mention, it's fairly easy to put together...AND CHEAP....I'll say it again, CHEAP...

A few things you'll need to get started:
  1. 2-3 Galvanized Watering Cans.
  2. Large Galvanized Tub or a 1/2 Barrel.
  3. Small Water Pump
  4. Water tubing ( suggest 6-8 feet @ 75 cent a ft.)
  5. Hanging Brackets ( anything that can get the job done)
  6. Power Drilll and Drill Bit
 Getting started you'll want to find an area in your yard such as a fence or building to use as the support back drop. A landscaped area makes for a better surrounding. 1st thing; You'll want to place your large galvanized tub out far enough to catch the water flowing from the bottom water can. I suggest about 2 1/2 feet away from the fence or building. (don't worry about perfect placement at this time, you can adjust it later.)
Next, determine how high you'd like your 1st water jug. I placed mine approx. 5 ft. high. I found it best if you place the two water jugs about 2 feet a part. Once you've made your placement, you'll need to drill a hole in each water jug handle. This is a must, otherwise the jug could potently move, causing you to lose water and burn up your pump.

I attached the top bracket hanger to my fence and hung the jug.  I personally like to step back to see if this will suit  me...sometimes it's helps to step back  and imagine the finish project.  
Now you'll need to drill another, slightly larger hole in the back of your top watering can. (the exact hole placement doesn't matter because you'll run the water tubing through the hole and then through the watering spout.) By drilling a hole in the back of the watering can hides the tubing. The objectives to make this water feature look as though it's pouring water with no tubes attached.

these picture show the water tubing runs through the watering can and then through the spout. 
Now you'll need to set your pole with concrete. I set mine at an angle so the water jug would be hanging at a sight angle.

The only thing left is the most tricky- adding your last watering can. You'll need to turn on the pump to see where the water flows. This will give you the exact placement to where you need to install the watering can. It also lets you know where to install the other hanging bracket. I marked the pole so I knew where to install the bracket and I also marked the water jug handle so I knew where to drill my last hole.

This little water feature has so much potential....
I Hope you enjoyed ...Bookmark this page, more tutorials coming soon.

TIPS:Advertising your YARD SALE


~TIPS: Advertising Your Yard Sale~
Lets face it; we could all use a little extra money selling items laying around our homes. It hard throwing something out knowing there's someone out there that could use your unwanted items.
"One mans junk, is another mans treasure."

Times are tough, I've put together a list of items to help you make your next yard sale more successful....---------------------------------------

***Make your signs BIG. From the main roads you'll bring the most traffic, Use a posterboard size -Don't cut it in half, you need to get as much attention as possible on the busiest road near your home.

***You need TWO big posters to catch the attention on your busiest road near your home. One for the traffic going one way, and one for the traffic headed the opposite way. A great way to do this is with a large A frame sign.

*Use balloons on your large signs. Catching a customers eye is worth using balloons. The more people that you can get to look at your signs, the more people you will have to actually turn off the road and head your way.

*Give your address & sale date on your signs. People look for a date, making sure they're not wasting their time looking for a sale that's not happening.

*Use one color of poster throughout your advertising campaign. If you go with a bright yellow poster, then every poster needs to be bright yellow. If you stay with one color, then traffic knows they are headed to the correct yard sale.

*Write BIG with Black marker. Make sure your posters can be read clearly from a long distance away. If they can't read your signs they won't be making it to your sale. Use BIG clear letters.

*Guide your traffic every 2 blocks with arrows. Remember that using the same color of poster board is key here.Think of the arrows as little reassurances that say "almost there" or "you are still on the right path." Remember, make it as easy as possible to find your sale.

*You need to post signs through out your town. Post signs at busy intersections or popular roadways. Also, advertise in your local paper or Craigslist.

*Advertise the sale as "HUGE," "NEIGHBORHOOD" or "MULTI-FAMILY." If you can get you neighbor to join in that makes your sale even better. You can advertise your sale as a Multi-family sale. This will catch the attention of your traffic.

*Post what your big items- "Kids cloths" or "Moving sale", "Lots Furniture" or "Tools" or Baby Items." Be specific if you have something that will be a hot item. For example: "Tools" or "Antiques."

*Allow your kids to sell drinks or cookies....customers love when young children are involved in the sale activites. Not only is it fun for the kids but helps them learn good customer service.

*Put a price tag on EVERYTHING. People do not want to have to ask how much something is for everything they may be interested in. People WILL get IRRITATED, they'll walk away from the sale instead of having to ask., if you have your prices clearly marked, then you'll have more people buying.

*Organize your items. Some people enjoy hunting for items, (Myself, I hate searching through piles of items) Don't lose customers that aren't the searching type. Place items on tables= keep tables of clothes look nice and neat. Hang as many items as possible on hangers. People would rather look through clothes on hangers than sorting through them on tables. Plus you'll save time in folding those cloths over and over again.

*If you are selling a kids play house, assemble it. If you are selling a bedroom suite, pillows,night stands, bedding set, set it up in your driveway like a bedroom. Remember, visually make it easy for customers to see what it may look like in their home.

*Have everything set up and ready the night before your big sale. You'll more than likely have early birds...arriving before the sale begins. If customers come and you're still setting up, you may miss out on a sales. It's annoying when people show up early and they begin rummaging through your stuff.-the point of having this sale is to get rid of your stuff.

*Don't forget to welcome your customers with a friendly smile and a "Good morning" greeting.

Re-Purposed Crib Idea

Re-Purposed Crib Idea-

I'm all about giving unwanted items new meaning.....We have many items stored in our homes that have so much sentimental meaning to us, these items carry so many memories in our hearts, we're so attached we couldn't bare thinking of getting rid of them....


I found a post on "Diamond in the Stuff" Blog...They've take an old crib and turned it into a lovely bench....What a great idea for such an item we couldn't bare thinking of parting with...such an item we could dispalyed in our homes and enjoy for years to come. (possibly be shared and handed down for generations to come)
Please click here for a wonderful descriptive tutorial....

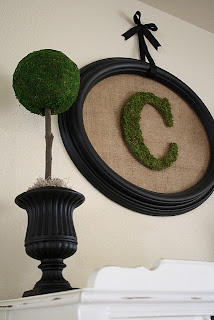
Junk into Topiaries

As I browsed this blog I found another adorable crafty idea I love...
It's an inexpensive project and looks as though it would only take a short time to make. Click here for topiaries directions


    Thanks for a marvelous posts "Diamond in the Stuff"....
Related Posts Plugin for WordPress, Blogger...